Radiant Garden: Difference between revisions
mNo edit summary |
(→Heartless: any reason these haven't been on here?) |
||
| (740 intermediate revisions by more than 100 users not shown) | |||
| Line 1: | Line 1: | ||
{{Game|KH2|FM2|BBS}} | {{Game|REC|KH2|FM2|BBS|FMB|DDD|DHD|KHX|UCX|KH3|3RM|MOM}} | ||
{{suite}} | |||
{{Youmay|the world|[[Hollow Bastion|the world's ruined version]] or {{c|Radiant Garden|track|the field theme}}}} | |||
{{World | |||
| | |name=Radiant Garden | ||
| | |katakana=レイディアントガーデン | ||
| | |romaji=Reidianto Gāden | ||
| | |fr=Jardin Radieux | ||
|ally | |de=Radiant Garden | ||
| | |KH2image=[[File:Hollow Bastion KHII.png]]<!--[[File:Radiant Garden KHII.png]]--> | ||
| | |KH2logo=[[File:Radiant Garden Logo (KHIIFM) KHIIHD.png|300px]] | ||
| | |BBSimage=[[File:Radiant Garden KHBBS.png]] | ||
|BBSlogo=[[File:Radiant Garden Logo KHBBS.png|300px]] | |||
|KH3logo=[[File:Radiant Garden Logo KHIIIRM.png|300px]] | |||
|game1=Kingdom Hearts II | |||
|game2=Kingdom Hearts Birth by Sleep | |||
|game3=Kingdom Hearts III | |||
|game4=Kingdom Hearts Melody of Memory | |||
|ally=Terra, Ventus, Aqua, King Mickey{{KHBbS}} | |||
|assist=Leon, Cloud, Yuffie, Tifa{{KHII}} | |||
|KH2normalname=Reviving Hollow Bastion | |||
|KH2normalfile=Reviving Hollow Bastion KHII.ogg | |||
|KH2battlename=Scherzo Di Notte | |||
|KH2battlefile=Scherzo Di Notte KHII.ogg | |||
|KH2normalname2=Cavern of Remembrance | |||
|KH2normalname2n=''{{FMII}} | |||
|KH2normalfile2=Cavern of Remembrance KHIIFM.ogg | |||
|KH2battlename2=Deep Anxiety | |||
|KH2battlename2n=''{{FMII}} | |||
|KH2battlefile2=Deep Anxiety KHIIFM.ogg | |||
|BBSnormalname=Radiant Garden | |||
|BBSnormalfile=Radiant Garden KHBBS.ogg | |||
|BBSbattlename=Black Garden | |||
|BBSbattlefile=Black Garden KHBBS.ogg | |||
|KH3normalname=Radiant Garden | |||
|KH3normalfile=Radiant Garden KHIIIRM.ogg | |||
|KH3normalname2=Cavern of Remembrance -KINGDOM HEARTS III Version- | |||
|KH3normalfile2=Cavern of Remembrance -KINGDOM HEARTS III Version- KHIIIRM.ogg | |||
}} | }} | ||
'''Radiant Garden''', also known as '''The Radiant Garden''', is an explorable world in ''[[Kingdom Hearts II]]'' and ''[[Kingdom Hearts Birth by Sleep]]''. It is also featured in ''[[Kingdom Hearts 3D: Dream Drop Distance]]'', ''[[Kingdom Hearts III]]'', and ''[[Kingdom Hearts Melody of Memory]]'', although only in cutscenes. Radiant Garden is the home world of many ''Final Fantasy'' characters within the series, as well as the original home world of [[Kairi]], [[Ansem the Wise]], and many of the members of [[Organization XIII]]'s human forms. | |||
A ruined incarnation of this world appears in ''{{c|Kingdom Hearts|game}}'', ''[[Kingdom Hearts Chain of Memories]]'', and ''[[Kingdom Hearts coded]]'' under the name "[[Hollow Bastion]]", consisting primarily of the castle that lies in the center of the world, with the areas outside mostly destroyed. Even after its restoration, it continues to go by this name until the final visit in ''Kingdom Hearts II''. | |||
In ''Kingdom Hearts II'', Radiant Garden plays a similar role to [[Traverse Town]] from ''Kingdom Hearts'', as a sort of "home base" for [[Sora]] before his return to the [[Destiny Islands]]. | |||
==Development== | |||
Leon, Yuffie, Aerith, Cloud, Tifa, and Cid were originally set to appear in ''Kingdom Hearts Birth by Sleep'' but were removed from the game because, according to Nomura, there were too many plot lines already, and it would have gotten confusing.<ref>'''''[[Kingdom Hearts Birth by Sleep Ultimania]]''''', '''Interviewer''': "Zack appears at the Coliseum, but was there a reason why he is the only ''Final Fantasy'' character this time around?" / '''Tetsuya Nomura''': "We wanted to have Cid and the gang in Radiant Garden, but that would have made the story go too far off track. The main story of ''Birth by Sleep'' is complicated enough as it is, so instead of making a lot of side roads, we concentrated on the main story. Which resulted in having no other ''Final Fantasy'' character but Zack make an appearance." [https://www.khinsider.com/news/Full-Nomura-Interview-20-KH-Mysteries-Solved-1366 Translation via Lissar].</ref> | |||
Pre-release screenshots and trailers for ''Kingdom Hearts Birth by Sleep'' showed Terra conversing with and carrying Ventus in The Great Maw.<ref>[https://www.youtube.com/watch?v=pDO0aeSbx5c '''''KINGDOM HEARTS Birth By Sleep Jump Festa 2008 Trailer''''']</ref> However, this area wasn't included in the final game and the scene was moved to the [[Land of Departure]]. | |||
==Settings and Areas== | |||
===''Kingdom Hearts II''=== | |||
====Radiant Garden==== | |||
[[Sora]] first arrives in the Radiant Garden (still known as [[Hollow Bastion]] at the time) at the {{nihongo|'''{{a|Marketplace}}'''|商店街|Shōten Machi|lit. "Shopping District"}}, which houses the world's [[Moogle Shop]], as well as [[Scrooge McDuck]] and the accessory, weapon, and items shops of his nephews [[Huey, Dewey, and Louie]]. Down the stairs past the item shop is the {{nihongo|'''{{a|Borough}}'''|住宅街|Jūtakugai|lit. "Residential Area"}}, a residential area where {{nihongo|'''{{a|Merlin's House}}'''|マーリンの家|Mārin no Ie}} is located. It's also the [[Hollow Bastion Restoration Committee]]'s base of operations, as well as where the [[100 Acre Wood]] book is located. | |||
[[File:Marketplace (Art).png|thumb|left|225px|Artwork of the Marketplace.]] | |||
Continuing on leads to the {{nihongo|'''{{a|Bailey}}'''|城壁広場|Jōheki Hiroba|lit. "Castle Walls Square"}} which has a great view of the varies valleys outside of the town. Far off in the distance, the Villain's Vale can be seen. From here the {{nihongo|'''{{a|Restoration Site}}'''|建設中通路|Kensetsu-chū Tsūro}} can be accessed. The area contain some equipment used to restore the town and the castle, and is changed after the first visit to Space Paranoids, by the brick walls to the left being shattered, now offering a slightly quicker path through the area. | |||
Passing through the Restoration Site leads to the {{nihongo|'''{{a|Postern}}'''|城通用口|Shiro Tsūyō Kuchi}}, the site of a save point and the base entrance to the castle itself. Going inside, the party must navigate the twisting and maze-like {{nihongo|'''{{a|Corridors}}'''|廊下|Rōka}} before reaching the end at {{nihongo|'''{{a|Ansem's Study}}'''|アンセムの研究室|Ansemu no Kenkyūshitsu|lit. "Ansem's Laboratory"}}. The room contains a desk, several bookshelves, broken containers formerly filled with [[heart]]s, as well as a portrait of [[Terra-Xehanort]]. A secret passage can be found here that leads to Ansem the Wise's computer room. Ansem's Computer contains a complex data system and an elaborate network copied from ENCOM, which was updated and modified for research purposes. From here the party can transport inside the computer and access the [[Space Paranoids]] world. On the other side of the computer room is a small balcony overlooking the {{nihongo|'''{{a|Heartless Manufactory}}'''|ハートレス製造施設}}, which can also be accessed by use of the elevator found there. Below the Manufactory area is an inaccessible {{nihongo|'''{{a|Underground Facility}}'''|地下施設}}, only seen in cutscenes. The area contains a long downward spiral staircase with a long hallway at the end, with several prison cells on each side of the corridor. At the end lies the entrance to the [[Chamber of Repose]]. | |||
[[File:Villain's Vale KHII.png|thumb|225px|right|The Villain's Vale surrounded by a swarm of Heartless.]] | |||
After the events of the first visit to Space Paranoids, the layout of the Bailey is altered; the outer wall of the town are broken down, and the {{nihongo|'''{{a|Castle Gate}}'''|城門前|Jōmon Mae|lit. "Gate Before the Castle"}} can now be accessed from here. From the Castle Gate, Sora can reach the long and winding {{nihongo|'''{{a|Ravine Trail}}'''|谷間の道|Tanima no Michi}} that eventually leads to the {{nihongo|'''{{a|Crystal Fissure}}'''|結晶の狭間|Kesshō no Hazama|lit. "Crystal Interstice"}}, a small cave-like area with glowing crystals. From here {{nihongo|'''{{a|The Great Maw}}'''|大渓谷|Dai Keikoku|lit. "Great Valley"}} is accessed, a large open area where the climax of the [[Battle of the 1000 Heartless]] takes place. The next and last location down this route is {{nihongo|'''{{a|The Dark Depths}}'''|闇の淵|Yami no Fuchi}}, where Sora and his friends encounter [[Xemnas]], [[Axel]], [[Saïx]], and [[Maleficent]]. | |||
The Dark Depths is the closest Sora can come to the {{nihongo|'''{{a|Villain's Vale}}'''|ヴィラン砦|Viran Toride|lit. "Villain's Fort"}}, which contains five ramshackle set of towers arranged in a castle configuration, with pipes twirling around them, rising from a pile of ruined masonry and machinery. A big Heartless emblem can be seen atop of the tower in the middle. Villain's Vale contains a room inside, also known as {{nihongo|'''Villain's Vale'''|ヴィラン砦の一室|Viran Toride no Isshitsu|lit. "Chamber of the Villain's Fort"}}, which acts as a base of operations for Maleficent and Pete. | |||
{{-|left}} | |||
{|class="wikitable mw-collapsible mw-collapsed" | |||
!Area Map of Radiant Garden in ''Kingdom Hearts II'' | |||
|- | |||
| | |||
[[File:Minimap (Radiant Garden) KHII.png|500px]] | |||
|} | |||
====Cavern of Remembrance==== | |||
[[File:Cavern of Remembrance - Depths KHIIFM.png|thumb|left|225px|An overview of the Depths.]] | |||
As the Battle of the 1000 Heartless attack begins, a hole in the castle wall at the Postern appears, revealing the entrance to the ''Kingdom Hearts II Final Mix'' exclusive {{nihongo|'''{{a|Cavern of Remembrance}}'''|追憶の洞|Tsuioku no Hora}}. Climbing down the hole leads to the cave's first area called the {{nihongo|'''{{a|Depths}}'''|最深部|Saishinbu}}. The area appears at first to be a small cave with a stream of water pouring down a high ledge, next to a [[Drive Orb]] crystal, however, past the ledge is a short tunnel leading to an immense, beautiful crystalline cave, containing many ledges, stalactites, and stalagmites which can be ascended to reach an ornate door, as well as a healthy population of powerful Heartless. | |||
Through the door lies the lowest part of the {{nihongo|'''{{a|Mineshaft}}'''|坑道|Kōdō}}, a purple, deep, and winding pit cave which is crisscrossed with pipes across multiple "floors". Each floor contains openings in the pipes that require specialized, maximum leveled [[Abilities (KHII)#Growth abilities|Growth Abilities]] to traverse, as well as the appropriate [[Drive Form]] for each obstacle; the first two are also guarded by event battles with several waves of Heartless. Crossing the first chasm with [[Quick Run]] brings Sora to another ornate door, as well as a passage leading to an upper cubby of the Depths, where he can dislodge a stalactite in order to create a shortcut. | |||
[[File:Garden of Assemblage KHIIFM.png|thumb|right|225px|The Garden of Assemblage.]] | |||
Both the door and the cubby lead to the {{nihongo|'''{{a|Mining Area}}'''|採鉱部|Saikōbu}}, a complex area of pistons, vents, and engines that is initially inert. By activating the engines lying at the very bottom of the chamber, Sora awakens the powerful machinery that he must navigate to reach the next room. Passing through the door leads to the second floor of the Mineshaft, which is much greener and has several pipes that must be bypassed with [[Aerial Dodge]] in order to reach the next door. Through this door is the busy {{nihongo|'''{{a|Engine Chamber}}'''|機関部|Kikanbu}}, filled with conveyor belts, pistons, scalding jets of steam bursting from pipes, and more powerful Heartless, as well as several hidden balconies. At the end of this is another door leading to the final section of the Mineshaft, with a final pipe obstacle which must be threaded using [[Glide]]. | |||
Exiting the cavern through this door brings Sora to the {{nihongo|'''{{a|Transport to Remembrance}}'''|追憶への誘い|Tsuioku e no Izunai|lit. "Invitation to Remembrance"}}, a long balcony hallway built in the same style as [[Castle Oblivion]], with Radiant Garden's characteristic inverted waterfalls against the open sides of the path. The hall is bursting with powerful Nobodies, and Sora's initial traversal of it requires him to conquer three separate event battles, each with multiple waves of Nobodies. | |||
The final door leads out of the subterranean caves to the {{nihongo|'''{{a|Garden of Assemblage}}'''|集積の庭園|Shūseki no Teien}}, an ornate mall in the style of the [[Castle That Never Was]] surrounded by a circular wall, which is itself ringed by more of the inverted waterfalls. At the center of this mall lies a computer, which can be used to bring out the [[Organization XIII's Replica Data]] for Sora to combat. Behind the computer is a secret passageway, veiled by an illusion, leading back to the Restoration Site. | |||
{|class="wikitable mw-collapsible mw-collapsed" | |||
!Area Map of Cavern of Remembrance in ''Kingdom Hearts II'' | |||
|- | |||
| | |||
[[File:Minimap (Cavern of Remembrance) KHII.png|500px]] | |||
|} | |||
===''Kingdom Hearts Birth by Sleep''=== | |||
[[File:Radiant Garden (Art).png|thumb|left|225px|Artwork of Radiant Garden.]] | |||
In ''Kingdom Hearts Birth by Sleep'', Radiant Garden is shown in its original glory, before it got turned into Hollow Bastion. The world's castle is shown to originally have a relevantly pastel palette, with the castle sitting on top of a large town filled with trees, grass, and flowers. The walls surrounding the town have several massive fountains, and are generally covered in climbers plants. Outside the walls is an ocean, with several green mountains in the distance. | |||
The {{nihongo|'''{{a|Central Square}}'''|中央広場|Chūō Hiroba}} is a town square located in the middle of the world, filled with beautiful flowers and trees, as well as many homes surrounding the area. Going northwest leads to the massive {{nihongo|'''{{a|Gardens}}'''|庭園|Teien}} area. Ascending the garden and leaving through a gate will lead to the {{nihongo|'''{{a|Front Doors}}'''|正面扉口|Shōmen Tobira Kuchi}}, a small circular area with stairs leading to a wide open space outside the castle's gates. | |||
[[File:Fountain Court (Art).png|thumb|right|225px|Artwork of the Fountain Court.]] | |||
By heading east from the Central Square, [[Terra]], [[Aqua]], and [[Ven]] will arrive at the {{nihongo|'''{{a|Castle Town}}'''|住宅街|Jūtakugai|lit. "Residential Area"}}, a smaller back street with a Moogle Shop. Also located here is {{nihongo|'''{{a|Merlin's House}}'''|マーリンの家|Mārin no Ie}}, where the [[Hunny Pot Board]] can acquired. Continuing through the tunnel at the end of Castle Town will lead to the {{nihongo|'''{{a|Fountain Court}}'''|噴水広場|Funsui Hiroba|lit. "Fountain Square"}}, home to several large fountain layered on top of each other. By climbing the fountains and heading for the exit will take the characters to the {{nihongo|'''{{a|Aqueduct}}'''|水路|Suiro}}, Radiant Garden's irrigation system. Running up some stairs and across the outer walls will eventually lead down to the world's {{nihongo|'''{{a|Reactor}}'''|動力炉|Dōryoku-ro|lit. "Power Reactor"}}, where the [[Trinity Armor]] is fought. The Reactor can also be accessed through a broken gate at the Gardens Area. | |||
Heading south from the Central Square will lead to a pair of stairs, one on either side, which leads down to the {{nihongo|'''{{a|Entryway}}'''|エントランス|Entoransu|lit. "Entrance"}}. A resting area within the wall which also houses a save point. Heading outside is the {{nihongo|'''{{a|Outer Gardens}}'''|城外庭園|Jōgai Teien|lit. "Outer Castle Gardens"}}, a lotus shaped platform surrounded by water with even more flower beds. In the middle of the area is a fountain with a secret door in it, which leads down to the {{nihongo|'''{{a|Purification Facility}}'''|浄化施設|Jōka Shisetsu}}, a large platform in an open area situated below the gardens. | |||
{{-|left}} | |||
{|class="wikitable mw-collapsible mw-collapsed" | |||
!Area Map in ''Kingdom Hearts Birth by Sleep'' | |||
|- | |||
| | |||
[[File:Minimap (Radiant Garden) KHBBS.png|500px]] | |||
|} | |||
===''Kingdom Hearts III''=== | |||
[[File:Ending 10 KHIII.png|thumb|left|225px|Radiant Garden's castle restored to its full glory.]] | |||
In ''Kingdom Hearts III'', the world appears to finally have been restored to its former self, and is almost identical to how it appeared in ''Kingdom Hearts Birth by Sleep''. The world itself is inaccessible, but appears in several cutscenes. Areas shown are the computer room in '''Ansem's Study''', as well as the '''Central Square''' outside of the castle. | |||
[[File:Garden of Assemblage KHIIIRM.png|thumb|right|225px|The digital replica of the Garden of Assemblage.]] | |||
In ''Kingdom Hearts III Re Mind'', {{nihongo|'''{{a|Merlin's House}}'''|マーリンの家|Mārin no Ie}} becomes playable during the [[Limitcut Episode]], and retains its appearance from ''Kingdom Hearts II''. Though the outside portion resembles its appearance as '''Castle Town''' in ''Kingdom Hearts Birth by Sleep''. Inside, by accessing [[Cid]]'s computer, a data version of the {{nihongo|'''{{a|Garden of Assemblage}}'''|集積の庭園|Shūseki no Teien}} can be entered, though it looks relatively different. The digital replica lacks a sky and replaces the waterfalls with dark streams of data, as well as dark pillars seen between them. The passage which used to lead to the Restoration Site is simply replaced with a wall. From the garden the [[Real Organization XIII's Recreated Data]] can be fought. [[Master Xehanort]] and [[Xion]]'s portals are unavailable until the eleven other members have been beaten. The area also contains a save point and a Moogle Shop. All thirteen battles take place at the {{nihongo|'''{{a|Data-Organization XIII Arena}}'''}}, which consists of massively detailed circular platforms, with neon blue and purple lines springing out of the platform. Surrounding the arena are dark and ominous clouds. | |||
Through [[Data Greeting]], areas such as the Central Square, Merlin's House, Garden of Assemblage, and the Data-Organization XIII Arena can be freely explored. | |||
{{-}} | |||
==Story== | ==Story== | ||
===''Kingdom Hearts Birth by Sleep''=== | |||
==='' | {{Q|It stands to reason that [[Vanitas|he]] will strike next in the city of light, Radiant Garden.|[[Master Xehanort]] telling Terra that Radiant Garden is in danger.}} | ||
It | Radiant Garden, once known as the "city of light", was a beautiful city of gardens and fountains that lay below Hollow Bastion, a glorious castle kept by a loving king, Ansem the Wise, and his apprentices. Much of the history of the castle is unknown, other than that Ansem ruled from it. The three Keyblade wielders, [[Terra]], [[Ventus]], and [[Aqua]], all arrive in the town at roughly the same time. | ||
Terra arrives here looking for [[Vanitas]], but only finds a swarm of [[Unversed]] in the town center. He then sees [[Master Xehanort]] walking down a street and follows him. Along the way he picks up Pooh's storybook dropped by the wizard [[Merlin]] and then sees a large Unversed fly towards a mining area outside town. | |||
Aqua arrives here shortly after Terra's arrival. She first meets [[Scrooge McDuck]], who says he saw someone heading towards the castle. She runs to the castle, where she meets a young Kairi being attacked by the Unversed. [[Mickey Mouse|Mickey]] then appears from the sky and the two protect the young girl together. They also sense the pure light from Kairi, but Mickey is called away by his Star Shard immediately after he proposes that he and Aqua team up. Kairi offers Aqua flowers as thanks for helping her, and Aqua places a spell on Kairi in order to protect her light should it ever be threatened. [[Kairi's Grandma]] arrives and tells her story of the origin of light to Kairi as they head home. Aqua then sees a giant Unversed and chases it through town. | |||
Ven, meanwhile appeared in Radiant Garden after Mickey's Star Fragment sent him there, however, he sees Mickey walking towards the castle and follows him to the front doors, but the guards, [[Dilan]] and [[Aeleus]] prevent his entrance. A giant Unversed appears, causing Ven to chase after it. The guards prepare to follow, but are reprimanded by [[Even]], who says that the boy can take care of himself and also senses that Ven has no darkness in his heart, or rather it was taken out. In the town square, Ven defends Scrooge McDuck from the Unversed so the mister offers him three lifetime [[Disney Town Pass|passports]] to Disney Town. Ven thanks him and runs after the Unversed, meeting Merlin along the way. | |||
All three heroes arrive at the same place by chasing their respective Unversed. They are surprised to see each other, but first defeat the [[Trinity Armor]] that forms. They fight together and win. Ven shares his tickets to Disney Town with his friends. Ven tells of his journey and how he even defeated a masked boy who bad mouthed Terra. Terra knows this is Vanitas and bids him to go home with Aqua. Aqua wonders if Terra has gotten too close to the darkness. Terra is insulted and feels that [[Eraqus]] sent her to spy on him. As Terra leaves to follow his own path, Ven displays disbelief to Aqua's claims and goes after Terra, but not before telling a disheartened Aqua that she has changed. | |||
Terra enters the lower portions of the castle where he meets [[Braig]], who openly tells him that he has captured Master Xehanort. Terra goes further into the castle to find the last person he trusts, but is approached again by Braig who wants the Keyblade for himself. The two battle, with the captured Xehanort imploring Terra to give into his darkness. Terra eventually does so, and shoots a [[Dark Firaga]] at Braig's face, giving him the scars he appears with later and blinding one of his eyes. Terra and Xehanort form a pact to work together to destroy Vanitas. Terra then prepares to leave, even after Ven wants to come with him. | |||
Aqua, meanwhile, left towards the town square, meeting Merlin on the way. In the town square, she meets Vanitas, who taunts her by inquiring about Ventus and then attacks. Aqua wins the battle, but Vanitas escapes, complementing her on her skill, and making an ambiguous comment that she'll be his "Plan B" and finishes by telling her only to get stronger. Ven then arrives, wanting to go with her as well, but Aqua declines and tells him just to go home, she then leaves. | |||
Ven, after the battle with the Trinity Armor, passes by young [[Ienzo]], being attacked by Unversed. He helps the boy as Even arrives. The scientist thanks Ven for rescuing the orphan, and also notes that they may be connected in the future. He plays with Terra's old wooden Keyblade, but drops in front of two teenagers, [[Lea]] and [[Isa]]. Lea challenges Ven, but loses embarrassingly. Isa says it is time that they left, with Lea saying that he and Ven will meet again someday because they are friends now. Isa has no clue as to why Lea is so friendly, but Lea responds he wants to be a part of many people's memories so that he can live forever in the memories of all the people he meets. The two look towards the castle, silently getting ready to do something, they then leave. Reminded of his friends, Ven leaves for new worlds. | |||
In the last chapter, Aqua comes to Radiant Garden looking for Terra after creating Castle Oblivion. She finds Terra, however possessed by Master Xehanort's dark heart. Aqua struggles when he tries to strangle her, but she tries to make him remember his true self. Terra cannot overpower Xehanort's heart, leaving Aqua no choice but to battle her friend. Terra awakens the darkness in his heart in the form of Xehanort's guardian. However Aqua proves victorious, and Terra tries to release the darkness in his heart by sending himself to the Realm of Darkness. Aqua jumps in after him wearing her armor as protection. Unfortunately, Aqua realizes cannot save both of them, so she gives Terra her armor and Keyblade to protect him, and sends him back to the Realm of Light, while she stays in the darkness. | |||
Terra's unconscious body is found in Radiant Garden hereafter by Braig, who brings Ansem the Wise and Dilan to retrieve the stranger. Terra can only remember the name, Xehanort, causing Braig to smile deviously. They also find Aqua's armor and Keyblade although they are unsure of what it is. Later, Terra, now using the name "[[Xehanort]]", has become Ansem's apprentice, and making an ally in Braig. Ansem and Ienzo then walk by, catching the boy's attention and the scientist's suspicion. | |||
Later, Lea and Isa attempt to break into the castle, but are thrown out by Dilan and Aeleus. Afterwards Lea buys two sticks of sea-salt ice cream from Scrooge McDuck and shares it with Isa. Kairi is also seen picking flowers and gazing up at the sky above her, while her necklace faintly glows. | |||
===Between ''Kingdom Hearts Birth by Sleep'' and ''Kingdom Hearts''=== | |||
As Xehanort had now become one of Ansem's apprentices he was subjected to experiments of the heart in an effort to regain his lost memories. The [[Chamber of Repose]] was constructed deep within the castle, where these experiments continued. In time, Ansem deemed the experiments unethical, and ordered them ceased. However, on discovering [[Subject X]], Xehanort began to continue the experiments without Ansem's knowledge or consent.{{storylink|Secret Report 3}} Lea and Isa would continue their attempts to infiltrate the castle, eventually reaching the Chamber of Repose, where they met Subject X. {{storylink|Secret Report 5}} Henceforth, whenever they were able to enter the castle, they would go to see her. However, Ansem eventually discovered the experiments' continuation, and in response, he sent Subject X where Xehanort and the other apprentices could not find her.{{storylink|Secret Report 4}} {{storylink|Kingdom Hearts III}} As a consequence, when Lea and Isa infiltrated the castle again, they found her cell empty; this led to their approaching the castle with intent to apprentice under Ansem the Wise.{{storylink|Secret Report 6}} | |||
A year after the battle at the Keyblade Graveyard, Xehanort and the other apprentices overthrow Ansem, banishing him to the [[Realm of Darkness]], and remodel the castle to include mechanical components. The result is a twisted bastion; half beautiful castle, half distorted factory. Shortly after Maleficent invades Radiant Garden with her Heartless. Some residents manage to escape, many of whom end up in [[Traverse Town]]. However, Kairi is sent into the "oceans of the worlds" by Xehanort and ends up in Destiny Islands, partly due to the spell Aqua put on her necklace. | |||
During Maleficent's reign in the castle it is probable that she either creates or remodels the castle's keep, which has decorations and models of roses and her thorned plants. | |||
=== | ===''Kingdom Hearts''=== | ||
Hollow Bastion | {{Main|Hollow Bastion}} | ||
==='' | ===''Kingdom Hearts Chain of Memories''=== | ||
Following their adventure in [[Castle Oblivion]], [[Riku]] and [[Mickey Mouse]] walk through the Great Maw of Radiant Garden. Riku briefly stops and kneels down, prompting concern from Mickey, but Riku quickly stands up and they continue walking. | |||
===''Kingdom Hearts II''=== | |||
Sora and his friends reunite with [[Leon]], [[Yuffie]], [[Aerith]], and [[Cid]], who have started the [[Hollow Bastion Restoration Committee]], an organization attempting to rebuild the world that they once lived in. After reuniting with [[Merlin]] as well, Leon makes Sora, Donald, and Goofy honorary members of the committee and takes them to view the restoration work on the Bailey. There, after a surprise attack, the party has their first real encounter with [[Organization XIII]] in the form of taunts and cryptic messages. After unlocking the pathway to other worlds via his committee card, Sora heads out to search for King Mickey and Riku. | |||
The party returns briefly to visit and assist Merlin, who has found [[Winnie the Pooh|Pooh's]] book, the entrance to the [[100 Acre Wood]]. However, a raid by [[Heartless]] damages the book when they try to steal it from Sora's group, leading to Pooh's amnesia and the search for the book's Torn Pages. | |||
When the party is called again to Hollow Bastion, they reunite with [[Cloud]], who vows to go after [[Sephiroth]]. They then are sent by Cid and Merlin to assist Leon in the Bastion itself; along the way, they meet the Gullwings for the first time. After reaching the Bastion, they first see Ansem's study and are introduced to his seemingly malfunctioning computer system after a brief encounter with [[Tifa]]. After an unplanned trip to the [[Space Paranoids]] courtesy of [[Stitch]], they finally meet with the King in Ansem's study, who promises to talk after they finish helping Tron. Sora and his party copy Tron's scrambled data, finding out about Ansem the Wise. | |||
Mickey explains about Ansem the Wise, his impostor, and the Heartless and Nobodies that resulted, most notably Xemnas. While he explains many things to them, Sora learns that the King can't tell him about Riku. He charges them to go find the missing Riku and Kairi, but there is a sudden explosion outside the Bastion. Heartless and Nobodies begin pouring through a hole blown in the outer wall. Sora's party encounter Maleficent, who orders her Heartless to attack, and the Gullwings, who they trick into joining Leon's side. They also find Sephiroth, looking to fight Cloud. | |||
The party makes their way to the Bailey, where they witness the Hollow Bastion Restoration Committee, the Gullwings, Cloud, and Tifa's attempts to stop the Heartless, as well as an encounter between Cloud and Sephiroth. Mickey orders them to find Riku and Kairi instead of fighting the Heartless, but Sora refuses and leaps into the fray, joined by Donald and Goofy. Their first encounter is with [[Demyx]], who attempts to eliminate Sora again. They defeat Demyx, and Mickey catches up with them and admits his earlier decision was hasty. An explosion caused by a Heartless causes a boulder to fly at Mickey, but Goofy takes the blow instead and is seemingly killed. Spurred on by his sacrifice, the three jump into the battle, assisted by the other residents of Hollow Bastion. After a short time, it is revealed that Goofy is alright and reunites with them. Together, they work to halt the Heartless invasion. | |||
They are triumphant in the end, but are confronted by Xemnas and [[Saïx]] who reveals, with help from [[Axel]], Organization XIII's master plot. Maleficent appears and attempts to claim Kingdom Hearts for her own. She helps Sora escape so he can help her find a way to get rid of the Nobodies by sending him and his friends into the Realm of Darkness. There, they find the two clues needed to unlock the identity of [[Roxas]], as well as the way to unlock the second set of adventures in each World. | |||
On the third and final main visit to Hollow Bastion, the [[Master Control Program]] has taken over Cid and Ansem the Wise's computers, causing the [[claymore]]s in Hollow Bastion to malfunction and attack the residents. Sora, Donald, and Goofy go into Space Paranoids to contact Tron while Cid works on a program to delete the MCP. When downloaded into the Space Paranoids, the party is able to retake control of Hollow Bastion's computers and restore order. In addition, Tron finds information on Ansem's data of Hollow Bastion's existence before the Heartless came, then reveals it to all residents, reminding everyone its true name and nature: the Radiant Garden. | |||
[[ | |||
Optionally, Sora and co. find and fight Sephiroth at Villain's Vale after Radiant Garden's chaotic situation is solved. If he is proven victorious, Sephiroth tells him to find Cloud so that they may finish everything once and for all. Cloud and Sephiroth emit in a great battle until Tifa arrives and renews his light, giving him the strength to fight Sephiroth. Cloud and Sephiroth disappear to once again finish their battle. Tifa gives Sora the [[Fenrir|Fenrir Keychain]] as token for her gratitude for helping her and Cloud. | |||
===''Kingdom Hearts coded''=== | |||
{{Main|Hollow Bastion}} | |||
Following the demise of Organization XIII, Braig, Dilan, Even, Aeleus, Ienzo, Isa, and Lea are resurrected in the computer room. [[Young Xehanort]] arrives and wakes [[Braig]], and both converse about [[Master Xehanort]]'s plans. While both are unsure of what Master Xehanort really wants, a comment of Young Xehanort's causes Braig to realize that it may have something to do with the [[Keyblade War]], and they take Isa along as part of their plan.{{storylink|Destiny}} | |||
=== | ===''Kingdom Hearts 3D: Dream Drop Distance''=== | ||
Lea wakes up in the computer room and notices that he has reverted to his original human form. He ventures into Ansem's study, where he finds Dilan, Even, Aeleus, and a now-adult Ienzo. They also take note that Braig and Isa are mysteriously missing, prompting Lea to decide to go and search for them. | |||
After Sora and Riku's [[Mark of Mastery exam]], Lea returns to Radiant Garden. | |||
===''Kingdom Hearts III''=== | |||
By this time, Radiant Garden has been completely rebuilt to its former glory. | |||
While following [[Aqua]]'s trail, [[Mickey Mouse]] and [[Riku]] travel to Radiant Garden and are led by Dilan to the [[Central Square]] where Aqua was last seen in the Realm of Light. Mickey recounts the events of her final moments, and explains that [[Terra]] is under Xehanort's control. He then recounts how both [[Ansem, Seeker of Darkness]] and [[Xemnas]] had each been fulfilling a part of Master Xehanort's plan; though both were thwarted, Young Xehanort had secretly been traveling through time to collect members for a new Organization. They receive a call from Sora, who wonders about how to restore Roxas; Riku mentions the [[replica]]s, promising to ask Ienzo about them. Riku and the King ask Ienzo, but learn the only person who would have in-depth knowledge about this, [[Even]] has vanished from Radiant Garden. The King concludes that he was taken by the Organization to help fill out their ranks. | |||
[[Vexen]] meets with [[Demyx]] the night before the second [[Keyblade War]], asking him to deliver a blank replica for Roxas and [[Ansem the Wise]] to Ienzo. Demyx complies, with Ansem having a heartfelt reunion with a remorseful Ienzo. Together, they prep the replica with Roxas's data, which is soon called the to the Keyblade Graveyard by Roxas's heart. Demyx obtains a replica formerly used by [[Dark Riku]] and delivers it to Ansem the Wise, who uses his data on [[Naminé]] to prep the replica for her heart. Sora and Kairi complete the replica by using the Keyblade's power to extract Naminé's heart, and Riku returns to pick up the newly revived Naminé for a celebration on [[Destiny Islands]]. | |||
One year later, following Sora's disappearance, Riku visits the [[Radiant Garden Restoration Committee]] for any leads on Sora's whereabouts. There, [[Cid]] reveals that he has reconstructed data on the [[real Organization XIII]] and sends out a data copy of Sora to battle the Organization's data in order to find any clues. The ensuing battles yield no results, but the [[Fairy Godmother]] arrives, having been sent by [[Yen Sid]] and [[Merlin]] to look through Riku's dreams. | |||
===''Kingdom Hearts Melody of Memory ''=== | |||
{{sec-stub}} | |||
==Other appearances== | |||
===''Kingdom Hearts χ''=== | |||
Radiant Garden appears in the game's opening where [[Kairi's Grandma]] tells Kairi the story of the age of fairy tales and the ancient Keyblade War. | |||
==Characters== | ==Characters== | ||
<gallery> | <gallery> | ||
File:Kairi KHIII.png|[[Kairi]]<br>{{KHBbS}}{{RM}}{{KHMoM}} | |||
File:Kairi's Grandma KHBBS.png|[[Kairi's Grandma]]<br>{{KHBbS}} | |||
File:Leon KHIIIRM.png|[[Leon]]<br>{{KHII}}{{RM}} | |||
File:Cid KHIIIRM.png|[[Cid]]<br>{{KHII}}{{RM}} | |||
File:Aerith KHIIIRM.png|[[Aerith]]<br>{{KHII}}{{RM}} | |||
File:Yuffie KHIIIRM.png|[[Yuffie]]<br>{{KHII}}{{RM}} | |||
File:Cloud KHII.png|[[Cloud]]<br>{{KHII}} | |||
File:Tifa KHII.png|[[Tifa]]<br>{{KHII}} | |||
File:Sephiroth KHII.png|[[Sephiroth]]<br>{{KHII}} | |||
File:Gullwings KHII.png|The [[Gullwings]]<br>{{KHII}} | |||
File:Merlin KHBBS.png|[[Merlin]]<br>{{KHBbS}}{{KHII}} | |||
File:Ansem the Wise KHIII.png|[[Ansem the Wise]]<br>{{KHBbS}}{{KHII}}{{KHIII}}{{KHMoM}} | |||
File:Braig KHBBS.png|[[Braig]]<br>{{KHBbS}}{{KHc}} | |||
File:Dilan KHIII.png|[[Dilan]]<br>{{KHBbS}}{{KHc}}{{KH3D}}{{KHIII}} | |||
File:Even KHBBS.png|[[Even]]<br>{{KHBbS}}{{KHc}}{{KH3D}}{{KHIII}}{{KHMoM}} | |||
File:Aeleus KHIII.png|[[Aeleus]]<br>{{KHBbS}}{{KHc}}{{KH3D}}{{KHIII}}{{KHMoM}} | |||
File:Ienzo KHIII.png|[[Ienzo]]<br>{{KHBbS}}{{KHc}}{{KH3D}}{{KHIII}}{{KHMoM}} | |||
File:Saïx KHII.png|[[Isa]]<br>{{KHBbS}}{{KHc}} | |||
File:Lea KH3D.png|[[Lea]]<br>{{KHBbS}}{{KHc}}{{KH3D}} | |||
File:Xehanort KHII.png|[[Terra-Xehanort|Xehanort]]<br>{{KHBbS}}{{KHII}}{{KHMoM}} | |||
File:Wedge KHII.png|[[Wedge]]<br>{{KHII}} | |||
File:Scrooge McDuck KHII.png|[[Scrooge McDuck]]<br>{{KHBbS}}{{KHII}} | |||
File:Huey KHBBS.png|[[Huey, Dewey, and Louie|Huey]]<br>{{KHII}} | |||
File:Dewey KHBBS.png|[[Huey, Dewey, and Louie|Dewey]]<br>{{KHII}} | |||
File:Louie KHBBS.png|[[Huey, Dewey, and Louie|Louie]]<br>{{KHII}} | |||
File:Mickey Mouse KHIII.png|[[King Mickey]]<br>{{KHBbS}}{{KHII}}{{KHIII}} | |||
File:Maleficent KH.png|[[Maleficent]]<br>{{KHII}} | |||
File:Pete KHII.png|[[Pete]]<br>{{KHII}} | |||
File:Stitch KHII.png|[[Stitch]]<br>{{KHII}} | |||
File:Master Xehanort KHBBS.png|[[Master Xehanort]]<br>{{KHBbS}} | |||
File:Vanitas KHBBS.png|[[Vanitas]]<br>{{KHBbS}} | |||
File:Young Xehanort KH3D.png|[[Young Xehanort]]<br>{{KHc}} | |||
File:Vexen KHIII.png|[[Vexen]]<br>{{KHIII}} | |||
File:Demyx KHIII.png|[[Demyx]]<br>{{KHIII}} | |||
File:Naminé KHIII.png|[[Naminé]]<br>{{KHIII}} | |||
File:Riku KHIII.png|[[Riku]]<br>{{KHIII}}{{RM}}{{KHMoM}} | |||
File:Fairy Godmother KHIIIRM.png|[[Fairy Godmother]]<br>{{RM}}{{KHMoM}} | |||
File:Moogle KH.png|[[Mog]]<br>{{KHII}} | |||
</gallery> | </gallery> | ||
==Enemies== | ==Enemies== | ||
=== | ===Heartless=== | ||
{|class="wikitable mw-collapsible mw-collapsed" | |||
! | |||
|- | |||
| | |||
<gallery> | <gallery> | ||
File:Shadow KHII.png|[[Shadow]]<br>{{KHII}} | |||
File:Soldier KHII.png|[[Soldier]]<br>{{KHII}} | |||
File:Crimson Jazz KHII.png|[[Crimson Jazz]]<br>{{KHII}} | |||
File: | File:Spring Metal KHIIFM.png|[[Spring Metal]]<br>{{FMII}} | ||
File:Aerial Viking KHIIFM.png|[[Aerial Viking]]<br>{{FMII}} | |||
File:Neoshadow KHII.png|[[Neoshadow]]<br>{{KHII}} | |||
File:Magic Phantom KHIIFM.png|[[Magic Phantom]]<br>{{FMII}} | |||
File:Beffudler KHIIFM.png|[[Beffudler]]<br>{{FMII}} | |||
File:Bookmaster KHII.png|[[Bookmaster]]<br>{{KHII}} | |||
File:Runemaster KHIIFM.png|[[Runemaster]]<br>{{FMII}} | |||
File:Iron Hammer KHIIFM.png|[[Iron Hammer]]<br>{{FMII}} | |||
File:Camo Cannon KHIIFM.png|[[Camo Cannon]]<br>{{FMII}} | |||
File:Lance Warrior KHIIFM.png|[[Lance Warrior]]<br>{{FMII}} | |||
File:Morning Star KHII.png|[[Morning Star]]<br>{{KHII}} | |||
File:Mad Ride KHIIFM.png|[[Mad Ride]]<br>{{FMII}} | |||
File:Reckless KHIIFM.png|[[Reckless]]<br>{{FMII}} | |||
File:Necromancer KHIIFM.png|[[Necromancer]]<br>{{FMII}} | |||
File:Aerial Champ KHIIFM.png|[[Aerial Champ]]<br>{{FMII}} | |||
File:Armored Knight KHII.png|[[Armored Knight]]<br>{{KHII}} | |||
File:Surveillance Robot KHII.png|[[Surveillance Robot]]<br>{{KHII}} | |||
File:Mushroom XIII No. 9 KHIIFM.png|'''[[Mushroom XIII No. 9]]'''<br>{{FMII}} | |||
File:Mushroom XIII No. 13 KHIIFM.png|'''[[Mushroom XIII No. 13]]'''<br>{{FMII}} | |||
File:Ansem, Seeker of Darkness's Recreated Data KHIIIRM.png|'''{{ns|Game|Ansem, Seeker of Darkness|Ansem's Recreated Data}}'''<br>{{RM}} | |||
</gallery> | </gallery> | ||
|} | |||
=== | ===Nobodies=== | ||
{|class="wikitable mw-collapsible mw-collapsed" | |||
! | |||
|- | |||
| | |||
<gallery> | <gallery> | ||
File:Dusk KHII.png|[[Dusk]]<br>{{KHII}} | |||
File:Creeper KHII.png|[[Creeper]]<br>{{KHII}} | |||
File:Sorcerer KHII.png|[[Sorcerer]]<br>{{KHII}} | |||
File:Sniper KHII.png|[[Sniper]]<br>{{KHII}} | |||
File:Dragoon KHII.png|[[Dragoon]]<br>{{KHII}} | |||
File:Berserker KHII.png|[[Berserker]]<br>{{KHII}} | |||
File:Assassin KHII.png|[[Assassin]]<br>{{KHII}} | |||
File:Dancer KHII.png|[[Dancer]]<br>{{KHII}} | |||
File:Gambler KHII.png|[[Gambler]]<br>{{KHII}} | |||
File:Samurai KHII.png|[[Samurai]]<br>{{KHII}} | |||
File:Xemnas's Replica Data KHIIFM.png|'''{{ns|Game|Xemnas|Xemnas's Replica Data}}'''<br>{{FMII}} | |||
File:Xigbar's Replica Data KHIIFM.png|'''{{ns|Game|Xigbar|Xigbar's Replica Data}}'''<br>{{FMII}} | |||
File:Xaldin's Replica Data KHIIFM.png|'''{{ns|Game|Xaldin|Xaldin's Replica Data}}'''<br>{{FMII}} | |||
File:Vexen's Replica Data KHIIFM.png|'''{{ns|Game|Vexen|Vexen's Replica Data}}'''<br>{{FMII}} | |||
File:Lexaeus's Replica Data KHIIFM.png|'''{{ns|Game|Lexaeus|Lexaeus's Replica Data}}'''<br>{{FMII}} | |||
File:Zexion's Replica Data KHIIFM.png|'''{{ns|Game|Zexion|Zexion's Replica Data}}'''<br>{{FMII}} | |||
File:Saïx's Replica Data KHIIFM.png|'''{{ns|Game|Saïx|Saïx's Replica Data}}'''<br>{{FMII}} | |||
File:Axel's Replica Data KHIIFM.png|'''{{ns|Game|Axel|Axel's Replica Data}}'''<br>{{FMII}} | |||
File:Demyx's Replica Data KHIIFM.png|'''{{ns|Game|Demyx|Demyx's Replica Data}}'''<br>{{FMII}} | |||
File:Luxord's Replica Data KHIIFM.png|'''{{ns|Game|Luxord|Luxord's Replica Data}}'''<br>{{FMII}} | |||
File:Marluxia's Replica Data KHIIFM.png|'''{{ns|Game|Marluxia|Marluxia's Replica Data}}'''<br>{{FMII}} | |||
File:Larxene's Replica Data KHIIFM.png|'''{{ns|Game|Larxene|Larxene's Replica Data}}'''<br>{{FMII}} | |||
File:Roxas's Replica Data KHIIFM.png|'''{{ns|Game|Roxas|Roxas's Replica Data}}'''<br>{{FMII}} | |||
File:Xemnas's Recreated Data KHIIIRM.png|'''{{ns|Game|Xemnas|Xemnas's Recreated Data}}'''<br>{{RM}} | |||
File:Xigbar's Recreated Data KHIIIRM.png|'''{{ns|Game|Xigbar|Xigbar's Recreated Data}}'''<br>{{RM}} | |||
File:Luxord's Recreated Data KHIIIRM.png|'''{{ns|Game|Luxord|Luxord's Recreated Data}}'''<br>{{RM}} | |||
File:Larxene's Recreated Data KHIIIRM.png|'''{{ns|Game|Larxene|Larxene's Recreated Data}}'''<br>{{RM}} | |||
File:Marluxia's Recreated Data KHIIIRM.png|'''{{ns|Game|Marluxia|Marluxia's Recreated Data}}'''<br>{{RM}} | |||
File:Saïx's Recreated Data KHIIIRM.png|'''{{ns|Game|Saïx|Saïx's Recreated Data}}'''<br>{{RM}} | |||
</gallery> | </gallery> | ||
|} | |} | ||
=== | ===Unversed=== | ||
{| | {|class="wikitable mw-collapsible mw-collapsed" | ||
! | ! | ||
|- | |- | ||
| | | | ||
<gallery> | <gallery> | ||
File:Flood KHBBS.png|[[Flood]]<br>{{KHBbS}} | |||
File:Scrapper KHBBS.png|[[Scrapper]]<br>{{KHBbS}} | |||
File:Bruiser KHBBS.png|[[Bruiser]]<br>{{KHBbS}} | |||
File:Red Hot Chili KHBBS.png|[[Red Hot Chili]] <br>{{KHBbS}} | |||
File:Prize Pod KHBBS.png|[[Prize Pod]]<br>{{KHBbS}} | |||
File:Blue Sea Salt KHBBS.png|[[Blue Sea Salt]]<br>{{KHBbS}} | |||
File:Archraven KHBBS.png|[[Archraven]]<br>{{KHBbS}} | |||
File:Tank Toppler KHBBS.png|[[Tank Toppler]]<br>{{KHBbS}} | |||
File:Mandrake KHBBS.png|[[Mandrake]]<br>{{KHBbS}} | |||
File:Chrono Twister KHBBS.png|[[Chrono Twister]]<br>{{KHBbS}} | |||
File:Belly Balloon KHBBSFM.png|[[Belly Balloon]]<br>{{FMBbS}} | |||
File:Trinity Armor KHBBS.png|'''[[Trinity Armor]]'''<br>{{KHBbS}} | |||
</gallery> | </gallery> | ||
|} | |||
== | ===Other=== | ||
{|class="wikitable mw-collapsible mw-collapsed" | |||
! | |||
|- | |||
| | |||
<gallery> | <gallery> | ||
File:Sephiroth KHII.png|'''{{ns|Game|Sephiroth}}'''<br>{{FMII}} | |||
File:Vanitas KHBBS.png|'''{{ns|Game|Vanitas}}'''<br>{{KHBbS}} | |||
File:Braig KHBBS.png|'''{{ns|Game|Braig}}'''<br>{{KHBbS}} | |||
File:Terra-Xehanort (with Dark Figure) KHBBS.png|'''{{ns|Game|Terra-Xehanort}}'''<br>{{KHBbS}} | |||
File:Master Xehanort's Recreated Data KHIIIRM.png|'''{{ns|Game|Master Xehanort|Master Xehanort's Recreated Data}}'''<br>{{RM}} | |||
File:Terra-Xehanort's Recreated Data KHIIIRM.png|'''{{ns|Game|Terra-Xehanort|Terra-Xehanort's Recreated Data}}'''<br>{{RM}} | |||
File:Vanitas's Recreated Data KHIIIRM.png|'''{{ns|Game|Vanitas|Vanitas's Recreated Data}}'''<br>{{RM}} | |||
File:Dark Riku's Recreated Data KHIIIRM.png|'''{{ns|Game|Riku Replica|Dark Riku's Recreated Data}}'''<br>{{RM}} | |||
File:Xion's Recreated Data KHIIIRM.png|'''{{ns|Game|Xion|Xion's Recreated Data}}'''<br>{{RM}} | |||
File:Young Xehanort's Recreated Data KHIIIRM.png|'''{{ns|Game|Young Xehanort|Young Xehanort's Recreated Data}}'''<br>{{RM}} | |||
</gallery> | </gallery> | ||
|} | |||
==Trivia== | ==Trivia== | ||
* | *In ''Kingdom Hearts II'', the hidden message behind the painting in Ansem's study reads "TRON DOOR TO DARKNESS". In ''Dream Drop Distance'', however, it instead reads "TORON DOOR TO DARKNESS", using the Japanese romanization of [[Tron]]'s name. | ||
==Notes and references== | |||
{{Reflist}} | |||
==See also== | ==See also== | ||
*[[Space Paranoids]] | *[[Space Paranoids]] | ||
*[[100 Acre Wood]] | *[[100 Acre Wood]] | ||
{{KH2}} | |||
{{ | {{BBS}} | ||
{{ | {{DDD}} | ||
{{ | {{KH3}} | ||
{{MOM}} | |||
Latest revision as of 23:38, 18 January 2025
| This article is about the world. You may be looking for the world's ruined version or the field theme. |
Radiant Garden, also known as The Radiant Garden, is an explorable world in Kingdom Hearts II and Kingdom Hearts Birth by Sleep. It is also featured in Kingdom Hearts 3D: Dream Drop Distance, Kingdom Hearts III, and Kingdom Hearts Melody of Memory, although only in cutscenes. Radiant Garden is the home world of many Final Fantasy characters within the series, as well as the original home world of Kairi, Ansem the Wise, and many of the members of Organization XIII's human forms.
A ruined incarnation of this world appears in Kingdom Hearts, Kingdom Hearts Chain of Memories, and Kingdom Hearts coded under the name "Hollow Bastion", consisting primarily of the castle that lies in the center of the world, with the areas outside mostly destroyed. Even after its restoration, it continues to go by this name until the final visit in Kingdom Hearts II.
In Kingdom Hearts II, Radiant Garden plays a similar role to Traverse Town from Kingdom Hearts, as a sort of "home base" for Sora before his return to the Destiny Islands.
Development[edit]
Leon, Yuffie, Aerith, Cloud, Tifa, and Cid were originally set to appear in Kingdom Hearts Birth by Sleep but were removed from the game because, according to Nomura, there were too many plot lines already, and it would have gotten confusing.[1]
Pre-release screenshots and trailers for Kingdom Hearts Birth by Sleep showed Terra conversing with and carrying Ventus in The Great Maw.[2] However, this area wasn't included in the final game and the scene was moved to the Land of Departure.
Settings and Areas[edit]
Kingdom Hearts II[edit]
Radiant Garden[edit]
Sora first arrives in the Radiant Garden (still known as Hollow Bastion at the time) at the Marketplace (商店街 Shōten Machi, lit. "Shopping District"), which houses the world's Moogle Shop, as well as Scrooge McDuck and the accessory, weapon, and items shops of his nephews Huey, Dewey, and Louie. Down the stairs past the item shop is the Borough (住宅街 Jūtakugai, lit. "Residential Area"), a residential area where Merlin's House (マーリンの家 Mārin no Ie) is located. It's also the Hollow Bastion Restoration Committee's base of operations, as well as where the 100 Acre Wood book is located.
Continuing on leads to the Bailey (城壁広場 Jōheki Hiroba, lit. "Castle Walls Square") which has a great view of the varies valleys outside of the town. Far off in the distance, the Villain's Vale can be seen. From here the Restoration Site (建設中通路 Kensetsu-chū Tsūro) can be accessed. The area contain some equipment used to restore the town and the castle, and is changed after the first visit to Space Paranoids, by the brick walls to the left being shattered, now offering a slightly quicker path through the area.
Passing through the Restoration Site leads to the Postern (城通用口 Shiro Tsūyō Kuchi), the site of a save point and the base entrance to the castle itself. Going inside, the party must navigate the twisting and maze-like Corridors (廊下 Rōka) before reaching the end at Ansem's Study (アンセムの研究室 Ansemu no Kenkyūshitsu, lit. "Ansem's Laboratory"). The room contains a desk, several bookshelves, broken containers formerly filled with hearts, as well as a portrait of Terra-Xehanort. A secret passage can be found here that leads to Ansem the Wise's computer room. Ansem's Computer contains a complex data system and an elaborate network copied from ENCOM, which was updated and modified for research purposes. From here the party can transport inside the computer and access the Space Paranoids world. On the other side of the computer room is a small balcony overlooking the Heartless Manufactory (ハートレス製造施設), which can also be accessed by use of the elevator found there. Below the Manufactory area is an inaccessible Underground Facility (地下施設), only seen in cutscenes. The area contains a long downward spiral staircase with a long hallway at the end, with several prison cells on each side of the corridor. At the end lies the entrance to the Chamber of Repose.
After the events of the first visit to Space Paranoids, the layout of the Bailey is altered; the outer wall of the town are broken down, and the Castle Gate (城門前 Jōmon Mae, lit. "Gate Before the Castle") can now be accessed from here. From the Castle Gate, Sora can reach the long and winding Ravine Trail (谷間の道 Tanima no Michi) that eventually leads to the Crystal Fissure (結晶の狭間 Kesshō no Hazama, lit. "Crystal Interstice"), a small cave-like area with glowing crystals. From here The Great Maw (大渓谷 Dai Keikoku, lit. "Great Valley") is accessed, a large open area where the climax of the Battle of the 1000 Heartless takes place. The next and last location down this route is The Dark Depths (闇の淵 Yami no Fuchi), where Sora and his friends encounter Xemnas, Axel, Saïx, and Maleficent.
The Dark Depths is the closest Sora can come to the Villain's Vale (ヴィラン砦 Viran Toride, lit. "Villain's Fort"), which contains five ramshackle set of towers arranged in a castle configuration, with pipes twirling around them, rising from a pile of ruined masonry and machinery. A big Heartless emblem can be seen atop of the tower in the middle. Villain's Vale contains a room inside, also known as Villain's Vale (ヴィラン砦の一室 Viran Toride no Isshitsu, lit. "Chamber of the Villain's Fort"), which acts as a base of operations for Maleficent and Pete.
| Area Map of Radiant Garden in Kingdom Hearts II |
|---|
Cavern of Remembrance[edit]
As the Battle of the 1000 Heartless attack begins, a hole in the castle wall at the Postern appears, revealing the entrance to the Kingdom Hearts II Final Mix exclusive Cavern of Remembrance (追憶の洞 Tsuioku no Hora). Climbing down the hole leads to the cave's first area called the Depths (最深部 Saishinbu). The area appears at first to be a small cave with a stream of water pouring down a high ledge, next to a Drive Orb crystal, however, past the ledge is a short tunnel leading to an immense, beautiful crystalline cave, containing many ledges, stalactites, and stalagmites which can be ascended to reach an ornate door, as well as a healthy population of powerful Heartless.
Through the door lies the lowest part of the Mineshaft (坑道 Kōdō), a purple, deep, and winding pit cave which is crisscrossed with pipes across multiple "floors". Each floor contains openings in the pipes that require specialized, maximum leveled Growth Abilities to traverse, as well as the appropriate Drive Form for each obstacle; the first two are also guarded by event battles with several waves of Heartless. Crossing the first chasm with Quick Run brings Sora to another ornate door, as well as a passage leading to an upper cubby of the Depths, where he can dislodge a stalactite in order to create a shortcut.
Both the door and the cubby lead to the Mining Area (採鉱部 Saikōbu), a complex area of pistons, vents, and engines that is initially inert. By activating the engines lying at the very bottom of the chamber, Sora awakens the powerful machinery that he must navigate to reach the next room. Passing through the door leads to the second floor of the Mineshaft, which is much greener and has several pipes that must be bypassed with Aerial Dodge in order to reach the next door. Through this door is the busy Engine Chamber (機関部 Kikanbu), filled with conveyor belts, pistons, scalding jets of steam bursting from pipes, and more powerful Heartless, as well as several hidden balconies. At the end of this is another door leading to the final section of the Mineshaft, with a final pipe obstacle which must be threaded using Glide.
Exiting the cavern through this door brings Sora to the Transport to Remembrance (追憶への誘い Tsuioku e no Izunai, lit. "Invitation to Remembrance"), a long balcony hallway built in the same style as Castle Oblivion, with Radiant Garden's characteristic inverted waterfalls against the open sides of the path. The hall is bursting with powerful Nobodies, and Sora's initial traversal of it requires him to conquer three separate event battles, each with multiple waves of Nobodies.
The final door leads out of the subterranean caves to the Garden of Assemblage (集積の庭園 Shūseki no Teien), an ornate mall in the style of the Castle That Never Was surrounded by a circular wall, which is itself ringed by more of the inverted waterfalls. At the center of this mall lies a computer, which can be used to bring out the Organization XIII's Replica Data for Sora to combat. Behind the computer is a secret passageway, veiled by an illusion, leading back to the Restoration Site.
| Area Map of Cavern of Remembrance in Kingdom Hearts II |
|---|
Kingdom Hearts Birth by Sleep[edit]
In Kingdom Hearts Birth by Sleep, Radiant Garden is shown in its original glory, before it got turned into Hollow Bastion. The world's castle is shown to originally have a relevantly pastel palette, with the castle sitting on top of a large town filled with trees, grass, and flowers. The walls surrounding the town have several massive fountains, and are generally covered in climbers plants. Outside the walls is an ocean, with several green mountains in the distance.
The Central Square (中央広場 Chūō Hiroba) is a town square located in the middle of the world, filled with beautiful flowers and trees, as well as many homes surrounding the area. Going northwest leads to the massive Gardens (庭園 Teien) area. Ascending the garden and leaving through a gate will lead to the Front Doors (正面扉口 Shōmen Tobira Kuchi), a small circular area with stairs leading to a wide open space outside the castle's gates.
By heading east from the Central Square, Terra, Aqua, and Ven will arrive at the Castle Town (住宅街 Jūtakugai, lit. "Residential Area"), a smaller back street with a Moogle Shop. Also located here is Merlin's House (マーリンの家 Mārin no Ie), where the Hunny Pot Board can acquired. Continuing through the tunnel at the end of Castle Town will lead to the Fountain Court (噴水広場 Funsui Hiroba, lit. "Fountain Square"), home to several large fountain layered on top of each other. By climbing the fountains and heading for the exit will take the characters to the Aqueduct (水路 Suiro), Radiant Garden's irrigation system. Running up some stairs and across the outer walls will eventually lead down to the world's Reactor (動力炉 Dōryoku-ro, lit. "Power Reactor"), where the Trinity Armor is fought. The Reactor can also be accessed through a broken gate at the Gardens Area.
Heading south from the Central Square will lead to a pair of stairs, one on either side, which leads down to the Entryway (エントランス Entoransu, lit. "Entrance"). A resting area within the wall which also houses a save point. Heading outside is the Outer Gardens (城外庭園 Jōgai Teien, lit. "Outer Castle Gardens"), a lotus shaped platform surrounded by water with even more flower beds. In the middle of the area is a fountain with a secret door in it, which leads down to the Purification Facility (浄化施設 Jōka Shisetsu), a large platform in an open area situated below the gardens.
| Area Map in Kingdom Hearts Birth by Sleep |
|---|
Kingdom Hearts III[edit]
In Kingdom Hearts III, the world appears to finally have been restored to its former self, and is almost identical to how it appeared in Kingdom Hearts Birth by Sleep. The world itself is inaccessible, but appears in several cutscenes. Areas shown are the computer room in Ansem's Study, as well as the Central Square outside of the castle.
In Kingdom Hearts III Re Mind, Merlin's House (マーリンの家 Mārin no Ie) becomes playable during the Limitcut Episode, and retains its appearance from Kingdom Hearts II. Though the outside portion resembles its appearance as Castle Town in Kingdom Hearts Birth by Sleep. Inside, by accessing Cid's computer, a data version of the Garden of Assemblage (集積の庭園 Shūseki no Teien) can be entered, though it looks relatively different. The digital replica lacks a sky and replaces the waterfalls with dark streams of data, as well as dark pillars seen between them. The passage which used to lead to the Restoration Site is simply replaced with a wall. From the garden the Real Organization XIII's Recreated Data can be fought. Master Xehanort and Xion's portals are unavailable until the eleven other members have been beaten. The area also contains a save point and a Moogle Shop. All thirteen battles take place at the Data-Organization XIII Arena, which consists of massively detailed circular platforms, with neon blue and purple lines springing out of the platform. Surrounding the arena are dark and ominous clouds.
Through Data Greeting, areas such as the Central Square, Merlin's House, Garden of Assemblage, and the Data-Organization XIII Arena can be freely explored.
Story[edit]
Kingdom Hearts Birth by Sleep[edit]
- "It stands to reason that he will strike next in the city of light, Radiant Garden."
- —Master Xehanort telling Terra that Radiant Garden is in danger.
Radiant Garden, once known as the "city of light", was a beautiful city of gardens and fountains that lay below Hollow Bastion, a glorious castle kept by a loving king, Ansem the Wise, and his apprentices. Much of the history of the castle is unknown, other than that Ansem ruled from it. The three Keyblade wielders, Terra, Ventus, and Aqua, all arrive in the town at roughly the same time.
Terra arrives here looking for Vanitas, but only finds a swarm of Unversed in the town center. He then sees Master Xehanort walking down a street and follows him. Along the way he picks up Pooh's storybook dropped by the wizard Merlin and then sees a large Unversed fly towards a mining area outside town.
Aqua arrives here shortly after Terra's arrival. She first meets Scrooge McDuck, who says he saw someone heading towards the castle. She runs to the castle, where she meets a young Kairi being attacked by the Unversed. Mickey then appears from the sky and the two protect the young girl together. They also sense the pure light from Kairi, but Mickey is called away by his Star Shard immediately after he proposes that he and Aqua team up. Kairi offers Aqua flowers as thanks for helping her, and Aqua places a spell on Kairi in order to protect her light should it ever be threatened. Kairi's Grandma arrives and tells her story of the origin of light to Kairi as they head home. Aqua then sees a giant Unversed and chases it through town.
Ven, meanwhile appeared in Radiant Garden after Mickey's Star Fragment sent him there, however, he sees Mickey walking towards the castle and follows him to the front doors, but the guards, Dilan and Aeleus prevent his entrance. A giant Unversed appears, causing Ven to chase after it. The guards prepare to follow, but are reprimanded by Even, who says that the boy can take care of himself and also senses that Ven has no darkness in his heart, or rather it was taken out. In the town square, Ven defends Scrooge McDuck from the Unversed so the mister offers him three lifetime passports to Disney Town. Ven thanks him and runs after the Unversed, meeting Merlin along the way.
All three heroes arrive at the same place by chasing their respective Unversed. They are surprised to see each other, but first defeat the Trinity Armor that forms. They fight together and win. Ven shares his tickets to Disney Town with his friends. Ven tells of his journey and how he even defeated a masked boy who bad mouthed Terra. Terra knows this is Vanitas and bids him to go home with Aqua. Aqua wonders if Terra has gotten too close to the darkness. Terra is insulted and feels that Eraqus sent her to spy on him. As Terra leaves to follow his own path, Ven displays disbelief to Aqua's claims and goes after Terra, but not before telling a disheartened Aqua that she has changed.
Terra enters the lower portions of the castle where he meets Braig, who openly tells him that he has captured Master Xehanort. Terra goes further into the castle to find the last person he trusts, but is approached again by Braig who wants the Keyblade for himself. The two battle, with the captured Xehanort imploring Terra to give into his darkness. Terra eventually does so, and shoots a Dark Firaga at Braig's face, giving him the scars he appears with later and blinding one of his eyes. Terra and Xehanort form a pact to work together to destroy Vanitas. Terra then prepares to leave, even after Ven wants to come with him.
Aqua, meanwhile, left towards the town square, meeting Merlin on the way. In the town square, she meets Vanitas, who taunts her by inquiring about Ventus and then attacks. Aqua wins the battle, but Vanitas escapes, complementing her on her skill, and making an ambiguous comment that she'll be his "Plan B" and finishes by telling her only to get stronger. Ven then arrives, wanting to go with her as well, but Aqua declines and tells him just to go home, she then leaves.
Ven, after the battle with the Trinity Armor, passes by young Ienzo, being attacked by Unversed. He helps the boy as Even arrives. The scientist thanks Ven for rescuing the orphan, and also notes that they may be connected in the future. He plays with Terra's old wooden Keyblade, but drops in front of two teenagers, Lea and Isa. Lea challenges Ven, but loses embarrassingly. Isa says it is time that they left, with Lea saying that he and Ven will meet again someday because they are friends now. Isa has no clue as to why Lea is so friendly, but Lea responds he wants to be a part of many people's memories so that he can live forever in the memories of all the people he meets. The two look towards the castle, silently getting ready to do something, they then leave. Reminded of his friends, Ven leaves for new worlds.
In the last chapter, Aqua comes to Radiant Garden looking for Terra after creating Castle Oblivion. She finds Terra, however possessed by Master Xehanort's dark heart. Aqua struggles when he tries to strangle her, but she tries to make him remember his true self. Terra cannot overpower Xehanort's heart, leaving Aqua no choice but to battle her friend. Terra awakens the darkness in his heart in the form of Xehanort's guardian. However Aqua proves victorious, and Terra tries to release the darkness in his heart by sending himself to the Realm of Darkness. Aqua jumps in after him wearing her armor as protection. Unfortunately, Aqua realizes cannot save both of them, so she gives Terra her armor and Keyblade to protect him, and sends him back to the Realm of Light, while she stays in the darkness.
Terra's unconscious body is found in Radiant Garden hereafter by Braig, who brings Ansem the Wise and Dilan to retrieve the stranger. Terra can only remember the name, Xehanort, causing Braig to smile deviously. They also find Aqua's armor and Keyblade although they are unsure of what it is. Later, Terra, now using the name "Xehanort", has become Ansem's apprentice, and making an ally in Braig. Ansem and Ienzo then walk by, catching the boy's attention and the scientist's suspicion.
Later, Lea and Isa attempt to break into the castle, but are thrown out by Dilan and Aeleus. Afterwards Lea buys two sticks of sea-salt ice cream from Scrooge McDuck and shares it with Isa. Kairi is also seen picking flowers and gazing up at the sky above her, while her necklace faintly glows.
Between Kingdom Hearts Birth by Sleep and Kingdom Hearts[edit]
As Xehanort had now become one of Ansem's apprentices he was subjected to experiments of the heart in an effort to regain his lost memories. The Chamber of Repose was constructed deep within the castle, where these experiments continued. In time, Ansem deemed the experiments unethical, and ordered them ceased. However, on discovering Subject X, Xehanort began to continue the experiments without Ansem's knowledge or consent. Secret Report 3 Lea and Isa would continue their attempts to infiltrate the castle, eventually reaching the Chamber of Repose, where they met Subject X. Secret Report 5 Henceforth, whenever they were able to enter the castle, they would go to see her. However, Ansem eventually discovered the experiments' continuation, and in response, he sent Subject X where Xehanort and the other apprentices could not find her. Secret Report 4 Kingdom Hearts III As a consequence, when Lea and Isa infiltrated the castle again, they found her cell empty; this led to their approaching the castle with intent to apprentice under Ansem the Wise. Secret Report 6
A year after the battle at the Keyblade Graveyard, Xehanort and the other apprentices overthrow Ansem, banishing him to the Realm of Darkness, and remodel the castle to include mechanical components. The result is a twisted bastion; half beautiful castle, half distorted factory. Shortly after Maleficent invades Radiant Garden with her Heartless. Some residents manage to escape, many of whom end up in Traverse Town. However, Kairi is sent into the "oceans of the worlds" by Xehanort and ends up in Destiny Islands, partly due to the spell Aqua put on her necklace.
During Maleficent's reign in the castle it is probable that she either creates or remodels the castle's keep, which has decorations and models of roses and her thorned plants.
Kingdom Hearts[edit]
Kingdom Hearts Chain of Memories[edit]
Following their adventure in Castle Oblivion, Riku and Mickey Mouse walk through the Great Maw of Radiant Garden. Riku briefly stops and kneels down, prompting concern from Mickey, but Riku quickly stands up and they continue walking.
Kingdom Hearts II[edit]
Sora and his friends reunite with Leon, Yuffie, Aerith, and Cid, who have started the Hollow Bastion Restoration Committee, an organization attempting to rebuild the world that they once lived in. After reuniting with Merlin as well, Leon makes Sora, Donald, and Goofy honorary members of the committee and takes them to view the restoration work on the Bailey. There, after a surprise attack, the party has their first real encounter with Organization XIII in the form of taunts and cryptic messages. After unlocking the pathway to other worlds via his committee card, Sora heads out to search for King Mickey and Riku.
The party returns briefly to visit and assist Merlin, who has found Pooh's book, the entrance to the 100 Acre Wood. However, a raid by Heartless damages the book when they try to steal it from Sora's group, leading to Pooh's amnesia and the search for the book's Torn Pages.
When the party is called again to Hollow Bastion, they reunite with Cloud, who vows to go after Sephiroth. They then are sent by Cid and Merlin to assist Leon in the Bastion itself; along the way, they meet the Gullwings for the first time. After reaching the Bastion, they first see Ansem's study and are introduced to his seemingly malfunctioning computer system after a brief encounter with Tifa. After an unplanned trip to the Space Paranoids courtesy of Stitch, they finally meet with the King in Ansem's study, who promises to talk after they finish helping Tron. Sora and his party copy Tron's scrambled data, finding out about Ansem the Wise.
Mickey explains about Ansem the Wise, his impostor, and the Heartless and Nobodies that resulted, most notably Xemnas. While he explains many things to them, Sora learns that the King can't tell him about Riku. He charges them to go find the missing Riku and Kairi, but there is a sudden explosion outside the Bastion. Heartless and Nobodies begin pouring through a hole blown in the outer wall. Sora's party encounter Maleficent, who orders her Heartless to attack, and the Gullwings, who they trick into joining Leon's side. They also find Sephiroth, looking to fight Cloud.
The party makes their way to the Bailey, where they witness the Hollow Bastion Restoration Committee, the Gullwings, Cloud, and Tifa's attempts to stop the Heartless, as well as an encounter between Cloud and Sephiroth. Mickey orders them to find Riku and Kairi instead of fighting the Heartless, but Sora refuses and leaps into the fray, joined by Donald and Goofy. Their first encounter is with Demyx, who attempts to eliminate Sora again. They defeat Demyx, and Mickey catches up with them and admits his earlier decision was hasty. An explosion caused by a Heartless causes a boulder to fly at Mickey, but Goofy takes the blow instead and is seemingly killed. Spurred on by his sacrifice, the three jump into the battle, assisted by the other residents of Hollow Bastion. After a short time, it is revealed that Goofy is alright and reunites with them. Together, they work to halt the Heartless invasion.
They are triumphant in the end, but are confronted by Xemnas and Saïx who reveals, with help from Axel, Organization XIII's master plot. Maleficent appears and attempts to claim Kingdom Hearts for her own. She helps Sora escape so he can help her find a way to get rid of the Nobodies by sending him and his friends into the Realm of Darkness. There, they find the two clues needed to unlock the identity of Roxas, as well as the way to unlock the second set of adventures in each World.
On the third and final main visit to Hollow Bastion, the Master Control Program has taken over Cid and Ansem the Wise's computers, causing the claymores in Hollow Bastion to malfunction and attack the residents. Sora, Donald, and Goofy go into Space Paranoids to contact Tron while Cid works on a program to delete the MCP. When downloaded into the Space Paranoids, the party is able to retake control of Hollow Bastion's computers and restore order. In addition, Tron finds information on Ansem's data of Hollow Bastion's existence before the Heartless came, then reveals it to all residents, reminding everyone its true name and nature: the Radiant Garden.
Optionally, Sora and co. find and fight Sephiroth at Villain's Vale after Radiant Garden's chaotic situation is solved. If he is proven victorious, Sephiroth tells him to find Cloud so that they may finish everything once and for all. Cloud and Sephiroth emit in a great battle until Tifa arrives and renews his light, giving him the strength to fight Sephiroth. Cloud and Sephiroth disappear to once again finish their battle. Tifa gives Sora the Fenrir Keychain as token for her gratitude for helping her and Cloud.
Kingdom Hearts coded[edit]
Following the demise of Organization XIII, Braig, Dilan, Even, Aeleus, Ienzo, Isa, and Lea are resurrected in the computer room. Young Xehanort arrives and wakes Braig, and both converse about Master Xehanort's plans. While both are unsure of what Master Xehanort really wants, a comment of Young Xehanort's causes Braig to realize that it may have something to do with the Keyblade War, and they take Isa along as part of their plan. Destiny
Kingdom Hearts 3D: Dream Drop Distance[edit]
Lea wakes up in the computer room and notices that he has reverted to his original human form. He ventures into Ansem's study, where he finds Dilan, Even, Aeleus, and a now-adult Ienzo. They also take note that Braig and Isa are mysteriously missing, prompting Lea to decide to go and search for them.
After Sora and Riku's Mark of Mastery exam, Lea returns to Radiant Garden.
Kingdom Hearts III[edit]
By this time, Radiant Garden has been completely rebuilt to its former glory.
While following Aqua's trail, Mickey Mouse and Riku travel to Radiant Garden and are led by Dilan to the Central Square where Aqua was last seen in the Realm of Light. Mickey recounts the events of her final moments, and explains that Terra is under Xehanort's control. He then recounts how both Ansem, Seeker of Darkness and Xemnas had each been fulfilling a part of Master Xehanort's plan; though both were thwarted, Young Xehanort had secretly been traveling through time to collect members for a new Organization. They receive a call from Sora, who wonders about how to restore Roxas; Riku mentions the replicas, promising to ask Ienzo about them. Riku and the King ask Ienzo, but learn the only person who would have in-depth knowledge about this, Even has vanished from Radiant Garden. The King concludes that he was taken by the Organization to help fill out their ranks.
Vexen meets with Demyx the night before the second Keyblade War, asking him to deliver a blank replica for Roxas and Ansem the Wise to Ienzo. Demyx complies, with Ansem having a heartfelt reunion with a remorseful Ienzo. Together, they prep the replica with Roxas's data, which is soon called the to the Keyblade Graveyard by Roxas's heart. Demyx obtains a replica formerly used by Dark Riku and delivers it to Ansem the Wise, who uses his data on Naminé to prep the replica for her heart. Sora and Kairi complete the replica by using the Keyblade's power to extract Naminé's heart, and Riku returns to pick up the newly revived Naminé for a celebration on Destiny Islands.
One year later, following Sora's disappearance, Riku visits the Radiant Garden Restoration Committee for any leads on Sora's whereabouts. There, Cid reveals that he has reconstructed data on the real Organization XIII and sends out a data copy of Sora to battle the Organization's data in order to find any clues. The ensuing battles yield no results, but the Fairy Godmother arrives, having been sent by Yen Sid and Merlin to look through Riku's dreams.
Kingdom Hearts Melody of Memory [edit]
Other appearances[edit]
Kingdom Hearts χ[edit]
Radiant Garden appears in the game's opening where Kairi's Grandma tells Kairi the story of the age of fairy tales and the ancient Keyblade War.
Characters[edit]
Enemies[edit]
Heartless[edit]
|
|
Nobodies[edit]
|
|
Unversed[edit]
|
|
Other[edit]
|
|
Trivia[edit]
- In Kingdom Hearts II, the hidden message behind the painting in Ansem's study reads "TRON DOOR TO DARKNESS". In Dream Drop Distance, however, it instead reads "TORON DOOR TO DARKNESS", using the Japanese romanization of Tron's name.
Notes and references[edit]
- ^ Kingdom Hearts Birth by Sleep Ultimania, Interviewer: "Zack appears at the Coliseum, but was there a reason why he is the only Final Fantasy character this time around?" / Tetsuya Nomura: "We wanted to have Cid and the gang in Radiant Garden, but that would have made the story go too far off track. The main story of Birth by Sleep is complicated enough as it is, so instead of making a lot of side roads, we concentrated on the main story. Which resulted in having no other Final Fantasy character but Zack make an appearance." Translation via Lissar.
- ^ KINGDOM HEARTS Birth By Sleep Jump Festa 2008 Trailer
See also[edit]
| Kingdom Hearts II |
|---|
| Characters |
| Party members |
| Roxas - Sora - Donald Duck - Goofy Fa Mulan - Beast - Auron - Jack Sparrow - Aladdin - Jack Skellington - Simba - Tron - Riku |
| Summons |
| Chicken Little - Genie - Stitch - Peter Pan |
| Antagonists |
| Organization XIII Xemnas - Xigbar - Xaldin - Saïx - Axel - Demyx - Luxord Villains Maleficent - Pete - Hades - Ursula - Hector Barbossa - Jafar - Oogie Boogie - Scar Shan-Yu - Master Control Program - Sark |
| Non-playable characters |
| Abu - Aerith - Ansem the Wise - Ariel - Ariel's Sisters - Auron - Bathtub - Belle - Biggs - Captain Pete - Carpet - Cave of Wonders Guardian - Cerberus - Chien Po, Ling, and Yao - Chip - Chip and Dale - Christmas Elves - Cid - Clara Cluck - Clarabelle Cow - Cloud - Cogsworth - Daisy Duck - Dark Figure - Dr. Finkelstein - Eeyore - Elizabeth Swann - Enchanted Brooms - Flora, Fauna, and Merryweather - Flotsam and Jetsam - Flounder - Fujin - Gopher - Gullwings - Hayabusa - Hayner - Hercules - Horace Horsecollar - Hostile Program - Huey, Dewey, and Louie - Hydra - Iago - Jasmine - Jessie - Jiminy Cricket - Kairi - Kanga - King Triton - Li Shang - Lock, Shock, and Barrel - Lumière - Maleficent's Raven - Megara - Merlin - Mickey Mouse - Minnie Mouse - Moogles - Mrs. Potts - Mufasa - Mushu - Nala - Naminé - Olette - Owl - Pain and Panic - Pegasus - Pence - Philoctetes - Piglet - Pluto - Prince Eric - Pumbaa - Rabbit - Rafiki - Raijin - Reindeer - Rock Titan - Roo - Sally - Santa Claus - Scrooge McDuck - Sebastian - Seifer - Selphie - Sephiroth - Setzer - Shenzi, Banzai, and Ed - Simba and Nala's cub - Squall Leonhart - Terra-Xehanort - The Emperor - The Experiment - The Ghost of Scar - The Mayor - The Peddler - Tifa - Tigger - Timon - Tinker Bell - Undead Pirates - Vivi - Wallace - Wantz - Wardrobe - William Turner - Winnie the Pooh - Wedge - Yen Sid - Yuffie - Zero |
| Locations |
| Worlds |
| Twilight Town - Destiny Islands - Hollow Bastion/Radiant Garden - The Land of Dragons - Beast's Castle - 100 Acre Wood - Olympus Coliseum - Disney Castle - Timeless River - Atlantica - Port Royal - Agrabah - Halloween Town - Pride Lands - Space Paranoids - The World That Never Was - End of Sea |
| Places |
| The Other Twilight Town - Dive to the Heart - Mysterious Tower - Kingdom Hearts |
| Terms |
| Cornerstone of Light - Drive Form - Gate - Hollow Bastion Restoration Committee - Kairi's Letter - Keyblade - Kingdom Hearts Encoder - Organization XIII - Princesses of Heart - Reaction Command - Secret Ansem Report - Sidecar Glider - Skateboard - The End - Twilight Town Disciplinary Committee |
| Music |
| Kingdom Hearts II Original Soundtrack - Kingdom Hearts Original Soundtrack Complete - Sanctuary |
| Archives |
| Accessories - Artwork - Bosses - Enemies - Items - Keyblades - Other Weapons - Songs - Removed content |
| Kingdom Hearts Birth by Sleep |
|---|
| Characters |
| Party members |
| Terra - Ventus - Aqua - Lingering Will Prince Phillip - Mickey Mouse - Hercules - Zack - Experiment 626 |
| Antagonists |
| Xehanort - Vanitas - Braig - Terra-Xehanort Maleficent - Lady Tremaine - Anastasia and Drizella - Lucifer - The Queen - Magic Mirror - Gantu - Experiment 221 - Hades - Ice Colossus - Captain Hook - Captain Dark |
| Non-playable characters |
| Aeleus - Ansem the Wise - Aurora - Captain Justice - Chip and Dale - Cinderella - Crocodile - Daisy Duck - Dark Figure - Dilan - Donald Duck - Dr. Jumba Jookiba - Enchanted Brooms - Eraqus - Even - Fairy Godmother - Flora, Fauna, and Merryweather - Goofy - Grand Councilwoman - Grand Duke - Horace Horsecollar - Huey, Dewey, and Louie - Ienzo - Isa - Jaq - Kairi - Kairi's Grandma - Lea - Lost Boys - Maleficent's Goons - Maleficent's Raven - Merlin - Minnie Mouse - Moogle - Peter Pan - Philoctetes - Pluto - The Prince - Prince Charming - Rabbit - Riku - Scrooge McDuck - Seven Dwarfs - Mr. Smee - Snow White - Sora - Tigger - Tinker Bell - Vanitas Remnant - Winnie the Pooh - Yen Sid |
| Locations |
| Worlds |
| Land of Departure - Enchanted Dominion - Castle of Dreams - Dwarf Woodlands - Destiny Islands - Radiant Garden - Olympus Coliseum - Disney Town - Deep Space - Mirage Arena - Neverland - Mysterious Tower - Keyblade Graveyard - Castle Oblivion - Realm of Darkness |
| Places |
| Dive to the Heart - 100 Acre Wood - Chamber of Waking |
| Terms |
| Bequeathing - Blank Points - Keyblade - Keyblade Armor - Keyblade Glider - Keyblade Master - Keyblade War - Kingdom Hearts - Mark of Mastery exam - Million Dreams Award - Princesses of Heart - The End - Unversed |
| Gameplay terms |
| Arena Mode - Command Board - Command Style - D-Link - Deck Commands - Shotlock - Special Command |
| Music |
| Kingdom Hearts Birth by Sleep & 358/2 Days Original Soundtrack - Simple and Clean |
| Archives |
| Artwork - Bosses - Enemies - Keyblades - Removed content |
| Kingdom Hearts 3D: Dream Drop Distance |
|---|
| Characters |
| Party members |
| Sora - Riku |
| Dream Eater Spirits |
| Meow Wow - Tama Sheep - Yoggy Ram - Komory Bat - Pricklemane - Hebby Repp - Sir Kyroo - Toximander - Fin Fatale - Tatsu Steed - Necho Cat - Thunderaffe - Kooma Panda - Pegaslick - Iceguin Ace - Peepsta Hoo - Escarglow - KO Kabuto - Wheeflower - Ghostabocky - Zolephant - Juggle Pup - Halbird - Staggerceps - Fishboné - Flowbermeow - Cyber Yog - Chef Kyroo - Lord Kyroo - Tatsu Blaze - Electricorn - Woeflower - Jestabocky - Eaglider - Me Me Bunny - Drill Sye - Tyranto Rex - Majik Lapin - Cera Terror - Skelterwild - Ducky Goose - Aura Lion - Ryu Dragon - Drak Quack - Keeba Tiger - Meowjesty - Sudo Neku - Frootz Cat - Ursa Circus - Kab Kannon - R & R Seal |
| Antagonists |
| Real Organization XIII (Seekers of Darkness) Master Xehanort - Young Xehanort - Terra-Xehanort - Ansem - Xemnas - Vanitas - Xigbar - Saïx - Luxord - Marluxia - Larxene - Dark Riku Villains Maleficent - Pete - Ursula Claude Frollo - CLU - Rinzler - Beagle Boys |
| Non-playable characters |
| Aeleus - Ansem the Wise - Anti Black Coat - Aqua - Axel - Black Guard - Blue Fairy - Braig - Chernabog - Daisukenojo Bito - Dark Figure - Dilan - Donald Duck - Enchanted Brooms - Esmeralda - Even - Geppetto - Goofy - Ienzo - Jiminy Cricket - Joshua - Julius - Kairi - Kevin Flynn - Lea - Maleficent's Raven - Mickey Mouse - Minnie Mouse - Monstro - Moogle - Naminé - Neku Sakuraba - Phoebus - Pinocchio - Pluto - Quasimodo - Quorra - Rhyme - Roxas - Sam Flynn - Shiki - Terra - Ventus - Victor, Hugo, and Laverne - Xion - Yen Sid |
| Locations |
| Worlds |
| Traverse Town - La Cité des Cloches - The Grid - Prankster's Paradise - Country of the Musketeers - Symphony of Sorcery - The World That Never Was |
| Destiny Islands - Mysterious Tower - Disney Castle - Radiant Garden - Dive to the Heart |
| Places |
| Sleeping Worlds |
| Terms |
| Another Guardian of Light - Dream Eater - Glossary - Keyblade War - Mark of Mastery exam - Real Organization XIII - Sleeping Keyhole - Sleeping Worlds - The End |
| Gameplay terms |
| Ability Link - AR Card - Deck Commands - Dive Mode - Drop System - Flick Rush - Flowmotion - Forecast - Link System - Reality Shift - Spirit |
| Music |
| Kingdom Hearts: Dream Drop Distance Original Soundtrack - Simple and Clean - Sanctuary |
| Archives |
| Artwork - Bosses - Enemies - Keyblades - Removed content |
| Kingdom Hearts III |
|---|
| Characters |
| Party members |
| Sora - Donald Duck - Goofy - Riku - Aqua Hercules - Woody - Buzz Lightyear - Rapunzel - Eugene Fitzherbert - James P. Sullivan - Mike Wazowski - Marshmallow - Jack Sparrow - Baymax Mickey Mouse - Kairi - Ventus - Lea - Roxas - Xion |
| Link system |
| Meow Wow - Wreck-It Ralph - Simba - Ariel - Stitch |
| Antagonists |
| Real Organization XIII (Seekers of Darkness) Master Xehanort - Young Xehanort - Terra-Xehanort - Ansem, Seeker of Darkness - Xemnas - Vanitas - Xigbar - Saïx - Luxord - Marluxia - Larxene - Dark Riku - Xion Vexen - Demyx - Replica Xehanort Villains Maleficent - Pete - Hades - Rock Titan - Ice Titan - Lava Titan - Tornado Titan Mother Gothel - Randall Boggs - Hans - Davy Jones - Kraken - Cutler Beckett - Dark Baymax Other Anti-Aqua |
| Non-playable characters |
| Seven Guardians of Light - New Seven Hearts Aced - Aeleus - Air Droids - Angelic Amber - Anna - Ansem the Wise - Apollo - Athena - Beasts & Bugs - Boo - Bouncy Pets - CDA Agent - Chip and Dale - Chirithy - Daisy Duck - Dark Figure - Dilan - Elizabeth Swann - Elsa - Ephemer - Eraqus - Even - Fred - Gigas - Go Go Tomago - Gopher - Green Army Men - Gula - Hamm - Hayner - Hector Barbossa - Hermes - Hiro Hamada - Honey Lemon - Huey, Dewey, and Louie - Ienzo - Invi - Ira - Isa - Jiminy Cricket - Joshamee Gibbs - Kristoff - Lingering Will - Little Green Men - Lumpy - Luxu - The Master of Masters - Maximus - Megara - Merlin - Minnie Mouse - Moogle - Nameless Star - Naminé - Olaf - Olette - Pascal - Patchwork Animals - Pegasus - Pence - Piglet - Philoctetes - Pluto - Rabbit - Remy - Rex - Riku Replica - Roo - Sarge - Scrooge McDuck - Supreme Smasher - Sven - Terra - Tia Dalma - Tigger - Wasabi - William Turner - Winnie the Pooh - Yen Sid - Yozora - Zeus |
| Locations |
| Worlds |
| Olympus - Dark World - Mysterious Tower - Disney Castle - Radiant Garden - Twilight Town - Toy Box - Kingdom of Corona - Monstropolis - Arendelle - The Caribbean - San Fransokyo - 100 Acre Wood - Destiny Islands - Castle Oblivion / Land of Departure - Keyblade Graveyard - The Final World - Scala ad Caelum - Quadratum |
| Terms |
| Alba & Ater - Ansem's Code - Black Box - Datascape - Dream Eater - Heartless - Keyblade - Keyblade Master - Keyblade War - Kingdom Hearts - New Seven Hearts - Nobody - Port Royal - Secret Reports - Subject X - Unversed - Verum Rex - Yozora |
| Gameplay terms |
| Armor Mode - Attractions - Battlegate - Black Pearl - Classic Kingdom - Flowmotion - Formchange - Gigas - Glossary - Gummiphone - Gummi Ship - Keyblade Forge - Leviathan - Lucky Emblems - Make Your Mark - Memory Archive - Moogle Shop - Link - Shotlock - Situation Command - Tech Points - χ3 |
| Music |
| Don't Think Twice - Face My Fears - Kingdom Hearts - III, II.8, Unchained χ & Union χ [Cross] - Original Soundtrack - Unnamed tracks |
| Archives |
| Accessories - Armor - Artwork - DLC - Enemies - Items - Keyblades - Weapons - Removed content |
| Kingdom Hearts Melody of Memory |
|---|
| Characters |
| Party members |
| Kairi - Sora - Roxas - Aqua - Riku Donald Duck - Goofy - Axel - Xion - Terra - Ventus - Meow Wow - Komory Bat - Mickey Mouse Hercules - Aladdin - Ariel - Peter Pan - Beast - Fa Mulan - Simba - Stitch |
| Antagonists |
| Xehanort - Ansem, Seeker of Darkness - Xemnas - Maleficent |
| Non-playable characters |
| Aeleus - Ansem the Wise - Even - Fairy Godmother - Ienzo - Nameless Star - Terra-Xehanort - Yen Sid |
| Locations |
| Worlds |
| Mysterious Tower - Radiant Garden - The Final World |
| Terms |
| An Oath to Return - Another Key - Key Art - Keyblade - Museum - Music Stage - Rhythm Points - Story Scene - The End - VS Battle - World Tour |
| Music |
| Kingdom Hearts Melody of Memory - Special Disc - Unnamed tracks |
| Archives |
| Artwork - Bosses - Enemies - Items - Trophy - Songs |
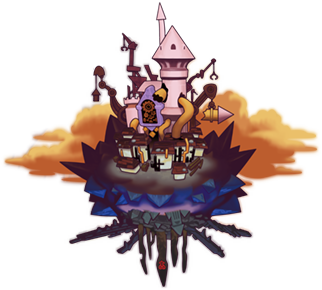
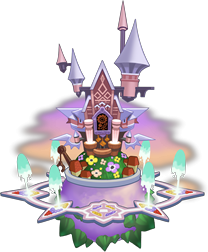
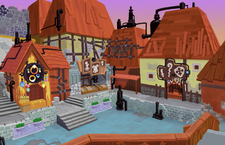
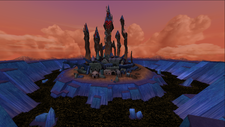
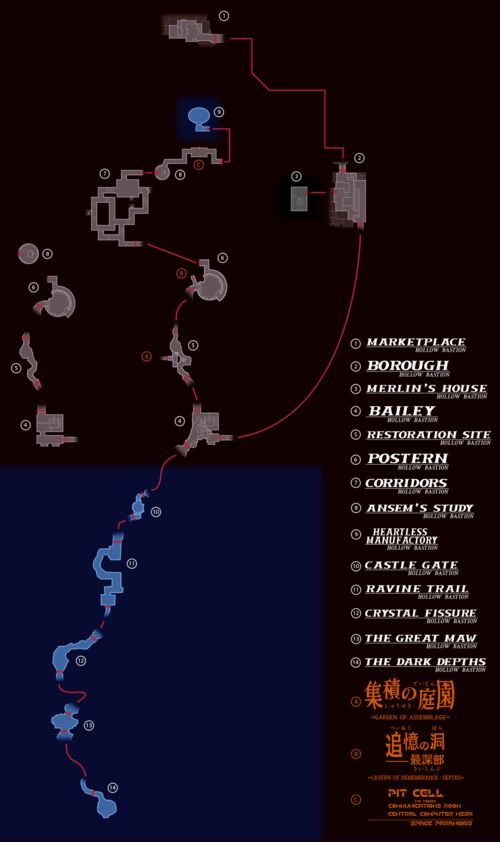
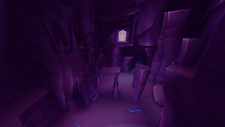
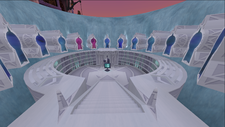
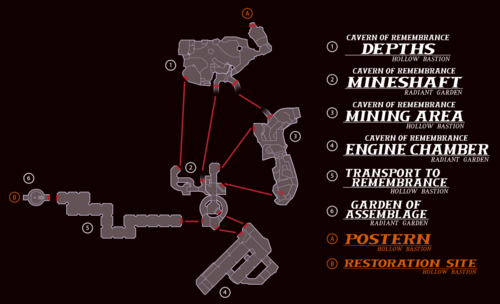
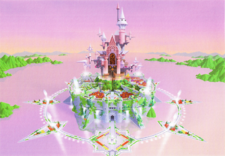
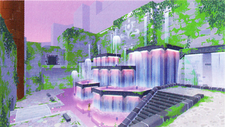
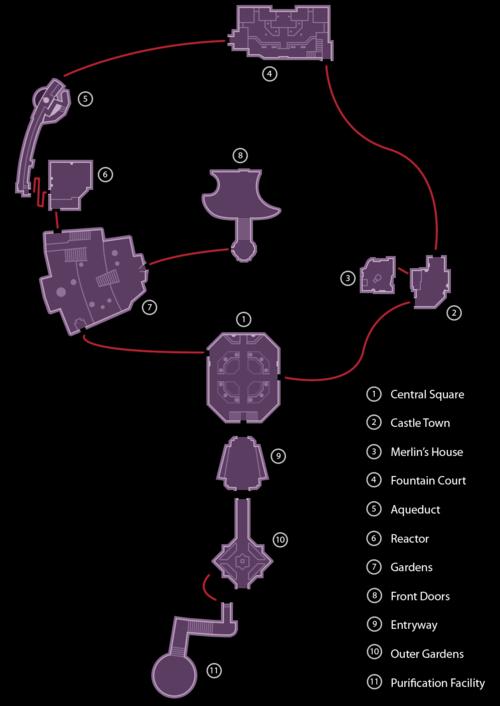
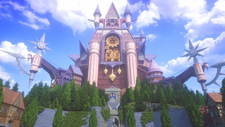
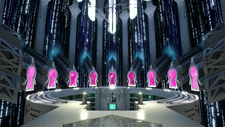
![Kairi's Grandma [KH BbS]](https://kh.wiki.gallery/images/thumb/3/30/Kairi%27s_Grandma_KHBBS.png/62px-Kairi%27s_Grandma_KHBBS.png)
![Yuffie [KH II][KH III RM]](https://kh.wiki.gallery/images/thumb/0/0e/Yuffie_KHIIIRM.png/53px-Yuffie_KHIIIRM.png)
![Cloud [KH II]](https://kh.wiki.gallery/images/thumb/a/aa/Cloud_KHII.png/120px-Cloud_KHII.png)
![Sephiroth [KH II]](https://kh.wiki.gallery/images/thumb/b/ba/Sephiroth_KHII.png/120px-Sephiroth_KHII.png)
![The Gullwings [KH II]](https://kh.wiki.gallery/images/thumb/8/82/Gullwings_KHII.png/110px-Gullwings_KHII.png)
![Merlin [KH BbS][KH II]](https://kh.wiki.gallery/images/thumb/f/fe/Merlin_KHBBS.png/83px-Merlin_KHBBS.png)
![Braig [KH BbS][KH coded]](https://kh.wiki.gallery/images/thumb/4/4c/Braig_KHBBS.png/67px-Braig_KHBBS.png)
![Isa [KH BbS][KH coded]](https://kh.wiki.gallery/images/thumb/b/bf/Sa%C3%AFx_KHII.png/106px-Sa%C3%AFx_KHII.png)
![Lea [KH BbS][KH coded][KH 3D]](https://kh.wiki.gallery/images/thumb/5/59/Lea_KH3D.png/56px-Lea_KH3D.png)
![Scrooge McDuck [KH BbS][KH II]](https://kh.wiki.gallery/images/thumb/e/e9/Scrooge_McDuck_KHII.png/79px-Scrooge_McDuck_KHII.png)
![Huey [KH II]](https://kh.wiki.gallery/images/thumb/d/da/Huey_KHBBS.png/107px-Huey_KHBBS.png)
![Dewey [KH II]](https://kh.wiki.gallery/images/thumb/5/53/Dewey_KHBBS.png/86px-Dewey_KHBBS.png)
![Louie [KH II]](https://kh.wiki.gallery/images/thumb/5/57/Louie_KHBBS.png/94px-Louie_KHBBS.png)
![King Mickey [KH BbS][KH II][KH III]](https://kh.wiki.gallery/images/thumb/c/c9/Mickey_Mouse_KHIII.png/71px-Mickey_Mouse_KHIII.png)
![Maleficent [KH II]](https://kh.wiki.gallery/images/thumb/c/c5/Maleficent_KH.png/69px-Maleficent_KH.png)
![Pete [KH II]](https://kh.wiki.gallery/images/thumb/2/23/Pete_KHII.png/85px-Pete_KHII.png)
![Stitch [KH II]](https://kh.wiki.gallery/images/thumb/5/5a/Stitch_KHII.png/112px-Stitch_KHII.png)
![Master Xehanort [KH BbS]](https://kh.wiki.gallery/images/thumb/8/85/Master_Xehanort_KHBBS.png/71px-Master_Xehanort_KHBBS.png)
![Vanitas [KH BbS]](https://kh.wiki.gallery/images/thumb/4/46/Vanitas_KHBBS.png/68px-Vanitas_KHBBS.png)
![Young Xehanort [KH coded]](https://kh.wiki.gallery/images/thumb/5/5a/Young_Xehanort_KH3D.png/67px-Young_Xehanort_KH3D.png)
![Demyx [KH III]](https://kh.wiki.gallery/images/thumb/c/ca/Demyx_KHIII.png/66px-Demyx_KHIII.png)
![Riku [KH III][KH III RM][KH MoM]](https://kh.wiki.gallery/images/thumb/7/75/Riku_KHIII.png/81px-Riku_KHIII.png)
![Fairy Godmother [KH III RM][KH MoM]](https://kh.wiki.gallery/images/thumb/f/ff/Fairy_Godmother_KHIIIRM.png/78px-Fairy_Godmother_KHIIIRM.png)
![Mog [KH II]](https://kh.wiki.gallery/images/thumb/e/eb/Moogle_KH.png/54px-Moogle_KH.png)
![Shadow [KH II]](https://kh.wiki.gallery/images/thumb/d/de/Shadow_KHII.png/120px-Shadow_KHII.png)
![Soldier [KH II]](https://kh.wiki.gallery/images/thumb/e/ee/Soldier_KHII.png/94px-Soldier_KHII.png)
![Crimson Jazz [KH II]](https://kh.wiki.gallery/images/thumb/f/f5/Crimson_Jazz_KHII.png/70px-Crimson_Jazz_KHII.png)
![Spring Metal [KH II FM]](https://kh.wiki.gallery/images/thumb/5/50/Spring_Metal_KHIIFM.png/67px-Spring_Metal_KHIIFM.png)
![Aerial Viking [KH II FM]](https://kh.wiki.gallery/images/thumb/7/7d/Aerial_Viking_KHIIFM.png/120px-Aerial_Viking_KHIIFM.png)
![Neoshadow [KH II]](https://kh.wiki.gallery/images/thumb/c/c9/Neoshadow_KHII.png/117px-Neoshadow_KHII.png)
![Magic Phantom [KH II FM]](https://kh.wiki.gallery/images/thumb/2/29/Magic_Phantom_KHIIFM.png/120px-Magic_Phantom_KHIIFM.png)
![Beffudler [KH II FM]](https://kh.wiki.gallery/images/thumb/0/02/Beffudler_KHIIFM.png/120px-Beffudler_KHIIFM.png)
![Bookmaster [KH II]](https://kh.wiki.gallery/images/thumb/d/da/Bookmaster_KHII.png/120px-Bookmaster_KHII.png)
![Runemaster [KH II FM]](https://kh.wiki.gallery/images/thumb/2/21/Runemaster_KHIIFM.png/120px-Runemaster_KHIIFM.png)
![Iron Hammer [KH II FM]](https://kh.wiki.gallery/images/thumb/8/8e/Iron_Hammer_KHIIFM.png/109px-Iron_Hammer_KHIIFM.png)
![Camo Cannon [KH II FM]](https://kh.wiki.gallery/images/thumb/a/a3/Camo_Cannon_KHIIFM.png/92px-Camo_Cannon_KHIIFM.png)
![Lance Warrior [KH II FM]](https://kh.wiki.gallery/images/thumb/4/45/Lance_Warrior_KHIIFM.png/69px-Lance_Warrior_KHIIFM.png)
![Morning Star [KH II]](https://kh.wiki.gallery/images/thumb/b/bf/Morning_Star_KHII.png/120px-Morning_Star_KHII.png)
![Mad Ride [KH II FM]](https://kh.wiki.gallery/images/thumb/c/c6/Mad_Ride_KHIIFM.png/120px-Mad_Ride_KHIIFM.png)
![Reckless [KH II FM]](https://kh.wiki.gallery/images/thumb/8/85/Reckless_KHIIFM.png/110px-Reckless_KHIIFM.png)
![Necromancer [KH II FM]](https://kh.wiki.gallery/images/thumb/4/42/Necromancer_KHIIFM.png/94px-Necromancer_KHIIFM.png)
![Aerial Champ [KH II FM]](https://kh.wiki.gallery/images/thumb/b/b6/Aerial_Champ_KHIIFM.png/120px-Aerial_Champ_KHIIFM.png)
![Armored Knight [KH II]](https://kh.wiki.gallery/images/thumb/b/b5/Armored_Knight_KHII.png/120px-Armored_Knight_KHII.png)
![Surveillance Robot [KH II]](https://kh.wiki.gallery/images/thumb/7/70/Surveillance_Robot_KHII.png/95px-Surveillance_Robot_KHII.png)
![Mushroom XIII No. 9 [KH II FM]](https://kh.wiki.gallery/images/thumb/6/67/Mushroom_XIII_No._9_KHIIFM.png/70px-Mushroom_XIII_No._9_KHIIFM.png)
![Mushroom XIII No. 13 [KH II FM]](https://kh.wiki.gallery/images/thumb/f/fc/Mushroom_XIII_No._13_KHIIFM.png/79px-Mushroom_XIII_No._13_KHIIFM.png)
![Ansem's Recreated Data [KH III RM]](https://kh.wiki.gallery/images/thumb/f/fa/Ansem%2C_Seeker_of_Darkness%27s_Recreated_Data_KHIIIRM.png/91px-Ansem%2C_Seeker_of_Darkness%27s_Recreated_Data_KHIIIRM.png)
![Dusk [KH II]](https://kh.wiki.gallery/images/thumb/b/ba/Dusk_KHII.png/89px-Dusk_KHII.png)
![Creeper [KH II]](https://kh.wiki.gallery/images/thumb/d/d8/Creeper_KHII.png/102px-Creeper_KHII.png)
![Sorcerer [KH II]](https://kh.wiki.gallery/images/thumb/1/14/Sorcerer_KHII.png/71px-Sorcerer_KHII.png)
![Sniper [KH II]](https://kh.wiki.gallery/images/thumb/7/76/Sniper_KHII.png/120px-Sniper_KHII.png)
![Dragoon [KH II]](https://kh.wiki.gallery/images/thumb/8/8c/Dragoon_KHII.png/120px-Dragoon_KHII.png)
![Berserker [KH II]](https://kh.wiki.gallery/images/thumb/a/a1/Berserker_KHII.png/120px-Berserker_KHII.png)
![Assassin [KH II]](https://kh.wiki.gallery/images/thumb/d/dc/Assassin_KHII.png/104px-Assassin_KHII.png)
![Dancer [KH II]](https://kh.wiki.gallery/images/thumb/b/bd/Dancer_KHII.png/76px-Dancer_KHII.png)
![Gambler [KH II]](https://kh.wiki.gallery/images/thumb/0/01/Gambler_KHII.png/105px-Gambler_KHII.png)
![Samurai [KH II]](https://kh.wiki.gallery/images/thumb/d/df/Samurai_KHII.png/103px-Samurai_KHII.png)
![Xemnas's Replica Data [KH II FM]](https://kh.wiki.gallery/images/thumb/3/34/Xemnas%27s_Replica_Data_KHIIFM.png/120px-Xemnas%27s_Replica_Data_KHIIFM.png)
![Xigbar's Replica Data [KH II FM]](https://kh.wiki.gallery/images/thumb/2/22/Xigbar%27s_Replica_Data_KHIIFM.png/120px-Xigbar%27s_Replica_Data_KHIIFM.png)
![Xaldin's Replica Data [KH II FM]](https://kh.wiki.gallery/images/thumb/5/53/Xaldin%27s_Replica_Data_KHIIFM.png/120px-Xaldin%27s_Replica_Data_KHIIFM.png)
![Vexen's Replica Data [KH II FM]](https://kh.wiki.gallery/images/thumb/e/ef/Vexen%27s_Replica_Data_KHIIFM.png/120px-Vexen%27s_Replica_Data_KHIIFM.png)
![Lexaeus's Replica Data [KH II FM]](https://kh.wiki.gallery/images/thumb/b/b4/Lexaeus%27s_Replica_Data_KHIIFM.png/120px-Lexaeus%27s_Replica_Data_KHIIFM.png)
![Zexion's Replica Data [KH II FM]](https://kh.wiki.gallery/images/thumb/5/52/Zexion%27s_Replica_Data_KHIIFM.png/120px-Zexion%27s_Replica_Data_KHIIFM.png)
![Saïx's Replica Data [KH II FM]](https://kh.wiki.gallery/images/thumb/7/76/Sa%C3%AFx%27s_Replica_Data_KHIIFM.png/120px-Sa%C3%AFx%27s_Replica_Data_KHIIFM.png)
![Axel's Replica Data [KH II FM]](https://kh.wiki.gallery/images/thumb/9/9a/Axel%27s_Replica_Data_KHIIFM.png/120px-Axel%27s_Replica_Data_KHIIFM.png)
![Demyx's Replica Data [KH II FM]](https://kh.wiki.gallery/images/thumb/3/3f/Demyx%27s_Replica_Data_KHIIFM.png/120px-Demyx%27s_Replica_Data_KHIIFM.png)
![Luxord's Replica Data [KH II FM]](https://kh.wiki.gallery/images/thumb/5/5a/Luxord%27s_Replica_Data_KHIIFM.png/120px-Luxord%27s_Replica_Data_KHIIFM.png)
![Marluxia's Replica Data [KH II FM]](https://kh.wiki.gallery/images/thumb/3/34/Marluxia%27s_Replica_Data_KHIIFM.png/120px-Marluxia%27s_Replica_Data_KHIIFM.png)
![Larxene's Replica Data [KH II FM]](https://kh.wiki.gallery/images/thumb/3/3b/Larxene%27s_Replica_Data_KHIIFM.png/120px-Larxene%27s_Replica_Data_KHIIFM.png)
![Roxas's Replica Data [KH II FM]](https://kh.wiki.gallery/images/thumb/5/5e/Roxas%27s_Replica_Data_KHIIFM.png/120px-Roxas%27s_Replica_Data_KHIIFM.png)
![Xemnas's Recreated Data [KH III RM]](https://kh.wiki.gallery/images/thumb/6/60/Xemnas%27s_Recreated_Data_KHIIIRM.png/96px-Xemnas%27s_Recreated_Data_KHIIIRM.png)
![Xigbar's Recreated Data [KH III RM]](https://kh.wiki.gallery/images/thumb/8/8a/Xigbar%27s_Recreated_Data_KHIIIRM.png/93px-Xigbar%27s_Recreated_Data_KHIIIRM.png)
![Luxord's Recreated Data [KH III RM]](https://kh.wiki.gallery/images/thumb/e/e7/Luxord%27s_Recreated_Data_KHIIIRM.png/120px-Luxord%27s_Recreated_Data_KHIIIRM.png)
![Larxene's Recreated Data [KH III RM]](https://kh.wiki.gallery/images/thumb/2/2b/Larxene%27s_Recreated_Data_KHIIIRM.png/120px-Larxene%27s_Recreated_Data_KHIIIRM.png)
![Marluxia's Recreated Data [KH III RM]](https://kh.wiki.gallery/images/thumb/0/00/Marluxia%27s_Recreated_Data_KHIIIRM.png/106px-Marluxia%27s_Recreated_Data_KHIIIRM.png)
![Saïx's Recreated Data [KH III RM]](https://kh.wiki.gallery/images/thumb/3/38/Sa%C3%AFx%27s_Recreated_Data_KHIIIRM.png/111px-Sa%C3%AFx%27s_Recreated_Data_KHIIIRM.png)
![Flood [KH BbS]](https://kh.wiki.gallery/images/thumb/d/db/Flood_KHBBS.png/68px-Flood_KHBBS.png)
![Scrapper [KH BbS]](https://kh.wiki.gallery/images/thumb/4/42/Scrapper_KHBBS.png/120px-Scrapper_KHBBS.png)
![Bruiser [KH BbS]](https://kh.wiki.gallery/images/thumb/0/05/Bruiser_KHBBS.png/120px-Bruiser_KHBBS.png)
![Red Hot Chili [KH BbS]](https://kh.wiki.gallery/images/thumb/6/68/Red_Hot_Chili_KHBBS.png/120px-Red_Hot_Chili_KHBBS.png)
![Prize Pod [KH BbS]](https://kh.wiki.gallery/images/thumb/4/4d/Prize_Pod_KHBBS.png/91px-Prize_Pod_KHBBS.png)
![Blue Sea Salt [KH BbS]](https://kh.wiki.gallery/images/thumb/5/54/Blue_Sea_Salt_KHBBS.png/119px-Blue_Sea_Salt_KHBBS.png)
![Archraven [KH BbS]](https://kh.wiki.gallery/images/thumb/1/1e/Archraven_KHBBS.png/120px-Archraven_KHBBS.png)
![Tank Toppler [KH BbS]](https://kh.wiki.gallery/images/thumb/1/1e/Tank_Toppler_KHBBS.png/120px-Tank_Toppler_KHBBS.png)
![Mandrake [KH BbS]](https://kh.wiki.gallery/images/thumb/7/73/Mandrake_KHBBS.png/86px-Mandrake_KHBBS.png)
![Chrono Twister [KH BbS]](https://kh.wiki.gallery/images/thumb/9/92/Chrono_Twister_KHBBS.png/77px-Chrono_Twister_KHBBS.png)
![Belly Balloon [KH BbS FM]](https://kh.wiki.gallery/images/thumb/c/c7/Belly_Balloon_KHBBSFM.png/120px-Belly_Balloon_KHBBSFM.png)
![Trinity Armor [KH BbS]](https://kh.wiki.gallery/images/thumb/d/d7/Trinity_Armor_KHBBS.png/117px-Trinity_Armor_KHBBS.png)
![Terra-Xehanort [KH BbS]](https://kh.wiki.gallery/images/thumb/a/a3/Terra-Xehanort_%28with_Dark_Figure%29_KHBBS.png/90px-Terra-Xehanort_%28with_Dark_Figure%29_KHBBS.png)
![Master Xehanort's Recreated Data [KH III RM]](https://kh.wiki.gallery/images/thumb/c/c9/Master_Xehanort%27s_Recreated_Data_KHIIIRM.png/120px-Master_Xehanort%27s_Recreated_Data_KHIIIRM.png)
![Terra-Xehanort's Recreated Data [KH III RM]](https://kh.wiki.gallery/images/thumb/6/6e/Terra-Xehanort%27s_Recreated_Data_KHIIIRM.png/118px-Terra-Xehanort%27s_Recreated_Data_KHIIIRM.png)
![Vanitas's Recreated Data [KH III RM]](https://kh.wiki.gallery/images/thumb/3/34/Vanitas%27s_Recreated_Data_KHIIIRM.png/120px-Vanitas%27s_Recreated_Data_KHIIIRM.png)
![Dark Riku's Recreated Data [KH III RM]](https://kh.wiki.gallery/images/thumb/5/57/Dark_Riku%27s_Recreated_Data_KHIIIRM.png/117px-Dark_Riku%27s_Recreated_Data_KHIIIRM.png)
![Xion's Recreated Data [KH III RM]](https://kh.wiki.gallery/images/thumb/4/49/Xion%27s_Recreated_Data_KHIIIRM.png/120px-Xion%27s_Recreated_Data_KHIIIRM.png)
![Young Xehanort's Recreated Data [KH III RM]](https://kh.wiki.gallery/images/thumb/2/25/Young_Xehanort%27s_Recreated_Data_KHIIIRM.png/120px-Young_Xehanort%27s_Recreated_Data_KHIIIRM.png)