Hades Paradox Cup: Difference between revisions
From the Kingdom Hearts Wiki, the Kingdom Hearts encyclopedia
Jump to navigationJump to search
Pureautism (talk | contribs) No edit summary |
SpahgettiMan (talk | contribs) |
||
| (9 intermediate revisions by 7 users not shown) | |||
| Line 9: | Line 9: | ||
|level=99 | |level=99 | ||
|unlock=Level up all [[Drive Form]]s and [[Summon]]s to level 7 and complete the second visit to [[Space Paranoids]]. | |unlock=Level up all [[Drive Form]]s and [[Summon]]s to level 7 and complete the second visit to [[Space Paranoids]]. | ||
|rules= | |rules=The rules for this tournament change every ten rounds. | ||
|missions=Give it a try.<br>Win with a score of 15,000 or more. | |missions=Give it a try.<br>Win with a score of 15,000 or more. | ||
|reward=Hades Cup Trophy | |reward=Hades Cup Trophy | ||
| Line 112: | Line 112: | ||
|round50=50 | |round50=50 | ||
|enem50=Hades | |enem50=Hades | ||
|style=kh2 | |||
}} | }} | ||
The '''Hades Paradox Cup''' is one of the four cups that can be entered by talking to [[Hades]] in his chamber in ''[[Kingdom Hearts II]]'', and is the longest and hardest in the game. The tournament consists of fifty matches, with the cup's rules changing every ten matches. A boss is fought on every tenth match and the final boss is Hades in Berserk mode. Upon winning the cup, the {{nihongo|'''Hades Cup Trophy'''|ハデスカップトロフィー|Hadesu Kappu Torofī}} is received. | |||
==Strategy== | |||
;Rounds 1-10 | |||
*No restrictions. Sora has access to [[Drive Form]]s, [[Summon]]s, and his allies. | |||
** Round 6 is fought in the dark. | |||
** A good strategy is to use [[Peter Pan]]'s [[Journey's End]] to accumulate points. However, this is ineffective on the boss fights on Rounds 5 and 10. | |||
;Rounds 11-20 | |||
*[[Titan Cup]] rules. [[Sora]] fights alone, and cannot use Drive Forms, but Summons are available. There is also the Damage Points restriction with Sora starting out at 500 points. | |||
* | ** As with the first 10 rounds, a good strategy is to use [[Peter Pan]]'s [[Journey's End]] to accumulate points. However, this is ineffective on the boss fights on Rounds 15 and 20. | ||
;Rounds 21-30 | |||
*[[Pain and Panic Cup]] rules. The [[Drive Gauge]] is locked, but Summons and Allies are available and [[Limit]]s consume less [[MP]] than usual. | *[[Pain and Panic Cup]] rules. The [[Drive Gauge]] is locked, but Summons and Allies are available and [[Limit]]s consume less [[MP]] than usual. | ||
** Liberal use of [[Trinity Limit]] is highly recommended for clearing this section. | |||
** Round 24 is a group of 3 [[Bulky Vendor]]s. Because prizes are not given during the tournament, there is no need to wait for their health to deplete. Use this time to breathe before the battle with [[Cloud]] & [[Tifa]] next round. | |||
;Rounds 31-40 | |||
*[[Cerberus Cup]] rules. Forms are available, and Drive | *[[Cerberus Cup]] rules. Forms are available, and the Drive Gauge fill much faster than normal. There is also a ten-minute timer. | ||
** Use of [[Final Form]] is recommended to beat the timer. | |||
** Round 35 is a cloud of [[Rapid Thruster]]s, you must defeat all of them before time runs out. It is recommended to use Magnet and Thunder to clear the wave as quickly as possible. | |||
** Round 38 is several waves of Nobody enemies. Magnet and Thunder can be used to clear each wave, but beware that the [[Sorcerer]] is immune to elemental magic. | |||
;Rounds 41-50 | |||
*No Summons, | *No Summons, Limit Form is the only available Drive{{FMII}}, and no allies (except in the final round, where you have [[Hercules]] as the only ally); only the Keyblade, magic, and [[Trinity Limit]] are available. | ||
** Round 44 is a group of [[Living Bone]] enemies. Be prepared to [[Reflect]] immediately as the round opens to survive their attacks. | |||
** Round 45 is a repeat of the [[Battle of 1000 Heartless]], and Sora must survive for one minute. Snag [[Surveillance Robot]]s and use Sparkle Ray liberally to clear the field. | |||
** Round 47 is the final round in which you can increase your score. | |||
{ | *** The round opens with a single Bulky Vendor; once it is defeated, several waves of additional enemies will spawn. A Magnet and Thunder combo can be used to clear the room rapidly for a score bonus. | ||
==Enemies== | ==Enemies== | ||
| Line 444: | Line 231: | ||
</gallery> | </gallery> | ||
|} | |} | ||
==Gallery== | |||
<gallery> | |||
File:Hades Cup Trophy KHII.png|The item icon for the Hades Cup trophy. | |||
</gallery> | |||
{{Minigames}} | {{Minigames}} | ||
[[fr:Coupe Hadès Paradoxe]] | [[fr:Coupe Hadès Paradoxe]] | ||
[[Category:Olympus Coliseum Cups]] | [[Category:Olympus Coliseum Cups]] | ||
Latest revision as of 13:29, 13 January 2025
We'll go together.
| |
|---|---|
| This article is being merged.
It has been suggested that this article or section be merged into Hades Cup. Please discuss this issue further on the talk page. | |
| Hades Paradox Cup
| |
| |
| Katakana | 裏ハデスカップ
|
|---|---|
| Romaji | Ura Hadesu Kappu |
| Unlocked | Level up all Drive Forms and Summons to level 7 and complete the second visit to Space Paranoids.
|
| Rules | The rules for this tournament change every ten rounds. |
| Level | 99 |
| Rounds | 50
|
| Missions | Give it a try. Win with a score of 15,000 or more. |
| Rewards | Hades Cup Trophy |
| Round | Enemies
|
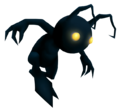
| 1 | Shadow x 3 Soldier x 3 |
|---|---|
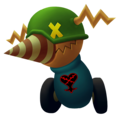
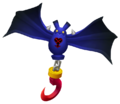
| 2 | Driller Mole x 4 Hook Bats x 2 |
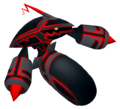
| 3 | Rapid Thruster x 3 Surveillance Robot x 2 |
| 4 | Rabid Dogs x 5 Creeper Plant x 2 |
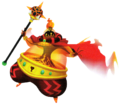
| 5 | Volcanic Lord Soldier x 2 |
| 6 | Cannon Gun x 3 Silver Rock x 2 |
| 7 | Icy Cubes x 3 Shadow x 4 Minute Bombs x ? |
| 8 | Soldier x ? Silver Rock x ? Armored Knights x 4 Large Body x 1 |
| 9 | Creepers x 4 Samurai x 1 |
| 10 | Yuffie Tifa |
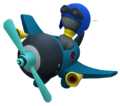
| 11 | Rapid Thruster x 5 Aeroplane x 3 |
| 12 | Minute Bomb x 4 Magnum Loader x 1 Air Pirate x 2 |
| 13 | Luna Bandit x 3 Driller Mole x 2 |
| 14 | Lance Soldier x 2 Armored Knights x 2 Tornado Step x 2 |
| 15 | Blizzard Lord |
| 16 | Soldier x 4 Wight Knight x 2 |
| 17 | Strafer x 4 Neoshadow x 4 Aerial Knocker x 4 |
| 18 | Luna Bandit x 2 Air Pirate x 2 Creeper Plant x 3 Wight Knight x 3 |
| 19 | Dusk x 2 Assassin x 2 Dragoon x 1 |
| 20 | Pete |
| 21 | Gargoyle Knight x 3 Armored Knight x 3 |
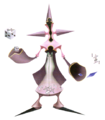
| 22 | Fortuneteller x 2 Aeroplane x 1 Trick Ghost x 2 |
| 23 | Soldier x 2 Creeper Plant x 2 Shaman x 2 |
| 24 | Bulky Vendor x 3 |
| 25 | Cloud Tifa |
| 26 | Bolt Tower x 2 Hammer Frame x 2 Neoshadow x 1 |
| 27 | Gargoyle Warrior x 2 Rabid Dog x 4 Nightwalker x 4 |
| 28 | Bookmaster x 2 Emerald Blues x 4 Shaman x 4 Silver Rock x 3 |
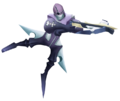
| 29 | Sniper x 2 Gambler x 2 |
| 30 | Hades |
| 31 | Samurai x 2 Berserker x 1 Creeper x 2 |
| 32 | Dancer x 3 Water Clone x 3 |
| 33 | Samurai x 4 |
| 34 | Sorcerer x 2 |
| 35 | Rapid Thruster x ? |
| 36 | Berserker x 3 |
| 37 | Sniper x 2 Assassin x 3 Dragoon x 4 |
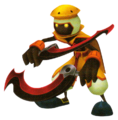
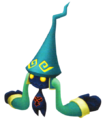
| 38 | Dusk x 6 Samurai x 3 Dancer x 3 Gambler x 4 Sorcerer x 1 |
| 39 | Dragoon x 4 |
| 40 | Leon Cloud |
| 41 | Toy Soldier x 2 Graveyard x 2 |
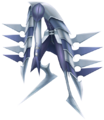
| 42 | Living Bone x 2 Fortuneteller x 1 |
| 43 | Morning Star x 2 Large Body x 2 |
| 44 | Living Bone x 3 |
| 45 | Armored Knight x ? Surveillance Robot x ? |
| 46 | Hot Rod x 2 Devastator x 1 |
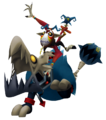
| 47 | Bulky Vendor x 1 Lance Soldier x 2 Living Bone x 1 Emerald Blues x 2 Assault Rider x 2 Morning Star x 3 Crescendo x 5 |
| 48 | Cerberus |
| 49 | Leon Cloud Yuffie Tifa |
| 50 | Hades |
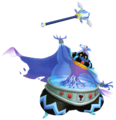
The Hades Paradox Cup is one of the four cups that can be entered by talking to Hades in his chamber in Kingdom Hearts II, and is the longest and hardest in the game. The tournament consists of fifty matches, with the cup's rules changing every ten matches. A boss is fought on every tenth match and the final boss is Hades in Berserk mode. Upon winning the cup, the Hades Cup Trophy (ハデスカップトロフィー Hadesu Kappu Torofī) is received.
Strategy[edit]
- Rounds 1-10
- No restrictions. Sora has access to Drive Forms, Summons, and his allies.
- Round 6 is fought in the dark.
- A good strategy is to use Peter Pan's Journey's End to accumulate points. However, this is ineffective on the boss fights on Rounds 5 and 10.
- Rounds 11-20
- Titan Cup rules. Sora fights alone, and cannot use Drive Forms, but Summons are available. There is also the Damage Points restriction with Sora starting out at 500 points.
- As with the first 10 rounds, a good strategy is to use Peter Pan's Journey's End to accumulate points. However, this is ineffective on the boss fights on Rounds 15 and 20.
- Rounds 21-30
- Pain and Panic Cup rules. The Drive Gauge is locked, but Summons and Allies are available and Limits consume less MP than usual.
- Liberal use of Trinity Limit is highly recommended for clearing this section.
- Round 24 is a group of 3 Bulky Vendors. Because prizes are not given during the tournament, there is no need to wait for their health to deplete. Use this time to breathe before the battle with Cloud & Tifa next round.
- Rounds 31-40
- Cerberus Cup rules. Forms are available, and the Drive Gauge fill much faster than normal. There is also a ten-minute timer.
- Use of Final Form is recommended to beat the timer.
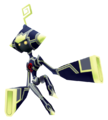
- Round 35 is a cloud of Rapid Thrusters, you must defeat all of them before time runs out. It is recommended to use Magnet and Thunder to clear the wave as quickly as possible.
- Round 38 is several waves of Nobody enemies. Magnet and Thunder can be used to clear each wave, but beware that the Sorcerer is immune to elemental magic.
- Rounds 41-50
- No Summons, Limit Form is the only available Drive[KH II FM], and no allies (except in the final round, where you have Hercules as the only ally); only the Keyblade, magic, and Trinity Limit are available.
- Round 44 is a group of Living Bone enemies. Be prepared to Reflect immediately as the round opens to survive their attacks.
- Round 45 is a repeat of the Battle of 1000 Heartless, and Sora must survive for one minute. Snag Surveillance Robots and use Sparkle Ray liberally to clear the field.
- Round 47 is the final round in which you can increase your score.
- The round opens with a single Bulky Vendor; once it is defeated, several waves of additional enemies will spawn. A Magnet and Thunder combo can be used to clear the room rapidly for a score bonus.
Enemies[edit]
Heartless[edit]
|
|
Nobody[edit]
|
|
Other[edit]
|
|
