Dive to the Heart: Difference between revisions
| (113 intermediate revisions by 36 users not shown) | |||
| Line 1: | Line 1: | ||
{{Game|KH1|FM1|KH2|FM2|KHC|RCO|BBS|FMB|DDD|DHD|KHX|UCX|KH3|FA}} | {{Game|KH1|FM1|KH2|FM2|KHC|RCO|BBS|FMB|DDD|DHD|KHX|UCX|KH3|3RM|MOM|FA}} | ||
{{suite}} | {{suite}} | ||
{{ | {{Youmay|the location|[[Dive into the Heart -Destati-|the field theme]]}} | ||
{{cleanup|Rewrite summary section to take into account other characters' dives: page; add settings and areas section}} | |||
{{World | {{World | ||
|name=Dive to the Heart | |name=Dive to the Heart | ||
| Line 11: | Line 12: | ||
|game1=Kingdom Hearts | |game1=Kingdom Hearts | ||
|game2=Kingdom Hearts II | |game2=Kingdom Hearts II | ||
|game3=Kingdom Hearts | |game3=Kingdom Hearts coded | ||
|game4=Kingdom Hearts | |game4=Kingdom Hearts Birth by Sleep | ||
|game5=Kingdom Hearts 3D: Dream Drop Distance | |game5=Kingdom Hearts 3D: Dream Drop Distance | ||
|game6=Kingdom Hearts III | |game6=Kingdom Hearts III | ||
|game7=Kingdom Hearts Melody of Memory | |||
|KHnormalname=Dive into the Heart -Destati- | |KHnormalname=Dive into the Heart -Destati- | ||
|KHnormalfile=Dive into the Heart -Destati- KH.ogg | |KHnormalfile=Dive into the Heart -Destati- KH.ogg | ||
| Line 27: | Line 29: | ||
|RECbattlename=Fragments of Sorrow | |RECbattlename=Fragments of Sorrow | ||
|RECbattlefile=Fragments of Sorrow KHREC.ogg | |RECbattlefile=Fragments of Sorrow KHREC.ogg | ||
|KH3normalname=Dive into the Heart -Destati- Third Inception | |||
|KH3normalfile=Dive into the Heart -Destati- Third Inception KHIII.ogg | |||
|KH3battlename=Dive into the Heart -Destati- Third Inception | |||
|KH3battlefile=Dive into the Heart -Destati- Third Inception KHIII.ogg | |||
|KH3battlename2=Dive into the Heart -Destati- Third Revival | |||
|KH3battlefile2=Dive into the Heart -Destati- Third Revival KHIII.ogg | |||
}} | }} | ||
The '''Dive to the Heart''' is a location which appears in '' | The '''Dive to the Heart''' is a location which appears in ''{{c|Kingdom Hearts|game}}'', ''[[Kingdom Hearts II]]'', ''[[Kingdom Hearts coded]]'', ''[[Kingdom Hearts Birth by Sleep]]'', ''[[Kingdom Hearts 3D: Dream Drop Distance]]'', and ''[[Kingdom Hearts III]]''. It is framed as a place within a dream<ref>'''''[[Kingdom_Hearts_III_Ultimania]]''''', While answering a question about the Final World, Nomura says that the Station of Waking is reached via a "state of sleep". [https://www.kh13.com/news/spoilers-the-big-tetsuya-nomura-interview-from-kingdom-hearts-iii-ultimania-has-been-translated-in-full-r2953/ Translation via Lunesacree].</ref>, <!-- {{?}} | ||
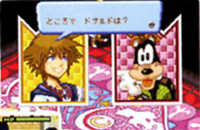
Donald: Wak! Not the message! Look at the monitor. What's HE doing there? | |||
To reinforce the dreamlike setting of the Dive to the Heart, Sora, Roxas, and Ventus each reach it by falling into an ocean. However, instead of drowning, they find that they can breathe, and land upon an ocean floor which erupts into doves, revealing the Dive to the Heart. In Roxas's case, this first Dive to the Heart is merely a memory of Sora's, and he enters his true dive three days later. The Dive to the Heart is composed of several enormous, illuminated stained-glass pillars known as "Stations", rising from unseen depths. Each Station has a unique shade, depicts a specific set of characters, and has its own specific part in the tutorial. In | Goofy: Gawrsh, I thought Sora said he was alone in that dream. | ||
Jiminy: That's what I wrote in the journal! So how come that's not what | |||
we're seeing? | |||
--> and its nature as the dreamer's [[heart]] is reinforced by the background music, the gameplay tutorial, and the strange way of speaking used by those within it (a manner also used by the remembered characters of ''[[Kingdom Hearts Chain of Memories]]'').<!--the speaking bit is referring to the mysterious things that Memory-Aerith and the others say, though I guess we learn that's just Naminé. Not sure how to word this.--> However, the events which occur within it have a real effect on the waking world, and in two instances they are actually observed by outside forces.<ref>In ''Kingdom Hearts II'', the Organization observes and comments upon Sora's battle with Roxas on the Station of Awakening. In ''Kingdom Hearts coded'', Data-Roxas appears before Data-Sora on the Station of Awakening.</ref> In terms of gameplay, the purpose of the Dive to the Heart is to serve as a tutorial level, where the player will learn the controls of the game, choose how their character will grow, and fight their first boss. The player is guided through the Dive to the Heart by an inaudible, unseen "voice", whose identity is eventually revealed to be that of King Mickey for Sora's dive<ref>''Kingdom Hearts Series Ultimania Alpha'', p. 087</ref>, and Sora for Ventus's.<!--probably should add to Mickey's page, and mention the final rest bit too--><!--http://kh-info-block.tumblr.com/tagged/KH1NIA--> | |||
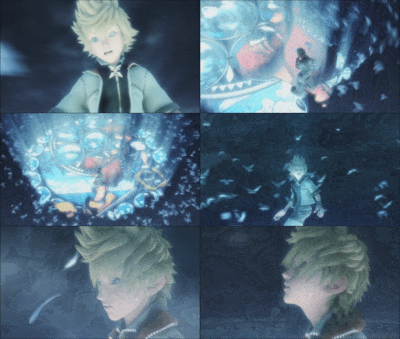
To reinforce the dreamlike setting of the Dive to the Heart, [[Sora]], [[Roxas]], and [[Ventus]] each reach it by falling into an ocean. However, instead of drowning, they find that they can breathe, and land upon an ocean floor which erupts into doves, revealing the Dive to the Heart. In Roxas's case, this first Dive to the Heart is merely a memory of Sora's, and he enters his true dive three days later. The Dive to the Heart is composed of several enormous, illuminated stained-glass pillars known as "Stations", rising from unseen depths. Each Station has a unique shade, depicts a specific set of characters, and has its own specific part in the tutorial. In ''Kingdom Hearts'', there is an additional area of the Dive to the Heart based on [[Destiny Islands]]. The background music, "Dive Into the Heart (Destati)", initially begins quietly and hard to hear, but grows in intensity as Sora or Roxas approaches the final pillar, where they fight a manifestation of the [[darkness]] within them. At the end of their battle with the creature, the Dive to the Heart is consumed by the darkness emanating from it, dragging Sora or Roxas with it, but they either wake up or are rescued. | |||
==Development== | ==Development== | ||
In ''Kingdom Hearts'', the proposal folder shown to Buena Vista included a Station representing Alice, although this was later omitted in favor of the generic pink Princesses of Heart Station. | |||
<!--like wikipedia - real-world based notes on how it was designed--> | <!--like wikipedia - real-world based notes on how it was designed--> | ||
[[File:Dive to the Heart (Removed) KHCOM.png|thumb|left|Early screenshot of Sora's Dive to the Heart in ''Kingdom Hearts Chain of Memories''.]] | [[File:Dive to the Heart (Removed) KHCOM.png|thumb|left|Early screenshot of Sora's Dive to the Heart in ''Kingdom Hearts Chain of Memories''.]] | ||
Sora's Dive to the Heart | Sora's Dive to the Heart appeared in a screenshot seen in early promotional materials for ''Kingdom Hearts Chain of Memories'', but it [[Removed content#Dive to the Heart|does not appear]] in the final game.<!--why?--> | ||
{{-}} | {{-}} | ||
| Line 54: | Line 70: | ||
<center>[[File:Station Character KHBBS.png|x100px|The tutorial Dive to the Heart.]][[File:Station Ventus 1 KHBBS.png|x100px|Ventus's Mind]][[File:Station Ventus 2 KHBBS.png|x100px|The original Soul World]][[File:Station Ventus 3 KHBBS.png|x100px|The final Soul World]][[File:Station Sora KHBBS.png|x100px|Sora's Mind]]</center> | <center>[[File:Station Character KHBBS.png|x100px|The tutorial Dive to the Heart.]][[File:Station Ventus 1 KHBBS.png|x100px|Ventus's Mind]][[File:Station Ventus 2 KHBBS.png|x100px|The original Soul World]][[File:Station Ventus 3 KHBBS.png|x100px|The final Soul World]][[File:Station Sora KHBBS.png|x100px|Sora's Mind]]</center> | ||
{{canon | {{canon | ||
| | |After the tutorial chapter, the player enters another Dive to the Heart, where they can choose whether to continue the story with [[Terra]], Ventus, or Aqua. This Station displays the trio's Wayfinders, but is purely a gameplay mechanic. | ||
After the tutorial chapter, the player enters another Dive to the Heart, where they can choose whether to continue the story with Terra, Ventus, or Aqua. This Station displays the trio's Wayfinders, but is purely a gameplay mechanic. | |||
}} | }} | ||
[[File:Broken Awakening KHBBS.png|150px|thumb | [[File:Broken Awakening KHBBS.png|150px|thumb|Ventus's blank and collapsing Station.]] | ||
Chronologically, Ventus's Dive to the Heart, called "'''{{a|Ventus's Mind}}'''",<ref>In the ''Kingdom Hearts HD 2.5 ReMIX'' re-release of ''Kingdom Hearts Birth by Sleep Final Mix'' the image on the station is changed to that of | Chronologically, Ventus's Dive to the Heart, called "'''{{a|Ventus's Mind}}'''",<ref>In the ''Kingdom Hearts HD 2.5 ReMIX'' re-release of ''Kingdom Hearts Birth by Sleep Final Mix'', the image on the first station is changed to that of Ventus's final '''Soul World''' station.</ref> is the first to be seen, and appears in an incomplete state due to his broken heart. It is here that Ventus comes in contact with the newborn Sora's heart, and his Station is restored. Ventus does not return to the Dive to the Heart until he involuntarily fuses with [[Vanitas]], his pillar changing appearance with the sudden presence of darkness in his heart, and is renamed {{nihongo|"'''{{a|Soul World}}'''"|精神世界|Seishin Sekai}}.<!--WHAT HAPPENS?? ADD PLOT SYNOPSIS HERE--> | ||
Ventus's Station is quite similar to Roxas's, but features a sleeping Ventus without his [[Wayward Wind]] at the [[Keyblade Graveyard]], rather than Sora with his [[Kingdom Key]] at Destiny Islands. The inner circle of emblems, which usually contains images of the sleeper's loved ones, only contains a stylized ''fleur-de-lis'', which also appears on the edges of the pillar. When Ventus is fused with Vanitas, Ventus's Station is modified—Vanitas himself now appears opposite Ventus, and both have their Keyblades. Half of the outer ring of symbols is replaced with the Unversed emblem representing darkness, while the other half is replaced with the [[Terra's Mark]] emblem representing light. The two symbols meet in the middle representing the twilight. The field of the [[Keyblade Graveyard]] is now filled with the abandoned Keyblades. The inner circle of emblems is replaced with silhouettes of Keychains for the [[χ-blade]], the Wayward Wind, and the [[Void Gear]]. After Ven defeats Vanitas, his station changes to a form similar to its original appearance, with some modifications. Ventus is now holding the Wayward Wind and wearing both his Keyblade Armor pauldron and his silver Terra's Mark charm, while the outer circle of emblems is filled with the Terra's Mark emblem and the inner circle of emblems is filled with his friends' [[Wayfinder]]s, possibly signifying that he has regained control of his completed heart. | Ventus's Station is quite similar to Roxas's, but features a sleeping Ventus without his [[Wayward Wind]] at the [[Keyblade Graveyard]], rather than Sora with his [[Kingdom Key]] at Destiny Islands. The inner circle of emblems, which usually contains images of the sleeper's loved ones, only contains a stylized ''fleur-de-lis'', which also appears on the edges of the pillar. When Ventus is fused with Vanitas, Ventus's Station is modified—Vanitas himself now appears opposite Ventus, and both have their [[Keyblades]]. Half of the outer ring of symbols is replaced with the [[Unversed]] emblem representing darkness, while the other half is replaced with the [[Terra's Mark]] emblem representing [[light]]. The two symbols meet in the middle representing the twilight. The field of the [[Keyblade Graveyard]] is now filled with the abandoned Keyblades. The inner circle of emblems is replaced with silhouettes of Keychains for the [[χ-blade]], the Wayward Wind, and the [[Void Gear]]. After Ven defeats Vanitas, his station changes to a form similar to its original appearance, with some modifications. Ventus is now holding the Wayward Wind and wearing both his [[Keyblade Armor]] pauldron and his silver Terra's Mark charm, while the outer circle of emblems is filled with the Terra's Mark emblem and the inner circle of emblems is filled with his friends' [[Wayfinder]]s, possibly signifying that he has regained control of his completed heart. | ||
After Ventus's body is placed within the [[Chambers of Repose and Waking|Chamber of Waking]], his heart | After Ventus's body is placed within the [[Chambers of Repose and Waking|Chamber of Waking]], his heart reconnects with that of a young Sora, who appears in his own Dive to the Heart, named "'''{{a|Sora's Mind}}'''". His Station displays the landscape of Destiny Islands on the bottom, with [[paopu fruit]]s and different elements found on or around the island encircled separately on the top. | ||
{{-}} | {{-}} | ||
===''Kingdom Hearts''=== | ===''Kingdom Hearts''=== | ||
<center>[[File:Station Snow White KH.png|x100px]][[File:Station Cinderella KH.png|x100px]][[File:Station Three Princesses KH.png|x100px]][[File:Station Aurora KH.png|x100px]][[File:Station Belle KH.png|x100px]]</center> | <center>[[File:Station Snow White KH.png|x100px]][[File:Station Cinderella KH.png|x100px]][[File:Station Three Princesses KH.png|x100px]][[File:Station Aurora KH.png|x100px]][[File:Station Belle KH.png|x100px]]</center> | ||
[[File:Opening 01 KH.png|thumb|right|Sora at Snow White’s station in ''Kingdom Hearts''.]] | |||
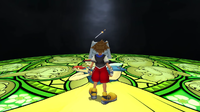
In Sora's dream, he falls from the sky into the sea below with his eyes closed and slowly descends onto the ground with abyss surrounding him. As he steps into the ground, the darkness below his feet starts to transform into birds and fly away, showing a radiant light that slowly forms into a circle. Each of the Stations in his later Dive to the Heart illustrates one or more of the [[Princesses of Heart]], as well as the characters related to them. [[Snow White]], [[Cinderella]], [[Aurora]], and [[Belle]] are asleep, perhaps signifying their comatose state in [[Hollow Bastion]]. | In Sora's dream, he falls from the sky into the sea below with his eyes closed and slowly descends onto the ground with abyss surrounding him. As he steps into the ground, the darkness below his feet starts to transform into birds and fly away, showing a radiant light that slowly forms into a circle. Each of the Stations in his later Dive to the Heart illustrates one or more of the [[Princesses of Heart]], as well as the characters related to them. [[Snow White]], [[Cinderella]], [[Aurora]], and [[Belle]] are asleep, perhaps signifying their comatose state in [[Hollow Bastion]]. | ||
*The first pillar, shaded green, depicts [[Snow White]], the [[Seven Dwarfs]], the forest animals, and [[The Queen]] in her hag form. While Snow White is asleep, all the other characters are depicted as awake. | *The first pillar, shaded green, depicts [[Snow White]], the [[Seven Dwarfs]], the forest animals, and [[The Queen]] in her hag form. While Snow White is asleep, all the other characters are depicted as awake. | ||
| Line 76: | Line 91: | ||
*The final pillar, shaded yellow, depicts [[Belle]], [[Beast]], and his servants [[Lumière]], [[Cogsworth]], [[Mrs. Potts]] and [[Chip]]. While Belle and the servants are asleep, the Beast is depicted as awake, signifying his freedom. | *The final pillar, shaded yellow, depicts [[Belle]], [[Beast]], and his servants [[Lumière]], [[Cogsworth]], [[Mrs. Potts]] and [[Chip]]. While Belle and the servants are asleep, the Beast is depicted as awake, signifying his freedom. | ||
All five pillars are known as {{nihongo|'''{{a|Awakening}}'''|めざめの園|Mezame no Sono|lit. "Station of Awakening"}}. On the first pillar, Sora is asked to walk, then is shown three weapons, the [[Dream Sword]], the [[Dream Shield]], and the [[Dream Rod]]. He is directed to choose one and discard another, and his choice determines his specialty, initial stats, and ability growth throughout the game. After choosing, the Station shatters and Sora falls to the second pillar, where he first encounters [[Shadow]]s, and is taught about battling and its rewards. The Station then sinks into darkness, and Sora awakens on the third pillar, where he is taught how to examine and interact with objects. By opening a treasure chest, moving a crate, and destroying a barrel, he materializes a door that leads to a dream version of Destiny Islands, where Sora meets facsimiles of his friends, [[Tidus]], [[Wakka]], and [[Selphie]], which ask him enigmatic questions that determine how he gains experience throughout the game. | All five pillars are known as {{nihongo|'''{{a|Awakening}}'''|めざめの園|Mezame no Sono|lit. "Station of Awakening"}}. On the first pillar, Sora is asked to walk, then is shown three weapons, the [[Dream Sword]], the [[Dream Shield]], and the [[Dream Rod]]. He is directed to choose one and discard another, and his choice determines his specialty, initial [[stats]], and [[ability]] growth throughout the game. After choosing, the Station shatters and Sora falls to the second pillar, where he first encounters [[Shadow]]s, and is taught about battling and its rewards. The Station then sinks into darkness, and Sora awakens on the third pillar, where he is taught how to examine and interact with objects. By opening a [[treasure chest]], moving a crate, and destroying a barrel, he materializes a door that leads to a dream version of Destiny Islands, where Sora meets facsimiles of his friends, [[Tidus]], [[Wakka]], and [[Selphie]], which ask him enigmatic questions that determine how he gains [[experience]] throughout the game. | ||
On the fourth pillar, Sora is again attacked by Shadows, but after defeating them the first [[Save Point]] is revealed, as well as floating steps to the final pillar. However, the steps vanish as he climbs them, trapping him on the fifth pillar. As he approaches a strange light, his shadow grows and becomes his [[Darkside]]; though he fights it, its darkness swallows him, and he reawakens on the Destiny Islands. | On the fourth pillar, Sora is again attacked by Shadows, but after defeating them the first [[Save Point]] is revealed, as well as floating steps to the final pillar. However, the steps vanish as he climbs them, trapping him on the fifth pillar. As he approaches a strange light, his shadow grows and becomes his [[Darkside]]; though he fights it, its darkness swallows him, and he reawakens on the Destiny Islands. | ||
The door reappears on Destiny Islands when the island is attacked by the Heartless, this time leading to the [[Secret Place]] containing the world's [[Keyhole]]. It reappears a final time at the [[Final Rest]] within [[End of the World]], leading to the remains of the Destiny Islands and the final confrontation with [[Ansem, Seeker of Darkness]]. | The door reappears on Destiny Islands when the island is attacked by the [[Heartless]], this time leading to the [[Secret Place]] containing the world's [[Keyhole]]. It reappears a final time at the [[Final Rest]] within [[End of the World]], leading to the remains of the Destiny Islands and the final confrontation with [[Ansem, Seeker of Darkness]]. | ||
{{-}} | {{-}} | ||
| Line 89: | Line 104: | ||
Roxas's Dive to the Heart appears in his dreams as he processes Sora's memories. As Roxas steps onto a Station, it is formed from a swirling flock of birds.<!--doves?--> | Roxas's Dive to the Heart appears in his dreams as he processes Sora's memories. As Roxas steps onto a Station, it is formed from a swirling flock of birds.<!--doves?--> | ||
On the third day of his story, Roxas encounters a [[Dusk]] in the Sandlot and is sucked into his Dive to the Heart. Like Sora's, Roxas's Dive to the Heart consists of five stained glass pillars, but each of these depict the same image of Sora, Riku, Kairi, Donald Duck, and Goofy at the Destiny Islands, and the pillars are divided between only three Stations. Sora's eyes are closed, showing that he is asleep, while Kairi and Riku's are open, showing that they are awake; strangely, Donald and Goofy's eyes are still open, even though they are asleep as well. | On the third day of his story, Roxas encounters a [[Dusk]] in the Sandlot and is sucked into his Dive to the Heart. Like Sora's, Roxas's Dive to the Heart consists of five stained glass pillars, but each of these depict the same image of Sora, [[Riku]], Kairi, [[Donald Duck]], and [[Goofy]] at the Destiny Islands, and the pillars are divided between only three Stations. Sora's eyes are closed, showing that he is asleep, while Kairi and Riku's are open, showing that they are awake; strangely, Donald and Goofy's eyes are still open, even though they are asleep as well. | ||
Roxas awakens on the {{nihongo|'''{{a|Station of Serenity}}'''|やすらぎの園|Yasuragi no Sono}}, where he chooses between the Dream Sword, Dream Shield, and Dream Rod. While this choice determines the order in which he learns abilities as before, the weapon he chooses is immediately transformed into the [[Kingdom Key]] | Roxas awakens on the {{nihongo|'''{{a|Station of Serenity}}'''|やすらぎの園|Yasuragi no Sono}}, where he chooses between the Dream Sword, Dream Shield, and Dream Rod. While this choice determines the order in which he learns abilities as before, the weapon he chooses is immediately transformed into the [[Kingdom Key]], and unlike the original ''{{c|Kingdom Hearts|game}}'' Dive to the Heart, he does not have to give up anything in exchange for his weapon. He goes through a door to the {{nihongo|'''{{a|Station of Calling}}'''|いざないの園|Izanai no Sono}}, consisting of three pillars shaded blue, green, and red and connected by floating stairs. Here, he encounters Dusks and learns about [[Reaction Command]]s and treasures. Going through another door, he enters the {{nihongo|'''{{a|Station of Awakening}}'''|めざめの園|Mezame no Sono}}, and finds an apparition of himself in his [[black coat]] which soon becomes the [[Twilight Thorn]]. Similar to Sora's Dive to the Heart, after defeating the Twilight Thorn, Roxas and his Dive to the Heart are consumed by darkness, but unlike Sora, Roxas is rescued by [[Naminé]] at the last minute. | ||
Much later, as Sora approaches [[Memory's Skyscraper]], Roxas reawakens inside him and takes him to the Station of Awakening, where they battle and come to peace with each other. This arena is replicated in the [[Cavern of Remembrance#Garden of Assemblage|Garden of Assemblage]] for the fight against [[Game:Roxas|Roxas's Replica Data]]. | Much later, as Sora approaches [[Memory's Skyscraper]], Roxas reawakens inside him and takes him to the Station of Awakening, where they battle and come to peace with each other. This arena is replicated in the [[Cavern of Remembrance#Garden of Assemblage|Garden of Assemblage]] for the fight against [[Game:Roxas|Roxas's Replica Data]]. | ||
| Line 99: | Line 114: | ||
<center>[[File:Station Snow White KH.png|x100px]][[File:Station Three Princesses KH.png|x100px]]</center> | <center>[[File:Station Snow White KH.png|x100px]][[File:Station Three Princesses KH.png|x100px]]</center> | ||
[[File:Dive to the Heart 04 KHREC.png|thumb|Sora encounters a hooded figure in ''Kingdom Hearts Re:coded''.]] | [[File:Dive to the Heart 04 KHREC.png|thumb|Sora encounters a hooded figure in ''Kingdom Hearts Re:coded''.]] | ||
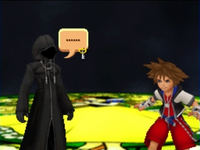
[[Data-Sora]] manifests in a digital version of the Dive to the Heart that is virtually the same as the real Sora's dive. He spots [[Data-Roxas]], but does not recognize him before he disappears, and later mistakes him for [[Data-Riku]]. Sora is | [[Data-Sora]] manifests in a digital version of the Dive to the Heart that is virtually the same as the real Sora's dive. He spots [[Data-Roxas]], but does not recognize him before he disappears, and later mistakes him for [[Data-Riku]]. As with the real Sora's first dive, Data-Sora is presented with the [[Dream Sword]], [[Dream Shield]], and [[Dream Rod]] and has to choose one discard another, with his decisions influencing his starting commands.<!--not sure how to mention that this determines starting commands--> However, due to [[Chip and Dale]]'s reprogramming, the Dream weapons immediately change into the Keyblade, as in Roxas's dive. After fighting off an ambush by a swarm of [[Shadow]]s, Data-Sora enters the same door that Sora did in his own dive, but this door leads directly to the "real" Destiny Islands, rather than a dream version. | ||
{|class="wikitable mw-collapsible mw-collapsed" | {|class="wikitable mw-collapsible mw-collapsed" | ||
| Line 111: | Line 126: | ||
===''Kingdom Hearts 3D: Dream Drop Distance''=== | ===''Kingdom Hearts 3D: Dream Drop Distance''=== | ||
<center>[[File:Station Roxas.png|x100px|Station of Awakening]]</center> | <center>[[File:Station Sora KH3D.png|x100px|Station of Awakening]][[File:Station Roxas (blue).png|x100px|Station of Awakening]][[File:Station Sora KH3D.png|x100px|Station of Awakening]]</center> | ||
When Sora falls into darkness, his sleeping body, clad in Ventus's Keyblade Armor, lies down on a new variation of the second blue Station from ''Kingdom Hearts II'' with the background of Destiny Islands and the black crown symbols from his ''Kingdom Hearts Birth by Sleep'' Station. | |||
In a flash of light, he suddenly finds himself on a facsimile of the dock at [[Destiny Islands]], at sunset.<!--do we know yet if this is the same one we saw in KH1?--> Walking around on the beach, Riku encounters Roxas, Ventus and Xion, each asking him a different question: "What are you so afraid of?, | After bringing the comatose Sora back to the [[Mysterious Tower]], Riku uses the [[power of waking]] to dive into {{nihongo|"'''{{a|Sora's Soul World}}'''"|ソラの精神世界|Sora no Seishin Sekai}}, drifting past memories and various floating Soras. In the background of this Dive is the second blue Station from ''Kingdom Hearts II''. Upon landing, he finds the stained glass window floor consumed by inky darkness, from which emerges the [[Armored Ventus Nightmare]]—Sora trapped inside [[Ventus]]'s [[Nightmare]]-possessed [[Keyblade Armor]]. When Riku defeats the Nightmare, the armor shatters, releasing Sora. The darkness envelopes Sora as it dissipates, with his Station reverting back to new version. Riku picks up Sora's dropped Keyblade and uses it to unlock the [[Sleeping Keyhole]] of Sora's heart. | ||
In a flash of light, he suddenly finds himself on a facsimile of the dock at [[Destiny Islands]], at sunset.<!--do we know yet if this is the same one we saw in KH1?--> Walking around on the beach, Riku encounters Roxas, Ventus, and [[Xion]], each asking him a different question: "What are you so afraid of?", "What do you value more than anything else?", and "What do you wish?". After Riku answers each of their questions, there is another bright flash of light, and Riku finds himself back on the beach, where he sees a message in a bottle drifting ashore. When Riku picks it up, a digitized version of [[Ansem the Wise]] appears, placed inside Sora's heart along with his research data [[Ansem's Code]]. Ansem the Wise reflects upon the strength of Sora's heart and theorizes that Sora may have the power to recreate people long thought lost forever. All Sora needs to do is be himself and follow wherever it is that his heart takes him. The rest is in the data in that bottle Riku just found. | |||
Ansem the Wise then reveals that Sora has already awoken. Defeating the Armored Ventus Nightmare freed Sora, and answering the questions of Roxas, Ventus, and Xion woke him up. Thanking Ansem the Wise, Riku summons Sora's Keyblade and prepares to leave, but Ansem the Wise stops him, asking for his name. Chuckling, Riku recalls the last time the man had asked him that. After answering his question, Riku departs for the outside world. | Ansem the Wise then reveals that Sora has already awoken. Defeating the Armored Ventus Nightmare freed Sora, and answering the questions of Roxas, Ventus, and Xion woke him up. Thanking Ansem the Wise, Riku summons Sora's Keyblade and prepares to leave, but Ansem the Wise stops him, asking for his name. Chuckling, Riku recalls the last time the man had asked him that. After answering his question, Riku departs for the outside world. | ||
===''Kingdom Hearts III''=== | ===''Kingdom Hearts III''=== | ||
Sora falls into the Dive to the Heart in his attire and body from when he first left Destiny Islands. A mirror appears and Sora sees himself as he is in the current day. Sora walks through the looking glass and becomes his present self. The mirror disappears and a series of screens begin to float around the platform depicting Sora's memories. Three screens in particular float in front of Sora: one of his battle with the possessed Riku, another of the King's appearance at the [[Door to Darkness]], and one more of Sora's first meeting with Donald and Goofy. A voice asks Sora which he desires, with the screens respectively representing vitality, wisdom, and balance. After Sora chooses one, three more screens appear depicting Sora's battle with Roxas, his promise to Naminé, and his reunion with the [[Dream | <center>[[File:Station Roxas (blue).png|100px]][[File:Station Ventus 3 KHBBS.png|100px]]</center> | ||
[[File:Opening 01 KHIII.png|thumb|Sora's Dive to the Heart displays his memories.]] | |||
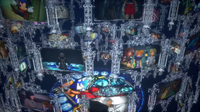
Sora falls into the Dive to the Heart in his attire and body from when he first left Destiny Islands. A mirror appears and Sora sees himself as he is in the current day. Sora walks through the looking glass and becomes his present self. The mirror disappears and a series of screens begin to float around the platform depicting Sora's memories. Three screens in particular float in front of Sora: one of his battle with the possessed Riku, another of [[the King]]'s appearance at the [[Door to Darkness]], and one more of Sora's first meeting with Donald and Goofy. A voice asks Sora which he desires, with the screens respectively representing vitality, wisdom, and balance. After Sora chooses one, three more screens appear depicting Sora's battle with Roxas, his promise to Naminé, and his reunion with the [[Dream Eater]]s. The voice asks Sora what power he seeks, the screens respectively representing that of the warrior, the guardian, and the mystic. | |||
Sora enters the Dive to the Heart to wake up Ventus and save Aqua when she is defeated by Vanitas. With the | {{canon | ||
| In ''[[Kingdom Hearts III Re Mind]]'', after choosing a power, three more screens appear depicting Sora's tea party after Riku returns from his dreams, his pursuit of [[Pluto]] towards [[Castle Oblivion]], and the [[Battle of the 1000 Heartless]], and the voice asks Sora what kind of adventure he seeks. The three screens correspond to the [[Premium Menu]], under the headers of "Easy Adventure", "Usual Adventure", and "Challenging Adventure", respectively. | |||
* The "Usual Adventure" locks the Premium Menu. | |||
* The "Easy Adventure" unlocks the EZ Codes in the Premium Menu. | |||
* The "Challenging Adventure" unlocks the PRO Codes in the Premium Menu. | |||
}} | |||
After making his choice, Sora sees all the screens vanish. Sora looks down and notices that the platform has been covered in water, which seems to be coming from a light beyond the Dive to the Heart. Sora runs to the light as a tidal wave washes him away, taking him to [[The Final World]]. | |||
Sora enters the Dive to the Heart to wake up Ventus and save Aqua when she is defeated by Vanitas. With the power of waking, Sora is able to transform the image on the pillar from his own into Ventus's, signaling that Ventus's heart has been reunited with his body and he has awakened from his comatose state. | |||
{{-}} | |||
<center>[[File:Station Olympus KHIII.png|100px]][[File:Station Toy Box KHIII.png|100px]][[File:Station Kingdom of Corona KHIII.png|100px]][[File:Station Monstropolis KHIII.png|100px]][[File:Station Arendelle KHIII.png|100px]][[File:Station The Caribbean KHIII.png|100px]][[File:Station San Fransokyo KHIII.png|100px]]</center> | |||
After the events at the Keyblade Graveyard, Sora enters a different dive using the power of waking within The Final World. Stations covered in darkness serve as portals leading to facsimiles of the worlds, where the [[Lich]] is holding the hearts of Sora's friends captive. | |||
During the | ===''Kingdom Hearts III Re Mind''=== | ||
<center>[[File:Station Ventus 3 KHBBS.png|100px]][[File:Station Aqua KHIIIRM.png|100px]][[File:Station Roxas (blue).png|100px]][[File:Station Terra KHIIIRM.png|100px]][[File:Station Roxas (blue).png|100px]][[File:Station Roxas KHIIIRM.png|100px]][[File:Station Roxas (Minus Xion) KHIIIRM.png|100px]][[File:Station Roxas (blue).png|100px]][[File:Station Riku KHIIIRM.png|100px]]</center> | |||
Following [[Xehanort]]'s defeat, Sora uses the power of waking one more time to go back in time and try to save Kairi. During this journey, he travels through the Dives to the Heart of Ventus, Aqua, Terra, Roxas, and Riku, using the connections in the hearts of his friends to lead himself to Kairi's heart. | |||
When [[Yozora]] confronts Sora, the image of Sora's station appears during the transition between The Final World and [[Quadratum]], briefly replacing the roof of the 104 building. | |||
==Other appearances== | |||
===''Super Smash Bros. Ultimate''=== | |||
<center>[[File:Coaster Station Sora Blue SSBU.png|100px]][[File:Coaster Station Card SSBU.png|100px]][[File:Memorial Clock (4 o'clock) SSBU.png|100px]][[File:Memorial Clock (5 o'clock) SSBU.png|100px]][[File:Coaster Station Terra SSBU.png|100px]][[File:Memorial Clock (8 o'clock) SSBU.png|100px]][[File:Station Ventus 3 SSBU.png|100px]]</center> | |||
Dive to the Heart appears as part of the {{ssb|Hollow Bastion}} downloadable stage in ''[[Super Smash Bros. Ultimate]]''. When time, stocks, or health are running low, [[Hollow Bastion]] transforms into Dive to the Heart, with the station of Sora, Riku, Roxas, Xion, Terra, Aqua, or Ventus appearing in the background. | |||
Sora, Riku, and Terra's stations are from the Square Enix Cafe's coaster design. Roxas, Xion, and Aqua's stations are from the [[Memorial Stained Glass Clock]] event. Ventus's station is from ''Kingdom Hearts Birth by Sleep''. | |||
==Characters== | ==Characters== | ||
<gallery widths="120"> | <gallery widths="120"> | ||
File:Sora 03 KHIII.png|[[Sora]]<br>{{KH}}{{KHBbS}}{{KH3D}}{{KHIII}} | File:Sora 03 KHIII.png|[[Sora]]<br>{{KH}}{{KHBbS}}{{KH3D}}{{KHIII}}{{RM}} | ||
File:Roxas KHII.png|[[Roxas]]<br>{{KHII}}{{KH3D}} | File:Roxas KHII.png|[[Roxas]]<br>{{KHII}}{{KH3D}} | ||
File:Data-Sora KHREC.png|[[Data-Sora]]<br>{{KHc}} | File:Data-Sora KHREC.png|[[Data-Sora]]<br>{{KHc}} | ||
| Line 137: | Line 179: | ||
File:Ansem the Wise (DiZ) KHII.png|[[Ansem the Wise]]<br>{{KH3D}} | File:Ansem the Wise (DiZ) KHII.png|[[Ansem the Wise]]<br>{{KH3D}} | ||
File:Armored Ventus Nightmare KH3D.png|[[Armored Ventus Nightmare]]<br>{{KH3D}} | File:Armored Ventus Nightmare KH3D.png|[[Armored Ventus Nightmare]]<br>{{KH3D}} | ||
File:Player (Male) KHX.png|[[Player (KHχ)|Male Player]]<br>{{KHx}} | |||
File:Player (Female) KHX.png|[[Player (KHχ)|Female Player]]<br>{{KHx}} | |||
File:Darkness KHUX.png|[[Darkness (character)|Darkness]]<br>{{RM}} | |||
File:Naminé KHIII.png|[[Naminé]]<br>{{RM}} | |||
File:Yozora KHIIIRM.png|[[Yozora]]<br>{{RM}} | |||
</gallery> | </gallery> | ||
| Line 146: | Line 193: | ||
| | | | ||
<gallery> | <gallery> | ||
File:Shadow KHII.png|[[Shadow]] | File:Shadow KHII.png|[[Shadow]]<br>{{KH}}{{KHc}}{{KHIII}} | ||
File: | File:AntiSora KH.png|[[AntiSora]]<br>{{KH3D}} | ||
File:Darkside KH.png|'''[[Darkside]]''' | File:Darkside KH.png|'''[[Darkside]]'''<br>{{KH}}{{KHIII}} | ||
</gallery> | </gallery> | ||
|} | |} | ||
| Line 158: | Line 205: | ||
| | | | ||
<gallery> | <gallery> | ||
File:Dusk KHII.png|[[Dusk]] | File:Dusk KHII.png|[[Dusk]]<br>{{KHII}} | ||
File:Creeper KHII.png|[[Creeper]] | File:Creeper KHII.png|[[Creeper]]<br>{{KHII}} | ||
File:Twilight Thorn KHII.png|'''[[Twilight Thorn]]''' | File:Twilight Thorn KHII.png|'''[[Twilight Thorn]]'''<br>{{KHII}} | ||
File:Roxas (Dual Wield) KHII.png|'''[[Game:Roxas|Roxas]]''' | File:Roxas (Dual Wield) KHII.png|'''[[Game:Roxas|Roxas]]'''<br>{{KHII}} | ||
</gallery> | </gallery> | ||
|} | |} | ||
| Line 171: | Line 218: | ||
| | | | ||
<gallery> | <gallery> | ||
File:Armored Ventus Nightmare KH3D.png|'''[[Armored Ventus Nightmare]]''' | File:Armored Ventus Nightmare KH3D.png|'''[[Armored Ventus Nightmare]]'''<br>{{KH3D}} | ||
</gallery> | </gallery> | ||
|} | |} | ||
| Line 181: | Line 228: | ||
| | | | ||
<gallery> | <gallery> | ||
File:Vanitas (Unmasked) KHBBS.png|'''[[Game:Vanitas|Vanitas]]''' | File:Vanitas (Unmasked) KHBBS.png|'''[[Game:Vanitas|Vanitas]]'''<br>{{KHBbS}} | ||
</gallery> | </gallery> | ||
|} | |} | ||
== | ==Notes and references== | ||
{{reflist}} | |||
{ | |||
==See also== | |||
* [[Memorial Stained Glass Clock]] | |||
{{KH1}} | {{KH1}} | ||
{{KH2}} | {{KH2}} | ||
{{Coded}} | {{Coded}} | ||
{{BBS}} | |||
{{DDD}} | {{DDD}} | ||
{{XChi}} | |||
{{KH3}} | {{KH3}} | ||
{{MOM}} | |||
[[Category:Datascape]] | [[Category:Datascape]] | ||
Latest revision as of 16:06, 12 September 2024
| This article is about the location. You may be looking for the field theme. |
Oh no! The water! I'm in big trouble if I don't fetch it!
| |
| This article requires cleanup or improvement.
Please help out by editing this page. Please see the Manual of Style and editing help before getting started. Issues: Rewrite summary section to take into account other characters' dives: page; add settings and areas section | |
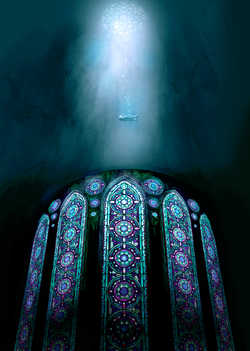
The Dive to the Heart is a location which appears in Kingdom Hearts, Kingdom Hearts II, Kingdom Hearts coded, Kingdom Hearts Birth by Sleep, Kingdom Hearts 3D: Dream Drop Distance, and Kingdom Hearts III. It is framed as a place within a dream[1], and its nature as the dreamer's heart is reinforced by the background music, the gameplay tutorial, and the strange way of speaking used by those within it (a manner also used by the remembered characters of Kingdom Hearts Chain of Memories). However, the events which occur within it have a real effect on the waking world, and in two instances they are actually observed by outside forces.[2] In terms of gameplay, the purpose of the Dive to the Heart is to serve as a tutorial level, where the player will learn the controls of the game, choose how their character will grow, and fight their first boss. The player is guided through the Dive to the Heart by an inaudible, unseen "voice", whose identity is eventually revealed to be that of King Mickey for Sora's dive[3], and Sora for Ventus's.
To reinforce the dreamlike setting of the Dive to the Heart, Sora, Roxas, and Ventus each reach it by falling into an ocean. However, instead of drowning, they find that they can breathe, and land upon an ocean floor which erupts into doves, revealing the Dive to the Heart. In Roxas's case, this first Dive to the Heart is merely a memory of Sora's, and he enters his true dive three days later. The Dive to the Heart is composed of several enormous, illuminated stained-glass pillars known as "Stations", rising from unseen depths. Each Station has a unique shade, depicts a specific set of characters, and has its own specific part in the tutorial. In Kingdom Hearts, there is an additional area of the Dive to the Heart based on Destiny Islands. The background music, "Dive Into the Heart (Destati)", initially begins quietly and hard to hear, but grows in intensity as Sora or Roxas approaches the final pillar, where they fight a manifestation of the darkness within them. At the end of their battle with the creature, the Dive to the Heart is consumed by the darkness emanating from it, dragging Sora or Roxas with it, but they either wake up or are rescued.
Development[edit]
In Kingdom Hearts, the proposal folder shown to Buena Vista included a Station representing Alice, although this was later omitted in favor of the generic pink Princesses of Heart Station.
Sora's Dive to the Heart appeared in a screenshot seen in early promotional materials for Kingdom Hearts Chain of Memories, but it does not appear in the final game.
Story[edit]
Kingdom Hearts χ[chi][edit]

| This information is based on alternate scenes or materials and is not considered canon within the overall plot of the series. |
|---|
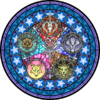
| At the beginning of the game, the player finds themselves on a station where one of the Unions – Unicornis, Leopardus, Anguis, Ursus or Vulpeus – has to be selected. After the decision is made, the station is engulfed into darkness that is quickly repelled by a light which turns out to be the Starlight Keyblade.
The menu backdrops for Kingdom Hearts Union χ feature a unique station which only depicts the emblem of the Book of Prophecies. |
Kingdom Hearts Birth by Sleep[edit]

| This information is based on alternate scenes or materials and is not considered canon within the overall plot of the series. |
|---|
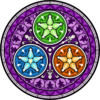
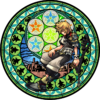
| After the tutorial chapter, the player enters another Dive to the Heart, where they can choose whether to continue the story with Terra, Ventus, or Aqua. This Station displays the trio's Wayfinders, but is purely a gameplay mechanic. |
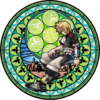
Chronologically, Ventus's Dive to the Heart, called "Ventus's Mind",[4] is the first to be seen, and appears in an incomplete state due to his broken heart. It is here that Ventus comes in contact with the newborn Sora's heart, and his Station is restored. Ventus does not return to the Dive to the Heart until he involuntarily fuses with Vanitas, his pillar changing appearance with the sudden presence of darkness in his heart, and is renamed "Soul World" (精神世界 Seishin Sekai).
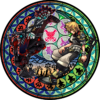
Ventus's Station is quite similar to Roxas's, but features a sleeping Ventus without his Wayward Wind at the Keyblade Graveyard, rather than Sora with his Kingdom Key at Destiny Islands. The inner circle of emblems, which usually contains images of the sleeper's loved ones, only contains a stylized fleur-de-lis, which also appears on the edges of the pillar. When Ventus is fused with Vanitas, Ventus's Station is modified—Vanitas himself now appears opposite Ventus, and both have their Keyblades. Half of the outer ring of symbols is replaced with the Unversed emblem representing darkness, while the other half is replaced with the Terra's Mark emblem representing light. The two symbols meet in the middle representing the twilight. The field of the Keyblade Graveyard is now filled with the abandoned Keyblades. The inner circle of emblems is replaced with silhouettes of Keychains for the χ-blade, the Wayward Wind, and the Void Gear. After Ven defeats Vanitas, his station changes to a form similar to its original appearance, with some modifications. Ventus is now holding the Wayward Wind and wearing both his Keyblade Armor pauldron and his silver Terra's Mark charm, while the outer circle of emblems is filled with the Terra's Mark emblem and the inner circle of emblems is filled with his friends' Wayfinders, possibly signifying that he has regained control of his completed heart.
After Ventus's body is placed within the Chamber of Waking, his heart reconnects with that of a young Sora, who appears in his own Dive to the Heart, named "Sora's Mind". His Station displays the landscape of Destiny Islands on the bottom, with paopu fruits and different elements found on or around the island encircled separately on the top.
Kingdom Hearts[edit]
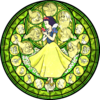

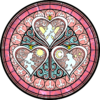


In Sora's dream, he falls from the sky into the sea below with his eyes closed and slowly descends onto the ground with abyss surrounding him. As he steps into the ground, the darkness below his feet starts to transform into birds and fly away, showing a radiant light that slowly forms into a circle. Each of the Stations in his later Dive to the Heart illustrates one or more of the Princesses of Heart, as well as the characters related to them. Snow White, Cinderella, Aurora, and Belle are asleep, perhaps signifying their comatose state in Hollow Bastion.
- The first pillar, shaded green, depicts Snow White, the Seven Dwarfs, the forest animals, and The Queen in her hag form. While Snow White is asleep, all the other characters are depicted as awake.
- The second pillar, shaded violet, depicts a sleeping Cinderella.
- The third pillar, shaded pink, depicts three princess silhouettes, representing the three free Princesses of Heart, Alice, Jasmine, and Kairi.
- The fourth pillar, shaded red, depicts a sleeping Aurora and silhouettes of Flora, Fauna, and Merryweather, and the silhouette Maleficent makes when vanishing into green fire.
- The final pillar, shaded yellow, depicts Belle, Beast, and his servants Lumière, Cogsworth, Mrs. Potts and Chip. While Belle and the servants are asleep, the Beast is depicted as awake, signifying his freedom.
All five pillars are known as Awakening (めざめの園 Mezame no Sono, lit. "Station of Awakening"). On the first pillar, Sora is asked to walk, then is shown three weapons, the Dream Sword, the Dream Shield, and the Dream Rod. He is directed to choose one and discard another, and his choice determines his specialty, initial stats, and ability growth throughout the game. After choosing, the Station shatters and Sora falls to the second pillar, where he first encounters Shadows, and is taught about battling and its rewards. The Station then sinks into darkness, and Sora awakens on the third pillar, where he is taught how to examine and interact with objects. By opening a treasure chest, moving a crate, and destroying a barrel, he materializes a door that leads to a dream version of Destiny Islands, where Sora meets facsimiles of his friends, Tidus, Wakka, and Selphie, which ask him enigmatic questions that determine how he gains experience throughout the game.
On the fourth pillar, Sora is again attacked by Shadows, but after defeating them the first Save Point is revealed, as well as floating steps to the final pillar. However, the steps vanish as he climbs them, trapping him on the fifth pillar. As he approaches a strange light, his shadow grows and becomes his Darkside; though he fights it, its darkness swallows him, and he reawakens on the Destiny Islands.
The door reappears on Destiny Islands when the island is attacked by the Heartless, this time leading to the Secret Place containing the world's Keyhole. It reappears a final time at the Final Rest within End of the World, leading to the remains of the Destiny Islands and the final confrontation with Ansem, Seeker of Darkness.
Kingdom Hearts II[edit]
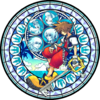
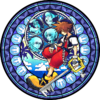
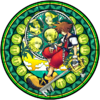
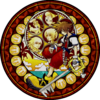

Roxas's Dive to the Heart appears in his dreams as he processes Sora's memories. As Roxas steps onto a Station, it is formed from a swirling flock of birds.
On the third day of his story, Roxas encounters a Dusk in the Sandlot and is sucked into his Dive to the Heart. Like Sora's, Roxas's Dive to the Heart consists of five stained glass pillars, but each of these depict the same image of Sora, Riku, Kairi, Donald Duck, and Goofy at the Destiny Islands, and the pillars are divided between only three Stations. Sora's eyes are closed, showing that he is asleep, while Kairi and Riku's are open, showing that they are awake; strangely, Donald and Goofy's eyes are still open, even though they are asleep as well.
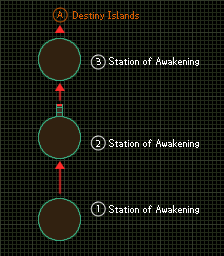
Roxas awakens on the Station of Serenity (やすらぎの園 Yasuragi no Sono), where he chooses between the Dream Sword, Dream Shield, and Dream Rod. While this choice determines the order in which he learns abilities as before, the weapon he chooses is immediately transformed into the Kingdom Key, and unlike the original Kingdom Hearts Dive to the Heart, he does not have to give up anything in exchange for his weapon. He goes through a door to the Station of Calling (いざないの園 Izanai no Sono), consisting of three pillars shaded blue, green, and red and connected by floating stairs. Here, he encounters Dusks and learns about Reaction Commands and treasures. Going through another door, he enters the Station of Awakening (めざめの園 Mezame no Sono), and finds an apparition of himself in his black coat which soon becomes the Twilight Thorn. Similar to Sora's Dive to the Heart, after defeating the Twilight Thorn, Roxas and his Dive to the Heart are consumed by darkness, but unlike Sora, Roxas is rescued by Naminé at the last minute.
Much later, as Sora approaches Memory's Skyscraper, Roxas reawakens inside him and takes him to the Station of Awakening, where they battle and come to peace with each other. This arena is replicated in the Garden of Assemblage for the fight against Roxas's Replica Data.
Kingdom Hearts coded[edit]


Data-Sora manifests in a digital version of the Dive to the Heart that is virtually the same as the real Sora's dive. He spots Data-Roxas, but does not recognize him before he disappears, and later mistakes him for Data-Riku. As with the real Sora's first dive, Data-Sora is presented with the Dream Sword, Dream Shield, and Dream Rod and has to choose one discard another, with his decisions influencing his starting commands. However, due to Chip and Dale's reprogramming, the Dream weapons immediately change into the Keyblade, as in Roxas's dive. After fighting off an ambush by a swarm of Shadows, Data-Sora enters the same door that Sora did in his own dive, but this door leads directly to the "real" Destiny Islands, rather than a dream version.
| Area Map |
|---|
Kingdom Hearts 3D: Dream Drop Distance[edit]
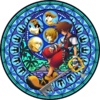


When Sora falls into darkness, his sleeping body, clad in Ventus's Keyblade Armor, lies down on a new variation of the second blue Station from Kingdom Hearts II with the background of Destiny Islands and the black crown symbols from his Kingdom Hearts Birth by Sleep Station.
After bringing the comatose Sora back to the Mysterious Tower, Riku uses the power of waking to dive into "Sora's Soul World" (ソラの精神世界 Sora no Seishin Sekai), drifting past memories and various floating Soras. In the background of this Dive is the second blue Station from Kingdom Hearts II. Upon landing, he finds the stained glass window floor consumed by inky darkness, from which emerges the Armored Ventus Nightmare—Sora trapped inside Ventus's Nightmare-possessed Keyblade Armor. When Riku defeats the Nightmare, the armor shatters, releasing Sora. The darkness envelopes Sora as it dissipates, with his Station reverting back to new version. Riku picks up Sora's dropped Keyblade and uses it to unlock the Sleeping Keyhole of Sora's heart.
In a flash of light, he suddenly finds himself on a facsimile of the dock at Destiny Islands, at sunset. Walking around on the beach, Riku encounters Roxas, Ventus, and Xion, each asking him a different question: "What are you so afraid of?", "What do you value more than anything else?", and "What do you wish?". After Riku answers each of their questions, there is another bright flash of light, and Riku finds himself back on the beach, where he sees a message in a bottle drifting ashore. When Riku picks it up, a digitized version of Ansem the Wise appears, placed inside Sora's heart along with his research data Ansem's Code. Ansem the Wise reflects upon the strength of Sora's heart and theorizes that Sora may have the power to recreate people long thought lost forever. All Sora needs to do is be himself and follow wherever it is that his heart takes him. The rest is in the data in that bottle Riku just found.
Ansem the Wise then reveals that Sora has already awoken. Defeating the Armored Ventus Nightmare freed Sora, and answering the questions of Roxas, Ventus, and Xion woke him up. Thanking Ansem the Wise, Riku summons Sora's Keyblade and prepares to leave, but Ansem the Wise stops him, asking for his name. Chuckling, Riku recalls the last time the man had asked him that. After answering his question, Riku departs for the outside world.
Kingdom Hearts III[edit]


Sora falls into the Dive to the Heart in his attire and body from when he first left Destiny Islands. A mirror appears and Sora sees himself as he is in the current day. Sora walks through the looking glass and becomes his present self. The mirror disappears and a series of screens begin to float around the platform depicting Sora's memories. Three screens in particular float in front of Sora: one of his battle with the possessed Riku, another of the King's appearance at the Door to Darkness, and one more of Sora's first meeting with Donald and Goofy. A voice asks Sora which he desires, with the screens respectively representing vitality, wisdom, and balance. After Sora chooses one, three more screens appear depicting Sora's battle with Roxas, his promise to Naminé, and his reunion with the Dream Eaters. The voice asks Sora what power he seeks, the screens respectively representing that of the warrior, the guardian, and the mystic.
| This information is based on alternate scenes or materials and is not considered canon within the overall plot of the series. |
|---|
In Kingdom Hearts III Re Mind, after choosing a power, three more screens appear depicting Sora's tea party after Riku returns from his dreams, his pursuit of Pluto towards Castle Oblivion, and the Battle of the 1000 Heartless, and the voice asks Sora what kind of adventure he seeks. The three screens correspond to the Premium Menu, under the headers of "Easy Adventure", "Usual Adventure", and "Challenging Adventure", respectively.
|
After making his choice, Sora sees all the screens vanish. Sora looks down and notices that the platform has been covered in water, which seems to be coming from a light beyond the Dive to the Heart. Sora runs to the light as a tidal wave washes him away, taking him to The Final World.
Sora enters the Dive to the Heart to wake up Ventus and save Aqua when she is defeated by Vanitas. With the power of waking, Sora is able to transform the image on the pillar from his own into Ventus's, signaling that Ventus's heart has been reunited with his body and he has awakened from his comatose state.
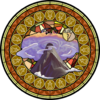
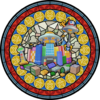
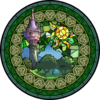
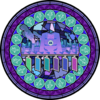
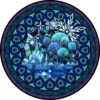
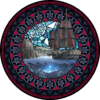
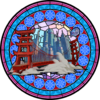
After the events at the Keyblade Graveyard, Sora enters a different dive using the power of waking within The Final World. Stations covered in darkness serve as portals leading to facsimiles of the worlds, where the Lich is holding the hearts of Sora's friends captive.
Kingdom Hearts III Re Mind[edit]

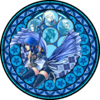

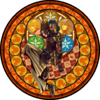

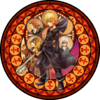
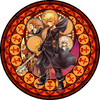

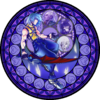
Following Xehanort's defeat, Sora uses the power of waking one more time to go back in time and try to save Kairi. During this journey, he travels through the Dives to the Heart of Ventus, Aqua, Terra, Roxas, and Riku, using the connections in the hearts of his friends to lead himself to Kairi's heart.
When Yozora confronts Sora, the image of Sora's station appears during the transition between The Final World and Quadratum, briefly replacing the roof of the 104 building.
Other appearances[edit]
Super Smash Bros. Ultimate[edit]
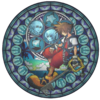
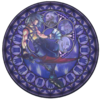
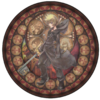
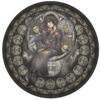
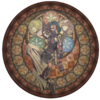
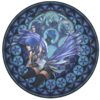
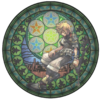
Dive to the Heart appears as part of the Hollow Bastion downloadable stage in Super Smash Bros. Ultimate. When time, stocks, or health are running low, Hollow Bastion transforms into Dive to the Heart, with the station of Sora, Riku, Roxas, Xion, Terra, Aqua, or Ventus appearing in the background.
Sora, Riku, and Terra's stations are from the Square Enix Cafe's coaster design. Roxas, Xion, and Aqua's stations are from the Memorial Stained Glass Clock event. Ventus's station is from Kingdom Hearts Birth by Sleep.
Characters[edit]
Enemies[edit]
Heartless[edit]
|
|
Nobodies[edit]
|
|
Nightmares[edit]
|
|
Other[edit]
|
|
Notes and references[edit]
- ^ Kingdom_Hearts_III_Ultimania, While answering a question about the Final World, Nomura says that the Station of Waking is reached via a "state of sleep". Translation via Lunesacree.
- ^ In Kingdom Hearts II, the Organization observes and comments upon Sora's battle with Roxas on the Station of Awakening. In Kingdom Hearts coded, Data-Roxas appears before Data-Sora on the Station of Awakening.
- ^ Kingdom Hearts Series Ultimania Alpha, p. 087
- ^ In the Kingdom Hearts HD 2.5 ReMIX re-release of Kingdom Hearts Birth by Sleep Final Mix, the image on the first station is changed to that of Ventus's final Soul World station.
See also[edit]
| Kingdom Hearts |
|---|
| Characters |
| Party members |
| Sora - Donald Duck - Goofy Tarzan - Aladdin - Ariel - Jack Skellington - Peter Pan - Beast |
| Summons |
| Simba - Genie - Dumbo - Bambi - Tinker Bell - Mushu |
| Antagonists |
| Ansem - Clayton Villains Maleficent - Riku - Hades - Captain Hook - Oogie Boogie - Ursula - Jafar |
| Non-playable characters |
| 99 Puppies - Abu - Aerith - Alice - Aurora - Bathtub - Belle - Card Soldiers - Carpet - Cave of Wonders Guardian - Cerberus - Chernabog - Cheshire Cat - Chip and Dale - Cid - Cinderella - Cloud - Crocodile - Daisy Duck - Dark Figure - Doorknob - Dr. Finkelstein - Eeyore - Enchanted Brooms - Fairy Godmother - Flotsam and Jetsam - Flounder - Flower - Geppetto - Hercules - Huey, Dewey, and Louie - Iago - Ice Titan - Jane Porter - Jasmine - Jiminy Cricket - Kairi - Kairi's Grandma - Kala - Kerchak - King Triton - Lock, Shock, and Barrel - Merlin - Mickey Mouse - Minnie Mouse - Moogles - Mr. Smee - Owl - Philoctetes - Piglet - Pinocchio - Pluto - Pongo and Perdita - Queen of Hearts - Rabbit - Rock Titan - Roo - Roxas - Sabor - Sally - Sebastian - Selphie - Sephiroth - Snow White - Squall Leonhart - Terk - The Mayor - The Peddler - The Shark - Tidus - Tigger - Wakka - Wendy - White Rabbit - Winnie the Pooh - Yuffie - Xemnas - Zero |
| Locations |
| Worlds |
| Destiny Islands - Disney Castle - Traverse Town - Wonderland - Olympus Coliseum - Deep Jungle - 100 Acre Wood - Agrabah - Monstro - Atlantica - Halloween Town - Neverland - Hollow Bastion - End of the World |
| Places |
| Dive to the Heart |
| Terms |
| Ansem's Reports - Door to Darkness - Final Keyhole - Keyblade - Keyhole - Kingdom Hearts - Mickey's Letter - Postcard - Princesses of Heart - The End - Trinity Mark |
| Music |
| Kingdom Hearts Original Soundtrack - Kingdom Hearts Original Soundtrack Complete - Simple and Clean |
| Archives |
| Accessories - Artwork - Bosses - Enemies - Items - Keyblades - Other Weapons - Removed content |
| Kingdom Hearts II |
|---|
| Characters |
| Party members |
| Roxas - Sora - Donald Duck - Goofy Fa Mulan - Beast - Auron - Jack Sparrow - Aladdin - Jack Skellington - Simba - Tron - Riku |
| Summons |
| Chicken Little - Genie - Stitch - Peter Pan |
| Antagonists |
| Organization XIII Xemnas - Xigbar - Xaldin - Saïx - Axel - Demyx - Luxord Villains Maleficent - Pete - Hades - Ursula - Hector Barbossa - Jafar - Oogie Boogie - Scar Shan-Yu - Master Control Program - Sark |
| Non-playable characters |
| Abu - Aerith - Ansem the Wise - Ariel - Ariel's Sisters - Auron - Bathtub - Belle - Biggs - Captain Pete - Carpet - Cave of Wonders Guardian - Cerberus - Chien Po, Ling, and Yao - Chip - Chip and Dale - Christmas Elves - Cid - Clara Cluck - Clarabelle Cow - Cloud - Cogsworth - Daisy Duck - Dark Figure - Dr. Finkelstein - Eeyore - Elizabeth Swann - Enchanted Brooms - Flora, Fauna, and Merryweather - Flotsam and Jetsam - Flounder - Fujin - Gopher - Gullwings - Hayabusa - Hayner - Hercules - Horace Horsecollar - Hostile Program - Huey, Dewey, and Louie - Hydra - Iago - Jasmine - Jessie - Jiminy Cricket - Kairi - Kanga - King Triton - Li Shang - Lock, Shock, and Barrel - Lumière - Maleficent's Raven - Megara - Merlin - Mickey Mouse - Minnie Mouse - Moogles - Mrs. Potts - Mufasa - Mushu - Nala - Naminé - Olette - Owl - Pain and Panic - Pegasus - Pence - Philoctetes - Piglet - Pluto - Prince Eric - Pumbaa - Rabbit - Rafiki - Raijin - Reindeer - Rock Titan - Roo - Sally - Santa Claus - Scrooge McDuck - Sebastian - Seifer - Selphie - Sephiroth - Setzer - Shenzi, Banzai, and Ed - Simba and Nala's cub - Squall Leonhart - Terra-Xehanort - The Emperor - The Experiment - The Ghost of Scar - The Mayor - The Peddler - Tifa - Tigger - Timon - Tinker Bell - Undead Pirates - Vivi - Wallace - Wantz - Wardrobe - William Turner - Winnie the Pooh - Wedge - Yen Sid - Yuffie - Zero |
| Locations |
| Worlds |
| Twilight Town - Destiny Islands - Hollow Bastion/Radiant Garden - The Land of Dragons - Beast's Castle - 100 Acre Wood - Olympus Coliseum - Disney Castle - Timeless River - Atlantica - Port Royal - Agrabah - Halloween Town - Pride Lands - Space Paranoids - The World That Never Was - End of Sea |
| Places |
| The Other Twilight Town - Dive to the Heart - Mysterious Tower - Kingdom Hearts |
| Terms |
| Cornerstone of Light - Drive Form - Gate - Hollow Bastion Restoration Committee - Kairi's Letter - Keyblade - Kingdom Hearts Encoder - Organization XIII - Princesses of Heart - Reaction Command - Secret Ansem Report - Sidecar Glider - Skateboard - The End - Twilight Town Disciplinary Committee |
| Music |
| Kingdom Hearts II Original Soundtrack - Kingdom Hearts Original Soundtrack Complete - Sanctuary |
| Archives |
| Accessories - Artwork - Bosses - Enemies - Items - Keyblades - Other Weapons - Songs - Removed content |
| Kingdom Hearts coded |
|---|
| Characters |
| Party members |
| Data-Sora Cloud - Hercules - Donald Duck - Goofy |
| Antagonists |
| Maleficent - Pete - Sora's Heartless |
| Non-playable characters |
| Aladdin - Alice - Card Soldier - Cave of Wonders Guardian - Cerberus - Cheshire Cat - Chip and Dale - Cid - Data-Naminé - Data-Riku - Data-Roxas - Hades - Huey, Dewey, and Louie - Iago - Jafar - Jasmine - Jiminy Cricket - Mickey Mouse - Moogle - Philoctetes - Pluto - Queen of Hearts - Rock Titan - Selphie - Squall Leonhart - The Peddler - Tidus - Wakka - White Rabbit - Yuffie |
| Locations |
| Worlds |
| Disney Castle - Datascape - Dive to the Heart - Destiny Islands - Traverse Town - Wonderland - Olympus Coliseum - Agrabah - Hollow Bastion - Castle Oblivion |
| Terms |
| Bug Blox - Command Matrix - Datascape - Debug Ability - Ending Card - Gear Matrix - Hero's License - Keyblade - Keyhole - Mickey's Letters - Questploration - Stat Matrix - The End - World Card |
| Music |
| Kingdom Hearts Birth by Sleep & 358/2 Days Original Soundtrack - Simple and Clean |
| Archives |
| Artwork - Bosses - Items - Removed content |
| Kingdom Hearts Birth by Sleep |
|---|
| Characters |
| Party members |
| Terra - Ventus - Aqua - Lingering Will Prince Phillip - Mickey Mouse - Hercules - Zack - Experiment 626 |
| Antagonists |
| Xehanort - Vanitas - Braig - Terra-Xehanort Maleficent - Lady Tremaine - Anastasia and Drizella - Lucifer - The Queen - Magic Mirror - Gantu - Experiment 221 - Hades - Ice Colossus - Captain Hook - Captain Dark |
| Non-playable characters |
| Aeleus - Ansem the Wise - Aurora - Captain Justice - Chip and Dale - Cinderella - Crocodile - Daisy Duck - Dark Figure - Dilan - Donald Duck - Dr. Jumba Jookiba - Enchanted Brooms - Eraqus - Even - Fairy Godmother - Flora, Fauna, and Merryweather - Goofy - Grand Councilwoman - Grand Duke - Horace Horsecollar - Huey, Dewey, and Louie - Ienzo - Isa - Jaq - Kairi - Kairi's Grandma - Lea - Lost Boys - Maleficent's Goons - Maleficent's Raven - Merlin - Minnie Mouse - Moogle - Peter Pan - Philoctetes - Pluto - The Prince - Prince Charming - Rabbit - Riku - Scrooge McDuck - Seven Dwarfs - Mr. Smee - Snow White - Sora - Tigger - Tinker Bell - Vanitas Remnant - Winnie the Pooh - Yen Sid |
| Locations |
| Worlds |
| Land of Departure - Enchanted Dominion - Castle of Dreams - Dwarf Woodlands - Destiny Islands - Radiant Garden - Olympus Coliseum - Disney Town - Deep Space - Mirage Arena - Neverland - Mysterious Tower - Keyblade Graveyard - Castle Oblivion - Realm of Darkness |
| Places |
| Dive to the Heart - 100 Acre Wood - Chamber of Waking |
| Terms |
| Bequeathing - Blank Points - Keyblade - Keyblade Armor - Keyblade Glider - Keyblade Master - Keyblade War - Kingdom Hearts - Mark of Mastery exam - Million Dreams Award - Princesses of Heart - The End - Unversed |
| Gameplay terms |
| Arena Mode - Command Board - Command Style - D-Link - Deck Commands - Shotlock - Special Command |
| Music |
| Kingdom Hearts Birth by Sleep & 358/2 Days Original Soundtrack - Simple and Clean |
| Archives |
| Artwork - Bosses - Enemies - Keyblades - Removed content |
| Kingdom Hearts 3D: Dream Drop Distance |
|---|
| Characters |
| Party members |
| Sora - Riku |
| Dream Eater Spirits |
| Meow Wow - Tama Sheep - Yoggy Ram - Komory Bat - Pricklemane - Hebby Repp - Sir Kyroo - Toximander - Fin Fatale - Tatsu Steed - Necho Cat - Thunderaffe - Kooma Panda - Pegaslick - Iceguin Ace - Peepsta Hoo - Escarglow - KO Kabuto - Wheeflower - Ghostabocky - Zolephant - Juggle Pup - Halbird - Staggerceps - Fishboné - Flowbermeow - Cyber Yog - Chef Kyroo - Lord Kyroo - Tatsu Blaze - Electricorn - Woeflower - Jestabocky - Eaglider - Me Me Bunny - Drill Sye - Tyranto Rex - Majik Lapin - Cera Terror - Skelterwild - Ducky Goose - Aura Lion - Ryu Dragon - Drak Quack - Keeba Tiger - Meowjesty - Sudo Neku - Frootz Cat - Ursa Circus - Kab Kannon - R & R Seal |
| Antagonists |
| Real Organization XIII (Seekers of Darkness) Master Xehanort - Young Xehanort - Terra-Xehanort - Ansem - Xemnas - Vanitas - Xigbar - Saïx - Luxord - Marluxia - Larxene - Dark Riku Villains Maleficent - Pete - Ursula Claude Frollo - CLU - Rinzler - Beagle Boys |
| Non-playable characters |
| Aeleus - Ansem the Wise - Anti Black Coat - Aqua - Axel - Black Guard - Blue Fairy - Braig - Chernabog - Daisukenojo Bito - Dark Figure - Dilan - Donald Duck - Enchanted Brooms - Esmeralda - Even - Geppetto - Goofy - Ienzo - Jiminy Cricket - Joshua - Julius - Kairi - Kevin Flynn - Lea - Maleficent's Raven - Mickey Mouse - Minnie Mouse - Monstro - Moogle - Naminé - Neku Sakuraba - Phoebus - Pinocchio - Pluto - Quasimodo - Quorra - Rhyme - Roxas - Sam Flynn - Shiki - Terra - Ventus - Victor, Hugo, and Laverne - Xion - Yen Sid |
| Locations |
| Worlds |
| Traverse Town - La Cité des Cloches - The Grid - Prankster's Paradise - Country of the Musketeers - Symphony of Sorcery - The World That Never Was |
| Destiny Islands - Mysterious Tower - Disney Castle - Radiant Garden - Dive to the Heart |
| Places |
| Sleeping Worlds |
| Terms |
| Another Guardian of Light - Dream Eater - Glossary - Keyblade War - Mark of Mastery exam - Real Organization XIII - Sleeping Keyhole - Sleeping Worlds - The End |
| Gameplay terms |
| Ability Link - AR Card - Deck Commands - Dive Mode - Drop System - Flick Rush - Flowmotion - Forecast - Link System - Reality Shift - Spirit |
| Music |
| Kingdom Hearts: Dream Drop Distance Original Soundtrack - Simple and Clean - Sanctuary |
| Archives |
| Artwork - Bosses - Enemies - Keyblades - Removed content |
| Kingdom Hearts χ[chi] |
|---|
| Characters |
| Party members |
| Player - Keyblade Wielders - Hercules - Skuld - Aladdin |
| Non-playable characters |
| Aced - Alice - Ava - Beast - Belle - Card Soldier - Cerberus - Cheshire Cat - Chip - Chip and Dale - Chirithy - Cloud - Cogsworth - Donald Duck - Doorknob - Ephemer - Gaston - Goofy - Guards - Gula - Hades - Invi - Ira - Lumière - Luxu - Mad Hatter and March Hare - Magic Mirror - Maleficent - Maleficent's Raven - Maui - Maurice - Mickey Mouse - Mrs. Potts - Moana - Moogle - Philoctetes - Queen of Hearts - The Master of Masters - The Prince - The Queen - Seven Dwarfs - Snow White - Wardrobe - White Rabbit |
| Locations |
| Worlds |
| Daybreak Town - Dwarf Woodlands - Wonderland - Agrabah - Olympus Coliseum - Beast's Castle - Enchanted Dominion |
| Places |
| Dive to the Heart |
| Terms |
| Book of Prophecies - Cards - Dark Corridor Trials - Dark Footsteps - Heartless - Key Art - Key Scene - Keyblade - Keyblade War - Lux - Raid Boss - Union |
| Archives |
| Artwork - Items - Keyblades - Music |
| Kingdom Hearts III |
|---|
| Characters |
| Party members |
| Sora - Donald Duck - Goofy - Riku - Aqua Hercules - Woody - Buzz Lightyear - Rapunzel - Eugene Fitzherbert - James P. Sullivan - Mike Wazowski - Marshmallow - Jack Sparrow - Baymax Mickey Mouse - Kairi - Ventus - Lea - Roxas - Xion |
| Link system |
| Meow Wow - Wreck-It Ralph - Simba - Ariel - Stitch |
| Antagonists |
| Real Organization XIII (Seekers of Darkness) Master Xehanort - Young Xehanort - Terra-Xehanort - Ansem, Seeker of Darkness - Xemnas - Vanitas - Xigbar - Saïx - Luxord - Marluxia - Larxene - Dark Riku - Xion Vexen - Demyx - Replica Xehanort Villains Maleficent - Pete - Hades - Rock Titan - Ice Titan - Lava Titan - Tornado Titan Mother Gothel - Randall Boggs - Hans - Davy Jones - Kraken - Cutler Beckett - Dark Baymax Other Anti-Aqua |
| Non-playable characters |
| Seven Guardians of Light - New Seven Hearts Aced - Aeleus - Air Droids - Angelic Amber - Anna - Ansem the Wise - Apollo - Athena - Beasts & Bugs - Boo - Bouncy Pets - CDA Agent - Chip and Dale - Chirithy - Daisy Duck - Dark Figure - Dilan - Elizabeth Swann - Elsa - Ephemer - Eraqus - Even - Fred - Gigas - Go Go Tomago - Gopher - Green Army Men - Gula - Hamm - Hayner - Hector Barbossa - Hermes - Hiro Hamada - Honey Lemon - Huey, Dewey, and Louie - Ienzo - Invi - Ira - Isa - Jiminy Cricket - Joshamee Gibbs - Kristoff - Lingering Will - Little Green Men - Lumpy - Luxu - The Master of Masters - Maximus - Megara - Merlin - Minnie Mouse - Moogle - Nameless Star - Naminé - Olaf - Olette - Pascal - Patchwork Animals - Pegasus - Pence - Piglet - Philoctetes - Pluto - Rabbit - Remy - Rex - Riku Replica - Roo - Sarge - Scrooge McDuck - Supreme Smasher - Sven - Terra - Tia Dalma - Tigger - Wasabi - William Turner - Winnie the Pooh - Yen Sid - Yozora - Zeus |
| Locations |
| Worlds |
| Olympus - Dark World - Mysterious Tower - Disney Castle - Radiant Garden - Twilight Town - Toy Box - Kingdom of Corona - Monstropolis - Arendelle - The Caribbean - San Fransokyo - 100 Acre Wood - Destiny Islands - Castle Oblivion / Land of Departure - Keyblade Graveyard - The Final World - Scala ad Caelum - Quadratum |
| Terms |
| Alba & Ater - Ansem's Code - Black Box - Datascape - Dream Eater - Heartless - Keyblade - Keyblade Master - Keyblade War - Kingdom Hearts - New Seven Hearts - Nobody - Port Royal - Secret Reports - Subject X - Unversed - Verum Rex - Yozora |
| Gameplay terms |
| Armor Mode - Attractions - Battlegate - Black Pearl - Classic Kingdom - Flowmotion - Formchange - Gigas - Glossary - Gummiphone - Gummi Ship - Keyblade Forge - Leviathan - Lucky Emblems - Make Your Mark - Memory Archive - Moogle Shop - Link - Shotlock - Situation Command - Tech Points - χ3 |
| Music |
| Don't Think Twice - Face My Fears - Kingdom Hearts - III, II.8, Unchained χ & Union χ [Cross] - Original Soundtrack - Unnamed tracks |
| Archives |
| Accessories - Armor - Artwork - DLC - Enemies - Items - Keyblades - Weapons - Removed content |
| Kingdom Hearts Melody of Memory |
|---|
| Characters |
| Party members |
| Kairi - Sora - Roxas - Aqua - Riku Donald Duck - Goofy - Axel - Xion - Terra - Ventus - Meow Wow - Komory Bat - Mickey Mouse Hercules - Aladdin - Ariel - Peter Pan - Beast - Fa Mulan - Simba - Stitch |
| Antagonists |
| Xehanort - Ansem, Seeker of Darkness - Xemnas - Maleficent |
| Non-playable characters |
| Aeleus - Ansem the Wise - Even - Fairy Godmother - Ienzo - Nameless Star - Terra-Xehanort - Yen Sid |
| Locations |
| Worlds |
| Mysterious Tower - Radiant Garden - The Final World |
| Terms |
| An Oath to Return - Another Key - Key Art - Keyblade - Museum - Music Stage - Rhythm Points - Story Scene - The End - VS Battle - World Tour |
| Music |
| Kingdom Hearts Melody of Memory - Special Disc - Unnamed tracks |
| Archives |
| Artwork - Bosses - Enemies - Items - Trophy - Songs |

![Sora [KH I][KH BbS][KH 3D][KH III][KH III RM]](https://kh.wiki.gallery/images/thumb/8/89/Sora_03_KHIII.png/66px-Sora_03_KHIII.png)
![Roxas [KH II][KH 3D]](https://kh.wiki.gallery/images/thumb/5/53/Roxas_KHII.png/64px-Roxas_KHII.png)
![Data-Sora [KH coded]](https://kh.wiki.gallery/images/thumb/a/ad/Data-Sora_KHREC.png/82px-Data-Sora_KHREC.png)
![Data-Roxas [KH coded]](https://kh.wiki.gallery/images/thumb/2/2b/Data-Roxas_KHREC.png/120px-Data-Roxas_KHREC.png)
![Vanitas [KH BbS]](https://kh.wiki.gallery/images/thumb/e/e4/Vanitas_%28Unmasked%29_KHBBS.png/120px-Vanitas_%28Unmasked%29_KHBBS.png)
![Riku [KH 3D]](https://kh.wiki.gallery/images/thumb/c/ce/Riku_KH3D.png/69px-Riku_KH3D.png)
![Ansem the Wise [KH 3D]](https://kh.wiki.gallery/images/thumb/d/de/Ansem_the_Wise_%28DiZ%29_KHII.png/63px-Ansem_the_Wise_%28DiZ%29_KHII.png)
![Armored Ventus Nightmare [KH 3D]](https://kh.wiki.gallery/images/thumb/3/35/Armored_Ventus_Nightmare_KH3D.png/73px-Armored_Ventus_Nightmare_KH3D.png)
![Darkness [KH III RM]](https://kh.wiki.gallery/images/thumb/2/25/Darkness_KHUX.png/81px-Darkness_KHUX.png)
![Shadow [KH I][KH coded][KH III]](https://kh.wiki.gallery/images/thumb/d/de/Shadow_KHII.png/120px-Shadow_KHII.png)
![AntiSora [KH 3D]](https://kh.wiki.gallery/images/thumb/3/31/AntiSora_KH.png/117px-AntiSora_KH.png)
![Darkside [KH I][KH III]](https://kh.wiki.gallery/images/thumb/b/bc/Darkside_KH.png/112px-Darkside_KH.png)
![Dusk [KH II]](https://kh.wiki.gallery/images/thumb/b/ba/Dusk_KHII.png/89px-Dusk_KHII.png)
![Creeper [KH II]](https://kh.wiki.gallery/images/thumb/d/d8/Creeper_KHII.png/102px-Creeper_KHII.png)
![Twilight Thorn [KH II]](https://kh.wiki.gallery/images/thumb/b/bb/Twilight_Thorn_KHII.png/120px-Twilight_Thorn_KHII.png)
![Roxas [KH II]](https://kh.wiki.gallery/images/thumb/9/99/Roxas_%28Dual_Wield%29_KHII.png/120px-Roxas_%28Dual_Wield%29_KHII.png)