Halloween Town: Difference between revisions
KrytenKoro (talk | contribs) No edit summary |
(rearranging order) |
||
| (72 intermediate revisions by 25 users not shown) | |||
| Line 1: | Line 1: | ||
{{Game|KH1|FM1|COM|REC|KH2|FM2|358|MOM}} | |||
{{Game|KH1|FM1|COM|REC|KH2|FM2|358}} | |||
{{suite}} | {{suite}} | ||
{{World | {{World | ||
| Line 18: | Line 17: | ||
|game3=Kingdom Hearts II | |game3=Kingdom Hearts II | ||
|game4=Kingdom Hearts 358/2 Days | |game4=Kingdom Hearts 358/2 Days | ||
|game5=Kingdom Hearts Melody of Memory | |||
|film=''{{w|The Nightmare Before Christmas|The Nightmare Before Christmas (1993)}}'' | |film=''{{w|The Nightmare Before Christmas|The Nightmare Before Christmas (1993)}}'' | ||
|KHnormalname=This is Halloween | |KHnormalname=This is Halloween | ||
| Line 31: | Line 31: | ||
|KH2battlename=Spooks of Halloween Town | |KH2battlename=Spooks of Halloween Town | ||
|KH2battlefile=Spooks of Halloween Town KHII.ogg | |KH2battlefile=Spooks of Halloween Town KHII.ogg | ||
|KH2normalname2=What A Surprise?! | |||
|KH2normalname2n=''{{FMII}} | |||
|KH2normalfile2=What A Surprise! KHIIFM.ogg | |||
|KH2battlename2=Happy Holidays! | |||
|KH2battlename2n=''{{FMII}} | |||
|KH2battlefile2=Happy Holidays! KHIIFM.ogg | |||
|358normalname=This is Halloween | |358normalname=This is Halloween | ||
|358normalfile=This is Halloween KHD.ogg | |358normalfile=This is Halloween KHD.ogg | ||
| Line 36: | Line 42: | ||
|358battlefile=Spooks Of Halloween Town KHD.ogg | |358battlefile=Spooks Of Halloween Town KHD.ogg | ||
}} | }} | ||
'''Halloween Town''' is a world from the ''{{c|Kingdom Hearts|series}}'' series, based on {{w|Tim Burton}}'s 1993 classic stop-motion Disney film, ''{{w|The Nightmare Before Christmas}}''. [[Jack Skellington]], as the Pumpkin King, is the leader of | '''Halloween Town''' is a world from the ''{{c|Kingdom Hearts|series}}'' series, based on {{w|Tim Burton}}'s 1993 classic stop-motion Disney film, ''{{w|The Nightmare Before Christmas}}''. [[Jack Skellington]], as the Pumpkin King, is the leader of Halloween Town. The [[Keyhole]] in this world is hidden underneath Oogie Boogie's manor. | ||
In ''[[Kingdom Hearts II]]'', '''Christmas Town''' is introduced, located through a door in the Hinterlands. Although Christmas Town is its own world within the story of Halloween Town, it is recognized as a part of Halloween Town for gameplay purposes. | |||
==Settings and | ==Development== | ||
In the original release of ''Kingdom Hearts'', while any unopened treasure chest from Oogie's Manor will reappear in the ditch after the battle, the [[Red Trinity]] must be activated before the battle or it will be unobtainable. This bug was corrected in ''Kingdom Hearts Final Mix''. | |||
In the original version of ''Kingdom Hearts II'', Christmas Town shares the same field and battle themes as Halloween Town. However, in ''[[Kingdom Hearts II Final Mix]]'', Christmas Town instead has unique tracks: "[[What A Surprise?!]]" and "[[Happy Holidays!]]" as the respective field and battle themes. They both were included on the ninth disc of the ''[[Kingdom Hearts Original Soundtrack Complete]]''. | |||
==Settings and Areas== | |||
===''Kingdom Hearts''=== | |||
Based on the holiday of Halloween, Halloween Town is in a constant state of night, lighted mainly by the bright full moon overhead. The area has a twisted, Gothic, and creepy appearance. | Based on the holiday of Halloween, Halloween Town is in a constant state of night, lighted mainly by the bright full moon overhead. The area has a twisted, Gothic, and creepy appearance. | ||
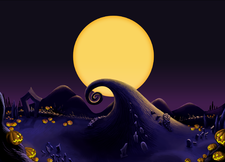
{{nihongo|'''{{a|Guillotine | [[File:Curly Hill (Art).png|thumb|225px|left|Artwork of Moonlight Hill.]] | ||
[[Sora]], [[Donald]], and [[Goofy]] arrive at the {{nihongo|'''{{a|Guillotine Gate}}'''|ギロチン広場:入口|Girochin Hiroba: Iriguchi|lit. "Guillotine Square: Entrance"}}, a small circular area, where they notice their changed forms. In front of the party is a tiny path and a gate leading to the {{nihongo|'''{{a|Guillotine Square}}'''|ギロチン広場|Girochin Hiroba}}, named after the deadly guillotine located there. In the middle of the area is a creepy fountain full of green water; along the left wall are several pumpkins in various sizes, as well as various ledges to climb on. [[Jack Skellington]]'s house is also located here, as well as [[Dr. Finkelstein]]'s lab, accessed through the {{nihongo|'''{{a|Lab Entryway}}'''|研究所前|Kenkyūjo Mae|lit. "In Front of the Laboratory"}} further leading to his {{nihongo|'''{{a|Research Lab}}'''|研究所|Kenkyūjo|lit. "Laboratory"}}. The insides of the lab is constructed entirely from metal plates, and is very dimly lit. Dr. Finkelstein is often found close to his operation table, or his enormous science book. | |||
[[File:Oogie's Manor (Art).png|thumb|right|180px|Artwork of Oogie's Manor.]] | |||
Near the square is the {{nihongo|'''{{a|Graveyard}}'''|棺のある墓地|Hitsugi no Arubochi|lit. "Cemetery of Coffins"}}, which further connects to other areas. Through a coffin at the end, the party can travel to the {{nihongo|'''{{a|Boneyard}}'''|集合墓地|Shūgō Bochi|lit. "Assembled Cemetery"}}, where a massive pumpkin can be found. After a quick interaction with [[The Mayor]] the pumpkin explodes, revealing a cat-shaped doorway behind it leading to {{nihongo|'''{{a|Moonlight Hill}}'''|月の見える丘|Tsuki no Mieru Oka|lit. "Hill with a View of the Moon"}}. The area is decently big and filled with graves and pumpkins, with a sundae swirl-shaped hill in the middle. The Graveyard can also be directly accessed from here by lighting a platform on fire. Near the platform is spruce-shaped door that'll take Sora and party to the '''{{a|Cemetery}}''', which is a small area filled with mausoleums and columbariums of all kinds of shapes. | |||
By interacting with a specific grave at Moonlight Hill, the curly hill can be uncurled and will allow for crossing to the {{nihongo|'''{{a|Bridge}}'''|吊り橋|Tsuribashi|lit. "Suspension Bridge"}}. The area consists of a small bridge and some green waters and sewers underneath it. Up ahead is gate leading to {{nihongo|'''{{a|Oogie's Manor}}'''|ブギーの屋敷|Bugī no Yashiki}}. | |||
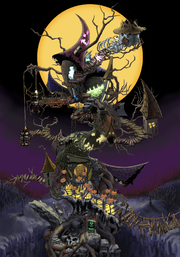
The manor is huge with lots of twists and turns, and consists of wooden walkways and several odd-shaped buildings. At the top of the manor lies the {{nihongo|'''{{a|Evil Playroom}}'''|小鬼たちの部屋|Saki-tachi no Heya|lit. "Little Demons' Room"}}, where [[Lock, Shock, and Barrel]] are fought. Below the main entrance is a green door leading to the {{nihongo|'''{{a|Torture Chamber}}'''|ブギーの拷問室|Bugī no Gōmon-shitsu|lit. "Boogie's Torture Room"}}, where [[Oogie Boogie]] is fought. After defeating Oogie Boogie, he fuses with the manor, creating a gigantic version of himself. After Oogie's defeat and the manor's collapse, the site is renamed {{nihongo|'''{{a|Manor Ruins}}'''|ブギーの屋敷跡|Bugī no Yashiki Ato|lit. "Remnants of Boogie's Manor"}}, which is large, open, and barren area, with some remnants from the manor spread around. By using the sewer tunnels down at the ruins, Sora can travel back to the Bridge, and by further traversing the sewer tunnels, he can travel back to Guillotine Square as well. | |||
===''Kingdom Hearts Chain of Memories''=== | |||
In ''Kingdom Hearts Chain of Memories'', a memory version of Halloween Town appears inside of [[Castle Oblivion]]. The world is explored through boxed-in areas inspired by Guillotine Square and the Graveyard. In cutscenes areas such as the '''{{a|Guillotine Square}}''', the '''{{a|Research Lab}}''', and the '''{{a|Cemetery}}''' are visited. The boss battle against Oogie Boogie takes place in an unnamed room heavily inspired by the Torture Chamber. | |||
===''Kingdom Hearts II''=== | |||
In ''Kingdom Hearts II'', the world is expanded with the addition of '''Christmas Town'''. | |||
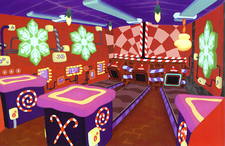
[[File:Toy Factory - Shipping and Receiving (Art).png|thumb|225px|left|Artwork of the Toy Factory's Shipping and Receiving area.]] | |||
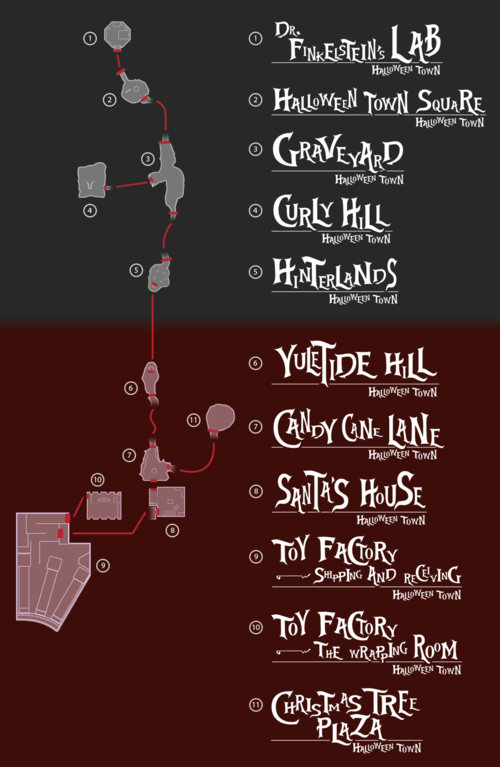
The Guillotine Square has been renamed to '''{{a|Halloween Town Square}}''', and takes on a slightly different appearance: the fountain now squirts water that deals damage, the guillotine can come down to damage characters if they pass beneath it, the gates with presents behind them deal damage if Sora and company come near it, and nearby grates spew poisonous gas. Leaving Halloween Town Square will either take Sora to {{nihongo|'''{{a|Dr. Finkelstein's Lab}}'''|フィンケルスタイン研究所|Finkerusutain Kenkyūjo|lit. "Finkelstein Laboratory"}} or to the '''{{a|Graveyard}}''', now decorated with tall graves that can fall over and deal damage when hit. Heading right from the Graveyard leads to Moonlight Hill, now renamed {{nihongo|'''{{a|Curly Hill}}'''|スパイラルヒル|Supairaru Hiru|lit. "Spiral Hill"}}, where [[Prison Keeper]] is fought. | |||
Continuing straight ahead at the Graveyard takes the party to the {{nihongo|'''{{a|Hinterlands}}'''|ヒンターランド|Hintārando}}, a quiet wood leading to a group of trees carved with various symbols of other holidays. These lead to towns of various holidays: Christmas, Easter, St. Patrick's Day, Thanksgiving, Independence Day, and Valentine's Day. However, Christmas Town's doorway is the only accessible one, and leads to {{nihongo|'''{{a|Yuletide Hill}}'''|街外れ|Machihazure no Oka|lit. "Hill on the Outskirts of Town"}}, which has a great view of the town below. Traveling down the hill takes Sora and company to {{nihongo|'''{{a|Candy Cane Lane}}'''|クリスマス通り|Kurisumasu-dōri|lit. "Christmas Street"}}, a plaza which features a carousel as its centerpiece that can spin and damage enemies. In Christmas Town, characters can visit Santa Claus himself in {{nihongo|'''{{a|Santa's House}}'''|サンタの部屋|Santa no Heya|lit. "Santa's Room"}} and explore the {{nihongo|'''{{a|Shipping & Receiving}}'''|配送エリア|Haisō Eria|lit. "Delivery Area"}} and {{nihongo|'''{{a|The Wrapping Room}}'''|梱包エリア|Konpō Eria|lit. "Packing Area"}} of the {{nihongo|'''{{a|Toy Factory}}'''|おもちゃ工場|Omocha Kōjō}}. Later in the game, {{nihongo|'''{{a|Christmas Tree Plaza}}'''|クリスマス広場|Kurisumasu Hiroba|lit. "Christmas Square"}} becomes accessible, and is the location of a boss battle with [[The Experiment]]. | |||
{|class="wikitable mw-collapsible mw-collapsed" | {|class="wikitable mw-collapsible mw-collapsed" | ||
!Area Map in ''Kingdom Hearts | !Area Map in ''Kingdom Hearts II'' | ||
|- | |- | ||
| | | | ||
[[File:Minimap (Halloween Town) | [[File:Minimap (Halloween Town) KHII.png|500px]] | ||
|} | |} | ||
===''Kingdom Hearts 358/2 Days''=== | |||
In ''Kingdom Hearts 358/2 Days'' the world is more or less exactly the same as in the first game, with Dr. Finkelstein's lab being the only inaccessible area. Roxas will arrive at {{nihongo|'''{{a|Halloween Town Entrance}}'''|ギロチン広場入口|Girochin Hiroba Iriguchi|lit. "Guillotine Square Entrance"}}, which has a longer hallway now before reaching the {{nihongo|'''{{a|Halloween Town Square}}'''|ギロチン広場|Girochin Hiroba|lit. "Guillotine Square"}}. From there Roxas can travel to the {{nihongo|'''{{a|Graveyard}}'''|棺のある墓地|Hitsugi no Aru Bochi|lit. : Graveyard with Coffins"}} which lead into both {{nihongo|'''{{a|Moonlight Hill}}'''|月の見える丘|Tsuki no Mieru Oka|lit. "Hill with Moon View"}}, and the {{nihongo|'''{{a|Boneyard 1}}'''|集合墓地1|Shūgō Bochi 1|lit. "Mass Grave 1"}}, with the latter also connecting to Moonlight Hill. At the hill is a spruce-shaped door which takes Roxas to {{nihongo|'''{{a|Boneyard 2}}'''|集合墓地2|Shūgō Bochi 2|lit. "Mass Grave 2"}}, which is a bit more spacious than it previously was when called Cemetery. | |||
At Moonlight Hill there's also a ladder which can be used to access the {{nihongo|'''{{a|Suspension Bridge}}'''|吊り橋|Tsuribashi}}, which further leads to the {{nihongo|'''{{a|Manor Ruins}}'''|ブギーの屋敷跡|Bugī no Yashiki Ato|lit. "Boogie's Mansion Ruins"}}. The area has been cleaned up a bit since the first game, with the area only housing several big rocks now, as opposed to several leftovers from the Oogie's manor. By using the sewer tunnels Roxas can transport back to the Suspension Bridge. | |||
{|class="wikitable mw-collapsible mw-collapsed" | {|class="wikitable mw-collapsible mw-collapsed" | ||
!Area Map in ''Kingdom Hearts | !Area Map in ''Kingdom Hearts 358/2 Days'' | ||
|- | |- | ||
| | | | ||
[[File:Minimap (Halloween Town) | [[File:Minimap (Halloween Town) KHD.png|500px]] | ||
|} | |} | ||
{{-}} | {{-}} | ||
| Line 81: | Line 110: | ||
During his first mission to Halloween Town (Mission 42, Day 149), Roxas encounters Jack Skellington, who ponders how to make Halloween scarier and more shocking than ever before. Roxas leaves him to think, and continues on his mission to collect hearts. On Roxas's next few missions to Halloween Town, he finds there are fewer and fewer Heartless, making heart collecting more difficult. Roxas uses [[Zero]], who is able to locate hidden Heartless, to help him finish his mission. After a few more visits to Halloween Town, Roxas grows annoyed of Lock, Shock, and Barrel, who had been playing tricks on him, and attempts to stop them. The trio attack Roxas, who defeats them, and they promise not to play tricks on him anymore. | During his first mission to Halloween Town (Mission 42, Day 149), Roxas encounters Jack Skellington, who ponders how to make Halloween scarier and more shocking than ever before. Roxas leaves him to think, and continues on his mission to collect hearts. On Roxas's next few missions to Halloween Town, he finds there are fewer and fewer Heartless, making heart collecting more difficult. Roxas uses [[Zero]], who is able to locate hidden Heartless, to help him finish his mission. After a few more visits to Halloween Town, Roxas grows annoyed of Lock, Shock, and Barrel, who had been playing tricks on him, and attempts to stop them. The trio attack Roxas, who defeats them, and they promise not to play tricks on him anymore. | ||
[[File:Mission 66 01 KHD.png | [[File:Mission 66 01 KHD.png|thumb|The scarecrow Jack made that Roxas inspired.]] | ||
Barrel almost divulges information on what they've been doing, but Lock quiets him and the trio escape. Disregarding their promise, the three play the same trick on Roxas immediately on his next arrival. After completing his mission, Roxas tries to leave, but is attacked by a [[Tentaclaw]]. He defeats it and RTC's. The Organization reports that the Heartless population in Halloween Town is unusually low, so Roxas is sent to investigate. When he arrives at Guillotine Plaza, a Creepworm appears, fleeing from something. Another Tentaclaw sprouts from the ground and swallows the Creepworm. Roxas searches for the source outside of town and sees Lock, Shock, and Barrel escaping over the wall to Boogie's home. He defeats the Tentaclaws at Curly Hill, before taking on the source of the cannibalistic appendages, the [[Leechgrave]], at Manor Ruins. However, Jack, watching from outside the zone of battle, likes the idea of a Halloween with "a black cloak and black tentacles," and creates a scarecrow in Roxas's image. | Barrel almost divulges information on what they've been doing, but Lock quiets him and the trio escape. Disregarding their promise, the three play the same trick on Roxas immediately on his next arrival. After completing his mission, Roxas tries to leave, but is attacked by a [[Tentaclaw]]. He defeats it and RTC's. The Organization reports that the Heartless population in Halloween Town is unusually low, so Roxas is sent to investigate. When he arrives at Guillotine Plaza, a Creepworm appears, fleeing from something. Another Tentaclaw sprouts from the ground and swallows the Creepworm. Roxas searches for the source outside of town and sees Lock, Shock, and Barrel escaping over the wall to Boogie's home. He defeats the Tentaclaws at Curly Hill, before taking on the source of the cannibalistic appendages, the [[Leechgrave]], at Manor Ruins. However, Jack, watching from outside the zone of battle, likes the idea of a Halloween with "a black cloak and black tentacles," and creates a scarecrow in Roxas's image. | ||
| Line 95: | Line 124: | ||
By the time Sora, Donald and Goofy return to Halloween Town, it has been decorated for Christmas. They run into Jack, who appoints them to act as bodyguards so he can bring [[Santa Claus]] to see all his work. [[Maleficent]] arrives shortly afterwards and recruits Lock, Shock and Barrel as minions to destroy Christmas Town. However, when Jack's group arrive to see Santa, Maleficent changes her plans to getting revenge on Sora and the others first. Upon hearing [[Oogie Boogie]] had been destroyed by Sora, she brings him back to assist in ruining Christmas. Maleficent and Oogie kidnap Santa, leaving the [[Prison Keeper]] behind to assist Lock, Shock and Barrel in delaying the heroes. Sora and co. destroy the Heartless and learn of Oogie's return. [[Sally]] finds them and informs them that Santa has been captured. | By the time Sora, Donald and Goofy return to Halloween Town, it has been decorated for Christmas. They run into Jack, who appoints them to act as bodyguards so he can bring [[Santa Claus]] to see all his work. [[Maleficent]] arrives shortly afterwards and recruits Lock, Shock and Barrel as minions to destroy Christmas Town. However, when Jack's group arrive to see Santa, Maleficent changes her plans to getting revenge on Sora and the others first. Upon hearing [[Oogie Boogie]] had been destroyed by Sora, she brings him back to assist in ruining Christmas. Maleficent and Oogie kidnap Santa, leaving the [[Prison Keeper]] behind to assist Lock, Shock and Barrel in delaying the heroes. Sora and co. destroy the Heartless and learn of Oogie's return. [[Sally]] finds them and informs them that Santa has been captured. | ||
In Christmas Town, Maleficent prepares to turn Santa into a Heartless, but is then dismissed by Oogie. Sora and co. arrive and fight Oogie, who has converted the toy factory into a Heartless-producing machine. Beating Oogie, the bag of bugs springs leaks and Donald steps on the bug serving as Oogie's brain. Though Jack wishes to continue his plan to help Santa, Santa tells Jack that he is needed to manage Halloween just as Christmas needs him, which Jack accepts and decides to look for new ways to create fear. Jack's Santa suit glows and opens new [[Gate]], which Sora promptly unlocks, allowing passage to [[Pride Lands]]. | [[File:Oogie's Demise 01 KHII.png|thumb|left|200px|Oogie begins to deflate as insects leak out of him.]] | ||
In Christmas Town, Maleficent prepares to turn Santa into a Heartless, but is then dismissed by Oogie. Sora and co. arrive and fight Oogie, who has converted the toy factory into a Heartless-producing machine. Beating Oogie, the bag of bugs springs leaks and Donald steps on the bug serving as Oogie's brain. Though Jack wishes to continue his plan to help Santa, Santa tells Jack that he is needed to manage Halloween just as Christmas needs him, which Jack accepts and decides to look for new ways to create fear. Jack's Santa suit glows and opens a new [[Gate]], which Sora promptly unlocks, allowing passage to the [[Pride Lands]]. | |||
On their second visit, Sora, Donald, and Goofy learn from Jack that [[Present|Christmas presents]] are being stolen, and resolve to find out who and to what end. After discovering that Lock, Shock, and Barrel and the Heartless are not to blame, they visit Santa and request to make [[Decoy Presents]] to draw out the thief. After hiding in a huge box, they surprise the thief, which happens to be Dr. Finkelstein's [[The Experiment|Experiment]]. A battle goes on with the raging machine, but Sora and co. come out on top, learning from Dr. Finkelstein later that the Experiment wished only to know the happiness that Christmas brings. Jack, all the while, thinks the box makes the magic, but learns from Sora that what matters is the principle of giving. After this, Jack and Sally share a romantic moment in the snow, with Donald and Goofy comforting Sora about giving Kairi a real Christmas present, one that comes from his heart. | On their second visit, Sora, Donald, and Goofy learn from Jack that [[Present|Christmas presents]] are being stolen, and resolve to find out who and to what end. After discovering that Lock, Shock, and Barrel and the Heartless are not to blame, they visit Santa and request to make [[Decoy Presents]] to draw out the thief. After hiding in a huge box, they surprise the thief, which happens to be Dr. Finkelstein's [[The Experiment|Experiment]]. A battle goes on with the raging machine, but Sora and co. come out on top, learning from Dr. Finkelstein later that the Experiment wished only to know the happiness that Christmas brings. Jack, all the while, thinks the box makes the magic, but learns from Sora that what matters is the principle of giving. After this, Jack and Sally share a romantic moment in the snow, with Donald and Goofy comforting Sora about giving [[Kairi]] a real Christmas present, one that comes from his heart. | ||
Some time after [[Xemnas]]'s defeat, Jack is seen discussing plans for the next Halloween with everyone in Dr. Finkelstein's lab. | Some time after [[Xemnas]]'s defeat, Jack is seen discussing plans for the next Halloween with everyone in Dr. Finkelstein's lab. | ||
| Line 114: | Line 144: | ||
File:Bathtub KHII.png|[[Bathtub]]<br>{{KH}}{{KHII}} | File:Bathtub KHII.png|[[Bathtub]]<br>{{KH}}{{KHII}} | ||
File:Reindeer KHII.png|Jack's [[Reindeer]]<br>{{KHII}} | File:Reindeer KHII.png|Jack's [[Reindeer]]<br>{{KHII}} | ||
File:Santa Claus KHII.png|[[Santa Claus]]<br>{{KHII}} | |||
File:Christmas Elf (Male) KHII.png|[[Christmas Elf]] (Male)<br>{{KHII}} | |||
File:Christmas Elf (Female) KHII.png|[[Christmas Elf]] (Female)<br>{{KHII}} | |||
File:Santa's Reindeer KHII.png|[[Reindeer]]<br>{{KHII}} | |||
File:The Experiment KHII.png|[[The Experiment]]<br>{{KHII}} | File:The Experiment KHII.png|[[The Experiment]]<br>{{KHII}} | ||
File:Moogle KH.png|[[Gumo]]<br>{{KHII}} | File:Moogle KH.png|[[Gumo]]<br>{{KHII}} | ||
</gallery> | </gallery> | ||
==Character Design== | ==Character Design== | ||
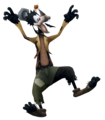
During their time in Halloween Town, Sora, Donald and Goofy each wear a monster costume in order to suit the town's season. Sora's attire is reminiscent of vampires while Donald and Goofy resemble a mummy and {{w|Frankenstein's monster}}, respectively. Other characters, such as Riku, Mickey and Maleficent, retain their normal outfits but are shaded with a darker hue. | During their time in Halloween Town, Sora, Donald and Goofy each wear a monster costume in order to suit the town's season. Sora's attire is reminiscent of vampires while Donald and Goofy resemble a mummy and {{w|Frankenstein's monster}}, respectively. Other characters, such as Riku, Mickey and Maleficent, retain their normal outfits but are shaded with a darker hue. In ''Kingdom Hearts II'', when Sora uses [[Drive Form]]s, his mask changes shape: a Bomb-esque creature for [[Valor Form]], a Blue Mage for [[Wisdom Form]], an unevenly-stitched fusion of the Valor Form and Wisdom Form masks for [[Master Form]], a crown for [[Final Form]], a [[Shadow]] for [[Antiform]], and a checkered heart for [[Limit Form]]. | ||
<gallery> | <gallery> | ||
File:Sora HT KHII.png|Sora's [[Form:Sora#Halloween Town version|Halloween Town costume]] | File:Sora HT KHII.png|Sora's [[Form:Sora#Halloween Town version|Halloween Town costume]] | ||
File:Donald HT KHII.png|Donald's [[Form:Donald Duck#Halloween Town version|Halloween Town costume]] | File:Donald Duck HT KHII.png|Donald's [[Form:Donald Duck#Halloween Town version|Halloween Town costume]] | ||
File:Goofy HT KHII.png|Goofy's [[Form:Goofy#Halloween Town version|Halloween Town costume]] | File:Goofy HT KHII.png|Goofy's [[Form:Goofy#Halloween Town version|Halloween Town costume]] | ||
File:Riku HT KHRECOM.png|Riku in Halloween Town | File:Riku HT KHRECOM.png|Riku in Halloween Town | ||
File: | File:Mickey Mouse HT KHRECOM.png|King Mickey in Halloween Town | ||
File:Maleficent HT KHII.png|Maleficent in Halloween Town | File:Maleficent HT KHII.png|Maleficent in Halloween Town | ||
</gallery> | </gallery> | ||
While in Christmas Town in ''[[Kingdom Hearts II Final Mix]]'', Sora, Donald, and Goofy lose their Halloween Town garb and gain Christmas-themed forms instead. Sora retains his vampire form, but loses his vampire fangs, and his garb is replaced by a black Santa suit. When using Drive Forms, his hat and the back of his shirt gain the form's respective sigil. Meanwhile, Donald and Goofy completely lose all traces of their Halloween Town forms, becoming a snowman and reindeer, respectively. | |||
<gallery> | <gallery> | ||
File: | File:Sora CT KHIIFM.png|Sora in his [[Form:Sora#Christmas Town version|Christmas Town costume]] | ||
File:Donald Duck CT KHIIFM.png|Donald in his [[Form:Donald Duck#Christmas Town version|Christmas Town costume]] | |||
File:Goofy CT KHIIFM.png|Goofy in his [[Form:Goofy#Christmas Town version|Christmas Town costume]] | |||
File: | |||
File: | |||
</gallery> | </gallery> | ||
=== | ==Enemies== | ||
===Heartless=== | |||
{|class="wikitable mw-collapsible mw-collapsed" | {|class="wikitable mw-collapsible mw-collapsed" | ||
! | ! | ||
| Line 189: | Line 179: | ||
| | | | ||
<gallery> | <gallery> | ||
File: | File:Shadow HT KH.png|[[Shadow]]<br>{{KH}}{{KHCoM}}{{KHD}}{{KHII}} | ||
File:Mega-Shadow KHD.png|[[Mega-Shadow]]<br>{{KHD}} | |||
File:Soldier HT KHII.png|[[Soldier]]<br>{{KHII}} | |||
File:Emerald Blues HT KHII.png|[[Emerald Blues]]<br>{{KHII}} | |||
File:Search Ghost HT KH.png|[[Search Ghost]]<br>{{KH}}{{KHCoM}} | |||
File:Hover Ghost KHD.png|[[Hover Ghost]]<br>{{KHD}} | |||
File:Carrier Ghost KHD.png|[[Carrier Ghost]]<br>{{KHD}} | |||
File:Wight Knight HT KH.png|[[Wight Knight]]<br>{{KH}}{{KHCoM}}{{KHII}} | |||
File:Gargoyle HT KH.png|[[Gargoyle]]<br>{{KH}}{{KHCoM}} | |||
File:Darkball HT KH.png|[[Darkball]]<br>{{KH}} | |||
File:Windstorm KHD.png|[[Windstorm]]<br>{{KHD}} | |||
File:Wizard HT KH.png|[[Wizard]]<br>{{KH}} | |||
File:Invisible KHD.png|[[Invisible]]<br>{{KHD}} | |||
File:Orcus KHD.png|[[Orcus]]<br>{{KHD}} | |||
File:White Mushroom HT KH.png|[[White Mushroom]]<br>{{KH}}{{KHCoM}} | |||
File:Black Fungus HT KH.png|[[Black Fungus]]<br>{{KH}}{{KHCoM}} | |||
File:Rare Truffle HT KH.png|[[Rare Truffle]]<br>{{KH}} | |||
File:Chimera KHFM.png|[[Chimera]]<br>{{FM}} | |||
File:Neoshadow HT KHII.png|[[Neoshadow]]<br>{{KHII}} | |||
File:Creeper Plant HT KHII.png|[[Creeper Plant]]<br>{{KHCoM}}{{KHII}} | |||
File:Trick Ghost HT KHII.png|{{c|Trick Ghost|KHII}}<br>{{KHII}} | |||
File:Skater Bomb KHD.png|[[Skater Bomb]]<br>{{KHD}} | |||
File:Detonator KHD.png|[[Detonator]]<br>{{KHD}} | |||
File:Bulky Vendor HT KHIIFM.png|[[Bulky Vendor]]<br>{{KHD}}{{KHII}} | |||
File:Rare Vendor KHD.png|[[Rare Vendor]]<br>{{KHD}} | |||
File:Driller Mole HT KHII.png|[[Driller Mole]]<br>{{KHII}} | |||
File:Icy Cube KHD.png|[[Icy Cube]]<br>{{KHD}}<!--Icy Cubes only appear in Halloween Town during KH 358/2 Days and therefore should feature a Days render.--> | |||
File:Snowy Crystal KHD.png|[[Snowy Crystal]]<br>{{KHD}} | |||
File:Graveyard HT KHII.png|[[Graveyard]]<br>{{KHII}} | |||
File:Toy Soldier HT KHII.png|[[Toy Soldier]]<br>{{KHII}} | |||
File:Armored Knight HT KHII.png|[[Armored Knight]]<br>{{KHII}} | |||
File:Tricky Monkey KHD.png|[[Tricky Monkey]]<br>{{KHD}} | |||
File:Creepworm KHD.png|[[Creepworm]]<br>{{KHD}} | |||
File:Dual Blade KHD.png|[[Dual Blade]]<br>{{KHD}} | |||
File:Chill Ripper KHD.png|[[Chill Ripper]]<br>{{KHD}} | |||
File:Shadow Glob KHD.png|[[Shadow Glob]]<br>{{KHD}} | |||
File:Prison Keeper KHII.png|'''[[Prison Keeper]]'''<br>{{KHII}} | |||
File:The Experiment KHII.png|'''[[The Experiment]]'''<br>{{KHII}} | |||
File:Mushroom XIII No. 2 HT KHIIFM.png|'''[[Mushroom XIII No. 2]]'''<br>{{FMII}} | |||
File:Tentaclaw KHD.png|'''[[Tentaclaw]]'''<br>{{KHD}} | |||
File:Leechgrave KHD.png|'''[[Leechgrave]]'''<br>{{KHD}} | |||
</gallery> | </gallery> | ||
|} | |} | ||
| Line 199: | Line 229: | ||
| | | | ||
<gallery> | <gallery> | ||
File:Lock, Shock, and Barrel KHII.png|'''{{ns|game|Lock, Shock, and Barrel}}''' | File:Lock, Shock, and Barrel KHII.png|'''{{ns|game|Lock, Shock, and Barrel}}'''<br>{{KH}}{{KHD}}{{KHII}} | ||
File:Oogie Boogie KHII.png|'''{{ns|game|Oogie Boogie}}''' | File:Oogie Boogie KHII.png|'''{{ns|game|Oogie Boogie}}'''<br>{{KH}}{{KHCoM}}{{KHII}} | ||
File:Oogie Boogie's Manor KH.png|'''{{ns|game|Oogie's Manor}}''' | File:Oogie Boogie's Manor KH.png|'''{{ns|game|Oogie's Manor}}'''<br>{{KH}} | ||
File:Xion Second Form KHD.png|'''{{ns|game|Xion|Xion (Second Form)}}'''<br>{{KHD}} | |||
</gallery> | </gallery> | ||
|} | |} | ||
{{KH1}} | {{KH1}} | ||
{{COM}} | {{COM}} | ||
{{KH2}} | {{KH2}} | ||
{{358}} | {{358}} | ||
{{MOM}} | |||
Latest revision as of 09:34, 19 December 2024
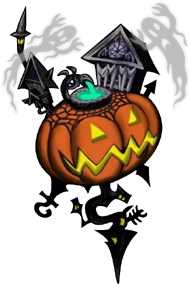
Halloween Town is a world from the Kingdom Hearts series, based on Tim Burton's 1993 classic stop-motion Disney film, The Nightmare Before Christmas. Jack Skellington, as the Pumpkin King, is the leader of Halloween Town. The Keyhole in this world is hidden underneath Oogie Boogie's manor.
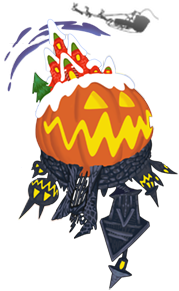
In Kingdom Hearts II, Christmas Town is introduced, located through a door in the Hinterlands. Although Christmas Town is its own world within the story of Halloween Town, it is recognized as a part of Halloween Town for gameplay purposes.
Development[edit]
In the original release of Kingdom Hearts, while any unopened treasure chest from Oogie's Manor will reappear in the ditch after the battle, the Red Trinity must be activated before the battle or it will be unobtainable. This bug was corrected in Kingdom Hearts Final Mix.
In the original version of Kingdom Hearts II, Christmas Town shares the same field and battle themes as Halloween Town. However, in Kingdom Hearts II Final Mix, Christmas Town instead has unique tracks: "What A Surprise?!" and "Happy Holidays!" as the respective field and battle themes. They both were included on the ninth disc of the Kingdom Hearts Original Soundtrack Complete.
Settings and Areas[edit]
Kingdom Hearts[edit]
Based on the holiday of Halloween, Halloween Town is in a constant state of night, lighted mainly by the bright full moon overhead. The area has a twisted, Gothic, and creepy appearance.
Sora, Donald, and Goofy arrive at the Guillotine Gate (ギロチン広場:入口 Girochin Hiroba: Iriguchi, lit. "Guillotine Square: Entrance"), a small circular area, where they notice their changed forms. In front of the party is a tiny path and a gate leading to the Guillotine Square (ギロチン広場 Girochin Hiroba), named after the deadly guillotine located there. In the middle of the area is a creepy fountain full of green water; along the left wall are several pumpkins in various sizes, as well as various ledges to climb on. Jack Skellington's house is also located here, as well as Dr. Finkelstein's lab, accessed through the Lab Entryway (研究所前 Kenkyūjo Mae, lit. "In Front of the Laboratory") further leading to his Research Lab (研究所 Kenkyūjo, lit. "Laboratory"). The insides of the lab is constructed entirely from metal plates, and is very dimly lit. Dr. Finkelstein is often found close to his operation table, or his enormous science book.
Near the square is the Graveyard (棺のある墓地 Hitsugi no Arubochi, lit. "Cemetery of Coffins"), which further connects to other areas. Through a coffin at the end, the party can travel to the Boneyard (集合墓地 Shūgō Bochi, lit. "Assembled Cemetery"), where a massive pumpkin can be found. After a quick interaction with The Mayor the pumpkin explodes, revealing a cat-shaped doorway behind it leading to Moonlight Hill (月の見える丘 Tsuki no Mieru Oka, lit. "Hill with a View of the Moon"). The area is decently big and filled with graves and pumpkins, with a sundae swirl-shaped hill in the middle. The Graveyard can also be directly accessed from here by lighting a platform on fire. Near the platform is spruce-shaped door that'll take Sora and party to the Cemetery, which is a small area filled with mausoleums and columbariums of all kinds of shapes.
By interacting with a specific grave at Moonlight Hill, the curly hill can be uncurled and will allow for crossing to the Bridge (吊り橋 Tsuribashi, lit. "Suspension Bridge"). The area consists of a small bridge and some green waters and sewers underneath it. Up ahead is gate leading to Oogie's Manor (ブギーの屋敷 Bugī no Yashiki).
The manor is huge with lots of twists and turns, and consists of wooden walkways and several odd-shaped buildings. At the top of the manor lies the Evil Playroom (小鬼たちの部屋 Saki-tachi no Heya, lit. "Little Demons' Room"), where Lock, Shock, and Barrel are fought. Below the main entrance is a green door leading to the Torture Chamber (ブギーの拷問室 Bugī no Gōmon-shitsu, lit. "Boogie's Torture Room"), where Oogie Boogie is fought. After defeating Oogie Boogie, he fuses with the manor, creating a gigantic version of himself. After Oogie's defeat and the manor's collapse, the site is renamed Manor Ruins (ブギーの屋敷跡 Bugī no Yashiki Ato, lit. "Remnants of Boogie's Manor"), which is large, open, and barren area, with some remnants from the manor spread around. By using the sewer tunnels down at the ruins, Sora can travel back to the Bridge, and by further traversing the sewer tunnels, he can travel back to Guillotine Square as well.
Kingdom Hearts Chain of Memories[edit]
In Kingdom Hearts Chain of Memories, a memory version of Halloween Town appears inside of Castle Oblivion. The world is explored through boxed-in areas inspired by Guillotine Square and the Graveyard. In cutscenes areas such as the Guillotine Square, the Research Lab, and the Cemetery are visited. The boss battle against Oogie Boogie takes place in an unnamed room heavily inspired by the Torture Chamber.
Kingdom Hearts II[edit]
In Kingdom Hearts II, the world is expanded with the addition of Christmas Town.
The Guillotine Square has been renamed to Halloween Town Square, and takes on a slightly different appearance: the fountain now squirts water that deals damage, the guillotine can come down to damage characters if they pass beneath it, the gates with presents behind them deal damage if Sora and company come near it, and nearby grates spew poisonous gas. Leaving Halloween Town Square will either take Sora to Dr. Finkelstein's Lab (フィンケルスタイン研究所 Finkerusutain Kenkyūjo, lit. "Finkelstein Laboratory") or to the Graveyard, now decorated with tall graves that can fall over and deal damage when hit. Heading right from the Graveyard leads to Moonlight Hill, now renamed Curly Hill (スパイラルヒル Supairaru Hiru, lit. "Spiral Hill"), where Prison Keeper is fought.
Continuing straight ahead at the Graveyard takes the party to the Hinterlands (ヒンターランド Hintārando), a quiet wood leading to a group of trees carved with various symbols of other holidays. These lead to towns of various holidays: Christmas, Easter, St. Patrick's Day, Thanksgiving, Independence Day, and Valentine's Day. However, Christmas Town's doorway is the only accessible one, and leads to Yuletide Hill (街外れ Machihazure no Oka, lit. "Hill on the Outskirts of Town"), which has a great view of the town below. Traveling down the hill takes Sora and company to Candy Cane Lane (クリスマス通り Kurisumasu-dōri, lit. "Christmas Street"), a plaza which features a carousel as its centerpiece that can spin and damage enemies. In Christmas Town, characters can visit Santa Claus himself in Santa's House (サンタの部屋 Santa no Heya, lit. "Santa's Room") and explore the Shipping & Receiving (配送エリア Haisō Eria, lit. "Delivery Area") and The Wrapping Room (梱包エリア Konpō Eria, lit. "Packing Area") of the Toy Factory (おもちゃ工場 Omocha Kōjō). Later in the game, Christmas Tree Plaza (クリスマス広場 Kurisumasu Hiroba, lit. "Christmas Square") becomes accessible, and is the location of a boss battle with The Experiment.
| Area Map in Kingdom Hearts II |
|---|
Kingdom Hearts 358/2 Days[edit]
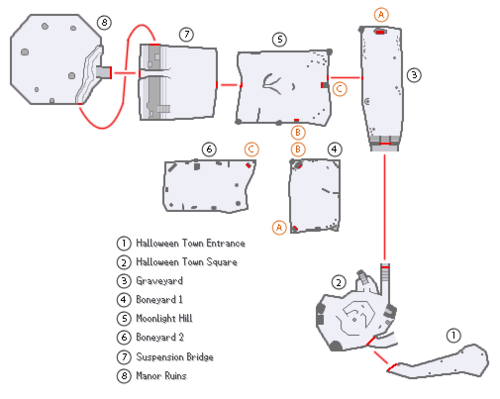
In Kingdom Hearts 358/2 Days the world is more or less exactly the same as in the first game, with Dr. Finkelstein's lab being the only inaccessible area. Roxas will arrive at Halloween Town Entrance (ギロチン広場入口 Girochin Hiroba Iriguchi, lit. "Guillotine Square Entrance"), which has a longer hallway now before reaching the Halloween Town Square (ギロチン広場 Girochin Hiroba, lit. "Guillotine Square"). From there Roxas can travel to the Graveyard (棺のある墓地 Hitsugi no Aru Bochi, lit. : Graveyard with Coffins") which lead into both Moonlight Hill (月の見える丘 Tsuki no Mieru Oka, lit. "Hill with Moon View"), and the Boneyard 1 (集合墓地1 Shūgō Bochi 1, lit. "Mass Grave 1"), with the latter also connecting to Moonlight Hill. At the hill is a spruce-shaped door which takes Roxas to Boneyard 2 (集合墓地2 Shūgō Bochi 2, lit. "Mass Grave 2"), which is a bit more spacious than it previously was when called Cemetery.
At Moonlight Hill there's also a ladder which can be used to access the Suspension Bridge (吊り橋 Tsuribashi), which further leads to the Manor Ruins (ブギーの屋敷跡 Bugī no Yashiki Ato, lit. "Boogie's Mansion Ruins"). The area has been cleaned up a bit since the first game, with the area only housing several big rocks now, as opposed to several leftovers from the Oogie's manor. By using the sewer tunnels Roxas can transport back to the Suspension Bridge.
| Area Map in Kingdom Hearts 358/2 Days |
|---|
Story[edit]
Kingdom Hearts[edit]
Sora, Donald, and Goofy arrive in Halloween Town and notice several Heartless immobile. They soon spot their true purpose after watching them introduce Jack Skellington. However, the Pumpkin King is not pleased with the results and decides to consult Dr. Finkelstein in an effort to make the Heartless even more terrifying. Sora, Donald, and Goofy follow him and watch as the two discuss a way to fit Jack's needs. They decide to give the Heartless a heart, but their first attempt fails to work. The doctor sends Jack to find Sally and the Mayor, as they have the missing ingredients. As they are searching for the ingredients, Lock, Shock, and Barrel learn about their plans and inform Oogie Boogie. The villain orders his henchman to steal the artificial heart, which they promptly do after the group return. Jack sends his ghost dog, Zero, to follow them and they, in turn, pursue the spirit.
Their hunt leads them to Oogie Boogie's Manor where they defeat the thieves, who point them toward the Torture Chamber hidden underneath the manor. There, they find Oogie Boogie, who devours the Doctor's experimental heart in a bid to control the Heartless. Due to the artificial state of the heart, not many Heartless answer the call and, in a fit of rage, Oogie Boogie attacks them with every instrument in the Torture Chamber. The group prevail in defeating him before departing the manor. However, Oogie Boogie fuses with his manor to exact revenge. He is defeated once more by the combined powers of Sora, Donald, Goofy, and Jack. Returning to the lab, Jack decides to cancel the Heartless Halloween festival and invites Sora to return next year.
Kingdom Hearts Chain of Memories[edit]
Inside the Halloween Town created in Castle Oblivion, Sora and company immediately run into Jack, who is attempting to get rid of the Heartless due to their attacking instead of just scaring. Jack goes to consult Dr. Finkelstein about it while Sora, Donald and Goofy follow. Once at the lab, Dr. Finkelstein reveals his latest invention: a potion to recover a person's "true memories", ones unaffected by the passage of time. Somehow, the potion is causing the Heartless to invade. While Dr. Finkelstein is certain he can solve the problem, the potion then appears to have been stolen. Sora and Jack team up to recover it, believed to be in the hands of Sally. They soon find her with the potion, as she stole it out of fear of what could happen if someone tried consuming it. That prospect intrigues Oogie Boogie, who leaps out from nearby and swipes the potion, planning to drink it up and see what terrors he can unleash of Halloween Town. Sora and the others give chase, but are too late to stop Oogie from drinking the formula. Oogie's true memories send him into a deep state of fear and he fights the group, only to be defeated. Meeting at the lab, Sora declines to try the remaining formula, remembering he promised Axel he'd try and recover his memories on his own.
Later, Riku enters a simulation of Halloween Town in the Basement and encounters Oogie, whom he promptly defeats.
Kingdom Hearts 358/2 Days[edit]
During his first mission to Halloween Town (Mission 42, Day 149), Roxas encounters Jack Skellington, who ponders how to make Halloween scarier and more shocking than ever before. Roxas leaves him to think, and continues on his mission to collect hearts. On Roxas's next few missions to Halloween Town, he finds there are fewer and fewer Heartless, making heart collecting more difficult. Roxas uses Zero, who is able to locate hidden Heartless, to help him finish his mission. After a few more visits to Halloween Town, Roxas grows annoyed of Lock, Shock, and Barrel, who had been playing tricks on him, and attempts to stop them. The trio attack Roxas, who defeats them, and they promise not to play tricks on him anymore.
Barrel almost divulges information on what they've been doing, but Lock quiets him and the trio escape. Disregarding their promise, the three play the same trick on Roxas immediately on his next arrival. After completing his mission, Roxas tries to leave, but is attacked by a Tentaclaw. He defeats it and RTC's. The Organization reports that the Heartless population in Halloween Town is unusually low, so Roxas is sent to investigate. When he arrives at Guillotine Plaza, a Creepworm appears, fleeing from something. Another Tentaclaw sprouts from the ground and swallows the Creepworm. Roxas searches for the source outside of town and sees Lock, Shock, and Barrel escaping over the wall to Boogie's home. He defeats the Tentaclaws at Curly Hill, before taking on the source of the cannibalistic appendages, the Leechgrave, at Manor Ruins. However, Jack, watching from outside the zone of battle, likes the idea of a Halloween with "a black cloak and black tentacles," and creates a scarecrow in Roxas's image.
During Mission 79, Roxas teams up with Xigbar to eliminate a Chill Ripper, which appears by the Suspension Bridge.
During Mission 87, Roxas is dispatched to battle three Windstorms in Guillotine Plaza.
On his last mission to Halloween Town (Mission 88), Roxas begins to worry about Xion, and resolves to finish his mission as quickly as possible and return to the castle to speak with her. As he searches through Halloween Town, Roxas is unable to find any Heartless. He decides to check outside of town, and encounters what he believes is an Orcus. The Heartless proves hard to handle, but Axel arrives and intervenes, as the Orcus is revealed to be Xion. Axel explains that the battle was a "setup" to get the two to fight to the death, disposing of the weaker one. They leave for Twilight Town, disturbed by the Organization's intentions.
On Day 357, Xion transports Roxas to Manor Ruins, where Roxas does battle with Xion's second form.
Kingdom Hearts II[edit]
By the time Sora, Donald and Goofy return to Halloween Town, it has been decorated for Christmas. They run into Jack, who appoints them to act as bodyguards so he can bring Santa Claus to see all his work. Maleficent arrives shortly afterwards and recruits Lock, Shock and Barrel as minions to destroy Christmas Town. However, when Jack's group arrive to see Santa, Maleficent changes her plans to getting revenge on Sora and the others first. Upon hearing Oogie Boogie had been destroyed by Sora, she brings him back to assist in ruining Christmas. Maleficent and Oogie kidnap Santa, leaving the Prison Keeper behind to assist Lock, Shock and Barrel in delaying the heroes. Sora and co. destroy the Heartless and learn of Oogie's return. Sally finds them and informs them that Santa has been captured.
In Christmas Town, Maleficent prepares to turn Santa into a Heartless, but is then dismissed by Oogie. Sora and co. arrive and fight Oogie, who has converted the toy factory into a Heartless-producing machine. Beating Oogie, the bag of bugs springs leaks and Donald steps on the bug serving as Oogie's brain. Though Jack wishes to continue his plan to help Santa, Santa tells Jack that he is needed to manage Halloween just as Christmas needs him, which Jack accepts and decides to look for new ways to create fear. Jack's Santa suit glows and opens a new Gate, which Sora promptly unlocks, allowing passage to the Pride Lands.
On their second visit, Sora, Donald, and Goofy learn from Jack that Christmas presents are being stolen, and resolve to find out who and to what end. After discovering that Lock, Shock, and Barrel and the Heartless are not to blame, they visit Santa and request to make Decoy Presents to draw out the thief. After hiding in a huge box, they surprise the thief, which happens to be Dr. Finkelstein's Experiment. A battle goes on with the raging machine, but Sora and co. come out on top, learning from Dr. Finkelstein later that the Experiment wished only to know the happiness that Christmas brings. Jack, all the while, thinks the box makes the magic, but learns from Sora that what matters is the principle of giving. After this, Jack and Sally share a romantic moment in the snow, with Donald and Goofy comforting Sora about giving Kairi a real Christmas present, one that comes from his heart.
Some time after Xemnas's defeat, Jack is seen discussing plans for the next Halloween with everyone in Dr. Finkelstein's lab.
Characters[edit]
Christmas Elf (Male)
[KH II]Christmas Elf (Female)
[KH II]
Character Design[edit]
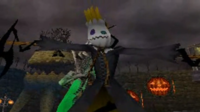
During their time in Halloween Town, Sora, Donald and Goofy each wear a monster costume in order to suit the town's season. Sora's attire is reminiscent of vampires while Donald and Goofy resemble a mummy and Frankenstein's monster, respectively. Other characters, such as Riku, Mickey and Maleficent, retain their normal outfits but are shaded with a darker hue. In Kingdom Hearts II, when Sora uses Drive Forms, his mask changes shape: a Bomb-esque creature for Valor Form, a Blue Mage for Wisdom Form, an unevenly-stitched fusion of the Valor Form and Wisdom Form masks for Master Form, a crown for Final Form, a Shadow for Antiform, and a checkered heart for Limit Form.
Sora's Halloween Town costume
Donald's Halloween Town costume
Goofy's Halloween Town costume
While in Christmas Town in Kingdom Hearts II Final Mix, Sora, Donald, and Goofy lose their Halloween Town garb and gain Christmas-themed forms instead. Sora retains his vampire form, but loses his vampire fangs, and his garb is replaced by a black Santa suit. When using Drive Forms, his hat and the back of his shirt gain the form's respective sigil. Meanwhile, Donald and Goofy completely lose all traces of their Halloween Town forms, becoming a snowman and reindeer, respectively.
Sora in his Christmas Town costume
Donald in his Christmas Town costume
Goofy in his Christmas Town costume
Enemies[edit]
Heartless[edit]
|
|
Other[edit]
|
|
| Kingdom Hearts |
|---|
| Characters |
| Party members |
| Sora - Donald Duck - Goofy Tarzan - Aladdin - Ariel - Jack Skellington - Peter Pan - Beast |
| Summons |
| Simba - Genie - Dumbo - Bambi - Tinker Bell - Mushu |
| Antagonists |
| Ansem - Clayton Villains Maleficent - Riku - Hades - Captain Hook - Oogie Boogie - Ursula - Jafar |
| Non-playable characters |
| 99 Puppies - Abu - Aerith - Alice - Aurora - Bathtub - Belle - Card Soldiers - Carpet - Cave of Wonders Guardian - Cerberus - Chernabog - Cheshire Cat - Chip and Dale - Cid - Cinderella - Cloud - Crocodile - Daisy Duck - Dark Figure - Doorknob - Dr. Finkelstein - Eeyore - Enchanted Brooms - Fairy Godmother - Flotsam and Jetsam - Flounder - Flower - Geppetto - Hercules - Huey, Dewey, and Louie - Iago - Ice Titan - Jane Porter - Jasmine - Jiminy Cricket - Kairi - Kairi's Grandma - Kala - Kerchak - King Triton - Lock, Shock, and Barrel - Merlin - Mickey Mouse - Minnie Mouse - Moogles - Mr. Smee - Owl - Philoctetes - Piglet - Pinocchio - Pluto - Pongo and Perdita - Queen of Hearts - Rabbit - Rock Titan - Roo - Roxas - Sabor - Sally - Sebastian - Selphie - Sephiroth - Snow White - Squall Leonhart - Terk - The Mayor - The Peddler - The Shark - Tidus - Tigger - Wakka - Wendy - White Rabbit - Winnie the Pooh - Yuffie - Xemnas - Zero |
| Locations |
| Worlds |
| Destiny Islands - Disney Castle - Traverse Town - Wonderland - Olympus Coliseum - Deep Jungle - 100 Acre Wood - Agrabah - Monstro - Atlantica - Halloween Town - Neverland - Hollow Bastion - End of the World |
| Places |
| Dive to the Heart |
| Terms |
| Ansem's Reports - Door to Darkness - Final Keyhole - Keyblade - Keyhole - Kingdom Hearts - Mickey's Letter - Postcard - Princesses of Heart - The End - Trinity Mark |
| Music |
| Kingdom Hearts Original Soundtrack - Kingdom Hearts Original Soundtrack Complete - Simple and Clean |
| Archives |
| Accessories - Artwork - Bosses - Enemies - Items - Keyblades - Other Weapons - Removed content |
| Kingdom Hearts Chain of Memories |
|---|
| Characters |
| Party members |
| Sora - Riku - Donald Duck - Goofy - Mickey Mouse Aladdin - Ariel - Jack Skellington - Peter Pan - Beast |
| Summons |
| Simba - Genie - Cloud - Dumbo - Bambi - Tinker Bell - Mushu |
| Antagonists |
| Ansem Organization XIII Marluxia - Lexaeus - Larxene - Vexen - Zexion - Axel - Riku Replica Villains Hades - Jafar - Ursula - Oogie Boogie - Captain Hook - Maleficent |
| Non-playable characters |
| Aerith - Alice - Ansem the Wise - Belle - Card Soldiers - Cave of Wonders Guardian - Cheshire Cat - Cid - Dark Figure - Dr. Finkelstein - Eeyore - Flounder - Geppetto - Hercules - Iago - Jasmine - Jiminy Cricket - Kairi - Moogles - Naminé - Owl - Philoctetes - Piglet - Pinocchio - Pluto - Queen of Hearts - Rabbit - Roo - Sally - Sebastian - Selphie - Squall Leonhart - Tidus - Tigger - Wakka - Wendy - White Rabbit - Winnie the Pooh - Yuffie |
| Locations |
| Worlds |
| Traverse Town - Agrabah - Olympus Coliseum - Wonderland - Monstro - Halloween Town - Atlantica - Neverland - 100 Acre Wood - Hollow Bastion - Twilight Town - Destiny Islands - Castle Oblivion |
| Terms |
| Attack Card - Card break - Cards - Enemy Card - Friend Card - Gimmick Card - Item Card - Keyblade - Wayfinder - Magic Card - Map Card - Memory - Pod - Premium Cards - Reload Card - Replica - Sleight - Special Card - Summon Card - World Cards - The End |
| Music |
| Kingdom Hearts Original Soundtrack Complete - Simple and Clean |
| Archives |
| Artwork - Bosses - Enemies - Keyblades - Removed content |
| Kingdom Hearts II |
|---|
| Characters |
| Party members |
| Roxas - Sora - Donald Duck - Goofy Fa Mulan - Beast - Auron - Jack Sparrow - Aladdin - Jack Skellington - Simba - Tron - Riku |
| Summons |
| Chicken Little - Genie - Stitch - Peter Pan |
| Antagonists |
| Organization XIII Xemnas - Xigbar - Xaldin - Saïx - Axel - Demyx - Luxord Villains Maleficent - Pete - Hades - Ursula - Hector Barbossa - Jafar - Oogie Boogie - Scar Shan-Yu - Master Control Program - Sark |
| Non-playable characters |
| Abu - Aerith - Ansem the Wise - Ariel - Ariel's Sisters - Auron - Bathtub - Belle - Biggs - Captain Pete - Carpet - Cave of Wonders Guardian - Cerberus - Chien Po, Ling, and Yao - Chip - Chip and Dale - Christmas Elves - Cid - Clara Cluck - Clarabelle Cow - Cloud - Cogsworth - Daisy Duck - Dark Figure - Dr. Finkelstein - Eeyore - Elizabeth Swann - Enchanted Brooms - Flora, Fauna, and Merryweather - Flotsam and Jetsam - Flounder - Fujin - Gopher - Gullwings - Hayabusa - Hayner - Hercules - Horace Horsecollar - Hostile Program - Huey, Dewey, and Louie - Hydra - Iago - Jasmine - Jessie - Jiminy Cricket - Kairi - Kanga - King Triton - Li Shang - Lock, Shock, and Barrel - Lumière - Maleficent's Raven - Megara - Merlin - Mickey Mouse - Minnie Mouse - Moogles - Mrs. Potts - Mufasa - Mushu - Nala - Naminé - Olette - Owl - Pain and Panic - Pegasus - Pence - Philoctetes - Piglet - Pluto - Prince Eric - Pumbaa - Rabbit - Rafiki - Raijin - Reindeer - Rock Titan - Roo - Sally - Santa Claus - Scrooge McDuck - Sebastian - Seifer - Selphie - Sephiroth - Setzer - Shenzi, Banzai, and Ed - Simba and Nala's cub - Squall Leonhart - Terra-Xehanort - The Emperor - The Experiment - The Ghost of Scar - The Mayor - The Peddler - Tifa - Tigger - Timon - Tinker Bell - Undead Pirates - Vivi - Wallace - Wantz - Wardrobe - William Turner - Winnie the Pooh - Wedge - Yen Sid - Yuffie - Zero |
| Locations |
| Worlds |
| Twilight Town - Destiny Islands - Hollow Bastion/Radiant Garden - The Land of Dragons - Beast's Castle - 100 Acre Wood - Olympus Coliseum - Disney Castle - Timeless River - Atlantica - Port Royal - Agrabah - Halloween Town - Pride Lands - Space Paranoids - The World That Never Was - End of Sea |
| Places |
| The Other Twilight Town - Dive to the Heart - Mysterious Tower - Kingdom Hearts |
| Terms |
| Cornerstone of Light - Drive Form - Gate - Hollow Bastion Restoration Committee - Kairi's Letter - Keyblade - Kingdom Hearts Encoder - Organization XIII - Princesses of Heart - Reaction Command - Secret Ansem Report - Sidecar Glider - Skateboard - The End - Twilight Town Disciplinary Committee |
| Music |
| Kingdom Hearts II Original Soundtrack - Kingdom Hearts Original Soundtrack Complete - Sanctuary |
| Archives |
| Accessories - Artwork - Bosses - Enemies - Items - Keyblades - Other Weapons - Songs - Removed content |
| Kingdom Hearts 358/2 Days |
|---|
| Characters |
| Party members |
| Roxas - Axel - Demyx - Larxene - Lexaeus - Luxord - Marluxia - Saïx - Vexen - Xaldin - Xemnas - Xigbar - Xion - Zexion |
| Secret characters |
| Donald Duck - Goofy - King Mickey - Riku - Sora |
| Non-playable characters |
| Abu - Aladdin - Ansem the Wise - Beast - Belle - Captain Hook - Card Soldiers - Carpet - Cave of Wonders Guardian - Cheshire Cat - Cogsworth - Dark Figure - Doorknob - Dr. Finkelstein - Genie - Hayner - Hercules - Jack Skellington - Jasmine - Kairi - Lock, Shock, and Barrel - Lumière - Moogle - Mr. Smee - Naminé - Olette - Pence - Pete - Philoctetes - Queen of Hearts - Tinker Bell - White Rabbit - Zero |
| Locations |
| Worlds |
| Agrabah - Beast's Castle - Castle Oblivion - Destiny Islands - Halloween Town - Neverland - Olympus Coliseum - The World That Never Was - Twilight Town - Wonderland |
| Places |
| The Other Twilight Town |
| Terms |
| Heart - Heartless - Keyblade - Kingdom Hearts - Mission Mode - Nobody - Organization XIII - Organization XIII Device - Replica - Replica Program - Roxas's Diary - Sea-salt ice cream - The End |
| Music |
| Kingdom Hearts Birth by Sleep & 358/2 Days Original Soundtrack - Sanctuary |
| Archives |
| Rings - Artwork - Bosses - Enemies - Keyblades - Other Weapons - Removed content |
| Kingdom Hearts Melody of Memory |
|---|
| Characters |
| Party members |
| Kairi - Sora - Roxas - Aqua - Riku Donald Duck - Goofy - Axel - Xion - Terra - Ventus - Meow Wow - Komory Bat - Mickey Mouse Hercules - Aladdin - Ariel - Peter Pan - Beast - Fa Mulan - Simba - Stitch |
| Antagonists |
| Xehanort - Ansem, Seeker of Darkness - Xemnas - Maleficent |
| Non-playable characters |
| Aeleus - Ansem the Wise - Even - Fairy Godmother - Ienzo - Nameless Star - Terra-Xehanort - Yen Sid |
| Locations |
| Worlds |
| Mysterious Tower - Radiant Garden - The Final World |
| Terms |
| An Oath to Return - Another Key - Key Art - Keyblade - Museum - Music Stage - Rhythm Points - Story Scene - The End - VS Battle - World Tour |
| Music |
| Kingdom Hearts Melody of Memory - Special Disc - Unnamed tracks |
| Archives |
| Artwork - Bosses - Enemies - Items - Trophy - Songs |
![Oogie Boogie [KH I][KH CoM][KH II]](https://kh.wiki.gallery/images/thumb/8/89/Oogie_Boogie_KHII.png/99px-Oogie_Boogie_KHII.png)
![Dr. Finkelstein [KH I][KH CoM][KH Days][KH II]](https://kh.wiki.gallery/images/thumb/d/d2/Dr._Finklestein_KH.png/61px-Dr._Finklestein_KH.png)
![Zero [KH I][KH Days][KH II]](https://kh.wiki.gallery/images/thumb/9/9e/Zero_KHII.png/120px-Zero_KHII.png)
![Lock [KH I][KH Days][KH II]](https://kh.wiki.gallery/images/thumb/2/27/Lock_KHII.png/86px-Lock_KHII.png)
![Shock [KH I][KH Days][KH II]](https://kh.wiki.gallery/images/thumb/e/ef/Shock_KHII.png/51px-Shock_KHII.png)
![Barrel [KH I][KH Days][KH II]](https://kh.wiki.gallery/images/thumb/7/74/Barrel_KHII.png/120px-Barrel_KHII.png)
![The Mayor [KH I][KH II]](https://kh.wiki.gallery/images/thumb/f/fc/The_Mayor_KHII.png/57px-The_Mayor_KHII.png)
![Bathtub [KH I][KH II]](https://kh.wiki.gallery/images/thumb/6/65/Bathtub_KHII.png/76px-Bathtub_KHII.png)
![Jack's Reindeer [KH II]](https://kh.wiki.gallery/images/thumb/4/43/Reindeer_KHII.png/120px-Reindeer_KHII.png)
![Santa Claus [KH II]](https://kh.wiki.gallery/images/thumb/4/43/Santa_Claus_KHII.png/105px-Santa_Claus_KHII.png)
![Christmas Elf (Male) [KH II]](https://kh.wiki.gallery/images/thumb/7/7e/Christmas_Elf_%28Male%29_KHII.png/54px-Christmas_Elf_%28Male%29_KHII.png)
![Reindeer [KH II]](https://kh.wiki.gallery/images/thumb/5/5e/Santa%27s_Reindeer_KHII.png/78px-Santa%27s_Reindeer_KHII.png)
![The Experiment [KH II]](https://kh.wiki.gallery/images/thumb/9/93/The_Experiment_KHII.png/92px-The_Experiment_KHII.png)
![Gumo [KH II]](https://kh.wiki.gallery/images/thumb/e/eb/Moogle_KH.png/54px-Moogle_KH.png)



![Shadow [KH I][KH CoM][KH Days][KH II]](https://kh.wiki.gallery/images/thumb/7/71/Shadow_HT_KH.png/111px-Shadow_HT_KH.png)
![Mega-Shadow [KH Days]](https://kh.wiki.gallery/images/thumb/2/2a/Mega-Shadow_KHD.png/114px-Mega-Shadow_KHD.png)
![Soldier [KH II]](https://kh.wiki.gallery/images/thumb/8/86/Soldier_HT_KHII.png/79px-Soldier_HT_KHII.png)
![Emerald Blues [KH II]](https://kh.wiki.gallery/images/thumb/6/6a/Emerald_Blues_HT_KHII.png/59px-Emerald_Blues_HT_KHII.png)
![Search Ghost [KH I][KH CoM]](https://kh.wiki.gallery/images/thumb/7/75/Search_Ghost_HT_KH.png/115px-Search_Ghost_HT_KH.png)
![Hover Ghost [KH Days]](https://kh.wiki.gallery/images/thumb/a/ac/Hover_Ghost_KHD.png/120px-Hover_Ghost_KHD.png)
![Carrier Ghost [KH Days]](https://kh.wiki.gallery/images/thumb/3/39/Carrier_Ghost_KHD.png/97px-Carrier_Ghost_KHD.png)
![Wight Knight [KH I][KH CoM][KH II]](https://kh.wiki.gallery/images/thumb/2/2e/Wight_Knight_HT_KH.png/120px-Wight_Knight_HT_KH.png)
![Gargoyle [KH I][KH CoM]](https://kh.wiki.gallery/images/thumb/e/e0/Gargoyle_HT_KH.png/108px-Gargoyle_HT_KH.png)
![Darkball [KH I]](https://kh.wiki.gallery/images/thumb/b/b7/Darkball_HT_KH.png/120px-Darkball_HT_KH.png)
![Windstorm [KH Days]](https://kh.wiki.gallery/images/thumb/9/9e/Windstorm_KHD.png/120px-Windstorm_KHD.png)
![Wizard [KH I]](https://kh.wiki.gallery/images/thumb/e/eb/Wizard_HT_KH.png/88px-Wizard_HT_KH.png)
![Invisible [KH Days]](https://kh.wiki.gallery/images/thumb/9/9a/Invisible_KHD.png/85px-Invisible_KHD.png)
![Orcus [KH Days]](https://kh.wiki.gallery/images/thumb/a/ab/Orcus_KHD.png/119px-Orcus_KHD.png)
![White Mushroom [KH I][KH CoM]](https://kh.wiki.gallery/images/thumb/1/10/White_Mushroom_HT_KH.png/66px-White_Mushroom_HT_KH.png)
![Black Fungus [KH I][KH CoM]](https://kh.wiki.gallery/images/thumb/7/7a/Black_Fungus_HT_KH.png/70px-Black_Fungus_HT_KH.png)
![Rare Truffle [KH I]](https://kh.wiki.gallery/images/thumb/6/6c/Rare_Truffle_HT_KH.png/64px-Rare_Truffle_HT_KH.png)
![Chimera [KH I FM]](https://kh.wiki.gallery/images/thumb/2/24/Chimera_KHFM.png/120px-Chimera_KHFM.png)
![Neoshadow [KH II]](https://kh.wiki.gallery/images/thumb/d/d2/Neoshadow_HT_KHII.png/102px-Neoshadow_HT_KHII.png)
![Creeper Plant [KH CoM][KH II]](https://kh.wiki.gallery/images/thumb/d/da/Creeper_Plant_HT_KHII.png/83px-Creeper_Plant_HT_KHII.png)
![Trick Ghost [KH II]](https://kh.wiki.gallery/images/thumb/3/32/Trick_Ghost_HT_KHII.png/98px-Trick_Ghost_HT_KHII.png)
![Detonator [KH Days]](https://kh.wiki.gallery/images/thumb/f/f8/Detonator_KHD.png/59px-Detonator_KHD.png)
![Bulky Vendor [KH Days][KH II]](https://kh.wiki.gallery/images/thumb/c/c4/Bulky_Vendor_HT_KHIIFM.png/64px-Bulky_Vendor_HT_KHIIFM.png)
![Rare Vendor [KH Days]](https://kh.wiki.gallery/images/thumb/b/bb/Rare_Vendor_KHD.png/64px-Rare_Vendor_KHD.png)
![Driller Mole [KH II]](https://kh.wiki.gallery/images/thumb/f/f1/Driller_Mole_HT_KHII.png/120px-Driller_Mole_HT_KHII.png)
![Icy Cube [KH Days]](https://kh.wiki.gallery/images/thumb/7/73/Icy_Cube_KHD.png/101px-Icy_Cube_KHD.png)
![Snowy Crystal [KH Days]](https://kh.wiki.gallery/images/thumb/b/b8/Snowy_Crystal_KHD.png/101px-Snowy_Crystal_KHD.png)
![Graveyard [KH II]](https://kh.wiki.gallery/images/thumb/7/78/Graveyard_HT_KHII.png/120px-Graveyard_HT_KHII.png)
![Toy Soldier [KH II]](https://kh.wiki.gallery/images/thumb/c/c4/Toy_Soldier_HT_KHII.png/87px-Toy_Soldier_HT_KHII.png)
![Armored Knight [KH II]](https://kh.wiki.gallery/images/thumb/a/ad/Armored_Knight_HT_KHII.png/120px-Armored_Knight_HT_KHII.png)
![Tricky Monkey [KH Days]](https://kh.wiki.gallery/images/thumb/b/b6/Tricky_Monkey_KHD.png/120px-Tricky_Monkey_KHD.png)
![Creepworm [KH Days]](https://kh.wiki.gallery/images/thumb/4/4e/Creepworm_KHD.png/120px-Creepworm_KHD.png)
![Dual Blade [KH Days]](https://kh.wiki.gallery/images/thumb/9/92/Dual_Blade_KHD.png/120px-Dual_Blade_KHD.png)
![Chill Ripper [KH Days]](https://kh.wiki.gallery/images/thumb/0/08/Chill_Ripper_KHD.png/88px-Chill_Ripper_KHD.png)
![Shadow Glob [KH Days]](https://kh.wiki.gallery/images/thumb/c/c6/Shadow_Glob_KHD.png/120px-Shadow_Glob_KHD.png)
![Prison Keeper [KH II]](https://kh.wiki.gallery/images/thumb/5/5f/Prison_Keeper_KHII.png/100px-Prison_Keeper_KHII.png)
![Mushroom XIII No. 2 [KH II FM]](https://kh.wiki.gallery/images/thumb/4/4b/Mushroom_XIII_No._2_HT_KHIIFM.png/67px-Mushroom_XIII_No._2_HT_KHIIFM.png)
![Tentaclaw [KH Days]](https://kh.wiki.gallery/images/thumb/6/63/Tentaclaw_KHD.png/86px-Tentaclaw_KHD.png)
![Leechgrave [KH Days]](https://kh.wiki.gallery/images/thumb/0/04/Leechgrave_KHD.png/120px-Leechgrave_KHD.png)
![Lock, Shock, and Barrel [KH I][KH Days][KH II]](https://kh.wiki.gallery/images/thumb/b/bb/Lock%2C_Shock%2C_and_Barrel_KHII.png/110px-Lock%2C_Shock%2C_and_Barrel_KHII.png)
![Oogie's Manor [KH I]](https://kh.wiki.gallery/images/thumb/4/4a/Oogie_Boogie%27s_Manor_KH.png/120px-Oogie_Boogie%27s_Manor_KH.png)
![Xion (Second Form) [KH Days]](https://kh.wiki.gallery/images/thumb/b/b5/Xion_Second_Form_KHD.png/101px-Xion_Second_Form_KHD.png)