Pain and Panic Cup: Difference between revisions
KrytenKoro (talk | contribs) No edit summary |
(correct info after seeing the video.) |
||
| (51 intermediate revisions by 21 users not shown) | |||
| Line 1: | Line 1: | ||
{{ | {{cleanup|Check ''Kingdom Hearts II Final Mix'' rewards. Add strategy on how to complete the Jiminy requirements easiest.}}{{game|KH2|FM2}} | ||
{{tab|o-info|360px}} | |||
{{tab|Pain and Panic Cup}} | |||
{{Coliseum | {{Coliseum | ||
|name= | |name=Pain and Panic Cup | ||
|katakana=ペイン&パニックカップ | |||
|romaji=Pein & Panikku Kappu | |||
|jpname=Pain & Panic Cup | |||
|fr=Coupe Peine et Panique | |fr=Coupe Peine et Panique | ||
|image=[[File: | |image=[[File:Pain and Panic Cup Trophy KHII.png|x300px]] | ||
| | |rounds=10 | ||
|level=20{{KHII}}<br>25{{FMII}} | |||
|reward=[[Lucky Ring]]{{KHII}}<br>[[Protect Belt]]{{FMII}}<br>[[Serenity Stone]] | |reward=[[Lucky Ring]]{{KHII}}<br>[[Protect Belt]]{{FMII}}<br>[[Serenity Stone]] | ||
|unlock=Clear [[Disney Castle]]. | |unlock=Clear [[Disney Castle]]. | ||
| | |rules=Fight alongside your friends.<br>The Drive Gauge can't be used, but Limits consume less MP than usual.<br><br>No experience is gained. | ||
|missions=Give it a try<br>Win with a score of 2,000 or more | |||
|round1=1 | |||
|enem1=Shadow x 5<br>Hook Bat x 5 | |enem1=Shadow x 5<br>Hook Bat x 5 | ||
| | |round2=2 | ||
|enem2=Large Body x | |enem2=Large Body x 1<br>Minute Bomb x 6 | ||
| | |round3=3 | ||
|enem3=Soldier x 2<br>Rabid Dog x 5 | |enem3=Soldier x 2<br>Rabid Dog x 5 | ||
| | |round4=4 | ||
|enem4=Shadow x 4<br>Hot Rod x 2 | |enem4=Shadow x 4<br>Hot Rod x 2 | ||
| | |round5=5 | ||
|enem5=Hook Bat x 4<br>Rapid Thruster x 5<br>Bolt Tower x 2 | |enem5=Hook Bat x 4<br>Rapid Thruster x 5<br>Bolt Tower x 2 | ||
| | |round6=6 | ||
|enem6=Minute Bomb x | |enem6=Minute Bomb x 5<br>Gargoyle Knight x 3<br>Lance Soldier x 4 | ||
| | |round7=7 | ||
|enem7=Soldier x 2<br>Rabid Dog x 1<br>Aeroplane x 6<br>Assault Rider | |enem7=Soldier x 2<br>Rabid Dog x 1<br>Aeroplane x 6<br>Assault Rider x 2 | ||
| | |round8=8 | ||
|enem8=Rapid Thruster x | |enem8=Rapid Thruster x 128 | ||
| | |round9=9 | ||
|enem9=Creeper Plant x 4<br>Gargoyle Warrior x 2 | |enem9=Creeper Plant x 4<br>Gargoyle Warrior x 2 | ||
| | |round10=10 | ||
|enem10=Leon<br>Yuffie | |enem10=Leon<br>Yuffie | ||
|style=kh2 | |||
}} | }} | ||
The '''Pain and Panic Cup''' is the first tournament at the [[Underdrome]] in ''[[Kingdom Hearts II]]'', and all of the enemies within are set at level 20. | {{tab|c}}{{tab|Paradox}} | ||
{{Coliseum | |||
|name=Pain and Panic Paradox Cup | |||
|katakana=裏ペイン&パニックカップ | |||
|romaji=Ura Pein & Panikku Kappu | |||
|jpname=Inverse Pain & Panic Cup | |||
|image=[[File:Pain and Panic Cup Trophy KHII.png|x300px]] | |||
|rounds=10 | |||
|level=60 | |||
|unlock=Clear [[Goddess of Fate Cup]] | |||
|rules=Fight alongside your friends.<br>The Drive Gauge can't be used, but Limits consume less MP than usual.<br><br>No experience is gained. | |||
|missions=Give it a try<br>Win with a score of 2,500 or more | |||
|round1=1 | |||
|enem1=Shadow x 5<br>Hook Bat x 5 | |||
|round2=2 | |||
|enem2=Large Body x 1<br>Minute Bomb x 6 | |||
|round3=3 | |||
|enem3=Soldier x 2<br>Rabid Dog x 5 | |||
|round4=4 | |||
|enem4=Shadow x 4<br>Hot Rod x 2 | |||
|round5=5 | |||
|enem5=Hook Bat x 4<br>Rapid Thruster x 5<br>Bolt Tower x 2 | |||
|round6=6 | |||
|enem6=Minute Bomb x 5<br>Gargoyle Knight x 3<br>Lance Soldier x 4 | |||
|round7=7 | |||
|enem7=Soldier x 2<br>Rabid Dog x 1<br>Aeroplane x 6<br>Assault Rider x 2 | |||
|round8=8 | |||
|enem8=Rapid Thruster x 128 | |||
|round9=9 | |||
|enem9=Creeper Plant x 4<br>Gargoyle Warrior x 2 | |||
|round10=10 | |||
|enem10=Leon<br>Yuffie | |||
|style=kh2 | |||
}} | |||
{{tab|c}}{{tab|c}} | |||
The '''Pain and Panic Cup''' is the first tournament at the [[Underdrome]] in ''[[Kingdom Hearts II]]'', and all of the enemies within are set at level 20{{KHII}}/25{{FMII}}. Likewise, the '''Pain and Panic Paradox Cup''' is the first of the Paradox Cups, and is essentially the same cup with all of the enemies levels brought up to 60. Both cups forbid the use of [[Drive Form]]s, but reduce the MP consumption of [[Limit]]s. Upon completion of the normal cup, [[Pain and Panic]] put the titular cup on display in the [[Underworld Entrance]]. | |||
==Strategy== | ==Strategy== | ||
; | ;Round 4 | ||
Sora should use magic against the Hot Rods so that he can defeat them while staying out of their range. If they start to run into him, remember to guard their attacks and use Counterguard. This will leave any Hot Rods hit by the Counter open for attacks. | |||
; | ;Round 8 | ||
Although Sora only needs to stay alive for 60 seconds to complete this match, it is an excellent opportunity to amass points by using Magnet and Thunder on the Rapid Thrusters | |||
;Round 10 | |||
Sora cannot collect points in this match, so just focus on defeating Leon and Yuffie. As Leon's attacks are more powerful than Yuffie's, he should be targeted first. Once he is down, focus all attacks on Yuffie as she warps about. Use the more generous availability of Limits to his advantage. | |||
{{sec-stub}} | |||
==Enemies== | ==Enemies== | ||
===Heartless=== | ====Heartless==== | ||
{|class="wikitable collapsible collapsed" | {|class="wikitable mw-collapsible mw-collapsed" | ||
! | ! | ||
|- | |- | ||
| | | | ||
<gallery> | <gallery> | ||
File:Shadow | File:Shadow KHII.png|[[Shadow]] | ||
File:Soldier | File:Soldier KHII.png|[[Soldier]] | ||
File:Large Body | File:Large Body KHII.png|[[Large Body]] | ||
File: | File:Creeper Plant KHII.png|[[Creeper Plant]] | ||
File: | File:Rabid Dog KHII.png|[[Rabid Dog]] | ||
File:Hook Bat.png|[[Hook Bat]] | File:Hook Bat KHII.png|[[Hook Bat]] | ||
File:Minute Bomb | File:Minute Bomb KHII.png|[[Minute Bomb]] | ||
File: | File:Rapid Thruster KHII.png|[[Rapid Thruster]] | ||
File: | File:Lance Soldier KHII.png|[[Lance Soldier]] | ||
File:Gargoyle Knight.png|[[Gargoyle Knight]] | File:Gargoyle Knight KHII.png|[[Gargoyle Knight]] | ||
File:Gargoyle Warrior.png|[[Gargoyle Warrior]] | File:Gargoyle Warrior KHII.png|[[Gargoyle Warrior]] | ||
File:Aeroplane | File:Aeroplane KHII.png|[[Aeroplane]] | ||
File: | File:Hot Rod KHII.png|[[Hot Rod]] | ||
File: | File:Assault Rider KHII.png|[[Assault Rider]] | ||
File: | File:Bolt Tower KHII.png|[[Bolt Tower]] | ||
</gallery> | </gallery> | ||
|} | |} | ||
=== | ====Other==== | ||
{|class="wikitable collapsible collapsed" | {|class="wikitable mw-collapsible mw-collapsed" | ||
! | ! | ||
|- | |- | ||
| | | | ||
<gallery> | <gallery> | ||
File: | File:Leon KHII.png|'''{{ns|Game|Leon}}''' | ||
File: | File:Yuffie KHII.png|'''{{ns|Game|Yuffie}}''' | ||
</gallery> | </gallery> | ||
|} | |||
==Videos== | |||
{| class="video" | |||
! Pain and Panic Cup | |||
! Pain and Panic Paradox Cup | |||
|- | |||
| {{#widget:YouTube|id=iR7D5HlWNwI|width=320|height=240}} | |||
| {{#widget:YouTube|id=HBU6Hih5dm4|width=320|height=240}} | |||
|} | |} | ||
{{Minigames}} | {{Minigames}} | ||
Latest revision as of 00:28, 7 November 2024
Oh no! The water! I'm in big trouble if I don't fetch it!
| |
| This article requires cleanup or improvement.
Please help out by editing this page. Please see the Manual of Style and editing help before getting started. Issues: Check Kingdom Hearts II Final Mix rewards. Add strategy on how to complete the Jiminy requirements easiest. | |
| Pain and Panic Cup
| |
| |
| Katakana | ペイン&パニックカップ
|
|---|---|
| Romaji | Pein & Panikku Kappu |
| Japanese | Pain & Panic Cup |
| Unlocked | Clear Disney Castle.
|
| Rules | Fight alongside your friends. The Drive Gauge can't be used, but Limits consume less MP than usual. No experience is gained. |
| Level | 20[KH II] 25[KH II FM] |
| Rounds | 10
|
| Missions | Give it a try Win with a score of 2,000 or more |
| Rewards | Lucky Ring[KH II] Protect Belt[KH II FM] Serenity Stone |
| Round | Enemies
|
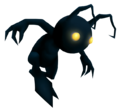
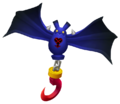
| 1 | Shadow x 5 Hook Bat x 5 |
|---|---|
| 2 | Large Body x 1 Minute Bomb x 6 |
| 3 | Soldier x 2 Rabid Dog x 5 |
| 4 | Shadow x 4 Hot Rod x 2 |
| 5 | Hook Bat x 4 Rapid Thruster x 5 Bolt Tower x 2 |
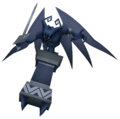
| 6 | Minute Bomb x 5 Gargoyle Knight x 3 Lance Soldier x 4 |
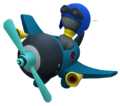
| 7 | Soldier x 2 Rabid Dog x 1 Aeroplane x 6 Assault Rider x 2 |
| 8 | Rapid Thruster x 128 |
| 9 | Creeper Plant x 4 Gargoyle Warrior x 2 |
| 10 | Leon Yuffie |
| Pain and Panic Paradox Cup
| |

| |
| Katakana | 裏ペイン&パニックカップ
|
|---|---|
| Romaji | Ura Pein & Panikku Kappu |
| Japanese | Inverse Pain & Panic Cup |
| Unlocked | Clear Goddess of Fate Cup
|
| Rules | Fight alongside your friends. The Drive Gauge can't be used, but Limits consume less MP than usual. No experience is gained. |
| Level | 60 |
| Rounds | 10
|
| Missions | Give it a try Win with a score of 2,500 or more |
| Round | Enemies
|
| 1 | Shadow x 5 Hook Bat x 5 |
|---|---|
| 2 | Large Body x 1 Minute Bomb x 6 |
| 3 | Soldier x 2 Rabid Dog x 5 |
| 4 | Shadow x 4 Hot Rod x 2 |
| 5 | Hook Bat x 4 Rapid Thruster x 5 Bolt Tower x 2 |
| 6 | Minute Bomb x 5 Gargoyle Knight x 3 Lance Soldier x 4 |
| 7 | Soldier x 2 Rabid Dog x 1 Aeroplane x 6 Assault Rider x 2 |
| 8 | Rapid Thruster x 128 |
| 9 | Creeper Plant x 4 Gargoyle Warrior x 2 |
| 10 | Leon Yuffie |
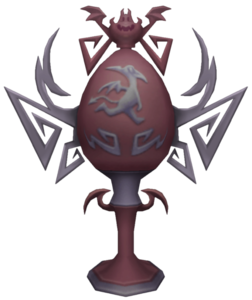
The Pain and Panic Cup is the first tournament at the Underdrome in Kingdom Hearts II, and all of the enemies within are set at level 20[KH II]/25[KH II FM]. Likewise, the Pain and Panic Paradox Cup is the first of the Paradox Cups, and is essentially the same cup with all of the enemies levels brought up to 60. Both cups forbid the use of Drive Forms, but reduce the MP consumption of Limits. Upon completion of the normal cup, Pain and Panic put the titular cup on display in the Underworld Entrance.
Strategy[edit]
- Round 4
Sora should use magic against the Hot Rods so that he can defeat them while staying out of their range. If they start to run into him, remember to guard their attacks and use Counterguard. This will leave any Hot Rods hit by the Counter open for attacks.
- Round 8
Although Sora only needs to stay alive for 60 seconds to complete this match, it is an excellent opportunity to amass points by using Magnet and Thunder on the Rapid Thrusters
- Round 10
Sora cannot collect points in this match, so just focus on defeating Leon and Yuffie. As Leon's attacks are more powerful than Yuffie's, he should be targeted first. Once he is down, focus all attacks on Yuffie as she warps about. Use the more generous availability of Limits to his advantage.
Enemies[edit]
Heartless[edit]
|
|
Other[edit]
|
|
Videos[edit]
| Pain and Panic Cup | Pain and Panic Paradox Cup |
|---|---|

