Hollow Bastion: Difference between revisions
m (Fixing song links.) |
|||
| (811 intermediate revisions by more than 100 users not shown) | |||
| Line 1: | Line 1: | ||
{{World | {{Game|KH1|FM1|COM|REC|KH2|FM2|KHC|RCO|MOM}} | ||
|name=Hollow Bastion | {{suite}} | ||
| | {{youmay|the castle|[[Radiant Garden|the original world]]''', the '''[[Hollow Bastion (track)|the field theme]]''', or '''[[Castle Oblivion#Hollow Bastion|the area based on memories of the castle]]''}} | ||
| | {{World | ||
| | |name=Hollow Bastion | ||
| | |katakana=ホロウバスティオン | ||
| | |romaji=Horou Basution | ||
[[ | |fr=Forteresse Oubliée | ||
| | |es=Bastión Hueco | ||
| | |de=Hollow Bastion | ||
| | |KHimage=[[File:Hollow Bastion KH.png|200px]] | ||
| | |KHlogo=[[File:Hollow Bastion Logo KH.png|300px]] | ||
| | |KH2image=[[File:Hollow Bastion KHII.png]] | ||
}} | |KH2logo=[[File:Hollow Bastion Logo KHII.png|300px]] | ||
'''Hollow Bastion''' is | |game1=Kingdom Hearts | ||
|game2=Kingdom Hearts Chain of Memories | |||
|game3=Kingdom Hearts II | |||
|game4=Kingdom Hearts coded | |||
|game5=Kingdom Hearts Melody of Memory | |||
|ally=[[Beast]]{{KH}}<br>[[Donald Duck]], [[Goofy]]{{KHc}} | |||
|assist=[[Leon]], [[Yuffie]], [[Tifa]], [[Cloud]], [[Claymore]]{{KHII}} | |||
|KHnormalname=Hollow Bastion | |||
|KHnormalfile=Hollow Bastion KH.ogg | |||
|KHbattlename=Scherzo Di Notte | |||
|KHbattlefile=Scherzo Di Notte KH.ogg | |||
|COMnormalname=Hollow Bastion | |||
|COMnormalfile=Hollow Bastion KHRECOM.ogg | |||
|COMbattlename=Scherzo Di Notte | |||
|COMbattlefile=Scherzo Di Notte KHRECOM.ogg | |||
|KH2normalname=Reviving Hollow Bastion | |||
|KH2normalfile=Reviving Hollow Bastion KHII.ogg | |||
|KH2battlename=Scherzo Di Notte | |||
|KH2battlefile=Scherzo Di Notte KHII.ogg | |||
|RECnormalname=Hollow Bastion | |||
|RECnormalfile=Hollow Bastion KHREC.ogg | |||
|RECnormalname2=List of unnamed tracks{{!}}No title | |||
|RECnormalfile2=Inside Riku's Data KHREC.ogg | |||
|RECbattlename=Scherzo Di Notte | |||
|RECbattlefile=Scherzo Di Notte KHREC.ogg | |||
}} | |||
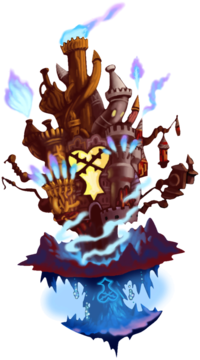
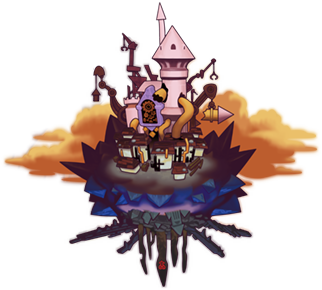
'''Hollow Bastion''' is an original [[world]] in ''{{c|Kingdom Hearts|game}}'' and ''[[Kingdom Hearts Chain of Memories]]'', with loose references to ''{{w|Beauty and the Beast (1991 film)|Beauty and the Beast}}'' and ''{{w|Sleeping Beauty (1959 film)|Sleeping Beauty}}''. In ''[[Kingdom Hearts coded]]'', the world is divided into two episodes: '''Hollow Bastion Part I''' and '''Hollow Bastion Part II'''. In ''[[Kingdom Hearts II]]'', the world was expanded into the town and other areas and eventually renamed [[Radiant Garden]], which was the world's original name. It also briefly appears as a flashback in ''[[Kingdom Hearts 358/2 Days]]'', experienced by [[Xion]]. | |||
[[Ansem the Wise]] was the former ruler of this world, before it was taken over by [[Maleficent]]. | |||
== | ==Settings and Areas== | ||
===''Kingdom Hearts''=== | ===''Kingdom Hearts''=== | ||
[[Sora]] and | [[File:Castle Gates (Art).png|thumb|225px|left|Artwork of Castle Gates.]] | ||
[[Sora]], Donald, and Goofy enter Hollow Bastion at the {{nihongo|'''{{a|Rising Falls}}'''|逆巻く滝の底|Sakamaku Taki no Soko|lit. "Bottom of the Reverse-Winding Waterfall"}}, appropriately named as there are waterfalls that run up instead of down. This area, as well as all other areas on the bottom reaches of the castle, contains magical bubbles that can transport the team under the solid water, or can be frozen to be used as platforms. Jumping on icy floating rocks and ledges takes the party to some broken stairs with a lift at the end. The lift takes Sora to the {{nihongo|'''{{a|Castle Gates}}'''|正門|Seimon|lit. "Main Gates"}}, the main entrance of Hollow Bastion which is made up of a set of balconies and lifts running both outside and inside the castle. From here, the party can travel down into the underground water system or enter the castle itself. | |||
Going down the nearby platform or leaping off the edge of the balcony takes the party to '''Base Level''', an area full of ledges, switches, and enemies. | Going down the nearby platform or leaping off the edge of the balcony takes the party to {{nihongo|'''{{a|Base Level}}'''|基部|Kibu}}, an area full of ledges, switches, and enemies. Successfully climbing to the balcony near the entrance earns extra treasures, while taking a nearby bubble carries them to the {{nihongo|'''{{a|Waterway}}'''|虚ろなる城:地下水路|Utsuronaru Shiro: Chika Suiro|lit. "Hollow Castle: Underground Waterway"}}, where a series of gates, switches, and bubbles must be navigated to operate the castle gate controls. Off of the Waterway is a small room called the {{nihongo|'''{{a|Dungeon}}'''|地下牢|Chika Rō|lit. "Underground Dungeon"}}. | ||
Going | [[File:Entrance Hall (Art).png|thumb|225px|right|Artwork of the Entrance Hall.]] | ||
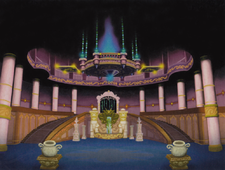
Going through the doors at the other end of the Castle Gates area takes the party to the massive two-level {{nihongo|'''{{a|Entrance Hall}}'''|虚ろなる城:エントランス|Utsoronaru Shiro: Entoransu|lit. "Hollow Castle: Entrance"}}, where a fight against [[Riku]] takes place. To continue onwards through the castle a puzzle at the end of the hall must be solved. When solved it'll allow access to the second half of the Castle Gates. Taking the left door in the Entrance Hall leads the party to the {{nihongo|'''{{a|Library}}'''|虚ろなる城:書庫|Utsuronaru Shiro: Shoko|lit. "Hollow Castle: Archive"}}, which is also the site of a large puzzle involving organizing the [[Hollow Bastion Library books]]. The room also contains one of the world's [[save point]]s. After the world's [[Keyhole]] has been locked, [[Belle]], [[Yuffie]], [[Leon]] and [[Aerith]] can be found here. | |||
Also accessible from the Library is the first of many entrances to the {{nihongo|'''{{a|Lift Stop}}'''|トロッコ乗場|Torokko Noriba|lit. "Minecart Boarding Place"}}, a junction point for many of the castle's lifts, which snake throughout the castle through magical tram lines. Each route is separated from the others by mystical barriers, and many passages and hallways also converge at this hub. The ceiling of the Lift Stop is decorated with stained glass. | |||
[[File:Castle Chapel (Art).png|thumb|200px|left|Artwork of the Castle Chapel.]] | |||
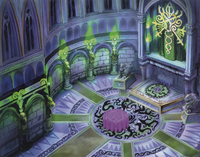
By taking the lift on the other side of the Castle Gates, the party can continuing up the castle to reach the {{nihongo|'''{{a|Great Crest}}'''|虚ろなる城:大紋壁|Utsuronaru Shiro: Daimon Kabe|lit. "Hollow Castle: Great Crest Wall"}}, which consists of three large balconies on opposite side of the castle's enormous Heartless emblem. From the first balcony, Sora can travel by use of the castle's largest lift, and after a slow journey across the front of the bastion, the party is dropped off at the second balcony. From there they can take the Lift Stop up to the third balcony, which further leads to the next area, the {{nihongo|'''{{a|High Tower}}'''|高楼|Kōrō|lit. "Skyscraper"}}. Located here is a smaller Heartless crest that can be moved to create a route up to the upper levels of the castle. The High Tower is divided into two areas which is connected by a passage through the Lift Stop. At the second level of the High Tower is an entrance which eventually leads to the {{nihongo|'''{{a|Castle Chapel}}'''|虚ろなる城:礼拝堂|Utsuronaru Shiro: Raihaidō|lit. "Hollow Castle: Chapel"}}, where [[Maleficent]] is fought. After her defeat, a portal to a secret area of the chapel can be temporarily found here, leading a fight against Maleficent in her dragon form. The portal later appears again for a fight against [[Xemnas]]. | |||
After defeating Maleficent twice, one of the walls to the right of the Castle Chapel will reveal a hidden entrance. Through there the Lift Stop can be quickly accessed which ultimately leads to the {{nihongo|'''{{a|Grand Hall}}'''|虚ろなる城:大広間|Utsuronaru Shiro: Ōhiroma|lit. "Hollow Castle: Grand Hall"}}, where the [[Princesses of Heart]] are held captive and the [[Final Keyhole]] forms. Inside the Grand Hall is a [[Heartless]] Emblem-shaped portal leading to a small dimension known as the {{nihongo|'''{{a|Dark Depths}}'''|闇の淵|Yami no Fuchi}}. Here, Sora and company fight off the [[Behemoth]] guarding the Keyhole from being sealed. | |||
The '''{{a|{{c|Laboratory|eotw}}}}''' is a room within Hollow Bastion, that can only be accessed once at [[End of the World]]. The lab consists of a short hallway blocked by a large Heartless emblem at one end, with a small room to the left. The side-room contains a large machine with a computer console and five capsules on it, hooked up to a tank of unknown liquid. Red, orange, and black warps in space dot the hall and lab. | |||
{{-}} | |||
===''Kingdom Hearts Chain of Memories''=== | |||
[[File:A Tiny Room 02 KHRECOM.png|thumb|right|210px|Riku inside his old room, reliving memories of the past.]] | |||
In ''Kingdom Hearts Chain of Memories'', Hollow Bastion appears within [[Castle Oblivion]] as a memory. The world can be explored through boxed-in areas that draw heavy inspiration from the various balconies across the castle, as well as the Lift Stop areas. In cutscenes, areas such the '''Castle Gates''', the '''Library''', the '''Entrance Hall''', and the '''Castle Chapel''' are visited. In ''Kingdom Hearts Re:Chain of Memories'', the secret part of the Castle Chapel also serves as arena for the fight against [[Dragon Maleficent]], while in ''Kingdom Hearts Chain of Memories'', the '''Castle Chapel''' serves as such. | |||
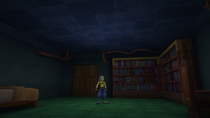
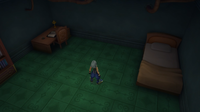
When Riku visits the memories of Hollow Bastion, a new area called '''{{a|Riku's Room}}''' is shown in cutscene. It's quite similar to the Library in design, but is a lot smaller with also a bed in it. | |||
===''Kingdom Hearts II''=== | ===''Kingdom Hearts II''=== | ||
{{main|Radiant Garden}} | |||
===''Kingdom Hearts coded''=== | |||
In ''Kingdom Hearts coded'', Hollow Bastion appears within the [[Datascape]] and is divided into two worlds. Hollow Bastion Part I and Hollow Bastion Part II, with the former being very similar to Hollow Bastion from ''Kingdom Hearts''. | |||
====Hollow Bastion Part I==== | |||
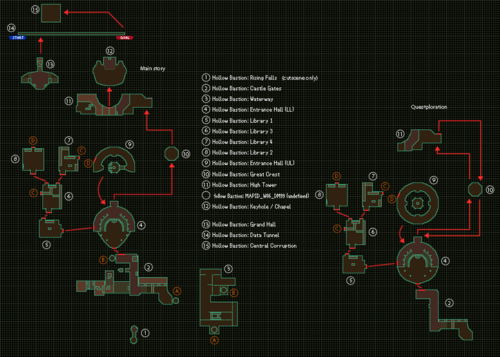
The '''Rising Falls''' are briefly seen in cutscenes, but Data-Sora's real journey at Hollow Bastion starts at the {{nihongo|'''{{a|Castle Gates}}'''|正門}}, where the second part of the area can now be accessed via platforms made of [[Bug Blox]]. He then heads down the underground {{nihongo|'''{{a|Waterway}}'''|地下水路}} to unlock the castle gate. After opening the gate, he soon joins with Goofy at the {{nihongo|'''{{a|Entrance Hall (LL)}}'''|エントランス(下部)|Entoransu (Kabu)|lit. "Entrance (Lower Level)"}}. After examining the Heartless slot on the exit door, Data-Sora visit the library, which is broken down into {{nihongo|'''{{a|Library 1}}'''|書庫1|Shoko Ichi|lit. "Archive 1"}}, {{nihongo|'''{{a|Library 2}}'''|書庫2|Shoko Ni|lit. "Archive 2"}}, {{nihongo|'''{{a|Library 3}}'''|書庫3|Shoko San|lit. "Archive 3"}} and {{nihongo|'''{{a|Library 4}}'''|書庫4|Shoko Yon|lit. "Archive 4"}}, to search for the missing emblem pieces. Passing through the libraries leads to {{nihongo|'''{{a|Entrance Hall (UL)}}'''|エントランス(上部)}}, which is the upper portion of the hall. | |||
After joining up with Donald and finding all the emblem pieces, Data-Sora and party can leave the Entrance Hall to access the {{nihongo|'''{{a|Great Crest}}'''|大紋壁 }}, a huge lift which further transports them to the {{nihongo|'''{{a|High Tower}}'''|高楼}}. The area is overflown by bugs, and to continue Data-Sora needs to activate all of the area's triggers. Doing so unlocks an entrance beneath the moveable platforms, where they can finally chase after Pete who waits in the {{nihongo|'''{{a|Grand Hall}}'''|大広間}}. Data-Sora then encounters Pete and Data-Riku at the glitched and corrupted {{nihongo|'''{{a|Keyhole / Chapel}}'''|鍵穴:礼拝堂|Kagiana: Raihaidō|lit. "Keyhole: Chapel"}}. | |||
{|class="wikitable mw-collapsible mw-collapsed" | |||
!Area Map of Hollow Bastion I in ''Kingdom Hearts Re:coded'' | |||
|- | |||
| | |||
[[File:Minimap (Hollow Bastion) KHREC.png|500px]] | |||
|} | |||
====Hollow Bastion Part II==== | |||
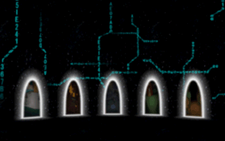
Hollow Bastion Part II is set within Data-Riku, who is lying comatose in the Grand Hall. Entering Data-Riku will take Data-Sora to {{nihongo|'''{{a|Inside Riku's Data}}'''|リク データ内部|Riku Dēta Naibu}}, where five doors are located. These five entry points lead to desaturated versions of past worlds from the game that are overrun by Bug Blox. | |||
[[File:Inside Riku 06 KHREC.png|thumb|left|225px|Inside Riku's Data, the main hub of Hollow Bastion Part II.]] | |||
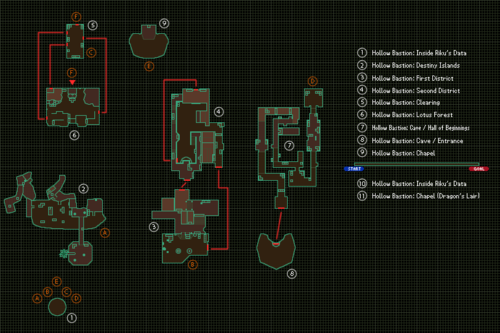
The first door takes Data-Sora to the {{nihongo|'''{{a|Destiny Islands}}'''|デスティニーアイランド|Desutinī Airando}}. The second takes him to [[Traverse Town]], divided into the {{nihongo|'''{{a|First District}}'''|1番街|Ichiban Machi}} and {{nihongo|'''{{a|Second District}}'''|2番街|Niban Machi}}. The third takes him to [[Wonderland]] at the {{nihongo|'''{{a|Clearing}}'''|中央広場|Chūō Hiroba|lit. "Central Square"}}, leading to the {{nihongo|'''{{a|Lotus Forest}}'''|ハスの森|Hasu no Mori}}. The fourth takes him to [[Agrabah]] at the {{nihongo|'''{{a|Cave / Hall of Beginnings}}'''|魔法の洞窟 始まりの間|Mahō no Dōkutsu Hajimari no Ma}}, where he must travel backwards out of the cave to the {{nihongo|'''{{a|Cave / Entrance}}'''|タイガーヘッド|Taigā Heddo|lit. "Tiger Head"}}. The final door takes him to Hollow Bastion's {{nihongo|'''{{a|Chapel}}'''|礼拝堂|Raihaidō}} where he encounters the bugged Data-Riku. | |||
After clearing all five doors, an exit appears leading to a [[side-scrolling]] segment through Inside Riku's Data, and ends with an encounter against Dragon Maleficent at the {{nihongo|'''{{a|Chapel (Dragon's Lair)}}'''|礼拝堂(竜の間)|Raihaidō (Ryū no Ma)}}. Data-Sora also revisits the Grand Hall before a [[3D shooting]] segment takes place in the {{nihongo|'''{{a|Data Tunnel}}'''|データホール}}. Data-Sora then fights and defeats [[Sora's Heartless]] at the {{nihongo|'''{{a|Central Corruption}}'''|変異データ中枢|Hen'i Dēta Chūsū|lit. "Central Data Mutation"}}. | |||
{{-|left}} | |||
{|class="wikitable mw-collapsible mw-collapsed" | |||
!Area Map of Hollow Bastion Part II in ''Kingdom Hearts Re:coded'' | |||
|- | |||
| | |||
[[File:Minimap (Inside Riku's data) KHREC.png|500px]] | |||
|} | |||
==Story== | ==Story== | ||
===Before ''Kingdom Hearts ''=== | |||
===''Kingdom Hearts | {{Main|Radiant Garden}} | ||
{{Sec-stub}} | |||
===''Kingdom Hearts''=== | ===''Kingdom Hearts''=== | ||
Sora, Donald and Goofy arrive at Hollow Bastion in time to find | During the destruction of [[Destiny Islands]], [[Riku]] is approached by Ansem and opens his heart to the [[darkness]], allowing Ansem to linger within his heart, and steps into a [[Corridor of Darkness]]. He awakens some time later in the '''Rising Falls'''. Here, he is greeted by Maleficent, given a room to stay in, and is gifted with the [[Soul Eater]] blade. | ||
Sora, [[Donald]] and [[Goofy]] arrive at Hollow Bastion in time to find Riku attacking another intruder, the [[Beast]]. Sora, Donald, and Goofy confront Riku, but he declares he is the [[Keyblade]]'s true holder; it jumps into his possession, leaving Sora defenseless except for his [[Wooden Sword|old wooden sword]]. Shocked at this revelation, Sora collapses to the ground. Riku departs, and Donald and Goofy, having been ordered to follow the Keybearer, reluctantly follow him. The Beast staggers on despite his injuries, and Sora quickly gets over his shock to help him. The Beast reveals that he is looking for someone important to him, and refuses to depart without her. Sora, sympathizing, takes up his old wooden sword, and the two team up to enter the castle. | |||
After traversing the castle waterways to unlock the main door, Sora and Beast enter Hollow Bastion. Beast witnesses an illusion of [[Belle]] transforming into a Heartless, and, enraged, jumps at the Heartless, with the doors slamming shut behind him. Riku, Donald, and Goofy appear soon after, where Riku orders Sora to give up, though Sora refuses to leave without Kairi. Sora informs Riku that while the darkness may destroy his [[body]], it can't harm his heart, and Riku decides to test Sora's theory by firing a [[Dark Firaga]] attack at him. Sora, believing it to be the end, braces himself, but Goofy rushes in and blocks the blast with his [[shield]]. After being questioned by Riku, Goofy swears that he will never betray [[King Mickey]], but won't betray Sora after all that they have been through together, and asks Donald to apologize to the King for him; however, Donald also chooses his friendship with Sora over King Mickey's orders and rejoins Sora. Sora informs Riku that he doesn't need the Keyblade; his friends and heart are the only weapons he needs. Sora's strength of heart with his friends back by his side pulls the Keyblade away from Riku and back to him. After a fierce battle, Riku is defeated and flees. Beast rejoins the party after watching the encounter, observing that Sora's heart was what helped him win. | |||
Riku is upset at losing the Keyblade, but encounters [[Ansem, Seeker of Darkness]], who promises him that he can make Riku's heart stronger through darkness and allow him to regain possession of the Keyblade. Jealous and angry at Sora and shamed over his loss of control of the Keyblade, Riku succumbs to his pledge and powers, and becomes consumed by the darkness. In the meantime, Maleficent has attempted to use the gathered Princesses of Heart to open the Bastion's Keyhole. The Heartless-possessed Riku meets with her to check her progress, where Maleficent declares she will control and use the darkness for her own purposes; however, neither she nor Ansem-Riku can unlock the Keyhole without Kairi's missing heart. | |||
Riku is | Sora and friends manage to travel through the labyrinth of a castle to reach the chapel; there they meet with and confront Maleficent. Overconfident in her abilities and underestimating those of Sora's gang, she is soundly defeated. Escaping back to Riku for help, she is stabbed through the heart by his [[Keyblade of heart]], made from the hearts of the six Princesses. It unlocks the darkest parts of her heart and allows her to transform into a large, powerful dragon; however, Sora's party defeat her again, and she is consumed and burned away by the darkness. Riku then appears and reveals that Maleficent was merely a pawn of the Heartless, unable to see the darkness swallowing her heart. He then departs and Sora and company travel to the Grand Hall, where the Keyhole and Princesses are located, to find and confront him. There, Sora finds Kairi unconscious on the floor in front of the partially opened Keyhole. He tries to wake her, but Riku appears to tell Sora her heart is missing. Riku continues to tell Sora that Kairi is one of the princesses and that her heart is within him. Sora is able to realize that Riku is no longer in control of his own body. Riku knocks both Donald and Goofy back behind a preset barrier, and Kairi's heart reacts to the Keyblade of heart's power, causing Sora crippling pain. [[Xehanort]]'s Heartless then attacks him, but Sora recovers and blocks the strike in time. After an intense battle over who would possess Kairi's heart, Sora emerges victorious. | ||
Riku disappears, but the Keyhole begins reacting to the presence of Kairi's heart. Sora attempts to lock the Keyhole, but without Kairi's heart, it is not complete and cannot be sealed. Sora puts two and two together and realizes what he has to do; despite Donald and Goofy's desperate pleas, Sora stabs himself with the Keyblade of heart left in Riku's wake, releasing all of the princesses' hearts (including Kairi's) and completing the Keyhole, but Sora falls into darkness himself. | |||
Kairi wakes just in time to see Sora disappear. As Kairi, Donald, and Goofy mourn the loss of Sora, Ansem, now in full possession of Riku's body and having shaped it into one resembling his original human self, reappears, declaring that Kairi's purpose is over, effectively deciding to kill her. Donald and Goofy bravely make a stand against Ansem, but both know that, without Sora, they may not be able to stop him. However, before Ansem can attack, Riku projects himself from his stolen body, manages to establish enough control to stop him in his tracks, and warns Kairi and the others that the Heartless called by Ansem will soon overrun the castle at which they heed and run to escape. The three return to the entrance, and hesitate due to Kairi's reluctance to leave Sora and Riku behind; Goofy himself is still concerned about the Keyhole (apparently failing to realize that, without Sora and the Keyblade, the Keyhole cannot be stopped). An apparently non-hostile Heartless arrives; Donald shouts at it to get lost and whacks it over the head with his [[staff]], but Kairi realizes that the Heartless is, in fact, Sora. At that moment, massive legions of Heartless attack, and swarm Kairi and Sora's Heartless, much to Donald and Goofy's horror. However, a brilliant flash of [[light]] blows the Heartless back, and in place of the Heartless, there is Sora, fully restored. Beast stays behind to hold off the Heartless and continue looking for Belle, and so the group departs Hollow Bastion. | |||
[[Cid]] manages to find a way to allow them to return and seal the Keyhole. They return and help Beast reunite with the re-awakened Belle, and jump through the Keyhole to fight a [[Behemoth]] Heartless. After a conversation with Leon's group, who have returned to restore their home world, Sora seals the Keyhole at Hollow Bastion. | |||
[[ | In the ''[[Kingdom Hearts Final Mix]]'' version, Sora also has his first encounter with [[Organization XIII]] in the chapel by way of Xemnas, here known only as "Unknown". After some cryptic messages (such as stating that Sora is incomplete and looks just like [[Roxas|"him"]]), Xemnas departs. It is revealed in ''Kingdom Hearts II'' that this battle takes place shortly after Xemnas recruited Roxas into the Organization, and he fought Sora to test his abilities. | ||
===''Kingdom Hearts Chain of Memories''=== | |||
[[File:A Tiny Room 01 KHRECOM.png|thumb|200px|Riku's bedroom in Hollow Bastion.]] | |||
Upon arriving in the Basement of [[Castle Oblivion]], Riku enters a memory simulation of Hollow Bastion. Guided by the voice of [[DiZ]], Riku explores the simulation, even coming across his old bedroom, and eventually encounters Maleficent, who tries to convince him to rejoin her. Riku refuses, and she promptly transforms into a dragon to battle him. He ultimately triumphs. | |||
Later, Sora and company also arrive in the simulation. They encounter the Beast, who is being told by Belle to stay away from her. Noticing his plight, Sora decides to help the Beast. | |||
As the group traverses the simulation, they encounter Maleficent, who is holding Belle hostage. Maleficent declares to Beast that Belle still loves him, but is afraid to say it to avoid detection. Maleficent gives Beast one last ultimatum, but Beast refuses. Outraged, Maleficent transforms into a dragon to battle Sora and company. Sora eventually defeats Maleficent, and as she fades away, Belle and Beast rekindle their relationship. | |||
A statue appears here in the '''Entrance Hall''' that was not present in ''Kingdom Hearts''. | |||
===''Kingdom Hearts 358/2 Days''=== | ===''Kingdom Hearts 358/2 Days''=== | ||
During ''Kingdom Hearts 358/2 Days'', when Xion experiences a short sequence of Sora's memories, the keyhole to Hollow Bastion can be seen as Sora releases his heart and his body dissipates. | |||
===''Kingdom Hearts II''=== | ===''Kingdom Hearts II''=== | ||
{{Main|Radiant Garden}} | |||
===''Kingdom Hearts coded''=== | |||
After Maleficent destroys [[Data-Sora]]'s Keyblade in the [[datascape]]'s version of [[Agrabah]] and captures [[Data-Riku]], [[Pete]] takes Data-Riku to the Datascape's Hollow Bastion. Without his weapon, Data-Sora is unable to fight, so Mickey travels there himself, leaving Donald, Goofy, and Data-Sora at [[Disney Castle]]. However, Sora runs off to Hollow Bastion on his own to confront Pete, and he manages to unlock the castle gate while dodging Heartless. Inside, Pete traps Sora and summons a horde of Heartless to attack, but Sora is rescued by Goofy. The two of them begin searching for a way to follow Pete deeper into the castle, while searching for Donald, who got separated from Goofy when they entered Hollow Bastion. | |||
Sora and Goofy find Donald in the waterway, and the three of them explore the castle, with Donald and Goofy breaking [[Bug Blox]] and fighting Heartless in place of Sora. They find the pieces of the Heartless emblem that unlock the door leading to the upper levels of the castle, and at the High Tower, Data-Sora reflects on the bond he feels with Donald and Goofy. The three of them confront Pete in the Grand Hall, where he traps Donald and Goofy in a cage of blox. Desperate, Sora manifests a new Keyblade from his evolving heart and frees them. Pete retreats into the [[Keyhole]], followed by Sora, who defeats him despite his own powers in the datascape. Pete then sets Data-Riku on him, having corrupted his data with bugs, but Data-Sora manages to subdue his friend after a drawn-out battle. | |||
Although Data-Sora and Data-Riku emerge from the Keyhole, Riku's data is thoroughly corrupted, prompting Sora to enter Riku's personal datascape to destroy the bugs, in Hollow Bastion Part II. After visiting manifestations of Riku's memories of different worlds, Sora defeats the main source of the corruption, which takes Riku's form. Maleficent attempts to block Sora from returning from inside Riku's data, but he emerges, and he defeats Maleficent's dragon form in the chapel. Mickey, Donald, and Goofy say goodbye before returning to the real world, but when the datascape begins erasing itself, Data-Sora sets off through the Final Keyhole for the innermost part of the datascape to retrieve Maleficent and Pete and to confront the source of the corruption, [[Sora's Heartless]]. | |||
As Data-Sora progresses through the Datascape's Castle Oblivion, he enters a room based on his visit to Hollow Bastion. He chases after Pete, using switches to progress, and defeats him. Pete calls Maleficent, who brings them to a long, trap-filled room, forcing Sora to traverse the obstacle course to reach the far side of the room. Upon confronting the two, Sora is returned to the Entrance Hall, with an [[Ending Card]] for Hollow Bastion. | |||
==Other appearances== | |||
===''Super Smash Bros. Ultimate''=== | |||
==== | {{ssb|Hollow Bastion}} is a downloadable stage in ''{{ssb|Super Smash Bros. Ultimate}}'', released along with Sora, as part of Challenger Pack 11. When time, stocks, or health are running low, Hollow Bastion transforms into [[Dive to the Heart]]. | ||
==Characters== | ==Characters== | ||
<gallery> | <gallery> | ||
File:Kairi (Young) KH.png|[[Kairi]]<br>{{KH}} | |||
File:Kairi's Grandma KH.png|[[Kairi's Grandma]]<br>{{KH}} | |||
File:Leon KH.png|[[Leon]]<br>{{KH}} | |||
File:Aerith KH.png|[[Aerith]]<br>{{KH}} | |||
File:Yuffie KH.png|[[Yuffie]]<br>{{KH}} | |||
File:Cid KH.png|[[Cid]]<br>{{KH}} | |||
File:Cloud KH.png|[[Cloud]]<br>{{KH}} | |||
File:Maleficent KHREC.png|[[Maleficent]]<br>{{KH}}{{KHCoM}}{{KHc}} | |||
File:Hades KH.png|[[Hades]]<br>{{KH}} | |||
File:Jafar KH.png|[[Jafar]]<br>{{KH}} | |||
File:Ursula KH.png|[[Ursula]]<br>{{KH}} | |||
File:Captain Hook KH.png|[[Captain Hook]]<br>{{KH}} | |||
File:Oogie Boogie KH.png|[[Oogie Boogie]]<br>{{KH}} | |||
File:Riku (Dark Mode) KH.png|[[Riku]]<br>{{KH}} | |||
File:Beast KH.png|[[Beast]]<br>{{KH}}{{KHCoM}} | |||
File:Ansem, Seeker of Darkness KH.png|[[Ansem, Seeker of Darkness]]<br>{{KH}} | |||
File:Shadow KHFM.png|[[Sora's Heartless|Sora-Heartless]]<br>{{KH}}{{KHc}} | |||
File:Snow White KH.png|[[Snow White]]<br>{{KH}} | |||
File:Cinderella KH.png|[[Cinderella]]<br>{{KH}} | |||
File:Jasmine KH.png|[[Jasmine]]<br>{{KH}} | |||
File:Aurora KH.png|[[Aurora]]<br>{{KH}} | |||
File:Alice KH.png|[[Alice]]<br>{{KH}} | |||
File:Belle KH.png|[[Belle]]<br>{{KH}}{{KHCoM}} | |||
File:Mysterious Figure KHFM.png|[[Xemnas]]<br>{{FM}} | |||
File:Data-Riku KHREC.png|[[Data-Riku]]<br>{{KHc}} | |||
File:Pete KHII.png|[[Pete]]<br>{{KHc}} | |||
</gallery> | </gallery> | ||
==Enemies== | ==Enemies== | ||
=== | ===Heartless=== | ||
{|class="wikitable mw-collapsible mw-collapsed" | |||
! | |||
|- | |||
| | |||
<gallery> | <gallery> | ||
File:Shadow KHII.png|[[Shadow]]<br>{{KH}}{{KHCoM}}{{KHc}} | |||
File:Soldier KHII.png|[[Soldier]]<br>{{KH}} | |||
File:Stealth Soldier KHFM.png|[[Stealth Soldier]]<br>{{FM}} | |||
File:Air Soldier KH.png|[[Air Soldier]]<br>{{KH}} | |||
File:Large Body KHII.png|[[Large Body]]<br>{{KH}} | |||
File:Red Nocturne KH.png|[[Red Nocturne]]<br>{{KH}} | |||
File:Blue Rhapsody KH.png|[[Blue Rhapsody]]<br>{{KH}} | |||
File:Yellow Opera KH.png|[[Yellow Opera]]<br>{{KH}} | |||
File:Green Requiem KH.png|[[Green Requiem]]<br>{{KH}} | |||
File:Darkball KH.png|[[Darkball]]<br>{{KH}}{{KHCoM}}{{KHc}} | |||
File:Wyvern KH.png|[[Wyvern]]<br>{{KH}}{{KHCoM}}{{KHc}} | |||
File:Defender KH.png|[[Defender]]<br>{{KH}}{{KHCoM}}{{KHc}} | |||
File:Eliminator KHREC.png|[[Eliminator]]<br>{{KHc}} | |||
File:Wizard KH.png|[[Wizard]]<br>{{KH}}{{KHCoM}}{{KHc}} | |||
File:White Mushroom KH.png|[[White Mushroom]]<br>{{KHCoM}} | |||
File:Black Fungus KH.png|[[Black Fungus]]<br>{{KH}}{{KHCoM}}{{KHc}} | |||
File:Gold Tricholoma KHREC.png|[[Gold Tricholoma]]<br>{{KHc}} | |||
File:Behemoth KH.png|'''[[Behemoth]]'''<br>{{KH}} | |||
File:Blox Bug KHREC.png|[[Blox Bug]]<br>{{KHc}} | |||
File:Prize Bug KHREC.png|[[Prize Bug]]<br>{{KHc}} | |||
File:Danger Bug KHREC.png|[[Danger Bug]]<br>{{KHc}} | |||
File:Metal Bug KHREC.png|[[Metal Bug]]<br>{{KHc}} | |||
File:Invisible KHREC.png|[[Invisible]]<br>{{KHc}} | |||
File:Sora's Heartless - Neo Darkside KHREC.png|'''[[Game:Sora's Heartless|Sora's Heartless: Neo Darkside]]'''<br>{{KHc}} | |||
File:Sora's Heartless - True Form KHREC.png|'''[[Game:Sora's Heartless|Sora's Heartless: True Form]]'''<br>{{KHc}} | |||
File:Sora's Heartless - True Form KHREC.png|'''[[Game:Sora's Heartless|Sora's Heartless: Offshoots]]'''<br>{{KHc}} | |||
File:Shadow KH.png|'''[[Game:Sora's Heartless|Sora's Heartless: Shadow]]'''<br>{{KHc}} | |||
</gallery> | </gallery> | ||
|} | |||
=== | ===Nobodies=== | ||
{|class="wikitable mw-collapsible mw-collapsed" | |||
! | |||
|- | |||
| | |||
<gallery> | <gallery> | ||
File:Mysterious Figure KHFM.png|'''[[Game:Xemnas|Unknown]]'''<br>{{KH}} | |||
File:Data-Roxas (Bugged) KHREC.png|'''[[Game:Data-Roxas|Data-Roxas]]'''<br>{{KHc}} | |||
</gallery> | </gallery> | ||
|} | |} | ||
=== | ===Other=== | ||
{|class="wikitable mw-collapsible mw-collapsed" | |||
! | |||
{| | |||
|- | |- | ||
| | | | ||
<gallery> | |||
|[[ | File:Maleficent KH.png|'''[[Game:Maleficent|Maleficent]]'''<br>{{KH}} | ||
File:Maleficent (Dragon) KH.png|'''[[Game:Maleficent (Dragon)|Dragon Maleficent]]'''<br>{{KH}}{{KHCoM}}{{KHc}} | |||
File:Riku (Dark Mode) KH.png|'''[[Game:Riku|Riku (Soul Eater)]]'''<br>{{KH}} | |||
File:Riku (Dark) KH.png|'''[[Game:Riku|Riku (Keyblade)]]'''<br>{{KH}} | |||
| | File:Pete KHREC.png|'''[[Game:Pete|Pete]]'''<br>{{KHc}} | ||
File:Data-Riku (Battle) KHREC.png|'''[[Game:Data-Riku|Data-Riku]]'''<br>{{KHc}} | |||
</gallery> | |||
| ''' | |||
|[[ | |||
| | |||
| | |||
|- | |||
|} | |} | ||
{{KH1}} | |||
{{COM}} | |||
{{KH2}} | |||
{{coded}} | |||
{{MOM}} | |||
[[Category:Datascape]] | |||
{{ | |||
[[Category: | |||
Latest revision as of 15:11, 16 September 2024
| This article is about the castle. You may be looking for the original world, the the field theme, or the area based on memories of the castle. |
Hollow Bastion is an original world in Kingdom Hearts and Kingdom Hearts Chain of Memories, with loose references to Beauty and the Beast and Sleeping Beauty. In Kingdom Hearts coded, the world is divided into two episodes: Hollow Bastion Part I and Hollow Bastion Part II. In Kingdom Hearts II, the world was expanded into the town and other areas and eventually renamed Radiant Garden, which was the world's original name. It also briefly appears as a flashback in Kingdom Hearts 358/2 Days, experienced by Xion.
Ansem the Wise was the former ruler of this world, before it was taken over by Maleficent.
Settings and Areas[edit]
Kingdom Hearts[edit]
Sora, Donald, and Goofy enter Hollow Bastion at the Rising Falls (逆巻く滝の底 Sakamaku Taki no Soko, lit. "Bottom of the Reverse-Winding Waterfall"), appropriately named as there are waterfalls that run up instead of down. This area, as well as all other areas on the bottom reaches of the castle, contains magical bubbles that can transport the team under the solid water, or can be frozen to be used as platforms. Jumping on icy floating rocks and ledges takes the party to some broken stairs with a lift at the end. The lift takes Sora to the Castle Gates (正門 Seimon, lit. "Main Gates"), the main entrance of Hollow Bastion which is made up of a set of balconies and lifts running both outside and inside the castle. From here, the party can travel down into the underground water system or enter the castle itself.
Going down the nearby platform or leaping off the edge of the balcony takes the party to Base Level (基部 Kibu), an area full of ledges, switches, and enemies. Successfully climbing to the balcony near the entrance earns extra treasures, while taking a nearby bubble carries them to the Waterway (虚ろなる城:地下水路 Utsuronaru Shiro: Chika Suiro, lit. "Hollow Castle: Underground Waterway"), where a series of gates, switches, and bubbles must be navigated to operate the castle gate controls. Off of the Waterway is a small room called the Dungeon (地下牢 Chika Rō, lit. "Underground Dungeon").
Going through the doors at the other end of the Castle Gates area takes the party to the massive two-level Entrance Hall (虚ろなる城:エントランス Utsoronaru Shiro: Entoransu, lit. "Hollow Castle: Entrance"), where a fight against Riku takes place. To continue onwards through the castle a puzzle at the end of the hall must be solved. When solved it'll allow access to the second half of the Castle Gates. Taking the left door in the Entrance Hall leads the party to the Library (虚ろなる城:書庫 Utsuronaru Shiro: Shoko, lit. "Hollow Castle: Archive"), which is also the site of a large puzzle involving organizing the Hollow Bastion Library books. The room also contains one of the world's save points. After the world's Keyhole has been locked, Belle, Yuffie, Leon and Aerith can be found here.
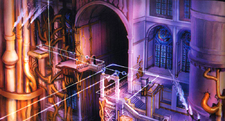
Also accessible from the Library is the first of many entrances to the Lift Stop (トロッコ乗場 Torokko Noriba, lit. "Minecart Boarding Place"), a junction point for many of the castle's lifts, which snake throughout the castle through magical tram lines. Each route is separated from the others by mystical barriers, and many passages and hallways also converge at this hub. The ceiling of the Lift Stop is decorated with stained glass.
By taking the lift on the other side of the Castle Gates, the party can continuing up the castle to reach the Great Crest (虚ろなる城:大紋壁 Utsuronaru Shiro: Daimon Kabe, lit. "Hollow Castle: Great Crest Wall"), which consists of three large balconies on opposite side of the castle's enormous Heartless emblem. From the first balcony, Sora can travel by use of the castle's largest lift, and after a slow journey across the front of the bastion, the party is dropped off at the second balcony. From there they can take the Lift Stop up to the third balcony, which further leads to the next area, the High Tower (高楼 Kōrō, lit. "Skyscraper"). Located here is a smaller Heartless crest that can be moved to create a route up to the upper levels of the castle. The High Tower is divided into two areas which is connected by a passage through the Lift Stop. At the second level of the High Tower is an entrance which eventually leads to the Castle Chapel (虚ろなる城:礼拝堂 Utsuronaru Shiro: Raihaidō, lit. "Hollow Castle: Chapel"), where Maleficent is fought. After her defeat, a portal to a secret area of the chapel can be temporarily found here, leading a fight against Maleficent in her dragon form. The portal later appears again for a fight against Xemnas.
After defeating Maleficent twice, one of the walls to the right of the Castle Chapel will reveal a hidden entrance. Through there the Lift Stop can be quickly accessed which ultimately leads to the Grand Hall (虚ろなる城:大広間 Utsuronaru Shiro: Ōhiroma, lit. "Hollow Castle: Grand Hall"), where the Princesses of Heart are held captive and the Final Keyhole forms. Inside the Grand Hall is a Heartless Emblem-shaped portal leading to a small dimension known as the Dark Depths (闇の淵 Yami no Fuchi). Here, Sora and company fight off the Behemoth guarding the Keyhole from being sealed.
The Laboratory is a room within Hollow Bastion, that can only be accessed once at End of the World. The lab consists of a short hallway blocked by a large Heartless emblem at one end, with a small room to the left. The side-room contains a large machine with a computer console and five capsules on it, hooked up to a tank of unknown liquid. Red, orange, and black warps in space dot the hall and lab.
Kingdom Hearts Chain of Memories[edit]
In Kingdom Hearts Chain of Memories, Hollow Bastion appears within Castle Oblivion as a memory. The world can be explored through boxed-in areas that draw heavy inspiration from the various balconies across the castle, as well as the Lift Stop areas. In cutscenes, areas such the Castle Gates, the Library, the Entrance Hall, and the Castle Chapel are visited. In Kingdom Hearts Re:Chain of Memories, the secret part of the Castle Chapel also serves as arena for the fight against Dragon Maleficent, while in Kingdom Hearts Chain of Memories, the Castle Chapel serves as such.
When Riku visits the memories of Hollow Bastion, a new area called Riku's Room is shown in cutscene. It's quite similar to the Library in design, but is a lot smaller with also a bed in it.
Kingdom Hearts II[edit]
Kingdom Hearts coded[edit]
In Kingdom Hearts coded, Hollow Bastion appears within the Datascape and is divided into two worlds. Hollow Bastion Part I and Hollow Bastion Part II, with the former being very similar to Hollow Bastion from Kingdom Hearts.
Hollow Bastion Part I[edit]
The Rising Falls are briefly seen in cutscenes, but Data-Sora's real journey at Hollow Bastion starts at the Castle Gates (正門), where the second part of the area can now be accessed via platforms made of Bug Blox. He then heads down the underground Waterway (地下水路) to unlock the castle gate. After opening the gate, he soon joins with Goofy at the Entrance Hall (LL) (エントランス(下部) Entoransu (Kabu), lit. "Entrance (Lower Level)"). After examining the Heartless slot on the exit door, Data-Sora visit the library, which is broken down into Library 1 (書庫1 Shoko Ichi, lit. "Archive 1"), Library 2 (書庫2 Shoko Ni, lit. "Archive 2"), Library 3 (書庫3 Shoko San, lit. "Archive 3") and Library 4 (書庫4 Shoko Yon, lit. "Archive 4"), to search for the missing emblem pieces. Passing through the libraries leads to Entrance Hall (UL) (エントランス(上部)), which is the upper portion of the hall.
After joining up with Donald and finding all the emblem pieces, Data-Sora and party can leave the Entrance Hall to access the Great Crest (大紋壁 ), a huge lift which further transports them to the High Tower (高楼). The area is overflown by bugs, and to continue Data-Sora needs to activate all of the area's triggers. Doing so unlocks an entrance beneath the moveable platforms, where they can finally chase after Pete who waits in the Grand Hall (大広間). Data-Sora then encounters Pete and Data-Riku at the glitched and corrupted Keyhole / Chapel (鍵穴:礼拝堂 Kagiana: Raihaidō, lit. "Keyhole: Chapel").
| Area Map of Hollow Bastion I in Kingdom Hearts Re:coded |
|---|
Hollow Bastion Part II[edit]
Hollow Bastion Part II is set within Data-Riku, who is lying comatose in the Grand Hall. Entering Data-Riku will take Data-Sora to Inside Riku's Data (リク データ内部 Riku Dēta Naibu), where five doors are located. These five entry points lead to desaturated versions of past worlds from the game that are overrun by Bug Blox.
The first door takes Data-Sora to the Destiny Islands (デスティニーアイランド Desutinī Airando). The second takes him to Traverse Town, divided into the First District (1番街 Ichiban Machi) and Second District (2番街 Niban Machi). The third takes him to Wonderland at the Clearing (中央広場 Chūō Hiroba, lit. "Central Square"), leading to the Lotus Forest (ハスの森 Hasu no Mori). The fourth takes him to Agrabah at the Cave / Hall of Beginnings (魔法の洞窟 始まりの間 Mahō no Dōkutsu Hajimari no Ma), where he must travel backwards out of the cave to the Cave / Entrance (タイガーヘッド Taigā Heddo, lit. "Tiger Head"). The final door takes him to Hollow Bastion's Chapel (礼拝堂 Raihaidō) where he encounters the bugged Data-Riku.
After clearing all five doors, an exit appears leading to a side-scrolling segment through Inside Riku's Data, and ends with an encounter against Dragon Maleficent at the Chapel (Dragon's Lair) (礼拝堂(竜の間) Raihaidō (Ryū no Ma)). Data-Sora also revisits the Grand Hall before a 3D shooting segment takes place in the Data Tunnel (データホール). Data-Sora then fights and defeats Sora's Heartless at the Central Corruption (変異データ中枢 Hen'i Dēta Chūsū, lit. "Central Data Mutation").
| Area Map of Hollow Bastion Part II in Kingdom Hearts Re:coded |
|---|
Story[edit]
Before Kingdom Hearts [edit]
Kingdom Hearts[edit]
During the destruction of Destiny Islands, Riku is approached by Ansem and opens his heart to the darkness, allowing Ansem to linger within his heart, and steps into a Corridor of Darkness. He awakens some time later in the Rising Falls. Here, he is greeted by Maleficent, given a room to stay in, and is gifted with the Soul Eater blade.
Sora, Donald and Goofy arrive at Hollow Bastion in time to find Riku attacking another intruder, the Beast. Sora, Donald, and Goofy confront Riku, but he declares he is the Keyblade's true holder; it jumps into his possession, leaving Sora defenseless except for his old wooden sword. Shocked at this revelation, Sora collapses to the ground. Riku departs, and Donald and Goofy, having been ordered to follow the Keybearer, reluctantly follow him. The Beast staggers on despite his injuries, and Sora quickly gets over his shock to help him. The Beast reveals that he is looking for someone important to him, and refuses to depart without her. Sora, sympathizing, takes up his old wooden sword, and the two team up to enter the castle.
After traversing the castle waterways to unlock the main door, Sora and Beast enter Hollow Bastion. Beast witnesses an illusion of Belle transforming into a Heartless, and, enraged, jumps at the Heartless, with the doors slamming shut behind him. Riku, Donald, and Goofy appear soon after, where Riku orders Sora to give up, though Sora refuses to leave without Kairi. Sora informs Riku that while the darkness may destroy his body, it can't harm his heart, and Riku decides to test Sora's theory by firing a Dark Firaga attack at him. Sora, believing it to be the end, braces himself, but Goofy rushes in and blocks the blast with his shield. After being questioned by Riku, Goofy swears that he will never betray King Mickey, but won't betray Sora after all that they have been through together, and asks Donald to apologize to the King for him; however, Donald also chooses his friendship with Sora over King Mickey's orders and rejoins Sora. Sora informs Riku that he doesn't need the Keyblade; his friends and heart are the only weapons he needs. Sora's strength of heart with his friends back by his side pulls the Keyblade away from Riku and back to him. After a fierce battle, Riku is defeated and flees. Beast rejoins the party after watching the encounter, observing that Sora's heart was what helped him win.
Riku is upset at losing the Keyblade, but encounters Ansem, Seeker of Darkness, who promises him that he can make Riku's heart stronger through darkness and allow him to regain possession of the Keyblade. Jealous and angry at Sora and shamed over his loss of control of the Keyblade, Riku succumbs to his pledge and powers, and becomes consumed by the darkness. In the meantime, Maleficent has attempted to use the gathered Princesses of Heart to open the Bastion's Keyhole. The Heartless-possessed Riku meets with her to check her progress, where Maleficent declares she will control and use the darkness for her own purposes; however, neither she nor Ansem-Riku can unlock the Keyhole without Kairi's missing heart.
Sora and friends manage to travel through the labyrinth of a castle to reach the chapel; there they meet with and confront Maleficent. Overconfident in her abilities and underestimating those of Sora's gang, she is soundly defeated. Escaping back to Riku for help, she is stabbed through the heart by his Keyblade of heart, made from the hearts of the six Princesses. It unlocks the darkest parts of her heart and allows her to transform into a large, powerful dragon; however, Sora's party defeat her again, and she is consumed and burned away by the darkness. Riku then appears and reveals that Maleficent was merely a pawn of the Heartless, unable to see the darkness swallowing her heart. He then departs and Sora and company travel to the Grand Hall, where the Keyhole and Princesses are located, to find and confront him. There, Sora finds Kairi unconscious on the floor in front of the partially opened Keyhole. He tries to wake her, but Riku appears to tell Sora her heart is missing. Riku continues to tell Sora that Kairi is one of the princesses and that her heart is within him. Sora is able to realize that Riku is no longer in control of his own body. Riku knocks both Donald and Goofy back behind a preset barrier, and Kairi's heart reacts to the Keyblade of heart's power, causing Sora crippling pain. Xehanort's Heartless then attacks him, but Sora recovers and blocks the strike in time. After an intense battle over who would possess Kairi's heart, Sora emerges victorious.
Riku disappears, but the Keyhole begins reacting to the presence of Kairi's heart. Sora attempts to lock the Keyhole, but without Kairi's heart, it is not complete and cannot be sealed. Sora puts two and two together and realizes what he has to do; despite Donald and Goofy's desperate pleas, Sora stabs himself with the Keyblade of heart left in Riku's wake, releasing all of the princesses' hearts (including Kairi's) and completing the Keyhole, but Sora falls into darkness himself.
Kairi wakes just in time to see Sora disappear. As Kairi, Donald, and Goofy mourn the loss of Sora, Ansem, now in full possession of Riku's body and having shaped it into one resembling his original human self, reappears, declaring that Kairi's purpose is over, effectively deciding to kill her. Donald and Goofy bravely make a stand against Ansem, but both know that, without Sora, they may not be able to stop him. However, before Ansem can attack, Riku projects himself from his stolen body, manages to establish enough control to stop him in his tracks, and warns Kairi and the others that the Heartless called by Ansem will soon overrun the castle at which they heed and run to escape. The three return to the entrance, and hesitate due to Kairi's reluctance to leave Sora and Riku behind; Goofy himself is still concerned about the Keyhole (apparently failing to realize that, without Sora and the Keyblade, the Keyhole cannot be stopped). An apparently non-hostile Heartless arrives; Donald shouts at it to get lost and whacks it over the head with his staff, but Kairi realizes that the Heartless is, in fact, Sora. At that moment, massive legions of Heartless attack, and swarm Kairi and Sora's Heartless, much to Donald and Goofy's horror. However, a brilliant flash of light blows the Heartless back, and in place of the Heartless, there is Sora, fully restored. Beast stays behind to hold off the Heartless and continue looking for Belle, and so the group departs Hollow Bastion.
Cid manages to find a way to allow them to return and seal the Keyhole. They return and help Beast reunite with the re-awakened Belle, and jump through the Keyhole to fight a Behemoth Heartless. After a conversation with Leon's group, who have returned to restore their home world, Sora seals the Keyhole at Hollow Bastion.
In the Kingdom Hearts Final Mix version, Sora also has his first encounter with Organization XIII in the chapel by way of Xemnas, here known only as "Unknown". After some cryptic messages (such as stating that Sora is incomplete and looks just like "him"), Xemnas departs. It is revealed in Kingdom Hearts II that this battle takes place shortly after Xemnas recruited Roxas into the Organization, and he fought Sora to test his abilities.
Kingdom Hearts Chain of Memories[edit]
Upon arriving in the Basement of Castle Oblivion, Riku enters a memory simulation of Hollow Bastion. Guided by the voice of DiZ, Riku explores the simulation, even coming across his old bedroom, and eventually encounters Maleficent, who tries to convince him to rejoin her. Riku refuses, and she promptly transforms into a dragon to battle him. He ultimately triumphs.
Later, Sora and company also arrive in the simulation. They encounter the Beast, who is being told by Belle to stay away from her. Noticing his plight, Sora decides to help the Beast.
As the group traverses the simulation, they encounter Maleficent, who is holding Belle hostage. Maleficent declares to Beast that Belle still loves him, but is afraid to say it to avoid detection. Maleficent gives Beast one last ultimatum, but Beast refuses. Outraged, Maleficent transforms into a dragon to battle Sora and company. Sora eventually defeats Maleficent, and as she fades away, Belle and Beast rekindle their relationship.
A statue appears here in the Entrance Hall that was not present in Kingdom Hearts.
Kingdom Hearts 358/2 Days[edit]
During Kingdom Hearts 358/2 Days, when Xion experiences a short sequence of Sora's memories, the keyhole to Hollow Bastion can be seen as Sora releases his heart and his body dissipates.
Kingdom Hearts II[edit]
Kingdom Hearts coded[edit]
After Maleficent destroys Data-Sora's Keyblade in the datascape's version of Agrabah and captures Data-Riku, Pete takes Data-Riku to the Datascape's Hollow Bastion. Without his weapon, Data-Sora is unable to fight, so Mickey travels there himself, leaving Donald, Goofy, and Data-Sora at Disney Castle. However, Sora runs off to Hollow Bastion on his own to confront Pete, and he manages to unlock the castle gate while dodging Heartless. Inside, Pete traps Sora and summons a horde of Heartless to attack, but Sora is rescued by Goofy. The two of them begin searching for a way to follow Pete deeper into the castle, while searching for Donald, who got separated from Goofy when they entered Hollow Bastion.
Sora and Goofy find Donald in the waterway, and the three of them explore the castle, with Donald and Goofy breaking Bug Blox and fighting Heartless in place of Sora. They find the pieces of the Heartless emblem that unlock the door leading to the upper levels of the castle, and at the High Tower, Data-Sora reflects on the bond he feels with Donald and Goofy. The three of them confront Pete in the Grand Hall, where he traps Donald and Goofy in a cage of blox. Desperate, Sora manifests a new Keyblade from his evolving heart and frees them. Pete retreats into the Keyhole, followed by Sora, who defeats him despite his own powers in the datascape. Pete then sets Data-Riku on him, having corrupted his data with bugs, but Data-Sora manages to subdue his friend after a drawn-out battle.
Although Data-Sora and Data-Riku emerge from the Keyhole, Riku's data is thoroughly corrupted, prompting Sora to enter Riku's personal datascape to destroy the bugs, in Hollow Bastion Part II. After visiting manifestations of Riku's memories of different worlds, Sora defeats the main source of the corruption, which takes Riku's form. Maleficent attempts to block Sora from returning from inside Riku's data, but he emerges, and he defeats Maleficent's dragon form in the chapel. Mickey, Donald, and Goofy say goodbye before returning to the real world, but when the datascape begins erasing itself, Data-Sora sets off through the Final Keyhole for the innermost part of the datascape to retrieve Maleficent and Pete and to confront the source of the corruption, Sora's Heartless.
As Data-Sora progresses through the Datascape's Castle Oblivion, he enters a room based on his visit to Hollow Bastion. He chases after Pete, using switches to progress, and defeats him. Pete calls Maleficent, who brings them to a long, trap-filled room, forcing Sora to traverse the obstacle course to reach the far side of the room. Upon confronting the two, Sora is returned to the Entrance Hall, with an Ending Card for Hollow Bastion.
Other appearances[edit]
Super Smash Bros. Ultimate[edit]
Hollow Bastion is a downloadable stage in Super Smash Bros. Ultimate, released along with Sora, as part of Challenger Pack 11. When time, stocks, or health are running low, Hollow Bastion transforms into Dive to the Heart.
Characters[edit]
Enemies[edit]
Heartless[edit]
|
|
Nobodies[edit]
|
|
Other[edit]
|
|
| Kingdom Hearts |
|---|
| Characters |
| Party members |
| Sora - Donald Duck - Goofy Tarzan - Aladdin - Ariel - Jack Skellington - Peter Pan - Beast |
| Summons |
| Simba - Genie - Dumbo - Bambi - Tinker Bell - Mushu |
| Antagonists |
| Ansem - Clayton Villains Maleficent - Riku - Hades - Captain Hook - Oogie Boogie - Ursula - Jafar |
| Non-playable characters |
| 99 Puppies - Abu - Aerith - Alice - Aurora - Bathtub - Belle - Card Soldiers - Carpet - Cave of Wonders Guardian - Cerberus - Chernabog - Cheshire Cat - Chip and Dale - Cid - Cinderella - Cloud - Crocodile - Daisy Duck - Dark Figure - Doorknob - Dr. Finkelstein - Eeyore - Enchanted Brooms - Fairy Godmother - Flotsam and Jetsam - Flounder - Flower - Geppetto - Hercules - Huey, Dewey, and Louie - Iago - Ice Titan - Jane Porter - Jasmine - Jiminy Cricket - Kairi - Kairi's Grandma - Kala - Kerchak - King Triton - Lock, Shock, and Barrel - Merlin - Mickey Mouse - Minnie Mouse - Moogles - Mr. Smee - Owl - Philoctetes - Piglet - Pinocchio - Pluto - Pongo and Perdita - Queen of Hearts - Rabbit - Rock Titan - Roo - Roxas - Sabor - Sally - Sebastian - Selphie - Sephiroth - Snow White - Squall Leonhart - Terk - The Mayor - The Peddler - The Shark - Tidus - Tigger - Wakka - Wendy - White Rabbit - Winnie the Pooh - Yuffie - Xemnas - Zero |
| Locations |
| Worlds |
| Destiny Islands - Disney Castle - Traverse Town - Wonderland - Olympus Coliseum - Deep Jungle - 100 Acre Wood - Agrabah - Monstro - Atlantica - Halloween Town - Neverland - Hollow Bastion - End of the World |
| Places |
| Dive to the Heart |
| Terms |
| Ansem's Reports - Door to Darkness - Final Keyhole - Keyblade - Keyhole - Kingdom Hearts - Mickey's Letter - Postcard - Princesses of Heart - The End - Trinity Mark |
| Music |
| Kingdom Hearts Original Soundtrack - Kingdom Hearts Original Soundtrack Complete - Simple and Clean |
| Archives |
| Accessories - Artwork - Bosses - Enemies - Items - Keyblades - Other Weapons - Removed content |
| Kingdom Hearts Chain of Memories |
|---|
| Characters |
| Party members |
| Sora - Riku - Donald Duck - Goofy - Mickey Mouse Aladdin - Ariel - Jack Skellington - Peter Pan - Beast |
| Summons |
| Simba - Genie - Cloud - Dumbo - Bambi - Tinker Bell - Mushu |
| Antagonists |
| Ansem Organization XIII Marluxia - Lexaeus - Larxene - Vexen - Zexion - Axel - Riku Replica Villains Hades - Jafar - Ursula - Oogie Boogie - Captain Hook - Maleficent |
| Non-playable characters |
| Aerith - Alice - Ansem the Wise - Belle - Card Soldiers - Cave of Wonders Guardian - Cheshire Cat - Cid - Dark Figure - Dr. Finkelstein - Eeyore - Flounder - Geppetto - Hercules - Iago - Jasmine - Jiminy Cricket - Kairi - Moogles - Naminé - Owl - Philoctetes - Piglet - Pinocchio - Pluto - Queen of Hearts - Rabbit - Roo - Sally - Sebastian - Selphie - Squall Leonhart - Tidus - Tigger - Wakka - Wendy - White Rabbit - Winnie the Pooh - Yuffie |
| Locations |
| Worlds |
| Traverse Town - Agrabah - Olympus Coliseum - Wonderland - Monstro - Halloween Town - Atlantica - Neverland - 100 Acre Wood - Hollow Bastion - Twilight Town - Destiny Islands - Castle Oblivion |
| Terms |
| Attack Card - Card break - Cards - Enemy Card - Friend Card - Gimmick Card - Item Card - Keyblade - Wayfinder - Magic Card - Map Card - Memory - Pod - Premium Cards - Reload Card - Replica - Sleight - Special Card - Summon Card - World Cards - The End |
| Music |
| Kingdom Hearts Original Soundtrack Complete - Simple and Clean |
| Archives |
| Artwork - Bosses - Enemies - Keyblades - Removed content |
| Kingdom Hearts II |
|---|
| Characters |
| Party members |
| Roxas - Sora - Donald Duck - Goofy Fa Mulan - Beast - Auron - Jack Sparrow - Aladdin - Jack Skellington - Simba - Tron - Riku |
| Summons |
| Chicken Little - Genie - Stitch - Peter Pan |
| Antagonists |
| Organization XIII Xemnas - Xigbar - Xaldin - Saïx - Axel - Demyx - Luxord Villains Maleficent - Pete - Hades - Ursula - Hector Barbossa - Jafar - Oogie Boogie - Scar Shan-Yu - Master Control Program - Sark |
| Non-playable characters |
| Abu - Aerith - Ansem the Wise - Ariel - Ariel's Sisters - Auron - Bathtub - Belle - Biggs - Captain Pete - Carpet - Cave of Wonders Guardian - Cerberus - Chien Po, Ling, and Yao - Chip - Chip and Dale - Christmas Elves - Cid - Clara Cluck - Clarabelle Cow - Cloud - Cogsworth - Daisy Duck - Dark Figure - Dr. Finkelstein - Eeyore - Elizabeth Swann - Enchanted Brooms - Flora, Fauna, and Merryweather - Flotsam and Jetsam - Flounder - Fujin - Gopher - Gullwings - Hayabusa - Hayner - Hercules - Horace Horsecollar - Hostile Program - Huey, Dewey, and Louie - Hydra - Iago - Jasmine - Jessie - Jiminy Cricket - Kairi - Kanga - King Triton - Li Shang - Lock, Shock, and Barrel - Lumière - Maleficent's Raven - Megara - Merlin - Mickey Mouse - Minnie Mouse - Moogles - Mrs. Potts - Mufasa - Mushu - Nala - Naminé - Olette - Owl - Pain and Panic - Pegasus - Pence - Philoctetes - Piglet - Pluto - Prince Eric - Pumbaa - Rabbit - Rafiki - Raijin - Reindeer - Rock Titan - Roo - Sally - Santa Claus - Scrooge McDuck - Sebastian - Seifer - Selphie - Sephiroth - Setzer - Shenzi, Banzai, and Ed - Simba and Nala's cub - Squall Leonhart - Terra-Xehanort - The Emperor - The Experiment - The Ghost of Scar - The Mayor - The Peddler - Tifa - Tigger - Timon - Tinker Bell - Undead Pirates - Vivi - Wallace - Wantz - Wardrobe - William Turner - Winnie the Pooh - Wedge - Yen Sid - Yuffie - Zero |
| Locations |
| Worlds |
| Twilight Town - Destiny Islands - Hollow Bastion/Radiant Garden - The Land of Dragons - Beast's Castle - 100 Acre Wood - Olympus Coliseum - Disney Castle - Timeless River - Atlantica - Port Royal - Agrabah - Halloween Town - Pride Lands - Space Paranoids - The World That Never Was - End of Sea |
| Places |
| The Other Twilight Town - Dive to the Heart - Mysterious Tower - Kingdom Hearts |
| Terms |
| Cornerstone of Light - Drive Form - Gate - Hollow Bastion Restoration Committee - Kairi's Letter - Keyblade - Kingdom Hearts Encoder - Organization XIII - Princesses of Heart - Reaction Command - Secret Ansem Report - Sidecar Glider - Skateboard - The End - Twilight Town Disciplinary Committee |
| Music |
| Kingdom Hearts II Original Soundtrack - Kingdom Hearts Original Soundtrack Complete - Sanctuary |
| Archives |
| Accessories - Artwork - Bosses - Enemies - Items - Keyblades - Other Weapons - Songs - Removed content |
| Kingdom Hearts coded |
|---|
| Characters |
| Party members |
| Data-Sora Cloud - Hercules - Donald Duck - Goofy |
| Antagonists |
| Maleficent - Pete - Sora's Heartless |
| Non-playable characters |
| Aladdin - Alice - Card Soldier - Cave of Wonders Guardian - Cerberus - Cheshire Cat - Chip and Dale - Cid - Data-Naminé - Data-Riku - Data-Roxas - Hades - Huey, Dewey, and Louie - Iago - Jafar - Jasmine - Jiminy Cricket - Mickey Mouse - Moogle - Philoctetes - Pluto - Queen of Hearts - Rock Titan - Selphie - Squall Leonhart - The Peddler - Tidus - Wakka - White Rabbit - Yuffie |
| Locations |
| Worlds |
| Disney Castle - Datascape - Dive to the Heart - Destiny Islands - Traverse Town - Wonderland - Olympus Coliseum - Agrabah - Hollow Bastion - Castle Oblivion |
| Terms |
| Bug Blox - Command Matrix - Datascape - Debug Ability - Ending Card - Gear Matrix - Hero's License - Keyblade - Keyhole - Mickey's Letters - Questploration - Stat Matrix - The End - World Card |
| Music |
| Kingdom Hearts Birth by Sleep & 358/2 Days Original Soundtrack - Simple and Clean |
| Archives |
| Artwork - Bosses - Items - Removed content |
| Kingdom Hearts Melody of Memory |
|---|
| Characters |
| Party members |
| Kairi - Sora - Roxas - Aqua - Riku Donald Duck - Goofy - Axel - Xion - Terra - Ventus - Meow Wow - Komory Bat - Mickey Mouse Hercules - Aladdin - Ariel - Peter Pan - Beast - Fa Mulan - Simba - Stitch |
| Antagonists |
| Xehanort - Ansem, Seeker of Darkness - Xemnas - Maleficent |
| Non-playable characters |
| Aeleus - Ansem the Wise - Even - Fairy Godmother - Ienzo - Nameless Star - Terra-Xehanort - Yen Sid |
| Locations |
| Worlds |
| Mysterious Tower - Radiant Garden - The Final World |
| Terms |
| An Oath to Return - Another Key - Key Art - Keyblade - Museum - Music Stage - Rhythm Points - Story Scene - The End - VS Battle - World Tour |
| Music |
| Kingdom Hearts Melody of Memory - Special Disc - Unnamed tracks |
| Archives |
| Artwork - Bosses - Enemies - Items - Trophy - Songs |

![Kairi [KH I]](https://kh.wiki.gallery/images/thumb/1/13/Kairi_%28Young%29_KH.png/57px-Kairi_%28Young%29_KH.png)
![Kairi's Grandma [KH I]](https://kh.wiki.gallery/images/thumb/2/20/Kairi%27s_Grandma_KH.png/63px-Kairi%27s_Grandma_KH.png)
![Leon [KH I]](https://kh.wiki.gallery/images/thumb/4/42/Leon_KH.png/120px-Leon_KH.png)
![Yuffie [KH I]](https://kh.wiki.gallery/images/thumb/3/35/Yuffie_KH.png/56px-Yuffie_KH.png)
![Cid [KH I]](https://kh.wiki.gallery/images/thumb/9/9a/Cid_KH.png/55px-Cid_KH.png)
![Cloud [KH I]](https://kh.wiki.gallery/images/thumb/5/5a/Cloud_KH.png/120px-Cloud_KH.png)
![Maleficent [KH I][KH CoM][KH coded]](https://kh.wiki.gallery/images/thumb/f/f6/Maleficent_KHREC.png/104px-Maleficent_KHREC.png)
![Hades [KH I]](https://kh.wiki.gallery/images/thumb/9/90/Hades_KH.png/55px-Hades_KH.png)
![Jafar [KH I]](https://kh.wiki.gallery/images/thumb/3/31/Jafar_KH.png/98px-Jafar_KH.png)
![Ursula [KH I]](https://kh.wiki.gallery/images/thumb/f/fe/Ursula_KH.png/118px-Ursula_KH.png)
![Captain Hook [KH I]](https://kh.wiki.gallery/images/thumb/f/fe/Captain_Hook_KH.png/71px-Captain_Hook_KH.png)
![Oogie Boogie [KH I]](https://kh.wiki.gallery/images/thumb/2/29/Oogie_Boogie_KH.png/120px-Oogie_Boogie_KH.png)
![Riku [KH I]](https://kh.wiki.gallery/images/thumb/c/c4/Riku_%28Dark_Mode%29_KH.png/85px-Riku_%28Dark_Mode%29_KH.png)
![Beast [KH I][KH CoM]](https://kh.wiki.gallery/images/thumb/c/c7/Beast_KH.png/120px-Beast_KH.png)
![Ansem, Seeker of Darkness [KH I]](https://kh.wiki.gallery/images/thumb/3/3e/Ansem%2C_Seeker_of_Darkness_KH.png/94px-Ansem%2C_Seeker_of_Darkness_KH.png)
![Sora-Heartless [KH I][KH coded]](https://kh.wiki.gallery/images/thumb/b/b7/Shadow_KHFM.png/75px-Shadow_KHFM.png)
![Snow White [KH I]](https://kh.wiki.gallery/images/thumb/d/de/Snow_White_KH.png/83px-Snow_White_KH.png)
![Cinderella [KH I]](https://kh.wiki.gallery/images/thumb/e/e8/Cinderella_KH.png/75px-Cinderella_KH.png)
![Alice [KH I]](https://kh.wiki.gallery/images/thumb/1/1a/Alice_KH.png/70px-Alice_KH.png)
![Belle [KH I][KH CoM]](https://kh.wiki.gallery/images/thumb/f/f3/Belle_KH.png/69px-Belle_KH.png)
![Xemnas [KH I FM]](https://kh.wiki.gallery/images/thumb/c/c8/Mysterious_Figure_KHFM.png/60px-Mysterious_Figure_KHFM.png)
![Data-Riku [KH coded]](https://kh.wiki.gallery/images/thumb/4/47/Data-Riku_KHREC.png/70px-Data-Riku_KHREC.png)
![Pete [KH coded]](https://kh.wiki.gallery/images/thumb/2/23/Pete_KHII.png/85px-Pete_KHII.png)
![Shadow [KH I][KH CoM][KH coded]](https://kh.wiki.gallery/images/thumb/d/de/Shadow_KHII.png/120px-Shadow_KHII.png)
![Soldier [KH I]](https://kh.wiki.gallery/images/thumb/e/ee/Soldier_KHII.png/94px-Soldier_KHII.png)
![Stealth Soldier [KH I FM]](https://kh.wiki.gallery/images/thumb/0/04/Stealth_Soldier_KHFM.png/95px-Stealth_Soldier_KHFM.png)
![Air Soldier [KH I]](https://kh.wiki.gallery/images/thumb/d/d2/Air_Soldier_KH.png/120px-Air_Soldier_KH.png)
![Large Body [KH I]](https://kh.wiki.gallery/images/thumb/2/2e/Large_Body_KHII.png/120px-Large_Body_KHII.png)
![Red Nocturne [KH I]](https://kh.wiki.gallery/images/thumb/2/2c/Red_Nocturne_KH.png/79px-Red_Nocturne_KH.png)
![Blue Rhapsody [KH I]](https://kh.wiki.gallery/images/thumb/e/e7/Blue_Rhapsody_KH.png/69px-Blue_Rhapsody_KH.png)
![Yellow Opera [KH I]](https://kh.wiki.gallery/images/thumb/0/04/Yellow_Opera_KH.png/67px-Yellow_Opera_KH.png)
![Green Requiem [KH I]](https://kh.wiki.gallery/images/thumb/0/06/Green_Requiem_KH.png/68px-Green_Requiem_KH.png)
![Darkball [KH I][KH CoM][KH coded]](https://kh.wiki.gallery/images/thumb/3/33/Darkball_KH.png/120px-Darkball_KH.png)
![Wyvern [KH I][KH CoM][KH coded]](https://kh.wiki.gallery/images/thumb/0/08/Wyvern_KH.png/120px-Wyvern_KH.png)
![Defender [KH I][KH CoM][KH coded]](https://kh.wiki.gallery/images/thumb/2/23/Defender_KH.png/120px-Defender_KH.png)
![Eliminator [KH coded]](https://kh.wiki.gallery/images/thumb/0/0e/Eliminator_KHREC.png/120px-Eliminator_KHREC.png)
![Wizard [KH I][KH CoM][KH coded]](https://kh.wiki.gallery/images/thumb/b/ba/Wizard_KH.png/76px-Wizard_KH.png)
![White Mushroom [KH CoM]](https://kh.wiki.gallery/images/thumb/4/4a/White_Mushroom_KH.png/67px-White_Mushroom_KH.png)
![Black Fungus [KH I][KH CoM][KH coded]](https://kh.wiki.gallery/images/thumb/5/50/Black_Fungus_KH.png/76px-Black_Fungus_KH.png)
![Gold Tricholoma [KH coded]](https://kh.wiki.gallery/images/thumb/d/d9/Gold_Tricholoma_KHREC.png/81px-Gold_Tricholoma_KHREC.png)
![Behemoth [KH I]](https://kh.wiki.gallery/images/thumb/7/72/Behemoth_KH.png/120px-Behemoth_KH.png)
![Blox Bug [KH coded]](https://kh.wiki.gallery/images/thumb/3/3c/Blox_Bug_KHREC.png/120px-Blox_Bug_KHREC.png)
![Prize Bug [KH coded]](https://kh.wiki.gallery/images/thumb/d/da/Prize_Bug_KHREC.png/120px-Prize_Bug_KHREC.png)
![Danger Bug [KH coded]](https://kh.wiki.gallery/images/thumb/6/60/Danger_Bug_KHREC.png/120px-Danger_Bug_KHREC.png)
![Metal Bug [KH coded]](https://kh.wiki.gallery/images/thumb/0/0a/Metal_Bug_KHREC.png/120px-Metal_Bug_KHREC.png)
![Invisible [KH coded]](https://kh.wiki.gallery/images/thumb/e/e8/Invisible_KHREC.png/112px-Invisible_KHREC.png)
![Sora's Heartless: Neo Darkside [KH coded]](https://kh.wiki.gallery/images/thumb/6/6a/Sora%27s_Heartless_-_Neo_Darkside_KHREC.png/120px-Sora%27s_Heartless_-_Neo_Darkside_KHREC.png)
![Sora's Heartless: True Form [KH coded]](https://kh.wiki.gallery/images/thumb/c/c8/Sora%27s_Heartless_-_True_Form_KHREC.png/87px-Sora%27s_Heartless_-_True_Form_KHREC.png)
![Sora's Heartless: Shadow [KH coded]](https://kh.wiki.gallery/images/thumb/d/d2/Shadow_KH.png/120px-Shadow_KH.png)
![Data-Roxas [KH coded]](https://kh.wiki.gallery/images/thumb/9/95/Data-Roxas_%28Bugged%29_KHREC.png/120px-Data-Roxas_%28Bugged%29_KHREC.png)
![Maleficent [KH I]](https://kh.wiki.gallery/images/thumb/c/c5/Maleficent_KH.png/69px-Maleficent_KH.png)
![Dragon Maleficent [KH I][KH CoM][KH coded]](https://kh.wiki.gallery/images/thumb/d/de/Maleficent_%28Dragon%29_KH.png/120px-Maleficent_%28Dragon%29_KH.png)
![Riku (Keyblade) [KH I]](https://kh.wiki.gallery/images/thumb/a/a6/Riku_%28Dark%29_KH.png/70px-Riku_%28Dark%29_KH.png)
![Pete [KH coded]](https://kh.wiki.gallery/images/thumb/6/65/Pete_KHREC.png/90px-Pete_KHREC.png)
![Data-Riku [KH coded]](https://kh.wiki.gallery/images/thumb/0/0e/Data-Riku_%28Battle%29_KHREC.png/67px-Data-Riku_%28Battle%29_KHREC.png)