Lucky Emblem: Difference between revisions
(Added Proof of Promises to reward table) |
No edit summary |
||
| (17 intermediate revisions by 12 users not shown) | |||
| Line 1: | Line 1: | ||
{{cleanup| | {{cleanup|Redo screenshots to not have the "taking screenshot" thing}} | ||
{{game|KH3}} | {{game|KH3}} | ||
{{Q|Supposedly, these things are hidden all over town. And if you get a picture of them, they'll bring you good luck.|Olette,explaining about the Lucky Emblems}} | {{Q|Supposedly, these things are hidden all over town. And if you get a picture of them, they'll bring you good luck.|Olette, explaining about the Lucky Emblems}} | ||
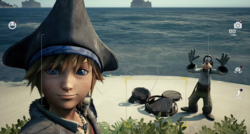
[[File:Lucky Emblem KHIII.png|thumb|250px|Sora photographs a Lucky Emblem.]] | [[File:Lucky Emblem KHIII.png|thumb|250px|Sora photographs a Lucky Emblem.]] | ||
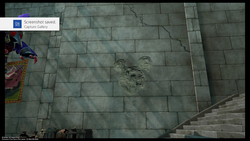
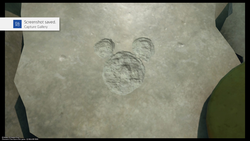
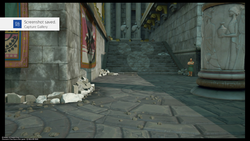
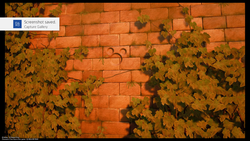
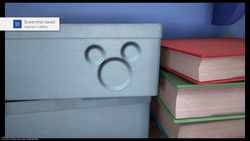
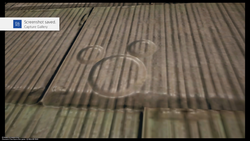
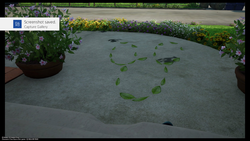
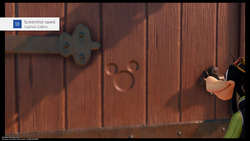
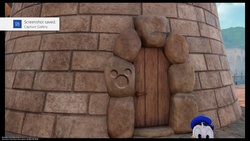
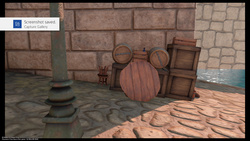
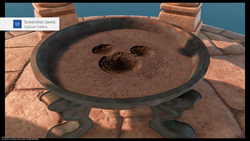
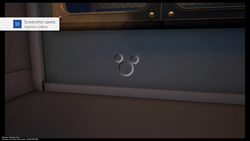
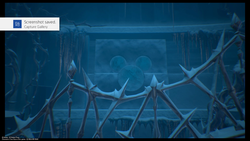
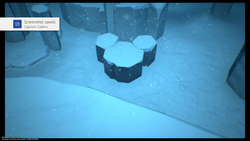
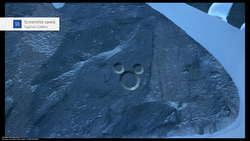
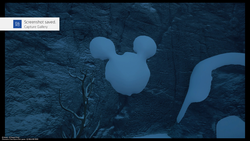
'''{{Nihongo|Lucky Emblems|幸運のマーク|Kōun no Māku}}''' are {{w|Hidden Mickey}}s in the worlds of ''[[Kingdom Hearts III]]''. They can be photographed with the [[Gummiphone]]. While the majority of them are simply standard | '''{{Nihongo|Lucky Emblems|幸運のマーク|Kōun no Māku}}''' are {{w|Hidden Mickey}}s in the worlds of ''[[Kingdom Hearts III]]''. They can be photographed with the [[Gummiphone]]. While the majority of them are simply standard Hidden Mickeys ([[File:Symbol Character - Mickey.png|15px]]) stamped into a wall, they can sometimes be more esoteric, incorporating standard objects that resemble a Hidden Mickey when viewed from a specific angle. | ||
==Story== | ==Story== | ||
===''Kingdom Hearts III''=== | ===''Kingdom Hearts III''=== | ||
During the group's first visit to [[Twilight Town]], Goofy takes a group picture of Sora, Hayner, Pence, Olette, and Donald using the Gummiphone. While reviewing the photograph, Olette points out a Lucky Emblem in the wall behind them. She explains that they're part of a new phenomenon of symbols appearing all over town; taking a picture of one will bring good luck. Sora, Donald, and Goofy then depart to investigate the Old Mansion, but not before noting the Emblem's resemblance to [[the King]]. | |||
==Gameplay== | ==Gameplay== | ||
Sora is given a reward once a certain number of Lucky Emblems are photographed. | Sora is given a reward once a certain number of Lucky Emblems are photographed. | ||
{|cellspacing="0" cellpadding="5" border="1" align="center" | {|cellspacing="0" cellpadding="5" border="1" align="center"style="width:150px" | ||
|-style="{{style|kh3|a}}" | |||
! | !# | ||
!Reward | |||
|- | |- | ||
| 1 || [[AP Boost]] | | 1 || [[AP Boost]] | ||
| Line 50: | Line 51: | ||
| 80 || [[Orichalcum+]] | | 80 || [[Orichalcum+]] | ||
|- | |- | ||
| 90 || [[Mickey Clasp | | 90 || [[Mickey Clasp]] | ||
|} | |} | ||
The amount of Lucky Emblems photographed is tied to unlocking the [[Yozora (video)|Secret Ending]]. The player must photograph all 90 on [[Beginner Mode]], 60 on [[Standard Mode]], and 30 on [[Proud Mode]]; no emblems are required on [[Critical Mode]]. | The amount of Lucky Emblems photographed is tied to unlocking the [[Yozora (video)|Secret Ending]]. The player must photograph all 90 on [[Beginner Mode]], 60 on [[Standard Mode]], and 30 on [[Proud Mode]]; no emblems are required on [[Critical Mode]]. | ||
The [[Proof of Promises]] is awarded when all 90 Lucky Emblems have been found in a cleared save file. | |||
==List of Lucky Emblems== | ==List of Lucky Emblems== | ||
===Olympus=== | ===Olympus=== | ||
[[Olympus]] has 12 Lucky Emblems that need to be photographed. | [[Olympus]] has 12 Lucky Emblems that need to be photographed. These can only be photographed if the world is revisited after fighting the [[Demon Tide]] in Twilight Town. | ||
{|class="mw-collapsible mw-collapsed" cellspacing="0" cellpadding="6" border="1" align="center" | {|class="mw-collapsible mw-collapsed" cellspacing="0" cellpadding="6" border="1" align="center" style="width:900px" | ||
|-style="{{style|kh3|a}}" | |||
!style=" | !style="width:5%"|No. | ||
!style=" | !style="width:33%"|Lucky Emblem | ||
!style=" | !style="width:20%"|Location | ||
!style="width:42%"|Notes | |||
|- | |- | ||
| 1 || [[File:Lucky Emblem (Olympus) 01 KHIII.png|250px]] || [[Overlook]] || Imprint on wall | | 1 || [[File:Lucky Emblem (Olympus) 01 KHIII.png|250px|center]] || [[Overlook]] || Imprint on wall | ||
|- | |- | ||
| 2 || [[File:Lucky Emblem (Olympus) 02 KHIII.png|250px]] || [[The Big Olive]] || Imprint on wall | | 2 || [[File:Lucky Emblem (Olympus) 02 KHIII.png|250px|center]] || [[The Big Olive]] || Imprint on wall | ||
|- | |- | ||
| 3 || [[File:Lucky Emblem (Olympus) 03 KHIII.png|250px]] || [[Agora]] || Imprint on stairs | | 3 || [[File:Lucky Emblem (Olympus) 03 KHIII.png|250px|center]] || [[Agora]] || Imprint on stairs | ||
|- | |- | ||
| 4 || [[File:Lucky Emblem (Olympus) 04 KHIII.png|250px]] || Overlook || Imprint on wall | | 4 || [[File:Lucky Emblem (Olympus) 04 KHIII.png|250px|center]] || Overlook || Imprint on wall | ||
|- | |- | ||
| 5 || [[File:Lucky Emblem (Olympus) 05 KHIII.png|250px]] || [[Cliff Ascent]] || Imprint on pillar | | 5 || [[File:Lucky Emblem (Olympus) 05 KHIII.png|250px|center]] || [[Cliff Ascent]] || Imprint on pillar | ||
|- | |- | ||
| 6 || [[File:Lucky Emblem (Olympus) 06 KHIII.png|250px]] || Cliff Ascent || Imprint on wall next to waterfall | | 6 || [[File:Lucky Emblem (Olympus) 06 KHIII.png|250px|center]] || Cliff Ascent || Imprint on wall next to waterfall | ||
|- | |- | ||
| 7 || [[File:Lucky Emblem (Olympus) 07 KHIII.png|250px]] || Cliff Ascent || Rock formation | | 7 || [[File:Lucky Emblem (Olympus) 07 KHIII.png|250px|center]] || Cliff Ascent || Rock formation | ||
|- | |- | ||
| 8 || [[File:Lucky Emblem (Olympus) 08 KHIII.png|250px]] || [[Mountainside]] || Made out of vines | | 8 || [[File:Lucky Emblem (Olympus) 08 KHIII.png|250px|center]] || [[Mountainside]] || Made out of vines | ||
|- | |- | ||
| 9 || [[File:Lucky Emblem (Olympus) 09 KHIII.png|250px]] || {{c|Corridors|ol}} || Imprint on wall | | 9 || [[File:Lucky Emblem (Olympus) 09 KHIII.png|250px|center]] || {{c|Corridors|ol}} || Imprint on wall | ||
|- | |- | ||
| 10 || [[File:Lucky Emblem (Olympus) 10 KHIII.png|250px]] || Corridors || Imprint on wall | | 10 || [[File:Lucky Emblem (Olympus) 10 KHIII.png|250px|center]] || Corridors || Imprint on wall | ||
|- | |- | ||
| 11 || [[File:Lucky Emblem (Olympus) 11 KHIII.png|250px]] || [[Secluded Forge]] || Imprint on anvil | | 11 || [[File:Lucky Emblem (Olympus) 11 KHIII.png|250px|center]] || [[Secluded Forge]] || Imprint on anvil | ||
|- | |- | ||
| 12 || [[File:Lucky Emblem (Olympus) 12 KHIII.png|250px]] || [[Cloud Ridge]] || Cloud formation | | 12 || [[File:Lucky Emblem (Olympus) 12 KHIII.png|250px|center]] || [[Cloud Ridge]] || Cloud formation | ||
|} | |} | ||
| Line 93: | Line 97: | ||
[[Twilight Town]] has 9 Lucky Emblems that need to be photographed. | [[Twilight Town]] has 9 Lucky Emblems that need to be photographed. | ||
{|class="mw-collapsible mw-collapsed" cellspacing="0" cellpadding="6" border="1" align="center" | {|class="mw-collapsible mw-collapsed" cellspacing="0" cellpadding="6" border="1" align="center" style="width:900px" | ||
|-style="{{style|kh3|a}}" | |||
!style=" | !style="width:5%"|No. | ||
!style=" | !style="width:33%"|Lucky Emblem | ||
!style=" | !style="width:20%"|Location | ||
!style="width:42%"|Notes | |||
|- | |- | ||
| 1 || [[File:Lucky Emblem (Twilight Town) 01 KHIII.png|250px]] || [[Tram Common]] || Imprint on wall next to Gummi Shop | | 1 || [[File:Lucky Emblem (Twilight Town) 01 KHIII.png|250px|center]] || [[Tram Common]] || Imprint on wall next to Gummi Shop | ||
|- | |- | ||
| 2 || [[File:Lucky Emblem (Twilight Town) 02 KHIII.png|250px]] || Tram Common || Imprint on tram roof | | 2 || [[File:Lucky Emblem (Twilight Town) 02 KHIII.png|250px|center]] || Tram Common || Imprint on tram roof | ||
|- | |- | ||
| 3 || [[File:Lucky Emblem (Twilight Town) 03 KHIII.png|250px]] || Tram Common || Imprint on chimney | | 3 || [[File:Lucky Emblem (Twilight Town) 03 KHIII.png|250px|center]] || Tram Common || Imprint on chimney | ||
|- | |- | ||
| 4 || [[File:Lucky Emblem (Twilight Town) 04 KHIII.png|250px]] || Tram Common || Imprint on screen, have to wait for short to finish before being able to photographed | | 4 || [[File:Lucky Emblem (Twilight Town) 04 KHIII.png|250px|center]] || Tram Common || Imprint on screen, have to wait for short to finish before being able to photographed | ||
|- | |- | ||
| 5 || [[File:Lucky Emblem (Twilight Town) 05 KHIII.png|250px]] || Tram Common || Made of plates on rooftop terrace | | 5 || [[File:Lucky Emblem (Twilight Town) 05 KHIII.png|250px|center]] || Tram Common || Made of plates on rooftop terrace | ||
|- | |- | ||
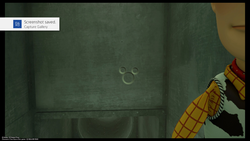
| 6 || [[File:Lucky Emblem (Twilight Town) 06 KHIII.png|250px]] || Tram Common || Imprint on cellar's door | | 6 || [[File:Lucky Emblem (Twilight Town) 06 KHIII.png|250px|center]] || Tram Common || Imprint on cellar's door | ||
|- | |- | ||
| 7 || [[File:Lucky Emblem (Twilight Town) 07 KHIII.png|250px]] || [[The Woods]] || Imprint on wall near [[Underground Conduit]] | | 7 || [[File:Lucky Emblem (Twilight Town) 07 KHIII.png|250px|center]] || [[The Woods]] || Imprint on wall near [[Underground Conduit]] | ||
|- | |- | ||
| 8 || [[File:Lucky Emblem (Twilight Town) 08 KHIII.png|250px]] || The Woods || Light cast through the trees on a hill | | 8 || [[File:Lucky Emblem (Twilight Town) 08 KHIII.png|250px|center]] || The Woods || Light cast through the trees on a hill | ||
|- | |- | ||
| 9 || [[File:Lucky Emblem (Twilight Town) 09 KHIII.png|250px|center]] || [[The Old Mansion]] || Imprint on wall | |||
|} | |} | ||
| Line 122: | Line 126: | ||
[[Toy Box]] has 11 Lucky Emblems that need to be photographed. | [[Toy Box]] has 11 Lucky Emblems that need to be photographed. | ||
{|class="mw-collapsible mw-collapsed" cellspacing="0" cellpadding="6" border="1" align="center" | {|class="mw-collapsible mw-collapsed" cellspacing="0" cellpadding="6" border="1" align="center" style="width:900px" | ||
|-style="{{style|kh3|a}}" | |||
!style=" | !style="width:5%"|No. | ||
!style=" | !style="width:33%"|Lucky Emblem | ||
!style=" | !style="width:20%"|Location | ||
!style="width:42%"|Notes | |||
|- | |- | ||
| | | 1 || [[File:Lucky Emblem (Toy Box) 01 KHIII.png|250px|center]] || [[Andy's House]] || Imprint on box | ||
|- | |- | ||
| | | 2 || [[File:Lucky Emblem (Toy Box) 02 KHIII.png|250px|center]] || Andy's House || Imprint on roof | ||
|- | |- | ||
| | | 3 || [[File:Lucky Emblem (Toy Box) 03 KHIII.png|250px|center]] || Andy's House || Made of leaves | ||
|- | |- | ||
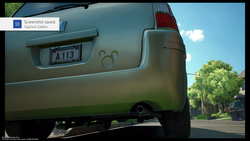
| | | 4 || [[File:Lucky Emblem (Toy Box) 04 KHIII.png|250px|center]] || Andy's House || Imprint on car | ||
|- | |- | ||
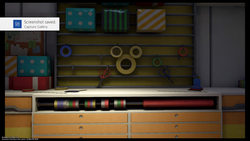
| | | 5 || [[File:Lucky Emblem (Toy Box) 05 KHIII.png|250px|center]] || [[Main Floor: 1F]] || Made of tape | ||
|- | |- | ||
| | | 6 || [[File:Lucky Emblem (Toy Box) 06 KHIII.png|250px|center]] || Main Floor: 1F || Imprint on pedestal. Requires a Gigas to destroy the display model. | ||
|- | |- | ||
| | | 7 || [[File:Lucky Emblem (Toy Box) 07 KHIII.png|250px|center]] || [[Lower Vents]] || Imprint on wall | ||
|- | |- | ||
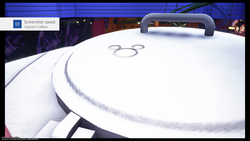
| | | 8 || [[File:Lucky Emblem (Toy Box) 08 KHIII.png|250px|center]] || [[Main Floor: 2F]] || Imprint on UFO | ||
|- | |- | ||
| | | 9 || [[File:Lucky Emblem (Toy Box) 09 KHIII.png|250px|center]] || [[Babies & Toddlers: Dolls]] || Made of disco balls, have to be taken from a specific angle in order to be photographed | ||
|- | |- | ||
| | | 10 || [[File:Lucky Emblem (Toy Box) 10 KHIII.png|250px|center]] || Main Floor: 3F || Imprint on stand | ||
|- | |- | ||
| 11 || [[File:Lucky Emblem (Toy Box) 11 KHIII.png|250px|center]] || Main Floor: 1F || Made of box and stickers, just outside the store. | |||
|} | |} | ||
| Line 155: | Line 159: | ||
[[Kingdom of Corona]] has 9 Lucky Emblems that need to be photographed. | [[Kingdom of Corona]] has 9 Lucky Emblems that need to be photographed. | ||
{|class="mw-collapsible mw-collapsed" cellspacing="0" cellpadding="6" border="1" align="center" | {|class="mw-collapsible mw-collapsed" cellspacing="0" cellpadding="6" border="1" align="center" style="width:900px" | ||
|-style="{{style|kh3|a}}" | |||
!style=" | !style="width:5%"|No. | ||
!style=" | !style="width:33%"|Lucky Emblem | ||
!style=" | !style="width:20%"|Location | ||
!style="width:42%"|Notes | |||
|- | |- | ||
| | | 1 || [[File:Lucky Emblem (Kingdom of Corona) 01 KHIII.png|250px|center]] || {{c|Tower|koc}} || Rock formation, have to be photographed from the roof of Rapunzel's Tower | ||
|- | |- | ||
| | | 2 || [[File:Lucky Emblem (Kingdom of Corona) 02 KHIII.png|250px|center]] || [[Marsh]] || Imprint on wall | ||
|- | |- | ||
| | | 3 || [[File:Lucky Emblem (Kingdom of Corona) 03 KHIII.png|250px|center]] || [[Wetlands]] || Imprint on barrel in a cave | ||
|- | |- | ||
| | | 4 || [[File:Lucky Emblem (Kingdom of Corona) 04 KHIII.png|250px|center]] || {{c|Shore|koc}} || Imprint on bridge | ||
|- | |- | ||
| | | 5 || [[File:Lucky Emblem (Kingdom of Corona) 05 KHIII.png|250px|center]] || [[Thoroughfare]] || Imprint on arch | ||
|- | |- | ||
| | | 6 || [[File:Lucky Emblem (Kingdom of Corona) 06 KHIII.png|250px|center]] || Thoroughfare || Imprint on door | ||
|- | |- | ||
| | | 7 || [[File:Lucky Emblem (Kingdom of Corona) 07 KHIII.png|250px|center]] || {{c|Wharf|koc}} || Imprint on doorpost | ||
|- | |- | ||
| | | 8 || [[File:Lucky Emblem (Kingdom of Corona) 08 KHIII.png|250px|center]] || Wharf || Made of crates and barrels | ||
|- | |- | ||
| 9 || [[File:Lucky Emblem (Kingdom of Corona) 09 KHIII.png|250px|center]] || Wharf || Imprint on pedestal on tower | |||
|} | |} | ||
| Line 184: | Line 188: | ||
[[Monstropolis]] has 11 Lucky Emblems that need to be photographed. | [[Monstropolis]] has 11 Lucky Emblems that need to be photographed. | ||
{|class="mw-collapsible mw-collapsed" cellspacing="0" cellpadding="6" border="1" align="center" | {|class="mw-collapsible mw-collapsed" cellspacing="0" cellpadding="6" border="1" align="center" style="width:900px" | ||
|-style="{{style|kh3|a}}" | |||
!style=" | !style="width:5%"|No. | ||
!style=" | !style="width:33%"|Lucky Emblem | ||
!style=" | !style="width:20%"|Location | ||
!style="width:42%"|Notes | |||
|- | |||
| 1 || [[File:Lucky Emblem (Monstropolis) 01 KHIII.png|250px|center]] || [[Laugh Floor]] || Drawing on clipboard | |||
|- | |||
| 2 || [[File:Lucky Emblem (Monstropolis) 02 KHIII.png|250px|center]] || Laugh Floor || Imprint on floor underneath clown | |||
|- | |- | ||
| | | 3 || [[File:Lucky Emblem (Monstropolis) 03 KHIII.png|250px|center]] || [[Upper Level]] || Imprint on wall | ||
|- | |- | ||
| | | 4 || [[File:Lucky Emblem (Monstropolis) 04 KHIII.png|250px|center]] || Upper Level || Made of doors | ||
|- | |- | ||
| | | 5 || [[File:Lucky Emblem (Monstropolis) 05 KHIII.png|250px|center]] || [[Ground Floor]] || Imprint on wall | ||
|- | |- | ||
| | | 6 || [[File:Lucky Emblem (Monstropolis) 06 KHIII.png|250px|center]] || Ground Floor || Paint spill on floor | ||
|- | |- | ||
| | | 7 || [[File:Lucky Emblem (Monstropolis) 07 KHIII.png|250px|center]] || [[Second Floor]] || Imprint on wall | ||
|- | |- | ||
| | | 8 || [[File:Lucky Emblem (Monstropolis) 08 KHIII.png|250px|center]] || [[Accessway]] || Imprint on file cabinet; near save point | ||
|- | |- | ||
| | | 9 || [[File:Lucky Emblem (Monstropolis) 09 KHIII.png|250px|center]] || Accessway || Imprint on doorpost | ||
|- | |- | ||
| | | 10 || [[File:Lucky Emblem (Monstropolis) 10 KHIII.png|250px|center]] || [[Tank Yard]] || Made of pipes, have to be photographed from a specific angle | ||
|- | |- | ||
| | | 11 || [[File:Lucky Emblem (Monstropolis) 11 KHIII.png|250px|center]] || [[Door Vault Passage]] || Imprint on floor, can be only be photographed after finishing the world | ||
|} | |||
===100 Acre Wood=== | |||
[[100 Acre Wood]] has 3 Lucky Emblems that need to be photographed. | |||
{|class="mw-collapsible mw-collapsed" cellspacing="0" cellpadding="6" border="1" align="center" style="width:900px" | |||
|-style="{{style|kh3|a}}" | |||
!style="width:5%"|No. | |||
!style="width:33%"|Lucky Emblem | |||
!style="width:20%"|Location | |||
!style="width:42%"|Notes | |||
|- | |- | ||
| | | 1 || [[File:Lucky Emblem (100 Acre Wood) 01 KHIII.png|250px|center]] || [[Rabbit's House]] || Tree formation in the distance | ||
|- | |- | ||
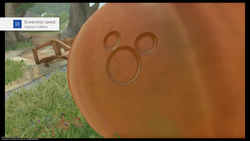
| | | 2 || [[File:Lucky Emblem (100 Acre Wood) 02 KHIII.png|250px|center]] || Rabbit's House || Imprint on pumpkin | ||
|- | |- | ||
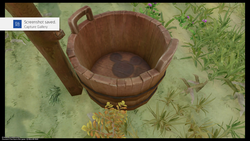
| 3 || [[File:Lucky Emblem (100 Acre Wood) 03 KHIII.png|250px|center]] || Rabbit's House || Imprint on the bottom of the bucket | |||
|} | |} | ||
| Line 217: | Line 238: | ||
[[Arendelle]] has 11 Lucky Emblems that need to be photographed. | [[Arendelle]] has 11 Lucky Emblems that need to be photographed. | ||
{|class="mw-collapsible mw-collapsed" cellspacing="0" cellpadding="6" border="1" align="center" | {|class="mw-collapsible mw-collapsed" cellspacing="0" cellpadding="6" border="1" align="center" style="width:900px" | ||
|-style="{{style|kh3|a}}" | |||
!style=" | !style="width:5%"|No. | ||
!style=" | !style="width:33%"|Lucky Emblem | ||
!style=" | !style="width:20%"|Location | ||
!style="width:42%"|Notes | |||
|- | |- | ||
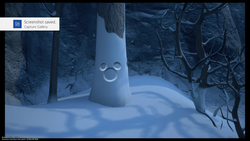
| 1 || [[File:Lucky Emblem (Arendelle) 01 KHIII.png|250px]] || [[Treescape]] || Imprint on tree | | 1 || [[File:Lucky Emblem (Arendelle) 01 KHIII.png|250px|center]] || [[Treescape]] || Imprint on tree | ||
|- | |- | ||
| 2 || [[File:Lucky Emblem (Arendelle) 02 KHIII.png|250px]] || [[Middle Tier]] || Imprint on wall | | 2 || [[File:Lucky Emblem (Arendelle) 02 KHIII.png|250px|center]] || [[Middle Tier]] || Imprint on wall | ||
|- | |- | ||
| 3 || [[File:Lucky Emblem (Arendelle) 03 KHIII.png|250px]] || [[Lower Tier]] || Imprint on wall | | 3 || [[File:Lucky Emblem (Arendelle) 03 KHIII.png|250px|center]] || [[Lower Tier]] || Imprint on wall | ||
|- | |- | ||
| 4 || [[File:Lucky Emblem (Arendelle) 04 KHIII.png|250px]] || Middle Tier || Imprint on wall | | 4 || [[File:Lucky Emblem (Arendelle) 04 KHIII.png|250px|center]] || Middle Tier || Imprint on wall | ||
|- | |- | ||
| 5 || [[File:Lucky Emblem (Arendelle) 05 KHIII.png|250px]] || [[Upper Tier]] || Rock formation | | 5 || [[File:Lucky Emblem (Arendelle) 05 KHIII.png|250px|center]] || [[Upper Tier]] || Rock formation | ||
|- | |- | ||
| 6 || [[File:Lucky Emblem (Arendelle) 06 KHIII.png|250px]] || [[Mountain Ridge]] || Imprint on wall | | 6 || [[File:Lucky Emblem (Arendelle) 06 KHIII.png|250px|center]] || [[Mountain Ridge]] || Imprint on wall | ||
|- | |- | ||
| 7 || [[File:Lucky Emblem (Arendelle) 07 KHIII.png|250px]] || [[Frozen Wall]] || Snow on | | 7 || [[File:Lucky Emblem (Arendelle) 07 KHIII.png|250px|center]] || [[Frozen Wall]] || Snow on wall | ||
|- | |- | ||
| 8 || [[File:Lucky Emblem (Arendelle) 08 KHIII.png|250px]] || Frozen Wall || Imprint on snow | | 8 || [[File:Lucky Emblem (Arendelle) 08 KHIII.png|250px|center]] || Frozen Wall || Imprint on snow | ||
|- | |- | ||
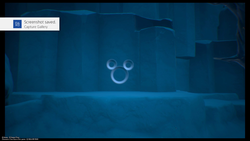
| 9 || [[File:Lucky Emblem (Arendelle) 09 KHIII.png|250px]] || [[Snowfield]] || Imprint on snow | | 9 || [[File:Lucky Emblem (Arendelle) 09 KHIII.png|250px|center]] || [[Snowfield]] || Imprint on snow | ||
|- | |- | ||
| 10 || [[File:Lucky Emblem (Arendelle) 10 KHIII.png|250px]] || Snowfield || Made of logs | | 10 || [[File:Lucky Emblem (Arendelle) 10 KHIII.png|250px|center]] || Snowfield || Made of logs | ||
|- | |- | ||
| 11 || [[File:Lucky Emblem (Arendelle) 11 KHIII.png|250px|center]] || [[Foothills]] || Imprint on boulder | |||
|} | |} | ||
| Line 267: | Line 271: | ||
[[The Caribbean]] has 13 Lucky Emblems that need to be photographed. | [[The Caribbean]] has 13 Lucky Emblems that need to be photographed. | ||
{|class="mw-collapsible mw-collapsed" cellspacing="0" cellpadding="6" border="1" align="center" | {|class="mw-collapsible mw-collapsed" cellspacing="0" cellpadding="6" border="1" align="center" style="width:900px" | ||
|-style="{{style|kh3|a}}" | |||
!style=" | !style="width:5%"|No. | ||
!style=" | !style="width:33%"|Lucky Emblem | ||
!style=" | !style="width:20%"|Location | ||
!style="width:42%"|Notes | |||
|- | |- | ||
| 1 || [[File:Lucky Emblem (The Caribbean) 01 KHIII.png|250px]] || {{c|Docks|tc}} || Imprint on boat | | 1 || [[File:Lucky Emblem (The Caribbean) 01 KHIII.png|250px|center]] || {{c|Docks|tc}} || Imprint on boat | ||
|- | |- | ||
| 2 || [[File:Lucky Emblem (The Caribbean) 02 KHIII.png|250px]] || Docks || Imprint on pillar | | 2 || [[File:Lucky Emblem (The Caribbean) 02 KHIII.png|250px|center]] || Docks || Imprint on pillar | ||
|- | |- | ||
| 3 || [[File:Lucky Emblem (The Caribbean) 03 KHIII.png|250px]] || [[Seaport]] || Light cast through the shack, have to be photographed from a specific angle | | 3 || [[File:Lucky Emblem (The Caribbean) 03 KHIII.png|250px|center]] || [[Seaport]] || Light cast through the shack, have to be photographed from a specific angle | ||
|- | |- | ||
| 4 || [[File:Lucky Emblem (The Caribbean) 04 KHIII.png|250px]] || Seaport || Imprint on sign | | 4 || [[File:Lucky Emblem (The Caribbean) 04 KHIII.png|250px|center]] || Seaport || Imprint on sign | ||
|- | |- | ||
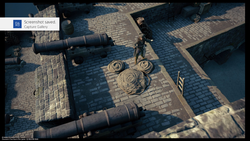
| 5 || [[File:Lucky Emblem (The Caribbean) 05 KHIII.png|250px]] || [[Fort]] || Made of rope | | 5 || [[File:Lucky Emblem (The Caribbean) 05 KHIII.png|250px|center]] || [[Fort]] || Made of rope | ||
|- | |- | ||
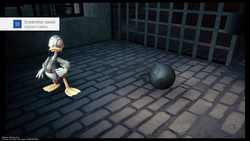
| 6 || [[File:Lucky Emblem (The Caribbean) 06 KHIII.png|250px]] || Fort || Imprint on shackle | | 6 || [[File:Lucky Emblem (The Caribbean) 06 KHIII.png|250px|center]] || Fort || Imprint on shackle | ||
|- | |- | ||
| 7 || [[File:Lucky Emblem (The Caribbean) 07 KHIII.png|250px]] || [[Isla Verdemontaña]] || Rock formation | | 7 || [[File:Lucky Emblem (The Caribbean) 07 KHIII.png|250px|center]] || [[Isla Verdemontaña]] || Rock formation | ||
|- | |- | ||
| 8 || [[File:Lucky Emblem (The Caribbean) 08 KHIII.png|250px]] || [[Isle of Luck]] || Rock formation | | 8 || [[File:Lucky Emblem (The Caribbean) 08 KHIII.png|250px|center]] || [[Isle of Luck]] || Rock formation | ||
|- | |- | ||
| 9 || [[File:Lucky Emblem (The Caribbean) 09 KHIII.png|250px]] || [[Horseshoe Isle]] || Rock formation | | 9 || [[File:Lucky Emblem (The Caribbean) 09 KHIII.png|250px|center]] || [[Horseshoe Isle]] || Rock formation | ||
|- | |- | ||
| 10 || [[File:Lucky Emblem (The Caribbean) 10 KHIII.png|250px]] || [[Port Royal Waters]] || Broken barrels, on small, circular island west of Isla de los Mástilles | | 10 || [[File:Lucky Emblem (The Caribbean) 10 KHIII.png|250px|center]] || [[Port Royal Waters]] || Broken barrels, on small, circular island west of Isla de los Mástilles | ||
|- | |- | ||
| 11 || [[File:Lucky Emblem (The Caribbean) 11 KHIII.png|250px]] || [[ | | 11 || [[File:Lucky Emblem (The Caribbean) 11 KHIII.png|250px|center]] || [[Ship's End]] || Imprint on ship's deck | ||
|- | |- | ||
| 12 || [[File:Lucky Emblem (The Caribbean) 12 KHIII.png|250px]] || [[Sandbar Isle]] || Imprint on wall | | 12 || [[File:Lucky Emblem (The Caribbean) 12 KHIII.png|250px|center]] || [[Sandbar Isle]] || Imprint on wall | ||
|- | |- | ||
| 13 || [[File:Lucky Emblem (The Caribbean) 13 KHIII.png|250px|center]] || Sandbar Isle || Imprint on rock, opposite and below #12 | |||
|} | |} | ||
| Line 304: | Line 308: | ||
[[San Fransokyo]] has 11 Lucky Emblems that need to be photographed. | [[San Fransokyo]] has 11 Lucky Emblems that need to be photographed. | ||
{|class="mw-collapsible mw-collapsed" cellspacing="0" cellpadding="6" border="1" align="center" | {|class="mw-collapsible mw-collapsed" cellspacing="0" cellpadding="6" border="1" align="center" style="width:900px" | ||
|-style="{{style|kh3|a}}" | |||
!style=" | !style="width:5%"|No. | ||
!style=" | !style="width:33%"|Lucky Emblem | ||
!style=" | !style="width:20%"|Location | ||
!style="width:42%"|Notes | |||
|- | |- | ||
| | | 1 || [[File:Lucky Emblem (San Fransokyo) 01 KHIII.png|250px|center]] || [[Hiro's Garage]] || Made of wires | ||
|- | |- | ||
| | | 2 || [[File:Lucky Emblem (San Fransokyo) 02 KHIII.png|250px|center]] || [[South District]] || Formation of the red bushes, directly east from the South District save point | ||
|- | |- | ||
| | | 3 || [[File:Lucky Emblem (San Fransokyo) 03 KHIII.png|250px|center]] || South District || Light formation cast on the Tsukiji sign atop a building directly north of the South District save point, can only be photographed at night | ||
|- | |- | ||
| | | 4 || [[File:Lucky Emblem (San Fransokyo) 04 KHIII.png|250px|center]] || South District || Imprint on the fan held by one of the statues atop the building northwest of the South District save point | ||
|- | |- | ||
| | | 5 || [[File:Lucky Emblem (San Fransokyo) 05 KHIII.png|250px|center]] || [[Central District]] || Imprint on the side of the glass dome, on the roof of a building in the southwest corner of the district | ||
|- | |- | ||
| | | 6 || [[File:Lucky Emblem (San Fransokyo) 06 KHIII.png|250px|center]] || Central District || Imprint on the roof of the building with blue, striped lights, southwest of North District's save point | ||
|- | |- | ||
| | | 7 || [[File:Lucky Emblem (San Fransokyo) 07 KHIII.png|250px|center]] || Central District || Imprint on blue koi fish balloon just southwest of North District's save point | ||
|- | |- | ||
| | | 8 || [[File:Lucky Emblem (San Fransokyo) 08 KHIII.png|250px|center]] || [[North District]] || Imprint on the northeast staircase of the building in the north of the district | ||
|- | |- | ||
| | | 9 || [[File:Lucky Emblem (San Fransokyo) 09 KHIII.png|250px|center]] || North District || Light in the tunnel in the building in the north of the district, have to be photographed from a specific angle, facing east | ||
|- | |- | ||
| | | 10 || [[File:Lucky Emblem (San Fransokyo) 10 KHIII.png|250px|center]] || North District || Imprint on the yellow car in the alley to the northwest of the train tracks before the tunnel | ||
|- | |- | ||
| 11 || [[File:Lucky Emblem (San Fransokyo) 11 KHIII.png|250px|center]] || North District || Imprint on the tip of the antenna atop the building in the north corner of the district | |||
|} | |} | ||
{{KH3}} | {{KH3}} | ||
[[Category:Kingdom Hearts III]] | [[Category:Kingdom Hearts III]] | ||
Latest revision as of 17:58, 6 August 2024
Oh no! The water! I'm in big trouble if I don't fetch it!
| |
| This article requires cleanup or improvement.
Please help out by editing this page. Please see the Manual of Style and editing help before getting started. Issues: Redo screenshots to not have the "taking screenshot" thing | |
- "Supposedly, these things are hidden all over town. And if you get a picture of them, they'll bring you good luck."
- —Olette, explaining about the Lucky Emblems
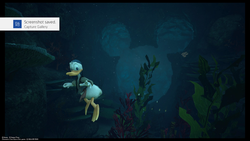
Lucky Emblems (幸運のマーク Kōun no Māku) are Hidden Mickeys in the worlds of Kingdom Hearts III. They can be photographed with the Gummiphone. While the majority of them are simply standard Hidden Mickeys (![]() ) stamped into a wall, they can sometimes be more esoteric, incorporating standard objects that resemble a Hidden Mickey when viewed from a specific angle.
) stamped into a wall, they can sometimes be more esoteric, incorporating standard objects that resemble a Hidden Mickey when viewed from a specific angle.
Story[edit]
Kingdom Hearts III[edit]
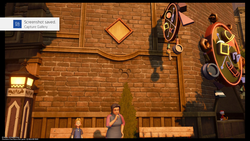
During the group's first visit to Twilight Town, Goofy takes a group picture of Sora, Hayner, Pence, Olette, and Donald using the Gummiphone. While reviewing the photograph, Olette points out a Lucky Emblem in the wall behind them. She explains that they're part of a new phenomenon of symbols appearing all over town; taking a picture of one will bring good luck. Sora, Donald, and Goofy then depart to investigate the Old Mansion, but not before noting the Emblem's resemblance to the King.
Gameplay[edit]
Sora is given a reward once a certain number of Lucky Emblems are photographed.
| # | Reward |
|---|---|
| 1 | AP Boost |
| 3 | Mega-Potion |
| 5 | Expert's Ring |
| 10 | Thundara Trinket |
| 15 | Moon Amulet |
| 20 | Magic Boost |
| 25 | Star Charm |
| 30 | Ribbon |
| 35 | Buster Band+ |
| 40 | Strength Boost |
| 45 | Master's Necklace |
| 50 | Wisdom Ring |
| 55 | Defense Boost |
| 60 | Orichalcum Ring |
| 65 | Cosmic Belt+ |
| 70 | Royal Ribbon |
| 80 | Orichalcum+ |
| 90 | Mickey Clasp |
The amount of Lucky Emblems photographed is tied to unlocking the Secret Ending. The player must photograph all 90 on Beginner Mode, 60 on Standard Mode, and 30 on Proud Mode; no emblems are required on Critical Mode.
The Proof of Promises is awarded when all 90 Lucky Emblems have been found in a cleared save file.
List of Lucky Emblems[edit]
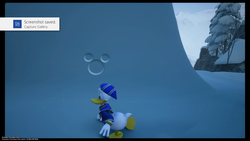
Olympus[edit]
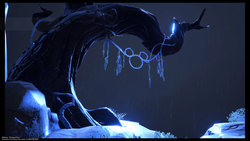
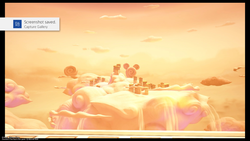
Olympus has 12 Lucky Emblems that need to be photographed. These can only be photographed if the world is revisited after fighting the Demon Tide in Twilight Town.
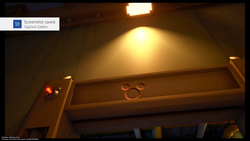
| No. | Lucky Emblem | Location | Notes |
|---|---|---|---|
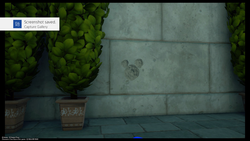
| 1 | Overlook | Imprint on wall | |
| 2 | The Big Olive | Imprint on wall | |
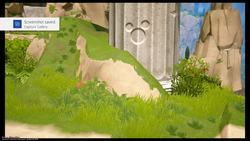
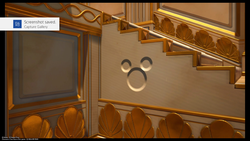
| 3 | Agora | Imprint on stairs | |
| 4 | Overlook | Imprint on wall | |
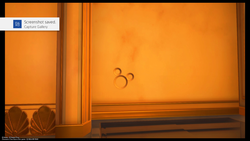
| 5 | Cliff Ascent | Imprint on pillar | |
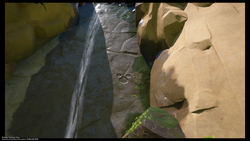
| 6 | Cliff Ascent | Imprint on wall next to waterfall | |
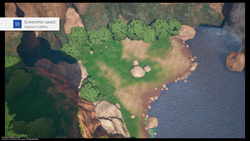
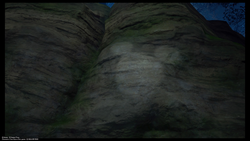
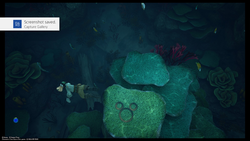
| 7 | Cliff Ascent | Rock formation | |
| 8 | Mountainside | Made out of vines | |
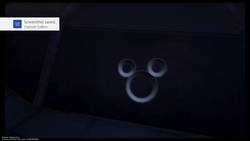
| 9 | Corridors | Imprint on wall | |
| 10 | Corridors | Imprint on wall | |
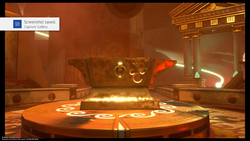
| 11 | Secluded Forge | Imprint on anvil | |
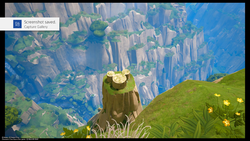
| 12 | Cloud Ridge | Cloud formation |
Twilight Town[edit]
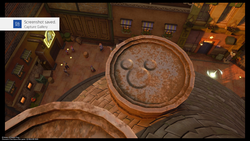
Twilight Town has 9 Lucky Emblems that need to be photographed.
| No. | Lucky Emblem | Location | Notes |
|---|---|---|---|
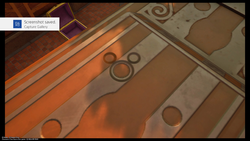
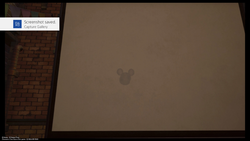
| 1 | Tram Common | Imprint on wall next to Gummi Shop | |
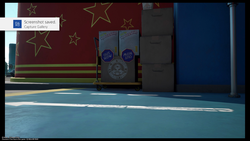
| 2 | Tram Common | Imprint on tram roof | |
| 3 | Tram Common | Imprint on chimney | |
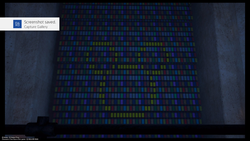
| 4 | Tram Common | Imprint on screen, have to wait for short to finish before being able to photographed | |
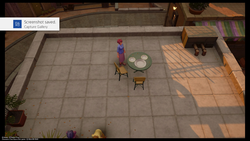
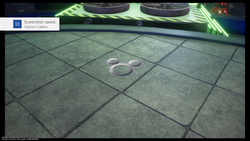
| 5 | Tram Common | Made of plates on rooftop terrace | |
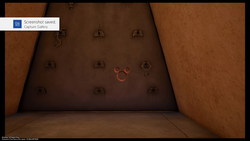
| 6 | Tram Common | Imprint on cellar's door | |
| 7 | The Woods | Imprint on wall near Underground Conduit | |
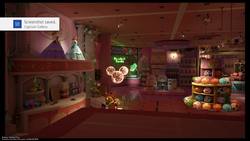
| 8 | The Woods | Light cast through the trees on a hill | |
| 9 | The Old Mansion | Imprint on wall |
Toy Box[edit]
Toy Box has 11 Lucky Emblems that need to be photographed.
| No. | Lucky Emblem | Location | Notes |
|---|---|---|---|
| 1 | Andy's House | Imprint on box | |
| 2 | Andy's House | Imprint on roof | |
| 3 | Andy's House | Made of leaves | |
| 4 | Andy's House | Imprint on car | |
| 5 | Main Floor: 1F | Made of tape | |
| 6 | Main Floor: 1F | Imprint on pedestal. Requires a Gigas to destroy the display model. | |
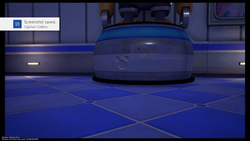
| 7 | Lower Vents | Imprint on wall | |
| 8 | Main Floor: 2F | Imprint on UFO | |
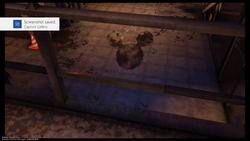
| 9 | Babies & Toddlers: Dolls | Made of disco balls, have to be taken from a specific angle in order to be photographed | |
| 10 | Main Floor: 3F | Imprint on stand | |
| 11 | Main Floor: 1F | Made of box and stickers, just outside the store. |
Kingdom of Corona[edit]
Kingdom of Corona has 9 Lucky Emblems that need to be photographed.
| No. | Lucky Emblem | Location | Notes |
|---|---|---|---|
| 1 | Tower | Rock formation, have to be photographed from the roof of Rapunzel's Tower | |
| 2 | Marsh | Imprint on wall | |
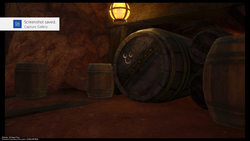
| 3 | Wetlands | Imprint on barrel in a cave | |
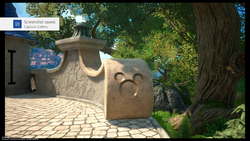
| 4 | Shore | Imprint on bridge | |
| 5 | Thoroughfare | Imprint on arch | |
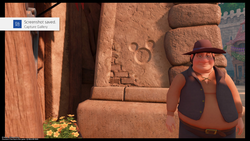
| 6 | Thoroughfare | Imprint on door | |
| 7 | Wharf | Imprint on doorpost | |
| 8 | Wharf | Made of crates and barrels | |
| 9 | Wharf | Imprint on pedestal on tower |
Monstropolis[edit]
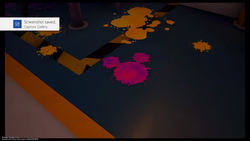
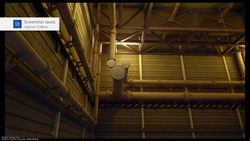
Monstropolis has 11 Lucky Emblems that need to be photographed.
| No. | Lucky Emblem | Location | Notes |
|---|---|---|---|
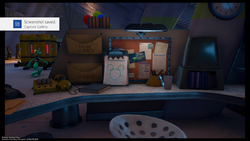
| 1 | Laugh Floor | Drawing on clipboard | |
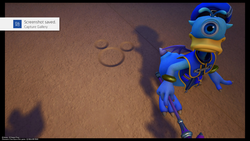
| 2 | Laugh Floor | Imprint on floor underneath clown | |
| 3 | Upper Level | Imprint on wall | |
| 4 | Upper Level | Made of doors | |
| 5 | Ground Floor | Imprint on wall | |
| 6 | Ground Floor | Paint spill on floor | |
| 7 | Second Floor | Imprint on wall | |
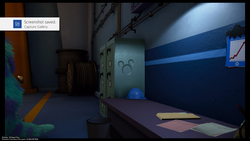
| 8 | Accessway | Imprint on file cabinet; near save point | |
| 9 | Accessway | Imprint on doorpost | |
| 10 | Tank Yard | Made of pipes, have to be photographed from a specific angle | |
| 11 | Door Vault Passage | Imprint on floor, can be only be photographed after finishing the world |
100 Acre Wood[edit]
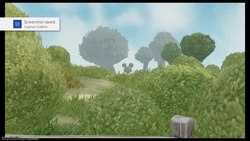
100 Acre Wood has 3 Lucky Emblems that need to be photographed.
| No. | Lucky Emblem | Location | Notes |
|---|---|---|---|
| 1 | Rabbit's House | Tree formation in the distance | |
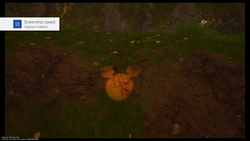
| 2 | Rabbit's House | Imprint on pumpkin | |
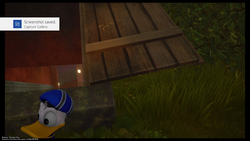
| 3 | Rabbit's House | Imprint on the bottom of the bucket |
Arendelle[edit]
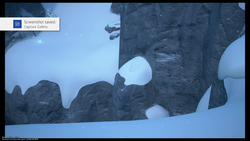
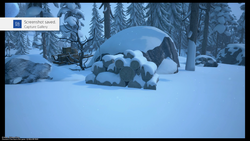
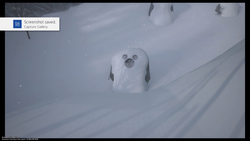
Arendelle has 11 Lucky Emblems that need to be photographed.
| No. | Lucky Emblem | Location | Notes |
|---|---|---|---|
| 1 | Treescape | Imprint on tree | |
| 2 | Middle Tier | Imprint on wall | |
| 3 | Lower Tier | Imprint on wall | |
| 4 | Middle Tier | Imprint on wall | |
| 5 | Upper Tier | Rock formation | |
| 6 | Mountain Ridge | Imprint on wall | |
| 7 | Frozen Wall | Snow on wall | |
| 8 | Frozen Wall | Imprint on snow | |
| 9 | Snowfield | Imprint on snow | |
| 10 | Snowfield | Made of logs | |
| 11 | Foothills | Imprint on boulder |
The Caribbean[edit]
The Caribbean has 13 Lucky Emblems that need to be photographed.
| No. | Lucky Emblem | Location | Notes |
|---|---|---|---|
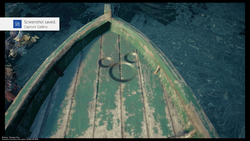
| 1 | Docks | Imprint on boat | |
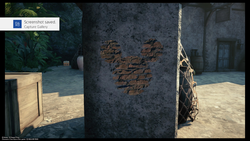
| 2 | Docks | Imprint on pillar | |
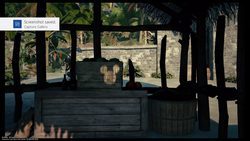
| 3 | Seaport | Light cast through the shack, have to be photographed from a specific angle | |
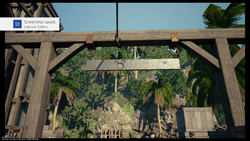
| 4 | Seaport | Imprint on sign | |
| 5 | Fort | Made of rope | |
| 6 | Fort | Imprint on shackle | |
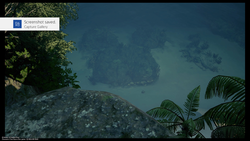
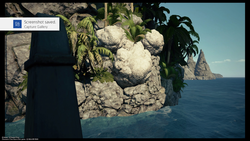
| 7 | Isla Verdemontaña | Rock formation | |
| 8 | Isle of Luck | Rock formation | |
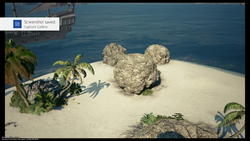
| 9 | Horseshoe Isle | Rock formation | |
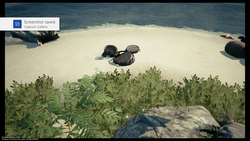
| 10 | Port Royal Waters | Broken barrels, on small, circular island west of Isla de los Mástilles | |
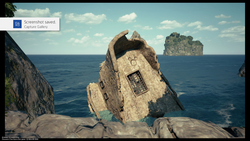
| 11 | Ship's End | Imprint on ship's deck | |
| 12 | Sandbar Isle | Imprint on wall | |
| 13 | Sandbar Isle | Imprint on rock, opposite and below #12 |
San Fransokyo[edit]
San Fransokyo has 11 Lucky Emblems that need to be photographed.
| No. | Lucky Emblem | Location | Notes |
|---|---|---|---|
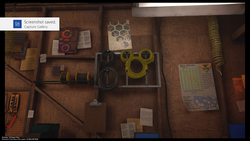
| 1 | Hiro's Garage | Made of wires | |
| 2 | South District | Formation of the red bushes, directly east from the South District save point | |
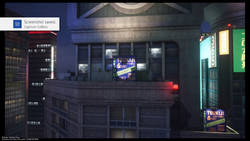
| 3 | South District | Light formation cast on the Tsukiji sign atop a building directly north of the South District save point, can only be photographed at night | |
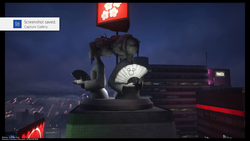
| 4 | South District | Imprint on the fan held by one of the statues atop the building northwest of the South District save point | |
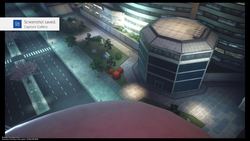
| 5 | Central District | Imprint on the side of the glass dome, on the roof of a building in the southwest corner of the district | |
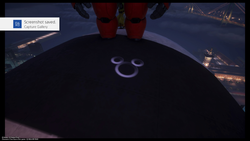
| 6 | Central District | Imprint on the roof of the building with blue, striped lights, southwest of North District's save point | |
| 7 | Central District | Imprint on blue koi fish balloon just southwest of North District's save point | |
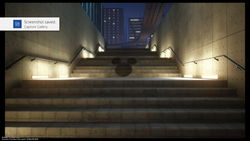
| 8 | North District | Imprint on the northeast staircase of the building in the north of the district | |
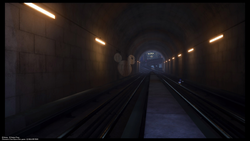
| 9 | North District | Light in the tunnel in the building in the north of the district, have to be photographed from a specific angle, facing east | |
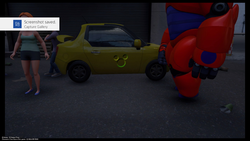
| 10 | North District | Imprint on the yellow car in the alley to the northwest of the train tracks before the tunnel | |
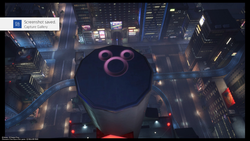
| 11 | North District | Imprint on the tip of the antenna atop the building in the north corner of the district |

