User:One-Winged Angel/Game Data/BbS: Difference between revisions
m (→[[File:TERRA.png]][[File:TerraCharm.png|25px]][[Terra]][[File:TerraCharm.png|25px]]: fixing links, replaced: Experiment 221 (Boss) → Game:Experiment 221) |
m (TSH, replaced: DL Sprite Terra Ability 1 KHBBS.png → Overdrive KHBBS.png, DL Sprite Terra Ability 2 KHBBS.png → Auto-Block KHBBS.png, DL Sprite Ventus Ability 1 KHBBS.png → Haste KHBBS.png, DL Sprite Ventus Ability 2 KHBBS.png → Auto-Counter KHBBS.png, DL Sprite Aqua Ability 1 KHBBS.png → Magic Deflector KHBBS.png, DL Sprite Aqua Ability 2 KHBBS.png → Auto-Life KHBBS.png) |
||
| (19 intermediate revisions by 9 users not shown) | |||
| Line 1: | Line 1: | ||
http://i273.photobucket.com/albums/jj210/phantomhourglassds/Command_User_OWA.gif | http://i273.photobucket.com/albums/jj210/phantomhourglassds/Command_User_OWA.gif | ||
| Line 10: | Line 8: | ||
|romaji = Kingudamu Hātsu Bāsu Bai Surīpu | |romaji = Kingudamu Hātsu Bāsu Bai Surīpu | ||
|developer = [[Wikipedia:Square Enix|Square Enix]] | |developer = [[Wikipedia:Square Enix|Square Enix]] | ||
|publisher = [[File:Flag of Japan.png|20px|Japan]] [[Wikipedia:Square Enix|Square Enix]]<br> [[File:Flag of the United States.png|20px|United States]]/[[File:Flag of Canada.png|20px|Canada]] Square Enix<br> [[File:European | |publisher = [[File:Flag of Japan.png|20px|Japan]] [[Wikipedia:Square Enix|Square Enix]]<br> [[File:Flag of the United States.png|20px|United States]]/[[File:Flag of Canada.png|20px|Canada]] Square Enix<br> [[File:Flag of European Union.png|20px|Europe]]/[[File:Flag of Australia.png|20px|Australia]] Square Enix | ||
|release = [[File:Flag of Japan.png|20px|Japan]] January 9, 2010<br>[[File:Flag of the United States.png|20px|United States]]/[[File:Flag of Canada.png|20px|Canada]] September 7, 2010 | |release = [[File:Flag of Japan.png|20px|Japan]] January 9, 2010<br>[[File:Flag of the United States.png|20px|United States]]/[[File:Flag of Canada.png|20px|Canada]] September 7, 2010 | ||
[[File:Flag of Australia.png|20px|Australia]] September 9, 2010 <br> | [[File:Flag of Australia.png|20px|Australia]] September 9, 2010 <br> | ||
[[File:European | [[File:Flag of European Union.png|20px|Europe]] September 10, 2010 | ||
|genre = Action RPG | |genre = Action RPG | ||
|modes = Single player, multiplayer | |modes = Single player, multiplayer | ||
| Line 20: | Line 18: | ||
}} | }} | ||
Unlike all my other Game Data (Reviews), I am designing the data for ''Kingdom Hearts Birth by Sleep'' to be both a review and | Unlike all my other Game Data (Reviews), I am designing the data for ''Kingdom Hearts Birth by Sleep'' to be both a review and a guide. | ||
http://i273.photobucket.com/albums/jj210/phantomhourglassds/ICON0.png '''Data Install''': | http://i273.photobucket.com/albums/jj210/phantomhourglassds/ICON0.png '''Data Install''': | ||
{| border="1" | |||
|- | |||
| | |||
|200 MB | |||
|- | |||
| | |||
|400 MB | |||
|- | |||
|'''X''' | |||
|624 MB | |||
|} | |||
Congratulations! I cleared the whole game on Critical! | |||
{| border="1" | |||
|- | |||
| | |||
|Beginner | |||
|- | |||
| | |||
|Standard | |||
|- | |||
| | |||
|Proud | |||
|- | |||
|'''X''' | |||
|Critical | |||
|} | |||
==[[File: | ==[[File:Terra_Saving_XMB.png]][[File:TerraCharm.png|25px]][[Terra]][[File:TerraCharm.png|25px]]== | ||
[[File:Earthshaker_KHBBS.png|thumb|left|[[Earthshaker]] (Default)]] | [[File:Earthshaker_KHBBS.png|thumb|left|[[Earthshaker]] (Default)]] | ||
Critical Mode is new to me like most people, so even though I like a good challenge, some points were unbelievable. In [[Enchanted Dominion]], I had to use all 6 or so of my potions on the bridge before dying in throne room once I got in there. If I recall correctly, My level was in the double digits before I was able to defeat [[Wheel Master]]. Getting onto a tangent, the stickers for the [[Sticker Album]] are in the most impossible of places. In [[Castle of Dreams]], I failed the first time around escorting [[Cinderella]] to the ball. Nothing notable about [[Dwarf Woodlands]]. In [[Radiant Garden]], The battle with [[Trinity Armor]] was smooth. I took caution in the battle with [[ | Critical Mode is new to me like most people, so even though I like a good challenge, some points were unbelievable. In [[Enchanted Dominion]], I had to use all 6 or so of my potions on the bridge before dying in throne room once I got in there. If I recall correctly, My level was in the double digits before I was able to defeat [[Wheel Master]]. Getting onto a tangent, the stickers for the [[Sticker Album]] are in the most impossible of places. In [[Castle of Dreams]], I failed the first time around escorting [[Cinderella]] to the ball. Nothing notable about [[Dwarf Woodlands]]. In [[Radiant Garden]], The battle with [[Trinity Armor]] was smooth. I took caution in the battle with [[Braig (Boss)|Braig]] causing it to be much longer than average. [[Disney Town]] was..."interesting". It took me forever to get the machine room going. Pete's Rec Room seemed kinda pointless yet fun. In [[Olympus Coliseum]], it took me forever to defeat [[Zack (Boss)|Dark Zack]]. In [[Deep Space]], the [[Experiment 221 (Boss)|Expirement 221]] battle was annoying. The last Disney world and last nothing-notable-about world: [[Neverland]]. Then, the battle with [[Master Eraqus]] was fairly quick and easy. [[Keyblade Graveyard]]: The tornadoes were annoying. [[Master Xehanort (Boss)|Master Xehanort]] was way too easy. It's hilarious how easy it was to Shotlock and Combo him a few times before victory. He dare call himself a Master!? Anyway, [[Terra-Xehanort (Boss)|Terra-Xehanort]] was a worthy opponent. I spent around 3-4 hours training before I could beat him. | ||
==[[File:Ventus_Saving_XMB.png]][[File:VenCharm.png|25px]][[Ventus]][[File:VenCharm.png|25px]]== | |||
[[File:Wayward_Wind_KHBBS.png|thumb|left|[[Wayward Wind]] (Default)]] | |||
In Dwarf Woodlands, it was annoying trying to find the dwarfs and escorting Snow White was worse than escorting Cinderella in Terra's story. Then Castle of Dreams was so-so. I racked up a lot of EXP but finding dress items was annoying. The one thing more annoying then dwarfs or a dress, was the warp holes (reminiscent of Saffron City in Poke'mon) in Enchanted Dominion. I don't appreciate Square Enix Teasing me with treasure chests because I'm being warped from one dead end to the next. I had a little trouble (Mandrakes) when starting out in Radiant Garden. Olympus Coliseum went quick and then the first battle with [[Metamorphosis]] got on my nerves. When in Deep Space, I had trouble realizing where to find it for it's second showdown. In Neverland I had trouble (Mandrakes) in the Indian Village. Then more trouble (Mandrakes) befell me when in the Keyblade Graveyard. The final battle with [[Vanitas (Boss)|Vanitas]] was just about as easy as [[Marluxia (Boss)|Marluxia's]] second form. | |||
==[[File:Aqua_Saving_XMB.png]][[File:AquaCharm.png|25px]][[Aqua]][[File:AquaCharm.png|25px]]== | |||
[[File:Rainfell_KHBBS.png|thumb|left|[[Rainfell]] (Default)]] | |||
A common thing between the three stories is that the first world is the hardest because since it is the start, almost no abilities and every stat including HP is the lowest (well DUH!). In addition to the obviousness, you have very little variety of Deck Commands. I had this trouble with Terra and Ventus, but with Aqua it was unbelievable. It took me a few hours to get past Castle of Dreams. Dwarf Woodlands wasn't bad but when I got to Enchanted Dominion, Maleficent's goons gave me a run for my money. I had to restart the save file to right before entering so I could train in the other worlds. There was nothing notable about Radiant Garden, Disney Town, or Olympus Coliseum. Deep Space was annoying because I kept going back and forth in an odd confusion of not knowing where to go. Then in Neverland the Rainbow Falls were annoying. I kept falling off because of the stupid Unversed. Both Vanitas battles weren't much of a challenge, but Braig and [[Ventus-Vanitas]] were. | |||
===[[File:Final_Episode_Saving_XMB.png]][[File:Symbol_-_Keyblade_Master.png|25px]][[Final Episode]][[File:Symbol_-_Keyblade_Master.png|25px]]=== | |||
[[File:Brightcrest_KHBBS.png|thumb|left|[[Brightcrest]] (Obtained at Start)]] | |||
The first Terra-Xehanort battle took me a few tries, but when I FINALly got to the FINAL boss of the FINAL episode, I stubbornly refused to level up and retry no matter how many dozen times I was KO'd. When I FINALly beat the FINAL episode, the battle took me just about an hour (Me and my over-exaggerated carefulness Xp). The new unorganized strategy of mine was only go on the offense right after the Guardian returned from the ground. Well, not only that but a couple times I used shotlock right as the Guardian sinks into the ground. Then I realized I would get a lot more damage in by using Mine Seeker "right as..." just like the shotlock which I could use again after enough of the gauge was restored by the other attacks. After I got him down to his last HP bar I was "dodge-waiting" 10-20 minutes for the Guardian to sink into the ground again before it hit me: "Wait. Maybe he doesn't use that attack anymore." It was then that I went back to "Blizzard-ing" but now was happening between the Guardians attacks. Most of the time he was dodging so damage was still rare. When a little less then a quarter of his last HP bar was left, I was expecting to go into the light part but it never happened. I actually beat him without going into the light, but Aqua went into the darkness. | |||
My tentative statement is that TX is harder than VR. | |||
{|class=" | ==Superbosses== | ||
===[[File:Unversedlogo.png|25px]][[Vanitas Remnant]][[File:Unversedlogo.png|25px]]=== | |||
{|class="infobox" style="float:left;" "font-size:89%; width:80px; background-color:#FFF; align:left;" | |||
|- | |||
|colspan=2 style="text-align: centerf|[[File:Vanitas Remnant (Action Render) KHBBS.png|200px]] | |||
|- | |||
|valign="top" style=" background:#87CEEB; width:140px"|'''HP''' | |||
|style="background:#E6E6FA"|200 | |||
|- | |||
|valign="top" style=" background:#87CEEB; width:140px"|'''Rewards''' | |||
|style="background:#E6E6FA"| | |||
{| border="1" | |||
|- | |- | ||
| | !style="background:#D2691E;" |[[Secret Gem]], | ||
[[Void Gear]] | |||
|- | |||
!style="background:#00FF7F;" |[[Secret Gem]], | |||
[[Void Gear]] | |||
|- | |||
!style="background:#00FFFF;" |[[Secret Gem]], | |||
[[Void Gear]] | |||
|} | |||
|} | |} | ||
{{-}} | {{-}} | ||
==[[File: | ====[[File:Terra Sprite KHBBS.png|50px]][[File:TerraCharm.png|25px]]Terra[[File:TerraCharm.png|25px]]==== | ||
[[File: | [[File:No_Data_Saving_XMB.png]] | ||
{{-}} | |||
====[[File:Ventus Sprite KHBBS.png|50px]][[File:VenCharm.png|25px]]Ventus[[File:VenCharm.png|25px]]==== | |||
One of the hardest bosses in the game becomes one of the easiest with the perfect strategy. Make the first two commands Tornado. Right as the battle starts waste no time...: | |||
#getting to the remnant | |||
#pressing [[File:Button Triangle.png]] | |||
#paying close attention to when the tornado fades. | |||
#repeating step 2 and 3 right when you see the remnant fall to the ground. | |||
#pressing [[File:Button Cross.png]] right when you see the remnant fall to the ground the 2nd time. | |||
With this strategy you will have him beat in less than 30 seconds like I am seemingly the first one to do. | |||
{| | {|align="left" width="500" style="text-align:center; border:1px solid" | ||
|width="340" style="border-radius:10px"|'''Vanitas Remnant defeated in less than 30 seconds!''' | |||
|- | |- | ||
| | |style="border:5px solid #00FF7F"|{{#widget:YouTube|id=bbrhMRdusGk|width=480|height=272}} | ||
|} | |} | ||
{{-}} | {{-}} | ||
==[[File: | ====[[File:Aqua Sprite KHBBS.png|50px]][[File:AquaCharm.png|25px]]Aqua[[File:AquaCharm.png|25px]]==== | ||
[[File: | [[File:No_Data_Saving_XMB.png]] | ||
{{-}} | |||
{|class=" | ===[[File:Joker Card KHBBS.png|26px]][[Young Xehanort|Unknown]][[File:Joker Card KHBBS.png|26px]]=== | ||
!style=" | {|class="infobox" style="float:left;" "font-size:89%; width:80px; background-color:#FFF; align:left;" | ||
|- | |||
|colspan=2 style="text-align: centerf|[[File:Unknown KHBBS.png|200px]] | |||
|- | |||
|valign="top" style=" background:#87CEEB; width:140px"|'''HP''' | |||
|style="background:#E6E6FA"|999 | |||
|- | |||
|valign="top" style=" background:#87CEEB; width:140px"|'''Rewards''' | |||
|style="background:#E6E6FA"| | |||
{| border="1" | |||
|- | |||
!style="background:#D2691E;" |[[No Name]] | |||
|- | |||
!style="background:#00FF7F;" |[[No Name]] | |||
|- | |- | ||
!style="background:#00FFFF;" |[[No Name]] | |||
|} | |||
|} | |} | ||
{{-}} | {{-}} | ||
====[[File:Terra (Armor) Sprite KHBBS.png|50px]][[File:TerraCharm.png|25px]]Terra[[File:TerraCharm.png|25px]]==== | |||
[[File:No_Data_Saving_XMB.png]] | |||
===[[File: | {{-}} | ||
[[File: | |||
====[[File:Ventus (Armor) Sprite KHBBS.png|50px]][[File:VenCharm.png|25px]]Ventus[[File:VenCharm.png|25px]]==== | |||
[[File:No_Data_Saving_XMB.png]] | |||
{{-}} | |||
====[[File:Aqua (Armor) Sprite KHBBS.png|50px]][[File:AquaCharm.png|25px]]Aqua[[File:AquaCharm.png|25px]]==== | |||
[[File:No_Data_Saving_XMB.png]] | |||
{{-}} | |||
==[[Mirage Arena]]== | ==[[Mirage Arena]]== | ||
===[[Joint Struggle|Arena Mode]]=== | ===[[Joint Struggle|Arena Mode]]=== | ||
{|class="wikitable collapsible collapsed" border="0" style="width:100%" | {|class="wikitable mw-collapsible mw-collapsed" border="0" style="width:100%" | ||
!style="width:16em; text-align:left"|'''Match #1: ''[[Day of Reckoning]]''''' | !style="width:16em; text-align:left"|'''Match #1: ''[[Day of Reckoning]]''''' | ||
|- | |- | ||
|colspan="2"| | |colspan="2"| | ||
{| border="1" | |||
|- | |||
|'''How To Unlock''' | |||
| | |||
{| border="1" | |||
|- | |||
!style="background:#D2691E;" |N/A | |||
|- | |||
!style="background:#00FF7F;" |N/A | |||
|- | |||
!style="background:#00FFFF;" |N/A | |||
|} | |||
|- | |||
|'''Battle Level''' | |||
|<span style="color:blue;">★</span> | |||
|- | |||
|'''Location''' | |||
|[[Mirage Arena]] | |||
|- | |||
|'''Rewards''' | |||
| | |||
{| border="1" | |||
|- | |||
|'''75 Medals''' | |||
|- | |||
!style="background:#D2691E;" |N/A | |||
|- | |||
!style="background:#00FF7F;" |N/A | |||
|- | |||
!style="background:#00FFFF;" |N/A | |||
|} | |||
|} | |||
{|class="wikitable" width="70%" | |||
|- bgcolor="#87CEEB" | |||
|width="25%" style="text-align:center"|'''Round''' | |||
|width="25%" style="text-align:center"|'''Enemies''' | |||
|-bgcolor="#E6E6FA" style="text-align:center" | |||
|1 | |||
| | |||
{| border="1" | |||
|- | |||
|[[Bruiser]] x1 | |||
[[Flood]] x5 | |||
|- | |||
|[[Scrapper]] x6 | |||
[[Red Hot Chili]] x3 | |||
|- | |||
|[[Bruiser]] x3 | |||
[[Red Hot Chili]] x3 | |||
[[Flood]] x2 | |||
|} | |||
|-bgcolor="#E6E6FA" style="text-align:center" | |||
|2 | |||
| | |||
{| border="1" | |||
|- | |||
|[[Thornbite]] x3 | |||
[[Red Hot Chili]] x2 | |||
|- | |||
|[[Bruiser]] x3 | |||
[[Red Hot Chili]] x3 | |||
|- | |||
|[[Scrapper]] x4 | |||
|- | |||
|[[Bruiser]] x3 | |||
[[Red Hot Chili]] x3 | |||
|} | |||
|-bgcolor="#E6E6FA" style="text-align:center" | |||
|3 | |||
| | |||
{| border="1" | |||
|- | |||
|[[Hareraiser]] x6 | |||
|- | |||
|[[Bruiser]] x4 | |||
|- | |||
|[[Bruiser]] x3 | |||
[[Monotrucker]] x3 | |||
|- | |||
|[[Bruiser]] x3 | |||
[[Archraven]] x4 | |||
|} | |||
|-bgcolor="#E6E6FA" style="text-align:center" | |||
|4 | |||
|'''[[Iron Imprisoner|Iron Imprisoner I]]''' | |||
|-bgcolor="#E6E6FA" style="text-align:center" | |||
|} | |||
|} | |} | ||
{{-}} | {{-}} | ||
Match #2: ''[[Wheels of Misfortune]]'' | {|class="wikitable mw-collapsible mw-collapsed" border="0" style="width:100%" | ||
!style="width:16em; text-align:left"|'''Match #2: ''[[Wheels of Misfortune]]''''' | |||
|- | |||
|colspan="2"| | |||
{| border="1" | |||
|- | |||
|'''How To Unlock''' | |||
| | |||
{| border="1" | |||
|- | |||
!style="background:#D2691E;" |Clear Aqua's Story | |||
|- | |||
!style="background:#00FF7F;" |Clear Aqua's Story | |||
|- | |||
!style="background:#00FFFF;" |Clear Castle of Dreams | |||
|} | |||
|- | |||
|'''Battle Level''' | |||
|<span style="color:blue;">★</span> | |||
|- | |||
|'''Location''' | |||
|[[Castle of Dreams]] | |||
|- | |||
|'''Rewards''' | |||
| | |||
{| border="1" | |||
|- | |||
|'''90 Medals''' | |||
|- | |||
!style="background:#D2691E;" |N/A | |||
|- | |||
!style="background:#00FF7F;" |N/A | |||
|- | |||
!style="background:#00FFFF;" |HP Boost | |||
|} | |||
|} | |||
{|class="wikitable" width="70%" | |||
|- bgcolor="#87CEEB" | |||
|width="25%" style="text-align:center"|'''Round''' | |||
|width="25%" style="text-align:center"|'''Enemies''' | |||
|-bgcolor="#E6E6FA" style="text-align:center" | |||
|1 | |||
| | |||
{| border="1" | |||
|- | |||
|[[Shoegazer]] x3 | |||
[[Thornbite]] x3 | |||
|- | |||
|[[Hareraiser]] x3 | |||
[[Red Hot Chili]] x4 | |||
|- | |||
|[[Shoegazer]] x6 | |||
[[Hareraiser]] x1 | |||
[[Thornbite]] x1 | |||
[[Red Hot Chili]] x1 | |||
|} | |||
|-bgcolor="#E6E6FA" style="text-align:center" | |||
|2 | |||
| | |||
{| border="1" | |||
|- | |||
|[[Monotrucker]] x3 | |||
[[Archraven]] x3 | |||
|- | |||
|[[Spiderchest]] x3 | |||
[[Blue Sea Salt]] x3 | |||
|- | |||
|[[Monotrucker]] x4 | |||
[[Blue Sea Salt]] x4 | |||
|- | |||
|[[Spiderchest]] x3 | |||
[[Monotrucker]] x3 | |||
[[Archraven]] x3 | |||
|} | |||
|-bgcolor="#E6E6FA" style="text-align:center" | |||
|3 | |||
| | |||
{| border="1" | |||
|- | |||
|[[Red Hot Chili]] x6 | |||
|- | |||
|[[Bruiser]] x1 | |||
[[Axe Flapper]] x3 | |||
[[Vile Phial]] x3 | |||
|- | |||
|[[Bruiser]] x3 | |||
[[Axe Flapper]] x2 | |||
[[Vile Phial]] x2 | |||
[[Red Hot Chili]] x1 | |||
|} | |||
|-bgcolor="#E6E6FA" style="text-align:center" | |||
|4 | |||
|'''[[Cursed Coach]]''' | |||
|-bgcolor="#E6E6FA" style="text-align:center" | |||
|} | |||
|} | |||
{{-}} | |||
{|class="wikitable collapsible collapsed" border="0" style="width:100%" | {|class="wikitable mw-collapsible mw-collapsed" border="0" style="width:100%" | ||
!style="width:16em; text-align:left"|'''Match # | !style="width:16em; text-align:left"|'''Match #3: ''[[Risky Riches]]''''' | ||
|- | |- | ||
|colspan="2"| | |colspan="2"| | ||
{| border="1" | |||
|- | |||
|'''How To Unlock''' | |||
| | |||
{| border="1" | |||
|- | |||
!style="background:#D2691E;" |Reach Arena Level 8 or purchase Risky Ticket | |||
|- | |||
!style="background:#00FF7F;" |Reach Arena Level 8 or purchase Risky Ticket | |||
|- | |||
!style="background:#00FFFF;" |Reach Arena Level 8 or purchase Risky Ticket | |||
|} | |||
|- | |||
|'''Battle Level''' | |||
|<span style="color:blue;">★</span> | |||
|- | |||
|'''Location''' | |||
|[[Neverland]] | |||
|- | |||
|'''Rewards''' | |||
| | |||
{| border="1" | |||
|- | |||
|'''105 Medals''' | |||
|- | |||
!style="background:#D2691E;" |N/A | |||
|- | |||
!style="background:#00FF7F;" |N/A | |||
|- | |||
!style="background:#00FFFF;" |N/A | |||
|} | |||
|} | |||
{|class="wikitable" width="70%" | |||
|- bgcolor="#87CEEB" | |||
|width="25%" style="text-align:center"|'''Round''' | |||
|width="25%" style="text-align:center"|'''Enemies''' | |||
|-bgcolor="#E6E6FA" style="text-align:center" | |||
|1 | |||
| | |||
{| border="1" | |||
|- | |||
|[[Spiderchest]] x4 | |||
[[Flood]] x3 | |||
|- | |||
|[[Spiderchest]] x4 | |||
[[Scrapper]] x3 | |||
|} | |||
|-bgcolor="#E6E6FA" style="text-align:center" | |||
|2 | |||
| | |||
{| border="1" | |||
|- | |||
|[[Spiderchest]] x4 | |||
[[Archraven]] x4 | |||
|- | |||
|[[Spiderchest]] x4 | |||
[[Chrono Twister]] x1 | |||
[[Bruiser]] x3 | |||
|} | |||
|-bgcolor="#E6E6FA" style="text-align:center" | |||
|3 | |||
| | |||
{| border="1" | |||
|- | |||
|[[Spiderchest]] x8 | |||
|- | |||
|[[Spiderchest]] x1 | |||
[[Bruiser]] x4 | |||
[[Hareraiser]] x4 | |||
|- | |||
|[[Prize Pod]] (Dancin' Lemon) x6 | |||
|- | |||
|[[Spiderchest]] x8 | |||
|} | |||
|-bgcolor="#E6E6FA" style="text-align:center" | |||
|} | |||
|} | |} | ||
{{-}} | {{-}} | ||
Match # | {|class="wikitable mw-collapsible mw-collapsed" border="0" style="width:100%" | ||
!style="width:16em; text-align:left"|'''Match #4: ''[[Weaver Fever]]''''' | |||
|- | |||
|colspan="2"| | |||
{| border="1" | |||
|- | |||
|'''How To Unlock''' | |||
| | |||
{| border="1" | |||
|- | |||
!style="background:#D2691E;" |Clear Enchanted Dominion | |||
|- | |||
!style="background:#00FF7F;" |Clear Terra's Story | |||
|- | |||
!style="background:#00FFFF;" |Clear Terra's Story | |||
|} | |||
|- | |||
|'''Battle Level''' | |||
|<span style="color:blue;">★★</span> | |||
|- | |||
|'''Location''' | |||
|[[Enchanted Dominion]] | |||
|- | |||
|'''Rewards''' | |||
| | |||
{| border="1" | |||
|- | |||
|'''120 Medals''' | |||
|- | |||
!style="background:#D2691E;" |HP Boost | |||
|- | |||
!style="background:#00FF7F;" |N/A | |||
|- | |||
!style="background:#00FFFF;" |N/A | |||
|} | |||
|} | |||
{|class="wikitable" width="70%" | |||
|- bgcolor="#87CEEB" | |||
|width="25%" style="text-align:center"|'''Round''' | |||
|width="25%" style="text-align:center"|'''Enemies''' | |||
|-bgcolor="#E6E6FA" style="text-align:center" | |||
|1 | |||
| | |||
{| border="1" | |||
|- | |||
|[[Bruiser]] x3 | |||
[[Flood]] x4 | |||
|- | |||
|[[Bruiser]] x1 | |||
[[Blue Sea Salt]] x4 | |||
|- | |||
|[[Bruiser]] x4 | |||
[[Vile Phial]] x4 | |||
|} | |||
|-bgcolor="#E6E6FA" style="text-align:center" | |||
|2 | |||
| | |||
{| border="1" | |||
|- | |||
|[[Thornbite]] x3 | |||
[[Scrapper]] x4 | |||
|- | |||
|[[Scrapper]] x3 | |||
[[Blue Sea Salt]] x5 | |||
|- | |||
|[[Bruiser]] x3 | |||
[[Thornbite]] x5 | |||
|} | |||
|-bgcolor="#E6E6FA" style="text-align:center" | |||
|3 | |||
| | |||
{| border="1" | |||
|- | |||
|[[Bruiser]] x1 | |||
[[Red Hot Chili]] x2 | |||
[[Blue Sea Salt]] x4 | |||
|- | |||
|[[Thornbite]] x4 | |||
[[Red Hot Chili]] x4 | |||
|- | |||
|[[Bruiser]] x3 | |||
{|class="wikitable collapsible collapsed" border="0" style="width:100%" | [[Red Hot Chili]] x3 | ||
!style="width:16em; text-align:left"|'''Match # | |||
[[Blue Sea Salt]] x3 | |||
|} | |||
|-bgcolor="#E6E6FA" style="text-align:center" | |||
|4 | |||
|'''[[Wheel Master]]''' | |||
|-bgcolor="#E6E6FA" style="text-align:center" | |||
|} | |||
|} | |||
{{-}} | |||
{|class="wikitable mw-collapsible mw-collapsed" border="0" style="width:100%" | |||
!style="width:16em; text-align:left"|'''Match #5: ''[[Sinister Sentinel]]''''' | |||
|- | |- | ||
|colspan="2"| | |colspan="2"| | ||
{| border="1" | |||
|- | |||
|'''How To Unlock''' | |||
| | |||
{| border="1" | |||
|- | |||
!style="background:#D2691E;" |Reach Arena Level 3 or purchase Sentinel Ticket | |||
|- | |||
!style="background:#00FF7F;" |Reach Arena Level 3 or purchase Sentinel Ticket | |||
|- | |||
!style="background:#00FFFF;" |Reach Arena Level 3 or purchase Sentinel Ticket | |||
|} | |||
|- | |||
|'''Battle Level''' | |||
|<span style="color:blue;">★★</span> | |||
|- | |||
|'''Location''' | |||
|[[Mirage Arena]] | |||
|- | |||
|'''Rewards''' | |||
| | |||
{| border="1" | |||
|- | |||
|'''150 Medals''' | |||
|- | |||
!style="background:#D2691E;" |[[Xehanort's Report]] 5 | |||
|- | |||
!style="background:#00FF7F;" |[[Sky Climber]] [[Command Style]] | |||
|- | |||
!style="background:#00FFFF;" |N/A | |||
|} | |||
|} | |||
{|class="wikitable" width="70%" | |||
|- bgcolor="#87CEEB" | |||
|width="25%" style="text-align:center"|'''Round''' | |||
|width="25%" style="text-align:center"|'''Enemies''' | |||
|-bgcolor="#E6E6FA" style="text-align:center" | |||
|1 | |||
| | |||
{| border="1" | |||
|- | |||
|[[Bruiser]] x1 | |||
[[Flood]] x6 | |||
|- | |||
|[[Scrapper]] x6 | |||
[[Red Hot Chili]] x1 | |||
|- | |||
|[[Bruiser]] x1 | |||
[[Red Hot Chili]] x6 | |||
|- | |||
|[[Bruiser]] x6 | |||
[[Red Hot Chili]] x3 | |||
|} | |||
|-bgcolor="#E6E6FA" style="text-align:center" | |||
|2 | |||
| | |||
{| border="1" | |||
|- | |||
|[[Bruiser]] x1 | |||
[[Flood]] x6 | |||
|- | |||
|[[Scrapper]] x3 | |||
[[Red Hot Chili]] x3 | |||
|- | |||
|[[Bruiser]] x1 | |||
[[Flood]] x6 | |||
|- | |||
|[[Bruiser]] x3 | |||
[[Scrapper]] x3 | |||
[[Red Hot Chili]] x3 | |||
|} | |||
|-bgcolor="#E6E6FA" style="text-align:center" | |||
|3 | |||
| | |||
{| border="1" | |||
|- | |||
|[[Tank Toppler]] x3 | |||
[[Red Hot Chili]] x3 | |||
|- | |||
|[[Thornbite]] x4 | |||
[[Blue Sea Salt]] x4 | |||
|- | |||
|[[Tank Toppler]] x4 | |||
[[Red Hot Chili]] x3 | |||
[[Blue Sea Salt]] x1 | |||
|} | |||
|-bgcolor="#E6E6FA" style="text-align:center" | |||
|4 | |||
| | |||
{| border="1" | |||
|- | |||
|[[Hareraiser]] x8 | |||
|- | |||
|[[Tank Toppler]] x3 | |||
[[Scrapper]] x4 | |||
|- | |||
|[[Scrapper]] x4 | |||
[[Hareraiser]] x3 | |||
|- | |||
|[[Tank Toppler]] x4 | |||
[[Archraven]] x4 | |||
|} | |||
|-bgcolor="#E6E6FA" style="text-align:center" | |||
|5 | |||
|'''[[Iron Imprisoner II]]''' | |||
|-bgcolor="#E6E6FA" style="text-align:center" | |||
|} | |||
|} | |} | ||
{{-}} | {{-}} | ||
Match # | {|class="wikitable mw-collapsible mw-collapsed" border="0" style="width:100%" | ||
!style="width:16em; text-align:left"|'''Match #6: ''[[Dead Ringer]]''''' | |||
|- | |||
|colspan="2"| | |||
{| border="1" | |||
|- | |||
|'''How To Unlock''' | |||
| | |||
{| border="1" | |||
|- | |||
!style="background:#D2691E;" |Reach Arena Level 5 or purchase Ringer Ticket | |||
|- | |||
!style="background:#00FF7F;" |Reach Arena Level 5 or purchase Ringer Ticket | |||
|- | |||
!style="background:#00FFFF;" |Reach Arena Level 5 or purchase Ringer Ticket | |||
|} | |||
|- | |||
|'''Battle Level''' | |||
|<span style="color:blue;">★★</span> | |||
|- | |||
|'''Location''' | |||
|[[Deep Space]] | |||
|- | |||
|'''Rewards''' | |||
| | |||
{| border="1" | |||
|- | |||
|'''180 Medals''' | |||
|- | |||
!style="background:#D2691E;" |[[Darkgnaw]] [[Keyblade]] | |||
|- | |||
!style="background:#00FF7F;" |HP Boost | |||
|- | |||
!style="background:#00FFFF;" |N/A | |||
|} | |||
|} | |||
{|class="wikitable" width="70%" | |||
|- bgcolor="#87CEEB" | |||
|width="25%" style="text-align:center"|'''Round''' | |||
|width="25%" style="text-align:center"|'''Enemies''' | |||
|-bgcolor="#E6E6FA" style="text-align:center" | |||
|1 | |||
| | |||
{| border="1" | |||
|- | |||
|[[Bruiser]] x3 | |||
[[Flood]] x6 | |||
|- | |||
|[[Bruiser]] x1 | |||
[[Red Hot Chili]] x8 | |||
|- | |||
|[[Bruiser]] x1 | |||
[[Shoegazer]] x5 | |||
|} | |||
|-bgcolor="#E6E6FA" style="text-align:center" | |||
|2 | |||
| | |||
{| border="1" | |||
|- | |||
|[[Tank Toppler]] x1 | |||
[[Flood]] x3 | |||
|- | |||
|[[Thornbite]] x4 | |||
[[Sonic Blaster]] x1 | |||
|- | |||
|[[Tank Toppler]] x1 | |||
[[Sonic Blaster]] x3 | |||
[[Flood]] x3 | |||
|- | |||
|[[Tank Toppler]] x1 | |||
[[Thornbite]] x4 | |||
[[Flood]] x4 | |||
|} | |||
|-bgcolor="#E6E6FA" style="text-align:center" | |||
|3 | |||
| | |||
{| border="1" | |||
|- | |||
|[[Sonic Blaster]] x3 | |||
[[Vile Phial]] x4 | |||
|- | |||
|[[Vile Phial]] x2 | |||
[[Flood]] x6 | |||
|- | |||
|[[Hareraiser]] x5 | |||
[[Vile Phial]] x1 | |||
|- | |||
|[[Sonic Blaster]] x5 | |||
{|class="wikitable collapsible collapsed" border="0" style="width:100%" | [[Vile Phial]] x4 | ||
!style="width:16em; text-align:left"|'''Match # | |} | ||
|-bgcolor="#E6E6FA" style="text-align:center" | |||
|4 | |||
| | |||
{| border="1" | |||
|- | |||
|[[Tank Toppler]] x1 | |||
[[Scrapper]] x4 | |||
|- | |||
|[[Monotrucker]] x6 | |||
[[Sonic Blaster]] x1 | |||
|- | |||
|[[Tank Toppler]] x1 | |||
[[Sonic Blaster]] x3 | |||
[[Scrapper]] x3 | |||
|- | |||
|[[Tank Toppler]] x4 | |||
[[Sonic Blaster]] x5 | |||
|} | |||
|-bgcolor="#E6E6FA" style="text-align:center" | |||
|5 | |||
|'''[[Mimic Master]]''' | |||
|-bgcolor="#E6E6FA" style="text-align:center" | |||
|} | |||
|} | |||
{{-}} | |||
{|class="wikitable mw-collapsible mw-collapsed" border="0" style="width:100%" | |||
!style="width:16em; text-align:left"|'''Match #7: ''[[Combined Threat]]''''' | |||
|- | |- | ||
|colspan="2"| | |colspan="2"| | ||
{| border="1" | |||
|- | |||
|'''How To Unlock''' | |||
| | |||
{| border="1" | |||
|- | |||
!style="background:#D2691E;" |Reach Arena Level 7 or purchase Threat Ticket | |||
|- | |||
!style="background:#00FF7F;" |Reach Arena Level 7 or purchase Threat Ticket | |||
|- | |||
!style="background:#00FFFF;" |Reach Arena Level 7 or purchase Threat Ticket | |||
|} | |||
|- | |||
|'''Battle Level''' | |||
|<span style="color:orange;">★★★</span> | |||
|- | |||
|'''Location''' | |||
|[[Deep Space]] | |||
|- | |||
|'''Rewards''' | |||
| | |||
{| border="1" | |||
|- | |||
|'''210 Medals''' | |||
|- | |||
!style="background:#D2691E;" |N/A | |||
|- | |||
!style="background:#00FF7F;" |N/A | |||
|- | |||
!style="background:#00FFFF;" |[[Sky Climber]] [[Command Style]] | |||
|} | |||
|} | |||
{|class="wikitable" width="70%" | |||
|- bgcolor="#87CEEB" | |||
|width="25%" style="text-align:center"|'''Round''' | |||
|width="25%" style="text-align:center"|'''Enemies''' | |||
|-bgcolor="#E6E6FA" style="text-align:center" | |||
|1 | |||
| | |||
{| border="1" | |||
|- | |||
|[[Tank Toppler]] x1 | |||
[[Scrapper]] x3 | |||
|- | |||
|[[Sonic Blaster]] x3 | |||
[[Red Hot Chili]] x3 | |||
|- | |||
|[[Tank Toppler]] x4 | |||
[[Red Hot Chili]] x3 | |||
[[Scrapper]] x3 | |||
|} | |||
|-bgcolor="#E6E6FA" style="text-align:center" | |||
|2 | |||
| | |||
{| border="1" | |||
|- | |||
|[[Chrono Twister]] x1 | |||
[[Bruiser]] x3 | |||
|- | |||
|[[Sonic Blaster]] x3 | |||
[[Vile Phial]] x3 | |||
|- | |||
|[[Bruiser]] x5 | |||
[[Vile Phial]] x3 | |||
|} | |||
|-bgcolor="#E6E6FA" style="text-align:center" | |||
|3 | |||
| | |||
{| border="1" | |||
|- | |||
|[[Blue Sea Salt]] x3 | |||
[[Flood]] x3 | |||
|- | |||
|[[Tank Toppler]] x1 | |||
[[Flood]] x8 | |||
|- | |||
|[[Chrono Twister]] x3 | |||
[[Tank Toppler]] x3 | |||
[[Blue Sea Salt]] x3 | |||
|} | |||
|-bgcolor="#E6E6FA" style="text-align:center" | |||
|4 | |||
| | |||
{| border="1" | |||
|- | |||
|[[Shoegazer]] x8 | |||
[[Sonic Blaster]] x1 | |||
|- | |||
|[[Bruiser]] x3 | |||
[[Shoegazer]] x3 | |||
[[Mandrake]] x3 | |||
|- | |||
|[[Sonic Blaster]] x3 | |||
[[Bruiser]] x3 | |||
[[Mandrake]] x3 | |||
|} | |||
|-bgcolor="#E6E6FA" style="text-align:center" | |||
|5 | |||
| | |||
{| border="1" | |||
|- | |||
|[[Tank Toppler]] x1 | |||
[[Yellow Mustard]] x3 | |||
|- | |||
|[[Tank Toppler]] x4 | |||
[[Monotrucker]] x4 | |||
[[Yellow Mustard]] x1 | |||
|- | |||
|[[Chrono Twister]] x3 | |||
[[Tank Toppler]] x3 | |||
[[Yellow Mustard]] x3 | |||
|} | |||
|-bgcolor="#E6E6FA" style="text-align:center" | |||
|6 | |||
|'''[[Trinity Armor]]''' | |||
|-bgcolor="#E6E6FA" style="text-align:center" | |||
|} | |||
|} | |} | ||
{{-}} | {{-}} | ||
{|class="wikitable collapsible collapsed" border="0" style="width:100%" | {|class="wikitable mw-collapsible mw-collapsed" border="0" style="width:100%" | ||
!style="width:16em; text-align:left"|'''Match # | !style="width:16em; text-align:left"|'''Match #8: ''[[Treasure Tussle]]''''' | ||
|- | |- | ||
|colspan="2"| | |colspan="2"| | ||
{| border="1" | |||
|- | |||
|'''How To Unlock''' | |||
| | |||
{| border="1" | |||
|- | |||
!style="background:#D2691E;" |Reach Arena Level 15 or purchase Treasure Ticket | |||
|- | |||
!style="background:#00FF7F;" |Reach Arena Level 15 or purchase Treasure Ticket | |||
|- | |||
!style="background:#00FFFF;" |Reach Arena Level 15 or purchase Treasure Ticket | |||
|} | |||
|- | |||
|'''Battle Level''' | |||
|<span style="color:orange;">★★★</span> | |||
|- | |||
|'''Location''' | |||
|[[Disney Town]] | |||
|- | |||
|'''Rewards''' | |||
| | |||
{| border="1" | |||
|- | |||
|'''240 Medals''' | |||
|- | |||
!style="background:#D2691E;" |N/A | |||
|- | |||
!style="background:#00FF7F;" |N/A | |||
|- | |||
!style="background:#00FFFF;" |N/A | |||
|} | |||
|} | |||
{|class="wikitable" width="70%" | |||
|- bgcolor="#87CEEB" | |||
|width="25%" style="text-align:center"|'''Round''' | |||
|width="25%" style="text-align:center"|'''Enemies''' | |||
|-bgcolor="#E6E6FA" style="text-align:center" | |||
|1 | |||
| | |||
{| border="1" | |||
|- | |||
|[[Tank Toppler]] x2 | |||
[[Spiderchest]] x7 | |||
|- | |||
|[[Red Hot Chili]] x4 | |||
[[Blue Sea Salt]] x4 | |||
|- | |||
|[[Spiderchest]] x9 | |||
|} | |||
|-bgcolor="#E6E6FA" style="text-align:center" | |||
|2 | |||
| | |||
{| border="1" | |||
|- | |||
|[[Chrono Twister]] x1 | |||
[[Hareraiser]] x4 | |||
|- | |||
|[[Spiderchest]] x4 | |||
[[Archraven]] x5 | |||
|- | |||
|[[Chrono Twister]] x2 | |||
[[Hareraiser]] x3 | |||
[[Archraven]] x4 | |||
|- | |||
|[[Spiderchest]] x9 | |||
|} | |||
|-bgcolor="#E6E6FA" style="text-align:center" | |||
|3 | |||
| | |||
{| border="1" | |||
|- | |||
|[[Spiderchest]] x5 | |||
|- | |||
|[[Spiderchest]] x5 | |||
|- | |||
|[[Prize Pod]] (Open Sesame) x4 | |||
|- | |||
|[[Spiderchest]] x8 | |||
|} | |||
|-bgcolor="#E6E6FA" style="text-align:center" | |||
|} | |||
|} | |||
{{-}} | |||
{|class="wikitable collapsible collapsed" border="0" style="width:100%" | {|class="wikitable mw-collapsible mw-collapsed" border="0" style="width:100%" | ||
!style="width:16em; text-align:left"| | !style="width:16em; text-align:left"|'''Match #9: ''[[Harsh Punishment]]''''' | ||
|- | |- | ||
|colspan="2"| | |colspan="2"| | ||
{| border="1" | |||
|- | |||
|'''How To Unlock''' | |||
| | |||
</ | {| border="1" | ||
|- | |||
!style="background:#D2691E;" |Reach Arena Level 10 | |||
|- | |||
!style="background:#00FF7F;" |Reach Arena Level 10 | |||
|- | |||
!style="background:#00FFFF;" |Reach Arena Level 10 | |||
|} | |||
|- | |||
|'''Battle Level''' | |||
|<span style="color:orange;">★★★</span> | |||
|- | |||
|'''Location''' | |||
|[[Mirage Arena]] | |||
|- | |||
|'''Rewards''' | |||
| | |||
{| border="1" | |||
|- | |||
|'''300 Medals''' | |||
|- | |||
!style="background:#D2691E;" |N/A | |||
|- | |||
!style="background:#00FF7F;" |N/A | |||
|- | |||
!style="background:#00FFFF;" |N/A | |||
|} | |||
|} | |||
{|class="wikitable" width="70%" | |||
|- bgcolor="#87CEEB" | |||
|width="25%" style="text-align:center"|'''Round''' | |||
|width="25%" style="text-align:center"|'''Enemies''' | |||
|-bgcolor="#E6E6FA" style="text-align:center" | |||
|1 | |||
| | |||
{| border="1" | |||
|- | |||
|[[Scrapper]] x9 | |||
[[Monotrucker]] x8 | |||
[[Shoegazer]] x9 | |||
[[Bruiser]] x8 | |||
|} | |||
|-bgcolor="#E6E6FA" style="text-align:center" | |||
|2 | |||
| | |||
{| border="1" | |||
|- | |||
|[[Axe Flapper]] x6 | |||
[[Flood]] x3 | |||
|- | |||
|[[Scrapper]] x3 | |||
[[Blue Sea Salt]] x3 | |||
|- | |||
|[[Buckle Bruiser]] x1 | |||
[[Axe Flapper]] x6 | |||
|- | |||
|[[Buckle Bruiser]] x4 | |||
[[Scrapper]] x3 | |||
[[Blue Sea Salt]] x3 | |||
|} | |||
|-bgcolor="#E6E6FA" style="text-align:center" | |||
|3 | |||
| | |||
{| border="1" | |||
|- | |||
|[[Sonic Blaster]] x4 | |||
[[Vile Phial]] x4 | |||
|- | |||
|[[Scrapper]] x3 | |||
[[Blue Sea Salt]] x3 | |||
|- | |||
|[[Tank Toppler]] x5 | |||
[[Blue Sea Salt]] x3 | |||
[[Vile Phial]] x1 | |||
|} | |||
|-bgcolor="#E6E6FA" style="text-align:center" | |||
|4 | |||
| | |||
{| border="1" | |||
|- | |||
|[[Tank Toppler]] x1 | |||
[[Vile Phial]] x8 | |||
|- | |||
|[[Chrono Twister]] x1 | |||
[[Tank Toppler]] x3 | |||
[[Vile Phial]] x3 | |||
|- | |||
|[[Chrono Twister]] x1 | |||
[[Buckle Bruiser]] x3 | |||
[[Vile Phial]] x3 | |||
|- | |||
|[[Chrono Twister]] x1 | |||
[[Tank Toppler]] x4 | |||
[[Buckle Bruiser]] x3 | |||
|} | |||
|-bgcolor="#E6E6FA" style="text-align:center" | |||
|5 | |||
| | |||
{| border="1" | |||
|- | |||
|[[Blue Sea Salt]] x9 | |||
[[Archraven]] x9 | |||
|- | |||
|[[Bruiser]] x9 | |||
[[Tank Toppler]] x9 | |||
|} | |||
|-bgcolor="#E6E6FA" style="text-align:center" | |||
|6 | |||
|'''[[Iron Imprisoner|Iron Imprisoner III]]''' | |||
|-bgcolor="#E6E6FA" style="text-align:center" | |||
|} | |} | ||
|} | |} | ||
{{-}} | {{-}} | ||
===[[ | {|class="wikitable mw-collapsible mw-collapsed" border="0" style="width:100%" | ||
!style="width:16em; text-align:left"|'''Match #10: ''[[A Time to Chill]]''''' | |||
|- | |||
|colspan="2"| | |||
{| border="1" | |||
|- | |||
|'''How To Unlock''' | |||
| | |||
{| border="1" | |||
|- | |||
!style="background:#D2691E;" |Clear Aqua's Story or Reach Arena Level 13 or purchase Chill Ticket | |||
|- | |||
!style="background:#00FF7F;" |Clear Aqua's Story or Reach Arena Level 13 or purchase Chill Ticket | |||
|- | |||
!style="background:#00FFFF;" |Clear Olympus Coliseum or Reach Arena Level 13 or purchase Chill Ticket | |||
|} | |||
|- | |||
|'''Battle Level''' | |||
|<span style="color:orange;">★★★★</span> | |||
|- | |||
|'''Location''' | |||
|[[Olympus Coliseum]] | |||
|- | |||
|'''Rewards''' | |||
| | |||
{| border="1" | {| border="1" | ||
|- | |- | ||
|''' | |'''375 Medals''' | ||
|- | |- | ||
!style="background:#D2691E;" |N/A | |||
|- | |- | ||
| | !style="background:#00FF7F;" |HP Boost | ||
|- | |- | ||
| | !style="background:#00FFFF;" |HP Boost | ||
| | |} | ||
| | |} | ||
{|class="wikitable" width="70%" | |||
|- bgcolor="#87CEEB" | |||
|width="25%" style="text-align:center"|'''Round''' | |||
|width="25%" style="text-align:center"|'''Enemies''' | |||
|-bgcolor="#E6E6FA" style="text-align:center" | |||
|1 | |||
| | |||
{| border="1" | |||
|- | |- | ||
| | |[[Spiderchest]] x4 | ||
|- | |- | ||
| | |[[Monotrucker]] x4 | ||
[[Archraven]] x3 | |||
|- | |- | ||
| | |[[Buckle Bruiser]] x5 | ||
[[Spiderchest]] x4 | |||
|} | |} | ||
|-bgcolor="#E6E6FA" style="text-align:center" | |||
|2 | |||
| | |||
{| border="1" | |||
|- | |||
|[[Hareraiser]] x4 | |||
[[Blue Sea Salt]] x3 | |||
|- | |||
|[[Sonic Blaster]] x5 | |||
|- | |||
|[[Tank Toppler]] x4 | |||
[[Blue Sea Salt]] x5 | |||
|} | |||
|-bgcolor="#E6E6FA" style="text-align:center" | |||
|3 | |||
| | |||
{| border="1" | {| border="1" | ||
|- | |- | ||
| | |[[Wild Bruiser]] x4 | ||
| | |||
| | [[Thornbite]] x1 | ||
|- | |||
|[[Chrono Twister]] x2 | |||
[[Mandrake]] x5 | |||
|- | |- | ||
| | |[[Wild Bruiser]] x3 | ||
|[[ | |||
|5 | [[Thornbite]] x3 | ||
[[Mandrake]] x3 | |||
|} | |||
|-bgcolor="#E6E6FA" style="text-align:center" | |||
|4 | |||
|'''[[Zack]] & [[Hades]]''' | |||
|-bgcolor="#E6E6FA" style="text-align:center" | |||
|5 | |||
| | |||
{| border="1" | |||
|- | |- | ||
| | |[[Bruiser]] x3 | ||
[[Yellow Mustard]] x4 | |||
|- | |- | ||
| | |[[Triple Wrecker]] x3 | ||
[[Vile Phial]] x3 | |||
|- | |- | ||
| | |[[Bruiser]] x4 | ||
[[Triple Wrecker]] x1 | |||
[[Yellow Mustard]] x4 | |||
|} | |} | ||
|-bgcolor="#E6E6FA" style="text-align:center" | |||
|6 | |||
| | |||
{| border="1" | |||
|- | |||
|[[Buckle Bruiser]] x2 | |||
[[Sonic Blaster]] x2 | |||
[[Vile Phial]] x1 | |||
[[ | |- | ||
|[[Vile Phial]] x8 | |||
|- | |||
|[[Buckle Bruiser]] x4 | |||
[[Sonic Blaster]] x1 | |||
[[Yellow Mustard]] x2 | |||
[[Vile Phial]] x2 | |||
|} | |||
|-bgcolor="#E6E6FA" style="text-align:center" | |||
|7 | |||
| | |||
{| border="1" | |||
|- | |||
|[[Red Hot Chili]] x9 | |||
|- | |||
|[[Wild Bruiser]] x1 | |||
[[Tank Toppler]] x4 | |||
[[Monotrucker]] x2 | |||
[[Red Hot Chili]] x2 | |||
|- | |||
|[[Wild Bruiser]] x3 | |||
[[Tank Toppler]] x2 | |||
[[Red Hot Chili]] x4 | |||
|} | |||
|-bgcolor="#E6E6FA" style="text-align:center" | |||
|8 | |||
|'''[[Ice Colossus]]''' | |||
|-bgcolor="#E6E6FA" style="text-align:center" | |||
|} | |||
|} | |||
{{-}} | |||
{|class="wikitable mw-collapsible mw-collapsed" border="0" style="width:100%" | |||
!style="width:16em; text-align:left"|'''Match #11: ''[[Copycat Crisis]]''''' | |||
|- | |||
|colspan="2"| | |||
{| border="1" | |||
|- | |||
|'''How To Unlock''' | |||
| | |||
{| border="1" | |||
|- | |||
!style="background:#D2691E;" |Reach Arena Level 17 | |||
|- | |||
!style="background:#00FF7F;" |Reach Arena Level 17 | |||
|- | |||
!style="background:#00FFFF;" |Reach Arena Level 17 | |||
|} | |||
|- | |||
|'''Battle Level''' | |||
|<span style="color:orange;">★★★★</span> | |||
|- | |||
|'''Location''' | |||
|[[Land of Departure]] | |||
|- | |||
|'''Rewards''' | |||
| | |||
{| border="1" | |||
|- | |||
|'''450 Medals''' | |||
|- | |||
!style="background:#D2691E;" |HP Boost | |||
|- | |||
!style="background:#00FF7F;" |N/A | |||
|- | |||
!style="background:#00FFFF;" |N/A | |||
|} | |||
|} | |||
{|class="wikitable" width="70%" | |||
|- bgcolor="#87CEEB" | |||
|width="25%" style="text-align:center"|'''Round''' | |||
|width="25%" style="text-align:center"|'''Enemies''' | |||
|-bgcolor="#E6E6FA" style="text-align:center" | |||
|1 | |||
| | |||
{| border="1" | |||
|- | |||
|[[Bruiser]] x3 | |||
|- | |||
|[[Triple Wrecker]] x6 | |||
[[Yellow Mustard]] x1 | |||
|- | |||
|[[Bruiser]] x1 | |||
# | [[Yellow Mustard]] x6 | ||
|- | |||
|[[Triple Wrecker]] x1 | |||
[[Hareraiser]] x4 | |||
|} | |||
|-bgcolor="#E6E6FA" style="text-align:center" | |||
|2 | |||
| | |||
{| border="1" | |||
|- | |||
|[[Tank Toppler]] x3 | |||
[[Monotrucker]] x6 | |||
|- | |||
|[[Spiderchest]] x4 | |||
[[Archraven]] x5 | |||
|- | |- | ||
| | |[[Tank Toppler]] x4 | ||
[[Spiderchest]] x3 | |||
[[Monotrucker]] x1 | |||
|} | |} | ||
|-bgcolor="#E6E6FA" style="text-align:center" | |||
|3 | |||
| | |||
{| border="1" | |||
|- | |||
|[[Buckle Bruiser]] x3 | |||
[[Blue Sea Salt]] x3 | |||
|- | |||
|[[Monotrucker]] x5 | |||
[[Thornbite]] x3 | |||
|- | |||
|[[Buckle Bruiser]] x2 | |||
[[Mandrake]] x3 | |||
[[Blue Sea Salt]] x3 | |||
|- | |||
|[[Buckle Bruiser]] x4 | |||
[[Blue Sea Salt]] x4 | |||
[[Thornbite]] x1 | |||
|} | |||
|-bgcolor="#E6E6FA" style="text-align:center" | |||
|4 | |||
|'''[[Jellyshade]]''' | |||
|-bgcolor="#E6E6FA" style="text-align:center" | |||
|5 | |||
| | |||
{| border="1" | |||
|- | |||
|[[Thornbite]] x3 | |||
[[Vile Phial]] x4 | |||
|- | |||
|[[Axe Flapper]] x5 | |||
[[Vile Phial]] x3 | |||
|- | |||
|[[Bruiser]] x4 | |||
[[Thornbite]] x4 | |||
[[Vile Phial]] x1 | |||
|} | |||
|-bgcolor="#E6E6FA" style="text-align:center" | |||
|6 | |||
| | |||
{| border="1" | |||
|- | |||
|[[Triple Wrecker]] x6 | |||
[[Blue Sea Salt]] x1 | |||
|- | |||
|[[Wild Bruiser]] x1 | |||
[[Hareraiser]] x4 | |||
[[Blue Sea Salt]] x4 | |||
|- | |||
|[[Wild Bruiser]] x5 | |||
[[Triple Wrecker]] x3 | |||
[[Blue Sea Salt]] x1 | |||
|} | |||
|-bgcolor="#E6E6FA" style="text-align:center" | |||
|7 | |||
| | |||
{| border="1" | |||
|- | |||
|[[Chrono Twister]] x1 | |||
[[Mandrake]] x4 | |||
|- | |||
|[[Chrono Twister]] x3 | |||
[[Archraven]] x3 | |||
[[Mandrake]] x2 | |||
|- | |||
|[[Chrono Twister]] x1 | |||
[[Buckle Bruiser]] x4 | |||
[[Mandrake]] x2 | |||
[[Archraven]] x2 | |||
|} | |||
|-bgcolor="#E6E6FA" style="text-align:center" | |||
|8 | |||
|'''[[Mimic Master]]''' | |||
|-bgcolor="#E6E6FA" style="text-align:center" | |||
|} | |||
|} | |||
{{-}} | |||
{|class="wikitable mw-collapsible mw-collapsed" border="0" style="width:100%" | |||
!style="width:16em; text-align:left"|'''Match #12: ''[[Keepers of the Arena]]''''' | |||
|- | |||
|colspan="2"| | |||
{| border="1" | |||
|- | |||
|'''How To Unlock''' | |||
| | |||
{| border="1" | |||
|- | |||
!style="background:#D2691E;" |Reach Arena Level 20 | |||
|- | |||
!style="background:#00FF7F;" |Reach Arena Level 20 | |||
|- | |||
!style="background:#00FFFF;" |Reach Arena Level 20 | |||
|} | |||
|- | |||
|'''Battle Level''' | |||
|<span style="color:red;">★★★★★</span> | |||
|- | |||
|'''Location''' | |||
|[[Mirage Arena]] | |||
|- | |||
|'''Rewards''' | |||
| | |||
{| border="1" | |||
|- | |||
|'''500 Medals''' | |||
|- | |||
!style="background:#D2691E;" |[[Ultima Cannon]] [[Shotlock]] | |||
|- | |||
!style="background:#00FF7F;" |[[Multivortex]] [[Shotlock]] | |||
|- | |||
!style="background:#00FFFF;" |[[Lightbloom]] [[Shotlock]] | |||
|} | |||
|} | |||
{|class="wikitable" width="70%" | |||
|- bgcolor="#87CEEB" | |||
|width="25%" style="text-align:center"|'''Round''' | |||
|width="25%" style="text-align:center"|'''Enemies''' | |||
|-bgcolor="#E6E6FA" style="text-align:center" | |||
|1 | |||
| | |||
{| border="1" | |||
|- | |||
|[[Axe Flapper]] x3 | |||
[[Flood]] x3 | |||
|- | |||
|[[Buckle Bruiser]] x3 | |||
[[Mandrake]] x3 | |||
|- | |||
|[[Axe Flapper]] x3 | |||
[[Mandrake]] x2 | |||
[[Flood]] x3 | |||
|- | |||
|[[Buckle Bruiser]] x3 | |||
[[Mandrake]] x3 | |||
|- | |||
|[[Buckle Bruiser]] x3 | |||
[[Axe Flapper]] x3 | |||
[[Mandrake]] x3 | |||
|} | |||
|-bgcolor="#E6E6FA" style="text-align:center" | |||
|2 | |||
| | |||
{| border="1" | |||
|- | |||
|[[Monotrucker]] x6 | |||
[[Archraven]] x3 | |||
[[ | |- | ||
|[[Monotrucker]] x3 | |||
[[Blue Sea Salt]] x3 | |||
|- | |||
|[[Wild Bruiser]] x4 | |||
[[Archraven]] x4 | |||
|- | |||
|[[Monotrucker]] x5 | |||
[[Blue Sea Salt]] x3 | |||
|} | |||
|-bgcolor="#E6E6FA" style="text-align:center" | |||
|3 | |||
| | |||
{| border="1" | |||
|- | |||
|[[Chrono Twister]] x2 | |||
[[Tank Toppler]] x6 | |||
|- | |||
|[[Tank Toppler]] x3 | |||
[[Mandrake]] x3 | |||
|- | |||
|[[Chrono Twister]] x1 | |||
[[Buckle Bruiser]] x3 | |||
[[Mandrake]] x3 | |||
|- | |- | ||
| | |[[Chrono Twister]] x1 | ||
[[Tank Toppler]] x4 | |||
[[Buckle Bruiser]] x4 | |||
|} | |} | ||
{ | |-bgcolor="#E6E6FA" style="text-align:center" | ||
|4 | |||
|'''[[Iron Imprisoner|Iron Imprisoner III]]''' | |||
|-bgcolor="#E6E6FA" style="text-align:center" | |||
|5 | |||
| | |||
{| border="1" | |||
|- | |||
|[[Triple Wrecker]] x6 | |||
[[Bruiser]] x3 | |||
[[ | |- | ||
|[[Scrapper]] x3 | |||
[[Blue Sea Salt]] x3 | |||
|- | |||
[[ | |[[Bruiser]] x3 | ||
[[Scrapper]] x4 | |||
|- | |||
|[[Bruiser]] x4 | |||
[[Scrapper]] x4 | |||
[[Blue Sea Salt]] x3 | |||
|} | |||
|-bgcolor="#E6E6FA" style="text-align:center" | |||
|6 | |||
| | |||
{| border="1" | |||
|- | |||
|[[Thornbite]] x4 | |||
[[Axe Flapper]] x2 | |||
|- | |||
|[Tank Toppler]] x3 | |||
[[Yellow Mustard]] x3 | |||
|- | |||
|[[Tank Toppler]] x1 | |||
[[Axe Flapper]] x4 | |||
[[Yellow Mustard]] x4 | |||
|- | |||
|[[Tank Toppler]] x4 | |||
[[Yellow Mustard]] x2 | |||
[[Thornbite]] x2 | |||
[[Axe Flapper]] x1 | |||
|} | |||
|-bgcolor="#E6E6FA" style="text-align:center" | |||
|7 | |||
| | |||
{| border="1" | |||
|- | |||
|[[Triple Wrecker]] x3 | |||
[[Mandrake]] x5 | |||
|- | |||
|[[Buckle Bruiser]] x3 | |||
[[Scrapper]] x4 | |||
[[ | |- | ||
|[[Triple Wrecker]] x1 | |||
[[Mandrake]] x3 | |||
[[Scrapper]] x3 | |||
|- | |||
|[[Wild Bruiser]] x4 | |||
[[Mandrake]] x5 | |||
|} | |||
|-bgcolor="#E6E6FA" style="text-align:center" | |||
|8 | |||
| | |||
{| border="1" | |||
|- | |||
|[[Sonic Blaster]] x3 | |||
[[Yellow Mustard]] x3 | |||
[[Mandrake]] x1 | |||
|- | |||
|[[Yellow Mustard]] x4 | |||
[[Mandrake]] x5 | |||
|- | |||
|[[Wild Bruiser]] x3 | |||
[[Sonic Blaster]] x3 | |||
[[Mandrake]] x1 | |||
|- | |||
|[[Wild Bruiser]] x4 | |||
[[Mandrake]] x5 | |||
|} | |||
|-bgcolor="#E6E6FA" style="text-align:center" | |||
|9 | |||
|'''[[Iron Imprisoner|Iron Imprisoner IV]]''' | |||
|-bgcolor="#E6E6FA" style="text-align:center" | |||
|} | |||
|} | |||
{{-}} | |||
{|class="wikitable mw-collapsible mw-collapsed" border="0" style="width:100%" | |||
!style="width:16em; text-align:left"|'''Match #13: ''[[Villains' Vendetta]]''''' | |||
|- | |||
|colspan="2"| | |||
{| border="1" | |||
|- | |||
|'''How To Unlock''' | |||
| | |||
{| border="1" | |||
|- | |||
!style="background:#D2691E;" |Reach Arena Level 30 | |||
|- | |||
!style="background:#00FF7F;" |Reach Arena Level 30 | |||
|- | |||
!style="background:#00FFFF;" |Reach Arena Level 30 | |||
|} | |||
|- | |||
|'''Battle Level''' | |||
|<span style="color:red;">★★★★★</span> | |||
|- | |||
|'''Location''' | |||
|[[Mirage Arena]] | |||
|- | |||
|'''Rewards''' | |||
| | |||
{| border="1" | |||
|- | |||
|'''750 Medals''' | |||
|- | |||
!style="background:#D2691E;" |[[Ultima Weapon]] | |||
|- | |||
!style="background:#00FF7F;" |[[Ultima Weapon]] | |||
|- | |||
!style="background:#00FFFF;" |[[Ultima Weapon]] | |||
|} | |||
|} | |||
{|class="wikitable" width="70%" | |||
|- bgcolor="#87CEEB" | |||
|width="25%" style="text-align:center"|'''Round''' | |||
|width="25%" style="text-align:center"|'''Enemies''' | |||
|-bgcolor="#E6E6FA" style="text-align:center" | |||
|1 | |||
|'''[[Iron Imprisoner|Iron Imprisoner I]]''' | |||
|-bgcolor="#E6E6FA" style="text-align:center" | |||
|2 | |||
|'''[[Cursed Coach]]''' | |||
|-bgcolor="#E6E6FA" style="text-align:center" | |||
|3 | |||
|'''[[Wheel Master]]''' | |||
|-bgcolor="#E6E6FA" style="text-align:center" | |||
|4 | |||
|'''[[Iron Imprisoner|Iron Imprisoner II]]''' | |||
|-bgcolor="#E6E6FA" style="text-align:center" | |||
|5 | |||
|'''[[Ice Colossus]]''' | |||
|-bgcolor="#E6E6FA" style="text-align:center" | |||
|6 | |||
|'''[[Iron Imprisoner|Iron Imprisoner III]]''' | |||
|-bgcolor="#E6E6FA" style="text-align:center" | |||
|7 | |||
|'''[[Trinity Armor]]''' | |||
|-bgcolor="#E6E6FA" style="text-align:center" | |||
|8 | |||
|'''[[Iron Imprisoner|Iron Imprisoner IV]]''' | |||
|-bgcolor="#E6E6FA" style="text-align:center" | |||
|} | |||
|} | |||
{{-}} | |||
====[[ | ===[[Command Board]]=== | ||
[[ | {|class="wikitable" width="70%" | ||
|- bgcolor="#87CEEB" | |||
|width="25%" style="text-align:center"|'''Board''' | |||
|width="25%" style="text-align:center"|'''World''' | |||
|width="25%" style="text-align:center"|'''Characters''' | |||
|-bgcolor="#E6E6FA" style="text-align:center" | |||
|Keyblade Board/ | |||
Secret Board | |||
|[[Land of Departure]] | |||
|[[Terra]], [[Ventus]], [[Aqua]] | |||
|-bgcolor="#E6E6FA" style="text-align:center" | |||
|Royal Board | |||
|[[Castle of Dreams]] | |||
|[[Cinderella]] | |||
|-bgcolor="#E6E6FA" style="text-align:center" | |||
|Spaceship Board | |||
|[[Deep Space]] | |||
|[[Experiment 626]], [[Gantu]] | |||
|-bgcolor="#E6E6FA" style="text-align:center" | |||
|Toon Board | |||
|[[Disney Town]] | |||
|[[Queen Minnie]], [[Captain Dark]] | |||
|-bgcolor="#E6E6FA" style="text-align:center" | |||
|Skull Board | |||
|[[Neverland]] | |||
|[[Peter Pan]], [[Captain Hook]] | |||
|-bgcolor="#E6E6FA" style="text-align:center" | |||
|Honeypot Board | |||
|[[100 Acre Wood]] | |||
|[[Winnie the Pooh]], [[Tigger]] | |||
|} | |||
{|class="wikitable mw-collapsible mw-collapsed" border="0" style="width:100%" | |||
!style="width:16em; text-align:left"|Cards | |||
|- | |||
|colspan="2"| | |||
{|class="wikitable" width="100%" | |||
|-bgcolor="#87ceeb" | |||
|style="text-align:center"|'''Card''' | |||
|width="500" style="text-align:center"|'''Description''' | |||
|-bgcolor="#e6e6fa" | |||
|width="10%" style="text-align:center"|[[File:Attack Card KHBBS.png|30px]]<br>'''Attack Card''' | |||
|width="90%"|A card representing an attack command. Marked with a Keyblade. | |||
|-bgcolor="#e6e6fa" | |||
|width="10%" style="text-align:center"|[[File:Magic Card KHBBS.png|30px]]<br>'''Magic Card''' | |||
|width="90%"|A card that represents a magic command. Marked with a Mage Hat. | |||
|-bgcolor="#e6e6fa" | |||
|width="10%" style="text-align:center"|[[File:Misc Card KHBBS.png|30px]]<br>'''Miscellaneous Card''' | |||
|width="90%"|A card representing action commands and Shotlock commands. Marked with a Crown. | |||
|-bgcolor="#e6e6fa" | |||
|width="10%" style="text-align:center"|[[File:Joker Card KHBBS.png|30px]]<br>'''Joker Card''' | |||
|width="90%"|A random card marked with a question mark. | |||
|} | |||
{{-}} | |||
|} | |||
{{-}} | |||
{|class="wikitable mw-collapsible mw-collapsed" border="0" style="width:100%" | |||
!style="width:16em; text-align:left"|Effects | |||
|- | |||
|colspan="2"| | |||
{|class="wikitable" width="100%" | |||
|-bgcolor="#87ceeb" | |||
|width="15%" style="text-align:center"|'''Effects''' | |||
|width="55%" style="text-align:center"|'''Description''' | |||
|width="30%" style="text-align:center"|'''Requirements''' | |||
|-bgcolor="#e6e6fa" | |||
|width="10%" style="text-align:center"|'''Stun''' | |||
|Causes an opponent to lose their next turn. | |||
|<center>[[File:Attack Card KHBBS.png|30px]]</center> | |||
|-bgcolor="#e6e6fa" | |||
|width="10%" style="text-align:center"|'''Navigator''' | |||
|Allows player to move in any direction on their turn | |||
|<center>[[File:Attack Card KHBBS.png|30px]]+[[File:Attack Card KHBBS.png|30px]]</center> | |||
|-bgcolor="#e6e6fa" | |||
|width="10%" style="text-align:center"|'''Double Toll''' | |||
|Doubles the value of player's panels for 5 turns. | |||
|<center>[[File:Attack Card KHBBS.png|30px]]+[[File:Attack Card KHBBS.png|30px]]+[[File:Attack Card KHBBS.png|30px]]</center> | |||
|-bgcolor="#e6e6fa" | |||
|width="10%" style="text-align:center"|'''Two Dice''' | |||
|Allows the user to roll two dice for this turn. | |||
|<center>[[File:Magic Card KHBBS.png|30px]]</center> | |||
|-bgcolor="#e6e6fa" | |||
|width="10%" style="text-align:center"|'''Three Dice''' | |||
|Allows the user to roll three dice for this turn. | |||
|<center>[[File:Magic Card KHBBS.png|30px]]+[[File:Magic Card KHBBS.png|30px]]</center> | |||
|-bgcolor="#e6e6fa" | |||
|width="10%" style="text-align:center"|'''GP Protector''' | |||
|Prevents the player from losing GP. | |||
|<center>[[File:Misc Card KHBBS.png|30px]]</center> | |||
|-bgcolor="#e6e6fa" | |||
|width="10%" style="text-align:center"|'''Confuse''' | |||
|Causes all opponents to move without control. This does not work, however, with A.I. opponents. | |||
|<center>[[File:Misc Card KHBBS.png|30px]]+[[File:Misc Card KHBBS.png|30px]]</center> | |||
|-bgcolor="#e6e6fa" | |||
|width="10%" style="text-align:center"|'''Jokers Fortune''' | |||
|Activates a slot reel that can be stopped to activate various effects, including a "Panel Capture", where you can claim a random panel in the board. | |||
|<center>[[File:Joker Card KHBBS.png|30px]]</center> | |||
|-bgcolor="#e6e6fa" | |||
|width="10%" style="text-align:center"|'''Golden Fortune''' | |||
|Activates a slot reel that can be stopped to activate various effects, including a "Zone Capture", where you can claim an entire colored zone in the board. | |||
|<center>[[File:Joker Card KHBBS.png|30px]]+[[File:Joker Card KHBBS.png|30px]]+[[File:Joker Card KHBBS.png|30px]]</center> | |||
|-bgcolor="#e6e6fa" | |||
|width="10%" style="text-align:center"|'''GP Magnet''' | |||
|Receive GP based on the number of panels owned by opponents, the more panels they own the more GP is gained. | |||
|<center>[[File:Attack Card KHBBS.png|30px]]+[[File:Magic Card KHBBS.png|30px]]+[[File:Misc Card KHBBS.png|30px]]</center> | |||
|} | |||
{{-}} | |||
|} | |||
There are some Command Cards that can protect you from Special Panels. | |||
If you run out of Command Cards, you can no longer buy Command Panels. If you reach a Check Panel, you receive one Command Card, and if you reach the Start Panel after passing all Check Panels you will receive as many command cards as you can hold. | |||
{|class="wikitable collapsible collapsed" border="0" style="width:100%" | ===[[Rumble Racing]]=== | ||
!style="width:16em; text-align:left"| | {|class="wikitable" width="70%" | ||
|- bgcolor="#87CEEB" | |||
|width="25%" style="text-align:center"|'''Courses''' | |||
|width="25%" style="text-align:center"|'''Prize for Top-Three Finish''' | |||
|width="25%" style="text-align:center"|'''[[Mirage Arena]] Target Time''' | |||
|-bgcolor="#E6E6FA" style="text-align:center" | |||
|Country Chase | |||
|[[Hi-Potion]] | |||
|5 laps in 2:30 | |||
|-bgcolor="#E6E6FA" style="text-align:center" | |||
|Disney Drive | |||
|[[Fire Dash]] | |||
|5 laps in 5:00 | |||
|-bgcolor="#E6E6FA" style="text-align:center" | |||
|Grand Spree | |||
|[[Aerora]] | |||
|5 laps in 5:00 | |||
|-bgcolor="#E6E6FA" style="text-align:center" | |||
|Castle Circuit | |||
|[[Victory Line]] | |||
|5 laps in 5:30 | |||
|} | |||
{|class="wikitable mw-collapsible mw-collapsed" border="0" style="width:100%" | |||
!style="width:16em; text-align:left"|Controls | |||
|- | |- | ||
|colspan="2"| | |colspan="2"| | ||
*{{button|t}}: Barrier | |||
*{{button|c}}: Skid Charge (Terra) | |||
*{{button|c}}: Air Gyre (Ventus) | |||
*{{button|c}}: Wing Arrow (Aqua) | |||
*{{button|s}}: Brake | |||
*{{button|x}}: Accelerate | |||
|} | |} | ||
{{-}} | {{-}} | ||
| Line 472: | Line 2,027: | ||
==[[Trinity Archives]]== | ==[[Trinity Archives]]== | ||
{|class="wikitable collapsible collapsed" border="0" style="width:100%" | {|class="wikitable mw-collapsible mw-collapsed" border="0" style="width:100%" | ||
!style="width:16em; text-align:left"|Trinity Archives | !style="width:16em; text-align:left"|Trinity Archives | ||
|- | |- | ||
| Line 479: | Line 2,034: | ||
Simple enough. To complete TIMELINE all you have to do is clear all three stories and the Final Episode. | Simple enough. To complete TIMELINE all you have to do is clear all three stories and the Final Episode. | ||
{|class="wikitable collapsible collapsed" border="0" style="width:100%" | {|class="wikitable mw-collapsible mw-collapsed" border="0" style="width:100%" | ||
!style="width:16em; text-align:left"|Timeline | !style="width:16em; text-align:left"|Timeline | ||
|- | |- | ||
| Line 514: | Line 2,069: | ||
There are a total of 8 Trophies. Each require different actions to be done to get them | There are a total of 8 Trophies. Each require different actions to be done to get them | ||
{|class="wikitable collapsible collapsed" border="0" style="width:100%" | {|class="wikitable mw-collapsible mw-collapsed" border="0" style="width:100%" | ||
!style="width:16em; text-align:left"|Trophies | !style="width:16em; text-align:left"|Trophies | ||
|- | |- | ||
|colspan="2"| | |colspan="2"| | ||
<gallery> | <gallery> | ||
Image:Power Walker Trophy KHBBS.png|Power Walker: Walk 99,999 steps | |||
Image:Keyslinger Trophy KHBBS.png|Keyslinger: Fight 9,999 Unversed | |||
Image:Clockwork Trophy KHBBS.png|Clockwork: Play the game for eighty hours or more | |||
Image:Arena Sweeper Trophy KHBBS.png|Arena Sweeper: Complete all arena matches<br> | |||
Image:Dairy Devotee Trophy KHBBS.png|Dairy Devotee: Use the [[Frozen Fortune]] [[Command Style]] thirty times | |||
Image:In the Munny Trophy KHBBS.png|In the Munny: Obtain 33,333 Munny | |||
Image:One Down Trophy KHBBS.png|One Down: Finish one character's story | |||
Image:Trinity Trophy KHBBS.png|Trinity Trophy: Beat the game on Proud or Critical Mode | |||
</gallery> | </gallery> | ||
|} | |} | ||
| Line 532: | Line 2,087: | ||
*5 SECRET REPORTS: | *5 SECRET REPORTS: | ||
Completing this nets you | Completing this nets you Final Episode. Obtain every Xehanort Report in the game. There's a total of 13, including Xehanort's letter. | ||
{|class="wikitable mw-collapsible mw-collapsed" border="0" style="width:100%" | |||
!style="width:16em; text-align:left"|Xehanort Reports | |||
|- | |||
|colspan="2"| | |||
{| border="1" | |||
|- | |||
|'''Number''' | |||
|'''How To Obtain''' | |||
|- | |||
|- | |||
!style="background:#00FF7F;" |Letter | |||
!style="background:#00FF7F;" |Obtained after leaving the [[Land of Departure]]. | |||
|- | |||
!style="background:#00FF7F;" |I | |||
!style="background:#00FF7F;" |Obtained from a chest on the [[Deep Space#Launch Deck|Launch Deck]] at [[Deep Space]]. | |||
|- | |||
!style="background:#D2691E;" |II | |||
!style="background:#D2691E;" |Obtained after defeating [[Braig (Boss)|Braig]] at [[Radiant Garden]]. | |||
|- | |||
!style="background:#00FFFF;" |III | |||
!style="background:#00FFFF;" |Obtained from a chest in [[Radiant Garden#Merlin's House|Merlin's House]] at [[Radiant Garden]]. | |||
|- | |||
!style="background:#00FFFF;" |IV | |||
!style="background:#00FFFF;" |Obtained after speaking with [[Yen Sid]] at the [[Mysterious Tower]]. | |||
|- | |||
!style="background:#D2691E;" |V | |||
!style="background:#D2691E;" |Obtained after completing [[Sinister Sentinel]] at the [[Mirage Arena]]. | |||
|- | |||
!style="background:#00FFFF;" |VI | |||
!style="background:#00FFFF;" |Obtained after defeating [[Maleficent (Boss)|Maleficent]] at [[Enchanted Dominion]]. | |||
|- | |||
!style="background:#00FFFF;" |VII | |||
!style="background:#00FFFF;" |Obtained after defeating [[Vanitas (Boss)|Vanitas]] at [[Keyblade Graveyard]]. | |||
|- | |||
!style="background:#D2691E;" |VIII | |||
!style="background:#D2691E;" |Obtained after defeating [[Master Eraqus (Boss)|Master Eraqus]] at the [[Land of Departure]]. | |||
|- | |||
!style="background:#00FF7F;" |IX | |||
!style="background:#00FF7F;" |Obtained after leaving [[Destiny Islands]]. | |||
|- | |||
!style="background:#00FF7F;" |X | |||
!style="background:#00FF7F;" |Obtained after defeating [[Vanitas (Boss)|Vanitas]] at the [[Keyblade Graveyard]]. | |||
|- | |||
!style="background:#D2691E;" |XI | |||
!style="background:#D2691E;" |Obtained after defeating [[Terra-Xehanort]] at the [[Keyblade Graveyard]]. | |||
|- | |||
!style="background:#00FF7F;" |XII | |||
!style="background:#00FF7F;" |Obtained from a chest in the [[Keyblade Graveyard#Seat of War|Seat of War]] at the [[Keyblade Graveyard]]. | |||
|- | |||
|} | |||
|} | |||
{{-}} | |||
|} | |} | ||
{{-}} | {{-}} | ||
===Info=== | ===Info=== | ||
[[File:Station Character.png|thumb|Story Selection]] | [[File:Station Character KHBBS.png|thumb|Story Selection]] | ||
{| border="1" | {| border="1" | ||
| Line 606: | Line 2,215: | ||
====D-Links==== | ====D-Links==== | ||
{|class="wikitable" width="100%" | {|class="wikitable" width="100%" | ||
|- bgcolor=" | |- bgcolor="lightgray" | ||
|rowspan="2" width="11%" style="text-align:center"|'''D-Link''' | |rowspan="2" width="11%" style="text-align:center"|'''D-Link''' | ||
|rowspan="2" width="5%" style="text-align:center"|'''Avatar''' | |rowspan="2" width="5%" style="text-align:center"|'''Avatar''' | ||
| Line 619: | Line 2,228: | ||
|width="18%" style="text-align:center"|'''Description''' | |width="18%" style="text-align:center"|'''Description''' | ||
|- bgcolor="#D2691E" | |- bgcolor="#D2691E" | ||
|rowspan="2"|'''[[File: | |rowspan="2"|'''[[File:Terra D-Link KHBBS.png|120px|link=Terra]]''' | ||
|style="text-align:center"|[[File: | |style="text-align:center"|[[File:Terra Sprite KHBBS.png|55px]] | ||
|'''[[Finish]]''' | |'''[[Finish]]''' | ||
|A strong jumping slash blow. | |A strong jumping slash blow. | ||
|[[File: | |[[File:Overdrive KHBBS.png]] [[Overdrive (ability)|Overdrive]] | ||
|Attack power increases when HP is at less than 25%. | |Attack power increases when HP is at less than 25%. | ||
|rowspan="2"|'''Lv.0''': [[ | |rowspan="2"|'''Lv.0''': [[Quick Blitz]], [[Slide Dash]], [[Stun Blade]]<br>'''Lv.1''': [[Quick Blitz]], [[Slide Dash]], [[Stun Edge]], [[Slide Dash]], [[Zero Gravity]]<br>'''Lv.2''': [[Quick Blitz]], [[Sonic Blade]], [[Stun Edge]], [[Sonic Blade]], [[Zero Gravira]], [[Binding Strike]], [[Cure]] | ||
|rowspan="2"|Ventus, Aqua | |rowspan="2"|Ventus, Aqua | ||
|- bgcolor="#D2691E" | |- bgcolor="#D2691E" | ||
|style="text-align:center"|[[File: | |style="text-align:center"|[[File:Terra (Armor) Sprite KHBBS.png|55px]] | ||
|'''[[ | |'''[[Landbreaker]]''' | ||
|Breaks the ground so that nearly all enemies are damaged and blown off. | |Breaks the ground so that nearly all enemies are damaged and blown off. | ||
|[[File: | |[[File:Auto-Block KHBBS.png]] [[Auto-Block]] | ||
|Automatic guard against enemies from the front. | |Automatic guard against enemies from the front. | ||
|- bgcolor="#00FF7F" | |- bgcolor="#00FF7F" | ||
|rowspan="2"|'''[[File: | |rowspan="2"|'''[[File:Ventus D-Link KHBBS.png|120px|link=Ventus]]''' | ||
|style="text-align:center"|[[File: | |style="text-align:center"|[[File:Ventus Sprite KHBBS.png|55px]] | ||
|'''[[Finish]]''' | |'''[[Finish]]''' | ||
|A speedy rapid combo attack. | |A speedy rapid combo attack. | ||
|[[File: | |[[File:Haste KHBBS.png]] [[Haste]] | ||
|Increase your speed and the speed of normal attack. | |Increase your speed and the speed of normal attack. | ||
|rowspan="2"|'''Lv.0''': [[ | |rowspan="2"|'''Lv.0''': [[Quick Blitz]], [[Strike Raid]], [[Aero]]<br>'''Lv.1''': [[Quick Blitz]], [[Strike Raid]], [[Sliding Dash]], [[Aero]]<br>'''Lv.2''': [[Blitz]], [[Strike Raid]], [[Slide Dash]], [[Blitz]], [[Freeze Raid]], [[Sliding Dash]], [[Aerora]], [[Cura]] | ||
|rowspan="2"|Terra, Aqua | |rowspan="2"|Terra, Aqua | ||
|- bgcolor="#00FF7F" | |- bgcolor="#00FF7F" | ||
|style="text-align:center"|[[File: | |style="text-align:center"|[[File:Ventus (Armor) Sprite KHBBS.png|55px]] | ||
|'''[[Air | |'''[[Air Dive]]''' | ||
|Press {{button|c}}/{{button|x}}/{{button|s}}/{{button|t}} to hit enemies while flying through the air. | |Press {{button|c}}/{{button|x}}/{{button|s}}/{{button|t}} to hit enemies while flying through the air. | ||
|[[File: | |[[File:Auto-Counter KHBBS.png]] [[Auto-Counter]] | ||
|When blown away by enemies you will automatically counter attack. | |When blown away by enemies you will automatically counter attack. | ||
|- bgcolor="#00FFFF" | |- bgcolor="#00FFFF" | ||
|rowspan="2"|'''[[File: | |rowspan="2"|'''[[File:Aqua D-Link KHBBS.png|120px|link=Aqua]]''' | ||
|style="text-align:center"|[[File: | |style="text-align:center"|[[File:Aqua Sprite KHBBS.png|55px]] | ||
|'''[[Finish]]''' | |'''[[Finish]]''' | ||
|Shoot many magic orbs towards enemies. | |Shoot many magic orbs towards enemies. | ||
|[[File: | |[[File:Magic Deflector KHBBS.png]] [[Magic Deflector]] | ||
|Sometimes guard against magic automatically. | |Sometimes guard against magic automatically. | ||
|rowspan="2"|'''Lv.0''': [[Blizzara]], [[Thundara]], [[ | |rowspan="2"|'''Lv.0''': [[Blizzara]], [[Thundara]], [[Cura]]<br>'''Lv.1''': [[Blizzara]], [[Fira]], [[Thundara]], [[Magnera]], [[Fire Strike]], [[Cura]]<br>'''Lv.2''': [[Blizzara]], [[Fira]], [[Thundara]], [[Mine Square]], [[Blizzara]], [[Magnera]], [[Fire Strike]], [[Cura]] | ||
|rowspan="2"|Terra, Ventus | |rowspan="2"|Terra, Ventus | ||
|- bgcolor="#00FFFF" | |- bgcolor="#00FFFF" | ||
|style="text-align:center"|[[File: | |style="text-align:center"|[[File:Aqua (Armor) Sprite KHBBS.png|55px]] | ||
|'''[[Magic Volley]]''' | |'''[[Magic Volley]]''' | ||
|Shoot magic orbs. Sometimes there will be a chance to press {{button|c}}, then you can teleport and shoot more magic orbs. | |Shoot magic orbs. Sometimes there will be a chance to press {{button|c}}, then you can teleport and shoot more magic orbs. | ||
|[[File: | |[[File:Auto-Life KHBBS.png]] [[Auto-Life]] | ||
|Auto Revive from battle once with 25% health. | |Auto Revive from battle once with 25% health. | ||
|} | |} | ||
{{BBS}} | {{BBS}} | ||
Latest revision as of 18:02, 28 May 2023

| Kingdom Hearts Birth by Sleep | |
|---|---|
| |
| キングダム ハーツ バース バイ スリープ Kingudamu Hātsu Bāsu Bai Surīpu | |
| Developer(s) | Square Enix |
| Publisher(s) | |
| Release date(s) | |
| Genre | Action RPG |
| Game modes | Single player, multiplayer |
| Ratings | CERO: A ESRB: E10+ PEGI: 12+ USK: 6+ OFLC: |
| Platform(s) | PlayStation Portable |
Unlike all my other Game Data (Reviews), I am designing the data for Kingdom Hearts Birth by Sleep to be both a review and a guide.
![]() Data Install:
Data Install:
| 200 MB | |
| 400 MB | |
| X | 624 MB |
Congratulations! I cleared the whole game on Critical!
| Beginner | |
| Standard | |
| Proud | |
| X | Critical |

 Terra
Terra
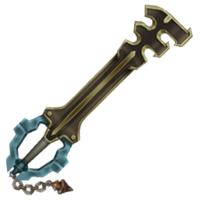
Critical Mode is new to me like most people, so even though I like a good challenge, some points were unbelievable. In Enchanted Dominion, I had to use all 6 or so of my potions on the bridge before dying in throne room once I got in there. If I recall correctly, My level was in the double digits before I was able to defeat Wheel Master. Getting onto a tangent, the stickers for the Sticker Album are in the most impossible of places. In Castle of Dreams, I failed the first time around escorting Cinderella to the ball. Nothing notable about Dwarf Woodlands. In Radiant Garden, The battle with Trinity Armor was smooth. I took caution in the battle with Braig causing it to be much longer than average. Disney Town was..."interesting". It took me forever to get the machine room going. Pete's Rec Room seemed kinda pointless yet fun. In Olympus Coliseum, it took me forever to defeat Dark Zack. In Deep Space, the Expirement 221 battle was annoying. The last Disney world and last nothing-notable-about world: Neverland. Then, the battle with Master Eraqus was fairly quick and easy. Keyblade Graveyard: The tornadoes were annoying. Master Xehanort was way too easy. It's hilarious how easy it was to Shotlock and Combo him a few times before victory. He dare call himself a Master!? Anyway, Terra-Xehanort was a worthy opponent. I spent around 3-4 hours training before I could beat him.

 Ventus
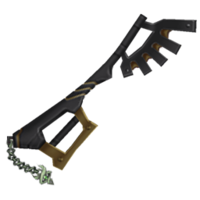
In Dwarf Woodlands, it was annoying trying to find the dwarfs and escorting Snow White was worse than escorting Cinderella in Terra's story. Then Castle of Dreams was so-so. I racked up a lot of EXP but finding dress items was annoying. The one thing more annoying then dwarfs or a dress, was the warp holes (reminiscent of Saffron City in Poke'mon) in Enchanted Dominion. I don't appreciate Square Enix Teasing me with treasure chests because I'm being warped from one dead end to the next. I had a little trouble (Mandrakes) when starting out in Radiant Garden. Olympus Coliseum went quick and then the first battle with Metamorphosis got on my nerves. When in Deep Space, I had trouble realizing where to find it for it's second showdown. In Neverland I had trouble (Mandrakes) in the Indian Village. Then more trouble (Mandrakes) befell me when in the Keyblade Graveyard. The final battle with Vanitas was just about as easy as Marluxia's second form.

 Aqua
Aqua
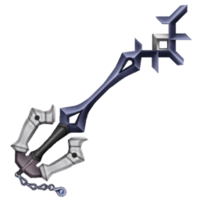
A common thing between the three stories is that the first world is the hardest because since it is the start, almost no abilities and every stat including HP is the lowest (well DUH!). In addition to the obviousness, you have very little variety of Deck Commands. I had this trouble with Terra and Ventus, but with Aqua it was unbelievable. It took me a few hours to get past Castle of Dreams. Dwarf Woodlands wasn't bad but when I got to Enchanted Dominion, Maleficent's goons gave me a run for my money. I had to restart the save file to right before entering so I could train in the other worlds. There was nothing notable about Radiant Garden, Disney Town, or Olympus Coliseum. Deep Space was annoying because I kept going back and forth in an odd confusion of not knowing where to go. Then in Neverland the Rainbow Falls were annoying. I kept falling off because of the stupid Unversed. Both Vanitas battles weren't much of a challenge, but Braig and Ventus-Vanitas were.

 Final Episode
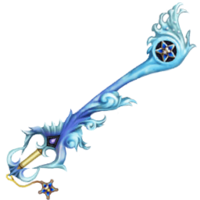
The first Terra-Xehanort battle took me a few tries, but when I FINALly got to the FINAL boss of the FINAL episode, I stubbornly refused to level up and retry no matter how many dozen times I was KO'd. When I FINALly beat the FINAL episode, the battle took me just about an hour (Me and my over-exaggerated carefulness Xp). The new unorganized strategy of mine was only go on the offense right after the Guardian returned from the ground. Well, not only that but a couple times I used shotlock right as the Guardian sinks into the ground. Then I realized I would get a lot more damage in by using Mine Seeker "right as..." just like the shotlock which I could use again after enough of the gauge was restored by the other attacks. After I got him down to his last HP bar I was "dodge-waiting" 10-20 minutes for the Guardian to sink into the ground again before it hit me: "Wait. Maybe he doesn't use that attack anymore." It was then that I went back to "Blizzard-ing" but now was happening between the Guardians attacks. Most of the time he was dodging so damage was still rare. When a little less then a quarter of his last HP bar was left, I was expecting to go into the light part but it never happened. I actually beat him without going into the light, but Aqua went into the darkness.
My tentative statement is that TX is harder than VR.
Superbosses
 Vanitas Remnant
| File:Vanitas Remnant (Action Render) KHBBS.png | ||||
| HP | 200 | |||
| Rewards |
| |||

 Terra
Terra

 Ventus
One of the hardest bosses in the game becomes one of the easiest with the perfect strategy. Make the first two commands Tornado. Right as the battle starts waste no time...:
- getting to the remnant
- pressing

- paying close attention to when the tornado fades.
- repeating step 2 and 3 right when you see the remnant fall to the ground.
- pressing
 right when you see the remnant fall to the ground the 2nd time.
With this strategy you will have him beat in less than 30 seconds like I am seemingly the first one to do.
| Vanitas Remnant defeated in less than 30 seconds! |

 Aqua
Aqua
 Unknown
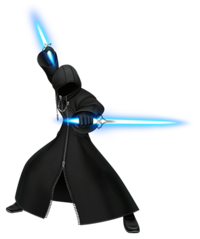
| ||||
| HP | 999 | |||
| Rewards |
| |||

 Terra
Terra

 Ventus

 Aqua
Aqua
Mirage Arena
Arena Mode
| Match #1: Day of Reckoning | |||||||||||||||||||||||||||||||||||||
|---|---|---|---|---|---|---|---|---|---|---|---|---|---|---|---|---|---|---|---|---|---|---|---|---|---|---|---|---|---|---|---|---|---|---|---|---|---|
| |||||||||||||||||||||||||||||||||||||
| Match #2: Wheels of Misfortune | ||||||||||||||||||||||||||||||||||||
|---|---|---|---|---|---|---|---|---|---|---|---|---|---|---|---|---|---|---|---|---|---|---|---|---|---|---|---|---|---|---|---|---|---|---|---|---|
| ||||||||||||||||||||||||||||||||||||
| Match #3: Risky Riches | ||||||||||||||||||||||||||||||||
|---|---|---|---|---|---|---|---|---|---|---|---|---|---|---|---|---|---|---|---|---|---|---|---|---|---|---|---|---|---|---|---|---|
| ||||||||||||||||||||||||||||||||
| Match #4: Weaver Fever | |||||||||||||||||||||||||||||||||||
|---|---|---|---|---|---|---|---|---|---|---|---|---|---|---|---|---|---|---|---|---|---|---|---|---|---|---|---|---|---|---|---|---|---|---|---|
| |||||||||||||||||||||||||||||||||||
| Match #5: Sinister Sentinel | |||||||||||||||||||||||||||||||||||||||||||
|---|---|---|---|---|---|---|---|---|---|---|---|---|---|---|---|---|---|---|---|---|---|---|---|---|---|---|---|---|---|---|---|---|---|---|---|---|---|---|---|---|---|---|---|
| |||||||||||||||||||||||||||||||||||||||||||
| Match #6: Dead Ringer | |||||||||||||||||||||||||||||||||||||||||||
|---|---|---|---|---|---|---|---|---|---|---|---|---|---|---|---|---|---|---|---|---|---|---|---|---|---|---|---|---|---|---|---|---|---|---|---|---|---|---|---|---|---|---|---|
| |||||||||||||||||||||||||||||||||||||||||||
| Match #7: Combined Threat | |||||||||||||||||||||||||||||||||||||||||||||
|---|---|---|---|---|---|---|---|---|---|---|---|---|---|---|---|---|---|---|---|---|---|---|---|---|---|---|---|---|---|---|---|---|---|---|---|---|---|---|---|---|---|---|---|---|---|
| |||||||||||||||||||||||||||||||||||||||||||||
| Match #8: Treasure Tussle | |||||||||||||||||||||||||||||||||||
|---|---|---|---|---|---|---|---|---|---|---|---|---|---|---|---|---|---|---|---|---|---|---|---|---|---|---|---|---|---|---|---|---|---|---|---|
| |||||||||||||||||||||||||||||||||||
| Match #9: Harsh Punishment | ||||||||||||||||||||||||||||||||||||||||||||
|---|---|---|---|---|---|---|---|---|---|---|---|---|---|---|---|---|---|---|---|---|---|---|---|---|---|---|---|---|---|---|---|---|---|---|---|---|---|---|---|---|---|---|---|---|
| ||||||||||||||||||||||||||||||||||||||||||||
| Match #10: A Time to Chill | ||||||||||||||||||||||||||||||||||||||||||||||||||||
|---|---|---|---|---|---|---|---|---|---|---|---|---|---|---|---|---|---|---|---|---|---|---|---|---|---|---|---|---|---|---|---|---|---|---|---|---|---|---|---|---|---|---|---|---|---|---|---|---|---|---|---|---|
| ||||||||||||||||||||||||||||||||||||||||||||||||||||
| Match #11: Copycat Crisis | ||||||||||||||||||||||||||||||||||||||||||||||||||||||
|---|---|---|---|---|---|---|---|---|---|---|---|---|---|---|---|---|---|---|---|---|---|---|---|---|---|---|---|---|---|---|---|---|---|---|---|---|---|---|---|---|---|---|---|---|---|---|---|---|---|---|---|---|---|---|
| ||||||||||||||||||||||||||||||||||||||||||||||||||||||
| Match #13: Villains' Vendetta | ||||||||||||||||||||||||||||||||||
|---|---|---|---|---|---|---|---|---|---|---|---|---|---|---|---|---|---|---|---|---|---|---|---|---|---|---|---|---|---|---|---|---|---|---|
| ||||||||||||||||||||||||||||||||||
Command Board
| Board | World | Characters |
| Keyblade Board/
Secret Board |
Land of Departure | Terra, Ventus, Aqua |
| Royal Board | Castle of Dreams | Cinderella |
| Spaceship Board | Deep Space | Experiment 626, Gantu |
| Toon Board | Disney Town | Queen Minnie, Captain Dark |
| Skull Board | Neverland | Peter Pan, Captain Hook |
| Honeypot Board | 100 Acre Wood | Winnie the Pooh, Tigger |
| Cards | |||||||||||
|---|---|---|---|---|---|---|---|---|---|---|---|
| |||||||||||
| Effects | ||||||||||||||||||||||||||||||||||
|---|---|---|---|---|---|---|---|---|---|---|---|---|---|---|---|---|---|---|---|---|---|---|---|---|---|---|---|---|---|---|---|---|---|---|
| ||||||||||||||||||||||||||||||||||
There are some Command Cards that can protect you from Special Panels.
If you run out of Command Cards, you can no longer buy Command Panels. If you reach a Check Panel, you receive one Command Card, and if you reach the Start Panel after passing all Check Panels you will receive as many command cards as you can hold.
Rumble Racing
| Courses | Prize for Top-Three Finish | Mirage Arena Target Time |
| Country Chase | Hi-Potion | 5 laps in 2:30 |
| Disney Drive | Fire Dash | 5 laps in 5:00 |
| Grand Spree | Aerora | 5 laps in 5:00 |
| Castle Circuit | Victory Line | 5 laps in 5:30 |
| Controls | |
|---|---|
| |
Trinity Archives
| Trinity Archives | ||||||||||||||||||||||||||||||||||||||||
|---|---|---|---|---|---|---|---|---|---|---|---|---|---|---|---|---|---|---|---|---|---|---|---|---|---|---|---|---|---|---|---|---|---|---|---|---|---|---|---|---|
Simple enough. To complete TIMELINE all you have to do is clear all three stories and the Final Episode.
Same as above.
There's 5 different objectives for this one:
There are a total of 8 Trophies. Each require different actions to be done to get them
Completing this nets you Final Episode. Obtain every Xehanort Report in the game. There's a total of 13, including Xehanort's letter.
| ||||||||||||||||||||||||||||||||||||||||
Info
| Name | Type | Description 1 | Description 2 | Description 3 |
| Terra | Power Type | A disciplined young man who feels
compelled to find greater strength. He relies on brute force in combat |
One of a certain Keyblade Master's three pupils.
Beneath Terra's mellow exterior lies a young man with tremendous drive; he is wholly devoted to his training... |
He overwhelms his opponents
with powerful attacks. |
|---|---|---|---|---|
| Ventus | Speed Type | An outgoing and inquisitive
boy who holds his Keyblade backhand. Quick attacks are his forte. |
A cheerful likeable boy who studies with the
same Keyblade Master as Terra and Aqua. For "Ven", as his friends affectionately call him, every day is a new discovery. |
He bewilders his foes with
incredible quickness. |
| Aqua | Magic Type | A kind young woman whose sense
of right and wrong never wavers. She is nimble, and a gifted mage. |
Aqua's dignified bearing belies an inner
sensitivity, and she often looks after Terra and Ventus who study with her under the same Keyblade Master. |
Her powerful spells leave
her enemies at her mercy. |
D-Links
| D-Link | Avatar | Finishers | Effects | Deck | Obtained | ||
| Name | Description | Name | Description | ||||

|
Finish | A strong jumping slash blow. | Attack power increases when HP is at less than 25%. | Lv.0: Quick Blitz, Slide Dash, Stun Blade Lv.1: Quick Blitz, Slide Dash, Stun Edge, Slide Dash, Zero Gravity Lv.2: Quick Blitz, Sonic Blade, Stun Edge, Sonic Blade, Zero Gravira, Binding Strike, Cure |
Ventus, Aqua | ||
| Landbreaker | Breaks the ground so that nearly all enemies are damaged and blown off. | Automatic guard against enemies from the front. | |||||
| Finish | A speedy rapid combo attack. | Increase your speed and the speed of normal attack. | Lv.0: Quick Blitz, Strike Raid, Aero Lv.1: Quick Blitz, Strike Raid, Sliding Dash, Aero Lv.2: Blitz, Strike Raid, Slide Dash, Blitz, Freeze Raid, Sliding Dash, Aerora, Cura |
Terra, Aqua | |||
| Air Dive | Press |
When blown away by enemies you will automatically counter attack. | |||||
| Finish | Shoot many magic orbs towards enemies. | Sometimes guard against magic automatically. | Lv.0: Blizzara, Thundara, Cura Lv.1: Blizzara, Fira, Thundara, Magnera, Fire Strike, Cura Lv.2: Blizzara, Fira, Thundara, Mine Square, Blizzara, Magnera, Fire Strike, Cura |
Terra, Ventus | |||
| Magic Volley | Shoot magic orbs. Sometimes there will be a chance to press |
Auto Revive from battle once with 25% health. | |||||
| Kingdom Hearts Birth by Sleep |
|---|
| Characters |
| Party members |
| Terra - Ventus - Aqua - Lingering Will Prince Phillip - Mickey Mouse - Hercules - Zack - Experiment 626 |
| Antagonists |
| Xehanort - Vanitas - Braig - Terra-Xehanort Maleficent - Lady Tremaine - Anastasia and Drizella - Lucifer - The Queen - Magic Mirror - Gantu - Experiment 221 - Hades - Ice Colossus - Captain Hook - Captain Dark |
| Non-playable characters |
| Aeleus - Ansem the Wise - Aurora - Captain Justice - Chip and Dale - Cinderella - Crocodile - Daisy Duck - Dark Figure - Dilan - Donald Duck - Dr. Jumba Jookiba - Enchanted Brooms - Eraqus - Even - Fairy Godmother - Flora, Fauna, and Merryweather - Goofy - Grand Councilwoman - Grand Duke - Horace Horsecollar - Huey, Dewey, and Louie - Ienzo - Isa - Jaq - Kairi - Kairi's Grandma - Lea - Lost Boys - Maleficent's Goons - Maleficent's Raven - Merlin - Minnie Mouse - Moogle - Peter Pan - Philoctetes - Pluto - The Prince - Prince Charming - Rabbit - Riku - Scrooge McDuck - Seven Dwarfs - Mr. Smee - Snow White - Sora - Tigger - Tinker Bell - Vanitas Remnant - Winnie the Pooh - Yen Sid |
| Locations |
| Worlds |
| Land of Departure - Enchanted Dominion - Castle of Dreams - Dwarf Woodlands - Destiny Islands - Radiant Garden - Olympus Coliseum - Disney Town - Deep Space - Mirage Arena - Neverland - Mysterious Tower - Keyblade Graveyard - Castle Oblivion - Realm of Darkness |
| Places |
| Dive to the Heart - 100 Acre Wood - Chamber of Waking |
| Terms |
| Bequeathing - Blank Points - Keyblade - Keyblade Armor - Keyblade Glider - Keyblade Master - Keyblade War - Kingdom Hearts - Mark of Mastery exam - Million Dreams Award - Princesses of Heart - The End - Unversed |
| Gameplay terms |
| Arena Mode - Command Board - Command Style - D-Link - Deck Commands - Shotlock - Special Command |
| Music |
| Kingdom Hearts Birth by Sleep & 358/2 Days Original Soundtrack - Simple and Clean |
| Archives |
| Artwork - Bosses - Enemies - Keyblades - Removed content |


