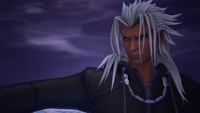
Game:Xemnas: Difference between revisions
BraviDunno (talk | contribs) |
BraviDunno (talk | contribs) |
||
| (24 intermediate revisions by 2 users not shown) | |||
| Line 16: | Line 16: | ||
|s1=Xemnas | |s1=Xemnas | ||
|s2=Xemnas's Data Rematch | |s2=Xemnas's Data Rematch | ||
|KHloc1=Hollow Bastion | |KHloc1=Hollow Bastion | ||
|KHHP1=1500 | |KHHP1=1500 | ||
| Line 109: | Line 108: | ||
|DDDBSrewards=Maximum HP +20 | |DDDBSrewards=Maximum HP +20 | ||
|DDDBSworlds=The World That Never Was | |DDDBSworlds=The World That Never Was | ||
|DDDBSreac1=12 (6s){{note|Does not get restored when flinching but with time only.}}<!--Requires confirmation on whether this value can or cannot be reduced after using Reality Shift successfully and Xemnas resets the arena after a Building Throw--> | |||
|KH3HP=1800 | |KH3HP=1800 | ||
|KH3EXP=0 | |KH3EXP=0 | ||
| Line 618: | Line 618: | ||
When reduced to 35-10% HP, Xemnas will repeat the opening sequence involving Sora running up Memory Skyscraper. The Reaction Commands for the second time are the same as the first. As he gets weaker, Xemnas teleports more often and more quickly than before. | When reduced to 35-10% HP, Xemnas will repeat the opening sequence involving Sora running up Memory Skyscraper. The Reaction Commands for the second time are the same as the first. As he gets weaker, Xemnas teleports more often and more quickly than before. | ||
====Data Rematch==== | |||
[[File:Versus Xemnas's Replica Data KHIIFM.png|thumb|right|Xemnas's Replica Data of the first battle appears before Sora in the [[Garden of Assemblage]].]] | |||
The Data Rematch against Xemnas has two battles. The first recreates Sora's one-on-one duel in Memory's Contortion, while the second recreates the battle against Xemnas's [[#Data Rematch 2|Final Form]]. | |||
Simply use the same strategy used against the real Xemnas. However, there are four differences. The first three are simple: Xemnas has more health, doesn't use Invitation to Nothingness on Sora until reduced to 30% HP, and is left with 1 HP if Sora uses '''Finish''' during '''Facedown'''. The fourth is the addition of an enhanced Dual Blade attack when Xemnas gets close to half health, where the arena darkens and he follows Sora closely, thereby making it much more difficult to evade his attack. | |||
In ''Kingdom Hearts II Final Mix'', Xemnas's Ethereal Blade attacks have a wider hitbox, his second and subsequent uses of Invitation to Nothingness occur when reduced below 15% HP, and when struck by Invitation to Nothingness, Sora's HP only starts dropping when Xemnas moves to the building. | In ''Kingdom Hearts II Final Mix'', Xemnas's Ethereal Blade attacks have a wider hitbox, his second and subsequent uses of Invitation to Nothingness occur when reduced below 15% HP, and when struck by Invitation to Nothingness, Sora's HP only starts dropping when Xemnas moves to the building. | ||
| Line 623: | Line 629: | ||
{{Atk|col=3|{{nihongo|'''Spark Wall'''|スパークウォール|<br>Supāku Wōru}}|Physical{{KHII}}<br>Thunder{{FMII}}|x0.5<br>'''Data battle''': x1.5<br>'''Data battle''': Hit 2+: x0.25|△|Raises a wall that deflects frontal attacks.|He follows up with Combo Attack if below 50% HP.}} | {{Atk|col=3|{{nihongo|'''Spark Wall'''|スパークウォール|<br>Supāku Wōru}}|Physical{{KHII}}<br>Thunder{{FMII}}|x0.5<br>'''Data battle''': x1.5<br>'''Data battle''': Hit 2+: x0.25|△|Raises a wall that deflects frontal attacks.|He follows up with Combo Attack if below 50% HP.}} | ||
{{Atk-m|col=3|{{nihongo|'''Combo Attack'''|連続攻撃|<br>Renzoku Kōgeki}}|(Cut)|Physical|x1.0<br>Hit 2+: x0.75<br>'''Data battle''': x0.5|△|Slashes to his right, kicks, then slashes to his left.||(Kick)|Physical|x0.5<br>Hit 2+: x0.25|△}} | {{Atk-m|col=3|{{nihongo|'''Combo Attack'''|連続攻撃|<br>Renzoku Kōgeki}}|(Cut)|Physical|x1.0<br>Hit 2+: x0.75<br>'''Data battle''': x0.5|△|Slashes to his right, kicks, then slashes to his left.||(Kick)|Physical|x0.5<br>Hit 2+: x0.25|△}} | ||
{{Atk-m|col=3|{{nihongo|'''Dual Blade'''|二刀流攻撃|<br>Nitōryū Kōgeki|lit. "Dual-Wield Attack"}}|(Cut)|Physical|x0.1|△|Dual-wields and attacks with dance-like slashes and kicks.|Below 50% HP he may use | {{Atk-m|col=3|{{nihongo|'''Dual Blade'''|二刀流攻撃|<br>Nitōryū Kōgeki|lit. "Dual-Wield Attack"}}|(Cut)|Physical|x0.1|△|Dual-wields and attacks with dance-like slashes and kicks.|Below 50% HP in the Data Rematch he may use an enhanced version of this attack.|(Kick)|Physical|x0.5<br>Hit 2+: x0.25|△}} | ||
{{Atk|col=3|{{nihongo|'''Invitation to Nothingness'''|無へのいざない|<br>Mu e no Izanai}}|Neutral|1 HP per 0.7 seconds{{Note|Stops dealing damage when Sora is at 1 HP}}|X|Envelops an opponent with the power of nothingness, dealing continuous damage.|Used at the | {{Atk|col=3|{{nihongo|'''Invitation to Nothingness'''|無へのいざない|<br>Mu e no Izanai}}|Neutral|1 HP per 0.7 seconds{{Note|Stops dealing damage when Sora is at 1 HP}}|X|Envelops an opponent with the power of nothingness, dealing continuous damage.|Used at the start of the fight (initial fight only), and at 35-10% HP. On the english PS3 version of the game, entering Limit Form during this attack causes the game to freeze when using Facedown.}} | ||
{{Atk-m|col=3|{{nihongo|'''Building Fall'''|ビル落下攻撃|<br>Biru Rakka Kōgeki|lit. "Building Fall Attack"}}|(Cut & kick)|Physical|x0.5{{KHII}}<br>x2.0{{FMII}}|X|Attacks five times with slashes and kicks, then deals extra damage to a falling Sora.|Used after Sora has not used any of the three Reaction Commands during the Facedown sequence.|(Other attacks)|Physical|x1.0{{KHII}}<br>x30.0{{FMII}}|X}} | {{Atk-m|col=3|{{nihongo|'''Building Fall'''|ビル落下攻撃|<br>Biru Rakka Kōgeki|lit. "Building Fall Attack"}}|(Cut & kick)|Physical|x0.5{{KHII}}<br>x2.0{{FMII}}|X|Attacks five times with slashes and kicks, then deals extra damage to a falling Sora.|Used after Sora has not used any of the three Reaction Commands during the Facedown sequence.|(Other attacks)|Physical|x1.0{{KHII}}<br>x30.0{{FMII}}|X}} | ||
{{Atk-c}} | {{Atk-c}} | ||
| Line 631: | Line 637: | ||
{{rc|{{nihongo|'''Clash'''|しりぞける|<br>Shirizokeru|lit. "Repel"}}|—|—|Can be used after using Facedown.<br>Sora and Xemnas pass by each other without any further interaction. Appears for 0.5 seconds.}} | {{rc|{{nihongo|'''Clash'''|しりぞける|<br>Shirizokeru|lit. "Repel"}}|—|—|Can be used after using Facedown.<br>Sora and Xemnas pass by each other without any further interaction. Appears for 0.5 seconds.}} | ||
{{rc|{{nihongo|'''Break Through'''|うちやぶる|<br>Uchiyaburu}}|Physical|x1.0{{KHII}}<br>x5.0<ref>x4.5 when fighting Xemnas's Replica Data.</ref>{{FMII}}|Can be used during the Facedown sequence if Clash wasn't used within 0.5 seconds.<br>Prevent Xemnas's attack and counterattack. Appears for 0.5 seconds.}} | {{rc|{{nihongo|'''Break Through'''|うちやぶる|<br>Uchiyaburu}}|Physical|x1.0{{KHII}}<br>x5.0<ref>x4.5 when fighting Xemnas's Replica Data.</ref>{{FMII}}|Can be used during the Facedown sequence if Clash wasn't used within 0.5 seconds.<br>Prevent Xemnas's attack and counterattack. Appears for 0.5 seconds.}} | ||
{{rc|{{nihongo|'''Finish'''|とどめ|<br>Todome}}|Physical|x4.0{{KHII}}<br>x15.0{{FMII}}<br>HP to 1<ref>During the Data Rematch.</ref>|Can be used during the Facedown sequence if Break Through wasn't used within 0.5 seconds.<br>Slam Xemnas into the building with a combo attack, stunning him. Appears for 0.5 | {{rc|{{nihongo|'''Finish'''|とどめ|<br>Todome}}|Physical|x4.0{{KHII}}<br>x15.0{{FMII}}<br>HP to 1<ref>During the Data Rematch.</ref>|Can be used during the Facedown sequence if Break Through wasn't used within 0.5 seconds.<br>Slam Xemnas into the building with a combo attack, stunning him. Appears for 0.5{{KHII}} or 0.25{{FMII}} seconds.}} | ||
{{rc|c}} | {{rc|c}} | ||
| Line 667: | Line 673: | ||
When an attack causes Xemnas to flinch, he counters with '''Sweep Away''', then launches attacks with weapons deployed in various locations. He will also launch two simultaneous attacks with deployed weapons when reduced to 40% HP. | When an attack causes Xemnas to flinch, he counters with '''Sweep Away''', then launches attacks with weapons deployed in various locations. He will also launch two simultaneous attacks with deployed weapons when reduced to 40% HP. | ||
[[ | Only [[Final Form]] is recommended for this portion of the battle and can greatly increase the rate at which Xemnas's HP is depleted. Other forms will most likely trigger [[Antiform]] due to the x10 Anti Point Modifier of this battle. Should Sora fall, King Mickey may appear and give him a second chance. | ||
{{Atk-o|KH2}} | |||
{{Atk|col=3|{{nihongo|'''Sweep Away'''|なぎ払い|<br>Nagiharai}}|Physical|x2.0<br>Hit 2+: x0.1|X|Sweeps with sword in right hand.|Used as Revenge Action.}} | |||
{{Atk|col=3|{{nihongo|'''Spark Wall'''|スパークウォール|<br>Supāku Wōru}}|Thunder|x1.5<br>Hit 2+: x0.25|X|Raises a wall that deflects frontal attacks.|Used at close range.}} | |||
{{Atk-m|col=3|{{nihongo|'''Spear Attack'''|ヤリ攻撃|<br>Yari Kōgeki}}|(Attack 1)|Physical|x1.0<br>Hit 2+: x0.2|△|Several [[Lindworm]] spears rain down in succession, spin around, then drop down all at once.|Starts with this attack.|(Attack 2)|Physical|x1.0|△}} | |||
{{Atk|col=3|{{nihongo|'''Chakram Attack'''|チャクラム攻撃|<br>Chakuramu Kōgeki}}|Physical|x1.0<br>Hit 2+: x0.3|△|Fiery [[Eternal Flames]] chakram circles and attacks target.}} | |||
{{Atk|col=3|{{nihongo|'''Water Form'''|水の分身攻撃|<br>Mizu no Bunshin Kōgeki|lit. "Water Clone Attack"}}|Blizzard|x1.0|△|Water clone continuously attacks with its lower half.|Used below 70% HP.}} | |||
{{Atk|col=3|{{nihongo|'''Card Attack'''|カード攻撃|<br>Kādo Kōgeki}}|Physical|x0.25|△|[[Fair Game]] card spins sideways and cuts through opponents.|Used when stepping on a card.}} | |||
{{Atk-m|col=3|{{nihongo|'''Large Sword Attack'''|大剣攻撃|<br>Daiken Kōgeki}}|(Shockwave)|Neutral|x1.0|X|[[Lunatic]] drops down and unleashes shock waves and explosions.||(Explosion)|Neutral|x0.5<br>Hit 5+: x0.25|X}} | |||
{{Atk|col=3|{{nihongo|'''Shot'''|ショット|<br>Shotto}}|Neutral|x0.25|O|A [[Sharpshooter]] arrowgun rapidly fires seven shots.}} | |||
{{Atk-c}} | |||
{{rc|o}} | |||
{{rc|{{nihongo|'''Wild Dance'''|ワイルドダンス|<br>Wairudo Dansu}}|Physical|x1.0|Can be used when near a musical note-shaped water clone.<br>Grab a water clone and attack surrounding enemies. The grabbed water clone vanishes after the attack. Acts as a finisher.}} | |||
{{rc|c}} | |||
;Second Incarnation | ;Second Incarnation | ||
[[File:Versus Xemnas (Armored Controller) 2 KHII.png|right|thumb|Armored Xemnas battles Sora and Riku on his massive Dragon Ship.]] | [[File:Versus Xemnas (Armored Controller) 2 KHII.png|right|thumb|Armored Xemnas battles Sora and Riku for the second time on his massive Dragon Ship.]] | ||
After the fall of the massive Dragon Ship, it rejuvenates and teleports Sora and Riku to an alternate dimension. They fly to the head of the ship, where they find the stationary, armored Xemnas awaiting them yet again. He will attack with a long-range sword swipe as in the last battle, dealing a lot of damage on contact. When reduced to the HP thresholds of 80%, 50%, and 30%, Xemnas blows Sora and Riku far away and fortifies his defenses with a giant shield. The first and second time Xemnas uses this attack, the shields will automatically deactivate after two minutes. | After the fall of the massive Dragon Ship, it rejuvenates and teleports Sora and Riku to an alternate dimension. They fly to the head of the ship, where they find the stationary, armored Xemnas awaiting them yet again. He will attack with a long-range sword swipe as in the last battle, dealing a lot of damage on contact. When reduced to the HP thresholds of 80%, 50%, and 30%, Xemnas blows Sora and Riku far away and fortifies his defenses with a giant shield. The first and second time Xemnas uses this attack, the shields will automatically deactivate after two minutes. | ||
Xemnas will bombard Sora with lasers and buildings, so use the Reaction Commands to get back to the ship. Failure to do so will result in Xemnas blowing Sora away and dealing minor damage. Once this is done, immediately and repetitively use [[Aerial Dodge]] in order to dodge Xemnas's next tactic, which allows him to summon snowflake-shaped energy that fires lasers and is unavoidable. Should this not be done, Sora can attempt Aerial Dodge again or merely allow damage and then fall to the point where he can safely [[glide]] back to the ship. Sora may alternatively use Thunder spells with the [[Magic Lock-On]] ability to deal damage to Xemnas without needing to land on the Dragon Ship's head. | Xemnas will bombard Sora with lasers and buildings, so use the Reaction Commands to get back to the ship. Failure to do so will result in Xemnas blowing Sora away and dealing minor damage. Once this is done, immediately and repetitively use [[Aerial Dodge]] in order to dodge Xemnas's next tactic, which allows him to summon snowflake-shaped energy that fires lasers and is unavoidable. Should this not be done, Sora can attempt Aerial Dodge again or merely allow damage and then fall to the point where he can safely [[glide]] back to the ship. Sora may alternatively use Thunder spells with the [[Magic Lock-On]] ability to deal damage to Xemnas without needing to land on the Dragon Ship's head. In other cases, Sora can teleport back to Xemnas by using Trinity Limit. | ||
When Xemnas is reduced to 50% HP, these lasers will continue to fire as Sora grapples with Xemnas. Be aware that he may summon a damaging shield, just as he did in his previous battles. Regardless of his [[Drive Form]] levels, Sora has full access to each Form's [[ability]], allowing easier movement and dodging. Riku will also heal Sora with [[Cure Potion]] if his HP falls below critical. | When Xemnas is reduced to 50% HP, these lasers will continue to fire as Sora grapples with Xemnas. Be aware that he may summon a damaging shield, just as he did in his previous battles. Regardless of his [[Drive Form]] levels, Sora has full access to each Form's [[ability]], allowing easier movement and dodging. Riku will also heal Sora with [[Cure Potion]] if his HP falls below critical. | ||
| Line 679: | Line 697: | ||
In ''Kingdom Hearts II Final Mix'', Xemnas's '''Laser''' and '''Magic Circle Laser''' attacks have a wider hitbox. | In ''Kingdom Hearts II Final Mix'', Xemnas's '''Laser''' and '''Magic Circle Laser''' attacks have a wider hitbox. | ||
{{Atk-o|KH2}} | {{Atk-o|KH2}} | ||
{{Atk|col=3|{{nihongo|'''Sweep Away'''|なぎ払い|<br>Nagiharai}}|Physical|x2.0<br>Hit 2+: x0.1|X|Sweeps with sword in right hand.|Starts with this attack | {{Atk|col=3|{{nihongo|'''Sweep Away'''|なぎ払い|<br>Nagiharai}}|Physical|x2.0<br>Hit 2+: x0.1|X|Sweeps with sword in right hand.|Starts with this attack. Used at close range as Revenge Action.}} | ||
{{Atk|col=3|{{nihongo|'''Spark Wall'''|スパークウォール|<br>Supāku Wōru}}|Thunder|x1.5<br>Hit 2+: x0.25|X|Raises a wall that deflects frontal attacks.|Used at close range.}} | {{Atk|col=3|{{nihongo|'''Spark Wall'''|スパークウォール|<br>Supāku Wōru}}|Thunder|x1.5<br>Hit 2+: x0.25|X|Raises a wall that deflects frontal attacks.|Used at close range.}} | ||
{{Atk|col=3|{{nihongo|'''Building Attack'''|ビル攻撃|<br>Biru Kōgeki}}|Physical|x2.0<br>Hit 2+: x0.25|△|Throws buildings.|Used when Sora is in the distance.}} | |||
{{Atk|col=3|{{nihongo|'''Lasers'''|レーザー|<br>Rēzā}}|Neutral|x1.0<br>Hit 2+: x0.1|X|Fires ten red lasers at Sora.|Used when Sora is in the distance.}} | |||
{{Atk|col=3|{{nihongo|'''Magic Laser'''|魔法陣レーザー|<br>Mahōjin Rēzā}}|Neutral|x1.0<br>Hit 2+: x0.1|X|Forms a magic circle in the air that fires lasers.|Used if Sora is in the distance, and when below 30% HP at close range.}} | |||
{{Atk|col=3|{{nihongo|'''Shield Shock'''|シールドショック|<br>Shīrudo Shokku}}|Neutral|x1.5|X|Shield knocks back anything that touches it.|Used if Sora gets too close without having Riku use Meteor Rain.}} | |||
{{Atk-c|note=At 80%, 50%, and 30% HP, the Armored Xehanort becomes invincible and blows Sora and Riku away with a downward sword slam. The slam deals no damage but counts as a hit. He only becomes vulnerable again after Meteor Rain is used or two minutes after.}} | |||
{{Atk|col=3|{{nihongo|'''Building Attack'''|ビル攻撃|<br>Biru Kōgeki}}|Physical|x2.0<br>Hit 2+: x0.25|△|Throws buildings.|Used | |||
{{Atk|col=3|{{nihongo|'''Lasers'''|レーザー|<br>Rēzā}}|Neutral|x1.0<br>Hit 2+: x0.1|X|Fires ten red lasers at Sora.|Used | |||
{{Atk|col=3|{{nihongo|'''Magic Laser'''|魔法陣レーザー|<br>Mahōjin Rēzā}}|Neutral|x1.0<br>Hit 2+: x0.1|X|Forms a magic circle in the air that fires lasers.|Used | |||
{{Atk|col=3|{{nihongo|'''Shield Shock'''|シールドショック|<br>Shīrudo Shokku}}|Neutral|x1.5|X|Shield knocks back anything that touches it.|Used | |||
{{Atk-c|note= | |||
{{rc|o}} | {{rc|o}} | ||
{{rc|{{nihongo|'''Riding Shot'''|ライドショット|<br>Raido Shotto}}|—|—|Can be used when near a drifting, non-spinning building.<br>Riku fastens onto one of the buildings summoned by Xemnas as Sora knocks the building towards Xemnas with his Keyblade.<br>Can be used even while Riku is down.}} | |||
{{rc|{{nihongo|'''Riding Shot'''|ライドショット|<br>Raido Shotto}}|—|—|Can be used | |||
{{rc|{{nihongo|'''Meteor Rain'''|メテオレイン|<br>Meteo Rein}}|—|—|Can be used after using Riding Shot.<br>Riku slices the building into pieces and uses the pieces to break Xemnas's shield.<br>Can be used even while Riku is down.<br>Using a Limit immediatly after causes Sora to lose all collision, resulting in a softlock if Xemnas has yet to blow opponents away when at 30% HP.}} | {{rc|{{nihongo|'''Meteor Rain'''|メテオレイン|<br>Meteo Rein}}|—|—|Can be used after using Riding Shot.<br>Riku slices the building into pieces and uses the pieces to break Xemnas's shield.<br>Can be used even while Riku is down.<br>Using a Limit immediatly after causes Sora to lose all collision, resulting in a softlock if Xemnas has yet to blow opponents away when at 30% HP.}} | ||
{{rc|c}} | {{rc|c}} | ||
| Line 744: | Line 755: | ||
====Data Rematch==== | ====Data Rematch==== | ||
Once the first battle is over, Riku joins the [[party]], giving Sora a chance to change his equipment between battles. After exiting the menu, the second battle starts. If Sora is defeated in the second battle, he will have to redo the first battle. | |||
Use the same strategy used in the final battle against the real Xemnas. However, Xemnas's pattern is different. For instance, he now uses the Bind Attack multiple times. Sora should bring [[Elixir]]s and [[Hi-Potion]]s to the fight for healing. If Sora is in [[Limit Form]], Xemnas forgoes using Bind Attack and instead begins his attack sequence where he throws Sora into the air. | |||
Xemnas uses his Bind Attack when reduced to 75% HP, begins using his Shot attack when reduced to 50%, and uses Multi Shot when reduced to 5% HP. | Xemnas uses his Bind Attack when reduced to 75% HP, begins using his Shot attack when reduced to 50%, and uses Multi Shot when reduced to 5% HP. | ||
| Line 762: | Line 770: | ||
{{Atk|col=3|{{nihongo|'''Bind Attack'''|拘束攻撃|<br>Kōsoku Kōgeki}}|Neutral|1 HP every 1.1 seconds|X|Restrains Sora and deals continuous damage to him.|Used below 50% HP (initial fight) or 75% HP (Replica Data). Xemnas is invulnerable while preparing the attack. If caught, player gains control as Riku until the Rescue Reaction Command is used. Does not trigger Reflect's explosion.}} | {{Atk|col=3|{{nihongo|'''Bind Attack'''|拘束攻撃|<br>Kōsoku Kōgeki}}|Neutral|1 HP every 1.1 seconds|X|Restrains Sora and deals continuous damage to him.|Used below 50% HP (initial fight) or 75% HP (Replica Data). Xemnas is invulnerable while preparing the attack. If caught, player gains control as Riku until the Rescue Reaction Command is used. Does not trigger Reflect's explosion.}} | ||
{{Atk|col=3|{{nihongo|'''Weapon Drop'''|武器落とし攻撃|<br>Buki Otoshi Kōgeki|lit. "Weapon Drop Attack"}}|Physical|x3.0|X|Knocks Sora's Keyblade out of his hands, then slashes at Sora and Riku.|Used after the repeated Blade Attacks if Xemnas has more than 50% HP.}} | {{Atk|col=3|{{nihongo|'''Weapon Drop'''|武器落とし攻撃|<br>Buki Otoshi Kōgeki|lit. "Weapon Drop Attack"}}|Physical|x3.0|X|Knocks Sora's Keyblade out of his hands, then slashes at Sora and Riku.|Used after the repeated Blade Attacks if Xemnas has more than 50% HP.}} | ||
{{Atk-c|note=Xemnas may grab and | {{Atk-c|note=Xemnas may grab and lift Sora upwards (can be blocked with Reflect but won't interrupt the following), using afterwards attacks such as Blade Attack, Thorn Beam, or Kick, one after another. In the initial fight, Xemnas always starts by doing this.}} | ||
{{rc|o}} | {{rc|o}} | ||
{{rc|{{nihongo|'''Reversal'''|スライドターン|<br>Suraido Tān|lit. "Slide Turn"}}|—|—|Can be used when approached by Thorn Beams.<br>If Xemnas fires his beams in mid-air, dodge them by soaring above; if Xemnas fires his beams while on the ground, dodge them by moving quickly as they approach.}} | {{rc|{{nihongo|'''Reversal'''|スライドターン|<br>Suraido Tān|lit. "Slide Turn"}}|—|—|Can be used when approached by Thorn Beams.<br>If Xemnas fires his beams in mid-air, dodge them by soaring above; if Xemnas fires his beams while on the ground, dodge them by moving quickly as they approach.}} | ||
| Line 781: | Line 789: | ||
Xemnas's most lethal move surrounds Sora with Shots, where he should leap over them with [[High Jump]] and either use the [[Air Slide]]/Sonic Impact/Double Impact combo or perform Superglide. The position of the Shots circle and aiming will always match Sora's so it is advised to keep moving and land only when they're all gone. When Xemnas traps Sora in a cage of Spark Walls, simply [[High Jump]] over them and either Super Glide or repeat the Air Slide/Sonic Impact/Double Impact combo to avoid the ensuing barrage of Shots. One other trick is to climb the walls with [[Flowmotion]], jump while moving around to dodge the Shots and attack near Xemnas with [[Shock Dive]] to deal damage. In the case where he creates the four walls while near Sora, he can just Block the Shots and Counter Rush, interrupting and knocking Xemnas back. He may try to suddenly defend himself with a single Spark Wall from time to time to knock Sora back, but if possible he can either stay away from it to avoid getting interrupted or allow it to knock him backwards so that he can perform [[Payback Raid]], as Spark Wall deals no damage. | Xemnas's most lethal move surrounds Sora with Shots, where he should leap over them with [[High Jump]] and either use the [[Air Slide]]/Sonic Impact/Double Impact combo or perform Superglide. The position of the Shots circle and aiming will always match Sora's so it is advised to keep moving and land only when they're all gone. When Xemnas traps Sora in a cage of Spark Walls, simply [[High Jump]] over them and either Super Glide or repeat the Air Slide/Sonic Impact/Double Impact combo to avoid the ensuing barrage of Shots. One other trick is to climb the walls with [[Flowmotion]], jump while moving around to dodge the Shots and attack near Xemnas with [[Shock Dive]] to deal damage. In the case where he creates the four walls while near Sora, he can just Block the Shots and Counter Rush, interrupting and knocking Xemnas back. He may try to suddenly defend himself with a single Spark Wall from time to time to knock Sora back, but if possible he can either stay away from it to avoid getting interrupted or allow it to knock him backwards so that he can perform [[Payback Raid]], as Spark Wall deals no damage. | ||
After half of his HP has been depleted, Xemnas resets the battlefield, and uses Building Throw. From Sora's starting position, it isn't required to move at all in case Xemnas throws one or two buildings, but in the case three are thrown, it will require Sora to dodge roll forwards | After half of his HP has been depleted, Xemnas resets the battlefield, and uses Building Throw. From Sora's starting position, it isn't required to move at all in case Xemnas throws one or two buildings, but in the case three are thrown, it will require Sora to dodge roll forwards after the nearest buiding falls in front of him. After all three sets of Building Throw have been sent, Sora gets sent into a gliding phase of the attack where he cannot move but can still use the Attack command (contrary to how it is displayed), and on the white building directed at him, he can trigger the [[Nightmare's End]] [[Reality Shift]]. | ||
If Nightmare's End succeeds, the arena will shift to its original form, and include a few chunks of buildings with long Flowmotion rails on top of them, with a passive Xemnas at its end. The first hit will cause Xemnas to sigh and recover after | If Nightmare's End succeeds, the arena will shift to its original form, and include a few chunks of buildings with long Flowmotion rails on top of them, with a passive Xemnas at its end. The first hit will cause Xemnas to sigh and recover after around 4 seconds have passed, meaning that in the meantime, Sora should quickly unleash his most powerful commands until the Nobody recovers. Once he has rallied, Xemnas warps the battlefield back to its original state, and will increase the frequency and ferocity of his attacks, while not staggering from damage anymore (he can still be interrupted by Blocks), making Sliding Sidewinder almost useless for its aforementioned purpose. Using Nightmare's End successfully is therefore not recommended in case Sora is underleveled or at Level 1. | ||
If Nightmare's End isn't used, Sora will take damage, and whether it fails or isn't used, the battlefield will shift back to its original form, but the ferocity of Xemnas's attacks will remain normal. | If Nightmare's End isn't used, Sora will take damage, and whether it fails or isn't used, the battlefield will shift back to its original form, but the ferocity of Xemnas's attacks will remain normal. In the 3DS version only, if Sora immediately kicks him with either Sonic Impact or Double Impact, he may restart Building Throw. In the rare case Sora gets defeated during the gliding phase because of the building but gets resurrected by [[Auto-Life]], he will essentially get soft-locked until his Drop Gauge gets depleted, with Xemnas staying intangible and immobile. | ||
If Xemnas is left undefeated for too long he might use Building Throw again. | If Xemnas is left undefeated for too long he might use Building Throw again. | ||
| Line 834: | Line 842: | ||
Xemnas ends by throwing a final building that tilts the arena, then throws four regular buildings and finally a white-striped building. | Xemnas ends by throwing a final building that tilts the arena, then throws four regular buildings and finally a white-striped building. | ||
|Only used in the following cases: <div style{{=}}"text-align:left"> | |Only used in the following cases: <div style{{=}}"text-align:left"> | ||
*At the | *At the start of the fight: only a set of two, followed by a set of three buildings are sent. Xemnas doesn't use the final building. | ||
* | *Below 50% of his HP: telegraphed by Xemnas changing his battle stance before warping away, Sora gets warped to the opposite (to Xemnas) edge of the arena, all three sets of throws are sent, and in a random order, then the final building is thrown. [[Nightmare's End]] can be used to destroy the white-striped building.</div> | ||
Flowmotion can be used on the buildings, but only on surfaces that do not cause knockbacks and that are considered vertical enough to be walls.<br> | Flowmotion can be used on the buildings, but only on surfaces that do not cause knockbacks and that are considered vertical enough to be walls.<br> | ||
If Nightmare's End is used succesfully, Xemnas is left | If Nightmare's End is used succesfully, Xemnas is left unconscious, behind the remains of the buildings, for 30 seconds. When he takes a hit, he will recover around 4 seconds later. Sora cannot use any action when Xemnas recovers, and afterwards he will increase the frequency of his attacks and never stagger; otherwise, Xemnas will keep fighting normally.<br>Should the white building put Sora's HP to 0 while he has the Auto-Life status on, Sora will get revived with all commands but the Attack command locked while Xemnas is locked in his attack, invincible.<ref>[https://youtu.be/i0zrnlWUOT4 Auto-Life Softlock at the end of Xemnas' Building Throw DM].</ref>}} | ||
{{Atk-c|note=During the fight, Xemnas may move and hide in a dark orb repetitvely, nullifying the opponents's attacks.}} | {{Atk-c|note=During the fight, Xemnas may move and hide in a dark orb repetitvely, nullifying the opponents's attacks.}} | ||
Latest revision as of 12:56, 30 December 2024
| Unknown | |||||||
|---|---|---|---|---|---|---|---|
| Japanese | 謎の男 | ||||||
| Rōmaji | Nazo no Otoko | ||||||
| Translation | Enigmatic Man
| ||||||
| Type | Organization XIII | ||||||
| Game | Kingdom Hearts Final Mix | ||||||
| |||||||
| |||||||
| HP | STR | DEF | MP rec | EXP | |||
| Hollow Bastion | 1500 | 46 | 46 | 70 | 12000 | ||
| Weapon | Fire | Blizzard | Thunder | ||||
| x1.0 | x0 | x0 | x0 | ||||
| Percentage | Stop | Stun | Other | ||||
| x0.01 | x0 | x0.5 | x0.5 | ||||
| Rewards | |||||||
| EXP Necklace, Ansem's Report 13 | |||||||
| World(s) | |||||||
| Hollow Bastion | |||||||
| Xemnas | |||||||||||||||||||
|---|---|---|---|---|---|---|---|---|---|---|---|---|---|---|---|---|---|---|---|
| Japanese | ゼムナス | ||||||||||||||||||
| Rōmaji | Zemunasu
| ||||||||||||||||||
| Type | Organization XIII | ||||||||||||||||||
| Games | Kingdom Hearts II Kingdom Hearts 3D: Dream Drop Distance Kingdom Hearts III Kingdom Hearts Melody of Memory | ||||||||||||||||||
| |||||||||||||||||||
| Enemy Card | ||||
|---|---|---|---|---|

| ||||
| Ability | Duration | Cost | ||
| Quick Barrier | 3 reloads | 65 CP | ||
| Description | ||||
| When receiving consecutive attacks, guards beyond the second strike. Resistant to fire, ice, lightning, and special attacks. | ||||
| Obtained | ||||
| Wonderland Room of Rewards[1] | ||||
| Location | HP | Strength | Defense | EXP | ||
| The World That Never Was | 1500 | 45 | 26 | 0 | ||
| Physical | Fire | Blizzard | ||||
| ×1.0 | ×0.5 | ×0.5 | ||||
| Thunder | Dark | Neutral | ||||
| ×0.5 | ×0.5 | ×0.5
| ||||
| Rewards | ||||||
| First Battle Sora: Max MP +10 Secret Ansem Report 13 | ||||||
| World(s) | ||||||
| The World That Never Was | ||||||
| Location | HP | Strength | Defense | EXP | ||
| The World That Never Was | 1500 | 45 | 26 | 0 | ||
| Physical | Fire | Blizzard | ||||
| ×1.0 | ×0.5 | ×0.5 | ||||
| Thunder | Dark | Neutral | ||||
| ×0.5 | ×0.5 | ×1.0
| ||||
| Rewards | ||||||
| First Battle Sora: Max HP +5, Max MP +10 Secret Ansem Report 13 Final Form Sora: Drive gauge +1 Riku: Max HP +25 | ||||||
| World(s) | ||||||
| The World That Never Was | ||||||
| Location | Level | HP | EXP | Strength | Magic | Defense |
| Reaction Endurance | Reality Endurance | |||||
| The World That Never Was | 38 | 2080 | 0 | 60 | 59 | 29 |
| 40 | 2167 | 0 | 63 | 62 | 30 | |
| 12 (6s) |
Reality Shifts disabled[2] | |||||
| Resistances | Fire | Blizzard | Thunder | Water | Dark | Light |
| x1.0 | x1.0 | x1.0 | x1.0 | x1.0 | x1.0 | |
| Status Effects | Stun | Mini | Sleep | Blind | Stop | Freeze |
| x0 | x0 | x0 | x0 | x0 | x0 | |
| Confuse | Poison | Magnet | Slow | Ignite | Bind | |
| x0 | x0 | x0 | x0 | x0 | x0 | |
| Zero Gravity | Time Bomb | Zantetsuken | ||||
| x0 | x0 | x0 | ||||
| Rewards | ||||||
| Maximum HP +20 | ||||||
| Worlds | ||||||
| The World That Never Was | ||||||
| Location | HP | Strength | Defense | EXP | |||||||
| Keyblade Graveyard | 1800 | 59 | 30 | 0 | |||||||
| Physical | Fire | Blizzard | Thunder | Water | |||||||
| ×1.0 | ×0.8 | ×0.8 | ×0 | ×0.8 | |||||||
| Aero | Dark | Neutral | Rapid-fire | ||||||||
| ×0.8 | ×0.8 | ×0.5 | ×0.5 | ||||||||
| Freeze | Electrify | Stun | Hunny | ||||||||
| ✕ | ✕ | ✕ | ✕ | ||||||||
| Reaction Endurance |
Revenge Value |
Attraction Magnification |
Damage Limit | ||||||||
| 0 | 7 | ×0.5 | 24
| ||||||||
| Rewards | |||||||||||
| Sora: Max HP +10[3] | |||||||||||
| World(s) | |||||||||||
| Keyblade Graveyard | |||||||||||
| Type | Boss |
| Music Stage | |
| Darkness of the Unknown | |
| Xemnas (Dragon Form) | |||||||
|---|---|---|---|---|---|---|---|
| Japanese | ゼムナス(ドラゴン) | ||||||
| Translation | Xemnas (Dragon)
| ||||||
| Type | Organization XIII | ||||||
| Game | Kingdom Hearts II | ||||||
| |||||||
| Location | HP | Strength | Defense | EXP | ||
| The World That Never Was | 20 | 45 | 26 | 0 | ||
| Physical | Fire | Blizzard | ||||
| — | — | — | ||||
| Thunder | Dark | Neutral | ||||
| — | — | — | ||||
| World(s) | ||||||
| The World That Never Was | ||||||
| Location | HP | Strength | Defense | EXP | ||
| The World That Never Was | 16 | 45 | 26 | 0 | ||
| Physical | Fire | Blizzard | ||||
| — | — | — | ||||
| Thunder | Dark | Neutral | ||||
| — | — | — | ||||
| World(s) | ||||||
| The World That Never Was | ||||||
| Bomb Bell B | ||
|---|---|---|
| Japanese | フローティングマインB | |
| Rōmaji | Furōtingu Main B | |
| Translation | Floating Mine B
| |
| Type | Gummi Nobody | |
| Game | Kingdom Hearts II | |
| Location | HP | Strength | Defense | EXP | ||
| The World That Never Was | 100 | 45 | 26 | 80 | ||
| Physical | Fire | Blizzard | ||||
| ×1.0 | ×1.0 | ×1.0 | ||||
| Thunder | Dark | Neutral | ||||
| ×1.0 | ×1.0 | ×1.0 | ||||
| World(s) | ||||||
| The World That Never Was | ||||||
| Location | HP | Strength | Defense | EXP | ||
| The World That Never Was | 50 | 45 | 26 | 60 | ||
| Physical | Fire | Blizzard | ||||
| ×1.0 | ×1.0 | ×1.0 | ||||
| Thunder | Dark | Neutral | ||||
| ×1.0 | ×1.0 | ×1.0 | ||||
| World(s) | ||||||
| The World That Never Was | ||||||
| Location | HP | Strength | Defense | EXP | ||
| The World That Never Was | 1000 | 45 | 26 | 0 | ||
| Physical | Fire | Blizzard | ||||
| ×1.0 | ×0.5 | ×0.5 | ||||
| Thunder | Dark | Neutral | ||||
| ×0.5 | ×0.5 | ×0.5 | ||||
| World(s) | ||||||
| The World That Never Was | ||||||
| Xemnas (Armored Controller) | |||||||
|---|---|---|---|---|---|---|---|
| Japanese | ゼムナス(鎧) | ||||||
| Rōmaji | Zemunasu (Yoroi) | ||||||
| Translation | Xemnas (Armor)
| ||||||
| Type | Organization XIII | ||||||
| Game | Kingdom Hearts II | ||||||
| |||||||
| Location | HP | Strength | Defense | EXP | ||
| The World That Never Was | 1000 | 45 | 26 | 0 | ||
| Physical | Fire | Blizzard | ||||
| ×1.0 | ×1.0 | ×1.0 | ||||
| Thunder | Dark | Neutral | ||||
| ×1.0 | ×1.0 | ×0.5 | ||||
| World(s) | ||||||
| The World That Never Was | ||||||
| Location | HP | Strength | Defense | EXP | ||
| The World That Never Was | 1000 | 45 | 26 | 0 | ||
| Physical | Fire | Blizzard | ||||
| ×1.0 | ×1.0 | ×1.0 | ||||
| Thunder | Dark | Neutral | ||||
| ×1.0 | ×1.0 | ×1.0 | ||||
| World(s) | ||||||
| The World That Never Was | ||||||
| Xemnas (Dragon Form) | ||
|---|---|---|
| Japanese | ゼムナス(ドラゴン) | |
| Translation | Xemnas (Dragon)
| |
| Type | Organization XIII | |
| Game | Kingdom Hearts II | |
| Location | HP | Strength | Defense | EXP | ||
| The World That Never Was First part |
1200 | 45 | 26 | 0 | ||
| The World That Never Was All other parts |
1500 | 45 | 26 | 0 | ||
| Physical | Fire | Blizzard | ||||
| ×1.0 | ×1.0 | ×1.0 | ||||
| Thunder | Dark | Neutral | ||||
| ×1.0 | ×1.0 | ×1.0 | ||||
| World(s) | ||||||
| The World That Never Was | ||||||
| Location | HP | Strength | Defense | EXP | ||
| The World That Never Was First part |
600 | 45 | 26 | 0 | ||
| The World That Never Was Second and third parts |
1200 | 45 | 26 | 0 | ||
| The World That Never Was Fourth and fifth parts |
1000 | 45 | 26 | 0 | ||
| Physical | Fire | Blizzard | ||||
| ×1.0 | ×1.0 | ×1.0 | ||||
| Thunder | Dark | Neutral | ||||
| ×1.0 | ×1.0 | ×1.0 | ||||
| World(s) | ||||||
| The World That Never Was | ||||||
| Bomb Bell B | ||
|---|---|---|
| Japanese | フローティングマインB | |
| Rōmaji | Furōtingu Main B | |
| Translation | Floating Mine B
| |
| Type | Gummi Nobody | |
| Game | Kingdom Hearts II | |
| Location | HP | Strength | Defense | EXP | ||
| The World That Never Was | 100 | 45 | 26 | 80 | ||
| Physical | Fire | Blizzard | ||||
| ×1.0 | ×1.0 | ×1.0 | ||||
| Thunder | Dark | Neutral | ||||
| ×1.0 | ×1.0 | ×1.0 | ||||
| World(s) | ||||||
| The World That Never Was | ||||||
| Location | HP | Strength | Defense | EXP | ||
| The World That Never Was | 50 | 45 | 26 | 60 | ||
| Physical | Fire | Blizzard | ||||
| ×1.0 | ×1.0 | ×1.0 | ||||
| Thunder | Dark | Neutral | ||||
| ×1.0 | ×1.0 | ×1.0 | ||||
| World(s) | ||||||
| The World That Never Was | ||||||
| Location | HP | Strength | Defense | EXP | ||
| The World That Never Was | 100 | 45 | 26 | 80 | ||
| Physical | Fire | Blizzard | ||||
| ×1.0 | ×1.0 | ×1.0 | ||||
| Thunder | Dark | Neutral | ||||
| ×1.0 | ×1.0 | ×1.0 | ||||
| World(s) | ||||||
| The World That Never Was | ||||||
| Location | HP | Strength | Defense | EXP | ||
| The World That Never Was | 50 | 45 | 26 | 60 | ||
| Physical | Fire | Blizzard | ||||
| ×1.0 | ×1.0 | ×1.0 | ||||
| Thunder | Dark | Neutral | ||||
| ×1.0 | ×1.0 | ×1.0 | ||||
| World(s) | ||||||
| The World That Never Was | ||||||
| Spiked Roller B | ||
|---|---|---|
| Japanese | ミサイラーB | |
| Rōmaji | Misairā B | |
| Translation | Missiler B
| |
| Type | Gummi Nobody | |
| Game | Kingdom Hearts II | |
| Location | HP | Strength | Defense | EXP | ||
| The World That Never Was | 100 | 45 | 26 | 80 | ||
| Physical | Fire | Blizzard | ||||
| ×1.0 | ×1.0 | ×1.0 | ||||
| Thunder | Dark | Neutral | ||||
| ×1.0 | ×1.0 | ×1.0 | ||||
| World(s) | ||||||
| The World That Never Was | ||||||
| Location | HP | Strength | Defense | EXP | ||
| The World That Never Was | 50 | 45 | 26 | 60 | ||
| Physical | Fire | Blizzard | ||||
| ×1.0 | ×1.0 | ×1.0 | ||||
| Thunder | Dark | Neutral | ||||
| ×1.0 | ×1.0 | ×1.0 | ||||
| World(s) | ||||||
| The World That Never Was | ||||||
| Xemnas (Armored Controller) | ||
|---|---|---|
| Japanese | ゼムナス(鎧) | |
| Rōmaji | Zemunasu (Yoroi) | |
| Translation | Xemnas (Armor)
| |
| Type | Organization XIII | |
| Game | Kingdom Hearts II | |
| Location | HP | Strength | Defense | EXP | ||
| The World That Never Was | 1000 | 45 | 26 | 0 | ||
| Physical | Fire | Blizzard | ||||
| ×1.0 | ×1.0 | ×1.0 | ||||
| Thunder | Dark | Neutral | ||||
| ×1.0 | ×1.0 | ×0.5 | ||||
| World(s) | ||||||
| The World That Never Was | ||||||
| Location | HP | Strength | Defense | EXP | ||
| The World That Never Was | 1000 | 45 | 26 | 0 | ||
| Physical | Fire | Blizzard | ||||
| ×1.0 | ×1.0 | ×1.0 | ||||
| Thunder | Dark | Neutral | ||||
| ×1.0 | ×1.0 | ×1.0 | ||||
| World(s) | ||||||
| The World That Never Was | ||||||
| Xemnas's Recreated Data | ||||||||||||
|---|---|---|---|---|---|---|---|---|---|---|---|---|
| Japanese | ゼムナスの再現データ | |||||||||||
| Rōmaji | Zemunasu no Saigen Dēta | |||||||||||
| Translation | Xemnas's Recreated Data
| |||||||||||
| Type | Organization XIII | |||||||||||
| Games | Kingdom Hearts II Final Mix Kingdom Hearts Union χ Kingdom Hearts III Re Mind | |||||||||||
| ||||||||||||
| Location | HP | Strength | Defense | EXP | ||
| Radiant Garden Garden of Assemblage |
3400 | 86 | 51 | 0 | ||
| Physical | Fire | Blizzard | ||||
| ×1.0 | ×0.5 | ×0.5 | ||||
| Thunder | Dark | Neutral | ||||
| ×0 | ×0.5 | ×1.0
| ||||
| Rewards | ||||||
| Power Boost | ||||||
| World(s) | ||||||
| Radiant Garden | ||||||
| Location | HP | Strength | Defense | EXP | |||||||
| Radiant Garden | 3000 | 0 | |||||||||
| Physical | Fire | Blizzard | Thunder | Water | |||||||
| ×1.0 | ×0.5 | ×0.5 | ×0 | ×0.5 | |||||||
| Aero | Dark | Neutral | Rapid-fire | ||||||||
| ×0.5 | ×0.5 | ×0.4 | ? | ||||||||
| Freeze | Electrify | Stun | Hunny | ||||||||
| ✕ | ✕ | ✕ | ✕ | ||||||||
| Reaction Endurance |
Revenge Value |
Attraction Magnification |
Damage Limit | ||||||||
| ? | 7 | — | ?
| ||||||||
| Rewards | |||||||||||
| Power Weight | |||||||||||
| World(s) | |||||||||||
| Radiant Garden | |||||||||||
- "I can not feel—sorrow... No matter what misery befalls the worlds. No matter what you think, what you feel, or how you exist."
- —Xemnas to Sora and co.
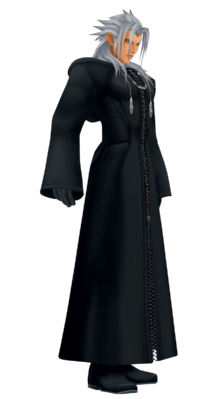
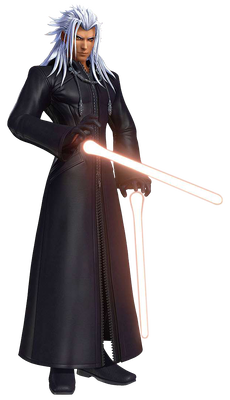
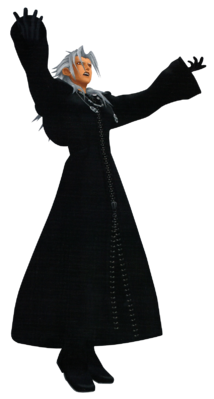
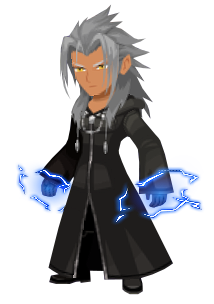
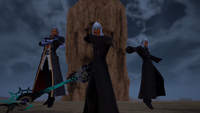
Xemnas is the leader of Organization XIII, and is fought as a boss in Kingdom Hearts Final Mix and the final boss of Kingdom Hearts II and Sora's story in Kingdom Hearts 3D: Dream Drop Distance.
In Kingdom Hearts Final Mix, he challenges Sora at Hollow Bastion, while in Kingdom Hearts II he fights Sora at both Memory's Contortion and within Kingdom Hearts itself.
In Kingdom Hearts 3D: Dream Drop Distance, he battles Sora in The World That Never Was.
In Kingdom Hearts III, he battles Sora, Riku, and Mickey alongside Ansem, Seeker of Darkness and Young Xehanort at the Keyblade Graveyard. A data replica of him is also an optional boss in Kingdom Hearts III Re Mind.
Design[edit]
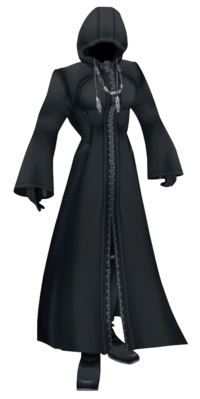
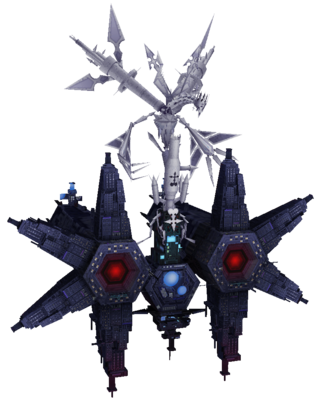
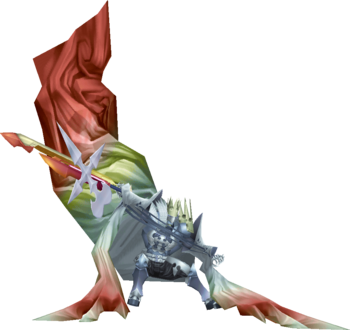
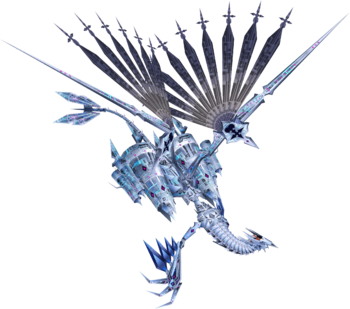
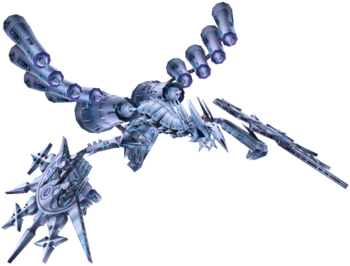
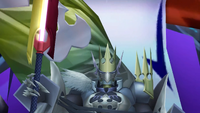
Xemnas commands a gigantic and draconian battleship during several parts of his final battle with Sora and Riku. The dragon has a small main body, a long, segmented neck, and a round head with numerous tall, thin spikes lining it. Its mouth is somewhat beak-like and Xemnas, covered in Keyblade Armor, sits on a throne on the top of the head. The throne is adorned with large spikes and other additives that resemble the Nobody emblem, and large, seemingly organic, orange objects connect Xemnas to the battleship. The dragon's wings are thin, angular, and each is emblazoned with a black Nobody symbol at the joint. Each wing also has several thin, black and white "feathers" with tips resembling the Nobody logo. Its thin arms end in three-fingered, segmented hands and each arm is lined by four blue diamond-shaped spikes of increasingly smaller size. In place of legs, the Dragon has two massive, conical engines with two smaller engines on either side of the main ones. It also has a long, thin tail with four conical objects connected to its tip. The dragon is predominantly colored in light shades of silver and metallic blue.
While commanding the dragon, Xemnas dons armor adorned with dozens of Nobody symbols. The shoulder pad on his left shoulder, helmet, crown, boots, knees, and breastplate all sport these designs. His crown and shoulder pad are gold, while the rest of the armor is colored in light shades of blue and silver. He has two silver belts on his waist and what seems to be white feathers on his right shoulder in place of armor. Several cords criss-cross in front of his torso, connecting to massive, oblong pieces of armor worn on each arm. Xemnas's faceplate is beak-like in structure and he wears clawed, metal gloves. He also wears black pants underneath the armor. Perhaps the most striking features of this armor are the oddly-shaped "sleeves" that are attached to each of Xemnas's arms. They are a mixture of red, orange, yellow, and white. He also wears a massive, similarly-colored cape that seems to connect him to the dragon. This armored form, referred to as the Armored Controller, bears a striking resemblance to No Heart.
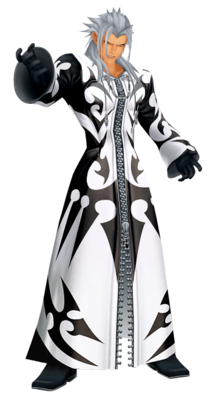
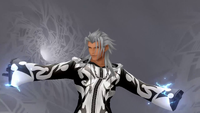
In the final section of his battle with Sora and Riku, Xemnas's appearance is unchanged, save for his cloak. His once all-black cloak is now a white one covered in black designs, many of which resemble the Nobody logo.
The Armored Controller's name reflects the armor Xemnas wears and his command over the dragon.
Early concepts for the Xemnas battle included two gargantuan Nobodies in place of the dragon, formed from Dark City rather than the Castle That Never Was: King (キング Kingu), which had a vaguely humanoid upper body adorned in Nobody sigils and wore an immense crown, and Kentauros (ケンタロウス Kentarousu), which resembled a dilapidated version of the King attached to a quadrupedal lower body, with the crown becoming a spiked ruff.
Strategy[edit]
Kingdom Hearts Final Mix[edit]
At the start of the battle, immediately Lock-On to Xemnas, summon Tinker Bell, and prepare any variant of Aero available (preferably as a shortcut). This will minimize the damage Xemnas can do to Sora. He will immediately execute an energy-ball attack, which explodes into orb-like, damaging force fields. While it is advised that Sora has his most powerful abilities equipped, be careful at close range, as Xemnas will counter with a damaging shield technique or a powerful slashing combo. As Sora must also be wary of his MP, Elixirs and Megalixirs are strongly recommended.
After about three-quarters of Xemnas's pink HP bar have been depleted, he will begin to teleport around the battlefield, ultimately increasing his speed. Escape his energy ball or slash/shield attack by keeping track of the dark cloud that surrounds him; it is possible to stun him with Gravity-based attacks before he reappears. He also gains a deadly ability in which he curses Sora and the party, draining their health and changing the Command Menu into a rapid roulette solely showing Shock and Release. Wait for Release to appear in the menu before selecting the command to end the curse. If Shock is chosen, Sora's health falls considerably. Tinker Bell can revive Sora to full health if he falls, but that means that once the curse is dispelled, Curaga is more essential. To avoid this attack, Dodge Roll at just the right moment when Xemnas teleports, or cast Curaga, as Leaf Bracer will shield Sora from getting cursed.
Once Xemnas hits his orange HP Bar, however, the battle difficulty increases even further. Xemnas will summon a ring of blue Ethereal Blades in the air before him, which fire at Sora when Xemnas gives the command. This technique can be avoided through the use of Dodge Roll. When his yellow bar is almost completely depleted, Xemnas will unleash his ultimate attack, which resembles All-Vanity. He will shroud the field in darkness, surround himself with energy, and fire long-range lasers in all directions. Remain close to Xemnas to avoid as much damage as possible, where he'll only hover in front of Sora and thus one only needs to merely watch for the direction of the lasers in order to properly avoid them. Another option of escape is to use Superglide. Once Xemnas uses his ultimate attack for the first time, his basic attacks become more powerful, and the Ethereal Blades he fires now glow red.
Xemnas also proves more difficult than Sephiroth due to attacking relentlessly, which in turn leaves very little chances to make him flinch from basic combos. Sora can try casting Gravity or using any other Gravity attribute attack (such as Zantetsuken) because if it hits while locked on to Xemnas, he will get stunned by a surge of overloading power causing him to cringe and shiver a bit in pain (Sora will also receive Tech Points). Xemnas can then be attacked, but be ready to use Dodge Roll to avoid his counterattack. The safe way to do this attacks him exactly three hits after Gravity hits him, then Dodge Roll and repeat Gravity. Also, cast the spell on him at the right time, as Xemnas might have a chance of shaking the spell off during an attack, even though Tech Points are gained, there is a chance he will retaliate hard.
Xemnas will only flinch to air combos, so keep that in mind when moving in to attack him, especially if stunned by any Gravity-based damage as aforementioned. Be sure to remove any Combo Plus abilities to access the combo finishers sooner before the battle, enabling Sora to attack with higher chances of not being interrupted. Prepare Curaga just in case Sora needs healing. With good timing, it is also possible to slide past or underneath the energy balls he fires with Sliding Dash. Should that connect, remember to combo from that to use a ground combo finisher if needed.
Xemnas's final phase tends to leave fewer openings to attack him head-on and to stun him, but there's often a free chance to make him flinch whenever he finishes using his strongest attack.
| Technique | Element | Tech | Power Bonus | Guard? | ||
|---|---|---|---|---|---|---|
| Spark Wall (スパークウォール Supāku Wōru) |
Thunder | x0 | 6 | Repellable (Recoil: 100) | ||
| Xemnas summons a wall in front of him that repels attacks. | ||||||
| Counter Attack (Right Hand Blade) (カウンター攻撃(右手ブレード) Kauntā Kougeki (Migite Burēdo)) |
Thunder | x0 | 6 | Repellable (Recoil: 100) | ||
| Xemnas slashes while spinning to the right. | ||||||
| Counter Attack (Kick) (カウンター攻撃(蹴り) Kauntā Kougeki (Keri)) |
None | x0 | 6 | Repellable (Recoil: 100) | ||
| Xemnas kicks while spinning. | ||||||
| Counter Attack (Left Hand Blade) (カウンター攻撃(左手ブレード) Kauntā Kougeki (Hidarite Burēdo)) |
Thunder | x0 | 8 | Repellable (Recoil: 100) | ||
| Xemnas slashes while spinning to the left. | ||||||
| Spark Bomb (スパークボム Supāku Bomu) |
Thunder | — | 10 | — | ||
| Xemnas fires two blue and white orbs forward. | ||||||
| Spark Shot (Blue) (スパークショット(青) Supāku Shotto (Ao)) |
Thunder | — | 6 | — | ||
| Xemnas fires a small blue orb at the opponent. | ||||||
| Spark Shot (Red) (スパークショット(赤) Supāku Shotto (Aka)) |
Thunder | — | 8 | — | ||
| Xemnas fires a small red orb at the opponent. | ||||||
| Dual Blade (Blade) (二刀流攻撃(ブレード) Nitouryū Kougeki (Burēdo), lit. "Dual-wielding Attack (Blade)") |
Thunder | x0 | 10 | Repellable (Recoil: 100) | ||
| Xemnas slashes with a sword in both hands while spinning. | ||||||
| Dual Blade (Kick) (二刀流攻撃(蹴り) Nitouryū Kougeki (Keri), lit. "Dual-wielding Attack (Kick)") |
None | x0 | 10 | Repellable (Recoil: 100) | ||
| Xemnas kicks while wielding a sword in both hands. | ||||||
| Dual Blade (Finish) (二刀流攻撃(フィニッシュ) Nitouryū Kougeki (Finisshu), lit. "Dual-wielding Attack (Finish)") |
Thunder | x0 | 12 | Repellable (Recoil: 100) | ||
| Xemnas gets on his knees and sweeps the opponent off his feet with a sword in both hands. | ||||||
| Laser Shower (レーザーシャワー Rēzā Shawā) |
(main) | Thunder | — | 12 | —
| |
| (sphere) | Thunder | x0 | 10
|
Repellable (Recoil: 100) | ||
| Xemnas wraps himself in a blue and white orb, and fires lasers around him.
| ||||||
| Used when at half HP and below. Resembles All-Vanity. | ||||||
| Invitation to Nothingness (無へのいざない Mu e no Izanai) |
Dark | — | — | — | ||
| Xemnas grabs the opponent with lightning, lifting them in the air.
| ||||||
| When hit with Invitation to Nothingness, all commands will be replaced with Shock (ショック Shokku), and Sora's HP will slowly deplete. The Release (かいほう Kaihō) command ends the effect, but it rapidly changes positions, and if you select "Shock", he will take additional damage (see the attack below). The speed at which "Release" changes position slows as time goes by. In the 1.5 ReMIX version, the fourth command becomes unavailable and assigned to the | ||||||
| Invitation to Nothingness (when using "Shock") (無へのいざない(「ショック」実行時) Mu e no Izanai ("Shokku" Jikkō-ji)) |
Dark | — | 6 | — | ||
| A orb that revolves around the opponent releases an electric shock. | ||||||
| Guard: Repellable = Can be blocked and interrupted | ||||||
Kingdom Hearts II[edit]
First Battle[edit]
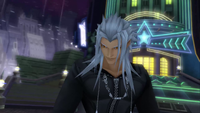
When the battle begins, Xemnas will use his Invitation to Nothingness attack, which ensnares Sora in a field of energy that will slowly drain his health, then he teleports to the top of Memory Skyscraper. Sora must rush to the bottom of the building and use the Reaction Command "Facedown" to break the energy field and run up the building after Xemnas. Xemnas will leap down to confront Sora as he nears the top. At this point, one of three Reaction Commands appears depending on how close Sora is to Xemnas. The first is "Clash", where they pass each other harmlessly. The second is "Breakthrough", where Sora attacks Xemnas with a single attack. At the last second, the command changes to "Finish", where Sora attacks Xemnas several times and slams him into the side of the skyscraper. It's recommended to hit ![]() at "Finish". Note that not hitting Xemnas will cause him to deal damage to Sora.
at "Finish". Note that not hitting Xemnas will cause him to deal damage to Sora.
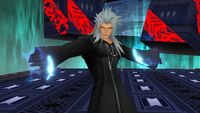
After the sequence ends, Xemnas will begin his normal attack pattern, very akin to how he fights in Kingdom Hearts Final Mix but more limited in terms of moveset. He will teleport in an orb of darkness frequently, emerging to attack Sora rapidly with his Ethereal Blades, spinning, flipping and kicking to attack from all sides. These attacks can be blocked with Guard, or more easily, Reflect. Xemnas will also project a barrier, blocking Sora's attacks and knocking him back. He can be stunned, so Sora can easily connect combos. However, Xemnas tends to teleport away afterward or if Sora attacks him too many times, he will teleport away in the middle of the combo when reaching his retaliation point.
When reduced to 35-10% HP, Xemnas will repeat the opening sequence involving Sora running up Memory Skyscraper. The Reaction Commands for the second time are the same as the first. As he gets weaker, Xemnas teleports more often and more quickly than before.
Data Rematch[edit]
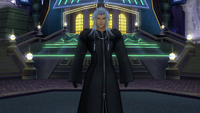
The Data Rematch against Xemnas has two battles. The first recreates Sora's one-on-one duel in Memory's Contortion, while the second recreates the battle against Xemnas's Final Form.
Simply use the same strategy used against the real Xemnas. However, there are four differences. The first three are simple: Xemnas has more health, doesn't use Invitation to Nothingness on Sora until reduced to 30% HP, and is left with 1 HP if Sora uses Finish during Facedown. The fourth is the addition of an enhanced Dual Blade attack when Xemnas gets close to half health, where the arena darkens and he follows Sora closely, thereby making it much more difficult to evade his attack.
In Kingdom Hearts II Final Mix, Xemnas's Ethereal Blade attacks have a wider hitbox, his second and subsequent uses of Invitation to Nothingness occur when reduced below 15% HP, and when struck by Invitation to Nothingness, Sora's HP only starts dropping when Xemnas moves to the building.
| Technique | Element | Power | Guard? | |||
|---|---|---|---|---|---|---|
| Spark Wall (スパークウォール Supāku Wōru) |
Physical[KH II] Thunder[KH II FM] |
x0.5 Data battle: x1.5 Data battle: Hit 2+: x0.25 |
△ | |||
| Raises a wall that deflects frontal attacks. | ||||||
| He follows up with Combo Attack if below 50% HP. | ||||||
| Combo Attack (連続攻撃 Renzoku Kōgeki) |
(Cut) | Physical | x1.0 Hit 2+: x0.75 Data battle: x0.5 |
△
| ||
| (Kick) | Physical | x0.5 Hit 2+: x0.25 |
△ | |||
| Slashes to his right, kicks, then slashes to his left. | ||||||
| Dual Blade (二刀流攻撃 Nitōryū Kōgeki, lit. "Dual-Wield Attack") |
(Cut) | Physical | x0.1 | △
| ||
| (Kick) | Physical | x0.5 Hit 2+: x0.25 |
△ | |||
| Dual-wields and attacks with dance-like slashes and kicks. | ||||||
| Below 50% HP in the Data Rematch he may use an enhanced version of this attack. | ||||||
| Invitation to Nothingness (無へのいざない Mu e no Izanai) |
Neutral | 1 HP per 0.7 seconds |
X | |||
| Envelops an opponent with the power of nothingness, dealing continuous damage. | ||||||
| Used at the start of the fight (initial fight only), and at 35-10% HP. On the english PS3 version of the game, entering Limit Form during this attack causes the game to freeze when using Facedown. | ||||||
| Building Fall (ビル落下攻撃 Biru Rakka Kōgeki, lit. "Building Fall Attack") |
(Cut & kick) | Physical | x0.5[KH II] x2.0[KH II FM] |
X
| ||
| (Other attacks) | Physical | x1.0[KH II] x30.0[KH II FM] |
X | |||
| Attacks five times with slashes and kicks, then deals extra damage to a falling Sora. | ||||||
| Used after Sora has not used any of the three Reaction Commands during the Facedown sequence. | ||||||
| Guard/Block: △ = Can be blocked; O = Can be blocked and interrupted (melee) or deflected back (projectile); X = Cannot be blocked. | ||||||
| Reaction Commands | |||||||
|---|---|---|---|---|---|---|---|
| Reaction Command | Element | Power | Description | ||||
| Facedown (たちむかう Tachimukau) |
— | — | Can be used when near the entrance of the building Xemnas climbs while under the effect of Invitation to Nothingness. Cancel the effect of Invitation to Nothingness and chase Xemnas up the building, starting a sequence in which several Reaction Commands briefly appear. If none of the following Reaction Commands are chosen in time, Sora is struck by Xemnas's Building Fall attack. | ||||
| Clash (しりぞける Shirizokeru, lit. "Repel") |
— | — | Can be used after using Facedown. Sora and Xemnas pass by each other without any further interaction. Appears for 0.5 seconds. | ||||
| Break Through (うちやぶる Uchiyaburu) |
Physical | x1.0[KH II] x5.0[4][KH II FM] |
Can be used during the Facedown sequence if Clash wasn't used within 0.5 seconds. Prevent Xemnas's attack and counterattack. Appears for 0.5 seconds. | ||||
| Finish (とどめ Todome) |
Physical | x4.0[KH II] x15.0[KH II FM] HP to 1[5] |
Can be used during the Facedown sequence if Break Through wasn't used within 0.5 seconds. Slam Xemnas into the building with a combo attack, stunning him. Appears for 0.5[KH II] or 0.25[KH II FM] seconds. | ||||
Final Battle[edit]
Energy Core[edit]
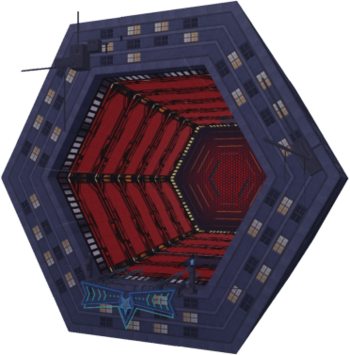
As soon as the battle starts, Xemnas begins to bombard Sora with buildings. Use the Reaction Command to avoid damage and then pass through the doorway into the next area. Run forward and use the "Skyscraper" command to reach Xemnas's massive Dragon Ship. Sora must now knock several Bomb Bell B Nobodies into the power generators of the ship and then use "Stunt Dodge" to dodge both the generator's laser attack and explosion upon destruction.
Sora then finds himself in the main core of the ship. Attack the core, dodging aerial attacks from the ship's "claws" and the lesser Nobodies that spawn once the core surrounds itself with a protective barrier. Only by destroying the Nobodies does the core become open to attack once again. Use the "Proceed" Reaction Command to enter the next phase of the battle.
- Building
| Technique | Element | Power | Guard? | |||
|---|---|---|---|---|---|---|
| Building Rising Thrust Attack (ビル突き上げ攻撃 Biru Tsukiage Kōgeki) |
Physical | x1.5 Hit 2+: x0.25 |
△ | |||
| A building bursts up from the road surface. | ||||||
| Used in End's Beginning 1. | ||||||
| Building Drop Attack (ビル落下攻撃 Biru Rakka Kōgeki) |
Physical | x1.5 | △ | |||
| A floating building drops down. | ||||||
| Used in End's Beginning 2. | ||||||
| Guard/Block: △ = Can be blocked; O = Can be blocked and interrupted (melee) or deflected back (projectile); X = Cannot be blocked. | ||||||
- Unit
| Technique | Element | Power | Guard? | |||
|---|---|---|---|---|---|---|
| Wave Cannon (波動砲 Hadō Hō) |
Neutral | x6.0 Hit 2+: x1.0 every 0.067 seconds[KH II FM] |
X | |||
| Fires an extremely powerful beam. | ||||||
| Used when the Unit's Charge gauge is full. | ||||||
| Guard/Block: △ = Can be blocked; O = Can be blocked and interrupted (melee) or deflected back (projectile); X = Cannot be blocked. | ||||||
- Energy Core
| Technique | Element | Power | Guard? | |||
|---|---|---|---|---|---|---|
| Thrust (突き Tsuki) |
Physical | x2.0 | △ | |||
| The dragon strikes with its giant claws. | ||||||
| Used once the barrier is raised twice and thereafter. | ||||||
| Guard/Block: △ = Can be blocked; O = Can be blocked and interrupted (melee) or deflected back (projectile); X = Cannot be blocked. | ||||||
| Reaction Commands | |||||||
|---|---|---|---|---|---|---|---|
| Reaction Command | Element | Power | Description | ||||
| Slicer (スラッシュ Surasshu, lit. "Slash") |
— | — | Can be used when near a building protruding from the path in End's Beginning 1. Slice through the building and nullify the Building Rising Thrust Attack. | ||||
| Escablade (ライズセイバー Raizu Seibā, lit. "Rise Saber") |
— | — | Can be used when near a floating building from underneath in End's Beginning 2. Slice through the buildings and nullify the Building Drop Attack. | ||||
| Sky Scraper (アサルトアーツ Asaruto Ātsu, lit. "Assault Arts") |
— | — | Can be used after using Escablade. Jump to and slash flying buildings. Can be used multiple times. | ||||
| Stunt Dodge (ドッジスタント Dojji Sutanto, lit. "Dodge Stunt") |
— | — | Can be used when the Unit's Charge gauge is at least 80% full, or the Unit is defeated and a countdown has begun. Jump onto the scaffolding above to avoid the Unit's Wave Cannon and its dying blast. If the other Unit is still active, Sora jumps toward it; if only one is active, he returns to it; if both are destroyed, he moves onto the next area. | ||||
Armored Controller[edit]
- First Incarnation
After destroying the main core of the Dragon Ship, Sora faces Xemnas in armor. Although he remains sitting on his throne, the Superior wields a massive sword, and can also channel the attacks of the game's fallen Organization XIII members.
When reduced to 70% HP, Xemnas summons five of Demyx's Water Forms, which drop HP prizes on defeat as well as allowing Sora to use the Wild Dance Reaction Command. Xemnas can deploy the weapons of fallen Organization members as well, including those of Xigbar, Xaldin, Saïx, Axel, and Luxord. Watch for when these weapons appear near Sora to avoid getting caught off guard. Additionally, Luxord's Fair Game can appear to attack Sora if he passes over the image of a card on the floor.
When an attack causes Xemnas to flinch, he counters with Sweep Away, then launches attacks with weapons deployed in various locations. He will also launch two simultaneous attacks with deployed weapons when reduced to 40% HP.
Only Final Form is recommended for this portion of the battle and can greatly increase the rate at which Xemnas's HP is depleted. Other forms will most likely trigger Antiform due to the x10 Anti Point Modifier of this battle. Should Sora fall, King Mickey may appear and give him a second chance.
| Technique | Element | Power | Guard? | |||
|---|---|---|---|---|---|---|
| Sweep Away (なぎ払い Nagiharai) |
Physical | x2.0 Hit 2+: x0.1 |
X | |||
| Sweeps with sword in right hand. | ||||||
| Used as Revenge Action. | ||||||
| Spark Wall (スパークウォール Supāku Wōru) |
Thunder | x1.5 Hit 2+: x0.25 |
X | |||
| Raises a wall that deflects frontal attacks. | ||||||
| Used at close range. | ||||||
| Spear Attack (ヤリ攻撃 Yari Kōgeki) |
(Attack 1) | Physical | x1.0 Hit 2+: x0.2 |
△
| ||
| (Attack 2) | Physical | x1.0 | △ | |||
| Several Lindworm spears rain down in succession, spin around, then drop down all at once. | ||||||
| Starts with this attack. | ||||||
| Chakram Attack (チャクラム攻撃 Chakuramu Kōgeki) |
Physical | x1.0 Hit 2+: x0.3 |
△ | |||
| Fiery Eternal Flames chakram circles and attacks target. | ||||||
| Water Form (水の分身攻撃 Mizu no Bunshin Kōgeki, lit. "Water Clone Attack") |
Blizzard | x1.0 | △ | |||
| Water clone continuously attacks with its lower half. | ||||||
| Used below 70% HP. | ||||||
| Card Attack (カード攻撃 Kādo Kōgeki) |
Physical | x0.25 | △ | |||
| Fair Game card spins sideways and cuts through opponents. | ||||||
| Used when stepping on a card. | ||||||
| Large Sword Attack (大剣攻撃 Daiken Kōgeki) |
(Shockwave) | Neutral | x1.0 | X
| ||
| (Explosion) | Neutral | x0.5 Hit 5+: x0.25 |
X | |||
| Lunatic drops down and unleashes shock waves and explosions. | ||||||
| Shot (ショット Shotto) |
Neutral | x0.25 | O | |||
| A Sharpshooter arrowgun rapidly fires seven shots. | ||||||
| Guard/Block: △ = Can be blocked; O = Can be blocked and interrupted (melee) or deflected back (projectile); X = Cannot be blocked. | ||||||
| Reaction Commands | |||||||
|---|---|---|---|---|---|---|---|
| Reaction Command | Element | Power | Description | ||||
| Wild Dance (ワイルドダンス Wairudo Dansu) |
Physical | x1.0 | Can be used when near a musical note-shaped water clone. Grab a water clone and attack surrounding enemies. The grabbed water clone vanishes after the attack. Acts as a finisher. | ||||
- Second Incarnation
After the fall of the massive Dragon Ship, it rejuvenates and teleports Sora and Riku to an alternate dimension. They fly to the head of the ship, where they find the stationary, armored Xemnas awaiting them yet again. He will attack with a long-range sword swipe as in the last battle, dealing a lot of damage on contact. When reduced to the HP thresholds of 80%, 50%, and 30%, Xemnas blows Sora and Riku far away and fortifies his defenses with a giant shield. The first and second time Xemnas uses this attack, the shields will automatically deactivate after two minutes.
Xemnas will bombard Sora with lasers and buildings, so use the Reaction Commands to get back to the ship. Failure to do so will result in Xemnas blowing Sora away and dealing minor damage. Once this is done, immediately and repetitively use Aerial Dodge in order to dodge Xemnas's next tactic, which allows him to summon snowflake-shaped energy that fires lasers and is unavoidable. Should this not be done, Sora can attempt Aerial Dodge again or merely allow damage and then fall to the point where he can safely glide back to the ship. Sora may alternatively use Thunder spells with the Magic Lock-On ability to deal damage to Xemnas without needing to land on the Dragon Ship's head. In other cases, Sora can teleport back to Xemnas by using Trinity Limit.
When Xemnas is reduced to 50% HP, these lasers will continue to fire as Sora grapples with Xemnas. Be aware that he may summon a damaging shield, just as he did in his previous battles. Regardless of his Drive Form levels, Sora has full access to each Form's ability, allowing easier movement and dodging. Riku will also heal Sora with Cure Potion if his HP falls below critical.
In Kingdom Hearts II Final Mix, Xemnas's Laser and Magic Circle Laser attacks have a wider hitbox.
| Technique | Element | Power | Guard? | |||
|---|---|---|---|---|---|---|
| Sweep Away (なぎ払い Nagiharai) |
Physical | x2.0 Hit 2+: x0.1 |
X | |||
| Sweeps with sword in right hand. | ||||||
| Starts with this attack. Used at close range as Revenge Action. | ||||||
| Spark Wall (スパークウォール Supāku Wōru) |
Thunder | x1.5 Hit 2+: x0.25 |
X | |||
| Raises a wall that deflects frontal attacks. | ||||||
| Used at close range. | ||||||
| Building Attack (ビル攻撃 Biru Kōgeki) |
Physical | x2.0 Hit 2+: x0.25 |
△ | |||
| Throws buildings. | ||||||
| Used when Sora is in the distance. | ||||||
| Lasers (レーザー Rēzā) |
Neutral | x1.0 Hit 2+: x0.1 |
X | |||
| Fires ten red lasers at Sora. | ||||||
| Used when Sora is in the distance. | ||||||
| Magic Laser (魔法陣レーザー Mahōjin Rēzā) |
Neutral | x1.0 Hit 2+: x0.1 |
X | |||
| Forms a magic circle in the air that fires lasers. | ||||||
| Used if Sora is in the distance, and when below 30% HP at close range. | ||||||
| Shield Shock (シールドショック Shīrudo Shokku) |
Neutral | x1.5 | X | |||
| Shield knocks back anything that touches it. | ||||||
| Used if Sora gets too close without having Riku use Meteor Rain.
| ||||||
| At 80%, 50%, and 30% HP, the Armored Xehanort becomes invincible and blows Sora and Riku away with a downward sword slam. The slam deals no damage but counts as a hit. He only becomes vulnerable again after Meteor Rain is used or two minutes after. | ||||||
| Guard/Block: △ = Can be blocked; O = Can be blocked and interrupted (melee) or deflected back (projectile); X = Cannot be blocked. | ||||||
| Reaction Commands | |||||||
|---|---|---|---|---|---|---|---|
| Reaction Command | Element | Power | Description | ||||
| Riding Shot (ライドショット Raido Shotto) |
— | — | Can be used when near a drifting, non-spinning building. Riku fastens onto one of the buildings summoned by Xemnas as Sora knocks the building towards Xemnas with his Keyblade. Can be used even while Riku is down. | ||||
| Meteor Rain (メテオレイン Meteo Rein) |
— | — | Can be used after using Riding Shot. Riku slices the building into pieces and uses the pieces to break Xemnas's shield. Can be used even while Riku is down. Using a Limit immediatly after causes Sora to lose all collision, resulting in a softlock if Xemnas has yet to blow opponents away when at 30% HP. | ||||
Xemnas (Dragon Form)[edit]
This fight pits Sora and Riku in a Gummi Ship-style battle on a Sidecar Glider against a massive Dragon Ship, which is piloted by Xemnas. Only three commands are available on the menu: Attack, Drain, and Shoot. Use Drain when enemy ships fire lasers at Sora and Riku, filling the Charge Gauge. If this gauge is filled, ![]() can be used to fire a powerful Reaction Command, "Mega-Laser". This attack will, if not completely, drain large portions of the ship's HP without fail.
can be used to fire a powerful Reaction Command, "Mega-Laser". This attack will, if not completely, drain large portions of the ship's HP without fail.
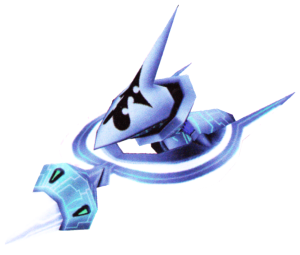
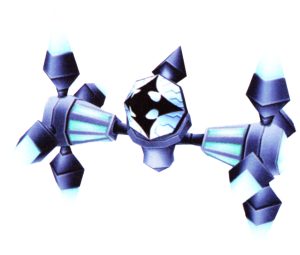
During the fight, Bomb Bells, Speeders, and Spiked Rollers will appear to attack Sora and Riku. If a Bomb Bell remains undamaged for six seconds after spawning, it moves to where Sora was at that time and uses Explosion. If it approaches, move away to avoid its blast. If Bomb Bells appear near Sora, he can press ![]() to fire lasers to deal damage, but the Attack option offers higher accuracy. Speeders uses Shot while moving forward, fly off-screen, then do a U-turn to return. If you see it fire its lasers, be sure to absorb them with the Drain barrier. When a Spiked Roller appears, it hovers in place and uses Homing Laser, then flies away immediately afterward. Its Homing Laser is quick enough to hit Sora as the Drain barrier forms, so don't hesitate to set up Drain in advance. The shoot command should only be used against enemies that are out of range. All enemies that bombard the ship via Shoot deal massive damage.
to fire lasers to deal damage, but the Attack option offers higher accuracy. Speeders uses Shot while moving forward, fly off-screen, then do a U-turn to return. If you see it fire its lasers, be sure to absorb them with the Drain barrier. When a Spiked Roller appears, it hovers in place and uses Homing Laser, then flies away immediately afterward. Its Homing Laser is quick enough to hit Sora as the Drain barrier forms, so don't hesitate to set up Drain in advance. The shoot command should only be used against enemies that are out of range. All enemies that bombard the ship via Shoot deal massive damage.
Sora must first tackle the Dragon Ship's tail. Utilizing a combo of the commands mentioned above, this should hardly be a challenge. Xemnas may fire a large array of missiles and since Sora cannot heal in this battle, be sure to dodge by flying in circles to each corner of the screen.
After destroying the tail, Sora must defeat the "legs" of the ship. "Mega-Laser" will come in handy here and also fly in circles to dodge the snowflake-shaped lasers that are fired. After defeating both of these limbs, Sora can proceed to the wings.
Before the first wing can be destroyed, Xemnas will use Magic Circle Laser as well as Missile. Both tactics can be dodged via flying to each screen corner. Once this is done, the command process repeats itself yet again. Defeat both wings in order to clear the battle and progress.
- Xemnas (Dragon Form)
| Technique | Element | Power | Guard? | |||
|---|---|---|---|---|---|---|
| Magic Circle Laser (魔法陣レーザー Mahōjin Rēzā) |
Neutral | x0.01 Hit 2-6: x0 |
X | |||
| Forms a magic circle in the air that fires lasers. | ||||||
| Cannot be absorbed with Drain. | ||||||
| Missile (ミサイル Misairu) |
Neutral | x0.5 Hit 2+: x0.25 |
X | |||
| Fires a multitude of missiles at Sora. | ||||||
| Cannot be absorbed with Drain. | ||||||
| Guard/Block: △ = Can be blocked; O = Can be blocked and interrupted (melee) or deflected back (projectile); X = Cannot be blocked. | ||||||
| Technique | Element | Power | Guard? | |||
|---|---|---|---|---|---|---|
| Explosion (爆発 Bakuhatsu) |
Neutral | x0.5 Hit 2+: x0.25 |
X | |||
| Approaches Sora and explodes. | ||||||
| Used 6 seconds after spawning. Is invulnerable during this attack and causes self-destruction. | ||||||
| Guard/Block: △ = Can be blocked; O = Can be blocked and interrupted (melee) or deflected back (projectile); X = Cannot be blocked. | ||||||
| Technique | Element | Power | Guard? | |||
|---|---|---|---|---|---|---|
| Shot (ショット Shotto) |
Neutral | x0.5 Hit 2+: x0.25 |
X | |||
| Fires three purple lasers. | ||||||
| Can be absorbed with Drain. | ||||||
| Guard/Block: △ = Can be blocked; O = Can be blocked and interrupted (melee) or deflected back (projectile); X = Cannot be blocked. | ||||||
| Technique | Element | Power | Guard? | |||
|---|---|---|---|---|---|---|
| Tracking Laser (追尾レーザー Tsuibi Rēzā) |
Neutral | x0.5 Hit 2+: x0.25 |
X | |||
| Fires a laser at Sora. | ||||||
| Can be absorbed with Drain. | ||||||
| Guard/Block: △ = Can be blocked; O = Can be blocked and interrupted (melee) or deflected back (projectile); X = Cannot be blocked. | ||||||
Final Form[edit]
- "Anger and Hate are supreme..."
- —Xemnas to Sora and Riku
Xemnas will first throw Sora and Riku into the air, leading to a series of aerial slash attacks and roundhouse kicks. It is possible, however, to avoid being thrown in the air if Sora has Reflega in the shortcut menu and uses it immediately after the battle begins. These tactics can be dodged by using the "Reversal" Reaction Command. To deal minor damage to Xemnas as he teleports around, manually select the Trinity Limit ability. This approach would then lead to the "Block" Reaction Command. It is also possible for a cinematic to play where Xemnas knocks Sora's Keyblade away. At this time, activate the Reaction Command "Defend", where Riku tosses Sora's Keyblade back to him and they both force Xemnas away.
Eventually, Xemnas will allow Sora and Riku to the dropdown. He will then teleport around the battle area, shooting threads of dark energy that can be dodged via Reversal. When Xemnas reappears, he uses a clone in an attempt to trick Sora. Attacking the wrong Xemnas will result in the true Superior slashing with his Interdiction or dealing a devastating roundhouse kick.
As his HP depletes, Xemnas will shoot energy balls that explode to both block and cause damage. When Xemnas's HP is reduced to 50%, he begins to teleport rapidly, encircling Sora and Riku with lasers continuously and in various configurations. He and his clone may then appear together or separately to shoot at Sora. These moves can be avoided via Reflega or Guard and if willing to be wasteful while possibly dealing damage, a Limit. Once these tactics are completed, Xemnas will trap Sora, slowly draining his HP. This forces the player to control Riku, who only can jump, cast Dark Aura, and attack. While Xemnas drains Sora, his clone will attack Riku with energy balls, slashes, and even the damaging shield tactic. The clone can be annoying, but Dark Aura will stun him just a little. Use this time to run to the real Xemnas and Sora, using Dark Aura every three steps until close to the true Xemnas. Jump to him and execute the Reaction Command in order to free Sora, stunning Xemnas. This leaves Xemnas open to major damage. However, the attack can be completely avoided: when Xemnas says, "Can you spare a heart?", cast Reflect or initiate a Limit just as Xemnas casts his curse on Sora. If Sora is out of MP, a well-timed Dodge Roll can also evade this attack, though this is only recommended when out of MP as it requires very precise timing.
Xemnas will then repeat the throwing technique used at the battle's start, as well as his normal attack pattern. When reduced to 10% HP, Xemnas uses his Multi Shot attack; he fills the battlefield with lasers, shrouding the area in darkness. At this point, repeatedly mash ![]() and
and ![]() in order to keep Sora and Riku alive. Failure to do so will spell certain death. Once the area is cleared of lasers after 30 seconds, a brief cinematic is shown, eventually permanently stunning Xemnas and reducing his HP to 1. From there, simply perform a combo finisher, magic, or a Limit to finish Xemnas off.
in order to keep Sora and Riku alive. Failure to do so will spell certain death. Once the area is cleared of lasers after 30 seconds, a brief cinematic is shown, eventually permanently stunning Xemnas and reducing his HP to 1. From there, simply perform a combo finisher, magic, or a Limit to finish Xemnas off.
Riku will heal Sora when his HP is low. Items still should be brought into battle, as it is best to be hit by Xemnas's drain attack with a full bar of HP. Ethers are also good for restoring much-needed MP. While Xemnas's final attack brings him to 1 HP, Sora can deplete his HP to 1 before the attack is executed as well. Riku cannot die in this battle, because he is needed for the entire battle. The only time that Riku can die is when Xemnas starts to drain Sora's HP. If Riku is defeated before he reaches Sora, it is a Game Over.
In Kingdom Hearts HD 2.5 ReMIX, the "Reversal" Reaction Command can show up less frequently. The best way to avoid Xemnas's Invitation to Nothingness in this version is to activate Session, providing Sora and Riku invincibility during the attack. This problem was fixed in Kingdom Hearts HD 1.5 + 2.5 ReMIX.
In Kingdom Hearts II Final Mix, Xemnas's Spark Wall attack knocks Riku to the side, and he recovers from flinching more quickly. Additionally, Thorn Beam has a larger hitbox and the Reversal Reaction Command is displayed for a longer period.
Data Rematch[edit]
Once the first battle is over, Riku joins the party, giving Sora a chance to change his equipment between battles. After exiting the menu, the second battle starts. If Sora is defeated in the second battle, he will have to redo the first battle.
Use the same strategy used in the final battle against the real Xemnas. However, Xemnas's pattern is different. For instance, he now uses the Bind Attack multiple times. Sora should bring Elixirs and Hi-Potions to the fight for healing. If Sora is in Limit Form, Xemnas forgoes using Bind Attack and instead begins his attack sequence where he throws Sora into the air.
Xemnas uses his Bind Attack when reduced to 75% HP, begins using his Shot attack when reduced to 50%, and uses Multi Shot when reduced to 5% HP.
| Technique | Element | Power | Guard? | |||
|---|---|---|---|---|---|---|
| Blade Attack (ブレード攻撃 Burēdo Kōgeki) |
Physical | x1.5 | X | |||
| Slashes with blades; slashing patterns may vary. | ||||||
| Thorn Beam (イバラビーム Ibara Bīmu) |
Neutral | x0.25 | X | |||
| Fires thorn-like beams. | ||||||
| Does not trigger Reflect's explosion. | ||||||
| Kick (キック Kikku) |
Physical | x1.5 | △ | |||
| Attacks with roundhouse kicks, foot sweeps and somersault kicks. | ||||||
| Shot (ショット, Shotto) |
Thunder | x0.25 | △ | |||
| Arranges red lasers in the air that follow the opponent and fires them. | ||||||
| Used below 50% HP. Xemnas alternatively arranges three or several lasers around Sora, and continuously fires lasers at him, occasionally along with a clone that cannot stagger and has no visible HP. Xemnas usually follows with Bind Attack. | ||||||
| Spark Bomb (スパークボム Supāku Bomu) |
Dark[KH II] Thunder[KH II FM] |
x1.5 | X | |||
| Fires two light spheres that explode. | ||||||
| Used when higher than 50% HP. The Data Replica always starts with this attack. | ||||||
| Spark Wall (スパークウォール Supāku Wōru) |
Thunder | x1.0 | X | |||
| Raises a wall that deflects frontal attacks. | ||||||
| Only used while playing as Riku. | ||||||
| Multi Shot (全方位ショット Zenhōi Shotto, lit. "Omnidirectional Shot") |
Thunder | x0.25 | △ | |||
| Arranges countless red lasers around opponents and fires them. | ||||||
| Used at 10% HP (intial fight) or 5% HP (Replica Data). The attack lasts for 30 seconds. Xemnas's HP cannot drop to 0 until this attack is used, and his HP is reduced to 1 at the end of the attack. | ||||||
| Bind Attack (拘束攻撃 Kōsoku Kōgeki) |
Neutral | 1 HP every 1.1 seconds | X | |||
| Restrains Sora and deals continuous damage to him. | ||||||
| Used below 50% HP (initial fight) or 75% HP (Replica Data). Xemnas is invulnerable while preparing the attack. If caught, player gains control as Riku until the Rescue Reaction Command is used. Does not trigger Reflect's explosion. | ||||||
| Weapon Drop (武器落とし攻撃 Buki Otoshi Kōgeki, lit. "Weapon Drop Attack") |
Physical | x3.0 | X | |||
| Knocks Sora's Keyblade out of his hands, then slashes at Sora and Riku. | ||||||
| Used after the repeated Blade Attacks if Xemnas has more than 50% HP.
| ||||||
| Xemnas may grab and lift Sora upwards (can be blocked with Reflect but won't interrupt the following), using afterwards attacks such as Blade Attack, Thorn Beam, or Kick, one after another. In the initial fight, Xemnas always starts by doing this. | ||||||
| Guard/Block: △ = Can be blocked; O = Can be blocked and interrupted (melee) or deflected back (projectile); X = Cannot be blocked. | ||||||
| Reaction Commands | |||||||
|---|---|---|---|---|---|---|---|
| Reaction Command | Element | Power | Description | ||||
| Reversal (スライドターン Suraido Tān, lit. "Slide Turn") |
— | — | Can be used when approached by Thorn Beams. If Xemnas fires his beams in mid-air, dodge them by soaring above; if Xemnas fires his beams while on the ground, dodge them by moving quickly as they approach. | ||||
| Block (ふせぐ Fusegu) |
— | — | Can be used when Xemnas uses his Weapon Drop attack. Sora and Riku narrowly dodge a powerful spinning attack Xemnas unleashes. | ||||
| Rescue (すくいだす Sukuidasu) |
— | — | Can be used while controlling Riku and near Sora as he is caught in Xemnas's Bind Attack. Interrupt Xemnas's attack and free Sora, who returns to the player's control afterward. | ||||
| Reflect (リフレクト Rifurekuto) |
— | — | Can be used during Xemnas's Multi Shot attack. Riku rapidly deflects the barrage of lasers shot by Xemnas. An identical command replaces Sora's Attack command, which allows Sora to deflect lasers. Both buttons need to be pressed continuously to avoid damage. | ||||
Kingdom Hearts 3D: Dream Drop Distance[edit]
- "As your flesh bears the sigil, so your name shall be known as that...of a recusant."
- —Xemnas to Sora
It is advised to bring two Curaga commands into battle to ensure maximum healing potential and cancel out the wait for command reload time should Sora's HP need replenishing. Also bring Spirits that have Curaga and the Haste Support Magic to not have problems with the reload time, while having ones that can cast Spirit Roar in order for Sora's damage to increase temporarily. Use Flowmotion to Sora's advantage, and the battle should end with minimal difficulty. It is a necessity to enter this fight with a full Drop Gauge (after using one to two Drop-Me-Nots), especially at lower levels.
At the start of the battle, Xemnas will use Building Throw at Sora while teleporting to the end of the arena, then follows by three more buildings. Perform carefully-timed Slide Rolls to avoid them and reach Xemnas quickly. If left alone during his normal phase, he will casually walk up to Sora like in prior games but will start to actively attack in response to Sora's offense.
Xemnas is incredibly swift and frequently travels around the battlefield either inside an impenetrable sphere of darkness or by teleporting from place to place, attempting to catch Sora from behind, and may also use it relentlessly in order to completely nullify his attacks. When Xemnas's reaction durability value reaches 0, he will flinch after every attack for 3.3 seconds. He fights with moves that are mainly seen in the final fight from the previous game, with the exception of the Spark Walls and the sphere teleports which are seen in the first fight. As soon as Xemnas reappears from the dark sphere, Lock-On to him and press ![]() or
or ![]() to guard against the ensuing Dual Blade or Flying Dual Blade, leaving him open to Sora's Counter Rush. Beware that Xemnas can still use Dual Blade again after a Counter Rush. The use of Sliding Sidewinder is also efficient at interrupting, staggering and repelling Xemnas. If he isn't using the sphere teleports and is instead idling, one can use Firaga Burst combined with either powerful Unison Attacks like Decussation, or commands with extended combos like Ars Arcanum, stunlocking Xemnas and dealing up to 3 or 4 HP bars of damage, especially when buffed with Spirit Roar. As with all bosses, a deck of alternating Balloon- and Cure-type spells can also easily win the battle.
to guard against the ensuing Dual Blade or Flying Dual Blade, leaving him open to Sora's Counter Rush. Beware that Xemnas can still use Dual Blade again after a Counter Rush. The use of Sliding Sidewinder is also efficient at interrupting, staggering and repelling Xemnas. If he isn't using the sphere teleports and is instead idling, one can use Firaga Burst combined with either powerful Unison Attacks like Decussation, or commands with extended combos like Ars Arcanum, stunlocking Xemnas and dealing up to 3 or 4 HP bars of damage, especially when buffed with Spirit Roar. As with all bosses, a deck of alternating Balloon- and Cure-type spells can also easily win the battle.
Xemnas's most lethal move surrounds Sora with Shots, where he should leap over them with High Jump and either use the Air Slide/Sonic Impact/Double Impact combo or perform Superglide. The position of the Shots circle and aiming will always match Sora's so it is advised to keep moving and land only when they're all gone. When Xemnas traps Sora in a cage of Spark Walls, simply High Jump over them and either Super Glide or repeat the Air Slide/Sonic Impact/Double Impact combo to avoid the ensuing barrage of Shots. One other trick is to climb the walls with Flowmotion, jump while moving around to dodge the Shots and attack near Xemnas with Shock Dive to deal damage. In the case where he creates the four walls while near Sora, he can just Block the Shots and Counter Rush, interrupting and knocking Xemnas back. He may try to suddenly defend himself with a single Spark Wall from time to time to knock Sora back, but if possible he can either stay away from it to avoid getting interrupted or allow it to knock him backwards so that he can perform Payback Raid, as Spark Wall deals no damage.
After half of his HP has been depleted, Xemnas resets the battlefield, and uses Building Throw. From Sora's starting position, it isn't required to move at all in case Xemnas throws one or two buildings, but in the case three are thrown, it will require Sora to dodge roll forwards after the nearest buiding falls in front of him. After all three sets of Building Throw have been sent, Sora gets sent into a gliding phase of the attack where he cannot move but can still use the Attack command (contrary to how it is displayed), and on the white building directed at him, he can trigger the Nightmare's End Reality Shift.
If Nightmare's End succeeds, the arena will shift to its original form, and include a few chunks of buildings with long Flowmotion rails on top of them, with a passive Xemnas at its end. The first hit will cause Xemnas to sigh and recover after around 4 seconds have passed, meaning that in the meantime, Sora should quickly unleash his most powerful commands until the Nobody recovers. Once he has rallied, Xemnas warps the battlefield back to its original state, and will increase the frequency and ferocity of his attacks, while not staggering from damage anymore (he can still be interrupted by Blocks), making Sliding Sidewinder almost useless for its aforementioned purpose. Using Nightmare's End successfully is therefore not recommended in case Sora is underleveled or at Level 1.
If Nightmare's End isn't used, Sora will take damage, and whether it fails or isn't used, the battlefield will shift back to its original form, but the ferocity of Xemnas's attacks will remain normal. In the 3DS version only, if Sora immediately kicks him with either Sonic Impact or Double Impact, he may restart Building Throw. In the rare case Sora gets defeated during the gliding phase because of the building but gets resurrected by Auto-Life, he will essentially get soft-locked until his Drop Gauge gets depleted, with Xemnas staying intangible and immobile.
If Xemnas is left undefeated for too long he might use Building Throw again.
| Technique | Element | Status | Power | Block? | ||
|---|---|---|---|---|---|---|
| Dual Blade (二刀流攻撃 Nitōryū Kōgeki, lit. "Dual-Wield Attack") |
— | 0.8 per hit | O | |||
| With a weapon in each hand, swings them in various movements, and may perform roundhouse or drop kicks.
| ||||||
| Xemnas may skip either the weapon or the kick attack. | ||||||
| Flying Dual Blade (飛翔二刀 Hishō Nitō) |
— | 0.8 per hit | O | |||
| With a weapon in each hand, rushes forward while gliding low in the air, and swings his weapons around.
| ||||||
| If used at close range, Xemnas skips the rush and performs only the weapon swings. Xemnas glides faster than Sora's Superglide. | ||||||
| Shot (ショット Shotto) |
— | 0.4 per hit | △ | |||
| Fires red bullets from his hand continuously at Sora, or places them around him while aimed and following his position, and fires them all at once.
| ||||||
| He may follow up with a quick swing or Flying Dual Blade after having fired the bullets around Sora. He may also use this ability twice in a row before firing everything at once. While having little power, many of them hit all at once, making the attack potentially lethal without Once More equipped. The bullets can despawn if they're placed in an edge of the arena. | ||||||
| Spark Wall (スパークウォール Supāku Wōru) |
— | 0 | X | |||
| Summons a wall in front of Sora that blows away anyone who touches it immediately after it appears, or four around him on all sides that block all attacks and movement.
| ||||||
| He follows up with "Shot" fired at Sora after surrounding him with walls. The four walls can be arranged differently depending on Sora's movement. Flowmotion can be used on either of these walls, and may prevent the knockback caused by the single Spark Wall. | ||||||
| Building Throw (ビル投げ Biru Nage) |
— | 1.0 per hit | △ (side) / X (front) | |||
Teleports to either the edge of the arena or beyond it, levitating, and throws sets of buildings as follows. Xemnas is invincible during the attack.
Xemnas ends by throwing a final building that tilts the arena, then throws four regular buildings and finally a white-striped building. | ||||||
Only used in the following cases:
Flowmotion can be used on the buildings, but only on surfaces that do not cause knockbacks and that are considered vertical enough to be walls. | ||||||
| During the fight, Xemnas may move and hide in a dark orb repetitvely, nullifying the opponents's attacks. | ||||||
| Guard/Block: △ = Can be blocked; O = Can be blocked and interrupted (melee) or deflected back (projectile); X = Cannot be blocked. | ||||||
Kingdom Hearts III[edit]
Xemnas is fought alongside Ansem, Seeker of Darkness and Young Xehanort. It is recommended to take him out last since he is the fastest and most aggressive out of them, making it difficult to land a combo. Xemnas will attack with his Ethereal Blades and hand-to-hand combat, employing a rapid slashing blade combo and swinging his Ethereal Blades in a helicopter-like manner before unleashing a burst of energy from his Ethereal Blades as well as spinning energy kicks, and can launch four energy balls and quickly move around while creating orbs that fire lasers. As his health decreases, Xemnas teleports more often to avoid attacks.
Each member will have a dark aura surrounding them, meaning they'll only attack Sora each time they disappear and reappear with a specific order of attacks. For Xemnas, Young Xehanort will release missiles of ice followed by Ansem's cage of dark claws that will launch Sora into the air and Xemnas using his rolling attack. Jump to avoid the dark cage and block the icicles and Xemnas's attack. Xemnas can release Ethereal lasers that can be blocked. Right as he launches the energy orbs, Airstep to him right away, as they cannot explode upon contact, to get a good combo. The end of his combos can be blocked and Sora can use Risk Dodge. When half of his health is down, or while the leader, his combos last longer and his finishing move will launch his victims into the air. During the cyclone sequence, each member will use a specific order of attacks. If Xemnas is the only one left, he'll first fire several Ethereal lasers that surround Sora, but can be difficult to block, then he'll do a normal combo followed by his rolling attack. He is immune to thunder magic, so use any other offensive spell to attack from a distance. Keeping Riku and Mickey alive is wise as they can do double and triple damage when attacking together. When they try to combo Sora's target, it would be wise to let them land their own. The Magic Carousel Attraction appears as well.
| Technique | Element | Status | Power | Block? | Repel LV | |
|---|---|---|---|---|---|---|
| Aerial Combo (エリアルコンボ Eriaru Konbo) |
(combo) | Physical | — | 0.3 (thrust 0.4) + 0.5 | △ | 2
|
| (cross-swing) | Physical | — | 1.2 | △ (Risk Dodge) | 3 | |
| (rising spin) | Physical | — | 0.2 per hit | △ | 2 | |
| (kick) | Physical | — | 1.0 | △ (Risk Dodge) | 3 | |
| After performing 1-3 combos of right swing → left swing, thrust → sweep, and roundhouse kick → foot sweep, perform a dual-blade cross swing or kick after a rising spin, with the latter being used during Leader Cooperation or if below 50% HP. | ||||||
| Shot (ショット Shotto) |
(normal combat) | Thunder | — | 0.1 per hit | △ |
—
|
| (during Annihilation) | Physical | — | 0.05 per hit | △ | — | |
| Flies around and arranges light projectiles in a circle; once Xemnas finishes this and warps away, each projectile fires one-by-one. | ||||||
| Spark Bomb (スパークボム Supāku Bomu) |
Dark | — | 0.5 per hit | △ | — | |
| Fires four light spheres that explode. | ||||||
| Dead End (デッドエンド Deddo Endo) |
(charge) | Physical | — | 0.7 | △ | 2
|
| (x-swing) | Aero | — | 2.5 | △ | — | |
| Spins vertically and charges. When the thrust hits Sora, he makes an X onto the ground and raises his blade. | ||||||
| Guard/Block: △ = Can be blocked; O = Can be blocked and interrupted (melee) or deflected back (projectile); X = Cannot be blocked. | ||||||
- Techniques used by all enemies
| Technique | Element | Status | Power | Block? | Repel LV | |
|---|---|---|---|---|---|---|
| Annihilation (アナイアレイション Anaiareishon) |
Physical | — | 1.5 per hit | △ |
2 | |
| Master Xehanort summons a storm of Keyblades that temporarily removes Riku and Mickey and surrounds the battlefield. Bundles of Keyblades will fly around Sora one-by-one (the last four bundles directly target him). Afterward, remaining enemies attack in succession; techniques used depend on those remaining.
| ||||||
| Leader Cooperation (リーダー連携 Rīdā Renkei) has one enemy designated as the leader. The non-leaders attack first, then the leader after them; the order depends on those remaining. When Leader Cooperation is used, one enemy is designated the "leader"; the leader is surrounded by an aura and targets Sora until the next use of Leader Cooperation. The initial leader is the one with the lowest maximum HP in terms of percentage, and they rotate between each other. When only one enemy remains, they automatically become the leader and use of Leader Cooperation is discontinued. | ||||||
| Guard/Block: △ = Can be blocked; O = Can be blocked and interrupted (melee) or deflected back (projectile); X = Cannot be blocked. | ||||||
Kingdom Hearts III Re Mind[edit]
In addition to fighting alongside Ansem and Young Xehanort as in the base game, Xemnas also briefly fights alongside Saïx for the second phase of his battle. Here, the player plays as Roxas, and has Lea and Xion as allies. Xemnas retains his attacks from the main fight, except the player can use the Thinking of You team attack.
When fought alongside Ansem and Young Xehanort, the fight is nearly identical except the Faith Volley and True End team attacks are available.
Data Rematch[edit]
Xemnas's data is not only much stronger and with more HP but has also acquired several new attacks, making him much more deadly. He retains his old Ethereal Blades slashing combo and helicopter attack as well as his energy kick, but has gained new melee attacks: he can perform a leaping kick with both legs, which can be enhanced with a burst of energy, and also a straight kick as well as also gaining more sword combos. Xemnas has also gained the ability to use his old barrier ability, which can be broken with a single attack but damages Sora if he is thrust into it, and Twilight Thorns that do not damage but cannot be blocked, can interrupt reprisals and will launch Sora into the air, allowing Xemnas to easily catch Sora off-guard.
After a certain amount of Xemnas's health has been depleted, he will unleash his ultimate attack. He first surrounds the entire arena with darkness as Twilight Thorns begin to suddenly materialize out of nowhere, allowing Xemnas to force Sora into the air without Sora being able to react. Eventually, Xemnas will create thousands of Ethereal Blades and launch them as projectiles while also randomly attacking until the stage returns to normal; the red Ethereal Blades can be blocked, but the blue ones cannot so be sure to roll out of the way upon seeing one. Before the first barrage, Xemnas will use his quick three-hit combos before throwing Sora with his Twilight Thorns. Block immediately when he teleports. After his first barrage, he will go with his slower two-hit kick combos before throwing Sora. Sora should time his guards to block all his kicks.
After the second salvo, Xemnas will immediately teleport for an unblockable X-shaped slash. Dodge Roll out of the way. Afterwards, Xemnas will use quick two-hit sword combos before throwing Sora, twice in succession, and follow with the unblockable X-shaped slash. The first barrage of Ethereal Blades are blockable, but the second barrage sends out blue Ethereal Blades after the first few red blades. The last barrage will shoot blue blades first and then shoot another few blue blades after a few following red blades. The last salvo will always leave Sora stunned afterward if he's not in a form or doesn't have Stun Protection and Xemnas will teleport in for the unblockable X-shaped slash, but Sora will recover before it comes. Dodge Roll out of the way and get in a combo on Xemnas.
Kingdom Hearts Melody of Memory[edit]
Videos[edit]
| Unknown – Kingdom Hearts Final Mix | Xemnas – Kingdom Hearts II |
|---|---|
| Xemnas (Armored Controller) I – Kingdom Hearts II | Xemnas (Dragon Form) – Kingdom Hearts II |
| Xemnas (Armored Controller) II – Kingdom Hearts II | Xemnas (Final Form) – Kingdom Hearts II |
| Xemnas's Replica Data – Kingdom Hearts II Final Mix | Xemnas – Kingdom Hearts Dream Drop Distance HD (Sora) |
| Ansem, Xemnas, and Young Xehanort – Kingdom Hearts III | Xemnas – Kingdom Hearts III |
| Xemnas and Saïx – Kingdom Hearts III Re Mind | Ansem, Xemnas, and Young Xehanort – Kingdom Hearts III Re Mind |
| Xemnas's Recreated Data – Kingdom Hearts III Re Mind | |
Gallery[edit]
The Sidecar Glider used by Riku and Sora during the second fight against Xemnas's Dragon Form.
Notes and references[edit]
- ^ Becomes available after clearing Kingdom Hearts II Final Mix in the original Japanese version, clearing "Sora's Story" and "Reverse/Rebirth" in the original English version, and completing Kingdom Hearts 358/2 Days in Kingdom Hearts HD 1.5 ReMIX.
- ^ Reality Shift cannot be used on Xemnas, but can be used on the white-striped building at the end of the Building Throw attack instead.
- ^ Shared with Ansem and Young Xehanort
- ^ x4.5 when fighting Xemnas's Replica Data.
- ^ During the Data Rematch.
- ^ Auto-Life Softlock at the end of Xemnas' Building Throw DM.
| Kingdom Hearts Final Mix |
|---|
| Additional enemies |
| Bosses |
| Arch Behemoth - Destroyed Behemoth - Red Armor - Sneak Army - Unknown |
| Enemy Heartless |
| Black Ballade - Chimera - Gigas Shadow - Grand Ghost - Jet Balloon - Missile Diver - Neoshadow - Stealth Soldier - Pot Scorpion - Pink Agaricus - Sniperwild |
| Additional weapons |
| Diamond Dust - One-Winged Angel - Fantasista - Meteor Strike - Mighty Shield - Seven Elements |
| Additional music |
| Kingdom Hearts Final Mix - Additional Tracks - Kingdom Hearts Original Soundtrack Complete |
| Archives |
| Additional accessories - Additional abilities - Another side, another story... [deep dive] - Artwork - Enemy renders |
| Nobodies |
|---|
| Organization XIII |
| I. Xemnas | II. Xigbar | III. Xaldin | IV. Vexen | V. Lexaeus | VI. Zexion | VII. Saïx | VIII. Axel | IX. Demyx | X. Luxord | XI. Marluxia | XII. Larxene | XIII. Roxas |
| Enemy Nobodies |
| Sorcerer - Sniper - Dragoon - Berserker - Assassin - Dancer - Gambler - Reaper - Ninja - Samurai Dusk - Creeper - Specter - Twilight Thorn - Fake Vivi |
| Special Nobodies |
| Naminé - Absent Silhouettes - Organization XIII's Replica Data - Anti-Saïx - Data-Roxas - Data-Naminé |
- Organization XIII
- Original characters
- Kingdom Hearts Final Mix characters
- Kingdom Hearts bosses
- Kingdom Hearts II characters
- Kingdom Hearts 3D: Dream Drop Distance characters
- Kingdom Hearts III characters
- Kingdom Hearts Melody of Memory characters
- Kingdom Hearts II bosses
- Kingdom Hearts 3D: Dream Drop Distance bosses
- Kingdom Hearts III bosses
- Kingdom Hearts Melody of Memory bosses
- Gummi Nobody
- Kingdom Hearts II enemies
- Kingdom Hearts II Final Mix characters
- Kingdom Hearts Union χ characters
- Kingdom Hearts III Re Mind characters
- Optional bosses
- Kingdom Hearts Final Mix bosses
- Gameplay
