Floating Island: Difference between revisions
ShardofTruth (talk | contribs) m (→Heartless) |
ShardofTruth (talk | contribs) No edit summary |
||
| (7 intermediate revisions by 6 users not shown) | |||
| Line 1: | Line 1: | ||
{{game|KH2|FM2 | {{game|KH2|FM2}} | ||
{{GummiMission | {{GummiMission | ||
|name=Floating Island | |name=Floating Island | ||
|katakana=フローティングアイランド | |katakana=フローティングアイランド | ||
|romaji= | |romaji=Furōtingu Airando | ||
|image=[[File:Floating Island KHII.png|300px]] | |image=[[File:Floating Island KHII.png|300px]] | ||
|world1=[[Disney Castle]] | |world1=[[Disney Castle]] | ||
|world2=[[Port Royal]] | |world2=[[Port Royal]] | ||
|normalname=Floating | |normalname=Floating In Bliss | ||
|normalfile=Floating | |normalfile=Floating In Bliss KHII.ogg | ||
|comp1S=[[Variety Skins A]] | |comp1S=[[File:Icon Design Pack KHII.png|20x20px]] [[Variety Skins A]] | ||
|comp1A=[[Propeller | |comp1A=[[File:Icon Gummi Block KHII.png|20x20px]] {{c|Propeller/G|kh2}} | ||
|comp1B=[[Shell | |comp1B=[[File:Icon Gummi Block KHII.png|20x20px]] [[Shell/G]] | ||
|comp1C=[[Sphere Helm | |comp1C=[[File:Icon Gummi Block KHII.png|20x20px]] {{c|Sphere Helm/G|kh2}} | ||
|comp1D=[[Orichalcum | |comp1D=[[File:Icon Gummi Block KHII.png|20x20px]] [[Orichalcum/G]] | ||
|comp1E=[[Active Formation]] | |comp1E=[[File:Icon Gummi Ability KHII.png|20x20px]] [[Active Formation]] | ||
|comp1EX=[[Moon Ring | |comp1EX=[[File:Icon Gummi Block KHII.png|20x20px]] [[Moon Ring/G]] | ||
|desc1EX=Fly a special model Ship! | |desc1EX=Fly a special model Ship! | ||
|score2S=300 | |score2S=300 | ||
| Line 23: | Line 23: | ||
|score2D=140 | |score2D=140 | ||
|score2E=100 | |score2E=100 | ||
|comp2S=[[Mandragora | |comp2S=[[File:Icon Blueprint KHII.png|20x20px]] [[Mandragora]] | ||
|comp2A=[[Large Rotor | |comp2A=[[File:Icon Gummi Block KHII.png|20x20px]] {{c|Large Rotor/G|kh2}} | ||
|comp2B=[[Cost Converter]] | |comp2B=[[File:Icon Gummi Ability KHII.png|20x20px]] [[Cost Converter]] | ||
|comp2C=[[Excalibur | |comp2C=[[File:Icon Gummi Block KHII.png|20x20px]] {{c|Excalibur/G|kh2}} | ||
|comp2D=[[Firaga | |comp2D=[[File:Icon Gummi Block KHII.png|20x20px]] {{c|Firaga/G|kh2}} | ||
|comp2E=[[Graviga | |comp2E=[[File:Icon Gummi Block KHII.png|20x20px]] {{c|Graviga/G|kh2}} | ||
|comp2EX=[[Caterpillar | |comp2EX=[[File:Icon Gummi Block KHII.png|20x20px]] {{c|Caterpillar/G|kh2}} | ||
|desc2EX=Fly a Gummi Ship with 4 or more Lock-on Gummies! | |desc2EX=Fly a Gummi Ship with 4 or more Lock-on Gummies! | ||
|score3SFM=1900000 | |||
|score3S=1000000 | |score3S=1000000 | ||
|score3A=900000 | |score3A=900000 | ||
| Line 37: | Line 38: | ||
|score3D=600000 | |score3D=600000 | ||
|score3E=500000 | |score3E=500000 | ||
|comp3S=[[Sphere Helm | |score3S+10=2900000 | ||
|comp3A=[[Square Light | |score3S+9=2700000 | ||
|comp3B=[[Mini-Propeller | |score3S+8=2500000 | ||
|comp3C=[[Saw | |score3S+7=2300000 | ||
|comp3D=[[Firaga | |score3S+6=2100000 | ||
|comp3E=[[Ultima | |score3S+5=1900000 | ||
|comp3EX=[[Figure | |score3S+4=1700000 | ||
|score3S+3=1500000 | |||
|score3S+2=1300000 | |||
|score3S+1=1100000 | |||
|score3S+10FM=2900000 | |||
|score3S+9FM=2800000 | |||
|score3S+8FM=2700000 | |||
|score3S+7FM=2600000 | |||
|score3S+6FM=2500000 | |||
|score3S+5FM=2400000 | |||
|score3S+4FM=2300000 | |||
|score3S+3FM=2200000 | |||
|score3S+2FM=2100000 | |||
|score3S+1FM=2000000 | |||
|comp3S=[[File:Icon Gummi Block KHII.png|20x20px]] {{c|Sphere Helm/G|kh2}} | |||
|comp3A=[[File:Icon Gummi Block KHII.png|20x20px]] {{c|Square Light/G|kh2}} | |||
|comp3B=[[File:Icon Gummi Block KHII.png|20x20px]] {{c|Mini-Propeller/G|kh2}} | |||
|comp3C=[[File:Icon Gummi Block KHII.png|20x20px]] {{c|Saw/G|kh2}} | |||
|comp3D=[[File:Icon Gummi Block KHII.png|20x20px]] {{c|Firaga/G|kh2}} | |||
|comp3E=[[File:Icon Gummi Block KHII.png|20x20px]] {{c|Ultima/G|kh2}} | |||
|comp3EX=[[File:Icon Gummi Block KHII.png|20x20px]] [[Figure/G Set]] | |||
|desc3EX=Fly without any Teeny Ships! | |desc3EX=Fly without any Teeny Ships! | ||
|enemy11=N/A | |enemy11=N/A | ||
| Line 79: | Line 100: | ||
|scree116=Back | |scree116=Back | ||
|scree117=Back | |scree117=Back | ||
|treas11=[[Cost Limit Upgrade]] | |treas11=[[File:Icon Gummi Upgrade KHII.png|20x20px]] [[Cost Limit Upgrade]] | ||
|treas12= | |treas12=[[File:Icon Gummi Block KHII.png|20x20px]] [[Material/G]] x10 | ||
|treas13=[[Mini-Propeller | |treas13=[[File:Icon Gummi Block KHII.png|20x20px]] {{c|Mini-Propeller/G|kh2}} | ||
|treas14=[[Fire | |treas14=[[File:Icon Gummi Block KHII.png|20x20px]] {{c|Fire/G|kh2}} | ||
|treas15=[[Propeller | |treas15=[[File:Icon Gummi Block KHII.png|20x20px]] {{c|Propeller/G|kh2}} | ||
|treas16=[[Mini-Propeller | |treas16=[[File:Icon Gummi Block KHII.png|20x20px]] {{c|Mini-Propeller/G|kh2}} | ||
|treas17=[[Propeller | |treas17=[[File:Icon Gummi Block KHII.png|20x20px]] {{c|Propeller/G|kh2}} | ||
|treas18=[[Mini-Propeller | |treas18=[[File:Icon Gummi Block KHII.png|20x20px]] {{c|Mini-Propeller/G|kh2}} | ||
|treas19=[[Booster | |treas19=[[File:Icon Gummi Block KHII.png|20x20px]] {{c|Booster/G|kh2}} | ||
|treas110=[[Blizzard | |treas110=[[File:Icon Gummi Block KHII.png|20x20px]] {{c|Blizzard/G|kh2}} | ||
|treas111=[[Storm | |treas111=[[File:Icon Gummi Block KHII.png|20x20px]] {{c|Storm/G|kh2}} | ||
|treas112=[[Mini-Propeller | |treas112=[[File:Icon Gummi Block KHII.png|20x20px]] {{c|Mini-Propeller/G|kh2}} | ||
|treas113=[[Thunder | |treas113=[[File:Icon Gummi Block KHII.png|20x20px]] {{c|Thunder/G|kh2}} | ||
|treas114=[[Solid Helm | |treas114=[[File:Icon Gummi Block KHII.png|20x20px]] {{c|Solid Helm/G|kh2}} | ||
|treas115=[[Propeller | |treas115=[[File:Icon Gummi Block KHII.png|20x20px]] {{c|Propeller/G|kh2}} | ||
|treas116=[[Gravity | |treas116=[[File:Icon Gummi Block KHII.png|20x20px]] {{c|Gravity/G|kh2}} | ||
|treas117=[[Drill | |treas117=[[File:Icon Gummi Block KHII.png|20x20px]] {{c|Drill/G|kh2}} | ||
|enemy21=[[Driller]] (R) | |enemy21=[[Driller]] (R) | ||
|enemy22=[[Crawler]] | |enemy22=[[Crawler]] | ||
| Line 128: | Line 149: | ||
|scree215=Right | |scree215=Right | ||
|scree216=Right | |scree216=Right | ||
|treas21=[[Masamune | |treas21=[[File:Icon Gummi Block KHII.png|20x20px]] {{c|Masamune/G|kh2}} | ||
|treas22=[[Neon Orb | |treas22=[[File:Icon Gummi Block KHII.png|20x20px]] {{c|Neon Orb/G|kh2}} | ||
|treas23=[[Auto-Regen]] | |treas23=[[File:Icon Gummi Ability KHII.png|20x20px]] [[Auto-Regen]] | ||
|treas24=[[Neon Bar | |treas24=[[File:Icon Gummi Block KHII.png|20x20px]] {{c|Neon Bar/G|kh2}} | ||
|treas25=[[Fira | |treas25=[[File:Icon Gummi Block KHII.png|20x20px]] {{c|Fira/G|kh2}} | ||
|treas26=[[Rotor | |treas26=[[File:Icon Gummi Block KHII.png|20x20px]] {{c|Rotor/G|kh2}} | ||
|treas27=[[Fira | |treas27=[[File:Icon Gummi Block KHII.png|20x20px]] {{c|Fira/G|kh2}} | ||
|treas28=[[Neon Bar | |treas28=[[File:Icon Gummi Block KHII.png|20x20px]] {{c|Neon Bar/G|kh2}} | ||
|treas29=[[Neon Orb | |treas29=[[File:Icon Gummi Block KHII.png|20x20px]] {{c|Neon Orb/G|kh2}} | ||
|treas210=[[Neon Bar | |treas210=[[File:Icon Gummi Block KHII.png|20x20px]] {{c|Neon Bar/G|kh2}} | ||
|treas211=[[Propeller | |treas211=[[File:Icon Gummi Block KHII.png|20x20px]] {{c|Propeller/G|kh2}} | ||
|treas212=[[Mini-Propeller | |treas212=[[File:Icon Gummi Block KHII.png|20x20px]] {{c|Mini-Propeller/G|kh2}} | ||
|treas213=[[Neon Orb | |treas213=[[File:Icon Gummi Block KHII.png|20x20px]] {{c|Neon Orb/G|kh2}} | ||
|treas214=[[Gungnir | |treas214=[[File:Icon Gummi Block KHII.png|20x20px]] {{c|Gungnir/G|kh2}} | ||
|treas215=[[Neon Bar | |treas215=[[File:Icon Gummi Block KHII.png|20x20px]] {{c|Neon Bar/G|kh2}} | ||
|treas216=[[Bridge | |treas216=[[File:Icon Gummi Block KHII.png|20x20px]] {{c|Bridge/G|kh2}} | ||
|enemy31=[[Driller]] (R) | |enemy31=[[Driller]] (R) | ||
|enemy32=[[Knight Head]] (R) | |enemy32=[[Knight Head]] (R) | ||
| Line 182: | Line 203: | ||
|scree318=Front | |scree318=Front | ||
|scree319=Back | |scree319=Back | ||
|treas31=[[Masamune | |treas31=[[File:Icon Gummi Block KHII.png|20x20px]] {{c|Masamune/G|kh2}} | ||
|treas32=[[Fira | |treas32=[[File:Icon Gummi Block KHII.png|20x20px]] {{c|Fira/G|kh2}} | ||
|treas33=[[Mini-Propeller | |treas33=[[File:Icon Gummi Block KHII.png|20x20px]] {{c|Mini-Propeller/G|kh2}} | ||
|treas34=[[Screw Propeller | |treas34=[[File:Icon Gummi Block KHII.png|20x20px]] {{c|Screw Propeller/G|kh2}} | ||
|treas35=[[Large Rotor | |treas35=[[File:Icon Gummi Block KHII.png|20x20px]] {{c|Large Rotor/G|kh2}} | ||
|treas36=[[Comet | |treas36=[[File:Icon Gummi Block KHII.png|20x20px]] {{c|Comet/G|kh2}} | ||
|treas37=[[Round Light | |treas37=[[File:Icon Gummi Block KHII.png|20x20px]] {{c|Round Light/G|kh2}} | ||
|treas38=[[Saw | |treas38=[[File:Icon Gummi Block KHII.png|20x20px]] {{c|Saw/G|kh2}} | ||
|treas39=[[Rotor | |treas39=[[File:Icon Gummi Block KHII.png|20x20px]] {{c|Rotor/G|kh2}} | ||
|treas310=[[Mini-Propeller | |treas310=[[File:Icon Gummi Block KHII.png|20x20px]] {{c|Mini-Propeller/G|kh2}} | ||
|treas311=[[Propeller | |treas311=[[File:Icon Gummi Block KHII.png|20x20px]] {{c|Propeller/G|kh2}} | ||
|treas312=[[Blizzara | |treas312=[[File:Icon Gummi Block KHII.png|20x20px]] {{c|Blizzara/G|kh2}} | ||
|treas313=[[Angel | |treas313=[[File:Icon Gummi Block KHII.png|20x20px]] {{c|Angel/G|kh2}} | ||
|treas314=[[Bubble Helm | |treas314=[[File:Icon Gummi Block KHII.png|20x20px]] {{c|Bubble Helm/G|kh2}} | ||
|treas315=[[Neon Orb | |treas315=[[File:Icon Gummi Block KHII.png|20x20px]] {{c|Neon Orb/G|kh2}} | ||
|treas316=[[Comet | |treas316=[[File:Icon Gummi Block KHII.png|20x20px]] {{c|Comet/G|kh2}} | ||
|treas317=[[Screw Propeller | |treas317=[[File:Icon Gummi Block KHII.png|20x20px]] {{c|Screw Propeller/G|kh2}} | ||
|treas318=[[Propeller | |treas318=[[File:Icon Gummi Block KHII.png|20x20px]] {{c|Propeller/G|kh2}} | ||
|treas319=[[Angel | |treas319=[[File:Icon Gummi Block KHII.png|20x20px]] {{c|Angel/G|kh2}} | ||
}} | }} | ||
'''Floating Island''' is a [[ | '''Floating Island''' is a [[Gummi Mission]] available in ''[[Kingdom Hearts II]]''. Upon completion the first time through, it unlocks [[Port Royal]] for regular gameplay. | ||
==Strategy== | ==Strategy== | ||
===Mission 1=== | ===Mission 1=== | ||
As similar with other medal collection missions, a Gummi Ship with plenty of weapon Gummis will have no problem with this mission. There are several opportunities to obtain a larger collection of points: defeating gold enemies, and defeating bigger [[Heartless]] enemies, such as the Dragonfly and Crawlers. | As similar with other medal collection missions, a Gummi Ship with plenty of weapon Gummis will have no problem with this mission. There are several opportunities to obtain a larger collection of points: defeating gold enemies, and defeating bigger [[Heartless]] enemies, such as the Dragonfly and Crawlers. | ||
| Line 211: | Line 231: | ||
===Mission 2=== | ===Mission 2=== | ||
This mission begins with a new enemy: the Driller. Dodge the Driller's punches and attack with laser Gummis for an easy victory. Defeat the pools of Knight Heads that will follow. As with Splash Island, do not focus solely on the larger Heartless enemies. Once 300 enemies have been defeated, Sora will earn an "S" rank. | This mission begins with a new enemy: the Driller. Dodge the Driller's punches and attack with laser Gummis for an easy victory. Defeat the pools of Knight Heads that will follow. As with Splash Island, do not focus solely on the larger Heartless enemies. Once 300 enemies have been defeated, Sora will earn an "S" rank. | ||
{{sec-stub}} | |||
==Enemies== | ==Enemies== | ||
===Heartless=== | ===Heartless=== | ||
{|class="wikitable collapsible collapsed" | {|class="wikitable mw-collapsible mw-collapsed" | ||
! | ! | ||
|- | |- | ||
| Line 226: | Line 247: | ||
===Nobodies=== | ===Nobodies=== | ||
{|class="wikitable collapsible collapsed" | {|class="wikitable mw-collapsible mw-collapsed" | ||
! | ! | ||
|- | |- | ||
| Line 240: | Line 261: | ||
</gallery> | </gallery> | ||
|} | |} | ||
{{ | {{Gummi}} | ||
{{ | {{Minigames}} | ||
[[Category:Mini-games]] | [[Category:Mini-games]] | ||
[[Category:Gummi]] | [[Category:Gummi]] | ||
Latest revision as of 13:06, 27 July 2024
| Floating Island | ||||
|---|---|---|---|---|
| ||||
| Japanese | フローティングアイランド
| |||
| Rōmaji | Furōtingu Airando | |||
| Path | Disney Castle ⇔ Port Royal
| |||
| ||||
| ||||
| Rank | Medal LV | Reward |
|---|---|---|
| 30 | ||
| 26 | ||
| 22 | ||
| 18 | ||
| 14 | ||
| 10 | ||
| Fly a special model Ship! | ||
| 30 | ||
| Enemy | Screen | Reward
|
|---|---|---|
| N/A | N/A | |
| Knight Head (R) | Front | |
| Crawler | Front | |
| Mega Tank (R) | Front | |
| Crawler | Front | |
| Crawler | Right | |
| Crawler | Front | |
| Crawler | Front | |
| Knight Head (R) | Front | |
| Bomber (R) | Back | |
| Bomber (G) | Back | |
| Crawler | Front | |
| Tank (R) | Front | |
| Bomber (R) | Front | |
| Crawler | Front | |
| Phoenix (R) | Back | |
| Phoenix (G) | Back | |
| Rank | Destroyed | Reward |
|---|---|---|
| 300 | ||
| 260 | ||
| 220 | ||
| 180 | ||
| 140 | ||
| 100 | ||
| Fly a Gummi Ship with 4 or more Lock-on Gummies! | ||
| 300 | ||
| Enemy | Screen | Reward
|
|---|---|---|
| Driller (R) | Back | |
| Crawler | Left | |
| Bomber (R) | Front | |
| Crawler | Back | |
| Phoenix (R) | Back | |
| Bomber (R) | Back | |
| Phoenix (R) | Back | |
| Crawler | Front | |
| Crawler | Front | |
| Crawler | Front | |
| Phoenix (G) | Front | |
| Phoenix (R) | Front | |
| Crawler | Left | |
| Driller (R) | Front | |
| Crawler | Right | |
| Tank (G) | Right | |
| Rank | Score | Reward |
|---|---|---|
| 1000000[KH II] 1900000[KH II FM] |
||
| 900000 | ||
| 800000 | ||
| 700000 | ||
| 600000 | ||
| 500000 | ||
| Fly without any Teeny Ships! | ||
| 1900000 | ||
| After reaching Rank S | ||
| Rank | Score (KH II) | Score (KH II FM) |
| 2900000 | 2900000 | |
| 2700000 | 2800000 | |
| 2500000 | 2700000 | |
| 2300000 | 2600000 | |
| 2100000 | 2500000 | |
| 1900000 | 2400000 | |
| 1700000 | 2300000 | |
| 1500000 | 2200000 | |
| 1300000 | 2100000 | |
| 1100000 | 2000000 | |
| Enemy | Screen | Reward
|
|---|---|---|
| Driller (R) | Back | |
| Knight Head (R) | Front | |
| Crawler | Front | |
| Bomber (R) | Front | |
| Crawler | Front | |
| Phoenix (R) | Back | |
| Bomber (R) | Back | |
| Phoenix (R) | Back | |
| Crawler | Right | |
| Crawler | Left | |
| Crawler | Right | |
| Knight Head (R) | Front | |
| Phoenix (G) | Front | |
| Bomber (R) | Back | |
| Bomber (G) | Back | |
| Phoenix (R) | Front | |
| Crawler | Front | |
| Crawler | Front | |
| Phoenix (G) | Back | |
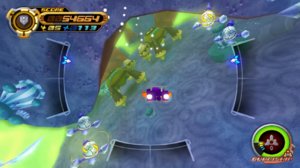
Floating Island is a Gummi Mission available in Kingdom Hearts II. Upon completion the first time through, it unlocks Port Royal for regular gameplay.
Strategy[edit]
Mission 1[edit]
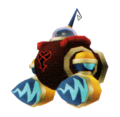
As similar with other medal collection missions, a Gummi Ship with plenty of weapon Gummis will have no problem with this mission. There are several opportunities to obtain a larger collection of points: defeating gold enemies, and defeating bigger Heartless enemies, such as the Dragonfly and Crawlers.
Mission 2[edit]
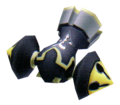
This mission begins with a new enemy: the Driller. Dodge the Driller's punches and attack with laser Gummis for an easy victory. Defeat the pools of Knight Heads that will follow. As with Splash Island, do not focus solely on the larger Heartless enemies. Once 300 enemies have been defeated, Sora will earn an "S" rank.
Enemies[edit]
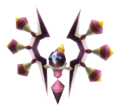
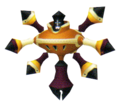
Heartless[edit]
|
|
Nobodies[edit]
|
|


