| Site Notice |
|---|
|
Remember to pay a visit to our Discord server and chat with our community! See here for more info. Be sure to check out the KHUX Wiki for the latest on Kingdom Hearts Union χ and Kingdom Hearts Dark Road! Go and pitch in! The KHWiki contains spoilers for all Kingdom Hearts games. Read at your own risk. Please remember not to add information about unreleased games from trailers. |
Splash Island: Difference between revisions
KrytenKoro (talk | contribs) No edit summary |
ShardofTruth (talk | contribs) No edit summary |
||
| (10 intermediate revisions by 7 users not shown) | |||
| Line 1: | Line 1: | ||
{{game|KH2|FM2 | {{game|KH2|FM2}} | ||
{{GummiMission | {{GummiMission | ||
|name=Splash Island | |name=Splash Island | ||
|katakana=スプラッシュアイランド | |katakana=スプラッシュアイランド | ||
|romaji= | |romaji=Supurasshu Airando | ||
|image=[[File:Splash Island KHII.png|300px]] | |image=[[File:Splash Island KHII.png|300px]] | ||
|world1=[[Disney Castle]] | |world1=[[Disney Castle]] | ||
|world2=[[Atlantica]] | |world2=[[Atlantica]] | ||
|normalname=Floating | |normalname=Floating In Bliss | ||
|normalfile=Floating | |normalfile=Floating In Bliss KHII.ogg | ||
|comp1S=[[Decal Skins]] | |comp1S=[[File:Icon Design Pack KHII.png|20x20px]] [[Decal Skins]] | ||
|comp1A=[[Neon Bar | |comp1A=[[File:Icon Gummi Block KHII.png|20x20px]] {{c|Neon Bar/G|kh2}} | ||
|comp1B=[[Screw Propeller | |comp1B=[[File:Icon Gummi Block KHII.png|20x20px]] {{c|Screw Propeller/G|kh2}} | ||
|comp1C=[[Bridge | |comp1C=[[File:Icon Gummi Block KHII.png|20x20px]] {{c|Bridge/G|kh2}} | ||
|comp1D=[[AP Limit Upgrade]] | |comp1D=[[File:Icon Gummi Upgrade KHII.png|20x20px]] [[AP Limit Upgrade]] | ||
|comp1E=[[Heal Upgrade]] | |comp1E=[[File:Icon Gummi Ability KHII.png|20x20px]] [[Heal Upgrade]] | ||
|comp1EX=[[Flag | |comp1EX=[[File:Icon Gummi Block KHII.png|20x20px]] {{c|Flag/G|kh2}} | ||
|desc1EX=Fly a Gummi Ship set with the Formation Change Ability! | |desc1EX=Fly a Gummi Ship set with the Formation Change Ability! | ||
|score2S=350 | |score2S=350 | ||
| Line 23: | Line 23: | ||
|score2D=150 | |score2D=150 | ||
|score2E=100 | |score2E=100 | ||
|comp2S={{c|Moogle | |comp2S=[[File:Icon Blueprint KHII.png|20x20px]] {{c|Moogle|Gummi Ship}} | ||
|comp2A=[[Storm | |comp2A=[[File:Icon Gummi Block KHII.png|20x20px]] {{c|Storm/G|kh2}} | ||
|comp2B=[[Round Light | |comp2B=[[File:Icon Gummi Block KHII.png|20x20px]] {{c|Round Light/G|kh2}} | ||
|comp2C=[[Antenna | |comp2C=[[File:Icon Gummi Block KHII.png|20x20px]] {{c|Antenna/G|kh2}} | ||
|comp2D=[[Laser Upgrade]] | |comp2D=[[File:Icon Gummi Ability KHII.png|20x20px]] [[Laser Upgrade]] | ||
|comp2E=[[Thundaga | |comp2E=[[File:Icon Gummi Block KHII.png|20x20px]] {{c|Thundaga/G|kh2}} | ||
|comp2EX=[[Boomerang | |comp2EX=[[File:Icon Gummi Block KHII.png|20x20px]] [[Boomerang/G]] | ||
|desc2EX=Fly an Invincible model from the sample blueprints! | |desc2EX=Fly an Invincible model from the sample blueprints! | ||
|score3SFM=3100000 | |||
|score3S=1000000 | |score3S=1000000 | ||
|score3A=900000 | |score3A=900000 | ||
| Line 37: | Line 38: | ||
|score3D=600000 | |score3D=600000 | ||
|score3E=500000 | |score3E=500000 | ||
|comp3S=[[Solid Helm | |score3S+10=3800000 | ||
|comp3A=[[Storm | |score3S+9=3500000 | ||
|comp3B=[[Screw Propeller | |score3S+8=3200000 | ||
|comp3C=[[Firaga | |score3S+7=2900000 | ||
|comp3D=[[Blizzaga | |score3S+6=2600000 | ||
|comp3E=[[Meteor | |score3S+5=2300000 | ||
|comp3EX=[[Mast | |score3S+4=2000000 | ||
|score3S+3=1700000 | |||
|score3S+2=1400000 | |||
|score3S+1=1100000 | |||
|score3S+10FM=3800000 | |||
|score3S+9FM=3600000 | |||
|score3S+8FM=3400000 | |||
|score3S+7FM=3200000 | |||
|score3S+6FM=3000000 | |||
|score3S+5FM=2800000 | |||
|score3S+4FM=2600000 | |||
|score3S+3FM=2400000 | |||
|score3S+2FM=2200000 | |||
|score3S+1FM=2000000 | |||
|comp3S=[[File:Icon Gummi Block KHII.png|20x20px]] {{c|Solid Helm/G|kh2}} | |||
|comp3A=[[File:Icon Gummi Block KHII.png|20x20px]] {{c|Storm/G|kh2}} | |||
|comp3B=[[File:Icon Gummi Block KHII.png|20x20px]] {{c|Screw Propeller/G|kh2}} | |||
|comp3C=[[File:Icon Gummi Block KHII.png|20x20px]] {{c|Firaga/G|kh2}} | |||
|comp3D=[[File:Icon Gummi Block KHII.png|20x20px]] {{c|Blizzaga/G|kh2}} | |||
|comp3E=[[File:Icon Gummi Block KHII.png|20x20px]] {{c|Meteor/G|kh2}} | |||
|comp3EX=[[File:Icon Gummi Block KHII.png|20x20px]] {{c|Mast/G|kh2}} | |||
|desc3EX=Fly a Gummi Ship with no Weapon Gummies! | |desc3EX=Fly a Gummi Ship with no Weapon Gummies! | ||
|enemy11=N/A | |enemy11=N/A | ||
| Line 51: | Line 72: | ||
|enemy15=[[Bomber]] (G) | |enemy15=[[Bomber]] (G) | ||
|enemy16=[[U.F.O.]] (R) | |enemy16=[[U.F.O.]] (R) | ||
|enemy17= | |enemy17={{c|Shield|Gummi Ship}} (R) | ||
|enemy18=[[Bomber]] (R) | |enemy18=[[Bomber]] (R) | ||
|scree11=N/A | |scree11=N/A | ||
| Line 61: | Line 82: | ||
|scree17=Left | |scree17=Left | ||
|scree18=Front | |scree18=Front | ||
|treas11=[[Auto Counter]] | |treas11=[[File:Icon Gummi Ability KHII.png|20x20px]] [[Auto-Counter]] | ||
|treas12=[[Formation Change]] | |treas12=[[File:Icon Gummi Ability KHII.png|20x20px]] [[Formation Change]] | ||
|treas13=[[Fira | |treas13=[[File:Icon Gummi Block KHII.png|20x20px]] {{c|Fira/G|kh2}} | ||
|treas14=[[Sphere Helm | |treas14=[[File:Icon Gummi Block KHII.png|20x20px]] {{c|Sphere Helm/G|kh2}} | ||
|treas15=[[Screw Propeller | |treas15=[[File:Icon Gummi Block KHII.png|20x20px]] {{c|Screw Propeller/G|kh2}} | ||
|treas16=[[Thundara | |treas16=[[File:Icon Gummi Block KHII.png|20x20px]] {{c|Thundara/G|kh2}} | ||
|treas17= | |treas17=[[File:Icon Gummi Block KHII.png|20x20px]] [[Material/G]] x10 | ||
|treas18=[[Booster | |treas18=[[File:Icon Gummi Block KHII.png|20x20px]] {{c|Booster/G|kh2}} | ||
|enemy21=[[Gatling Ship]] (R) | |enemy21=[[Gatling Ship]] (R) | ||
|enemy22=[[Gatling Ship]] (G) | |enemy22=[[Gatling Ship]] (G) | ||
| Line 74: | Line 95: | ||
|enemy24=[[Knight Head]] (R) | |enemy24=[[Knight Head]] (R) | ||
|enemy25=[[Knight Head]] (R) | |enemy25=[[Knight Head]] (R) | ||
|enemy26= | |enemy26={{c|Shield|Gummi Ship}} (R) | ||
|enemy27= | |enemy27={{c|Shield|Gummi Ship}} (G) | ||
|scree21=Left | |scree21=Left | ||
|scree22=Front | |scree22=Front | ||
| Line 83: | Line 104: | ||
|scree26=Back | |scree26=Back | ||
|scree27=Front | |scree27=Front | ||
|treas21=[[Screw Propeller | |treas21=[[File:Icon Gummi Block KHII.png|20x20px]] {{c|Screw Propeller/G|kh2}} | ||
|treas22=[[Neon Orb | |treas22=[[File:Icon Gummi Block KHII.png|20x20px]] {{c|Neon Orb/G|kh2}} | ||
|treas23=[[Fira | |treas23=[[File:Icon Gummi Block KHII.png|20x20px]] {{c|Fira/G|kh2}} | ||
|treas24=[[Comet | |treas24=[[File:Icon Gummi Block KHII.png|20x20px]] {{c|Comet/G|kh2}} | ||
|treas25=[[Screw Propeller | |treas25=[[File:Icon Gummi Block KHII.png|20x20px]] {{c|Screw Propeller/G|kh2}} | ||
|treas26=[[Orichalcum | |treas26=[[File:Icon Gummi Block KHII.png|20x20px]] [[Orichalcum/G]] | ||
|treas27=[[Large Rotor | |treas27=[[File:Icon Gummi Block KHII.png|20x20px]] {{c|Large Rotor/G|kh2}} | ||
|enemy31=[[U.F.O.]] (R) | |enemy31=[[U.F.O.]] (R) | ||
|enemy32=[[Gatling Ship]] (R) | |enemy32=[[Gatling Ship]] (R) | ||
| Line 99: | Line 120: | ||
|enemy38=[[Knight Head]] (R) | |enemy38=[[Knight Head]] (R) | ||
|enemy39=[[Knight Head]] (R) | |enemy39=[[Knight Head]] (R) | ||
|enemy310= | |enemy310={{c|Shield|Gummi Ship}} (R) | ||
|enemy311=[[U.F.O.]] (R) | |enemy311=[[U.F.O.]] (R) | ||
|enemy312= | |enemy312={{c|Shield|Gummi Ship}} (G) | ||
|enemy313= | |enemy313={{c|Shield|Gummi Ship}} (R) | ||
|enemy314=[[Bomber]] (R) | |enemy314=[[Bomber]] (R) | ||
|scree31=Front | |scree31=Front | ||
| Line 118: | Line 139: | ||
|scree313=Front | |scree313=Front | ||
|scree314=Front | |scree314=Front | ||
|treas31=[[Rotor | |treas31=[[File:Icon Gummi Block KHII.png|20x20px]] {{c|Rotor/G|kh2}} | ||
|treas32=[[Fira | |treas32=[[File:Icon Gummi Block KHII.png|20x20px]] {{c|Fira/G|kh2}} | ||
|treas33=[[Comet | |treas33=[[File:Icon Gummi Block KHII.png|20x20px]] {{c|Comet/G|kh2}} | ||
|treas34=[[Neon Bar | |treas34=[[File:Icon Gummi Block KHII.png|20x20px]] {{c|Neon Bar/G|kh2}} | ||
|treas35=[[Storm | |treas35=[[File:Icon Gummi Block KHII.png|20x20px]] {{c|Storm/G|kh2}} | ||
|treas36=[[Firaga | |treas36=[[File:Icon Gummi Block KHII.png|20x20px]] {{c|Firaga/G|kh2}} | ||
|treas37=[[Vortex | |treas37=[[File:Icon Gummi Block KHII.png|20x20px]] {{c|Vortex/G|kh2}} | ||
|treas38=[[Square Light | |treas38=[[File:Icon Gummi Block KHII.png|20x20px]] {{c|Square Light/G|kh2}} | ||
|treas39=[[Screw Propeller | |treas39=[[File:Icon Gummi Block KHII.png|20x20px]] {{c|Screw Propeller/G|kh2}} | ||
|treas310=[[Flat Helm | |treas310=[[File:Icon Gummi Block KHII.png|20x20px]] {{c|Flat Helm/G|kh2}} | ||
|treas311=[[Propeller | |treas311=[[File:Icon Gummi Block KHII.png|20x20px]] {{c|Propeller/G|kh2}} | ||
|treas312=[[Vortex | |treas312=[[File:Icon Gummi Block KHII.png|20x20px]] {{c|Vortex/G|kh2}} | ||
|treas313=[[Large Rotor | |treas313=[[File:Icon Gummi Block KHII.png|20x20px]] {{c|Large Rotor/G|kh2}} | ||
|treas314=[[Thruster | |treas314=[[File:Icon Gummi Block KHII.png|20x20px]] {{c|Thruster/G|kh2}} | ||
}} | }} | ||
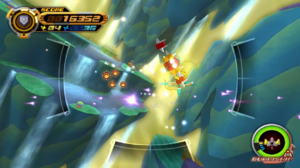
'''Splash Island''' is a [[ | '''Splash Island''' is a [[Gummi Mission]] available in ''[[Kingdom Hearts II]]''. Upon completion the first time through, it unlocks [[Atlantica]] for regular gameplay. | ||
==Strategy== | ==Strategy== | ||
===Mission 1=== | ===Mission 1=== | ||
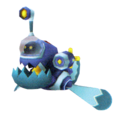
As soon as the mission starts, prepare to attack the numerous enemies on the ground for easy additional points. This level introduces two new enemies, the [[Submarine]] and [[Bomber]]. Although a bit stronger in HP, the Submarine's attacks are easy to avoid; simply remain still and allow the Gummi Ship to fly through the center of the Submarine's projected rings. The Bomber will fly onto the screen and fire numerous rockets. Shoot the Bombers down before they get too close to the Gummi Ship. Most enemies in this mission will attack in groups; especially the [[Knight Head | As soon as the mission starts, prepare to attack the numerous enemies on the ground for easy additional points. This level introduces two new enemies, the [[Submarine]] and [[Bomber]]. Although a bit stronger in HP, the Submarine's attacks are easy to avoid; simply remain still and allow the Gummi Ship to fly through the center of the Submarine's projected rings. The Bomber will fly onto the screen and fire numerous rockets. Shoot the Bombers down before they get too close to the Gummi Ship. Most enemies in this mission will attack in groups; especially the [[Knight Head]]s. At the end of the level a [[Dragonfly]] will appear, providing an opportunity to garner more points. This level is somewhat short, meaning the player should use a Gummi Ship that has a lot of weapon Gummis, such as the Falcon Peak. Equipping the "Draw" and "Medal Converter" Gummi Ship abilities is also helpful. Defeat all groups of red and basic [[Bomber]]s in the beginning of the level to eventually spawn a gold Bomber. | ||
===Mission 2=== | ===Mission 2=== | ||
As the level begins the camera will shift behind the Gummi Ship. Here you will encounter wave after wave of enemies that are much closer to the Gummi Ship than before, thus leaving less room to dodge attacks. A Gummi Ship with a great arsenal of weapon Gummis will do better than a defensive Gummi Ship. Again, the Falcon Peak blueprint will do well here. In the beginning of the level, defeat all basic and red Bombers to summon a gold Bomber. A Dragonfly will appear, but do not spend all time focused on it; this mission is ranked according to the number of enemies defeated, not the quality. About halfway through the level three Dragonflies will appear. Again, do not get distracted by them for there will be swarms of basic Knight Heads in the background. Defeating all groups of Shield enemies will summon a gold Shield at the end of the level. Defeat the gold Shield to earn a Large Rotor/G Gummi. At the end of the level, a final barrage of Knight Heads will appear. Keep a finger on [[File: | As the level begins the camera will shift behind the Gummi Ship. Here you will encounter wave after wave of enemies that are much closer to the Gummi Ship than before, thus leaving less room to dodge attacks. A Gummi Ship with a great arsenal of weapon Gummis will do better than a defensive Gummi Ship. Again, the Falcon Peak blueprint will do well here. In the beginning of the level, defeat all basic and red Bombers to summon a gold Bomber. A Dragonfly will appear, but do not spend all time focused on it; this mission is ranked according to the number of enemies defeated, not the quality. About halfway through the level three Dragonflies will appear. Again, do not get distracted by them for there will be swarms of basic Knight Heads in the background. Defeating all groups of Shield enemies will summon a gold Shield at the end of the level. Defeat the gold Shield to earn a Large Rotor/G Gummi. At the end of the level, a final barrage of Knight Heads will appear. Keep a finger on [[File:Button Cross.png|x20px]] and blast through the wave of enemies. Defeating at least 350 enemies will earn an "S" rank. | ||
==Enemies== | ==Enemies== | ||
===Heartless=== | ===Heartless=== | ||
{|class="wikitable collapsible collapsed" | {|class="wikitable mw-collapsible mw-collapsed" | ||
! | ! | ||
|- | |- | ||
| Line 155: | Line 176: | ||
===Nobodies=== | ===Nobodies=== | ||
{|class="wikitable collapsible collapsed" | {|class="wikitable mw-collapsible mw-collapsed" | ||
! | ! | ||
|- | |- | ||
| Line 164: | Line 185: | ||
File:Gatling Ship KHII.png|[[Gatling Ship]] | File:Gatling Ship KHII.png|[[Gatling Ship]] | ||
File:Phoenix KHII.png|[[Phoenix]] | File:Phoenix KHII.png|[[Phoenix]] | ||
File:Shield KHII.png| | File:Shield KHII.png|{{c|Shield|Gummi Ship}} | ||
File:Spider KHII.png|[[Spider]] | File:Spider KHII.png|[[Spider]] | ||
File:Tank KHII.png|[[Tank]] | File:Tank KHII.png|[[Tank]] | ||
| Line 170: | Line 191: | ||
</gallery> | </gallery> | ||
|} | |} | ||
{{ | {{Gummi}} | ||
{{Minigames}} | {{Minigames}} | ||
[[Category:Mini-games]] | [[Category:Mini-games]] | ||
[[Category:Gummi]] | [[Category:Gummi]] | ||
Latest revision as of 10:57, 27 July 2024
| Splash Island | ||
|---|---|---|

| ||
| Japanese | スプラッシュアイランド
| |
| Rōmaji | Supurasshu Airando | |
| Path | Disney Castle ⇔ Atlantica
| |
| ||
| ||
Splash Island is a Gummi Mission available in Kingdom Hearts II. Upon completion the first time through, it unlocks Atlantica for regular gameplay.
Strategy[edit]
Mission 1[edit]
As soon as the mission starts, prepare to attack the numerous enemies on the ground for easy additional points. This level introduces two new enemies, the Submarine and Bomber. Although a bit stronger in HP, the Submarine's attacks are easy to avoid; simply remain still and allow the Gummi Ship to fly through the center of the Submarine's projected rings. The Bomber will fly onto the screen and fire numerous rockets. Shoot the Bombers down before they get too close to the Gummi Ship. Most enemies in this mission will attack in groups; especially the Knight Heads. At the end of the level a Dragonfly will appear, providing an opportunity to garner more points. This level is somewhat short, meaning the player should use a Gummi Ship that has a lot of weapon Gummis, such as the Falcon Peak. Equipping the "Draw" and "Medal Converter" Gummi Ship abilities is also helpful. Defeat all groups of red and basic Bombers in the beginning of the level to eventually spawn a gold Bomber.
Mission 2[edit]
As the level begins the camera will shift behind the Gummi Ship. Here you will encounter wave after wave of enemies that are much closer to the Gummi Ship than before, thus leaving less room to dodge attacks. A Gummi Ship with a great arsenal of weapon Gummis will do better than a defensive Gummi Ship. Again, the Falcon Peak blueprint will do well here. In the beginning of the level, defeat all basic and red Bombers to summon a gold Bomber. A Dragonfly will appear, but do not spend all time focused on it; this mission is ranked according to the number of enemies defeated, not the quality. About halfway through the level three Dragonflies will appear. Again, do not get distracted by them for there will be swarms of basic Knight Heads in the background. Defeating all groups of Shield enemies will summon a gold Shield at the end of the level. Defeat the gold Shield to earn a Large Rotor/G Gummi. At the end of the level, a final barrage of Knight Heads will appear. Keep a finger on ![]() and blast through the wave of enemies. Defeating at least 350 enemies will earn an "S" rank.
and blast through the wave of enemies. Defeating at least 350 enemies will earn an "S" rank.
Enemies[edit]
Heartless[edit]
| show |
|---|
Nobodies[edit]
| show |
|---|
| showGummi |
|---|
| showMinigames |
|---|


