Stardust Sweep: Difference between revisions
No edit summary |
ShardofTruth (talk | contribs) No edit summary |
||
| (36 intermediate revisions by 17 users not shown) | |||
| Line 1: | Line 1: | ||
{{ | {{Game|KH2|FM2}} | ||
'''Stardust Sweep''' is | {{GummiMission | ||
|name=Stardust Sweep | |||
|katakana=スターダストスイープ | |||
|romaji=Sutādasuto Suīpu | |||
|fr=Circuit sidéral | |||
|de=Sternenstaubschneise | |||
|image=[[File:Stardust Sweep KHII.png|300px]] | |||
|world1=[[Hollow Bastion]] | |||
|world2=[[Beast's Castle]] | |||
|normalname=Asteroid Attack | |||
|normalfile=Asteroid Attack KHII.ogg | |||
|comp1S=[[File:Icon Design Pack KHII.png|20x20px]] [[Patterned Skins B]] | |||
|comp1A=[[File:Icon Gummi Block KHII.png|20x20px]] {{c|Rotor/G|kh2}} | |||
|comp1B=[[File:Icon Gummi Block KHII.png|20x20px]] {{c|Shield/G|kh2}} | |||
|comp1C=[[File:Icon Gummi Block KHII.png|20x20px]] {{c|Solid Helm/G|kh2}} | |||
|comp1D=[[File:Icon Gummi Block KHII.png|20x20px]] {{c|Blizzara/G|kh2}} | |||
|comp1E=[[File:Icon Gummi Ability KHII.png|20x20px]] [[Cannon Upgrade]] | |||
|comp1EX=[[File:Icon Gummi Block KHII.png|20x20px]] {{c|Flag/G|kh2}} | |||
|desc1EX=Fly a Gummi Ship set with 12 or more Wing Gummies! | |||
|score2S=500 | |||
|score2A=440 | |||
|score2B=380 | |||
|score2C=320 | |||
|score2D=260 | |||
|score2E=200 | |||
|comp2S=[[File:Icon Blueprint KHII.png|20x20px]] [[PuPu]] | |||
|comp2A=[[File:Icon Gummi Block KHII.png|20x20px]] {{c|Thruster/G|kh2}} | |||
|comp2B=[[File:Icon Gummi Block KHII.png|20x20px]] {{c|Parabola/G|kh2}} | |||
|comp2C=[[File:Icon Gummi Block KHII.png|20x20px]] {{c|Blizzara/G|kh2}} | |||
|comp2D=[[File:Icon Gummi Block KHII.png|20x20px]] [[Radar/G]] | |||
|comp2E=[[File:Icon Gummi Block KHII.png|20x20px]] [[Orichalcum/G]] | |||
|comp2EX=[[File:Icon Gummi Block KHII.png|20x20px]] [[Boomerang/G]] | |||
|desc2EX=Fly a Gummi Ship with only Projectile Gummies as Weapon Gummies! | |||
|score3SFM=3100000 | |||
|score3S=1000000 | |||
|score3A=900000 | |||
|score3B=800000 | |||
|score3C=700000 | |||
|score3D=600000 | |||
|score3E=500000 | |||
|score3S+10=4700000 | |||
|score3S+9=4300000 | |||
|score3S+8=3900000 | |||
|score3S+7=3500000 | |||
|score3S+6=3100000 | |||
|score3S+5=2700000 | |||
|score3S+4=2300000 | |||
|score3S+3=1900000 | |||
|score3S+2=1500000 | |||
|score3S+1=1100000 | |||
|score3S+10FM=4700000 | |||
|score3S+9FM=4500000 | |||
|score3S+8FM=4350000 | |||
|score3S+7FM=4200000 | |||
|score3S+6FM=4000000 | |||
|score3S+5FM=3850000 | |||
|score3S+4FM=3700000 | |||
|score3S+3FM=3350000 | |||
|score3S+2FM=3400000 | |||
|score3S+1FM=3250000 | |||
|comp3S=[[File:Icon Gummi Block KHII.png|20x20px]] {{c|Bubble Helm/G|kh2}} | |||
|comp3A=[[File:Icon Gummi Block KHII.png|20x20px]] {{c|Sonic Turbo/G|kh2}} | |||
|comp3B=[[File:Icon Gummi Block KHII.png|20x20px]] {{c|Booster/G|kh2}} | |||
|comp3C=[[File:Icon Gummi Block KHII.png|20x20px]] {{c|Drill/G|kh2}} | |||
|comp3D=[[File:Icon Gummi Block KHII.png|20x20px]] {{c|Antenna/G|kh2}} | |||
|comp3E=[[File:Icon Gummi Block KHII.png|20x20px]] {{c|Comet/G|kh2}} | |||
|comp3EX=[[File:Icon Gummi Block KHII.png|20x20px]] [[Strike/G]] | |||
|desc3EX=Fly a Gummi Ship set with 20 or more Projectile Gummies! | |||
|enemy11=N/A | |||
|enemy12=[[Gatling Ship]] (R) | |||
|enemy13=[[Hex Ring]] (R) | |||
|enemy14=[[Cyclops]] (R) | |||
|enemy15=[[Gatling Ship]] (R) | |||
|enemy16=[[Gatling Ship]] (R) | |||
|enemy17=[[Hunter]] | |||
|enemy18=[[Knight Head]] (R) | |||
|enemy19=[[Cyclops]] (R) | |||
|enemy110=[[Cyclops]] (R) | |||
|enemy111=[[Knight Head]] (R) | |||
|enemy112=[[Spider]] | |||
|enemy113=[[Knight Head]] (R) | |||
|enemy114=[[Knight Head]] (G) | |||
|enemy115=[[Bomb Bell]] (G) | |||
|scree11=N/A | |||
|scree12=Front | |||
|scree13=Back | |||
|scree14=Left | |||
|scree15=Right | |||
|scree16=Right | |||
|scree17=Back | |||
|scree18=Back | |||
|scree19=Left | |||
|scree110=Front | |||
|scree111=Back | |||
|scree112=Front | |||
|scree113=Front | |||
|scree114=Front | |||
|scree115=Front | |||
|treas11=[[File:Icon Gummi Ability KHII.png|20x20px]] [[Heal Upgrade]] | |||
|treas12=[[File:Icon Gummi Block KHII.png|20x20px]] {{c|Blizzard/G|kh2}} | |||
|treas13=[[File:Icon Gummi Block KHII.png|20x20px]] {{c|Fire/G|kh2}} | |||
|treas14=[[File:Icon Gummi Block KHII.png|20x20px]] {{c|Fire/G|kh2}} | |||
|treas15=[[File:Icon Gummi Block KHII.png|20x20px]] {{c|Bubble Helm/G|kh2}} | |||
|treas16=[[File:Icon Gummi Block KHII.png|20x20px]] {{c|Fire/G|kh2}} | |||
|treas17=[[File:Icon Gummi Block KHII.png|20x20px]] [[Material/G]] x10 | |||
|treas18=[[File:Icon Gummi Block KHII.png|20x20px]] {{c|Vernier/G|kh2}} | |||
|treas19=[[File:Icon Gummi Block KHII.png|20x20px]] {{c|Thunder/G|kh2}} | |||
|treas110=[[File:Icon Gummi Block KHII.png|20x20px]] {{c|Blizzard/G|kh2}} | |||
|treas111=[[File:Icon Gummi Block KHII.png|20x20px]] {{c|Vernier/G|kh2}} | |||
|treas112=[[File:Icon Gummi Block KHII.png|20x20px]] {{c|Thunder/G|kh2}} | |||
|treas113=[[File:Icon Gummi Block KHII.png|20x20px]] {{c|Blizzard/G|kh2}} | |||
|treas114=[[File:Icon Gummi Block KHII.png|20x20px]] {{c|Typhoon/G|kh2}} | |||
|treas115=[[File:Icon Gummi Block KHII.png|20x20px]] {{c|Neon Orb/G|kh2}} | |||
|enemy21=[[Spider]] | |||
|enemy22=[[Knight Head]] (G) | |||
|enemy23=[[Bomb Bell]] (R) | |||
|enemy24=[[Gatling Ship]] (R) | |||
|enemy25=[[Knight Head]] (R) | |||
|enemy26=[[Knight Head]] (R) | |||
|enemy27=[[Hunter]] | |||
|enemy28=[[Cyclops]] (G) | |||
|enemy29=[[Knight Head]] (R) | |||
|enemy210=[[Gatling Ship]] (R) | |||
|enemy211=[[Spider]] | |||
|enemy212=[[Gatling Ship]] (R) | |||
|enemy213=[[Spider]] | |||
|enemy214=[[Gatling Ship]] (R) | |||
|scree21=Back | |||
|scree22=Back | |||
|scree23=Front | |||
|scree24=Front | |||
|scree25=Front | |||
|scree26=Front | |||
|scree27=Front | |||
|scree28=Front | |||
|scree29=Front | |||
|scree210=Front | |||
|scree211=Front | |||
|scree212=Front | |||
|scree213=Front | |||
|scree214=Front | |||
|treas21=[[File:Icon Gummi Ability KHII.png|20x20px]] [[Heal Upgrade]] | |||
|treas22=[[File:Icon Gummi Block KHII.png|20x20px]] {{c|Storm/G|kh2}} | |||
|treas23=[[File:Icon Gummi Block KHII.png|20x20px]] {{c|Gravity/G|kh2}} | |||
|treas24=[[File:Icon Gummi Block KHII.png|20x20px]] {{c|Tempest/G|kh2}} | |||
|treas25=[[File:Icon Gummi Block KHII.png|20x20px]] {{c|Vernier/G|kh2}} | |||
|treas26=[[File:Icon Gummi Block KHII.png|20x20px]] {{c|Fire/G|kh2}} | |||
|treas27=[[File:Icon Gummi Block KHII.png|20x20px]] {{c|Thunder/G|kh2}} | |||
|treas28=[[File:Icon Gummi Block KHII.png|20x20px]] {{c|Screw Propeller/G|kh2}} | |||
|treas29=[[File:Icon Gummi Block KHII.png|20x20px]] {{c|Vernier/G|kh2}} | |||
|treas210=[[File:Icon Gummi Ability KHII.png|20x20px]] [[Slash Precharge]] | |||
|treas211=[[File:Icon Gummi Block KHII.png|20x20px]] {{c|Fire/G|kh2}} | |||
|treas212=[[File:Icon Gummi Ability KHII.png|20x20px]] [[Slash Haste]] | |||
|treas213=[[File:Icon Gummi Block KHII.png|20x20px]] {{c|Blizzard/G|kh2}} | |||
|treas214=[[File:Icon Gummi Block KHII.png|20x20px]] {{c|Tempest/G|kh2}} | |||
|enemy31=[[Spider]] | |||
|enemy32=[[Knight Head]] (G) | |||
|enemy33=[[Gatling Ship]] (R) | |||
|enemy34=[[Cyclops]] (R) | |||
|enemy35=[[Cyclops]] (R) | |||
|enemy36=[[Cyclops]] (R) | |||
|enemy37=[[Cyclops]] (R) | |||
|enemy38=[[Cyclops]] (G) | |||
|enemy39=[[Knight Head]] (R) | |||
|enemy310=[[Gatling Ship]] (R) | |||
|enemy311=[[Hunter]] | |||
|enemy312=[[Knight Head]] (R) | |||
|enemy313=[[Cyclops]] (G) | |||
|enemy314=[[Gatling Ship]] (R) | |||
|enemy315=[[Spider]] | |||
|enemy316=[[Knight Head]] (G) | |||
|enemy317=[[Knight Head]] (R) | |||
|enemy318=[[Bomb Bell]] (G) | |||
|enemy319=[[Spider]] | |||
|enemy320=[[Spider]] | |||
|scree31=Back | |||
|scree32=Back | |||
|scree33=Front | |||
|scree34=Left | |||
|scree35=Front | |||
|scree36=Back | |||
|scree37=Back | |||
|scree38=Back | |||
|scree39=Left | |||
|scree310=Right | |||
|scree311=Front | |||
|scree312=Back | |||
|scree313=Front | |||
|scree314=Front | |||
|scree315=Back | |||
|scree316=Back | |||
|scree317=Back | |||
|scree318=Back | |||
|scree319=Front | |||
|scree320=Front | |||
|treas31=[[File:Icon Gummi Block KHII.png|20x20px]] {{c|Booster/G|kh2}} | |||
|treas32=[[File:Icon Gummi Block KHII.png|20x20px]] {{c|Neon Bar/G|kh2}} | |||
|treas33=[[File:Icon Gummi Block KHII.png|20x20px]] {{c|Fire/G|kh2}} | |||
|treas34=[[File:Icon Gummi Block KHII.png|20x20px]] {{c|Cyclone/G|kh2}} | |||
|treas35=[[File:Icon Gummi Block KHII.png|20x20px]] {{c|Thruster/G|kh2}} | |||
|treas36=[[File:Icon Gummi Block KHII.png|20x20px]] {{c|Cyclone/G|kh2}} | |||
|treas37=[[File:Icon Gummi Block KHII.png|20x20px]] {{c|Thruster/G|kh2}} | |||
|treas38=[[File:Icon Gummi Block KHII.png|20x20px]] {{c|Drill/G|kh2}} | |||
|treas39=[[File:Icon Gummi Block KHII.png|20x20px]] {{c|Large Rotor/G|kh2}} | |||
|treas310=[[File:Icon Gummi Block KHII.png|20x20px]] {{c|Fire/G|kh2}} | |||
|treas311=[[File:Icon Gummi Block KHII.png|20x20px]] {{c|Parabola/G|kh2}} | |||
|treas312=[[File:Icon Gummi Block KHII.png|20x20px]] {{c|Tempest/G|kh2}} | |||
|treas313=[[File:Icon Gummi Block KHII.png|20x20px]] {{c|Rotor/G|kh2}} | |||
|treas314=[[File:Icon Gummi Block KHII.png|20x20px]] {{c|Fire/G|kh2}} | |||
|treas315=[[File:Icon Gummi Block KHII.png|20x20px]] {{c|Blizzard/G|kh2}} | |||
|treas316=[[File:Icon Gummi Block KHII.png|20x20px]] {{c|Round Light/G|kh2}} | |||
|treas317=[[File:Icon Gummi Block KHII.png|20x20px]] {{c|Tempest/G|kh2}} | |||
|treas318=[[File:Icon Gummi Block KHII.png|20x20px]] {{c|Neon Orb/G|kh2}} | |||
|treas319=[[File:Icon Gummi Block KHII.png|20x20px]] {{c|Gravity/G|kh2}} | |||
|treas320=[[File:Icon Gummi Block KHII.png|20x20px]] {{c|Mini-Propeller/G|kh2}} | |||
}} | |||
'''Stardust Sweep''' is a [[Gummi Mission]] in ''[[Kingdom Hearts II]]''. It connects [[Hollow Bastion]] to [[Beast's Castle]], and must be completed in order to travel to Beast's Castle. | |||
== | ==Strategy== | ||
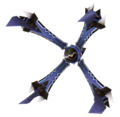
Stardust Sweep looks very similar to [[Asteroid Sweep]]. However, this area introduces a new enemy: the Hex Rings. These annoying enemies blast laser rings. This attack can be avoided three different ways: the first would be to stay still and let the ring pass over your ship. The second is optional, though more often used if being attacked by multiple ships: Dodge Rolling out of the way. The third is to quickly shoot the Hex Ring down before it has a chance to release its own laser attack. | |||
===Mission 1=== | ===Mission 1=== | ||
This is another medal gathering mission. Like other missions, you will want a Gummi Ship stocked with laser/lock-on Gummis. Teeny Ships are also helpful in cutting through enemies. While there are no lone asteroids to destroy, there are plenty of enemies to help rack up enough points needed for an S rank. | |||
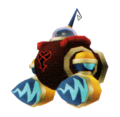
Quickly clear out all the enemies and watch for more to come. More gold and red enemies appear in this level, meaning more chances for a greater number of medals. Towards the beginning of the level a Hunter will appear. If you are using a higher level Gummi Ship, this Heartless will pose no threat. However, if you are not using a higher level ship, simply avoid the Hunter's lasers and retaliate with your own. Defeat the Hunter to get a great number of points, possibly moving you up one rank. Towards the end of the level a Spider will pop up. Handle this Spider similar to how you handled the Spider in the Asteroid Sweep level. Dismember the Spider then attack its torso. Defeating this enemy gives you a massive number of points, potentially moving you up two ranks. | |||
===Mission 2=== | ===Mission 2=== | ||
Being another mission focusing on the number of ships you destroy, come into this mission with a Gummi Ship with plenty of weapon Gummis. | |||
As soon as the mission starts you are attacked by a Spider enemy. Other smaller enemy ships will appear with this Spider. Position yourself to fire mainly on the smaller ships, with the Spider in between. The goal of this mission is quantity and not quality, so don't waste time entirely on larger enemies when smaller ones are available. You will need to angle yourself carefully in order to destroy enemies on the surrounding walls and blocks. Towards the middle of the level a Hunter ship will appear. This is a tough enemy even with higher leveled ships. Dodge Roll away from its attacks and fire away at it. Remain in the center as often as possible to avoid its attacks. In order to get a higher rank in this mission, you must defeat the Hunter quickly in order to make the red Knight Head, carrying the Vernier/G, and the red Gatling Ships, carrying the Fire/G, appear. At the end of the level, two Spiders will appear at the same time. Quickly shoot them into submission with your own lasers. | |||
===Mission 3=== | ===Mission 3=== | ||
You will rely heavily on your radar and attack power in this mission. Keep one eye locked on the radar screens for large enemy waves to appear. A higher level, powerful ship is a must for S rank seekers. | |||
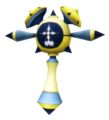
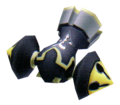
This mission immediately starts with a Spider enemy attacking from behind. Quickly move the camera around, and start attacking. As you battle this enemy, other smaller enemies will attack you from the front. This foreshadows what you will be doing the rest of the mission: moving the camera around constantly to attack large pools of enemies. A quick defeat of this Spider allows other special enemies to appear. Towards the middle of the level, a Hunter ship will appear. Similar with the previous Spider, other smaller enemies will also appear. Move the camera around to direct most of your fire to the smaller ships, shooting at the Hunter when you have an opening. Once you reach the second set of buildings, rotate the camera to the left and eliminate the red Cyclops. Once it is defeated, rotate the camera 180 degrees again, and take out another red Cyclopes. Finally, rotate another 180 degrees and take out a red and gold Cyclops enemies. These Cyclop enemies must be disposed of in order to make the others appear. Towards the end of the level you will be surrounded by three Spider enemies: one in the back, and two in the front. Quickly take out the lone Spider in the back, then move the camera to face the remaining two. Destroy them quickly to add more points to your rank. | |||
==Enemies== | |||
===Heartless=== | |||
{|class="wikitable mw-collapsible mw-collapsed" | |||
! | |||
| | |||
|- | |- | ||
| | |||
<gallery> | |||
File:Driller KHII.png|[[Driller]] | |||
File:Hunter KHII.png|[[Hunter]] | |||
</gallery> | |||
|} | |} | ||
===Nobodies=== | |||
{|class="wikitable mw-collapsible mw-collapsed" | |||
! | |||
{| | |||
! | |||
|- | |- | ||
| | |||
<gallery> | |||
File:Bomb Bell KHII.png|[[Bomb Bell]] | |||
File:Cyclops KHII.png|[[Cyclops]] | |||
File:Gatling Ship KHII.png|[[Gatling Ship]] | |||
File:Hex Ring KHII.png|[[Hex Ring]] | |||
File:Knight Head KHII.png|[[Knight Head]] | |||
File:Mega Tank KHII.png|[[Mega Tank]] | |||
File:Spider KHII.png|[[Spider]] | |||
File:U.F.O. KHII.png|[[U.F.O.]] | |||
</gallery> | |||
|} | |} | ||
{{Minigames}} | |||
{{ | {{Gummi}} | ||
{{ | |||
Latest revision as of 10:50, 27 July 2024
| Stardust Sweep | ||||
|---|---|---|---|---|
| ||||
| Japanese | スターダストスイープ
| |||
| Rōmaji | Sutādasuto Suīpu | |||
| Path | Hollow Bastion ⇔ Beast's Castle
| |||
| ||||
| ||||
| Rank | Medal LV | Reward |
|---|---|---|
| 30 | ||
| 26 | ||
| 22 | ||
| 18 | ||
| 14 | ||
| 10 | ||
| Fly a Gummi Ship set with 12 or more Wing Gummies! | ||
| 30 | ||
| Enemy | Screen | Reward
|
|---|---|---|
| N/A | N/A | |
| Gatling Ship (R) | Front | |
| Hex Ring (R) | Back | |
| Cyclops (R) | Left | |
| Gatling Ship (R) | Right | |
| Gatling Ship (R) | Right | |
| Hunter | Back | |
| Knight Head (R) | Back | |
| Cyclops (R) | Left | |
| Cyclops (R) | Front | |
| Knight Head (R) | Back | |
| Spider | Front | |
| Knight Head (R) | Front | |
| Knight Head (G) | Front | |
| Bomb Bell (G) | Front | |
| Rank | Destroyed | Reward |
|---|---|---|
| 500 | ||
| 440 | ||
| 380 | ||
| 320 | ||
| 260 | ||
| 200 | ||
| Fly a Gummi Ship with only Projectile Gummies as Weapon Gummies! | ||
| 500 | ||
| Enemy | Screen | Reward
|
|---|---|---|
| Spider | Back | |
| Knight Head (G) | Back | |
| Bomb Bell (R) | Front | |
| Gatling Ship (R) | Front | |
| Knight Head (R) | Front | |
| Knight Head (R) | Front | |
| Hunter | Front | |
| Cyclops (G) | Front | |
| Knight Head (R) | Front | |
| Gatling Ship (R) | Front | |
| Spider | Front | |
| Gatling Ship (R) | Front | |
| Spider | Front | |
| Gatling Ship (R) | Front | |
| Rank | Score | Reward |
|---|---|---|
| 1000000[KH II] 3100000[KH II FM] |
||
| 900000 | ||
| 800000 | ||
| 700000 | ||
| 600000 | ||
| 500000 | ||
| Fly a Gummi Ship set with 20 or more Projectile Gummies! | ||
| 3100000 | ||
| After reaching Rank S | ||
| Rank | Score (KH II) | Score (KH II FM) |
| 4700000 | 4700000 | |
| 4300000 | 4500000 | |
| 3900000 | 4350000 | |
| 3500000 | 4200000 | |
| 3100000 | 4000000 | |
| 2700000 | 3850000 | |
| 2300000 | 3700000 | |
| 1900000 | 3350000 | |
| 1500000 | 3400000 | |
| 1100000 | 3250000 | |
| Enemy | Screen | Reward
|
|---|---|---|
| Spider | Back | |
| Knight Head (G) | Back | |
| Gatling Ship (R) | Front | |
| Cyclops (R) | Left | |
| Cyclops (R) | Front | |
| Cyclops (R) | Back | |
| Cyclops (R) | Back | |
| Cyclops (G) | Back | |
| Knight Head (R) | Left | |
| Gatling Ship (R) | Right | |
| Hunter | Front | |
| Knight Head (R) | Back | |
| Cyclops (G) | Front | |
| Gatling Ship (R) | Front | |
| Spider | Back | |
| Knight Head (G) | Back | |
| Knight Head (R) | Back | |
| Bomb Bell (G) | Back | |
| Spider | Front | |
| Spider | Front | |
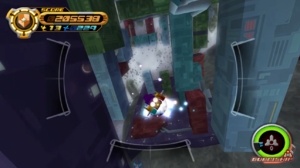
Stardust Sweep is a Gummi Mission in Kingdom Hearts II. It connects Hollow Bastion to Beast's Castle, and must be completed in order to travel to Beast's Castle.
Strategy[edit]
Stardust Sweep looks very similar to Asteroid Sweep. However, this area introduces a new enemy: the Hex Rings. These annoying enemies blast laser rings. This attack can be avoided three different ways: the first would be to stay still and let the ring pass over your ship. The second is optional, though more often used if being attacked by multiple ships: Dodge Rolling out of the way. The third is to quickly shoot the Hex Ring down before it has a chance to release its own laser attack.
Mission 1[edit]
This is another medal gathering mission. Like other missions, you will want a Gummi Ship stocked with laser/lock-on Gummis. Teeny Ships are also helpful in cutting through enemies. While there are no lone asteroids to destroy, there are plenty of enemies to help rack up enough points needed for an S rank.
Quickly clear out all the enemies and watch for more to come. More gold and red enemies appear in this level, meaning more chances for a greater number of medals. Towards the beginning of the level a Hunter will appear. If you are using a higher level Gummi Ship, this Heartless will pose no threat. However, if you are not using a higher level ship, simply avoid the Hunter's lasers and retaliate with your own. Defeat the Hunter to get a great number of points, possibly moving you up one rank. Towards the end of the level a Spider will pop up. Handle this Spider similar to how you handled the Spider in the Asteroid Sweep level. Dismember the Spider then attack its torso. Defeating this enemy gives you a massive number of points, potentially moving you up two ranks.
Mission 2[edit]
Being another mission focusing on the number of ships you destroy, come into this mission with a Gummi Ship with plenty of weapon Gummis.
As soon as the mission starts you are attacked by a Spider enemy. Other smaller enemy ships will appear with this Spider. Position yourself to fire mainly on the smaller ships, with the Spider in between. The goal of this mission is quantity and not quality, so don't waste time entirely on larger enemies when smaller ones are available. You will need to angle yourself carefully in order to destroy enemies on the surrounding walls and blocks. Towards the middle of the level a Hunter ship will appear. This is a tough enemy even with higher leveled ships. Dodge Roll away from its attacks and fire away at it. Remain in the center as often as possible to avoid its attacks. In order to get a higher rank in this mission, you must defeat the Hunter quickly in order to make the red Knight Head, carrying the Vernier/G, and the red Gatling Ships, carrying the Fire/G, appear. At the end of the level, two Spiders will appear at the same time. Quickly shoot them into submission with your own lasers.
Mission 3[edit]
You will rely heavily on your radar and attack power in this mission. Keep one eye locked on the radar screens for large enemy waves to appear. A higher level, powerful ship is a must for S rank seekers.
This mission immediately starts with a Spider enemy attacking from behind. Quickly move the camera around, and start attacking. As you battle this enemy, other smaller enemies will attack you from the front. This foreshadows what you will be doing the rest of the mission: moving the camera around constantly to attack large pools of enemies. A quick defeat of this Spider allows other special enemies to appear. Towards the middle of the level, a Hunter ship will appear. Similar with the previous Spider, other smaller enemies will also appear. Move the camera around to direct most of your fire to the smaller ships, shooting at the Hunter when you have an opening. Once you reach the second set of buildings, rotate the camera to the left and eliminate the red Cyclops. Once it is defeated, rotate the camera 180 degrees again, and take out another red Cyclopes. Finally, rotate another 180 degrees and take out a red and gold Cyclops enemies. These Cyclop enemies must be disposed of in order to make the others appear. Towards the end of the level you will be surrounded by three Spider enemies: one in the back, and two in the front. Quickly take out the lone Spider in the back, then move the camera to face the remaining two. Destroy them quickly to add more points to your rank.
Enemies[edit]
Heartless[edit]
|
|
Nobodies[edit]
|
|
