Game:The Caribbean: Difference between revisions
From the Kingdom Hearts Wiki, the Kingdom Hearts encyclopedia
Jump to navigationJump to search
m (→Ingredients) |
No edit summary |
||
| Line 9: | Line 9: | ||
!style="background:#6495ED"|Item | !style="background:#6495ED"|Item | ||
|- | |- | ||
|[[Betwixt Stone]] | |[[File:Icon Material KHIII.png|20px]] [[Betwixt Stone]] | ||
|- | |- | ||
|[[Betwixt Gem]] | |[[File:Icon Material KHIII.png|20px]] [[Betwixt Gem]] | ||
|- | |- | ||
|[[Betwixt Crystal]] | |[[File:Icon Material KHIII.png|20px]] [[Betwixt Crystal]] | ||
|- | |- | ||
|[[Twilight Stone]] | |[[File:Icon Material KHIII.png|20px]] [[Twilight Stone]] | ||
|- | |- | ||
|[[Twilight Gem]] | |[[File:Icon Material KHIII.png|20px]] [[Twilight Gem]] | ||
|- | |- | ||
|[[Twilight Crystal]]<!-- | |[[File:Icon Material KHIII.png|20px]] [[Twilight Crystal]]<!-- | ||
Possible, need confirming: | Possible, need confirming: | ||
|- | |- | ||
|[[Mythril Gem]]--> | |[[File:Icon Material KHIII.png|20px]] [[Mythril Gem]]--> | ||
|- | |- | ||
|[[Soothing Shard]]<!-- | |[[File:Icon Material KHIII.png|20px]] [[Soothing Shard]]<!-- | ||
Possible, need confirming: | Possible, need confirming: | ||
|- | |- | ||
|[[Soothing Stone]]--> | |[[File:Icon Material KHIII.png|20px]] [[Soothing Stone]]--> | ||
|} | |} | ||
| Line 33: | Line 33: | ||
{|cellspacing="0" cellpadding="5" border="1" align="center" width="700px" | {|cellspacing="0" cellpadding="5" border="1" align="center" width="700px" | ||
!style="background:#6495ED" width="2%"|# | !style="background:#6495ED" width="2%"|# | ||
!style="background:#6495ED" width=" | !style="background:#6495ED" width="33%"|Item | ||
!style="background:#6495ED" width="25%"|Location | !style="background:#6495ED" width="25%"|Location | ||
!style="background:#6495ED" width=" | !style="background:#6495ED" width="40%"|Notes | ||
|- | |- | ||
| 1 || [[Master's Ring]] || Huddled Isles || Inside sunken ship | | 1 || [[File:Icon Accessory KHIII.png|20px]] [[Master's Ring]] || Huddled Isles || Inside sunken ship | ||
|- | |- | ||
| 2 || [[Adamantite]] || Undersea Cavern || In room behind pile of rubble | | 2 || [[File:Icon Material KHIII.png|20px]] [[Adamantite]] || Undersea Cavern || In room behind pile of rubble | ||
|- | |- | ||
| 3 || [[Orichalcum]] || Undersea Cavern || Behind side passage of jellyfish | | 3 || [[File:Icon Material KHIII.png|20px]] [[Orichalcum]] || Undersea Cavern || Behind side passage of jellyfish | ||
|- | |- | ||
| 4 || [[Fishin' Frenzy]] || Undersea Cavern || At the end of a narrow passageway of jellyfish | | 4 || [[File:Icon Key Item KHIII.png|20px]] [[Fishin' Frenzy]] || Undersea Cavern || At the end of a narrow passageway of jellyfish | ||
|- | |- | ||
| 5 || [[Damascus]] || Isla de los Mástiles || On floor of hidden lagoon | | 5 || [[File:Icon Material KHIII.png|20px]] [[Damascus]] || Isla de los Mástiles || On floor of hidden lagoon | ||
|- | |- | ||
| 6 || [[Silver Necklace]] || Isla de los Mástiles || Requires Diving Strike from top of the island | | 6 || [[File:Icon Accessory KHIII.png|20px]] [[Silver Necklace]] || Isla de los Mástiles || Requires Diving Strike from top of the island | ||
|- | |- | ||
| 7 || [[Cosmic Arts]] || Ship's End || At dead end of an underwater cavern | | 7 || [[File:Icon Accessory KHIII.png|20px]] [[Cosmic Arts]] || Ship's End || At dead end of an underwater cavern | ||
|- | |- | ||
| 8 || [[Mega-Ether]] || Ship's End || At dead end of an underwater cavern | | 8 || [[File:Icon Item KHIII.png|20px]] [[Mega-Ether]] || Ship's End || At dead end of an underwater cavern | ||
|- | |- | ||
| 9 || [[Electrum]] || Isla Verdemontaña || Atop wall of vines | | 9 || [[File:Icon Material KHIII.png|20px]] [[Electrum]] || Isla Verdemontaña || Atop wall of vines | ||
|- | |- | ||
| 10 || [[Cast Out to Sea]] || Isla Verdemontaña || Requires Diving Strike from top of the island | | 10 || [[File:Icon Key Item KHIII.png|20px]] [[Cast Out to Sea]] || Isla Verdemontaña || Requires Diving Strike from top of the island | ||
|- | |- | ||
| 11 || [[Electrum]] || Sandbar Isle || On platform below Lucky Emblem #13 | | 11 || [[File:Icon Material KHIII.png|20px]] [[Electrum]] || Sandbar Isle || On platform below Lucky Emblem #13 | ||
|- | |- | ||
| 12 || [[Orichalcum+]] || Exile Island || Inlet in center of island | | 12 || [[File:Icon Material KHIII.png|20px]] [[Orichalcum+]] || Exile Island || Inlet in center of island | ||
|- | |- | ||
| 13 || [[Beach Party]] || Confinement Island || Center of island. Opening chest will trigger a fight with [[Water Core]]s and [[Spear Lizard]]s. | | 13 || [[File:Icon Key Item KHIII.png|20px]] [[Beach Party]] || Confinement Island || Center of island. Opening chest will trigger a fight with [[Water Core]]s and [[Spear Lizard]]s. | ||
|- | |- | ||
| 14 || [[Yin-Yang Cufflink]] || Northern Waters || Small platform at bottom of rocky arch, south of an island east of Isla de los Mástiles | | 14 || [[File:Icon Accessory KHIII.png|20px]] [[Yin-Yang Cufflink]] || Northern Waters || Small platform at bottom of rocky arch, south of an island east of Isla de los Mástiles | ||
|- | |- | ||
| 15 || [[Ocean Heartbinder]] || Undersea Cavern || At bottom of floor after fighting the [[Lightning Angler]] | | 15 || [[File:Icon Key Item KHIII.png|20px]] [[Ocean Heartbinder]] || Undersea Cavern || At bottom of floor after fighting the [[Lightning Angler]] | ||
|- | |- | ||
| 16 || [[Acrisius]] || Horseshoe Island || On beach among barrels | | 16 || [[File:Icon Armor KHIII.png|20px]] [[Acrisius]] || Horseshoe Island || On beach among barrels | ||
|- | |- | ||
| 17 || [[Map:Isla de los Mástiles]] || Isla de los Mástiles || Inside of cavern leading off the beach | | 17 || [[File:Icon Key Item KHIII.png|20px]] [[Map:Isla de los Mástiles]] || Isla de los Mástiles || Inside of cavern leading off the beach | ||
|- | |- | ||
| 18 || [[Map:Ship's End]] || Ship's End || On deck of sunken ship | | 18 || [[File:Icon Key Item KHIII.png|20px]] [[Map:Ship's End]] || Ship's End || On deck of sunken ship | ||
|- | |- | ||
| 19 || [[Map:Sandbar Isle]] || Sandbar Isle || On stone plateau | | 19 || [[File:Icon Key Item KHIII.png|20px]] [[Map:Sandbar Isle]] || Sandbar Isle || On stone plateau | ||
|- | |- | ||
| 20 || [[Map:Huddled Isles]] || Huddled Isles || | | 20 || [[File:Icon Key Item KHIII.png|20px]] [[Map:Huddled Isles]] || Huddled Isles || | ||
|- | |- | ||
| 21 || [[Panacea]] || Huddled Isles || Inside sunken ship | | 21 || [[File:Icon Item KHIII.png|20px]] [[Panacea]] || Huddled Isles || Inside sunken ship | ||
|- | |- | ||
| 22 || [[Mega-Potion]] || Huddled Isles || Inside sunken ship | | 22 || [[File:Icon Item KHIII.png|20px]] [[Mega-Potion]] || Huddled Isles || Inside sunken ship | ||
|- | |- | ||
| 23 || [[Insulator Rosette]] || Isla de los Mástiles || On floor of hidden lagoon | | 23 || [[File:Icon Armor KHIII.png|20px]] [[Insulator Rosette]] || Isla de los Mástiles || On floor of hidden lagoon | ||
|- | |- | ||
| 24 || [[Adamantite]] || Isla de los Mástiles || On floor of hidden lagoon | | 24 || [[File:Icon Material KHIII.png|20px]] [[Adamantite]] || Isla de los Mástiles || On floor of hidden lagoon | ||
|- | |- | ||
| 25 || [[Orichalcum]] || Isla Verdemontaña || Atop very tall wall of vines | | 25 || [[File:Icon Material KHIII.png|20px]] [[Orichalcum]] || Isla Verdemontaña || Atop very tall wall of vines | ||
|- | |- | ||
| 26 || [[Hungry Crystal]] || Sandbar Isle || On floor of lagoon | | 26 || [[File:Icon Material KHIII.png|20px]] [[Hungry Crystal]] || Sandbar Isle || On floor of lagoon | ||
|- | |- | ||
| 27 || [[Adamantite]] || Sandbar Isle || On stone | | 27 || [[File:Icon Material KHIII.png|20px]] [[Adamantite]] || Sandbar Isle || On stone | ||
|- | |- | ||
| 28 || [[Damascus]] || Sandbar Isle || On floor of lagoon | | 28 || [[File:Icon Material KHIII.png|20px]] [[Damascus]] || Sandbar Isle || On floor of lagoon | ||
|- | |- | ||
| 29 || [[Orichalcum]] || Sandbar Isle || On floor of lagoon | | 29 || [[File:Icon Material KHIII.png|20px]] [[Orichalcum]] || Sandbar Isle || On floor of lagoon | ||
|- | |- | ||
| 30 || [[Adamantite]] || Sandbar Isle || In lagoon | | 30 || [[File:Icon Material KHIII.png|20px]] [[Adamantite]] || Sandbar Isle || In lagoon | ||
|- | |- | ||
| 31 || [[Electrum]] || Sandbar Isle || On floor of Lucky Emblem #12 cavern | | 31 || [[File:Icon Material KHIII.png|20px]] [[Electrum]] || Sandbar Isle || On floor of Lucky Emblem #12 cavern | ||
|- | |- | ||
| 32 || [[Adamantite]] || Sandbar Isle || On floor of Lucky Emblem #12 cavern | | 32 || [[File:Icon Material KHIII.png|20px]] [[Adamantite]] || Sandbar Isle || On floor of Lucky Emblem #12 cavern | ||
|- | |- | ||
| 33 || [[Orichalcum]] || Sandbar Isle || In depths of hidden lagoon | | 33 || [[File:Icon Material KHIII.png|20px]] [[Orichalcum]] || Sandbar Isle || In depths of hidden lagoon | ||
|- | |- | ||
| 34 || [[Storm Anchor+]] || Sandbar Isle || In depths of hidden lagoon | | 34 || [[File:Icon Shield KHIII.png|20px]] [[Storm Anchor+]] || Sandbar Isle || In depths of hidden lagoon | ||
|- | |- | ||
| 35 || [[Electrum]] || Sandbar Isle || In depths of hidden lagoon | | 35 || [[File:Icon Material KHIII.png|20px]] [[Electrum]] || Sandbar Isle || In depths of hidden lagoon | ||
|- | |- | ||
| 36 || [[Orichalcum]] || Sandbar Isle || In depths of hidden lagoon | | 36 || [[File:Icon Material KHIII.png|20px]] [[Orichalcum]] || Sandbar Isle || In depths of hidden lagoon | ||
|- | |- | ||
| 37 || [[Adamantite]] || Sandbar Isle || In depths of hidden lagoon | | 37 || [[File:Icon Material KHIII.png|20px]] [[Adamantite]] || Sandbar Isle || In depths of hidden lagoon | ||
|- | |- | ||
| 38 || [[Electrum]] || Sandbar Isle || In depths of hidden lagoon | | 38 || [[File:Icon Material KHIII.png|20px]] [[Electrum]] || Sandbar Isle || In depths of hidden lagoon | ||
|- | |- | ||
| 39 || [[Adamantite]] || Sandbar Isle || In depths of hidden lagoon | | 39 || [[File:Icon Material KHIII.png|20px]] [[Adamantite]] || Sandbar Isle || In depths of hidden lagoon | ||
|- | |- | ||
| 40 || [[Hungry Crystal]] || Sandbar Isle || In depths of hidden lagoon | | 40 || [[File:Icon Material KHIII.png|20px]] [[Hungry Crystal]] || Sandbar Isle || In depths of hidden lagoon | ||
|- | |- | ||
| 41 || [[Damascus]] || Horseshoe Island || On beach among barrels | | 41 || [[File:Icon Material KHIII.png|20px]] [[Damascus]] || Horseshoe Island || On beach among barrels | ||
|- | |- | ||
| 42 || [[Firaga Bangle]] || Horseshoe Island || On beach among barrels | | 42 || [[File:Icon Armor KHIII.png|20px]] [[Firaga Bangle]] || Horseshoe Island || On beach among barrels | ||
|- | |- | ||
| 43 || [[Blizzaga Choker]] || Horseshoe Island || On beach among barrels | | 43 || [[File:Icon Armor KHIII.png|20px]] [[Blizzaga Choker]] || Horseshoe Island || On beach among barrels | ||
|- | |- | ||
| 44 || [[Chaos Anklet]] || Horseshoe Island || On beach | | 44 || [[File:Icon Armor KHIII.png|20px]] [[Chaos Anklet]] || Horseshoe Island || On beach | ||
|- | |- | ||
| 45 || [[Celestriad]] || Leviathan || On high mast of the '' | | 45 || [[File:Icon Accessory KHIII.png|20px]] [[Celestriad]] || Leviathan || On high mast of the ''{{c|Leviathan|ship}}'' | ||
|- | |- | ||
| 46 || [[Hi-Refocuser]] || Fort || End of lower layer of cannons | | 46 || [[File:Icon Item KHIII.png|20px]] [[Hi-Refocuser]] || Fort || End of lower layer of cannons | ||
|- | |- | ||
| 47 || [[Mickey's Prison Escape]] || Fort || In room next to Lucky Emblem #6 | | 47 || [[File:Icon Key Item KHIII.png|20px]] [[Mickey's Prison Escape]] || Fort || In room next to Lucky Emblem #6 | ||
|- | |- | ||
| 48 || [[Sorcerer's Ring]] || Seaport || Behind waterfall | | 48 || [[File:Icon Accessory KHIII.png|20px]] [[Sorcerer's Ring]] || Seaport || Behind waterfall | ||
|- | |- | ||
| 49 || [[Hi-Potion]] || Seaport || On docks south of Lucky Emblem #4 | | 49 || [[File:Icon Item KHIII.png|20px]] [[Hi-Potion]] || Seaport || On docks south of Lucky Emblem #4 | ||
|- | |- | ||
| 50 || [[Mega-Ether]] || Seaport || Under bridge near Lucky Emblem #3 | | 50 || [[File:Icon Item KHIII.png|20px]] [[Mega-Ether]] || Seaport || Under bridge near Lucky Emblem #3 | ||
|- | |- | ||
| 51 || [[Map:Port Royal Waters]] || Port Royal Waters || Visible from Leviathan docking port | | 51 || [[File:Icon Key Item KHIII.png|20px]] [[Map:Port Royal Waters]] || Port Royal Waters || Visible from Leviathan docking port | ||
|- | |- | ||
| 52 || [[Tent]] || Settlement || Atop a building, next to a | | 52 || [[File:Icon Tent KHIII.png|20px]] [[Tent]] || Settlement || Atop a building, next to a chimney | ||
|- | |- | ||
| 53 || [[Hi-Ether]] || Port Royal Waters || Small alleyway behind Lucky Emblem #2 | | 53 || [[File:Icon Item KHIII.png|20px]] [[Hi-Ether]] || Port Royal Waters || Small alleyway behind Lucky Emblem #2 | ||
|- | |- | ||
| 54 || [[Elixir]] || Seaport || In ocean outside of docks near Leviathan, near broken sunken ship | | 54 || [[File:Icon Item KHIII.png|20px]] [[Elixir]] || Seaport || In ocean outside of docks near Leviathan, near broken sunken ship | ||
|- | |- | ||
| 55 || [[Mega-Potion]] || Settlement || In a corner near a palm tree, inbetween two buildings | | 55 || [[File:Icon Item KHIII.png|20px]] [[Mega-Potion]] || Settlement || In a corner near a palm tree, inbetween two buildings | ||
|- | |- | ||
| 56 || [[Ether]] || Seaport || Behind waterfall | | 56 || [[File:Icon Item KHIII.png|20px]] [[Ether]] || Seaport || Behind waterfall | ||
|} | |} | ||
Revision as of 17:04, 3 August 2021
Kingdom Hearts III
Battle Levels
- Before completing The Final World: 34
- After completing The Final World: 40
Drops
| Item |
|---|
Treasures
| # | Item | Location | Notes |
|---|---|---|---|
| 1 | Huddled Isles | Inside sunken ship | |
| 2 | Undersea Cavern | In room behind pile of rubble | |
| 3 | Undersea Cavern | Behind side passage of jellyfish | |
| 4 | Undersea Cavern | At the end of a narrow passageway of jellyfish | |
| 5 | Isla de los Mástiles | On floor of hidden lagoon | |
| 6 | Isla de los Mástiles | Requires Diving Strike from top of the island | |
| 7 | Ship's End | At dead end of an underwater cavern | |
| 8 | Ship's End | At dead end of an underwater cavern | |
| 9 | Isla Verdemontaña | Atop wall of vines | |
| 10 | Isla Verdemontaña | Requires Diving Strike from top of the island | |
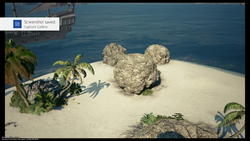
| 11 | Sandbar Isle | On platform below Lucky Emblem #13 | |
| 12 | Exile Island | Inlet in center of island | |
| 13 | Confinement Island | Center of island. Opening chest will trigger a fight with Water Cores and Spear Lizards. | |
| 14 | Northern Waters | Small platform at bottom of rocky arch, south of an island east of Isla de los Mástiles | |
| 15 | Undersea Cavern | At bottom of floor after fighting the Lightning Angler | |
| 16 | Horseshoe Island | On beach among barrels | |
| 17 | Isla de los Mástiles | Inside of cavern leading off the beach | |
| 18 | Ship's End | On deck of sunken ship | |
| 19 | Sandbar Isle | On stone plateau | |
| 20 | Huddled Isles | ||
| 21 | Huddled Isles | Inside sunken ship | |
| 22 | Huddled Isles | Inside sunken ship | |
| 23 | Isla de los Mástiles | On floor of hidden lagoon | |
| 24 | Isla de los Mástiles | On floor of hidden lagoon | |
| 25 | Isla Verdemontaña | Atop very tall wall of vines | |
| 26 | Sandbar Isle | On floor of lagoon | |
| 27 | Sandbar Isle | On stone | |
| 28 | Sandbar Isle | On floor of lagoon | |
| 29 | Sandbar Isle | On floor of lagoon | |
| 30 | Sandbar Isle | In lagoon | |
| 31 | Sandbar Isle | On floor of Lucky Emblem #12 cavern | |
| 32 | Sandbar Isle | On floor of Lucky Emblem #12 cavern | |
| 33 | Sandbar Isle | In depths of hidden lagoon | |
| 34 | Sandbar Isle | In depths of hidden lagoon | |
| 35 | Sandbar Isle | In depths of hidden lagoon | |
| 36 | Sandbar Isle | In depths of hidden lagoon | |
| 37 | Sandbar Isle | In depths of hidden lagoon | |
| 38 | Sandbar Isle | In depths of hidden lagoon | |
| 39 | Sandbar Isle | In depths of hidden lagoon | |
| 40 | Sandbar Isle | In depths of hidden lagoon | |
| 41 | Horseshoe Island | On beach among barrels | |
| 42 | Horseshoe Island | On beach among barrels | |
| 43 | Horseshoe Island | On beach among barrels | |
| 44 | Horseshoe Island | On beach | |
| 45 | Leviathan | On high mast of the Leviathan | |
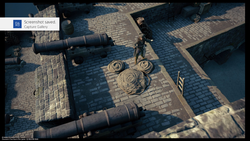
| 46 | Fort | End of lower layer of cannons | |
| 47 | Fort | In room next to Lucky Emblem #6 | |
| 48 | Seaport | Behind waterfall | |
| 49 | Seaport | On docks south of Lucky Emblem #4 | |
| 50 | Seaport | Under bridge near Lucky Emblem #3 | |
| 51 | Port Royal Waters | Visible from Leviathan docking port | |
| 52 | Settlement | Atop a building, next to a chimney | |
| 53 | Port Royal Waters | Small alleyway behind Lucky Emblem #2 | |
| 54 | Seaport | In ocean outside of docks near Leviathan, near broken sunken ship | |
| 55 | Settlement | In a corner near a palm tree, inbetween two buildings | |
| 56 | Seaport | Behind waterfall |
Ingredients
| Ingredient | Location | Appearance rate | Notes |
|---|---|---|---|
| Miller Mushroom x2~3 | Huddled Isles | 100% | Mushroom. |
| Mussel x1 | Huddled Isles | 100% | Shellfish. |
| Mussel x1 | Huddled Isles | 100% | Shellfish. On a rocky area just above sea level. |
| Crab x1 | Huddled Isles | 100% | Lobster. |
| Crab x1 | Huddled Isles | 100% | Lobster. |
| Mussel x1 | Huddled Isles | 100% | Shellfish. |
| Mussel x1 | Huddled Isles | 50% | Shellfish. |
| Lobster x1 | Huddled Isles | 100% | Lobster. |
| Scallop x1 | Huddled Isles | 100% | Shellfish. |
| Scallop x1 | Huddled Isles | 50% | Shellfish. |
| Crab x1 | Huddled Isles | 100% | Lobster. |
| Scallop x1 | Huddled Isles | 100% | Shellfish. |
| Scallop x2 | Undersea Cavern | 100% | Shellfish. |
| Lobster x1 | Undersea Cavern | 100% | Lobster. |
| Lemon x2 / Orange x2 | Docks | 100% | In food crate. |
| Gooseberry x2 / Lemon x2 | Docks | 100% | In food crate. |
| Apricot x2 / Orange x2 | Docks | 100% | In food crate. |
| Carrot x2 / Celery x2 | Docks | 100% | In cart. |
| Lemon x2 / Orange x3 | Docks | 100% | In food crate. |
| Quail x2~3 | Docks | 100% | In yellow crate. |
| Filet Mignon x2~3 | Docks | 100% | In yellow crate. |
| Quail x2~3 | Settlement | 100% | In yellow crate. |
| Onion x2 / Celery x2 | Settlement | 100% | In cart. |
| Tomato x2 / Carrot x2 | Settlement | 100% | In wheelbarrow. |
| Gooseberry x2 / Pear x2 | Settlement | 100% | In food crate. |
| Pumpkin x2 / Celery x2 | Settlement | 100% | In cart. |
| Carrot x2 / Celery x2 | Settlement | 100% | In cart. |
| Pumpkin x2 / Onion x2 | Settlement | 100% | In cart. |
| Pumpkin x2 / Celery x2 | Settlement | 100% | In wheelbarrow. |
| Onion x2 / Tomato x2 | Seaport | 100% | In cart. |
| Beef x2~3 | Seaport | 100% | In yellow crate. |
| Veal x2~3 | Seaport | 100% | In yellow crate. |
| Apricot x2 / Gooseberry x2 | Seaport | 100% | In food crate. |
| Filet Mignon x2~3 | Fort | 100% | In yellow crate. |
| Cloves x2 | Isla Verdemontaña | 100% | Herb. |
| King Oyster Mushroom x2 | Isla Verdemontaña | 50% | Mushroom. |
| King Oyster Mushroom x2 | Isla Verdemontaña | 100% | Mushroom. |
| Rosemary x2 | Isla Verdemontaña | 100% | Herb. |
| Morel x2 | Isla Verdemontaña | 50% | Mushroom. |
| Morel x2 | Isla Verdemontaña | 100% | Mushroom. |
| Lobster x2 | Isla Verdemontaña | 100% | Lobster. |
| Mussel x2 | Isla Verdemontaña | 100% | Shellfish. |
| Lobster x2 | Isla Verdemontaña | 100% | Lobster. |
| Mussel x2 | Isla Verdemontaña | 100% | Shellfish. |
| Mussel x2 | Isla Verdemontaña | 100% | Shellfish. |
| Mussel x2 | Isla Verdemontaña | 100% | Shellfish. |
| Lobster x2 | Isla Verdemontaña | 100% | Lobster. |
| Miller Mushroom x2~3 | Forsaken Isle | 100% | Mushroom. |
| Dill x2~3 | Forsaken Isle | 100% | Herb. |
| Dill x2~3 | Confinement Island | 100% | Herb. |
| Scallop x1 | Confinement Island | 100% | Shellfish. |
| Lobster x1 | Confinement Island | 100% | Lobster. |
| Scallop x1 | Confinement Island | 100% | Shellfish. |
| Lobster x1 | Confinement Island | 100% | Lobster. |
| Scallop x1 | Confinement Island | 100% | Shellfish. |
| Saffron x2~3 | Isle of Luck | 100% | Herb. |
| Black Truffle x2~3 | Isle of Luck | 100% | Mushroom. |
| Scallop x1 | Isle of Luck | 100% | Shellfish. |
| Scallop x1 | Isle of Luck | 100% | Shellfish. |
| Crab x1 | Isle of Luck | 100% | Lobster. |
| Crab x1 | Isle of Luck | 100% | Lobster. |
| Mussel x1 | Isle of Luck | 100% | Shellfish. |
| Portobello x2~3 | Horseshoe Island | 100% | Mushroom. |
| Thyme x2~3 | Horseshoe Island | 100% | Herb. |
| Crab x2 | Horseshoe Island | 50% | Lobster. |
| Mussel x1 | Horseshoe Island | 100% | Shellfish. |
| Crab x1 | Horseshoe Island | 100% | Lobster. |
| Crab x2 | Horseshoe Island | 50% | Lobster. |
| Mussel x1 | Horseshoe Island | 100% | Shellfish. |
| Mussel x1 | Horseshoe Island | 100% | Shellfish. |
| Chanterelle x2~3 | Isla De Los Mástiles | 100% | Mushroom. |
| Basil x2~3 | Isla De Los Mástiles | 100% | Herb. |
| Black Trumpet x2~3 | Isla De Los Mástiles | 100% | Mushroom. |
| Dill x2~3 | Isla De Los Mástiles | 100% | Herb. |
| Crab x2 | Isla De Los Mástiles | 100% | Lobster. |
| Scallop x1 | Isla De Los Mástiles | 100% | Shellfish. |
| Crab x1 | Isla De Los Mástiles | 50% | Lobster. |
| Scallop x2 | Isla De Los Mástiles | 50% | Shellfish. |
| Scallop x1 | Isla De Los Mástiles | 100% | Shellfish. |
| Crab x2 | Isla De Los Mástiles | 100% | Lobster. |
| Scallop x2 | Isla De Los Mástiles | 50% | Shellfish. |
| Crab x2 | Isla De Los Mástiles | 100% | Lobster. |
| Dill x2~3 | Port Royal Waters | 100% | Herb. On small island west of Isla De Los Mástiles. |
| Bay Leaf x2~3 | Exile Island | 100% | Herb. |
| Porcini x2~3 | Exile Island | 100% | Mushroom. |
| Porcini x2~3 | Exile Island | 100% | Mushroom. |
| Portobello x2~3 | Ship's End | 100% | Mushroom. |
| Thyme x2~3 | Ship's End | 100% | Herb. |
| Lobster x1 | Ship's End | 100% | Lobster. |
| Mussel x1 | Ship's End | 100% | Shellfish. |
| Lobster x2 | Ship's End | 100% | Lobster. |
| Mussel x1 | Ship's End | 100% | Shellfish. |
| Lobster x1 | Ship's End | 100% | Lobster. |
| Miller Mushroom x2~3 | Sandbar Isle | 100% | Mushroom. |
| Lobster x2 | Sandbar Isle | 100% | Lobster. |
| Scallop x2 | Sandbar Isle | 100% | Shellfish. |
| Scallop x2 | Sandbar Isle | 100% | Shellfish. |
| Lobster x2 | Sandbar Isle | 100% | Lobster. |
| Parsley x2~3 | Sandbar Isle | 100% | Herb. |
| Saffron x2~3 | Sandbar Isle | 100% | Herb. |
| Mussel x2 | Sandbar Isle | 100% | Shellfish. |
| Crab x2 | Sandbar Isle | 100% | Lobster. |
| Crab x2 | Sandbar Isle | 100% | Lobster. |
| Mussel x2 | Sandbar Isle | 100% | Shellfish. |
| Mussel x2 | Sandbar Isle | 100% | Shellfish. |
| Mussel x2 | Sandbar Isle | 100% | Shellfish. |
Additionally, Cod can be found in the sea around Isla Verdemontaña and Confinement Island, and Sea Bass can be found in the sea around Isla De Los Mástiles and Sandbar Isle.
