[dismiss]
| Site Notice |
|---|
|
Remember to pay a visit to our Discord server and chat with our community! See here for more info. Be sure to check out the KHUX Wiki for the latest on Kingdom Hearts Union χ and Kingdom Hearts Dark Road! Go and pitch in! The KHWiki contains spoilers for all Kingdom Hearts games. Read at your own risk. Please remember not to add information about unreleased games from trailers. |
Game:Twilight Town: Difference between revisions
From the Kingdom Hearts Wiki, the Kingdom Hearts encyclopedia
Jump to navigationJump to search
ShardofTruth (talk | contribs) m (Reverted edits by ShardofTruth (talk) to last revision by TheSilentHero) Tag: Rollback |
Limp Bizkit (talk | contribs) (fixed html tags) |
||
| Line 4: | Line 4: | ||
===Sora's Story=== | ===Sora's Story=== | ||
{{tab|o-center}}{{tab|Rewards}} | {{tab|o-center}}{{tab|Rewards}} | ||
{| | {|class="wikitable" style="text-align:center;float:center;width:725px" | ||
|- | |- | ||
!style="background:#6495ED | !style="background:#6495ED;width:18%"|Type | ||
!style="background:#6495ED | !style="background:#6495ED;width:27%"|Item | ||
!style="background:#6495ED | !style="background:#6495ED;width:25%"|Location | ||
!style="background:#6495ED | !style="background:#6495ED;width:30%"|Notes | ||
|- | |- | ||
|rowspan="3"|'''Enemy Card''' | |rowspan="3"|'''Enemy Card''' | ||
| Line 27: | Line 27: | ||
|[[Stardust Blitz]]{{ReCoM}}||Room of Rewards||1st Reward | |[[Stardust Blitz]]{{ReCoM}}||Room of Rewards||1st Reward | ||
|}{{tab|c}}{{tab|Bounty}} | |}{{tab|c}}{{tab|Bounty}} | ||
{| | {|class="wikitable" style="text-align:center;float:center;width:725px" | ||
|- | |- | ||
!style="background:#6495ED | !style="background:#6495ED;width:20%"|Type | ||
!style="background:#6495ED | !style="background:#6495ED;width:40%"|Item | ||
!style="background:#6495ED | !style="background:#6495ED;width:20%"|KHCoM | ||
!style="background:#6495ED | !style="background:#6495ED;width:20%"|ReCoM | ||
|- | |- | ||
|rowspan="14"|'''Attack Card''' | |rowspan="14"|'''Attack Card''' | ||
| Line 78: | Line 78: | ||
|[[Mega-Potion]]||10%<ref name="unlock"/>||5%<ref name="unlock"/> | |[[Mega-Potion]]||10%<ref name="unlock"/>||5%<ref name="unlock"/> | ||
|}{{tab|c}}{{tab|Field Drops}} | |}{{tab|c}}{{tab|Field Drops}} | ||
{| | {|class="wikitable" style="text-align:center;float:center;width:725px" | ||
|- | |- | ||
!style="background:#6495ED | !style="background:#6495ED;width:20%"|Type | ||
!style="background:#6495ED | !style="background:#6495ED;width:40%"|Item | ||
!style="background:#6495ED | !style="background:#6495ED;width:20%"|KHCoM | ||
!style="background:#6495ED | !style="background:#6495ED;width:20%"|ReCoM | ||
|- | |- | ||
|rowspan="17"|'''Attack Card''' | |rowspan="17"|'''Attack Card''' | ||
| Line 160: | Line 160: | ||
|Prize{{?}}||5%||— | |Prize{{?}}||5%||— | ||
|}{{tab|c}}{{tab|Map Cards}} | |}{{tab|c}}{{tab|Map Cards}} | ||
{| | {|class="wikitable" style="text-align:center;float:center;width:725px" | ||
|- | |- | ||
!style="background:#6495ED | !style="background:#6495ED;width:20%"|Type | ||
!style="background:#6495ED | !style="background:#6495ED;width:40%"|Item | ||
!style="background:#6495ED | !style="background:#6495ED;width:20%"|KHCoM | ||
!style="background:#6495ED | !style="background:#6495ED;width:20%"|ReCoM | ||
|- | |- | ||
|rowspan="6"|'''Red Map Card''' | |rowspan="6"|'''Red Map Card''' | ||
| Line 214: | Line 214: | ||
===Reverse/Rebirth=== | ===Reverse/Rebirth=== | ||
{{tab|o-center}}{{tab|KHCoM}} | {{tab|o-center}}{{tab|KHCoM}} | ||
{| | {|class="wikitable" style="text-align:center; text-style:bold;float:center:width:700px" | ||
|- | |- | ||
!colspan="6" style="background:#4169E1"|Deck | !colspan="6" style="background:#4169E1"|Deck | ||
| Line 238: | Line 238: | ||
|9|||||||||| | |9|||||||||| | ||
|}{{tab|c}}{{tab|ReCoM}} | |}{{tab|c}}{{tab|ReCoM}} | ||
{| | {|class="wikitable" style="text-align:center; text-style:bold;float:center;width:700px" | ||
|- | |- | ||
!colspan="6" style="background:#4169E1"|Deck | !colspan="6" style="background:#4169E1"|Deck | ||
| Line 266: | Line 266: | ||
{|cellpadding=0 cellspacing=0 border=0 align="center" | {|cellpadding=0 cellspacing=0 border=0 align="center" | ||
|valign="top"|[[File:Wantz KHII.png|x95px]]|| | |valign="top"|[[File:Wantz KHII.png|x95px]]|| | ||
{|border=1 cellpadding=2 cellspacing=0 class="sortable" style="text-align:left; font-size:90% | {|border=1 cellpadding=2 cellspacing=0 class="sortable" style="text-align:left; font-size:90%;float:center" | ||
! | !style="background-color:#c0c0c0;text-align:center;font-size:12px;width:120"|Item | ||
! | !style="background-color:#c0c0c0;text-align:center;font-size:12px;width:125"|Munny | ||
! | !style="background-color:#c0c0c0;text-align:center;font-size:12px;width:160"|First Shop | ||
|- | |- | ||
| [[File:Potion KHII.png|x20px]] [[Potion]] || 40 || [[Wantz's Item Shop]] | | [[File:Potion KHII.png|x20px]] [[Potion]] || 40 || [[Wantz's Item Shop]] | ||
| Line 283: | Line 283: | ||
{|cellpadding=0 cellspacing=0 border=0 align="center" | {|cellpadding=0 cellspacing=0 border=0 align="center" | ||
|valign="top"|[[File:Biggs KHII.png|x95px]]|| | |valign="top"|[[File:Biggs KHII.png|x95px]]|| | ||
{|border=1 cellpadding=2 cellspacing=0 class="sortable" style="text-align:left; font-size:90% | {|border=1 cellpadding=2 cellspacing=0 class="sortable" style="text-align:left; font-size:90%;float:center" | ||
! | !style="background-color:#c0c0c0;text-align:center;font-size:12px;width:120"|Item | ||
! | !style="background-color:#c0c0c0;text-align:center;font-size:12px;width:125"|Munny | ||
! | !style="background-color:#c0c0c0;text-align:center;font-size:12px;width:160"|First Shop | ||
|- | |- | ||
| [[File:Elven Bandanna KHII.png|x20px]] [[Elven Bandanna]] || 100 || [[Biggs' Armor Shop]] | | [[File:Elven Bandanna KHII.png|x20px]] [[Elven Bandanna]] || 100 || [[Biggs' Armor Shop]] | ||
| Line 316: | Line 316: | ||
{|cellpadding=0 cellspacing=0 border=0 align="center" | {|cellpadding=0 cellspacing=0 border=0 align="center" | ||
|valign="top"|[[File:Jessie KHII.png|x95px]]|| | |valign="top"|[[File:Jessie KHII.png|x95px]]|| | ||
{|border=1 cellpadding=2 cellspacing=0 class="sortable" style="text-align:left; font-size:90% | {|border=1 cellpadding=2 cellspacing=0 class="sortable" style="text-align:left; font-size:90%;float:center" | ||
! | !style="background-color:#c0c0c0;text-align:center;font-size:12px;width:120"|Item | ||
! | !style="background-color:#c0c0c0;text-align:center;font-size:12px;width:125"|Munny | ||
! | !style="background-color:#c0c0c0;text-align:center;font-size:12px;width:160"|First Shop | ||
|- | |- | ||
| [[File:Ability Ring KHII.png|x20px]] [[Ability Ring]] || 80 || [[Jessie's Accessory Shop]] | | [[File:Ability Ring KHII.png|x20px]] [[Ability Ring]] || 80 || [[Jessie's Accessory Shop]] | ||
| Line 343: | Line 343: | ||
{|cellpadding=0 cellspacing=0 border=0 align="center" | {|cellpadding=0 cellspacing=0 border=0 align="center" | ||
|valign="top"|[[File:Wallace KHII.png|x95px]]|| | |valign="top"|[[File:Wallace KHII.png|x95px]]|| | ||
{|border=1 cellpadding=2 cellspacing=0 class="sortable" style="text-align:left; font-size:90% | {|border=1 cellpadding=2 cellspacing=0 class="sortable" style="text-align:left; font-size:90%;float:center" | ||
! | !style="background-color:#c0c0c0;text-align:center;font-size:12px;width:120"|Item | ||
! | !style="background-color:#c0c0c0;text-align:center;font-size:12px;width:125"|Munny | ||
! | !style="background-color:#c0c0c0;text-align:center;font-size:12px;width:160"|First Shop | ||
|- | |- | ||
| [[File:Hammer Staff KHII.png|x20px]] [[Hammer Staff]] || 100 || [[Wallace's Weapon Shop]] | | [[File:Hammer Staff KHII.png|x20px]] [[Hammer Staff]] || 100 || [[Wallace's Weapon Shop]] | ||
| Line 374: | Line 374: | ||
{{tab|o}} | {{tab|o}} | ||
{{tab|Items}} | {{tab|Items}} | ||
{|border=1 cellpadding=2 cellspacing=0 class="sortable" style="text-align:left; font-size:90% | {|border=1 cellpadding=2 cellspacing=0 class="sortable" style="text-align:left; font-size:90%;float:center" | ||
! | !style="background-color:#c0c0c0;text-align:center;font-size:12px;width:120"|Item | ||
! | !style="background-color:#c0c0c0;text-align:center;font-size:12px;width:125"|Ingredients | ||
! | !style="background-color:#c0c0c0;text-align:center;font-size:12px;width:160"|Requirements | ||
|- | |- | ||
| [[File:Elixir KHII.png|x20px]] [[Elixir]] || [[File:Mythril Stone KHII.png|x20px]] [[Mythril Stone]] x 3<br>[[File:Power Stone KHII.png|x20px]] [[Power Stone]] x 1<br>[[File:Dark Stone KHII.png|x20px]] [[Dark Stone]] x 1 || [[Star Recipe]] | | [[File:Elixir KHII.png|x20px]] [[Elixir]] || [[File:Mythril Stone KHII.png|x20px]] [[Mythril Stone]] x 3<br>[[File:Power Stone KHII.png|x20px]] [[Power Stone]] x 1<br>[[File:Dark Stone KHII.png|x20px]] [[Dark Stone]] x 1 || [[Star Recipe]] | ||
| Line 400: | Line 400: | ||
|} | |} | ||
{{tab|c}}{{tab|Armors}} | {{tab|c}}{{tab|Armors}} | ||
{|border=1 cellpadding=2 cellspacing=0 class="sortable" style="text-align:left; font-size:90% | {|border=1 cellpadding=2 cellspacing=0 class="sortable" style="text-align:left; font-size:90%;float:center" | ||
! | !style="background-color:#c0c0c0;text-align:center;font-size:12px;width:120"|Item | ||
! | !style="background-color:#c0c0c0;text-align:center;font-size:12px;width:125"|Ingredients | ||
! | !style="background-color:#c0c0c0;text-align:center;font-size:12px;width:160"|Requirements | ||
|- | |- | ||
| [[File:Firaga Bangle KHII.png|x20px]] [[Firaga Bangle]] || [[File:Mythril Shard KHII.png|x20px]] [[Mythril Shard]] x 5<br>[[File:Blazing Stone KHII.png|x20px]] [[Blazing Stone]] x 1<br>[[File:Blazing Shard KHII.png|x20px]] [[Blazing Shard]] x 1 || | | [[File:Firaga Bangle KHII.png|x20px]] [[Firaga Bangle]] || [[File:Mythril Shard KHII.png|x20px]] [[Mythril Shard]] x 5<br>[[File:Blazing Stone KHII.png|x20px]] [[Blazing Stone]] x 1<br>[[File:Blazing Shard KHII.png|x20px]] [[Blazing Shard]] x 1 || | ||
| Line 438: | Line 438: | ||
|} | |} | ||
{{tab|c}}{{tab|Accessories}} | {{tab|c}}{{tab|Accessories}} | ||
{|border=1 cellpadding=2 cellspacing=0 class="sortable" style="text-align:left; font-size:90% | {|border=1 cellpadding=2 cellspacing=0 class="sortable" style="text-align:left; font-size:90%;float:center" | ||
! | !style="background-color:#c0c0c0;text-align:center;font-size:12px;width:120"|Item | ||
! | !style="background-color:#c0c0c0;text-align:center;font-size:12px;width:125"|Ingredients | ||
! | !style="background-color:#c0c0c0;text-align:center;font-size:12px;width:160"|Requirements | ||
|- | |- | ||
| [[File:Garnet Ring KHII.png|x20px]] [[Garnet Ring]] || [[File:Mythril Stone KHII.png|x20px]] [[Mythril Stone]] x 3<br>[[File:Power Stone KHII.png|x20px]] [[Power Stone]] x 1<br>[[File:Power Shard KHII.png|x20px]] [[Power Shard]] x 1<br>[[File:Dark Shard KHII.png|x20px]] [[Dark Shard]] x 1 || | | [[File:Garnet Ring KHII.png|x20px]] [[Garnet Ring]] || [[File:Mythril Stone KHII.png|x20px]] [[Mythril Stone]] x 3<br>[[File:Power Stone KHII.png|x20px]] [[Power Stone]] x 1<br>[[File:Power Shard KHII.png|x20px]] [[Power Shard]] x 1<br>[[File:Dark Shard KHII.png|x20px]] [[Dark Shard]] x 1 || | ||
| Line 480: | Line 480: | ||
|} | |} | ||
{{tab|c}}{{tab|Weapons}} | {{tab|c}}{{tab|Weapons}} | ||
{|border=1 cellpadding=2 cellspacing=0 class="sortable" style="text-align:left; font-size:90% | {|border=1 cellpadding=2 cellspacing=0 class="sortable" style="text-align:left; font-size:90%;float:center" | ||
! | !style="background-color:#c0c0c0;text-align:center;font-size:12px;width:120"|Item | ||
! | !style="background-color:#c0c0c0;text-align:center;font-size:12px;width:125"|Ingredients | ||
! | !style="background-color:#c0c0c0;text-align:center;font-size:12px;width:160"|Requirements | ||
|- | |- | ||
| [[File:Frozen Pride KHIIFM.png|x20px]] [[Frozen Pride]]<br>{{FMII}} || [[File:Lost Illusion KHIIFM.png|x20px]] [[Lost Illusion]] x 1<br>[[File:Tranquility Crystal KHIIFM.png|x20px]] [[Tranquility Crystal]] x 1<br>[[File:Tranquility Gem KHIIFM.png|x20px]] [[Tranquility Gem]] x 3<br>[[File:Tranquility Stone KHIIFM.png|x20px]] [[Tranquility Stone]] x 5<br>[[File:Tranquility Shard KHIIFM.png|x20px]] [[Tranquility Shard]] x 7 || [[Road to Discovery]] | | [[File:Frozen Pride KHIIFM.png|x20px]] [[Frozen Pride]]<br>{{FMII}} || [[File:Lost Illusion KHIIFM.png|x20px]] [[Lost Illusion]] x 1<br>[[File:Tranquility Crystal KHIIFM.png|x20px]] [[Tranquility Crystal]] x 1<br>[[File:Tranquility Gem KHIIFM.png|x20px]] [[Tranquility Gem]] x 3<br>[[File:Tranquility Stone KHIIFM.png|x20px]] [[Tranquility Stone]] x 5<br>[[File:Tranquility Shard KHIIFM.png|x20px]] [[Tranquility Shard]] x 7 || [[Road to Discovery]] | ||
| Line 504: | Line 504: | ||
|} | |} | ||
{{tab|c}}{{tab|Materials}} | {{tab|c}}{{tab|Materials}} | ||
{|border=1 cellpadding=2 cellspacing=0 class="sortable" style="text-align:left; font-size:90% | {|border=1 cellpadding=2 cellspacing=0 class="sortable" style="text-align:left; font-size:90%;float:center" | ||
! | !style="background-color:#c0c0c0;text-align:center;font-size:12px;width:120"|Item | ||
! | !style="background-color:#c0c0c0;text-align:center;font-size:12px;width:125"|Ingredients | ||
! | !style="background-color:#c0c0c0;text-align:center;font-size:12px;width:160"|Requirements | ||
|- | |- | ||
| [[File:Mythril Shard KHII.png|x20px]] [[Mythril Shard]] || [[File:Dense Stone KHII.png|x20px]] [[Dense Stone]] x 1<br>[[File:Dense Shard KHII.png|x20px]] [[Dense Shard]] x 3<br>[[File:Twilight Stone KHII.png|x20px]] [[Twilight Stone]] x 1<br>[[File:Twilight Shard KHII.png|x20px]] [[Twilight Shard]] x 3 || | | [[File:Mythril Shard KHII.png|x20px]] [[Mythril Shard]] || [[File:Dense Stone KHII.png|x20px]] [[Dense Stone]] x 1<br>[[File:Dense Shard KHII.png|x20px]] [[Dense Shard]] x 3<br>[[File:Twilight Stone KHII.png|x20px]] [[Twilight Stone]] x 1<br>[[File:Twilight Shard KHII.png|x20px]] [[Twilight Shard]] x 3 || | ||
| Line 577: | Line 577: | ||
===Treasures=== | ===Treasures=== | ||
====Roxas==== | ====Roxas==== | ||
{|cellspacing="0" cellpadding="5" border="1" | {|cellspacing="0" cellpadding="5" border="1" style="float:center;width:700px" | ||
!style="background:#6495ED | !style="background:#6495ED;width:30%"|Item | ||
!style="background:#6495ED | !style="background:#6495ED;width:35%"|Location | ||
!style="background:#6495ED | !style="background:#6495ED;width:35%"|Notes | ||
|- | |- | ||
|[[File:Icon Potion KHII.png|20x20px]] [[Potion]]||Station of Serenity|| | |[[File:Icon Potion KHII.png|20x20px]] [[Potion]]||Station of Serenity|| | ||
| Line 610: | Line 610: | ||
====Sora==== | ====Sora==== | ||
{|cellspacing="0" cellpadding="5" border="1" | {|cellspacing="0" cellpadding="5" border="1" style="float:center;width:700px" | ||
!style="background:#6495ED | !style="background:#6495ED;width:2%"|# | ||
!style="background:#6495ED | !style="background:#6495ED;width:28%"|Item | ||
!style="background:#6495ED | !style="background:#6495ED;width:35%"|Location | ||
!style="background:#6495ED | !style="background:#6495ED;width:35%"|Notes | ||
|- | |- | ||
|1||[[File:Icon Potion KHII.png|20x20px]] [[Potion]]||The Old Mansion|| | |1||[[File:Icon Potion KHII.png|20x20px]] [[Potion]]||The Old Mansion|| | ||
| Line 696: | Line 696: | ||
====Puzzle Pieces==== | ====Puzzle Pieces==== | ||
{|cellspacing="0" cellpadding="5" border="1" | {|cellspacing="0" cellpadding="5" border="1" style="float:center;width:700px" | ||
!style="background:#6495ED | !style="background:#6495ED;width:2%"|# | ||
!style="background:#6495ED | !style="background:#6495ED;width:23%"|Puzzle Piece | ||
!style="background:#6495ED | !style="background:#6495ED;width:35%"|Location | ||
!style="background:#6495ED | !style="background:#6495ED;width:40%"|Notes | ||
|- | |- | ||
|1||Daylight #28||Market Street: Station Heights||Need LV2 Glide and LV2 Aerial Dodge. | |1||Daylight #28||Market Street: Station Heights||Need LV2 Glide and LV2 Aerial Dodge. | ||
| Line 784: | Line 784: | ||
{{tab|o}} | {{tab|o}} | ||
{{tab|Items}} | {{tab|Items}} | ||
{|border=1 cellpadding=2 cellspacing=0 class="sortable" style="text-align:left; font-size:90% | {|border=1 cellpadding=2 cellspacing=0 class="sortable" style="text-align:left; font-size:90%;float:center" | ||
! | !style="background-color:#c0c0c0;text-align:center;font-size:12px;width:120"|Item | ||
! | !style="background-color:#c0c0c0;text-align:center;font-size:12px;width:125"|Munny | ||
! | !style="background-color:#c0c0c0;text-align:center;font-size:12px;width:160"|Shop Level | ||
|- | |- | ||
| [[File:Kupo Coin KHIII.png|x20px]] [[Kupo Coin]] || 400 (Limit: 1) || 3 | | [[File:Kupo Coin KHIII.png|x20px]] [[Kupo Coin]] || 400 (Limit: 1) || 3 | ||
| Line 858: | Line 858: | ||
|} | |} | ||
{{tab|c}}{{tab|Weapons}} | {{tab|c}}{{tab|Weapons}} | ||
{|border=1 cellpadding=2 cellspacing=0 class="sortable" style="text-align:left; font-size:90% | {|border=1 cellpadding=2 cellspacing=0 class="sortable" style="text-align:left; font-size:90%;float:center" | ||
! | !style="background-color:#c0c0c0;text-align:center;font-size:12px;width:120"|Item | ||
! | !style="background-color:#c0c0c0;text-align:center;font-size:12px;width:125"|Munny | ||
! | !style="background-color:#c0c0c0;text-align:center;font-size:12px;width:160"|Shop Level | ||
|- | |- | ||
| [[File:Warhammer KHIII.png|x20px]] [[Warhammer]] || 400 || 2 | | [[File:Warhammer KHIII.png|x20px]] [[Warhammer]] || 400 || 2 | ||
| Line 880: | Line 880: | ||
|} | |} | ||
{{tab|c}}{{tab|Armor}} | {{tab|c}}{{tab|Armor}} | ||
{|border=1 cellpadding=2 cellspacing=0 class="sortable" style="text-align:left; font-size:90% | {|border=1 cellpadding=2 cellspacing=0 class="sortable" style="text-align:left; font-size:90%;float:center" | ||
! | !style="background-color:#c0c0c0;text-align:center;font-size:12px;width:120"|Item | ||
! | !style="background-color:#c0c0c0;text-align:center;font-size:12px;width:125"|Munny | ||
! | !style="background-color:#c0c0c0;text-align:center;font-size:12px;width:160"|Shop Level | ||
|- | |- | ||
| [[File:Shield Belt KHIII.png|x20px]] [[Shield Belt]] || 200 || 1 | | [[File:Shield Belt KHIII.png|x20px]] [[Shield Belt]] || 200 || 1 | ||
| Line 908: | Line 908: | ||
|} | |} | ||
{{tab|c}}{{tab|Accessories}} | {{tab|c}}{{tab|Accessories}} | ||
{|border=1 cellpadding=2 cellspacing=0 class="sortable" style="text-align:left; font-size:90% | {|border=1 cellpadding=2 cellspacing=0 class="sortable" style="text-align:left; font-size:90%;float:center" | ||
! | !style="background-color:#c0c0c0;text-align:center;font-size:12px;width:120"|Item | ||
! | !style="background-color:#c0c0c0;text-align:center;font-size:12px;width:125"|Munny | ||
! | !style="background-color:#c0c0c0;text-align:center;font-size:12px;width:160"|Shop Level | ||
|- | |- | ||
| [[File:Ability Ring KHIII.png|x20px]] [[Ability Ring]] || 300 || 1 | | [[File:Ability Ring KHIII.png|x20px]] [[Ability Ring]] || 300 || 1 | ||
| Line 936: | Line 936: | ||
|} | |} | ||
{{tab|c}}{{tab|Materials}} | {{tab|c}}{{tab|Materials}} | ||
{|border=1 cellpadding=2 cellspacing=0 class="sortable" style="text-align:left; font-size:90% | {|border=1 cellpadding=2 cellspacing=0 class="sortable" style="text-align:left; font-size:90%;float:center" | ||
! | !style="background-color:#c0c0c0;text-align:center;font-size:12px;width:120"|Item | ||
! | !style="background-color:#c0c0c0;text-align:center;font-size:12px;width:125"|Munny | ||
! | !style="background-color:#c0c0c0;text-align:center;font-size:12px;width:160"|Shop Level | ||
|- | |- | ||
| [[File:Meat KHIII.png|x20px]] [[Veal]] || 20 || 2 | | [[File:Meat KHIII.png|x20px]] [[Veal]] || 20 || 2 | ||
| Line 1,063: | Line 1,063: | ||
===Drops=== | ===Drops=== | ||
{|cellspacing="0" cellpadding="5" border="1" | {|cellspacing="0" cellpadding="5" border="1" style="float:center;width:200px" | ||
!style="background:#6495ED"|Item | !style="background:#6495ED"|Item | ||
|- | |- | ||
| Line 1,076: | Line 1,076: | ||
===Treasures=== | ===Treasures=== | ||
{|cellspacing="0" cellpadding="5" border="1" | {|cellspacing="0" cellpadding="5" border="1" style="float:center;width:700px" | ||
!style="background:#6495ED | !style="background:#6495ED;width:2%"|# | ||
!style="background:#6495ED | !style="background:#6495ED;width:23%"|Item | ||
!style="background:#6495ED | !style="background:#6495ED;width:35%"|Location | ||
!style="background:#6495ED | !style="background:#6495ED;width:40%"|Notes | ||
|- | |- | ||
|1||[[Map: The Neighborhood]]||Tram Common||Near noticeboard. | |1||[[Map: The Neighborhood]]||Tram Common||Near noticeboard. | ||
| Line 1,104: | Line 1,104: | ||
====Ingredients==== | ====Ingredients==== | ||
{|cellspacing="0" cellpadding="5" border="1" | {|cellspacing="0" cellpadding="5" border="1" style="float:center;width:700px" | ||
!style="background:#6495ED | !style="background:#6495ED;width:25%"|Ingredient | ||
!style="background:#6495ED | !style="background:#6495ED;width:30%"|Location | ||
!style="background:#6495ED | !style="background:#6495ED;width:10%"|Appearance rate | ||
!style="background:#6495ED | !style="background:#6495ED;width:35%"|Notes | ||
|- | |- | ||
|Chocolate x2 / Butter x2||Tram Common||100%||In food box; Veal x3 when gathering ingredients for Little Chef. | |Chocolate x2 / Butter x2||Tram Common||100%||In food box; Veal x3 when gathering ingredients for Little Chef. | ||
| Line 1,148: | Line 1,148: | ||
===Lucky Emblems=== | ===Lucky Emblems=== | ||
{|cellspacing="0" cellpadding="5" border="1" | {|cellspacing="0" cellpadding="5" border="1" style="width:600px;float:center" | ||
!style="background:#6495ED | !style="background:#6495ED;width:30px"|# | ||
!style="background:#6495ED | !style="background:#6495ED;width:200px"|Image | ||
!style="background:#6495ED | !style="background:#6495ED;width:120px"|Location | ||
!style="background:#6495ED | !style="background:#6495ED;width:250px"|Notes | ||
|- | |- | ||
|1||[[File:Lucky Emblem (Twilight Town) 01 KHIII.png|200px]]||Tram Common||On wall next to Gummi Shop. | |1||[[File:Lucky Emblem (Twilight Town) 01 KHIII.png|200px]]||Tram Common||On wall next to Gummi Shop. | ||
Revision as of 04:58, 1 June 2020
Kingdom Hearts Chain of Memories
Sora's Story
| Type | Item | Location | Notes |
|---|---|---|---|
| Enemy Card | Vexen | Room of Beginnings | Defeat Vexen |
| Roxas[KH Re:CoM] | Room of Rewards | 2nd Reward | |
| Ansem[KH Re:CoM] | Bounty | 2nd Bounty[1] | |
| Sleight | Firaga Break[KH CoM] | Bounty | 1st Bounty |
| Warpinator[KH Re:CoM] | Bounty | 1st Bounty | |
| Warp[KH CoM] | Room of Rewards | 1st Reward | |
| Stardust Blitz[KH Re:CoM] | Room of Rewards | 1st Reward |
- ^ Available after clearing Reverse/Rebirth
- ^ Jump up to: a b c d e f g h i j k l m n o p q r s t u v w x y z aa ab ac ad ae af ag ah ai aj ak al am an ao ap aq ar Card needs to be unlocked first.
- ^ Jump up to: a b c d Available after defeating Marluxia.
- ^ Jump up to: a b c d e f g h PS2 version of Kingdom Hearts Re:Chain of Memories only.
- ^ Jump up to: a b c d e f g h HD version of Kingdom Hearts Re:Chain of Memories only.
- ^ Jump up to: a b When fighting a Black Fungus.
- ^ Jump up to: a b Does not appear if you already have a Key to Rewards, or if you have opened both treasure chests in the Room of Rewards in all worlds.
- ^ Beginner Mode
- ^ Standard Mode
- ^ Proud Mode
Reverse/Rebirth
Kingdom Hearts II
Battle Levels
Shop
Wantz's Item Shop
|
Biggs' Armor Shop
Jessie's Accessory Shop
|
Wallace's Weapon Shop
|
Elmina's Workshop
|
Mini-games
- Struggle can be replayed in the Sandlot while Twilight Town is available.
- Three summer job mini-games, Mail Delivery, Cargo Climb, and Grandstander, can be found on the bulletin board at Station Plaza.
- The other three summer job games, Poster Duty, Bumble Buster, and Junk Sweep, can be found on the board at Tram Common.
- There is also a Skateboarding game, SB Street Rave.
When collecting munny for Roxas to go to the beach, going to the station with at least 1,200 munny grants Roxas an AP +2 boost. Alternatively, Roxas says "I think that's enough munny" upon collecting 2,000 munny and the boost is granted without going to the station.
Missions
- Event Quests
- Mail Delivery
- Try again
- Complete within 14 seconds
- Cargo Climb
- Try again
- Complete within 15 seconds
- Grandstander
- Try again
- Complete with 100 or more points
- Poster Duty
- Try again
- Complete within 30 seconds
- Bumble-Buster
- Try again
- Complete within 10 seconds
- Junk Sweep
- Try again
- Complete with less than 6 points
- The Struggle: Hayner
- Give it a try
- Win by a margin of 100 or more points
- The Struggle: Setzer
- Give it a try
- Win by a margin of 150 or more points
- The Struggle: Seifer
- Give it a try
- Win by a margin of 200 or more points
- SB Street Rave
- Give it a try
- Finish with 1,000 or more points
- Mushroom XIII: No. 7[KH II FM]
- Challenge to a duel
- Complete within 10 seconds
- Mushroom XIII: No. 8[KH II FM]
- Challenge to a duel
- Complete with a score of 85 or more
- Mushroom XIII: No. 12[KH II FM]
- Challenge to a duel
- Complete with a score of 40 or more
Treasures
Roxas
| Item | Location | Notes |
|---|---|---|
| Station of Serenity | ||
| Station of Calling | ||
| Sunset Terrace | ||
| Sunset Terrace | ||
| Sunset Terrace | ||
| Sunset Terrace | ||
| Mansion: Foyer | ||
| Mansion: Foyer | ||
| Mansion: Foyer | ||
| Mansion: Dining Room | ||
| Mansion: Dining Room | ||
| Mansion: Library | ||
| Mansion: Basement Corridor |
Sora
| # | Item | Location | Notes |
|---|---|---|---|
| 1 | The Old Mansion | ||
| 2 | The Old Mansion | ||
| 3 | The Woods | ||
| 4 | The Woods | ||
| 5 | The Woods | ||
| 6 | Market Street: Tram Common | ||
| 7 | Market Street: Tram Common | ||
| 8 | Market Street: Tram Common | ||
| 9 | Market Street: Tram Common | ||
| 10 | Market Street: Tram Common | ||
| 11 | Market Street: Tram Common | ||
| 12 | Market Street: Tram Common | ||
| 13 | Central Station | ||
| 14 | Central Station | ||
| 15 | Central Station | ||
| 16 | The Tower | ||
| 17 | The Tower | ||
| 18 | The Tower | ||
| 19 | Tower: Entryway | ||
| 20 | Tower: Entryway | ||
| 21 | Tower: Sorcerer's Loft | ||
| 22 | Tower: Wardrobe | ||
| 23 | Underground Concourse | ||
| 24 | Underground Concourse | ||
| 25 | Underground Concourse | ||
| 26 | Underground Concourse | ||
| 27 | Tunnelway | ||
| 28 | Tunnelway | ||
| 29 | Sunset Terrace | ||
| 30 | Sunset Terrace | ||
| 31 | Sunset Terrace | ||
| 32 | Sunset Terrace | ||
| 33 | Mansion: Foyer | ||
| 34 | Mansion: Foyer | ||
| 35 | Mansion: Foyer | ||
| 36 | Mansion: Dining Room | ||
| 37 | Mansion: Dining Room | ||
| 38 | Mansion: Library | ||
| 39 | Mansion: Basement Corridor |
Puzzle Pieces
| # | Puzzle Piece | Location | Notes |
|---|---|---|---|
| 1 | Daylight #28 | Market Street: Station Heights | Need LV2 Glide and LV2 Aerial Dodge. |
| 2 | Daylight #27 | Market Street: Tram Common | Ride the tram to reach it on the Synthesis shop roof. |
| 3 | Frontier #5 | Market Street: Tram Common | On top of the northernmost building's rooftop. |
| 4 | Frontier #1 | Station Plaza | To the right of the doors to the station in the northeast corner. |
| 5 | Sunset #8 | Sunset Terrace | At the top waterfall. Need LV2 High Jump and LV2 Aerial Dodge. |
| 6 | Sunset #7 | Sunset Terrace | On top of lone building near the track. |
| 7 | Sunset #2 | Sunset Hill | Jump off the top of the hill. |
| 8 | Sunset #13 | Sunset Hill | On bench next to the mini clock tower. |
| 9 | Daylight #10 | The Old Mansion | Need Glide and LV2 Aerial Dodge. Atop column. |
| 10 | Daylight #22 | Mansion: Foyer | Need LV2 Glide. |
| 11 | Daylight #32 | Mansion: Foyer | |
| 12 | Sunset #24 | Mansion: White Room | |
| 13 | Daylight #23 | Mansion: Computer Room | |
| 14 | Daylight #31 | Mansion: Pod Room | |
| 15 | Sunset #15 | The Tower | Need High Jump. Jump off of the staircase leading up to the tower. |
| 16 | Awakening #5 | Tower: Wardrobe | This one is acquired once Sora has obtained his new clothes from the Three Good Fairies. |
| 17 | Sunset #22 | Tower: Wardrobe | |
| 18 | Sunset #31 | Tunnelway | By waterfall. |
| 19 | Sunset #45 | Underground Concourse | Above the pit area. |
| 20 | Sunset #38 | Underground Concourse |
Kingdom Hearts 358/2 Days
Missions
- Mission 00: Mission Mode Tutorial
- Mission 01: Learn mission basics
- Mission 02: Learn the basics of combat
- Mission 03: Learn about your field duties
- Mission 04: Learn how to use magic
- Mission 05: Learn about reconnaissance
- Mission 06: Learn about Limit Breaks
- Mission 07: Collect hearts
- Mission 08: Eliminate the Watchers
- Mission 09: Collect hearts
- Mission 11: Eliminate the Guardian
- Mission 12: Eliminate the Poison Plant
- Mission 13: Eliminate the Deserters
- Mission 14: Eliminate the Darkside
- Mission 17: Eliminate the Tailbunker
- Mission 20: Destroy the shadow globs
- Mission 23: Search for Xion
- Mission 25: Collect Organization emblems
- Mission 37: Vacation
- Mission 44: Eliminate the Avalanche
- Mission 56: Eliminate both giant Heartless
- Mission 59: Collect shining shards
- Mission 74: Search for the impostor
- Mission 75: Eliminate the impostor
- Mission 89: Eliminate six giant Heartless
- Mission 92: Xion
Kingdom Hearts III
Battle Levels
- Before completing Monstropolis and Arendelle: 10
- After completing Monstropolis and Arendelle: 16
- After completing The Final World: 24
Shop
|
Drops
| Item |
|---|
| Writhing Shard |
| Betwixt Shard |
| Twilight Shard |
| Mythril Shard |
Treasures
| # | Item | Location | Notes |
|---|---|---|---|
| 1 | Map: The Neighborhood | Tram Common | Near noticeboard. |
| 2 | Mythril Shard | Tram Common | On ledge near outdoor theater. |
| 3 | Fluorite | Tram Common | At dead end opposite from Underground Conduit entrance. |
| 4 | Fluorite | Tram Common | On roof of building. |
| 5 | Hi-Potion | Tram Common | On ledge near Le Grand Bistrot. |
| 6 | Refocuser | Underground Conduit | Near stairs. |
| 7 | AP Boost | The Woods | Across a fallen tree. |
| 8 | Ether | The Woods | |
| 9 | Fluorite | The Woods | |
| 10 | Defense Boost | The Old Mansion | To the right of the door. |
Ingredients
| Ingredient | Location | Appearance rate | Notes |
|---|---|---|---|
| Chocolate x2 / Butter x2 | Tram Common | 100% | In food box; Veal x3 when gathering ingredients for Little Chef. |
| Apricot x2 / Pear x2 | Tram Common | 100% | In basket; Lemon x3 when gathering ingredients for Little Chef. |
| Lemon x2 / Pear x2 | Tram Common | 100% | In basket; Celery x3 when gathering ingredients for Little Chef. |
| Caviar x2 / Butter x2 | Tram Common | 100% | In food box; Sole x3 when gathering ingredients for Little Chef. |
| Apricot x2 / Lemon x2 | Tram Common | 100% | In basket; Onion x3 when gathering ingredients for Little Chef. |
| Caviar x2 / Butter x2 | Tram Common | 100% | In food box; Porcini x3 when gathering ingredients for Little Chef. |
| Sole x2 / Eel x2 | Tram Common | 100% | In food box; Butter x3 when gathering ingredients for Little Chef. |
| Chocolate x2 / Caviar x2 | Tram Common | 100% | In food box; Caviar x3 when gathering ingredients for Little Chef. |
| Chocolate x2 / Butter x2 | Tram Common | 100% | In food box; Chocolate x3 when gathering ingredients for Little Chef. |
| Pear x2 / Apple x2 | Tram Common | 100% | In basket; Lemon x3 when gathering ingredients for Little Chef. |
| Caviar x2 / Cornichon x2 | Tram Common | 100% | In food box; Caviar x3 when gathering ingredients for Little Chef. |
| Veal x2 / Sole x2 | Tram Common | 100% | In food box; Sole x3 when gathering ingredients for Little Chef. |
| Lemon x2 / Apple x2 | Tram Common | 100% | In basket; Cloves x3 when gathering ingredients for Little Chef. |
| Porcini x2~3 | The Woods | 100% | Mushroom. |
| Chanterelle x2~3 | The Woods | 100% | Mushroom. |
| Black Trumpet x2~3 | The Woods | 100% | Mushroom. |
| Clover x2~3 | The Woods | 100% | Herb. |
| Celery x2~3 | The Old Mansion | 100% | Herb. |
Lucky Emblems
| # | Image | Location | Notes |
|---|---|---|---|
| 1 | 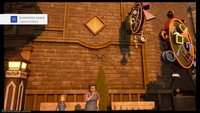 |
Tram Common | On wall next to Gummi Shop. |
| 2 | 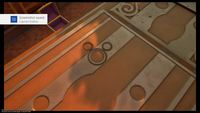 |
Tram Common | On roof of tram. |
| 3 | 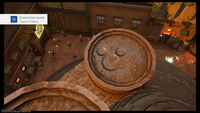 |
Tram Common | On Moogle Shop roof. |
| 4 | 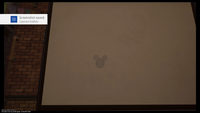 |
Tram Common | On movie screen. Available once the movie is finished. |
| 5 | 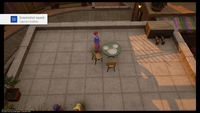 |
Tram Common | On table on rooftop terrace. |
| 6 | 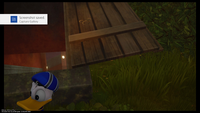 |
The Woods | On door to Underground Conduit. |
| 7 | 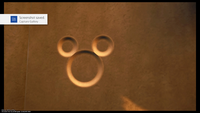 |
The Woods | On wall near Underground Conduit. |
| 8 | 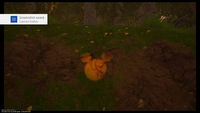 |
The Woods | On hill. |
| 9 | 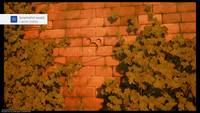 |
The Old Mansion | On outer wall. |


