Game:Master Xehanort
| Master Xehanort | ||||||||||||
|---|---|---|---|---|---|---|---|---|---|---|---|---|
| Japanese | マスター・ゼアノート | |||||||||||
| Rōmaji | Masutā Zeanōto | |||||||||||
| Games | Kingdom Hearts Birth by Sleep Kingdom Hearts III Kingdom Hearts Melody of Memory | |||||||||||
| ||||||||||||
| ||||||||||||
| Location | HP | EXP | Strength | Defense | |
| Keyblade Graveyard | 900 | 0 | 26 | 15 | |
| Physical | Fire | Blizzard | Thunder | Dark | Other |
| x1.0 | x1.0 | x1.0 | x1.0 | x0.75 | x1.0 |
| Stun | Freeze | Mini | Blind | Ignite | Confuse |
| x0 | x0 | x0 | x0 | x0 | x0 |
| Bind | Poison | Slow | Stop | Sleep | Death |
| x0 | x0 | x0 | x0 | x0 | x0 |
| Zero Gravity | Magnet | Warp | |||
| x0 | x0 | x0
| |||
| Rewards | |||||
| Maximum HP UP | |||||
| World(s) | |||||
| Keyblade Graveyard | |||||
| Location | HP | Strength | Defense | EXP | |||||||
| Scala ad Caelum | 3000 | 63 | 32 | 0 | |||||||
| Physical | Fire | Blizzard | Thunder | Water | |||||||
| ×1.0 | ×0.7 | ×0.7 | ×0.7 | ×0.7 | |||||||
| Aero | Dark | Neutral | Rapid-fire | ||||||||
| ×0.7 | ×0.5 | ×1.0 | ×0.5 | ||||||||
| Freeze | Electrify | Stun | Hunny | ||||||||
| ✕ | ✕ | ✕ | ✕ | ||||||||
| Reaction Endurance |
Revenge Value |
Attraction Magnification |
Damage Limit | ||||||||
| 0[1]/10[2] | 6 | — | 24 | ||||||||
| World(s) | |||||||||||
| Scala ad Caelum | |||||||||||
| Type | Boss |
| Music Stage | |
| Dark Domination | |
| Armored Xehanort | |||||||
|---|---|---|---|---|---|---|---|
| Japanese | アーマー・ゼアノート | ||||||
| Rōmaji | Āmā Zeanōto | ||||||
| Translation | Armor Xehanort | ||||||
| Game | Kingdom Hearts III | ||||||
| |||||||
| |||||||
| Location | HP | Strength | Defense | EXP | |||||||
| Scala ad Caelum | 3600 | 63 | 32 | 0 | |||||||
| Physical | Fire | Blizzard | Thunder | Water | |||||||
| ×1.0 | ×1.0 | ×1.0 | ×1.0 | ×1.0 | |||||||
| Aero | Dark | Neutral | Rapid-fire | ||||||||
| ×1.0 | ×0.7 | ×1.0 | ×0.5 | ||||||||
| Freeze | Electrify | Stun | Hunny | ||||||||
| ✕ | ✕ | ✕ | ✕ | ||||||||
| Reaction Endurance |
Revenge Value |
Attraction Magnification |
Damage Limit | ||||||||
| 0 | 10 | ×0.3 | 24 | ||||||||
| World(s) | |||||||||||
| Scala ad Caelum | |||||||||||
| Master Xehanort's Recreated Data | |||||||
|---|---|---|---|---|---|---|---|
| Japanese | マスター・ゼアノートの再現データ | ||||||
| Rōmaji | Masutā Zeanōto no Saigen Dēta | ||||||
| Game | Kingdom Hearts III Re Mind | ||||||
| |||||||
| Location | HP | Strength | Defense | EXP | |||||||
| Radiant Garden (Garden of Assemblage) |
3000 | 0 | |||||||||
| Physical | Fire | Blizzard | Thunder | Water | |||||||
| ×1.0 | ×0.5 | ×0.5 | ×0.5 | ×0.5 | |||||||
| Aero | Dark | Neutral | Rapid-fire | ||||||||
| ×0.5 | ×0.5 | ×0.6 | ? | ||||||||
| Freeze | Electrify | Stun | Hunny | ||||||||
| ✕ | ✕ | ✕ | ✕ | ||||||||
| Reaction Endurance |
Revenge Value |
Attraction Magnification |
Damage Limit | ||||||||
| ? | 8.5 | — | ?
| ||||||||
| Rewards | |||||||||||
| Master Belt | |||||||||||
| World(s) | |||||||||||
| Radiant Garden | |||||||||||
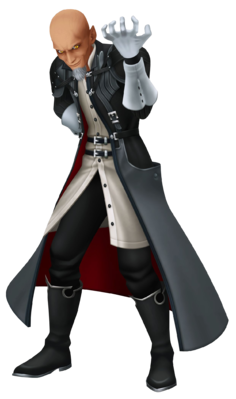
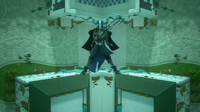
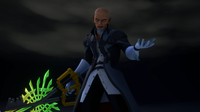
Master Xehanort appears as a boss in Kingdom Hearts Birth by Sleep. In Terra's story, he is fought twice in a row. The first fight is against both Master Xehanort and Vanitas, but the fight is ended prematurely, and the second fight is the penultimate fight of Terra's story: a one-on-one duel between Terra and Master Xehanort.
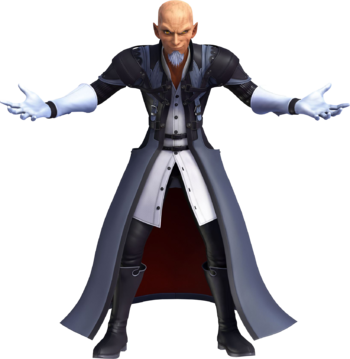
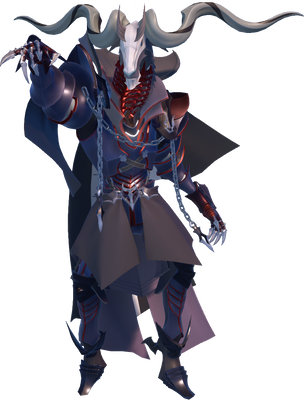
Master Xehanort serves as the final boss of Kingdom Hearts III, where he is fought by Sora and the party in Scala ad Caelum. He is fought twice in a row. The first fight is against him in his armored form and the second fight is against him while he wields the legendary χ-blade. A data replica of him is also a optional boss in Kingdom Hearts III Re Mind.
Master Xehanort serves as the final boss of Kingdom Hearts Melody of Memory, a memory created from within Kairi's heart, where he is fought by Sora.
Strategy[edit]
Kingdom Hearts Birth by Sleep[edit]
First Battle[edit]
Terra will fight both Master Xehanort and Vanitas two-on-one. Vanitas should be the primary target as Xehanort will mostly dodge and keep a distance from Terra. Xehanort isn't very difficult and after sustaining minor damage, the battle will end. On the PS4 version, Vanitas's HP has to be fully depleted in order to end the battle.
Second Battle[edit]
The second battle is the true battle against Master Xehanort. Like the previous battle, Xehanort will keep a distance, but now has access to wide-ranged magic spells. All of his attacks, including magic-based ones, can be dodged with the right timing. Cure commands and Shotlocks ease this battle significantly.
| Technique | Element | Status | Power | Block? | ||
|---|---|---|---|---|---|---|
| 4-part Combo (4連コンボ 4-ren Konbo) |
(slash) | Physical | — | 0.5 (3 times) | O
| |
| (thrust) | Physical | — | 1.0
|
O | ||
| (ice block) | Blizzard | — | 1.0 | △ | ||
| Quickly slashes three times, then either thrusts or shoots an ice block. Sometimes Xehanort will warp closer before attacking. | ||||||
| Blizzaga Shot (ブリザガ弾 Burizaga-dan) |
Blizzard | — | 1.5 (3 times) | △ | ||
| Fires ice bullets in three directions. | ||||||
| Thundaga (サンダガ Sandaga) |
Thunder | — | 1.5 (per hit) | △ | ||
| Summons powerful lightning around the opponent. | ||||||
| Rising Ground (ライジンググランド Raijingu Gurando) |
Neutral | — | 1.5 | X | ||
| Instantly raises the ground beneath the opponent's feet.
| ||||||
| Only used in the second battle. | ||||||
| Blade Tornado (ブレードトルネード Burēdo Torunēdo) |
Neutral | — | 0.5 (per hit) | X | ||
| Summon a bunch of Keyblades to attack the opponent.
| ||||||
| Only used in the second battle. | ||||||
| Ultima Freeze (アルテマフリーズ Arutema Furīzu) |
(grab) | Neutral | — | 1.0 | X
| |
| (cold air) | Blizzard | — | 2.5
|
— | ||
| Warps above the opponent, grabs them with his right hand, pushes them down, then hit them with cold air from his left hand. Repeatedly press the
| ||||||
| Only used in the second battle. Generally after a 4-part Combo. | ||||||
| Guard/Block: △ = Can be blocked; O = Can be blocked and interrupted (melee) or deflected back (projectile); X = Cannot be blocked. | ||||||
Kingdom Hearts III[edit]
Armored Xehanort[edit]
Sora should have several Elixirs equipped, with Curaga set as a shortcut. Stocking a Kupo Coin is also helpful, but beware of its price. The Ultima Weapon will be the most efficient Keyblade to have equipped, but Hero's Origin, Shooting Star, Crystal Snow, Hunny Spout, and Wheel of Fate are also useful for their Formchanges. Xehanort's Flare attacks are all neutral-element, unlike their looks, instead of fire.
After the Replica Xehanorts are defeated, Master Xehanort absorbs them and dons his new Keyblade Armor, then reshapes the plaza into a closed chamber to initiate the beginning phase. Keeping track of Xehanort's position can be difficult due to his speed and the size of the arena. Airstepping can be used to stay close to Xehanort, but can sometimes result in accidentally leaping to one of the flagpoles dotting the arena. Speedy or homing attacks such as Flare Force, Double Arrowguns, Hunny Blasters, Highwind, and Blizzard Blades will be useful for dealing damage, while the defensive Counter Shield can be used for its Wrathful Fist reprisal.
When reduced to 75% of his HP, Xehanort starts using Heavenly Pillar, damaging the arena, and removing all flagpoles. After dodging the scattered flame pillars, Sora should stay behind one of the houses at the bottom of the arena to avoid the Flare Shots, and parry the incoming Continuous Attacks, telegraphed by a sound or visual cue from Xehanort. Once the attack launches Sora into the air a second time, he should stand on a high ground, evade the Siege Flare, and, once the attack is over, perform a Diving Strike on the now vulnerable Xehanort.
After getting his health down to 50%, Xehanort will move the battle underwater, initiating the middle phase. As formchanges cannot be used underwater, Sora will not have access to Rage Form. Sora doesn't have access to shotlocks or counterattacks. He should then wait until Xehanort's combos end before responding with a combo. Regarding avoiding Xehanort's Flare attack, Sora should use the projectile attacks of his combo once, and slide the moment before the explosion happens.
Finally, after reducing his health down to 25%, Xehanort will move the battle to the stormy skies above the flooded town in ruins, initiating the closing phase. Sora will be alone during this phase, and consequently Donald Duck and Goofy cannot heal or support him. Sora should focus on dodging Xehanort's attacks during Heavenly Pillar, counterattacking his Continuous Attacks while evading his Face Claw which usually comes right after an attack, and healing when necessary.
| Technique | Element | Status | Power | Block? | Repel LV | |
|---|---|---|---|---|---|---|
| Continuous Attack (連続攻撃 Renzoku Kōgeki) |
(vertical swing) | Physical | — | 1.0 | △ | 2
|
| (horizontal swing) | Physical | — | 1.0 | △ |
2 | |
| (horizontal spinning swing) | Physical | — | 0.5 (per hit) 1.0 (final spin) |
△ |
2 | |
| (charging thrust) | Physical | — | 0.5 or 1.0 | △ (O when repeated x3) |
2 | |
| (rising thrust) | Physical | — | 1.5 | △ |
2 | |
Unleashes a specific series from among five types of attacks (see below).
| ||||||
| "Continuous Attacks" is Xehanort's primary attack. Telegraphed by his Keyblade glowing gold. During the closing phase, Xehanort will teleport around between each charging thrust. | ||||||
| Knock Down (たたき落とし Tataki Otoshi) |
Physical | — | 1.5 | △ |
2 | |
| Warps near the opponent and performs a downswing with his Keyblade, then knocks them down. | ||||||
| Face Claw (フェイスクロー Feisu Kurō) |
(grab) | — | — | — | X | —
|
| (crash) | Physical | — | 2.0[3] | X | — | |
| Warps to grab at the opponent, and if he catches them, throws them down so they crash into the ground. | ||||||
| Used in the closing phase. Telegraphed by Xehanort warping near Sora with the hand glowing blue. | ||||||
| Flare (フレア Furea) |
Neutral | — | 1.0 | △ |
— | |
| Converges flames on the opponent's position. The flames explode after drawing in the opponent. | ||||||
| Siege Flare (囲みフレア Kakomi Furea) |
Neutral | — | — (1.0 for everyone but Sora) | X | — | |
| Generates eight green fireballs surrounding Sora. The fireballs revolve around Sora, then converge and explode, warping him to Armored Xehanort if he's hit. | ||||||
| Used during the opening and closing phases if Sora is far from Xehanort. Leaves Sora wide open to further attacks. He still has a small chance to guard the next attack. | ||||||
| Flare Shot (フレアショット Furea Shotto) |
Neutral | — | 0.35 (per hit) | △ | — | |
| Shoots fireballs in a scatter formation. | ||||||
| Flare Shot is Xehanort's secondary attack. | ||||||
| Flare Pillar (フレアピラー Furea Pirā) |
Neutral | — | 1.5 | △ |
— | |
| Generates a slender pillar of light, then erects a pillar of fire at its position. | ||||||
| Flare Tornado (フレアトルネード Furea Torunēdo) |
(fire pillar) | Neutral | — | 1.5 (per hit) | △ |
—
|
| (tornado) | Neutral | — | 1.0 (per hit) | △ | — | |
| (fireball) | Neutral | — | 0.35 (per hit) | △ | — | |
| Erects four pillars of fire revolving around the opponent, performs "Continuous Attacks" twice using his Keyblade, converges and fuses the pillars of fire into a tornado of flame, then fires three volleys of fireballs. | ||||||
| Used below 40% HP during the underwater phase. Xehanort disappears when the pillars of fire converge until the end of the attack. Attacking Xehanort between two combos may result in the Continuous Attacks ending early. | ||||||
| Heavenly Pillar (ヘヴンリーピラー Hevunrī Pirā) |
(gigantic fire pillar) | Neutral | — | 1.5 (per hit) | X | —
|
| (fire pillar) | Neutral | — | 1.5 (per hit) | △ | — | |
| (fireball) | Neutral | — | 0.35 (per hit) | △ | — | |
| (flames) | Neutral | — | 0.1 (per hit) | X | — | |
| (big bang) | Neutral | — | 2.0 | X | — | |
| (rubble) | Neutral | — | 0.1 (per hit) | △ | — | |
| Erects a gigantic pillar of fire at the center of the plaza, damaging the surroundings, erects pillars of fire several other places similar to Flare Pillar, spreads fireballs similar to Flare Shot several times in a row, and Continuous Attack and rinse and repeat. After a while, erases the gigantic pillar of fire and draws the opponent to the center of the plaza while engulfing their body in flames, using "Siege Flare" if they are far away, then detonates a big bang (which also sprays rubble in the closing phase) after either enough time has passed or Sora is within range. | ||||||
| Used during the opening phase when below 75% HP and at the start of the closing phase. The attack will launch Sora into the air twice (once at the start, and a second time near the end of the first part of the attack), so Glide can be used to avoid the pillars. The first pillar is always placed at Sora's position. Xehanort will hide within the central pillar, only emerging to perform "Continuous Attacks". Dodge Roll or Air Slide can be used to avoid being sucked in to the warping fireballs and the big bang. After using this attack, Xehanort will be vulnerable for a short period. During the opening phase, this attack removes the flagpoles scattered across the arena as well.
| ||||||
| The Armored Xehanort starts the middle underwater phase when reduced to 50% HP, and the closing phase when reduced to 25% HP. The Deadly Blow EZ Code can only reduce Xehanort's HP to 1 unless if at the closing phase, and his HP will be restored to 50% or 25% at the start of each respective phase. | ||||||
| Guard/Block: △ = Can be blocked; O = Can be blocked and interrupted (melee) or deflected back (projectile); X = Cannot be blocked. | ||||||
Final Battle[edit]
With his armor destroyed, Xehanort flees to the top of the tower with Sora and the party in pursuit. Cornered, Xehanort summons the χ-blade and engages the party in one grand final battle. Like the previous battle, Sora should equip Elixirs and a Kupo Coin for healing (if not used up yet), and the Ultima Weapon if possible for offense.
Armed with the legendary χ-blade, Xehanort has an arsenal of powerful attacks at his disposal. Sora should focus on defense, as "Knock Down" will prevent him from landing attacks easily. Sora should also be close to Xehanort as much as possibly to prepare for "Call Calamity". While Xehanort uses it occasionally, it is his most dangerous attack and even getting hit by blizzaza can cause devastating damage to Sora. It comes out fast and if Sora is too far when Xehanort throws the χ-blade, it will halt in front of him and activate the -za spell sequence immediately meaning Sora has no choice but to withstand it. The only way to avoid this is to stay very close to Xehanort to properly block the χ-blade throw. Successfully blocking the attack allows for Sora to follow up with a reprisal. Reprisals such Counter Blast and Wrathful Flurry are useful for injecting damage, as well as speedy Formchanges like Highwind, Blizzard Blades, Twin Yo-Yos, and Nano Arms, or homing techniques like Flare Force.
After losing seven and a half health bars, Xehanort will initiate the second phase of the battle by summoning Kingdom Hearts via "Ascension", then immediately launch into "Dark Shooting". He will continue employing his earlier techniques, albeit enhanced via "Ascension".
After four more of his health bars are depleted, Xehanort will use the power of Kingdom Hearts to steal Sora's light, forcing him into a version of Rage Form that cannot terminate or use Riskcharge. In order to return to normal, Sora must attack Xehanort to force him to drop orbs of light which both fill the Situation Gauge and restore HP. During this portion, Xehanort cannot be directly damaged, but will continue to use his enhanced attacks. After filling the Situation Gauge, Sora can use "Return to the Light" to attack Xehanort and revert back to normal. Xehanort will respond with "XIII Combo", then continue attacking as normal. During "XIII Combo", Xehanort will send several shadowy clones to attack Sora before shooting an unblockable laser beam. Sora must block the shadows first and dodge just as a laser comes out. I-frames from the reprisals can help as well but during the final part of the barrage, Xehanort will shoot 4 beams before following up with one one larger beam so Sora has no choice but to dodge in that order. If enough time passes without advancing to the final phase, Xehanort will steal Sora's light again, forcing Sora to retrieve it once more.
Once Xehanort is down to 1 HP, Sora can use "Last Ray". However, Xehanort quickly counters and retaliates with a beam of darkness that seemingly kills Sora (displayed as reduced to 1HP). Sora can then use "Trinity", ending the fight.
| Technique | Element | Status | Power | Block? | Repel LV | |
|---|---|---|---|---|---|---|
| Continuous Attack (連続攻撃 Renzoku Kōgeki) |
(vertical swing) | Physical | — | 0.5 |
△ |
2
|
| (horizontal swing) | Physical | — | 0.5 |
△ |
2 | |
| (diagonal swing) | Physical | — | 0.5 |
△ |
2 | |
| (upswing) | Physical | — | 0.5 or 1.0 |
△ |
2 | |
| (halo) | Dark | — | 0.5 | △ | — | |
Unleashes a specific series of four types of attacks while holding the χ-blade (see below). While "Ascension" is active, the χ-blade will also release halos that deal dark damage.
| ||||||
| Knock Down (たたき落とし Tataki Otoshi) |
Physical | — | 1.0 or 1.5 | △ |
2 | |
| Warps near the opponent and performs a downswing with the χ-blade while somersaulting, then knocks them down. | ||||||
| Xehanort moves through Keyhole-shaped portals when using Knock Down. He uses Knock Down very frequently, and the warping makes it difficult to land hits on Xehanort. | ||||||
| Call Calamity (コール・カラミティ Kōru Karamiti) |
(weapon) | Physical | — | 1.0 | O[4] | 2
|
| (cold air) | Blizzard | Freeze (100%/3s) | 0.5 (per hit) | X | — | |
| (fireball) | Fire | — | 1.0 (per hit) | △ | — | |
| (thunderbolt) | Thunder | — | 1.0 (per hit) | X | — | |
| Releases cold air from the thrown χ-blade, smashes three fireballs together on Sora, and finally looses three lightning strikes on the opponents. | ||||||
| Call Calamity can be nullified with a Block before the weapon touches the ground. Xehanort disappears after it does so. The weapon is targettable. | ||||||
| Dark Shooting (ダークシューティング Dāku Shūtingu) |
Dark | — | 1.0 (per hit) | △ |
— | |
| Fires dark shots one after another which fly after the opponent. | ||||||
| Always used at the start of the second phase and thereafter. The shots can be blocked and countered successively while near Xehanort. | ||||||
| Ascension (アセンシオン Asenshion) |
(light pillar) | Dark | — | 1.0 (per hit) | △ | —
|
| (light ring) | Dark | — | 1.5 (per hit) | △ | — | |
| Summons pillars of light run around or forward, or performs "Continous Attacks" while emitting halos using the χ-blade. Furthermore, if the opponent approaches the light at the center of the plaze, it releases a ring of light to its vicinity. | ||||||
| Only used in the second phase, when below 25% HP. Telegraphed by Xehanort raising a platform of light and using Kingdom Hearts to steal Sora's light and force him into Rage Form. Although the attack is made out of beams of light, the attack deals dark damage. | ||||||
| XIII Combo (XIII連撃 XIII Rengeki) |
(avatars) | Physical | — | 0.5 (per hit) | △ | 2
|
| (light ray) | Dark | — | 1.5 (per hit) | X | — | |
| (denser light ray) | Dark | — | 3.0 (per hit) | X | — | |
| Repeatedly attacks using his avatars and light rays, then fires many light rays alongside a denser light ray. | ||||||
| Used once Sora has used Return to the Light. Telegraphed by the sky turning grey and thirteen thrones rising to encircle the plaza. The avatars' attacks can be blocked, but the light rays must be dodged. Although the rays are made out of beams of light, they deal dark damage. Xehanort is left vulnerable at the end. This attack is skipped if Return to the Light brings Xehanort to 1 HP.
| ||||||
| Master Xehanort starts the second phase when reduced to 50% HP. Sora does not have access to Rage Form, except when forced into it by Ascension. The Deadly Blow EZ Code can only reduce his HP to 1 and his HP will be restored to 50% at the start of the second phase. | ||||||
| Guard/Block: △ = Can be blocked; O = Can be blocked and interrupted (melee) or deflected back (projectile); X = Cannot be blocked. | ||||||
| Situation Commands | |||||||
|---|---|---|---|---|---|---|---|
| Situation Command | Element | Power | Description | ||||
| Return to the Light (リターントゥライ Ritān tu Raito, lit. "Return to Light") |
Neutral | 1.0 x6 + 6.0 | During Master Xehanort's Ascension attack, he will drop 1 light orb when attacked, 2 if he flinches from the hit. There are small and large light orbs, determined by the type of attack used. Collecting small orbs recovers 3 HP and fills the Situation Meter by 1, collecting large orbs recovers 5 HP and fills the Meter by 5. Return to the Light can be used after filling the Rage Form's Situation Meter to 100. Dash at Master Xehanort several times before performing a powerful final downwards dash to reclaim Sora's light. | ||||
| Last Ray (ラストレイ Rasuto Rei) |
— | — | Must be used once Master Xehanort's HP is at 1. Release the Keyblade's true power. Sora fires a ray of light, but Xehanort counters it with his own, reducing Sora's HP to 1 and triggering a Game Over-like cutscene. | ||||
| Trinity (トリニティ Torinit) |
— | — | Can be used a few seconds after having pressed buttons during the Game Over-like cutscene triggered by Last Ray. Call upon the bonds of friendship, revive Sora, counter the enemy's ray with Donald and Goofy's help, and defeat Master Xehanort. | ||||
Kingdom Hearts III Re Mind[edit]
Replica Xehanort[edit]
A replica of Master Xehanort in his armor serves as the final boss of the Re Mind scenario. The player can choose to play as Sora with ![]() or Kairi with
or Kairi with ![]() .
.
If playing as Sora, he should be equipped with some elixirs, Ultima Weapon and/or Oathkeeper/Oblivion.
This version of Armored Xehanort fights exactly like the first Armored Xehanort fight with some extra moves. His Keyblade attacks are augmented by the twelve No Names surrounding him, dealing extra damage. Xehanort can summon flame pillars from either above or below to hurt Sora or Kairi. If Xehanort is summoning a pillar from below, a Recusant's Sigil will spawn before summoning a pillar. If he is summoning a pillar from above, some yellow particles will surround the player and lift them up briefly before the attack. Both of these serve as indicators to dodge or block if Sora is using a form with Barrier or if playing as Kairi. Halfway through the battle, Xehanort's armor will break and he will begin his desperation attack. He will summon several planetoids and break them apart with his Keyblades, causing meteors to rain down on Sora and Kairi. The meteors are unblockable so the player should just dodge roll or slide away.
Occasionally, Xehanort will attempt to attack the player during the meteor rain. Simply block the attacks while trying to avoid the meteors. If playing as Sora, a Link can be used to remain unkillable during the attack. If playing as Kairi, it's best to notice the patter of meteors falling and either constantly slide to places where the meteors haven't fallen yet or slide exactly where a meteor just landed. During the second phase Xehanort will often place mines in the air which will leave an explosion trail leading to the player. After reducing Xehanort's HP to 1, a situation command will appear called Connecting Hearts which acts just like the Last Ray command and is required to end the fight.
Data Rematch[edit]
Master Xehanort's data is a recreation of his final boss battle. He retains most of his attacks from the final battle, but this time he can Formchange the χ-blade into a myriad of weapons, such as a double blade that inflicts Leech HP, a pair of chakrams that stun Sora on impact, a whip that has very long range which inflicts Time Break, spinning bombs that can freeze Sora if they explode, spikes that shoot gold lasers from the sky, and massive aerial cannons that fire large red beams. He often combines the Formchanges with his old attacks.
Many of his slashes now unleash spinning bombs that can be guarded at first but will explode, freezing Sora, and as such must be dodged or blocked and dodged. Xehanort also summons spikes that fire multiple beams of light that will fire exactly where Sora is at and as such, must be dodged right before they hit. Xehanort will also make use of giant cannons he manifests in the air that also track Sora before firing. Dodge the moment the cannons finish charging.
Xehanort always starts the battle with these two attacks:
- Dark Shooting and Lasers: Xehanort fires 2 purple meteors, a third meteor that coincides with unblockable gold lasers, 4 more meteors, and finally a wave of gold lasers. The meteors can be blocked, however the gold lasers cannot. Block the first 2 meteors, dodge the third meteor and the gold lasers simultaneously, block the next 4 meteors, and dodge the wave of gold lasers.
- Call Calamity: Xehanort appears and throws the χ-blade at Sora. If it connects or hits the ground, it will unleash a blast of Blizzard magic that will freeze Sora. Xehanort follows up with three fireballs and finishes with two thunderstorms, both combined with gold lasers. The magic and lasers are unblockable, however the thrown χ-blade is blockable if Sora is somewhat close to Xehanort when it's thrown - so when Xehanort appears, run towards him as he winds up the throw for this chance. Blocking the χ-blade reflects it back at Xehanort, cancels the entire magic sequence, and leaves Xehanort open to attack.
- Outside of the initial sequence, this attack can be anticipated if Xehanort disappears for longer than usual. If that happens, have Sora run towards the edge of the arena, and Xehanort should appear close enough that Sora can block the χ-blade.
Xehanort then calls upon Kingdom Hearts to flood the arena with a golden light, and pillars of light start to orbit out from the center of the arena. After a moment, Xehanort sends a shockwave towards Sora, followed by a spinning bomb, a set of 2 spinning bombs, and another single spinning bomb. Dodge the shockwave, and block-then-dodge-away from the bombs, as the bombs will explode unless Sora gets away from them quickly. Airstep to Xehanort as he throws the second single bomb for a chance to attack. After Xehanort has received some damage, the golden light on the arena will fade away.
For the remainder of Xehanort's first phase, he may use any of the above attacks, or any of the following additional attacks:
- Laser combo: Two waves of gold lasers will appear, followed by a third wave that also has a red laser. Dodge all three.
- Physical combo 1: Xehanort rushes in for a downward physical strike with the χ-blade, then an uppercut, and finally a downward strike. All three strikes can be blocked, and reprisaling as Xehanort finishes the uppercut grants a chance to attack. Alternatively, the uppercut can be dodged, and Sora can strike Xehanort as he finishes it.
- Physical combo 2: Xehanort rushes in, but does the uppercut first. Block-then-reprisal it, or dodge-then-strike for a chance to attack.
- Bombs combo: Xehanort throws 6 spinning bombs, one at a time. Dodge each, then airstep to him as he throws the sixth bomb for a chance to attack.
- Bombs into lasers: Xehanort throws one bomb, followed by rushing in for an uppercut physical strike at the same time as gold lasers spawn. Dodge the bomb, then block the uppercut and immediately reprisal for a chance to attack. The invulnerability granted by the reprisal will protect Sora from the gold lasers. Alternatively, dodge the lasers and the uppercut, then strike Xehanort for an opening.
- Red laser combo: Xehanort fires 6 red lasers, one by one. He re-appears in the center of the arena after the second fires, but disappears soon after the fourth fires. Dodge the first three red lasers, then airstep to Xehanort right as the 4th fires for a chance to attack. If Sora airsteps too early and the 4th red laser has not fired yet, strike Xehanort to stagger him, air slide to avoid the 4th red laser, and then airstep back to Xehanort to continue the combo.
At about 7 bars of HP remaining, Xehanort will summon a large red emblem and darken the arena. He will then perform a variant of XIII Combo, firing various gold and red lasers while summoning shadow Xehanorts to attack Sora. Xehanort himself cannot be attacked during this sequence, so focus on surviving.
- First combo: Gold lasers, then 4 shadow strikes. Dodge the lasers, then block the shadow strikes.
- Second combo: Gold lasers, 4 shadow strikes, and a shadow wielding the χ-blade will Formchange it into chakrams, followed by a double-bladed weapon. The chakram strike can stun Sora if it connects, but is blockable, while the double-blade strike is unblockable and will inflict Leech HP if it connects.
- Third combo: Gold lasers, 4 shadow strikes, double-bladed χ-blade, chakrams.
- Fourth combo: 4 shadow strikes, red laser.
- Fifth combo: 4 shadow strikes, 2 spinning bombs.
- Sixth combo: Gold lasers, red laser, 4 shadow strikes.
- Seventh combo: Gold lasers simultaneous with a shadow strike, 4 shadow strikes, double-bladed χ-blade. Jump then dodge the gold lasers, then block the shadow strikes mid-air, and dodge the double-blade strike.
After Xehanort's ultimate attack concludes, he is in his second phase, and adds the following attacks to his arsenal:
- Red laser + bomb + double-blade: Xehanort fires a red laser, followed closely by a bomb, and then a double-blade strike. Dodge each of the three, then strike Xehanort right after the double-blade finishes for a chance to attack.
- Formchange combo 1: Xehanort attacks with a whip, which inflicts Time Break, then chakrams, double-blade twice, chakrams twice, and finally double-blade. The whip and chakrams can be blocked, however the double-blade still cannot be blocked. Strike Xehanort after dodging the last double-blade for a chance to attack.
- Formchange combo 2: Chakrams twice, whip, chakrams, double-blade. Strike after dodging the double-blade for a chance to attack.
Kingdom Hearts Melody of Memory[edit]
Videos[edit]
| Vanitas and Xehanort – Kingdom Hearts Birth by Sleep (Terra) | |
|---|---|
| Armored Xehanort – Kingdom Hearts III | Master Xehanort – Kingdom Hearts III |
| Armored Xehanort – Kingdom Hearts III Re Mind | Master Xehanort's Recreated Data – Kingdom Hearts III Re Mind |
Trivia[edit]
- In Kingdom Hearts III Re Mind, when getting a Game Over against Master Xehanort's data while he is firing cannons or during his Desperation Move, his Game Over quote will be spoken with the voice of Rutger Hauer, his voice actor from the base game, as opposed to Christopher Lloyd's.
Notes and references[edit]
| Original bosses |
|---|
| Riku | Riku Replica | Shadow Roxas | Hostile Program | Lingering Will | Anti-Riku | Data-Riku | Terra | Ventus | Aqua | Braig | Vanitas | Master Eraqus | Master Xehanort | Ventus-Vanitas | Terra-Xehanort | Young Xehanort | Armor of Eraqus | No Heart Phantom Aqua | Anti-Aqua | Master Ava | Master Ira | Master Aced | Master Invi | Master Gula | Darkness | Ephemer & Skuld | Yozora | Vali, Vala, & Vidar | Hringhorn |
