Game:Demyx: Difference between revisions
No edit summary |
BraviDunno (talk | contribs) |
||
| (94 intermediate revisions by 35 users not shown) | |||
| Line 1: | Line 1: | ||
{{game|KH2|FM2}} | {{game|KH2|FM2|UCX}} | ||
{{ | {{suite}} | ||
{{ | {{tab|o-char}}{{tab|Demyx}} | ||
{{Character | |||
{{ | |||
|name=Demyx | |name=Demyx | ||
|katakana=デミックス | |katakana=デミックス | ||
|romaji=Demikkusu | |romaji=Demikkusu | ||
|fr=Demyx (Ennemi) | |fr=Demyx (Ennemi) | ||
|image=[[File:Demyx | |image=[[File:Demyx (Arpeggio) KHII.png|350x400px]] | ||
|game1=Kingdom Hearts II | |game1=Kingdom Hearts II | ||
|type=Organization XIII | |type=Organization XIII | ||
|spec=NobodyBoss | |spec=NobodyBoss | ||
|s1=Demyx | |s1=Demyx Data Rematch | ||
|REability=Water Charge | |REability=Water Charge | ||
|desc=Dramatically boosts power of ice-based attacks, such as Aqua Splash and Blizzard.<br>Resistant to fire, ice, lightning, and special attacks. | |desc=Dramatically boosts power of ice-based attacks, such as Aqua Splash and Blizzard.<br>Immune to ice, and resistant to lightning, and special attacks<ref>Japanese and HD versions.</ref><br>Resistant to fire, ice, lightning, and special attacks.<ref>English PS2 version only.</ref> | ||
|duration=2 reloads | |duration=2 reloads | ||
|CP=80 | |CP=80 | ||
|COMget=[[Atlantica]] [[Room of Rewards]] | |||
|KH2HP1=— | |||
|KH2HP2=1005 | |||
|KH2EXP=0 | |||
|KH2loc1=Olympus Coliseum | |KH2loc1=Olympus Coliseum | ||
| | |KH2enc1=Episode 1 | ||
| | |KH2LV1=16 | ||
| | |KH2loc2=Radiant Garden | ||
| | |KH2enc2=Episode 2 (post-Space Paranoids) | ||
|KH2LV2=30 | |||
|KH2phys=×1.0 | |||
| | |KH2fire=×1.0 | ||
| | |KH2bliz=×0 | ||
|KH2thun=×0.5 | |||
|KH2dark=×0.5 | |||
|KH2neut=×0.5 | |||
|FM2neut=×1.0 | |||
|KH2fire= | |KH2reward='''First'''<br>'''Sora:''' Max HP +5<br>'''Donald:''' [[MP Rage]]<br>'''Goofy:''' Max HP +5<br>Olympus Stone, Secret Ansem Report 5<br><br>'''Second'''<br>'''Sora:''' Armor slot, [[Blizzard]] element<br>'''Donald:''' [[Blizzard Boost]]<br>'''Goofy:''' Max HP +5 | ||
|KH2bliz= | |FM2reward='''First'''<br>'''Sora:''' Max HP +5<br>'''Donald:''' [[MP Rage]]<br>'''Goofy:''' Max HP +4<br>Olympus Stone, Secret Ansem Report 5<br><br>'''Second'''<br>'''Sora:''' Armor slot, [[Blizzard]] element<br>'''Donald:''' [[Blizzard Boost]]<br>'''Goofy:''' Max HP +4 | ||
|KH2thun= | |KH2world=Olympus Coliseum, Radiant Garden | ||
|KH2dark= | |FM2tab=* | ||
| | |KH2battlefile=Tension Rising KHII.ogg | ||
|KH2reward=''' | |KH2battlename=Tension Rising | ||
|KH2world= | |KH2battlefile2=The 13th Dilemma KHII.ogg | ||
|KH2battlename2=The 13th Dilemma | |||
}}{{tab|c}}{{tab|Data Rematch}} | |||
{{ | {{Character | ||
|name=Demyx | |name=Demyx | ||
|katakana=デミックス | |katakana=デミックス | ||
|romaji=Demikkusu | |romaji=Demikkusu | ||
|image=[[File:Demyx KHII.png| | |image=[[File:Demyx KHII.png|350x400px]] | ||
|tab2=KHUχ | |||
|image2=[[File:Demyx (Battle) KHUX.png]] | |||
|game1=Kingdom Hearts II Final Mix | |game1=Kingdom Hearts II Final Mix | ||
|game2=Kingdom Hearts Union χ | |||
|type=Organization XIII | |type=Organization XIII | ||
|spec=NobodyBoss | |spec=NobodyBoss | ||
|s1=Demyx | |s1=Demyx | ||
|KH2HP1=2715 | |KH2HP1=2715 | ||
|KH2EXP1=0 | |KH2EXP1=0 | ||
| | |KH2loc1=Radiant Garden | ||
| | |KH2enc1=Garden of Assemblage | ||
| | |KH2LV1=99FM | ||
|KH2fire= | |KH2phys=×0.5 | ||
|KH2bliz= | |KH2fire=×1.5 | ||
|KH2thun= | |KH2bliz=×0 | ||
|KH2dark= | |KH2thun=×0.5 | ||
| | |KH2dark=×0.5 | ||
|KH2neut=×0.5 | |||
|KH2reward=AP Boost | |KH2reward=AP Boost | ||
|KH2world=Radiant Garden | |KH2world=Radiant Garden | ||
|FM2ex=* | |||
|KH2battlefile=The 13th Dilemma KHII.ogg | |||
|KH2battlename=The 13th Dilemma | |||
}}{{tab|c}}{{tab|Water Form}} | |||
{{Character | |||
|name=Water Form | |||
|katakana=水の分身 | |||
|romaji=Mizu no Bunshin | |||
|image=[[File:Demyx (Water Form) 01 KHII.png|350x400px]] | |||
|jpname=Water Clone | |||
|game1=Kingdom Hearts II | |||
|spec=NobodyBoss | |||
|KH2HP1=3 | |||
|KH2HP2=5 | |||
|KH2HP3=6 | |||
|FM2HP4=— | |||
|KH2EXP1=0 | |||
|KH2EXP2=0 | |||
|KH2EXP3=0 | |||
|FM2EXP4=0 | |||
|KH2loc1=Olympus Coliseum | |||
|KH2enc1=Episode 1 | |||
|KH2LV1=16 | |||
|KH2loc2=Radiant Garden | |||
|KH2enc2=Episode 2 (post-Space Paranoids) | |||
|KH2LV2=30 | |||
|KH2loc3=The World That Never Was | |||
|KH2enc3=Final battle sequence | |||
|KH2LV3=50 | |||
|FM2loc4=Radiant Garden | |||
|FM2enc4=Cavern of Remembrance | |||
|FM2LV4=99FM | |||
|KH2phys=×1.0 | |||
|KH2fire=×1.0 | |||
|KH2bliz=×0 | |||
|KH2thun=×1.0 | |||
|KH2dark=×1.0 | |||
|KH2neut=×1.0 | |||
|FM2neut=×1.0 | |||
|KH2reward=HP prize (1) ×1 | |||
|FM2reward=MP prize (1) ×1 | |||
|KH2world=Olympus Coliseum, Radiant Garden, The World That Never Was | |||
|FM2tab=* | |||
|CKH2HP=0.06 | |||
|CKH2LV1=99 | |||
|CFM2LV1=99FM | |||
|KH2cup1=Hades Paradox Cup | |||
|KH2match11=32 | |||
|KH2num11=4 | |||
|CFM2tab=* | |||
}} | }} | ||
{{tab|c}}{{tab|c}}{{tab|c}} | |||
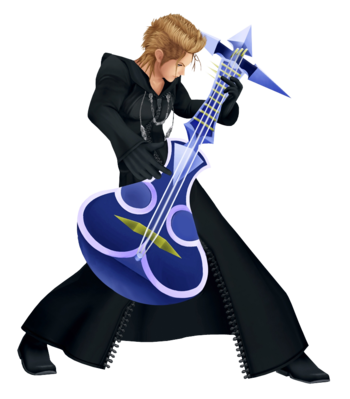
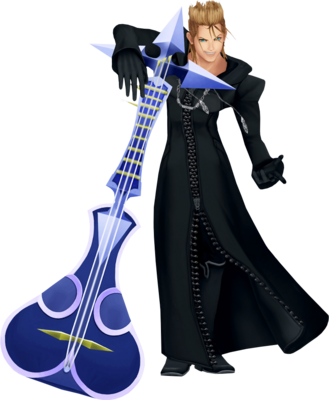
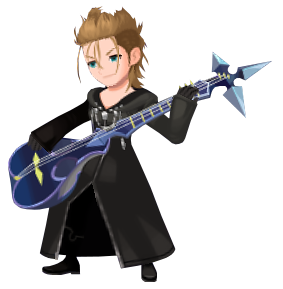
'''[[Demyx]]''' is fought as a boss in ''[[Kingdom Hearts II]]''. He attacks [[Sora]] and his allies in the [[Underworld]], as well as in [[Hollow Bastion]] during the [[Battle of the 1000 Heartless]]. He can be fought again in a data rematch in ''[[Kingdom Hearts II Final Mix]]''. | '''[[Demyx]]''' is fought as a boss in ''[[Kingdom Hearts II]]'' and ''[[Kingdom Hearts Union χ]]''. He attacks [[Sora]] and his allies in the [[Underworld]], as well as in [[Hollow Bastion]] during the [[Battle of the 1000 Heartless]]. He can be fought again in a data rematch in ''[[Kingdom Hearts II Final Mix]]''. | ||
== | ==Strategy== | ||
===''Kingdom Hearts II''=== | ===''Kingdom Hearts II''=== | ||
====First encounter==== | ====First encounter==== | ||
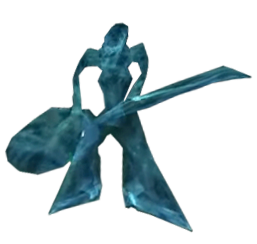
During the first battle, Demyx does not physically attack. Instead, he summons 100 water forms that must be defeated within eighty seconds. Water forms have two shapes, {{w|Eighth note|quaver}} musical notes and Demyx doppelgangers. Striking the Demyx-shaped forms will cause them to transform into note-shaped ones. The note forms can be grabbed with the [[Reaction Command]] '''Wild Dance''', which causes damage to many forms over a large area. It is recommended to use the '''Wild Dance''' Reaction Command as well as the Fire spell as many times as possible. The note-shaped forms will attack if left untouched for some time. Ethers should be stocked to refill the [[MP Gauge]] after a consecutive round of Fire spells, but HP should not be a problem, as defeating the water forms causes HP Balls to drop. | |||
During the first battle, Demyx does not physically attack. Instead, he summons 100 water forms that | |||
====Second encounter==== | ====Second encounter==== | ||
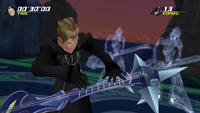
When the fight begins, Demyx summons his "water forms", and Sora must destroy fifty forms in forty seconds. In addition to the '''Wild Dance''' Reaction Command, [[Limit]] commands also help to destroy the water forms quickly. | |||
After the forms are destroyed, Demyx begins his normal attacks. He will leap across the arena | After the forms are destroyed, Demyx begins his normal attacks. He will leap across the arena with spouts of water erupting from the ground in his wake, and summon pillars of water around him. To stop him, try to hit him with a combo finisher before he leaps again, or alternatively counter the water spouts using Reflect. Demyx can leap and summon water even when knocked into the air by a combo, so be careful attacking him in the air. Demyx will also summon a rain of bubbles from above, and fire a bombardment of bubbles at Sora directly. He can also summon several spheres of water around himself, which explode after a short delay. Demyx will often summon two or three note-shaped water forms as back-up during the battle, and while there is no timer, these water forms will attack Sora and can cause heavy damage, although Sora can use the reaction command to destroy them and cause collateral damage to Demyx. | ||
Sora may occasionally get the chance to use the '''Show Stealer''' | [[File:Versus Demyx KHII.png|right|thumb|Demyx using Water Dance at the start of his battle against Sora, Donald, and Goofy in Hollow Bastion.]] | ||
Sora may occasionally get the chance to use the '''Show Stealer''' command—signaled by Demyx marching toward Sora while playing his sitar and quipping "Ain't it a blast?"—which knocks Demyx into the air and stuns him for a short time. This can backfire, however, as attacking Demyx without triggering the '''Show Stealer''' will result in Demyx automatically counterattacking with his sitar and doing major damage. | |||
When he has | When he has been reduced to 50% HP, Demyx will summon ten more water forms that must be defeated in ten seconds, fifteen seconds in the ''Final Mix'' version. Afterward, Demyx resumes his normal attacks but also gains a new technique, Water Finish. He will walk towards Sora, swinging his sitar, summoning walls of water in front of him and behind Sora. If Sora uses Guard against Demyx's sitar, he can sometimes avoid being damaged by the pillars, allowing him to counterattack. | ||
Most of Demyx's attacks knock Sora into the air, so | Most of Demyx's attacks knock Sora into the air, so Aerial Recovery is very useful. It is highly advised to stay away from Demyx until he is open for an attack. For this reason, [[Thunder]] helps greatly, and [[Wisdom Form]] is also useful. | ||
An alternate method is to beat all the water forms in the beginning | An alternate method is to beat all the water forms in the beginning and immediately use Knocksmash. The "Duo Raid" portion knocks Demyx into the air and prevents him from using any attacks. The "Cosmo Boost" portion deals more damage as Goofy flies around hitting him. This combo takes his health down almost completely for an extremely easy win, without using any other magic or Drive forms. However, this method becomes much less effective in ''Final Mix'', as the damage done by Cosmo Boost has been drastically reduced. | ||
====Data Rematch==== | ====Data Rematch==== | ||
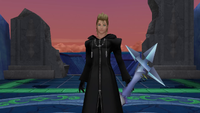
Demyx | [[File:Versus Demyx's Replica Data KHIIFM.png|thumb|right|Demyx's Replica Data appears before Sora in the [[Garden of Assemblage]].]] | ||
Demyx fights in a similar manner to the previous battle, but this time he makes use of more water forms. There are four rounds of water forms at the start, the amount and time limit randomizing among them. The most difficult of the four requires Sora to destroy seventy-five forms in thirty seconds. If Sora physically attacks any of the forms, instead of transforming into a note, it will instead retaliate. What is not immediately known to the player is that a water form hit with '''Blizzaga''' or other finishers now triggers the change into note form, therefore allowing "Wild Dance" to be performed. When reduced to his last health bar, Demyx once again sends out the forms in rounds. The very last of the round is the most difficult, requiring Sora to beat ninety-nine forms in only thirty seconds. Also, Demyx's fountains increase in number and power and some briefly follow Sora for a longer period of time, which somewhat resembles Vexen's Ice Needles Sleight. | |||
It is advisable to stock up on Ethers/Elixirs or any MP-restoring items in the item slots, including Donald and Goofy's, and have Donald and Goofy carry out their attacks very frequently. Disable any Auto Limit support abilities, as this might prevent usage of the Reaction Command "Wild Dance" and might force one into a Limit instead, making it more or less difficult to destroy all the forms in time. The note-shaped water forms do not appear to own their own, forcing the player to have to cast Blizzaga if they wish to use "Wild Dance". '''Firaga''' will also instantly destroy the water forms. Due to the number of individual projectiles, entering [[Limit Form]] and using '''Ragnarok''' can also prove useful. Alternatively, switch to Wisdom Form and use magic-based attacks. '''Reflect''' and '''Fire''' will come in handy—as while in Wisdom Form, casting magic is done at a faster rate and Sora can move around quicker. | |||
Also, be sure to reset the Anti-Points counter to zero before the battle, so as to help prevent Sora from entering Anti Form. However, one attack from Anti Form can destroy a form due to Anti Form dealing Neutral damage as opposed to Physical. While capable of defeating the water forms within the time limits, a method revolving around the use of Anti Form requires a lot of skill and some luck, making it less consistently reliable than simply using Wisdom Form. | |||
Heal when necessary, but prioritize MP for attacks; only use Cure if Donald is KO'd and Sora absolutely must heal. Equipping [[Bond of Flame]] for its [[Fire Boost]] ability and repetitively using Firaga is a fast way of reducing Demyx's HP. | |||
;Demyx | |||
{{Atk-o|KH2}} | |||
{{Atk|col=3|{{nihongo|'''Water Dance'''|水の舞踊|<br>Mizu no Buyō}}|—|—|—|Continuously creates Water Forms; enough must be defeated within a time limit to nullify the attack and prevent a game over.|Always starts with this attack. In the first encounter, Demyx uses this attack only once and the battle ends once nullified. Demyx is invincible during this attack. In the Data Rematch, Demyx uses this attack repeatedly, and his HP cannot drop to 0 until the attack that has him summon 99 Water Forms within 30 seconds is nullified.}} | |||
{{Atk|col=3|{{nihongo|'''Water Column'''|水柱攻撃|<br>Suichū Kōgeki|lit. "Water Column Attack"}}|Blizzard|x0.25|X|Attacks with many water columns in several different patterns.}} | |||
{{Atk-m|col=3|{{nihongo|'''Water Wall'''|水柱の壁|<br>Suichū no Kabe|lit. "Water Column Wall"}}|(Sitar)|Physical|x1.5|△|Creates a water wall and swings sitar at close targets.||(Water Attacks)|Blizzard|x0.25|X}} | |||
{{Atk-m|col=3|{{nihongo|'''Water Whirl'''|水柱乱舞|<br>Suichū Ranbu|lit. "Water Column Wild Dance"}}|(Sitar)|Physical|x0.5|△|Creates water pillars while swinging sitar.||(Water Attacks)|Blizzard|x0.25|X}} | |||
{{Atk-m|col=3|{{nihongo|'''Water Ball Attack'''|水球攻撃|<br>Suikyū Kōgeki}}|(Water Ball)|Blizzard|x0.5|X|Attacks with exploding water balls. Can either cause water balls to rain down or cause them to float in mid-air.||(Explosion)|Blizzard|x0.25|X}} | |||
{{Atk-m|col=3|{{nihongo|'''Rapid Water Ball'''|水球連射|<br>Suikyū Rensha|lit. "Water Ball Rapid-fire"}}|(Sitar)|Physical|x2.0|△|Lobs exploding water balls overhead.||(Water Ball)|Blizzard|x0.5|X|(Explosion)|Blizzard|x0.25|X}} | |||
{{Atk|col=3|{{nihongo|'''Rave'''|ライブ|<br>Raibu|lit. "Live Performance"}}|Physical|x2.5|X|Runs up to Sora, tempts him into performing, then suddenly attacks.}} | |||
{{atk-c}} | |||
{{rc|o}} | |||
{{rc|{{nihongo|'''Show Stealer'''|ライブジャック|<br>Raibu Jakku|lit. "Live Jack"}}|Physical|x1.0|Can be used when near Demyx while he uses Rave.<br>Knock Demyx away during his performance. Acts as a finisher{{FMII}}.}} | |||
{{rc|c}} | |||
;Water Form | |||
{{Atk-o|KH2}} | |||
{{Atk|col=3|{{nihongo|'''Combo Attack'''|連続攻撃|<br>Renzoku Kōgeki}}|Blizzard|x1.0|△|Continuously attacks with its lower half.}} | |||
{{atk-c}} | |||
{{rc|o}} | |||
{{rc|{{nihongo|'''Wild Dance'''|ワイルドダンス|<br>Wairudo Dansu}}|Physical|x1.0|Can be used when near a musical note-shaped Water Form.<br>Grab a Water Form and attack surrounding enemies. Can be used up to three times in succession; the last attack is a swing. The grabbed Water Form vanishes after the attack. Acts as a finisher.}} | |||
{{rc|c}} | |||
==Gallery== | |||
<gallery> | |||
File:Demyx (Water Form) 02 KHII.png|The water form's musical-note shape during Sora's Reaction Command. | |||
</gallery> | |||
==Videos== | ==Videos== | ||
{| | {| class="video" | ||
! Demyx I – ''Kingdom Hearts II'' | |||
! Demyx II – ''Kingdom Hearts II'' | |||
|- | |- | ||
| | | {{#widget:YouTube|id=LdpDxb-cIgA|width=320|height=240}} | ||
| | | {{#widget:YouTube|id=Scln_kAt6F4|width=320|height=240}} | ||
|- | |- | ||
! Demyx's Replica Data – ''Kingdom Hearts II Final Mix'' | |||
|- | |- | ||
| | | {{#widget:YouTube|id=QSkBfAajVYI|width=320|height=240}} | ||
|} | |} | ||
==Notes and | ==Notes and references== | ||
{{reflist | {{reflist}} | ||
{{ | |||
{{NobodyDirectory}} | |||
[[Category:Gameplay]] | |||
Latest revision as of 15:50, 28 December 2024
| Demyx | |||||||||
|---|---|---|---|---|---|---|---|---|---|
| Japanese | デミックス | ||||||||
| Rōmaji | Demikkusu
| ||||||||
| Type | Organization XIII | ||||||||
| Game | Kingdom Hearts II | ||||||||
| |||||||||
| |||||||||
| Enemy Card | ||||
|---|---|---|---|---|

| ||||
| Ability | Duration | Cost | ||
| Water Charge | 2 reloads | 80 CP | ||
| Description | ||||
| Dramatically boosts power of ice-based attacks, such as Aqua Splash and Blizzard. Immune to ice, and resistant to lightning, and special attacks[1] Resistant to fire, ice, lightning, and special attacks.[2] | ||||
| Obtained | ||||
| Atlantica Room of Rewards[3] | ||||
| Location | HP | Strength | Defense | EXP | ||
| Olympus Coliseum Episode 1 |
— | 17 | 9 | 0 | ||
| Radiant Garden Episode 2 (post-Space Paranoids) |
1005 | 29 | 16 | 0 | ||
| Physical | Fire | Blizzard | ||||
| ×1.0 | ×1.0 | ×0 | ||||
| Thunder | Dark | Neutral | ||||
| ×0.5 | ×0.5 | ×0.5
| ||||
| Rewards | ||||||
| First Sora: Max HP +5 Donald: MP Rage Goofy: Max HP +5 Olympus Stone, Secret Ansem Report 5 Second Sora: Armor slot, Blizzard element Donald: Blizzard Boost Goofy: Max HP +5 | ||||||
| World(s) | ||||||
| Olympus Coliseum, Radiant Garden | ||||||
| Location | HP | Strength | Defense | EXP | ||
| Olympus Coliseum Episode 1 |
— | 17 | 9 | 0 | ||
| Radiant Garden Episode 2 (post-Space Paranoids) |
1005 | 29 | 16 | 0 | ||
| Physical | Fire | Blizzard | ||||
| ×1.0 | ×1.0 | ×0 | ||||
| Thunder | Dark | Neutral | ||||
| ×0.5 | ×0.5 | ×1.0
| ||||
| Rewards | ||||||
| First Sora: Max HP +5 Donald: MP Rage Goofy: Max HP +4 Olympus Stone, Secret Ansem Report 5 Second Sora: Armor slot, Blizzard element Donald: Blizzard Boost Goofy: Max HP +4 | ||||||
| World(s) | ||||||
| Olympus Coliseum, Radiant Garden | ||||||
| Demyx | |||||||
|---|---|---|---|---|---|---|---|
| Japanese | デミックス | ||||||
| Rōmaji | Demikkusu
| ||||||
| Type | Organization XIII | ||||||
| Games | Kingdom Hearts II Final Mix Kingdom Hearts Union χ | ||||||
| |||||||
| |||||||
| Location | HP | Strength | Defense | EXP | ||
| Radiant Garden Garden of Assemblage |
2715 | 86 | 51 | 0 | ||
| Physical | Fire | Blizzard | ||||
| ×0.5 | ×1.5 | ×0 | ||||
| Thunder | Dark | Neutral | ||||
| ×0.5 | ×0.5 | ×0.5
| ||||
| Rewards | ||||||
| AP Boost | ||||||
| World(s) | ||||||
| Radiant Garden | ||||||
| Location | HP | Strength | Defense | EXP | ||
| Olympus Coliseum Episode 1 |
3 | 17 | 9 | 0 | ||
| Radiant Garden Episode 2 (post-Space Paranoids) |
5 | 29 | 16 | 0 | ||
| The World That Never Was Final battle sequence |
6 | 45 | 26 | 0 | ||
| Physical | Fire | Blizzard | ||||
| ×1.0 | ×1.0 | ×0 | ||||
| Thunder | Dark | Neutral | ||||
| ×1.0 | ×1.0 | ×1.0
| ||||
| Rewards | ||||||
| HP prize (1) ×1 | ||||||
| World(s) | ||||||
| Olympus Coliseum, Radiant Garden, The World That Never Was | ||||||
| Location | HP | Strength | Defense | EXP | ||
| Olympus Coliseum Episode 1 |
3 | 17 | 9 | 0 | ||
| Radiant Garden Episode 2 (post-Space Paranoids) |
5 | 29 | 16 | 0 | ||
| The World That Never Was Final battle sequence |
6 | 45 | 26 | 0 | ||
| Radiant Garden Cavern of Remembrance |
— | 86 | 51 | 0 | ||
| Physical | Fire | Blizzard | ||||
| ×1.0 | ×1.0 | ×0 | ||||
| Thunder | Dark | Neutral | ||||
| ×1.0 | ×1.0 | ×1.0
| ||||
| Rewards | ||||||
| MP prize (1) ×1 | ||||||
| World(s) | ||||||
| Olympus Coliseum, Radiant Garden, The World That Never Was | ||||||
| Cup | HP | Strength | Defense | ||
| Hades Paradox Cup |
• Match 32: 4 Water Form | ||||
| 11 | 87 | 51 | |||
| Physical | Fire | Blizzard | |||
| ×1.0 | ×1.0 | ×0 | |||
| Thunder | Dark | Neutral | |||
| ×1.0 | ×1.0 | ×1.0 | |||
| Cup | HP | Strength | Defense | ||
| Hades Paradox Cup |
• Match 32: 4 Water Form | ||||
| 11 | 86 | 51 | |||
| Physical | Fire | Blizzard | |||
| ×1.0 | ×1.0 | ×0 | |||
| Thunder | Dark | Neutral | |||
| ×1.0 | ×1.0 | ×1.0 | |||
Demyx is fought as a boss in Kingdom Hearts II and Kingdom Hearts Union χ. He attacks Sora and his allies in the Underworld, as well as in Hollow Bastion during the Battle of the 1000 Heartless. He can be fought again in a data rematch in Kingdom Hearts II Final Mix.
Strategy[edit]
Kingdom Hearts II[edit]
First encounter[edit]
During the first battle, Demyx does not physically attack. Instead, he summons 100 water forms that must be defeated within eighty seconds. Water forms have two shapes, quaver musical notes and Demyx doppelgangers. Striking the Demyx-shaped forms will cause them to transform into note-shaped ones. The note forms can be grabbed with the Reaction Command Wild Dance, which causes damage to many forms over a large area. It is recommended to use the Wild Dance Reaction Command as well as the Fire spell as many times as possible. The note-shaped forms will attack if left untouched for some time. Ethers should be stocked to refill the MP Gauge after a consecutive round of Fire spells, but HP should not be a problem, as defeating the water forms causes HP Balls to drop.
Second encounter[edit]
When the fight begins, Demyx summons his "water forms", and Sora must destroy fifty forms in forty seconds. In addition to the Wild Dance Reaction Command, Limit commands also help to destroy the water forms quickly.
After the forms are destroyed, Demyx begins his normal attacks. He will leap across the arena with spouts of water erupting from the ground in his wake, and summon pillars of water around him. To stop him, try to hit him with a combo finisher before he leaps again, or alternatively counter the water spouts using Reflect. Demyx can leap and summon water even when knocked into the air by a combo, so be careful attacking him in the air. Demyx will also summon a rain of bubbles from above, and fire a bombardment of bubbles at Sora directly. He can also summon several spheres of water around himself, which explode after a short delay. Demyx will often summon two or three note-shaped water forms as back-up during the battle, and while there is no timer, these water forms will attack Sora and can cause heavy damage, although Sora can use the reaction command to destroy them and cause collateral damage to Demyx.
Sora may occasionally get the chance to use the Show Stealer command—signaled by Demyx marching toward Sora while playing his sitar and quipping "Ain't it a blast?"—which knocks Demyx into the air and stuns him for a short time. This can backfire, however, as attacking Demyx without triggering the Show Stealer will result in Demyx automatically counterattacking with his sitar and doing major damage.
When he has been reduced to 50% HP, Demyx will summon ten more water forms that must be defeated in ten seconds, fifteen seconds in the Final Mix version. Afterward, Demyx resumes his normal attacks but also gains a new technique, Water Finish. He will walk towards Sora, swinging his sitar, summoning walls of water in front of him and behind Sora. If Sora uses Guard against Demyx's sitar, he can sometimes avoid being damaged by the pillars, allowing him to counterattack.
Most of Demyx's attacks knock Sora into the air, so Aerial Recovery is very useful. It is highly advised to stay away from Demyx until he is open for an attack. For this reason, Thunder helps greatly, and Wisdom Form is also useful.
An alternate method is to beat all the water forms in the beginning and immediately use Knocksmash. The "Duo Raid" portion knocks Demyx into the air and prevents him from using any attacks. The "Cosmo Boost" portion deals more damage as Goofy flies around hitting him. This combo takes his health down almost completely for an extremely easy win, without using any other magic or Drive forms. However, this method becomes much less effective in Final Mix, as the damage done by Cosmo Boost has been drastically reduced.
Data Rematch[edit]
Demyx fights in a similar manner to the previous battle, but this time he makes use of more water forms. There are four rounds of water forms at the start, the amount and time limit randomizing among them. The most difficult of the four requires Sora to destroy seventy-five forms in thirty seconds. If Sora physically attacks any of the forms, instead of transforming into a note, it will instead retaliate. What is not immediately known to the player is that a water form hit with Blizzaga or other finishers now triggers the change into note form, therefore allowing "Wild Dance" to be performed. When reduced to his last health bar, Demyx once again sends out the forms in rounds. The very last of the round is the most difficult, requiring Sora to beat ninety-nine forms in only thirty seconds. Also, Demyx's fountains increase in number and power and some briefly follow Sora for a longer period of time, which somewhat resembles Vexen's Ice Needles Sleight.
It is advisable to stock up on Ethers/Elixirs or any MP-restoring items in the item slots, including Donald and Goofy's, and have Donald and Goofy carry out their attacks very frequently. Disable any Auto Limit support abilities, as this might prevent usage of the Reaction Command "Wild Dance" and might force one into a Limit instead, making it more or less difficult to destroy all the forms in time. The note-shaped water forms do not appear to own their own, forcing the player to have to cast Blizzaga if they wish to use "Wild Dance". Firaga will also instantly destroy the water forms. Due to the number of individual projectiles, entering Limit Form and using Ragnarok can also prove useful. Alternatively, switch to Wisdom Form and use magic-based attacks. Reflect and Fire will come in handy—as while in Wisdom Form, casting magic is done at a faster rate and Sora can move around quicker.
Also, be sure to reset the Anti-Points counter to zero before the battle, so as to help prevent Sora from entering Anti Form. However, one attack from Anti Form can destroy a form due to Anti Form dealing Neutral damage as opposed to Physical. While capable of defeating the water forms within the time limits, a method revolving around the use of Anti Form requires a lot of skill and some luck, making it less consistently reliable than simply using Wisdom Form.
Heal when necessary, but prioritize MP for attacks; only use Cure if Donald is KO'd and Sora absolutely must heal. Equipping Bond of Flame for its Fire Boost ability and repetitively using Firaga is a fast way of reducing Demyx's HP.
- Demyx
| Technique | Element | Power | Guard? | |||
|---|---|---|---|---|---|---|
| Water Dance (水の舞踊 Mizu no Buyō) |
— | — | — | |||
| Continuously creates Water Forms; enough must be defeated within a time limit to nullify the attack and prevent a game over. | ||||||
| Always starts with this attack. In the first encounter, Demyx uses this attack only once and the battle ends once nullified. Demyx is invincible during this attack. In the Data Rematch, Demyx uses this attack repeatedly, and his HP cannot drop to 0 until the attack that has him summon 99 Water Forms within 30 seconds is nullified. | ||||||
| Water Column (水柱攻撃 Suichū Kōgeki, lit. "Water Column Attack") |
Blizzard | x0.25 | X | |||
| Attacks with many water columns in several different patterns. | ||||||
| Water Wall (水柱の壁 Suichū no Kabe, lit. "Water Column Wall") |
(Sitar) | Physical | x1.5 | △
| ||
| (Water Attacks) | Blizzard | x0.25 | X | |||
| Creates a water wall and swings sitar at close targets. | ||||||
| Water Whirl (水柱乱舞 Suichū Ranbu, lit. "Water Column Wild Dance") |
(Sitar) | Physical | x0.5 | △
| ||
| (Water Attacks) | Blizzard | x0.25 | X | |||
| Creates water pillars while swinging sitar. | ||||||
| Water Ball Attack (水球攻撃 Suikyū Kōgeki) |
(Water Ball) | Blizzard | x0.5 | X
| ||
| (Explosion) | Blizzard | x0.25 | X | |||
| Attacks with exploding water balls. Can either cause water balls to rain down or cause them to float in mid-air. | ||||||
| Rapid Water Ball (水球連射 Suikyū Rensha, lit. "Water Ball Rapid-fire") |
(Sitar) | Physical | x2.0 | △
| ||
| (Water Ball) | Blizzard | x0.5 | X | |||
| (Explosion) | Blizzard | x0.25 | X | |||
| Lobs exploding water balls overhead. | ||||||
| Rave (ライブ Raibu, lit. "Live Performance") |
Physical | x2.5 | X | |||
| Runs up to Sora, tempts him into performing, then suddenly attacks. | ||||||
| Guard/Block: △ = Can be blocked; O = Can be blocked and interrupted (melee) or deflected back (projectile); X = Cannot be blocked. | ||||||
| Reaction Commands | |||||||
|---|---|---|---|---|---|---|---|
| Reaction Command | Element | Power | Description | ||||
| Show Stealer (ライブジャック Raibu Jakku, lit. "Live Jack") |
Physical | x1.0 | Can be used when near Demyx while he uses Rave. Knock Demyx away during his performance. Acts as a finisher[KH II FM]. | ||||
- Water Form
| Technique | Element | Power | Guard? | |||
|---|---|---|---|---|---|---|
| Combo Attack (連続攻撃 Renzoku Kōgeki) |
Blizzard | x1.0 | △ | |||
| Continuously attacks with its lower half. | ||||||
| Guard/Block: △ = Can be blocked; O = Can be blocked and interrupted (melee) or deflected back (projectile); X = Cannot be blocked. | ||||||
| Reaction Commands | |||||||
|---|---|---|---|---|---|---|---|
| Reaction Command | Element | Power | Description | ||||
| Wild Dance (ワイルドダンス Wairudo Dansu) |
Physical | x1.0 | Can be used when near a musical note-shaped Water Form. Grab a Water Form and attack surrounding enemies. Can be used up to three times in succession; the last attack is a swing. The grabbed Water Form vanishes after the attack. Acts as a finisher. | ||||
Gallery[edit]
Videos[edit]
| Demyx I – Kingdom Hearts II | Demyx II – Kingdom Hearts II |
|---|---|
| Demyx's Replica Data – Kingdom Hearts II Final Mix | |
Notes and references[edit]
- ^ Japanese and HD versions.
- ^ English PS2 version only.
- ^ Becomes available after clearing Kingdom Hearts II Final Mix in the original Japanese version, clearing "Sora's Story" and "Reverse/Rebirth" in the original English version, and completing Kingdom Hearts 358/2 Days in Kingdom Hearts HD 1.5 ReMIX.
| Nobodies |
|---|
| Organization XIII |
| I. Xemnas | II. Xigbar | III. Xaldin | IV. Vexen | V. Lexaeus | VI. Zexion | VII. Saïx | VIII. Axel | IX. Demyx | X. Luxord | XI. Marluxia | XII. Larxene | XIII. Roxas |
| Enemy Nobodies |
| Sorcerer - Sniper - Dragoon - Berserker - Assassin - Dancer - Gambler - Reaper - Ninja - Samurai Dusk - Creeper - Specter - Twilight Thorn - Fake Vivi |
| Special Nobodies |
| Naminé - Absent Silhouettes - Organization XIII's Replica Data - Anti-Saïx - Data-Roxas - Data-Naminé |
