[dismiss]
| Site Notice |
|---|
|
Remember to pay a visit to our Discord server and chat with our community! See here for more info. Be sure to check out the KHUX Wiki for the latest on Kingdom Hearts Union χ and Kingdom Hearts Dark Road! Go and pitch in! The KHWiki contains spoilers for all Kingdom Hearts games. Read at your own risk. Please remember not to add information about unreleased games from trailers. |
Game:Olympus: Difference between revisions
From the Kingdom Hearts Wiki, the Kingdom Hearts encyclopedia
Jump to navigationJump to search
Pureautism (talk | contribs) (Treasure #31 and #32 are in Corridors, not Cloud Ridge) |
|||
| (10 intermediate revisions by 3 users not shown) | |||
| Line 8: | Line 8: | ||
===Drops=== | ===Drops=== | ||
{|cellspacing="0" cellpadding="5" border="1" align="center" | {|cellspacing="0" cellpadding="5" border="1" align="center" style="width:200px" | ||
!style=" | !style="{{style|kh3|a}}"|Item | ||
|- | |- | ||
|[[Betwixt Shard]] | |[[File:Icon Material KHIII.png|20px]] [[Betwixt Shard]] | ||
|- | |- | ||
|[[Twilight Shard]] | |[[File:Icon Material KHIII.png|20px]] [[Twilight Shard]] | ||
|- | |- | ||
|[[Mythril Shard]] | |[[File:Icon Material KHIII.png|20px]] [[Mythril Shard]] | ||
|- | |- | ||
|[[Wellspring Shard]] | |[[File:Icon Material KHIII.png|20px]] [[Wellspring Shard]] | ||
|} | |} | ||
===Treasures=== | ===Treasures=== | ||
{|cellspacing="0" cellpadding="5" border="1" align="center" width=" | {|cellspacing="0" cellpadding="5" border="1" align="center" style="width:900px" | ||
!style=" | |-style="{{style|kh3|a}}" | ||
!style=" | !style="width:2%"|# | ||
!style=" | !style="width:33%"|Item | ||
!style=" | !style="width:25%"|Location | ||
!style="width:40%"|Notes | |||
|- | |- | ||
|1||[[Power Ring]]||Ravine||In broken foot statue. | |1||[[File:Icon Accessory KHIII.png|20px]] [[Power Ring]]||Ravine||In broken foot statue. | ||
|- | |- | ||
|2||[[Water Cufflink]]||Ravine||Near broken foot statue. | |2||[[File:Icon Accessory KHIII.png|20px]] [[Water Cufflink]]||Ravine||Near broken foot statue. | ||
|- | |- | ||
|3||[[Potion]]||Cliff Ascent|| | |3||[[File:Icon Item KHIII.png|20px]] [[Potion]]||Cliff Ascent|| | ||
|- | |- | ||
|4||[[Panacea]]||Cliff Ascent|| | |4||[[File:Icon Item KHIII.png|20px]] [[Panacea]]||Cliff Ascent|| | ||
|- | |- | ||
|5||[[Ability Ring]]||Cliff Ascent|| | |5||[[File:Icon Accessory KHIII.png|20px]] [[Ability Ring]]||Cliff Ascent|| | ||
|- | |- | ||
|6||[[Bronze Necklace]]||Cliff Ascent|| | |6||[[File:Icon Accessory KHIII.png|20px]] [[Bronze Necklace]]||Cliff Ascent|| | ||
|- | |- | ||
|7||[[Potion]]||Cliff Ascent|| | |7||[[File:Icon Item KHIII.png|20px]] [[Potion]]||Cliff Ascent|| | ||
|- | |- | ||
|8||[[AP Boost]]||Cliff Ascent||Near Zeus statue. | |8||[[File:Icon Tent KHIII.png|20px]] [[AP Boost]]||Cliff Ascent||Near Zeus statue. | ||
|- | |- | ||
|9||[[Map: Mount Olympus]]||Cliff Ascent|| | |9||[[File:Icon Key Item KHIII.png|20px]] [[Map: Mount Olympus]]||Cliff Ascent|| | ||
|- | |- | ||
|10||[[AP Boost]]||Mountainside|| | |10||[[File:Icon Tent KHIII.png|20px]] [[AP Boost]]||Mountainside|| | ||
|- | |- | ||
|11||[[Fluorite]]||Summit|| | |11||[[File:Icon Material KHIII.png|20px]] [[Fluorite]]||Summit|| | ||
|- | |- | ||
|12||[[Hi-Ether]]||Mountainside|| | |12||[[File:Icon Item KHIII.png|20px]] [[Hi-Ether]]||Mountainside|| | ||
|- | |- | ||
|13||[[AP Boost]]||Alleyway||On ledge. | |13||[[File:Icon Tent KHIII.png|20px]] [[AP Boost]]||Alleyway||On ledge. | ||
|- | |- | ||
|14||[[Potion]]||Alleyway|| | |14||[[File:Icon Item KHIII.png|20px]] [[Potion]]||Alleyway|| | ||
|- | |- | ||
|15||[[Fluorite]]||Agora||Behind building with stairs on either side. | |15||[[File:Icon Material KHIII.png|20px]] [[Fluorite]]||Agora||Behind building with stairs on either side. | ||
|- | |- | ||
|16||[[Ether]]||The Big Olive|| | |16||[[File:Icon Item KHIII.png|20px]] [[Ether]]||The Big Olive|| | ||
|- | |- | ||
|17||[[Mega Potion]]||The Big Olive|| | |17||[[File:Icon Item KHIII.png|20px]] [[Mega-Potion]]||The Big Olive|| | ||
|- | |- | ||
|18||[[Magic Ring]]||Gardens|| | |18||[[File:Icon Accessory KHIII.png|20px]] [[Magic Ring]]||Gardens|| | ||
|- | |- | ||
|19||[[Ether]]||Overlook|| | |19||[[File:Icon Item KHIII.png|20px]] [[Ether]]||Overlook|| | ||
|- | |- | ||
|20||[[Shield Belt]]|| | |20||[[File:Icon Armor KHIII.png|20px]] [[Shield Belt]]||Overlook|| | ||
|- | |- | ||
|21||[[Potion]]||Gardens|| | |21||[[File:Icon Item KHIII.png|20px]] [[Potion]]||Gardens|| | ||
|- | |- | ||
|22||[[AP Boost]]||Overlook|| | |22||[[File:Icon Tent KHIII.png|20px]] [[AP Boost]]||Overlook|| | ||
|- | |- | ||
|23||[[Potion]]||Overlook|| | |23||[[File:Icon Item KHIII.png|20px]] [[Potion]]||Overlook|| | ||
|- | |- | ||
|24||[[Map: Thebes]]||Overlook||Near save point. | |24||[[File:Icon Key Item KHIII.png|20px]] [[Map: Thebes]]||Overlook||Near save point. | ||
|- | |- | ||
|25||[[Fluorite]]||Courtyard||Underneath stairs. | |25||[[File:Icon Material KHIII.png|20px]] [[Fluorite]]||Courtyard||Underneath stairs. | ||
|- | |- | ||
|26||[[Refocuser]]||Courtyard|| | |26||[[File:Icon Item KHIII.png|20px]] [[Refocuser]]||Courtyard|| | ||
|- | |- | ||
|27||[[Potion]]||Courtyard|| | |27||[[File:Icon Item KHIII.png|20px]] [[Potion]]||Courtyard|| | ||
|- | |- | ||
|28||[[Mythril Shard]]||Corridors|| | |28||[[File:Icon Material KHIII.png|20px]] [[Mythril Shard]]||Corridors|| | ||
|- | |- | ||
|29||[[Map: Realm of the Gods]]||Corridors||Near save point. | |29||[[File:Icon Key Item KHIII.png|20px]] [[Map: Realm of the Gods]]||Corridors||Near save point. | ||
|- | |- | ||
|30||[[Refocuser]]||Cloud Ridge|| | |30||[[File:Icon Item KHIII.png|20px]] [[Refocuser]]||Cloud Ridge|| | ||
|- | |- | ||
|31||[[Elixir]]||Corridors||In box. Break with | |31||[[File:Icon Item KHIII.png|20px]] [[Elixir]]||Corridors||In box. Break with Diving Strike. | ||
|- | |- | ||
|32||[[Potion]]||Corridors|| | |32||[[File:Icon Item KHIII.png|20px]] [[Potion]]||Corridors|| | ||
|} | |} | ||
==== | ====Rewards==== | ||
{|cellspacing="0" cellpadding="5" border="1" align="center" width=" | {|cellspacing="0" cellpadding="5" border="1" align="center" style="width:900px" | ||
!style=" | |-style="{{style|kh3|a}}" | ||
!style=" | !style="width:35%"|Item | ||
!style=" | !style="width:25%"|Location | ||
!style=" | !style="width:40%"|Notes | ||
|- | |||
|[[File:Icon Armor KHIII.png|20px]] [[Hero's Belt]]||Agora||Talk to the boy after collecting all five Golden Herc Figures. | |||
|- | |||
|[[File:Icon Item KHIII.png|20px]] [[Potion]]||Overlook||Rescue the man and woman. | |||
|- | |||
|[[File:Icon Material KHIII.png|20px]] [[Mythril Stone]]||Overlook||Return after completing Olympus and talk to the rescued man. | |||
|- | |||
|[[File:Icon Material KHIII.png|20px]] [[Lucid Gem]]||Overlook||Return after completing Olympus and talk to the rescued woman. | |||
|- | |||
|[[File:Icon Key Item KHIII.png|20px]] [[Golden Herc Figure]]||Overlook||On bench near save point. | |||
|- | |||
|[[File:Icon Key Item KHIII.png|20px]] [[Golden Herc Figure]]||Overlook||On statue's broken shield. | |||
|- | |||
|[[File:Icon Item KHIII.png|20px]] [[Hi-Potion]]||Gardens||Rescue the man. | |||
|- | |||
|[[File:Icon Material KHIII.png|20px]] [[Mythril Gem]]||Gardens||Return after completing Olympus and talk to the rescued man. | |||
|- | |||
|[[File:Icon Key Item KHIII.png|20px]] [[Golden Herc Figure]]||Gardens|| | |||
|- | |||
|[[File:Icon Key Item KHIII.png|20px]] [[Golden Herc Figure]]||Gardens||In hole in the ground. | |||
|- | |||
|[[File:Icon Item KHIII.png|20px]] [[Potion]]||The Big Olive||Rescue the mother and boy. | |||
|- | |||
|[[File:Icon Material KHIII.png|20px]] [[Lucid Gem]]||The Big Olive||Return after completing Olympus and talk to the rescued mother. | |||
|- | |||
|[[File:Icon Material KHIII.png|20px]] [[Lucid Stone]]||The Big Olive||Return after completing Olympus and talk to the rescued boy. | |||
|- | |||
|[[File:Icon Item KHIII.png|20px]] [[Ether]]||The Big Olive||Rescue the mother and girl. | |||
|- | |||
|[[File:Icon Material KHIII.png|20px]] [[Lucid Gem]]||The Big Olive||Return after completing Olympus and talk to the rescued mother. | |||
|- | |||
|[[File:Icon Material KHIII.png|20px]] [[Lucid Stone]]||The Big Olive||Return after completing Olympus and talk to the rescued girl. | |||
|- | |||
|[[File:Icon Key Item KHIII.png|20px]] [[Golden Herc Figure]]||Alleyway|| | |||
|- | |||
|[[File:Icon Shield KHIII.png|20px]] [[Knight's Shield+]]||Secluded Forge||Use the forge. | |||
|- | |||
|[[File:Icon Keyblade KHIII.png|20px]] [[Hero's Origin]]||Apex||Defeat the Tornado Titan. | |||
|- | |||
|[[File:Icon Accessory KHIII.png|20px]] [[Fire Cufflink]]<br>[[File:Secret Report KHIII.png|20px]] {{n|Secret Report|1}}||Courtyard||Clear [[Battlegate 1]]. | |||
|- | |||
|[[File:Icon Armor KHIII.png|20px]] [[Cosmic Belt+]]<br>[[File:Secret Report KHIII.png|20px]] {{n|Secret Report|2}}||Apex||Clear [[Battlegate 2]]. | |||
|} | |||
===Bonus Levels=== | |||
{|border=1 cellpadding=2 cellspacing=0 align="center" style="width:900px" | |||
|-style="{{style|kh3|a}}" | |||
!style="width:30%"|Objective | |||
!style="width:45%"|Reward | |||
!style="width:25%"|Location | |||
|- | |||
|Defeat the [[Heartless]] at the Cliff Ascent||'''Sora''': Maximum HP +10||Cliff Ascent | |||
|- | |||
|Defeat the [[Flame Core]]s at the Agora||'''Donald''': [[MP Haste]]||Agora | |||
|- | |||
|Defeat the Flame Cores at the Overlook||'''Sora''': Maximum HP +10||Overlook | |||
|- | |||
|Rescue the girl from the Flame Cores||'''Sora''': Maximum HP +10||Gardens | |||
|- | |||
|Defeat the Heartless within the time limit||'''Donald''': Maximum HP +10, [[Fire Boost]]||Alleyway | |||
|- | |||
|Defeat the [[Rock Troll]]||'''Sora''': Maximum HP +10<br>'''Goofy''': [[Lucky Strike]]||Agora | |||
|- | |||
|Defeat the [[Rock Titan]]||'''Sora''': Maximum MP +5||Mountainside | |||
|- | |||
|Defeat the [[Satyr]]s at the Courtyard||'''Goofy''': Maximum HP +10||Courtyard | |||
|- | |||
|Defeat the [[Tornado Titan]]||'''Sora''': Maximum HP +10||Apex | |||
|} | |||
===Ingredients=== | |||
{|cellspacing="0" cellpadding="5" border="1" align="center" style="width:900px" | |||
|-style="{{style|kh3|a}}" | |||
!style="width:25%"|Ingredient | |||
!style="width:30%"|Location | |||
!style="width:10%"|Appearance rate | |||
!style="width:35%"|Notes | |||
|- | |- | ||
|Onion x2 / Celery x2||Agora||100%||In basket. | |Onion x2 / Celery x2||Agora||100%||In basket. | ||
| Line 105: | Line 183: | ||
|Onion x2 / Celery x2||Overlook||100%||In basket. | |Onion x2 / Celery x2||Overlook||100%||In basket. | ||
|- | |- | ||
|Lemon x2|| | |Lemon x2||Overlook||100%||In basket. Only available after clearing world. | ||
|- | |- | ||
|Onion x2 / Celery x2|| | |Onion x2 / Celery x2||Overlook||100%||In basket. | ||
|- | |- | ||
|Porcini x2||Gardens||100%||Mushroom. Near fountain. | |Porcini x2||Gardens||100%||Mushroom. Near fountain. | ||
| Line 123: | Line 201: | ||
|King Oyster Mushroom x2||Gardens||100%||Mushroom. | |King Oyster Mushroom x2||Gardens||100%||Mushroom. | ||
|- | |- | ||
|Beef x2~3||The Big Olive|| | |Beef x2~3||The Big Olive||100%||In yellow crate. | ||
|- | |- | ||
|Veal x2~3||The Big Olive||100%||In yellow crate. | |Veal x2~3||The Big Olive||100%||In yellow crate. | ||
| Line 164: | Line 242: | ||
|- | |- | ||
|Pear x2~3||Summit||100%||In basket. | |Pear x2~3||Summit||100%||In basket. | ||
|} | |} | ||
===Lucky Emblems=== | ===Lucky Emblems=== | ||
{|cellspacing="0" cellpadding="5" border="1" align="center" width=" | {|cellspacing="0" cellpadding="5" border="1" align="center" style="width:900px" | ||
!style=" | |-style="{{style|kh3|a}}" | ||
!style=" | !style="width:5%"|# | ||
!style=" | !style="width:25%"|Image | ||
!style=" | !style="width:25%"|Location | ||
!style="width:45%"|Notes | |||
|- | |- | ||
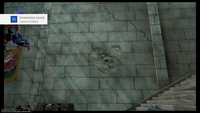
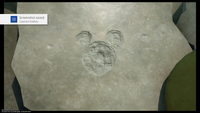
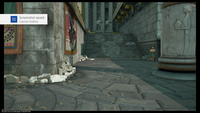
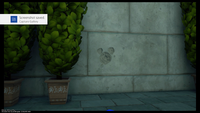
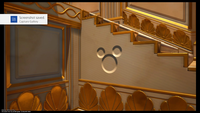
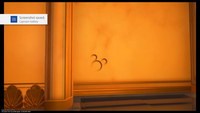
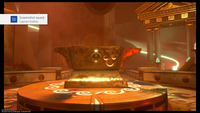
|1||[[File:Lucky Emblem (Olympus) 01 KHIII.png|200px]]||Overlook||On wall near Gardens. | |1||[[File:Lucky Emblem (Olympus) 01 KHIII.png|200px]]||Overlook||On wall near Gardens. | ||
| Line 240: | Line 276: | ||
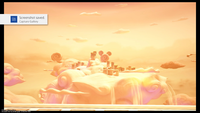
|12||[[File:Lucky Emblem (Olympus) 12 KHIII.png|200px]]||Cloud Ridge||Cloud formation in the distance. | |12||[[File:Lucky Emblem (Olympus) 12 KHIII.png|200px]]||Cloud Ridge||Cloud formation in the distance. | ||
|} | |} | ||
[[Category:Gameplay]] | |||
Latest revision as of 18:50, 12 November 2023
Kingdom Hearts III[edit]
Battle Levels[edit]
- Before completing Toy Box and Kingdom of Corona: 4
- After completing Toy Box and Kingdom of Corona: 14
- After completing Monstropolis and Arendelle: 22
- After completing The Final World: 30
Drops[edit]
| Item |
|---|
Treasures[edit]
| # | Item | Location | Notes |
|---|---|---|---|
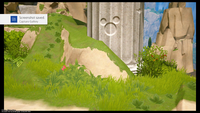
| 1 | Ravine | In broken foot statue. | |
| 2 | Ravine | Near broken foot statue. | |
| 3 | Cliff Ascent | ||
| 4 | Cliff Ascent | ||
| 5 | Cliff Ascent | ||
| 6 | Cliff Ascent | ||
| 7 | Cliff Ascent | ||
| 8 | Cliff Ascent | Near Zeus statue. | |
| 9 | Cliff Ascent | ||
| 10 | Mountainside | ||
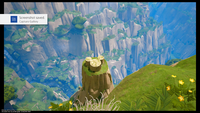
| 11 | Summit | ||
| 12 | Mountainside | ||
| 13 | Alleyway | On ledge. | |
| 14 | Alleyway | ||
| 15 | Agora | Behind building with stairs on either side. | |
| 16 | The Big Olive | ||
| 17 | The Big Olive | ||
| 18 | Gardens | ||
| 19 | Overlook | ||
| 20 | Overlook | ||
| 21 | Gardens | ||
| 22 | Overlook | ||
| 23 | Overlook | ||
| 24 | Overlook | Near save point. | |
| 25 | Courtyard | Underneath stairs. | |
| 26 | Courtyard | ||
| 27 | Courtyard | ||
| 28 | Corridors | ||
| 29 | Corridors | Near save point. | |
| 30 | Cloud Ridge | ||
| 31 | Corridors | In box. Break with Diving Strike. | |
| 32 | Corridors |
Rewards[edit]
| Item | Location | Notes |
|---|---|---|
| Agora | Talk to the boy after collecting all five Golden Herc Figures. | |
| Overlook | Rescue the man and woman. | |
| Overlook | Return after completing Olympus and talk to the rescued man. | |
| Overlook | Return after completing Olympus and talk to the rescued woman. | |
| Overlook | On bench near save point. | |
| Overlook | On statue's broken shield. | |
| Gardens | Rescue the man. | |
| Gardens | Return after completing Olympus and talk to the rescued man. | |
| Gardens | ||
| Gardens | In hole in the ground. | |
| The Big Olive | Rescue the mother and boy. | |
| The Big Olive | Return after completing Olympus and talk to the rescued mother. | |
| The Big Olive | Return after completing Olympus and talk to the rescued boy. | |
| The Big Olive | Rescue the mother and girl. | |
| The Big Olive | Return after completing Olympus and talk to the rescued mother. | |
| The Big Olive | Return after completing Olympus and talk to the rescued girl. | |
| Alleyway | ||
| Secluded Forge | Use the forge. | |
| Apex | Defeat the Tornado Titan. | |
| Courtyard | Clear Battlegate 1. | |
| Apex | Clear Battlegate 2. |
Bonus Levels[edit]
| Objective | Reward | Location |
|---|---|---|
| Defeat the Heartless at the Cliff Ascent | Sora: Maximum HP +10 | Cliff Ascent |
| Defeat the Flame Cores at the Agora | Donald: MP Haste | Agora |
| Defeat the Flame Cores at the Overlook | Sora: Maximum HP +10 | Overlook |
| Rescue the girl from the Flame Cores | Sora: Maximum HP +10 | Gardens |
| Defeat the Heartless within the time limit | Donald: Maximum HP +10, Fire Boost | Alleyway |
| Defeat the Rock Troll | Sora: Maximum HP +10 Goofy: Lucky Strike |
Agora |
| Defeat the Rock Titan | Sora: Maximum MP +5 | Mountainside |
| Defeat the Satyrs at the Courtyard | Goofy: Maximum HP +10 | Courtyard |
| Defeat the Tornado Titan | Sora: Maximum HP +10 | Apex |
Ingredients[edit]
| Ingredient | Location | Appearance rate | Notes |
|---|---|---|---|
| Onion x2 / Celery x2 | Agora | 100% | In basket. |
| Lemon x 2~3 | Agora | 100% | In basket. |
| Onion x2 / Celery x2 | Overlook | 100% | In basket. |
| Lemon x2 | Overlook | 100% | In basket. Only available after clearing world. |
| Onion x2 / Celery x2 | Overlook | 100% | In basket. |
| Porcini x2 | Gardens | 100% | Mushroom. Near fountain. |
| Cloves x2~3 | Gardens | 50% | Herb. |
| Morel x2 | Gardens | 50% | Mushroom. |
| Rosemary x2 | Gardens | 50% | Herb. |
| Cloves x2 | Gardens | 25% | Herb. |
| Cloves x2 | Gardens | 25% | Herb. |
| King Oyster Mushroom x2 | Gardens | 100% | Mushroom. |
| Beef x2~3 | The Big Olive | 100% | In yellow crate. |
| Veal x2~3 | The Big Olive | 100% | In yellow crate. |
| Onion x2 / Celery x2 | The Big Olive | 100% | In basket. Only available after clearing world. |
| Lemon x2~3 | The Big Olive | 100% | In basket. Only available after clearing world. |
| Parsley x2 | The Big Olive | 100% | Herb. |
| Black Truffle x2 | The Big Olive | 100% | Mushroom. |
| Cloves x2 | The Big Olive | 50% | Herb. |
| Chanterelle x2~3 | Alleyway | 100% | Mushroom. |
| King Oyster Mushroom | Alleyway | 100% | Mushroom. |
| Bay Leaf x2 | Alleyway | 50% | Herb. |
| Porcini x2 | Alleyway | 100% | Mushroom. |
| Cloves x2 | Alleyway | 50% | Herb. |
| Apple x2 | Cliff Ascent | 100% | Fruit tree. |
| Apricot x2 | Cliff Ascent | 100% | Fruit tree. |
| Veal x2~3 | Cliff Ascent | 100% | In yellow crate. |
| Apple x2 | Cliff Ascent | 50% | Fruit tree. |
| Apple x2 | Mountainside | 100% | Fruit tree. |
| Apricot x2 | Mountainside | 100% | Fruit tree. |
| Apple x2 | Mountainside | 100% | Fruit tree. |
| Beef x2~3 | Cliff Ascent | 100% | In yellow crate. |
| Pear x2~3 | Summit | 100% | In basket. |
