User:EternalNothingnessXIII/Kingdom Hearts Birth by Sleep Walkthrough/Story Walkthroughs/Aqua's Scenario/Keyblade Graveyard: Difference between revisions
m (IGNORE ME) |
m (Text replacement - "\[\[(:)?Image:" to "[[$1File:") |
||
| (2 intermediate revisions by one other user not shown) | |||
| Line 148: | Line 148: | ||
|x1.0 | |x1.0 | ||
|- | |- | ||
!bgcolor="powderblue"|[[File: | !bgcolor="powderblue"|[[File:Floating_Flora_KHBBSFM.png|80px]] <center><small><small>''Final Mix'' only!</small></small></center> | ||
|??? | |??? | ||
|??? | |??? | ||
| Line 202: | Line 202: | ||
|x0.75 | |x0.75 | ||
|} | |} | ||
==The Seat of War== | ==The Seat of War== | ||
From your starting point, turn around and open the treasure chest by the edge of the cliff to obtain a Mega-Potion. From there, turn into the side area to your right surrounded by mountains and proceed to the base of the cliff directly in front of you to find another treasure chest. Open it to obtain an Elixir. | From your starting point, turn around and open the treasure chest by the edge of the cliff to obtain a Mega-Potion. From there, turn into the side area to your right surrounded by mountains and proceed to the base of the cliff directly in front of you to find another treasure chest. Open it to obtain an Elixir. | ||
| Line 210: | Line 211: | ||
|style="text-align:center" bgcolor="dodgerblue" colspan="2"|<font color = white>'''Clear the Launching Plant Battle Mission!'''</font> | |style="text-align:center" bgcolor="dodgerblue" colspan="2"|<font color = white>'''Clear the Launching Plant Battle Mission!'''</font> | ||
|- | |- | ||
|rowspan=9 bgcolor="powderblue" width="40%"|[[ | |rowspan=9 bgcolor="powderblue" width="40%"|[[File:Floating_Flora_KHBBSFM.png|100px|center]] | ||
|style="text-align:center" bgcolor="deepskyblue" width="60%"|'''<font color="black">HP: ??? | |style="text-align:center" bgcolor="deepskyblue" width="60%"|'''<font color="black">HP: ??? | ||
|- | |- | ||
| Line 241: | Line 242: | ||
After obtaining the Mega-Potion and Elixir behind you, return to your starting point and proceed down the path in front of you in a straight line. You will eventually come to another treasure chest. Open it to obtain a map to help you navigate the Keyblade Graveyard. Floating high in the air right next to this treasure chest, you will find the Flower Sticker. Use Doubleflight to reach it. When you are ready, proceed to the next area. | After obtaining the Mega-Potion and Elixir behind you, return to your starting point and proceed down the path in front of you in a straight line. You will eventually come to another treasure chest. Open it to obtain a map to help you navigate the Keyblade Graveyard. Floating high in the air right next to this treasure chest, you will find the Flower Sticker. Use Doubleflight to reach it. When you are ready, proceed to the next area. | ||
==Face the Trials of Twister Trench!== | ==Face the Trials of Twister Trench!== | ||
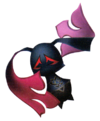
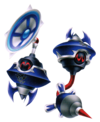
The Keyblade Graveyard is unique in the fact that you cannot encounter Unversed simply by running around in your present area. Instead, the most powerful versions of these enemies you've faced yet loom within the colorful twisters that swirl around the area known as the Twister Trench. The twisters, while slow-moving, are hard to avoid and home in on your location, but they are excellent sources of EXP if you need to level up before the game's final boss fights. Rather than reappear after you leave the area, the twisters only respawn when you leave the world and return to Twister Trench. | The Keyblade Graveyard is unique in the fact that you cannot encounter Unversed simply by running around in your present area. Instead, the most powerful versions of these enemies you've faced yet loom within the colorful twisters that swirl around the area known as the Twister Trench. The twisters, while slow-moving, are hard to avoid and home in on your location, but they are excellent sources of EXP if you need to level up before the game's final boss fights. Rather than reappear after you leave the area, the twisters only respawn when you leave the world and return to Twister Trench. | ||
| Line 254: | Line 256: | ||
|style="text-align:center" bgcolor="dodgerblue" colspan="2"|<font color = white>'''Defeat Braig!'''</font> | |style="text-align:center" bgcolor="dodgerblue" colspan="2"|<font color = white>'''Defeat Braig!'''</font> | ||
|- | |- | ||
|rowspan=9 bgcolor="powderblue" width="40%"|[[ | |rowspan=9 bgcolor="powderblue" width="40%"|[[File:Braig (Scarred) KHBBS.png|250px|center]] | ||
|style="text-align:center" bgcolor="deepskyblue" width="60%"|'''<font color="black">HP: 750 | |style="text-align:center" bgcolor="deepskyblue" width="60%"|'''<font color="black">HP: 750 | ||
|- | |- | ||
Latest revision as of 15:43, 10 February 2021
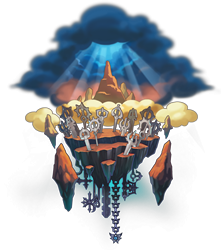
The Keyblade Graveyard is the place where all Keyblade wielders leave their mark on fate. And now it is Aqua's turn. Having heard devastating news about Master Eraqus's defeat at Terra's hand from Master Yen Sid, she traverses to the forboding world to see if this painful rumor is true.
Treasures
Combat Level
| 9 |
Unversed
The Seat of War
From your starting point, turn around and open the treasure chest by the edge of the cliff to obtain a Mega-Potion. From there, turn into the side area to your right surrounded by mountains and proceed to the base of the cliff directly in front of you to find another treasure chest. Open it to obtain an Elixir.
NOTE: The following content is exclusive to Kingdom Hearts Birth by Sleep Final Mix! It does not appear in any version of Kingdom Hearts Birth by Sleep.
| Clear the Launching Plant Battle Mission! | ||
| HP: ??? | ||
| Strength: ??? | ||
| Defense: ??? | ||
| Status Resistances: ??? | ||
| Physical: ??? | ||
| Fire: ??? | ||
| Blizzard: ??? | ||
| Thunder: ??? | ||
| Dark: ??? | ||
| Prizes: Illusion-L | ||
| Strategy | ||
|
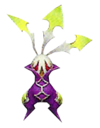
Also in the side area surrounded by mountains behind your starting point, you will find another Battle Mission emblem. Approach it to spawn three Launching Plants, Unversed similar in appearance to the Mandrake. You must attack these opponents to launch them into the sky, after which you must hit them repeatedly with wide-range Commands such as Thundaga, Aeroga, and Magic Hour to keep them airborne. The Launching Plants drop special orbs as you damage them. You must collect at least 350 of them in the 01'30"00 time limit to obtain the Illusion-L Command and a three-star ranking on this Battle Mission. | ||
Kingdom Hearts Birth by Sleep Final Mix content ends here.
After obtaining the Mega-Potion and Elixir behind you, return to your starting point and proceed down the path in front of you in a straight line. You will eventually come to another treasure chest. Open it to obtain a map to help you navigate the Keyblade Graveyard. Floating high in the air right next to this treasure chest, you will find the Flower Sticker. Use Doubleflight to reach it. When you are ready, proceed to the next area.
Face the Trials of Twister Trench!
The Keyblade Graveyard is unique in the fact that you cannot encounter Unversed simply by running around in your present area. Instead, the most powerful versions of these enemies you've faced yet loom within the colorful twisters that swirl around the area known as the Twister Trench. The twisters, while slow-moving, are hard to avoid and home in on your location, but they are excellent sources of EXP if you need to level up before the game's final boss fights. Rather than reappear after you leave the area, the twisters only respawn when you leave the world and return to Twister Trench.
From the entrance of Twister Trench, head to the center rock formation to find a treasure chest containing a Mega-Ether. A treasure chest containing an Aeroga Command can be found on the opposite side. Along the left side of the canyon's wall, you can find a treasure chest containing a Megalixir. A treasure chest with a Mega-Potion inside rests almost directly across from it. Proceed to the far end of Twister Trench to reach the next area.
Make Final Preparations in the Fissure!
Past Twister Trench lies the Fissure. This area contains a Moogle Shop to purchase any last-minute Commands, and it also houses a valuable save point. Make your final preparations here, because the final bosses and the ending of Aqua's scenario lie ahead. Once you proceed to the area after this, there is no turning back. Be sure to collect the Bubble Sticker in the center of the long path to the Fissure exit before you go.
Leave Your Mark on Fate!
At long last, Aqua's scenario has come to an end. After a lengthy battle against Master Xehanort and Vanitas, a mysterious man appears before Aqua as she cradles Ventus in her arms. He offers her confusing words about Terra, but it's time to show him who's boss!
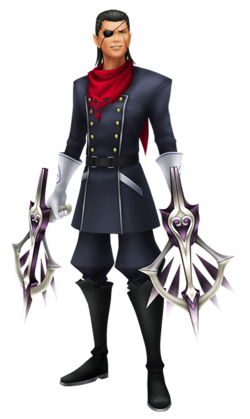
| Defeat Braig! | ||
| HP: 750 | ||
| Strength: 26 | ||
| Defense: 15 | ||
| Status Resistances: IMMUNE TO EVERYTHING | ||
| Physical: x1.0 | ||
| Fire: x1.0 | ||
| Blizzard: x1.0 | ||
| Thunder: x1.0 | ||
| Dark: x1.0 | ||
| Prizes: Maximum HP increased! | ||
| Strategy | ||
| At the start of the battle, Lock-On to Braig and Cartwheel to avoid him as he warps to Aqua's location and rushes at her multiple times while firing energy bullets from his twin Arrowguns. Do not attempt to use Barrier against this attack, as Aqua will still take damage from it upon impact with the boss. Braig will then begin to teleport to different locations around the battlefield, firing several bullets at Aqua whenever he does. Use Barrier to deflect the projectiles back at Braig and deal damage to him. If Braig starts running around Aqua and fires several bullets in her direction as he goes, cast Barrier multiple times to avoid taking damage from each shot.
When Braig's HP starts to dwindle, he will gain access to two new abilities, which he uses in combination with all attacks from the first phase of the battle. The first of these attacks causes him to warp to the center of the battlefield and begin spinning in place to attack from all angles. Chain several Cartwheels together to avoid the ensuing barrage. If Braig warps above the center of the battlefield, be prepared to face his ultimate attack as several large energy bullets rain down from all directions to bombard Aqua. Cartwheel is the only recommended way to avoid taking damage from this attack. In terms of your own offense, follow Braig as he warps around the battlefield with powerful physical Commands such as Magic Hour and Time Splicer or attack him from afar with Commands such as Firaga Burst. You can land a few Keyblade strikes on Braig whenever he becomes immobile and begins charging up enough power to launch a single powerful energy bullet, but be sure to Cartwheel away to dodge it when he does. Use Curaga to replenish your HP whenever Braig pauses between attacks, and be sure to maintain a constant hit-and-run strategy. Braig will fall in due time. He is quite skilled at dodging your Shotlock, so rely on basic gameplay elements like Command Styles and Aqua's Finish Command instead. As always, Dimension Links can be used if you need to recover HP quickly and do not have enough time to access Curaga. | ||
After you defeat Braig, Aqua is ambushed by Vanitas and knocked unconscious. When she wakes up, she finds King Mickey next to her, but Ventus is no where in sight. Aqua finds her friend standing off in the distance holding a strange Keyblade-like weapon, and he refuses to answer her as she calls his name. Find out what's wrong with Ventus and prepare to face Aqua's final boss!
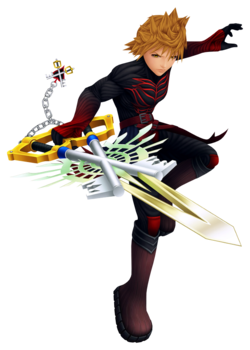
| Team up with Mickey, defeat Vanitas, and break his hold over Ventus! | ||
| HP: 1000 | ||
| Strength: 26 | ||
| Defense: 15 | ||
| Status Resistances: IMMUNE TO EVERYTHING | ||
| Physical: x1.0 | ||
| Fire: x1.0 | ||
| Blizzard: x1.0 | ||
| Thunder: x1.0 | ||
| Dark: x1.0 | ||
| Prizes: Xehanort's Report 7 | ||
| Strategy | ||
| At the beginning of this climatic confrontation, Lock-On to Ventus-Vanitas and press When Ventus-Vanitas's HP drops to about half, he gains access to an ultimate attack whose execution is signified whenever the boss warps to the center of the battlefield and begins charging power. It is at this time you should be the most aggressive towards the him, but be sure to execute Burst of Faith or a Shotlock as soon as he leaps into the air to avoid the intense burst of energy that follows. There is a small chance you can avoid this attack by repeatedly using Cartwheel along the very edge of the battlefield, but it is important to use Curaga immediately afterwards if you are hit. Depending on Aqua's level and stats, this energy burst could very well spell her end. In terms of your own offense, Ventus-Vanitas is best attacked with Commands skilled at following mobile targets like Firaga Burst or Time Splicer, and even Shotlocks. He is slightly more intelligent than Vanitas was when it comes to avoiding Seeker Mine, so be on your guard at all times! The boss is swift, and he attacks almost unceasingly. As with the previous boss battle, a continuous hit-and-run strategy should be used if you wish to survive this fight. You need not worry about Mickey's HP if it is fully depleted, as he will revive himself in a matter of seconds. His attacks in combination with your own should easily be able to conquer Ventus-Vanitas, allowing you to emerge from this battle victorious. | ||
Congratulations! You have officially cleared Aqua's scenario! After witnessing two lengthy cutscenes, the credits will roll and your game's progress report will be displayed. Save your game to mark this accomplishment, and if you've beaten Terra and Ventus's scenarios already, you will then unlock the Final Episode. If this occurs, create a save file for it and return to the start menu. Select "Continue" and your Final Episode save file to experience Kingdom Hearts Birth by Sleep's true ending.
