Kingdom Hearts V CAST: Difference between revisions
No edit summary |
|||
| (232 intermediate revisions by 87 users not shown) | |||
| Line 1: | Line 1: | ||
A Kingdom Hearts game | {{Game|KHVC|Real}} | ||
{{suite}} | |||
{{Infobox CVG | |||
|title = Kingdom Hearts V CAST | |||
|japan= | |||
|image = [[File:Kingdom Hearts V CAST Logo.png|200px]] | |||
|developer = Superscape | |||
|publisher = [[File:Flag of the United States.png|20px|United States]]/[[File:Flag of Canada.png|20px|Canada]] {{w|Disney Interactive Media Group|Walt Disney Internet Group}} | |||
|release = [[File:Flag of the United States.png|20px|United States]] February 1, 2005 <ref name="press">[https://web.archive.org/web/20171229141524/https://www.verizon.com/about/news/vzw/2005/02/pr2005-02-01 Verizon Wireless press release]</ref> | |||
|genre = Action RPG | |||
|modes = Single player | |||
|ratings = N/A | |||
|platforms = {{w|Verizon (mobile network)|Verizon Wireless V CAST}} | |||
|style = kh1 | |||
}} | |||
'''''Kingdom Hearts V CAST''''', officially '''''Kingdom Hearts''''', was a mobile game developed exclusively for V CAST, {{w|Verizon Wireless}}'s broadband service. It was released on February 1, 2005 in the United States as one of the launch games for the V CAST service. The game has since been discontinued and is no longer officially accessible, and it is not canon to the ''Kingdom Hearts'' series in any way.<ref name="canon">'''''[[Kingdom Hearts Ultimania|Kingdom Hearts Chain of Memories Ultimania]]'''''—From "KHCOM" to "KHII", p. 6; '''Interviewer''': "We have heard that, in America, there is a KH being developed for the mobile phone." / '''Tetsuya Nomura''': "There are quite a few things concerning that...officially it has nothing to do with the original KH. It's completely different. The title is KH, Sora makes an appearance, but the story has nothing to do whatsoever with the KH, KHCOM, and KHII we're developing, because it is Disney who designed V-Cast." (Translation by Mors)</ref> | |||
{{TOClimit|3}} | |||
==Development== | |||
''Kingdom Hearts V CAST'' was developed by {{w|Superscape}} and published by the {{w|Walt Disney Internet Group}} (now known as the Disney Interactive Media Group) and Verizon Wireless as a launch title for the V CAST cellular internet service. Square Enix was not involved in any way. Aside from some familiar characters and settings, the game has no connection to the plot of the ''Kingdom Hearts'' series, and it is considered non-canonical.<ref name="canon" /> | |||
[[File:Alice in Wonderland Logo KHVC.png|thumb|right|100px]] | |||
Verizon shut down V CAST on December 15, 2012, and all content exclusive to it was made unavailable. This includes ''Kingdom Hearts V CAST'', which hasn't been re-released by Square Enix or Disney, making this game impossible to play without having a phone that still has it installed. Additionally, only one chapter of the game could be stored on a phone at a time – to download another chapter, the currently-saved one must be deleted. | |||
{{w|Video game preservation}}ists<ref>[https://www.khinsider.com/forums/index.php?threads/kingdom-hearts-v-cast-game-files-ripped.211584/ Kingdom Hearts V-CAST Game Files Ripped]</ref> have managed to recover and {{w|Video game console emulator|emulate}} the game's first, third, and fourth chapters with the Obstacle Course, Swashbuckler's Island, Agrabah, and Maleficent's Castle.<ref>[https://www.youtube.com/playlist?list=PLKG4UqWK6IgOH80vfAlqvXOhOUJbx8pEf Kingdom Hearts V CAST - Youtube]</ref><ref>[https://www.youtube.com/watch?v=M1Ya55LRTd0 Kingdom Hearts V-Cast Maleficent's Castle (last stage) - Youtube]</ref> However, no files relating to the second chapter Wonderland (also referred to as "Alice in Wonderland") have been found, currently making it {{w|lost media}}. | |||
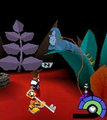
Sora is helped by "more than 20 characters" over the course of the game.<ref name="press" /> In the lost Wonderland chapter, Sora would have met The Caterpillar and fought against the Purple Crocodile, as well as another enemy referred to in the game's files as "UmbrellaBird". | |||
The {{unnamed|KHVC||soundtrack of ''Kingdom Hearts V CAST''}} was composed by Ian Livingstone. It has never been officially released on an album. | |||
{{-}} | |||
==Story== | |||
[[Sora]], [[Donald]], [[Goofy]], and [[Jiminy Cricket]] are returning from an adventure. On the journey back, Sora sets the [[Gummi Ship]] controls to economy wash and goes to sleep, except his dreams begin to spiral out of control. | |||
Sora wakes up on Swashbuckler's Island. Sora does not know how he got there, and his companions are nowhere in sight. [[Caw]], a parrot native to the island, guides Sora as he gathers materials to build a raft. [[Maleficent]] summons [[Sora's shadow]] to confront Sora at an altar with the [[Heartless]] emblem; although Sora defeats his shadow, he is bitten by a tendril of darkness that inflicts a dark curse. Sora and Caw leave on their raft to seek out [[The Caterpillar]] in another world. | |||
[[File:Agrabah 02 KHVC.png|thumb|120px|The Cave of Wonders.]] | |||
In [[Wonderland]], Sora is separated from Caw but manages to find The Caterpillar. To save Sora from the darkness growing inside him, The Caterpillar instructs him to concoct a potion out of the teeth of three magical creatures. Sora vanquishes the Purple Crocodile and collects the first of the teeth. Meanwhile, Donald and Goofy head off in search of Sora. | |||
Sora wakes up from another dream in [[Agrabah]]. An old man in the marketplace guides Sora to the Cave of Wonders – but only after Sora purchases him a cane for three golden coins. In the Cave of Wonders, Sora acquires the magic lamp and summons Genie, who grants him three wishes; his first wish is immediately used to escape the lava-filled cavern. Sora then confronts [[Jafar]], who reveals that he has allied himself with the Heartless. After dispatching Jafar's cobra form and collecting a snake tooth, Sora uses his second wish to create a portal to Maleficent's Castle. Genie is unable to fulfill his final wish to defeat the Heartless, so Sora takes the portal in search of a dragon tooth. Elsewhere, Maleficent captures Donald and Goofy. | |||
[[File:Maleficent's Castle 02 KHVC.png|thumb|left|120px|Maleficent steals the Keyblade.]] | |||
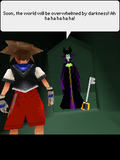
Fighting his way into Maleficent's Castle, Sora stumbles upon Caw trapped in a cell. However, it was a trick by Maleficent to steal Sora's [[Keyblade]]. Sora continues his journey through the castle and finds Donald and Goofy trapped in prison cells. Eventually, he finds the Kingdom Key inside a machine; he reclaims his Keyblade, accidentally activating the machine in the process. This, too, was a setup by Maleficent: only Sora's pure heart could open the portals that can spread darkness to the worlds. She also reveals that Sora will be fully consumed by darkness if he does not cure his darkness by midnight. Maleficent casts a spell removing the Keyblade's magic and retreats to the castle's tower. | |||
Unable to confront Maleficent in his current state, Sora instead returns to free Donald and Goofy. While thinking of a plan, Goofy accidentally reveals a hidden entrance to Maleficent's potion room. Sora harnesses the power of Sora's shadow through a strange mirror, restoring the Keyblade's magic. Donald and Goofy remain behind to help find the antidote, while Sora confronts Maleficent on top of the tower. Sora emerges victorious over Maleficent's dragon form, collecting a dragon tooth before returning to deactivate Maleficent's machine. Having saved the worlds from darkness, Sora rushes back to his companions to formulate the potion needed to cure him. He jumps into the cauldron, and the world begins to spiral around him. | |||
Sora wakes up in the Gummi Ship with Donald and Goofy by his side. The entire adventure was just a dream; still, some signs of the journey remain. Thus ends this chapter of Sora's battle with the darkness. | |||
{{-}} | |||
==Worlds==<!--All room names are taken from the game files, not every room has an actual name--> | |||
===Obstacle Course=== | |||
[[File:Obstacle Course Logo KHVC.png|thumb|right|100px]] | |||
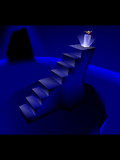
The Obstacle Course is a training area used for the game's tutorial. It consists of six sections with grassy floors and stone edges floating in an endless blue sky. The end of each section teleports Sora directly into the next. '''Section 1''' consists of a single flat zigzagging path. '''Section 2''' contains a rock path across a small pond, while the larger pond dividing '''Section 3''' can be crossed using a staircase, floating platforms, and a zipline. In '''Section 4''', there is a pit with a wooden crate, and in '''Section 5''', there is a drawbridge tied to a palm tree. The final area, '''Section 6''', is home to a single [[Shadow]] and an exit gate. | |||
{{-}} | |||
===Swashbuckler's Island=== | |||
[[File:Swashbuckler's Island Logo KHVC.png|thumb|right|100px]] | |||
Sora awakens in the '''Raft''' area of Swashbuckler’s Island, a sandy beach at the edge of the rocky island. Past a cave on the right side of the beach lies the '''Tower''', a second beachy outlook with an old wooden tower. Following another cave leads to a cavern filled with lava, where an altar gem is protected by a rolling barrel trap. | |||
A rocky path leads from the left side of the Raft to the '''Altar''', a mysterious stone shrine with the [[Symbols in the Kingdom Hearts series#Heartless|Heartless emblem]]. Inserting four gems into the altar grants [[Blizzard]] and activates a trapdoor trap that leads to an underground cavern with a wrecked ship. | |||
{{-}} | |||
===Agrabah=== | |||
[[File:Agrabah Logo KHVC.png|thumb|right|100px]] | |||
Sora wakes up in a small, featureless room. Outside the room is the '''Street''', an alleyway with scaffolding and ropes. The Street connects to another room with a rope and switch puzzle that grants access to the '''Market'''. The old man and merchant are located beneath two of the street stalls in the Market. The Market also has a ladder which leads back to the room Sora started in. | |||
The right path from the Market leads to '''Housing''', a street with many buildings. The '''Room''' at the end of the street contains a ladder that grants access to the upper level of Housing; navigating the rooftops leads to a small room with a small pedestal that grants the [[Fire]] spell. | |||
The left path from the Market connects to the '''Temple Entrance''', a street with a small oasis in the center of a split stairway. At the top of the stairs lies the '''Temple'''. Once the four braziers in the corners of the Temple are lit, a Mummy will climb out of a rectangular coffin; defeating them will cause the coffin to slide over, revealing a hole in the floor. Beneath the Temple lies the '''Crypt''', where sarcophagi lining the walls hide alcoves containing treasure. Behind the sarcophagus on the red-lined wall is a door that requires a golden scarab beetle to open. | |||
After the two halves of the scarab beetle have been placed in the door, Sora can enter the '''Cave of Wonders'''. All three rooms of the cave are flooded. In the central room where Sora enters, there is a steep rock pedestal with the Magic Lamp. The room to the left, the '''Waterfall''', has a monkey statue hidden at the top of a waterfall. The room to the right has a monkey statue next to two braziers. Once two gems from the central room are placed in both monkey statues, the lamp becomes accessible; grabbing the lamp causes the entire cave to flood with lava. | |||
Using Genie's magic to flee the Cave of Wonders, Sora finds himself in the '''Courtyard''', the grand entrance of the royal palace. A large gate leads back from the Courtyard into the Market, while continuing forward leads to the '''Throne''' where Jafar is fought. Once Sora destroys the throne and two pedestals, Jafar will destroy the floor of the room, leading to a second underground portion of the Throne floating over a pool of lava. | |||
{{-}} | |||
===Maleficent's Castle=== | |||
[[File:Maleficent's Caslte Logo KHVC.png|thumb|right|100px]] | |||
Maleficent's Castle is dark and foreboding, with menacing stone architecture complemented by black thorns. Sora enters Maleficent's Castle through the '''Gate''', consisting of two rooms; the lower room of the Gate is a passage containing a lever that allows the gate itself to be opened in the upper level. Ahead lies the '''Bridge''', the final obstacle leading to the castle proper. | |||
The large square '''Courtyard''' sits within the castle walls, with a small interior section leading to a ledge at the top of the room. Beyond the Courtyard is a broken wooden pathway over a large pit; as Sora crosses the room, one of Maleficent's goons throws rocks from a vantage. The exit leads to the '''Cell''' where Sora encounters Maleficent and is subsequently trapped, using a suspended metal cage to escape through a hole in the ceiling. | |||
Proceeding through the castle leads to the '''Maze'''. The first two rooms of the Maze contain a series of gates and pressure plates blocking the way forward. The third and final room of the Maze contains two prison cells where Donald and Goofy are being held. A secret doorway in the back of Goofy's cell hides the '''Potion Room''', which houses Maleficent's cauldron, a strange mirror, and the [[Thunder]] spell. | |||
Ahead past the Maze is the '''Orrery''', a large room containing Maleficent's machine and a floating model of the worlds. Its exit leads to the '''Staircase''', where waves of enemies must be defeated to lower each stair and proceed onwards. There are two smaller rooms of the Staircase to either side that contain unguarded treasures. The final room is the '''Tower'''. After a treacherous climb, Sora can confront Maleficent at the top of the Tower and then slide back down to the Orrery. | |||
==Gameplay== | |||
[[File:HP Gauge KHVC.png|thumb|The HP and MP gauge.]] | |||
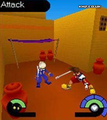
''Kingdom Hearts V CAST'' features gameplay elements from the original ''Kingdom Hearts'' adapted for compatibility with mobile phones. Moving Sora is done using tank controls, with one button on the control pad moving him forward, another moving him backwards, and two more turning him left or right. Moving forward or backwards also adjusts the camera to face where Sora is facing. Jumping, attacking, and context-sensitive actions such as opening chests, grabbing onto ziplines, or lifting crates are all handled by a single button. There is a separate button for using magic, but the player cannot control which spell Sora casts. | |||
There are substantially fewer combat options than in ''Kingdom Hearts''. When enemies are near, Sora can only move, attack, or cast magic (the attack command replaces jump). There are no party members, summons, or on-demand items – the only items in ''Kingdom Hearts V CAST'' are activated automatically – and even Sora's attacks are limited to single strikes. Both Sora and enemies get a large period of invincibility after taking a hit, so neither party is capable of performing combos. | |||
Combat is confined to specific areas. Each combat zone has a wave of enemies which can be defeated a set number of times. Due to hardware limitations, only one enemy can spawn in at a time, with the exception of [[Shadow]]s, which spawn in pairs – however, at least one shadow is in an invulnerable two-dimensional state at any moment, so even these encounters are effectively one-on-one. Experience points are only awarded after the entire wave of enemies is defeated. | |||
At the end of each level, the player is given a score based on the following formula: <code>Munny + (100 * Experience)</code> | |||
===Levels and experience=== | |||
{|border="1" cellpadding="2" cellspacing="0" align="center" style="width:30%" | |||
|-style="{{style|kh1|a}}" | |||
!style="width:15%"|Level||style="width:15%"|Experience||style="width:70%"|Reward | |||
|- | |||
|0||0||— | |||
|- | |||
|1||4||Max health increased | |||
|- | |||
|2||8||Strength increased | |||
|- | |||
|3||50||Defense increased | |||
|- | |||
|4||100||Max health increased | |||
|- | |||
|5||150||Strength increased | |||
|- | |||
|6||200||Defense increased | |||
|- | |||
|7||300||Max health increased | |||
|- | |||
|8||400||Strength increased | |||
|- | |||
|9||500<ref>Sora's experience can exceed 500, but no additional experience points can be earned after reaching Level 9.</ref>||Defense increased | |||
|} | |||
===Enemies=== | |||
====Shadow==== | |||
{{VCAST/Shadow}} | |||
[[Shadow]]s are the weakest enemy in the game and the only Heartless to appear in multiple worlds. They appear in groups of twos, although only one Shadow is capable of attacking at a time. Shadows spend most of their time sunken into the floor, only leaving this invincible state to attack. They have two basic moves: a simple claw strike, and a jump attack. Shadows can be easily defeated by attacking them as soon as they emerge from the ground. | |||
{{-}} | |||
====Sora's shadow==== | |||
{{VCAST | |||
|name=Sora's shadow | |||
|world=Swashbuckler's Island | |||
|exp=— | |||
|spawns=1 | |||
|room1=Altar | |||
|size1=1 | |||
|count1=1 | |||
|exp1=— | |||
}} | |||
There is a showdown against [[Sora's shadow]] on Swashbuckler's Island. Sora's shadow cannot move or attack autonomously; rather, it mirrors Sora's movements. Attacking Sora's shadow will cause Sora himself to take damage, and magic does not have any effect on either party. To defeat Sora's shadow, maneuver Sora on top of the altar to force Sora's shadow to fall down the hole in the floor on the opposite side of the arena. | |||
{{-}} | |||
====Pot Spider==== | |||
{{VCAST | |||
|name=Pot Spider | |||
|world=Agrabah | |||
|exp=6 | |||
|spawns=4 | |||
|room1=Street | |||
|size1=1 | |||
|count1=2 | |||
|room2=Housing | |||
|size2=1 | |||
|count2=2 | |||
|room3=Temple Entrance | |||
|size3=1 | |||
|count3=2 | |||
|room4=Courtyard | |||
|size4=1 | |||
|count4=1 | |||
}} | |||
[[Pot Spider]]s disguise themselves as normal pots, only revealing their hostile nature when Sora approaches. However, there is only one normal, non-Heartless pot in all of Agrabah, so exposing their camouflage trick should be a simple task. Pot Spiders only have a single attack in which they strike with their front two legs. Because Pot Spiders constantly walk towards Sora, it is advisable to slowly walk backwards to remain out of their attack range – if Sora is too close to the Pot Spider when he lands a strike, the Heartless may retaliate too quickly for Sora to dodge. | |||
{{-}} | |||
====Bandit==== | |||
{{VCAST | |||
|name=Bandit | |||
|world=Agrabah | |||
|exp=10 | |||
|spawns=5 | |||
|room1=Market | |||
|size1=3 | |||
|count1=3 | |||
|room2=Temple Entrance | |||
|size2=2 | |||
|count2=2 | |||
|room3=Waterfall | |||
|size3=1 | |||
|count3=2 | |||
|room4=Cave of Wonders{{Note|Monkey room to the right.}} | |||
|size4=1 | |||
|count4=1 | |||
|room5=Courtyard | |||
|size5=2 | |||
|count5=1 | |||
}} | |||
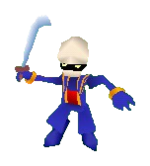
Unlike all other enemies, [[Bandit]]s usually spawn outside of the combat zone. They run towards Sora and perform one of two attacks: a one-handed swipe with their scimitar, or a spinning jump slash. Bandits are capable of dealing massive damage, so it is recommended to bring Potions or Hi-Potions if Sora is at a low level. The simplest way to defeat Bandits is to intercept all of their attacks with Keyblade swings, dealing damage and interrupting their swing, although this requires consistent timing to pull off. | |||
{{-}} | |||
====Blue Rhapsody==== | |||
{{VCAST | |||
|name=Blue Rhapsody | |||
|world=Agrabah | |||
|exp=— | |||
|spawns=1 | |||
|room1=Temple | |||
|size1=4+<ref>The Blue Rhapsody will respawn indefinitely until all four torches are lit.</ref> | |||
|count1=1 | |||
|exp1=12 | |||
}} | |||
The [[Blue Rhapsody]] only appears in the Temple as part of a puzzle. There are four torches that must be lit at each corner of the room, and the Blue Rhapsody must be defeated before the magic interaction icon will appear over the torches. After lighting each torch, the Blue Rhapsody will respawn. Approaching the Heartless to deal melee damage will cause them to run away, and the Blue Rhapsody will extinguish any torches they float past. For this reason, it is a good strategy to use ranged magic attacks, but this will necessitate Ethers or Elixirs. The Blue Rhapsody has a single attack in which it casts the Fire spell; standing near the Heartless or using a physical Keyblade attack will provoke the Blue Rhapsody to cast the spell, but it will never attack if Sora remains at a distance. | |||
{{-}} | |||
====Mummy==== | |||
{{VCAST | |||
|name=Mummy | |||
|world=Agrabah | |||
|exp=8 | |||
|spawns=3 | |||
|room1=Temple | |||
|size1=1 | |||
|count1=1 | |||
|room2=Crypt | |||
|size2=1 | |||
|count2=1 | |||
|room3=Crypt | |||
|size3=1 | |||
|count3=1 | |||
}} | |||
The [[Mummy]] will slowly approach Sora, dealing contact damage if it gets too close. Mummies are immune to physical attacks and can only be damaged by magic. If Sora is below level 5, it will take at least one Ether to defeat a Mummy. | |||
{{-}} | |||
====Jafar==== | |||
{{VCAST | |||
|name=Jafar | |||
|name2=Cobra | |||
|file2=Jafar (Cobra) KHVC | |||
|world=Agrabah | |||
|exp=35 | |||
|spawns=1 | |||
|room1=Throne | |||
|size1=1 | |||
|count1=1 | |||
}} | |||
The boss fight against [[Jafar]] is split into two phases. During the first phase, Jafar floats between three platforms and uses fire-based magic attacks. Attacking Jafar causes him to drop three random prizes, but it does not deal any damage. Destroying the three platforms with physical strikes or magic spells will cause Jafar to activate his second phase, in which he turns into his cobra form. Cobra Jafar stays at the center of the arena and has a single bite attack. He will telegraph this attack by facing his target; he will either attack Sora or target a MP prize that spawns from the holes in the arena floor. Jafar can only be damaged by magic, but he will still drop prizes when hit, and there are naturally-spawning MP prizes around the arena to replenish Sora's magic. | |||
{{-}} | |||
====Darkball==== | |||
{{VCAST | |||
|name=Darkball | |||
|world=Maleficent's Castle | |||
|exp=12 | |||
|spawns=4 | |||
|room1=Gate | |||
|size1=1 | |||
|count1=1 | |||
|room2=Bridge | |||
|size2=1 | |||
|count2=1 | |||
|room3=Maze | |||
|size3=1 | |||
|count3=1 | |||
|room4=Staircase | |||
|size4=3 | |||
|count4=2 | |||
}} | |||
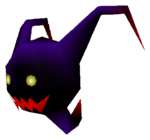
[[Darkball]]s will float towards Sora and attack with a basic bite technique. Their attacks can be intercepted with physical or magic strikes, denying the Darkball the opportunity to damage Sora. | |||
{{-}} | |||
====Maleficent's goon==== | |||
{{VCAST | |||
|name=Maleficent's goon | |||
|world=Maleficent's Castle | |||
|exp=10 | |||
|spawns=3 | |||
|room1=Courtyard | |||
|size1=2 | |||
|count1=2 | |||
|room2=Maze | |||
|size2=1 | |||
|count2=1 | |||
|room3=Staircase | |||
|size3=3 | |||
|count3=2 | |||
}} | |||
The [[Maleficent's Goon|axe-wielding goons]] guards the entrance to Maleficent's Castle. These pig soldiers can attack with either their axe or their rotund body. In either case, they do not pose much of a threat as long as Sora keeps his distance and preempts the goon's attacks. | |||
{{-}} | |||
====Air Soldier==== | |||
{{VCAST | |||
|name=Air Soldier | |||
|world=Maleficent's Castle | |||
|exp=15 | |||
|spawns=2 | |||
|room1=Maze | |||
|size1=1 | |||
|count1=2 | |||
|room2=Staircase | |||
|size2=4 | |||
|count2=2 | |||
}} | |||
[[Air Soldier]]s are the most formidable among the basic enemies. They possess the greatest amount of health, but like nearly every other enemy, will simply alternate between attacking and waiting, making their actions predictable. Air Soliders have one attack, a basic strike, and it can be easily intercepted by one of Sora's own moves. | |||
{{-}} | |||
====Maleficent==== | |||
{{VCAST | |||
|name=Maleficent (Dragon) | |||
|world=Maleficent's Castle | |||
|exp=40 | |||
|spawns=1 | |||
|room1=Tower | |||
|size1=1 | |||
|count1=1 | |||
}} | |||
[[Maleficent]] adopts her dragon form for the final showdown against Sora. She has a dangerous bite attack and a fire-based magic technique. Periodically throughout the battle, Maleficent will disappear and re-emerge on another side of the tower roof. Like Jafar, Maleficent is immune to physical attacks, but hitting her with the Keyblade will cause three random prizes to drop. This infinite resource replenishment makes it a simple task to keep Sora's HP and MP gauges full. | |||
{{-}} | |||
===Treasures=== | |||
{|cellspacing="0" cellpadding="2" border="1" align="center" style="width:800px" | |||
|-style="{{style|kh1|a}}" | |||
!style="width:25%"|Item | |||
!style="width:25%"|Location | |||
!style="width:50%"|Notes | |||
|- | |||
!colspan="3" style="{{style|kh1|b}}"|Obstacle course | |||
|- | |||
|key<!--not capitalized-->||Section 6||Defeat the Shadow. | |||
|- | |||
!colspan="3" style="{{style|kh1|b}}"|Swashbuckler's Island | |||
|- | |||
|Potion||Raft|| | |||
|- | |||
|5 Munny||Tower|| | |||
|- | |||
|Gem||Tower||Knock down the tower roof. | |||
|- | |||
|10 Munny||Barrel room|| | |||
|- | |||
!colspan="3" style="{{style|kh1|b}}"|Agrabah | |||
|- | |||
|Elixir||Street|| | |||
|- | |||
|1 Munny||Street|| | |||
|- | |||
|Golden Coin||Street|| | |||
|- | |||
|Elixir||Market|| | |||
|- | |||
|Elixir||Market|| | |||
|- | |||
|Elixir||Market|| | |||
|- | |||
|Golden Coin||Housing|| | |||
|- | |||
|5 Munny||Room|| | |||
|- | |||
|Elixir||Temple Entrance|| | |||
|- | |||
|Golden Coin||Crypt|| | |||
|- | |||
|Half Scarab Beetle||Crypt|| | |||
|- | |||
|Elixir||Courtyard|| | |||
|- | |||
|Elixir||Courtyard|| | |||
|- | |||
!colspan="3" style="{{style|kh1|b}}"|Maleficent's Castle | |||
|- | |||
|Elixir||Gate||Lower room. | |||
|- | |||
|Potion||Courtyard||Exterior room. | |||
|- | |||
|15 Munny||Courtyard||Interior room. | |||
|- | |||
|Nothing{{Note|The chest does not have anything inside of it.}}||Maze||First room. | |||
|- | |||
|Hi-Potion||Maze||First room. | |||
|- | |||
|Hi-Potion||Maze||First room. | |||
|- | |||
|Hi-Potion||Maze||First room. | |||
|- | |||
|Hi-Potion||Maze||Second room. | |||
|- | |||
|Elixir||Maze||Second room. | |||
|- | |||
|Hi-Potion||Maze||Second room. | |||
|- | |||
|Elixir||Maze||Second room. | |||
|- | |||
|Elixir||Staircase||Left side room. | |||
|- | |||
|Hi-Potion||Staircase||Left side room. | |||
|- | |||
|Potion||Staircase||Right side room. | |||
|- | |||
|Ether||Staircase||Right side room. | |||
|- | |||
|Potion||Tower|| | |||
|- | |||
|Potion||Tower|| | |||
|} | |||
==Gallery== | |||
<gallery> | |||
File:Opening Menu KHVC.png|The [[Opening Menu]]. | |||
File:Game Over KHVC.png|The [[Game Over]] screen. | |||
File:The End KHVC.png|[[The End]]. | |||
File:Swashbuckler's Island 01 KHVC.png|Sora faces off against Sora's shadow. | |||
File:Wonderland 01 KHVC.png|Sora and the Caterpillar in Alice in Wonderland. | |||
File:Wonderland 02 KHVC.png|Sora in Alice in Wonderland. | |||
File:Agrabah 01 KHVC.png|An early screenshot of Sora fighting a Bandit in Agrabah. | |||
File:Agrabah 03 KHVC.png|Donald and Goofy captured by Maleficent. | |||
File:Maleficent's Castle 01 KHVC.png|Maleficent's Castle. | |||
File:Maleficent's Castle 03 KHVC.png|Sora without the Keyblade. | |||
File:Maleficent's Castle 04 KHVC.png|The final confrontation with Maleficent. | |||
File:Merchant KHVC.png|The merchant from Agrabah. | |||
File:Old man KHVC.png|The old man from Agrabah. | |||
</gallery> | |||
==Notes and references== | |||
{{reflist}} | |||
{{KH series}} | |||
[[fr:Kingdom Hearts V CAST]] | |||
[[de:Kingdom Hearts V CAST]] | |||
[[Category:Games]] | |||
[[Category:Kingdom Hearts V CAST]] | |||
Latest revision as of 17:08, 8 December 2024
| Kingdom Hearts V CAST | |
|---|---|

| |
| Developer(s) | Superscape |
| Publisher(s) | |
| Release date(s) | |
| Genre | Action RPG |
| Game modes | Single player |
| Ratings | N/A |
| Platform(s) | Verizon Wireless V CAST |
Kingdom Hearts V CAST, officially Kingdom Hearts, was a mobile game developed exclusively for V CAST, Verizon Wireless's broadband service. It was released on February 1, 2005 in the United States as one of the launch games for the V CAST service. The game has since been discontinued and is no longer officially accessible, and it is not canon to the Kingdom Hearts series in any way.[2]
Development[edit]
Kingdom Hearts V CAST was developed by Superscape and published by the Walt Disney Internet Group (now known as the Disney Interactive Media Group) and Verizon Wireless as a launch title for the V CAST cellular internet service. Square Enix was not involved in any way. Aside from some familiar characters and settings, the game has no connection to the plot of the Kingdom Hearts series, and it is considered non-canonical.[2]
Verizon shut down V CAST on December 15, 2012, and all content exclusive to it was made unavailable. This includes Kingdom Hearts V CAST, which hasn't been re-released by Square Enix or Disney, making this game impossible to play without having a phone that still has it installed. Additionally, only one chapter of the game could be stored on a phone at a time – to download another chapter, the currently-saved one must be deleted.
Video game preservationists[3] have managed to recover and emulate the game's first, third, and fourth chapters with the Obstacle Course, Swashbuckler's Island, Agrabah, and Maleficent's Castle.[4][5] However, no files relating to the second chapter Wonderland (also referred to as "Alice in Wonderland") have been found, currently making it lost media.
Sora is helped by "more than 20 characters" over the course of the game.[1] In the lost Wonderland chapter, Sora would have met The Caterpillar and fought against the Purple Crocodile, as well as another enemy referred to in the game's files as "UmbrellaBird".
The soundtrack of Kingdom Hearts V CAST was composed by Ian Livingstone. It has never been officially released on an album.
Story[edit]
Sora, Donald, Goofy, and Jiminy Cricket are returning from an adventure. On the journey back, Sora sets the Gummi Ship controls to economy wash and goes to sleep, except his dreams begin to spiral out of control.
Sora wakes up on Swashbuckler's Island. Sora does not know how he got there, and his companions are nowhere in sight. Caw, a parrot native to the island, guides Sora as he gathers materials to build a raft. Maleficent summons Sora's shadow to confront Sora at an altar with the Heartless emblem; although Sora defeats his shadow, he is bitten by a tendril of darkness that inflicts a dark curse. Sora and Caw leave on their raft to seek out The Caterpillar in another world.
In Wonderland, Sora is separated from Caw but manages to find The Caterpillar. To save Sora from the darkness growing inside him, The Caterpillar instructs him to concoct a potion out of the teeth of three magical creatures. Sora vanquishes the Purple Crocodile and collects the first of the teeth. Meanwhile, Donald and Goofy head off in search of Sora.
Sora wakes up from another dream in Agrabah. An old man in the marketplace guides Sora to the Cave of Wonders – but only after Sora purchases him a cane for three golden coins. In the Cave of Wonders, Sora acquires the magic lamp and summons Genie, who grants him three wishes; his first wish is immediately used to escape the lava-filled cavern. Sora then confronts Jafar, who reveals that he has allied himself with the Heartless. After dispatching Jafar's cobra form and collecting a snake tooth, Sora uses his second wish to create a portal to Maleficent's Castle. Genie is unable to fulfill his final wish to defeat the Heartless, so Sora takes the portal in search of a dragon tooth. Elsewhere, Maleficent captures Donald and Goofy.
Fighting his way into Maleficent's Castle, Sora stumbles upon Caw trapped in a cell. However, it was a trick by Maleficent to steal Sora's Keyblade. Sora continues his journey through the castle and finds Donald and Goofy trapped in prison cells. Eventually, he finds the Kingdom Key inside a machine; he reclaims his Keyblade, accidentally activating the machine in the process. This, too, was a setup by Maleficent: only Sora's pure heart could open the portals that can spread darkness to the worlds. She also reveals that Sora will be fully consumed by darkness if he does not cure his darkness by midnight. Maleficent casts a spell removing the Keyblade's magic and retreats to the castle's tower.
Unable to confront Maleficent in his current state, Sora instead returns to free Donald and Goofy. While thinking of a plan, Goofy accidentally reveals a hidden entrance to Maleficent's potion room. Sora harnesses the power of Sora's shadow through a strange mirror, restoring the Keyblade's magic. Donald and Goofy remain behind to help find the antidote, while Sora confronts Maleficent on top of the tower. Sora emerges victorious over Maleficent's dragon form, collecting a dragon tooth before returning to deactivate Maleficent's machine. Having saved the worlds from darkness, Sora rushes back to his companions to formulate the potion needed to cure him. He jumps into the cauldron, and the world begins to spiral around him.
Sora wakes up in the Gummi Ship with Donald and Goofy by his side. The entire adventure was just a dream; still, some signs of the journey remain. Thus ends this chapter of Sora's battle with the darkness.
Worlds[edit]
Obstacle Course[edit]
The Obstacle Course is a training area used for the game's tutorial. It consists of six sections with grassy floors and stone edges floating in an endless blue sky. The end of each section teleports Sora directly into the next. Section 1 consists of a single flat zigzagging path. Section 2 contains a rock path across a small pond, while the larger pond dividing Section 3 can be crossed using a staircase, floating platforms, and a zipline. In Section 4, there is a pit with a wooden crate, and in Section 5, there is a drawbridge tied to a palm tree. The final area, Section 6, is home to a single Shadow and an exit gate.
Swashbuckler's Island[edit]
Sora awakens in the Raft area of Swashbuckler’s Island, a sandy beach at the edge of the rocky island. Past a cave on the right side of the beach lies the Tower, a second beachy outlook with an old wooden tower. Following another cave leads to a cavern filled with lava, where an altar gem is protected by a rolling barrel trap.
A rocky path leads from the left side of the Raft to the Altar, a mysterious stone shrine with the Heartless emblem. Inserting four gems into the altar grants Blizzard and activates a trapdoor trap that leads to an underground cavern with a wrecked ship.
Agrabah[edit]
Sora wakes up in a small, featureless room. Outside the room is the Street, an alleyway with scaffolding and ropes. The Street connects to another room with a rope and switch puzzle that grants access to the Market. The old man and merchant are located beneath two of the street stalls in the Market. The Market also has a ladder which leads back to the room Sora started in.
The right path from the Market leads to Housing, a street with many buildings. The Room at the end of the street contains a ladder that grants access to the upper level of Housing; navigating the rooftops leads to a small room with a small pedestal that grants the Fire spell.
The left path from the Market connects to the Temple Entrance, a street with a small oasis in the center of a split stairway. At the top of the stairs lies the Temple. Once the four braziers in the corners of the Temple are lit, a Mummy will climb out of a rectangular coffin; defeating them will cause the coffin to slide over, revealing a hole in the floor. Beneath the Temple lies the Crypt, where sarcophagi lining the walls hide alcoves containing treasure. Behind the sarcophagus on the red-lined wall is a door that requires a golden scarab beetle to open.
After the two halves of the scarab beetle have been placed in the door, Sora can enter the Cave of Wonders. All three rooms of the cave are flooded. In the central room where Sora enters, there is a steep rock pedestal with the Magic Lamp. The room to the left, the Waterfall, has a monkey statue hidden at the top of a waterfall. The room to the right has a monkey statue next to two braziers. Once two gems from the central room are placed in both monkey statues, the lamp becomes accessible; grabbing the lamp causes the entire cave to flood with lava.
Using Genie's magic to flee the Cave of Wonders, Sora finds himself in the Courtyard, the grand entrance of the royal palace. A large gate leads back from the Courtyard into the Market, while continuing forward leads to the Throne where Jafar is fought. Once Sora destroys the throne and two pedestals, Jafar will destroy the floor of the room, leading to a second underground portion of the Throne floating over a pool of lava.
Maleficent's Castle[edit]
Maleficent's Castle is dark and foreboding, with menacing stone architecture complemented by black thorns. Sora enters Maleficent's Castle through the Gate, consisting of two rooms; the lower room of the Gate is a passage containing a lever that allows the gate itself to be opened in the upper level. Ahead lies the Bridge, the final obstacle leading to the castle proper.
The large square Courtyard sits within the castle walls, with a small interior section leading to a ledge at the top of the room. Beyond the Courtyard is a broken wooden pathway over a large pit; as Sora crosses the room, one of Maleficent's goons throws rocks from a vantage. The exit leads to the Cell where Sora encounters Maleficent and is subsequently trapped, using a suspended metal cage to escape through a hole in the ceiling.
Proceeding through the castle leads to the Maze. The first two rooms of the Maze contain a series of gates and pressure plates blocking the way forward. The third and final room of the Maze contains two prison cells where Donald and Goofy are being held. A secret doorway in the back of Goofy's cell hides the Potion Room, which houses Maleficent's cauldron, a strange mirror, and the Thunder spell.
Ahead past the Maze is the Orrery, a large room containing Maleficent's machine and a floating model of the worlds. Its exit leads to the Staircase, where waves of enemies must be defeated to lower each stair and proceed onwards. There are two smaller rooms of the Staircase to either side that contain unguarded treasures. The final room is the Tower. After a treacherous climb, Sora can confront Maleficent at the top of the Tower and then slide back down to the Orrery.
Gameplay[edit]
Kingdom Hearts V CAST features gameplay elements from the original Kingdom Hearts adapted for compatibility with mobile phones. Moving Sora is done using tank controls, with one button on the control pad moving him forward, another moving him backwards, and two more turning him left or right. Moving forward or backwards also adjusts the camera to face where Sora is facing. Jumping, attacking, and context-sensitive actions such as opening chests, grabbing onto ziplines, or lifting crates are all handled by a single button. There is a separate button for using magic, but the player cannot control which spell Sora casts.
There are substantially fewer combat options than in Kingdom Hearts. When enemies are near, Sora can only move, attack, or cast magic (the attack command replaces jump). There are no party members, summons, or on-demand items – the only items in Kingdom Hearts V CAST are activated automatically – and even Sora's attacks are limited to single strikes. Both Sora and enemies get a large period of invincibility after taking a hit, so neither party is capable of performing combos.
Combat is confined to specific areas. Each combat zone has a wave of enemies which can be defeated a set number of times. Due to hardware limitations, only one enemy can spawn in at a time, with the exception of Shadows, which spawn in pairs – however, at least one shadow is in an invulnerable two-dimensional state at any moment, so even these encounters are effectively one-on-one. Experience points are only awarded after the entire wave of enemies is defeated.
At the end of each level, the player is given a score based on the following formula: Munny + (100 * Experience)
Levels and experience[edit]
| Level | Experience | Reward |
|---|---|---|
| 0 | 0 | — |
| 1 | 4 | Max health increased |
| 2 | 8 | Strength increased |
| 3 | 50 | Defense increased |
| 4 | 100 | Max health increased |
| 5 | 150 | Strength increased |
| 6 | 200 | Defense increased |
| 7 | 300 | Max health increased |
| 8 | 400 | Strength increased |
| 9 | 500[6] | Defense increased |
Enemies[edit]
Shadow[edit]
| Shadow | ||||
|---|---|---|---|---|

|
World | EXP per enemy | ||
| Obstacle Course | 0 | |||
| Swashbuckler's Island | 1 | |||
| Agrabah | 1.5 | |||
| Maleficent's Castle | 5 | |||
| Room | Wave size | Wave EXP | Wave count | |
| Section 6 | 1 | 0 | 1 | |
| Tower | 2 | 2 | 2 | |
| Barrel room | 2 | 2 | 1 | |
| Altar | 3 | 3 | 1 | |
| Street | 2 | 3 | 2 | |
| Housing | 2 | 3 | 2 | |
| Courtyard | 3 | 3 | 1 | |
| Gate | 3 | 15 | 1 | |
| Courtyard | 3 | 15 | 1 | |
| Maze | 2 | 10 | 2 | |
| Staircase | 10 | 0 | ∞[7] | |
Shadows are the weakest enemy in the game and the only Heartless to appear in multiple worlds. They appear in groups of twos, although only one Shadow is capable of attacking at a time. Shadows spend most of their time sunken into the floor, only leaving this invincible state to attack. They have two basic moves: a simple claw strike, and a jump attack. Shadows can be easily defeated by attacking them as soon as they emerge from the ground.
Sora's shadow[edit]
| Sora's shadow | ||||
|---|---|---|---|---|

|
World | EXP per enemy | ||
| Swashbuckler's Island | — | |||
| Room | Wave size | Wave EXP | Wave count | |
| Altar | 1 | — | 1 | |
There is a showdown against Sora's shadow on Swashbuckler's Island. Sora's shadow cannot move or attack autonomously; rather, it mirrors Sora's movements. Attacking Sora's shadow will cause Sora himself to take damage, and magic does not have any effect on either party. To defeat Sora's shadow, maneuver Sora on top of the altar to force Sora's shadow to fall down the hole in the floor on the opposite side of the arena.
Pot Spider[edit]
| Pot Spider | ||||
|---|---|---|---|---|

|
World | EXP per enemy | ||
| Agrabah | 6 | |||
| Room | Wave size | Wave EXP | Wave count | |
| Street | 1 | 6 | 2
| |
| Housing | 1 | 6 | 2 | |
| Temple Entrance | 1 | 6 | 2 | |
| Courtyard | 1 | 6 | 1 | |
Pot Spiders disguise themselves as normal pots, only revealing their hostile nature when Sora approaches. However, there is only one normal, non-Heartless pot in all of Agrabah, so exposing their camouflage trick should be a simple task. Pot Spiders only have a single attack in which they strike with their front two legs. Because Pot Spiders constantly walk towards Sora, it is advisable to slowly walk backwards to remain out of their attack range – if Sora is too close to the Pot Spider when he lands a strike, the Heartless may retaliate too quickly for Sora to dodge.
Bandit[edit]
| Bandit | ||||
|---|---|---|---|---|
|
World | EXP per enemy | ||
| Agrabah | 10 | |||
| Room | Wave size | Wave EXP | Wave count | |
| Market | 3 | 30 | 3
| |
| Temple Entrance | 2 | 20 | 2 | |
| Waterfall | 1 | 10 | 2 | |
| Cave of Wonders |
1 | 10 | 1 | |
| Courtyard | 2 | 20 | 1 | |
Unlike all other enemies, Bandits usually spawn outside of the combat zone. They run towards Sora and perform one of two attacks: a one-handed swipe with their scimitar, or a spinning jump slash. Bandits are capable of dealing massive damage, so it is recommended to bring Potions or Hi-Potions if Sora is at a low level. The simplest way to defeat Bandits is to intercept all of their attacks with Keyblade swings, dealing damage and interrupting their swing, although this requires consistent timing to pull off.
Blue Rhapsody[edit]
| Blue Rhapsody | ||||
|---|---|---|---|---|

|
World | EXP per enemy | ||
| Agrabah | — | |||
| Room | Wave size | Wave EXP | Wave count | |
| Temple | 4+[8] | 12 | 1 | |
The Blue Rhapsody only appears in the Temple as part of a puzzle. There are four torches that must be lit at each corner of the room, and the Blue Rhapsody must be defeated before the magic interaction icon will appear over the torches. After lighting each torch, the Blue Rhapsody will respawn. Approaching the Heartless to deal melee damage will cause them to run away, and the Blue Rhapsody will extinguish any torches they float past. For this reason, it is a good strategy to use ranged magic attacks, but this will necessitate Ethers or Elixirs. The Blue Rhapsody has a single attack in which it casts the Fire spell; standing near the Heartless or using a physical Keyblade attack will provoke the Blue Rhapsody to cast the spell, but it will never attack if Sora remains at a distance.
Mummy[edit]
| Mummy | ||||
|---|---|---|---|---|

|
World | EXP per enemy | ||
| Agrabah | 8 | |||
| Room | Wave size | Wave EXP | Wave count | |
| Temple | 1 | 8 | 1
| |
| Crypt | 1 | 8 | 1 | |
| Crypt | 1 | 8 | 1 | |
The Mummy will slowly approach Sora, dealing contact damage if it gets too close. Mummies are immune to physical attacks and can only be damaged by magic. If Sora is below level 5, it will take at least one Ether to defeat a Mummy.
Jafar[edit]
| Jafar | ||||
|---|---|---|---|---|
| World | EXP per enemy | |||
| Agrabah | 35 | |||
| Room | Wave size | Wave EXP | Wave count | |
| Throne | 1 | 35 | 1 | |
The boss fight against Jafar is split into two phases. During the first phase, Jafar floats between three platforms and uses fire-based magic attacks. Attacking Jafar causes him to drop three random prizes, but it does not deal any damage. Destroying the three platforms with physical strikes or magic spells will cause Jafar to activate his second phase, in which he turns into his cobra form. Cobra Jafar stays at the center of the arena and has a single bite attack. He will telegraph this attack by facing his target; he will either attack Sora or target a MP prize that spawns from the holes in the arena floor. Jafar can only be damaged by magic, but he will still drop prizes when hit, and there are naturally-spawning MP prizes around the arena to replenish Sora's magic.
Darkball[edit]
| Darkball | ||||
|---|---|---|---|---|
|
World | EXP per enemy | ||
| Maleficent's Castle | 12 | |||
| Room | Wave size | Wave EXP | Wave count | |
| Gate | 1 | 12 | 1
| |
| Bridge | 1 | 12 | 1 | |
| Maze | 1 | 12 | 1 | |
| Staircase | 3 | 36 | 2 | |
Darkballs will float towards Sora and attack with a basic bite technique. Their attacks can be intercepted with physical or magic strikes, denying the Darkball the opportunity to damage Sora.
Maleficent's goon[edit]
| Maleficent's goon | ||||
|---|---|---|---|---|

|
World | EXP per enemy | ||
| Maleficent's Castle | 10 | |||
| Room | Wave size | Wave EXP | Wave count | |
| Courtyard | 2 | 20 | 2
| |
| Maze | 1 | 10 | 1 | |
| Staircase | 3 | 30 | 2 | |
The axe-wielding goons guards the entrance to Maleficent's Castle. These pig soldiers can attack with either their axe or their rotund body. In either case, they do not pose much of a threat as long as Sora keeps his distance and preempts the goon's attacks.
Air Soldier[edit]
| Air Soldier | ||||
|---|---|---|---|---|
|
World | EXP per enemy | ||
| Maleficent's Castle | 15 | |||
| Room | Wave size | Wave EXP | Wave count | |
| Maze | 1 | 15 | 2
| |
| Staircase | 4 | 60 | 2 | |
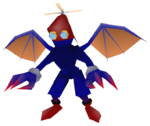
Air Soldiers are the most formidable among the basic enemies. They possess the greatest amount of health, but like nearly every other enemy, will simply alternate between attacking and waiting, making their actions predictable. Air Soliders have one attack, a basic strike, and it can be easily intercepted by one of Sora's own moves.
Maleficent[edit]
| Maleficent (Dragon) | ||||
|---|---|---|---|---|

|
World | EXP per enemy | ||
| Maleficent's Castle | 40 | |||
| Room | Wave size | Wave EXP | Wave count | |
| Tower | 1 | 40 | 1 | |
Maleficent adopts her dragon form for the final showdown against Sora. She has a dangerous bite attack and a fire-based magic technique. Periodically throughout the battle, Maleficent will disappear and re-emerge on another side of the tower roof. Like Jafar, Maleficent is immune to physical attacks, but hitting her with the Keyblade will cause three random prizes to drop. This infinite resource replenishment makes it a simple task to keep Sora's HP and MP gauges full.
Treasures[edit]
| Item | Location | Notes |
|---|---|---|
| Obstacle course | ||
| key | Section 6 | Defeat the Shadow. |
| Swashbuckler's Island | ||
| Potion | Raft | |
| 5 Munny | Tower | |
| Gem | Tower | Knock down the tower roof. |
| 10 Munny | Barrel room | |
| Agrabah | ||
| Elixir | Street | |
| 1 Munny | Street | |
| Golden Coin | Street | |
| Elixir | Market | |
| Elixir | Market | |
| Elixir | Market | |
| Golden Coin | Housing | |
| 5 Munny | Room | |
| Elixir | Temple Entrance | |
| Golden Coin | Crypt | |
| Half Scarab Beetle | Crypt | |
| Elixir | Courtyard | |
| Elixir | Courtyard | |
| Maleficent's Castle | ||
| Elixir | Gate | Lower room. |
| Potion | Courtyard | Exterior room. |
| 15 Munny | Courtyard | Interior room. |
| Nothing |
Maze | First room. |
| Hi-Potion | Maze | First room. |
| Hi-Potion | Maze | First room. |
| Hi-Potion | Maze | First room. |
| Hi-Potion | Maze | Second room. |
| Elixir | Maze | Second room. |
| Hi-Potion | Maze | Second room. |
| Elixir | Maze | Second room. |
| Elixir | Staircase | Left side room. |
| Hi-Potion | Staircase | Left side room. |
| Potion | Staircase | Right side room. |
| Ether | Staircase | Right side room. |
| Potion | Tower | |
| Potion | Tower | |
Gallery[edit]
The Opening Menu.
The Game Over screen.
Notes and references[edit]
- ^ a b Verizon Wireless press release
- ^ a b Kingdom Hearts Chain of Memories Ultimania—From "KHCOM" to "KHII", p. 6; Interviewer: "We have heard that, in America, there is a KH being developed for the mobile phone." / Tetsuya Nomura: "There are quite a few things concerning that...officially it has nothing to do with the original KH. It's completely different. The title is KH, Sora makes an appearance, but the story has nothing to do whatsoever with the KH, KHCOM, and KHII we're developing, because it is Disney who designed V-Cast." (Translation by Mors)
- ^ Kingdom Hearts V-CAST Game Files Ripped
- ^ Kingdom Hearts V CAST - Youtube
- ^ Kingdom Hearts V-Cast Maleficent's Castle (last stage) - Youtube
- ^ Sora's experience can exceed 500, but no additional experience points can be earned after reaching Level 9.
- ^ The Shadows are designed to be unkillable and will respawn indefinitely.
- ^ The Blue Rhapsody will respawn indefinitely until all four torches are lit.

