Blueprint: Difference between revisions
No edit summary |
|||
| (14 intermediate revisions by 3 users not shown) | |||
| Line 5: | Line 5: | ||
In ''{{c|Kingdom Hearts|game}}'', Blueprints can be obtained as drops from enemy ships, as rewards from [[Geppetto]] and [[Pinocchio]], and in the ''Final Mix'' version, as rewards for completing [[Gummi Missions]]. | In ''{{c|Kingdom Hearts|game}}'', Blueprints can be obtained as drops from enemy ships, as rewards from [[Geppetto]] and [[Pinocchio]], and in the ''Final Mix'' version, as rewards for completing [[Gummi Missions]]. | ||
Some Blueprints were changed for the International version, while several more | Some Blueprints were changed for the International version, while several more were changed for the ''Final Mix'' version of the game. | ||
{|border=1 cellpadding=2 cellspacing=0 style="text-align:center; font-size:90%" width="1400px" | {|border=1 cellpadding=2 cellspacing=0 style="text-align:center; font-size:90%" width="1400px" | ||
|- style=" | |- style="{{style|kh1|a}}; font-size:12px" | ||
!colspan="3" | !colspan="3" style="width:17%"|Blueprint | ||
!rowspan="2" | !rowspan="2" style="width:18%"|Name | ||
!rowspan="2" | !rowspan="2" style="width:15%"|Obtained | ||
!colspan="3" | !colspan="3" style="width:17%"|Blueprint | ||
!rowspan="2" | !rowspan="2" style="width:18%"|Name | ||
!rowspan="2" | !rowspan="2" style="width:15%"|Obtained | ||
|-style=" | |-style="{{style|kh1|b}}" | ||
!Japanese | !Japanese | ||
!International | !International | ||
| Line 21: | Line 21: | ||
!International | !International | ||
!''Final Mix'' | !''Final Mix'' | ||
|- | |- | ||
|colspan="3"|[[File:Kingdom Model KH.png|100x100px]]||{{nihongo|'''[[Kingdom]]'''|キングダムモデル|<br>Kingudamu Moderu|lit. "Kingdom Model"}}|||Default | |colspan="3"|[[File:Kingdom Model KH.png|100x100px]]||{{nihongo|'''[[Kingdom]]'''|キングダムモデル|<br>Kingudamu Moderu|lit. "Kingdom Model"}}|||Default | ||
|colspan="3"|[[File:Hyperion Model KH.png|100x100px]]||{{nihongo|'''{{c|Hyperion|Gummi Ship}}'''|ハイペリオン|<br>Haiperion}}||Speak with Geppetto after defeating 5000 Heartless and learning all six summons. | |colspan="3"|[[File:Hyperion Model KH.png|100x100px]]||{{nihongo|'''{{c|Hyperion|Gummi Ship}}'''|ハイペリオン|<br>Haiperion}}||Speak with Geppetto after defeating 5000 Heartless and learning all six summons. | ||
|- | |- | ||
|colspan="3"|[[File:Geppetto Model KH.png|100x100px]]||{{nihongo|'''{{c|Geppetto|Gummi Ship}}'''|ゼペットモデル|<br>Zepetto Moderu|lit. "Geppetto Model"}}||Speak with Geppetto. | |colspan="3"|[[File:Geppetto Model KH.png|100x100px]]||{{nihongo|'''{{c|Geppetto|Gummi Ship}}'''|ゼペットモデル|<br>Zepetto Moderu|lit. "Geppetto Model"}}||Speak with Geppetto. | ||
|colspan="3"|[[File:Cid Model KH.png|100x100px]]||{{nihongo|'''{{c|Cid|Gummi Ship}}'''|シドモデル|<br>Shido Moderu|lit. "Cid Model"}}||Speak with Geppetto after defeating 500 Heartless. | |colspan="3"|[[File:Cid Model KH.png|100x100px]]||{{nihongo|'''{{c|Cid|Gummi Ship}}'''|シドモデル|<br>Shido Moderu|lit. "Cid Model"}}||Speak with Geppetto after defeating 500 Heartless. | ||
|- | |- | ||
|colspan="3"|[[File:Leon Model KH.png|100x100px]]||{{nihongo|'''{{c|Leon|Gummi Ship}}'''|レオンモデル|<br>Reon Moderu|lit. "Leon Model"}}||Speak with Geppetto after defeating 4000 Heartless. | |colspan="3"|[[File:Leon Model KH.png|100x100px]]||{{nihongo|'''{{c|Leon|Gummi Ship}}'''|レオンモデル|<br>Reon Moderu|lit. "Leon Model"}}||Speak with Geppetto after defeating 4000 Heartless. | ||
|colspan="3"|[[File:Yuffie Model KH.png|100x100px]]||{{nihongo|'''{{c|Yuffie|Gummi Ship}}'''|ユフィモデル|<br>Yufi Moderu|lit. "Yuffie Model"}}||Speak with Geppetto after defeating 1500 Heartless. | |colspan="3"|[[File:Yuffie Model KH.png|100x100px]]||{{nihongo|'''{{c|Yuffie|Gummi Ship}}'''|ユフィモデル|<br>Yufi Moderu|lit. "Yuffie Model"}}||Speak with Geppetto after defeating 1500 Heartless. | ||
|- | |- | ||
|colspan="3"|[[File:Aerith Model KH.png|100x100px]]||{{nihongo|'''{{c|Aerith|Gummi Ship}}'''|エアリスモデル|<br>Earisu Moderu|lit. "Aerith Model"}}||Speak with Geppetto after defeating 3000 Heartless. | |colspan="3"|[[File:Aerith Model KH.png|100x100px]]||{{nihongo|'''{{c|Aerith|Gummi Ship}}'''|エアリスモデル|<br>Earisu Moderu|lit. "Aerith Model"}}||Speak with Geppetto after defeating 3000 Heartless. | ||
|colspan="3"|[[File:Cactuar Model KH.png|100x100px]]||{{nihongo|'''[[Cactuar]]'''|サボテンダー|<br>Sabotendā}}||Speak with Geppetto after defeating 1000 Heartless. | |colspan="3"|[[File:Cactuar Model KH.png|100x100px]]||{{nihongo|'''[[Cactuar]]'''|サボテンダー|<br>Sabotendā}}||Speak with Geppetto after defeating 1000 Heartless. | ||
|- | |- | ||
|colspan="3"|[[File:Chocobo Model KH.png|100x100px]]||{{nihongo|'''[[Chocobo]]'''|チョコボ|<br>Chokobo}}||Speak with Pinocchio after entering [[Geppetto's House]] thirty times. | |colspan="3"|[[File:Chocobo Model KH.png|100x100px]]||{{nihongo|'''[[Chocobo]]'''|チョコボ|<br>Chokobo}}||Speak with Pinocchio after entering [[Geppetto's House]] thirty times. | ||
|colspan="2"|[[File:Cindy Model A KH.png|100x100px]]||[[File:Cindy Model A KHFM.png|100x100px]]||{{nihongo|'''[[Cindy]]'''|マグ|<br>Magu|lit. "Magu"}}||Defeat Cindy enemy ships. | |colspan="2"|[[File:Cindy Model A KH.png|100x100px]]||[[File:Cindy Model A KHFM.png|100x100px]]||{{nihongo|'''[[Cindy]]'''|マグ|<br>Magu|lit. "Magu"}}||Defeat Cindy enemy ships. | ||
|- | |- | ||
|[[File:Shiva Model A (JP) KH.png|100x100px]]||[[File:Shiva Model A KH.png|100x100px]]||[[File:Shiva Model A KHFM.png|100x100px]]||{{nihongo|'''{{c|Shiva|Gummi Ship}}'''|シヴァ|<br>Shiva}}||Defeat Shiva enemy ships. | |[[File:Shiva Model A (JP) KH.png|100x100px]]||[[File:Shiva Model A KH.png|100x100px]]||[[File:Shiva Model A KHFM.png|100x100px]]||{{nihongo|'''{{c|Shiva|Gummi Ship}}'''|シヴァ|<br>Shiva}}||Defeat Shiva enemy ships. | ||
|colspan="3"|[[File:Lamia Model A KH.png|100x100px]]||{{nihongo|'''[[Lamia]]'''|ラミア|<br>Ramia}}||Defeat Lamia enemy ships. | |colspan="3"|[[File:Lamia Model A KH.png|100x100px]]||{{nihongo|'''[[Lamia]]'''|ラミア|<br>Ramia}}||Defeat Lamia enemy ships. | ||
|- | |- | ||
|colspan="2"|[[File:Sandy Model A KH.png|100x100px]]||[[File:Sandy Model A KHFM.png|100x100px]]||{{nihongo|'''[[Sandy]]'''|ドグ|<br>Dogu|lit. "Dogu"}}||Defeat Sandy enemy ships. | |colspan="2"|[[File:Sandy Model A KH.png|100x100px]]||[[File:Sandy Model A KHFM.png|100x100px]]||{{nihongo|'''[[Sandy]]'''|ドグ|<br>Dogu|lit. "Dogu"}}||Defeat Sandy enemy ships. | ||
|colspan="3"|[[File:Sylph Model A KH.png|100x100px]]||{{nihongo|'''[[Sylph]]'''|シルフ|<br>Shirufu}}||Defeat Sylph enemy ships. | |colspan="3"|[[File:Sylph Model A KH.png|100x100px]]||{{nihongo|'''[[Sylph]]'''|シルフ|<br>Shirufu}}||Defeat Sylph enemy ships. | ||
|- | |- | ||
|colspan="2"|[[File:Carbuncle Model A KH.png|100x100px]]||[[File:Carbuncle Model A KHFM.png|100x100px]]||{{nihongo|'''[[Carbuncle]]'''|カーバンクル|<br>Kābankuru}}||Defeat Carbuncle enemy ships. | |colspan="2"|[[File:Carbuncle Model A KH.png|100x100px]]||[[File:Carbuncle Model A KHFM.png|100x100px]]||{{nihongo|'''[[Carbuncle]]'''|カーバンクル|<br>Kābankuru}}||Defeat Carbuncle enemy ships. | ||
|colspan="2"|[[File:Mindy Model A KH.png|100x100px]]||[[File:Mindy Model A KHFM.png|100x100px]]||{{nihongo|'''[[Mindy]]'''|ラグ|<br>Ragu|lit. "Lagu"}}||Defeat Mindy enemy ships. | |colspan="2"|[[File:Mindy Model A KH.png|100x100px]]||[[File:Mindy Model A KHFM.png|100x100px]]||{{nihongo|'''[[Mindy]]'''|ラグ|<br>Ragu|lit. "Lagu"}}||Defeat Mindy enemy ships. | ||
|- | |- | ||
|colspan="3"|[[File:Goblin Model A KH.png|100x100px]]||{{nihongo|'''[[Goblin]]'''|ゴブリン|<br>Goburin}}||Defeat Goblin enemy ships. | |colspan="3"|[[File:Goblin Model A KH.png|100x100px]]||{{nihongo|'''[[Goblin]]'''|ゴブリン|<br>Goburin}}||Defeat Goblin enemy ships. | ||
|colspan="2"|[[File:Bomb Model A KH.png|100x100px]]||[[File:Bomb Model A KHFM.png|100x100px]]||{{nihongo|'''[[Bomb]]'''|ボム|<br>Bomu}}||Defeat Bomb enemy ships. | |colspan="2"|[[File:Bomb Model A KH.png|100x100px]]||[[File:Bomb Model A KHFM.png|100x100px]]||{{nihongo|'''[[Bomb]]'''|ボム|<br>Bomu}}||Defeat Bomb enemy ships. | ||
|- | |- | ||
|colspan=" | |colspan="2"|[[File:Remora Model A KH.png|100x100px]]||[[File:Remora Model A KHFM.png|100x100px]]||{{nihongo|'''[[Remora]]'''|レモラ|<br>Remora}}||Defeat Remora enemy ships. | ||
|[[File:Ahriman Model A (JP) KH.png|100x100px]]||[[File:Ahriman Model A KH.png|100x100px]]||[[File:Ahriman Model A KHFM.png|100x100px]]||{{nihongo|'''[[Ahriman]]'''|アーリマン|<br>Āriman}}||Defeat Ahriman enemy ships. | |[[File:Ahriman Model A (JP) KH.png|100x100px]]||[[File:Ahriman Model A KH.png|100x100px]]||[[File:Ahriman Model A KHFM.png|100x100px]]||{{nihongo|'''[[Ahriman]]'''|アーリマン|<br>Āriman}}||Defeat Ahriman enemy ships. | ||
|- | |- | ||
|colspan="3"|[[File:Imp Model A KH.png|100x100px]]||{{nihongo|'''[[Imp]]'''|インプ|<br>Inpu}}||Defeat Imp enemy ships. | |colspan="3"|[[File:Imp Model A KH.png|100x100px]]||{{nihongo|'''[[Imp]]'''|インプ|<br>Inpu}}||Defeat Imp enemy ships. | ||
|colspan="2"|[[File:Siren Model A KH.png|100x100px]]||[[File:Siren Model A KHFM.png|100x100px]]||{{nihongo|'''[[Siren]]'''|セイレーン|<br>Seirēn}}||Defeat Siren enemy ships. | |colspan="2"|[[File:Siren Model A KH.png|100x100px]]||[[File:Siren Model A KHFM.png|100x100px]]||{{nihongo|'''[[Siren]]'''|セイレーン|<br>Seirēn}}||Defeat Siren enemy ships. | ||
|- | |- | ||
|[[File:Stingray Model A (JP) KH.png|100x100px]]||colspan="2"|[[File:Stingray Model A KH.png|100x100px]]||{{nihongo|'''{{c|Stingray|Gummi Ship}}'''|スティングレイ|<br>Sutingurei}}||Defeat Stingray enemy ships. | |[[File:Stingray Model A (JP) KH.png|100x100px]]||colspan="2"|[[File:Stingray Model A KH.png|100x100px]]||{{nihongo|'''{{c|Stingray|Gummi Ship}}'''|スティングレイ|<br>Sutingurei}}||Defeat Stingray enemy ships. | ||
|colspan="3"|[[File:Catoblepas Model A KH.png|100x100px]]||{{nihongo|'''[[Catoblepas]]'''|カトブレパス|<br>Katoburepasu}}||Defeat Catoblepas enemy ships. | |colspan="3"|[[File:Catoblepas Model A KH.png|100x100px]]||{{nihongo|'''[[Catoblepas]]'''|カトブレパス|<br>Katoburepasu}}||Defeat Catoblepas enemy ships. | ||
|- | |- | ||
|colspan="2"|[[File:Adamant Model A KH.png|100x100px]]||[[File:Adamant Model A KHFM.png|100x100px]]||{{nihongo|'''{{c|Adamant|Gummi Ship}}'''|アダマンタイマイ|<br>Adamantaimai|lit. "Adamantoise"}}||Defeat Adamant enemy ships. | |colspan="2"|[[File:Adamant Model A KH.png|100x100px]]||[[File:Adamant Model A KHFM.png|100x100px]]||{{nihongo|'''{{c|Adamant|Gummi Ship}}'''|アダマンタイマイ|<br>Adamantaimai|lit. "Adamantoise"}}||Defeat Adamant enemy ships. | ||
|colspan="3"|[[File:Serpent Model A KH.png|100x100px]]||{{nihongo|'''[[Serpent]]'''|サーペント|<br>Sāpento}}||Defeat Serpent enemy ships. | |colspan="3"|[[File:Serpent Model A KH.png|100x100px]]||{{nihongo|'''[[Serpent]]'''|サーペント|<br>Sāpento}}||Defeat Serpent enemy ships. | ||
|- | |- | ||
|colspan="2"|[[File:Ifrit Model A KH.png|100x100px]]||[[File:Ifrit Model A KHFM.png|100x100px]]||{{nihongo|'''{{c|Ifrit|Gummi Ship}}'''|イフリート|<br>Ifurīto}}||Defeat Ifrit enemy ships. | |colspan="2"|[[File:Ifrit Model A KH.png|100x100px]]||[[File:Ifrit Model A KHFM.png|100x100px]]||{{nihongo|'''{{c|Ifrit|Gummi Ship}}'''|イフリート|<br>Ifurīto}}||Defeat Ifrit enemy ships. | ||
|colspan="2"|[[File:Odin Model A KH.png|100x100px]]||[[File:Odin Model A KHFM.png|100x100px]]||{{nihongo|'''{{c|Odin|Gummi Ship}}'''|オーディン|<br>Ōdin}}||Defeat Odin enemy ships. | |colspan="2"|[[File:Odin Model A KH.png|100x100px]]||[[File:Odin Model A KHFM.png|100x100px]]||{{nihongo|'''{{c|Odin|Gummi Ship}}'''|オーディン|<br>Ōdin}}||Defeat Odin enemy ships. | ||
|- | |- | ||
|colspan="2"|[[File:Atomos Model A KH.png|100x100px]]||[[File:Atomos Model A KHFM.png|100x100px]]||{{nihongo|'''[[Atomos]]'''|アトモス|<br>Atomosu}}||Defeat Atomos enemy ships. | |colspan="2"|[[File:Atomos Model A KH.png|100x100px]]||[[File:Atomos Model A KHFM.png|100x100px]]||{{nihongo|'''[[Atomos]]'''|アトモス|<br>Atomosu}}||Defeat Atomos enemy ships. | ||
|colspan="2"|[[File:Golem Model A KH.png|100x100px]]||[[File:Golem Model A KHFM.png|100x100px]]||{{nihongo|'''[[Golem]]'''|ゴーレム|<br>Gōremu}}||Defeat Golem enemy ships. | |colspan="2"|[[File:Golem Model A KH.png|100x100px]]||[[File:Golem Model A KHFM.png|100x100px]]||{{nihongo|'''[[Golem]]'''|ゴーレム|<br>Gōremu}}||Defeat Golem enemy ships. | ||
|- | |- | ||
|colspan="2"|[[File:Diablos Model A KH.png|100x100px]]||[[File:Diablos Model A KHFM.png|100x100px]]||{{nihongo|'''[[Diablos]]'''|ディアボロス|<br>Diaborosu}}||Defeat Diablos enemy ships. | |colspan="2"|[[File:Diablos Model A KH.png|100x100px]]||[[File:Diablos Model A KHFM.png|100x100px]]||{{nihongo|'''[[Diablos]]'''|ディアボロス|<br>Diaborosu}}||Defeat Diablos enemy ships. | ||
|colspan="3"|[[File:Deathguise Model A KH.png|100x100px]]||{{nihongo|'''[[Deathguise]]'''|デスゲイズ|<br>Desugeizu|lit. "Deathgaze"}}||Defeat Deathguise enemy ships. | |colspan="3"|[[File:Deathguise Model A KH.png|100x100px]]||{{nihongo|'''[[Deathguise]]'''|デスゲイズ|<br>Desugeizu|lit. "Deathgaze"}}||Defeat Deathguise enemy ships. | ||
|- | |- | ||
|colspan="3"|[[File:Typhoon Model A KH.png|100x100px]]||{{nihongo|'''[[Typhoon]]'''|テュポーン|<br>Tyupōn}}||Defeat Typhoon enemy ships. | |colspan="3"|[[File:Typhoon Model A KH.png|100x100px]]||{{nihongo|'''[[Typhoon]]'''|テュポーン|<br>Tyupōn}}||Defeat Typhoon enemy ships. | ||
|colspan="2"|[[File:Alexander Model A KH.png|100x100px]]||[[File:Alexander Model A KHFM.png|100x100px]]||{{nihongo|'''[[Alexander]]'''|アレクサンダー|<br>Arekusandā}}||Defeat Alexander enemy ships. | |colspan="2"|[[File:Alexander Model A KH.png|100x100px]]||[[File:Alexander Model A KHFM.png|100x100px]]||{{nihongo|'''[[Alexander]]'''|アレクサンダー|<br>Arekusandā}}||Defeat Alexander enemy ships. | ||
|- | |- | ||
|colspan="2"|[[File:Leviathan Model A KH.png|100x100px]]||[[File:Leviathan Model A KHFM.png|100x100px]]||{{nihongo|'''{{c|Leviathan|Gummi Ship}}'''|リヴァイアサン|<br>Rivaiasan}}||Defeat Leviathan enemy ships. | |colspan="2"|[[File:Leviathan Model A KH.png|100x100px]]||[[File:Leviathan Model A KHFM.png|100x100px]]||{{nihongo|'''{{c|Leviathan|Gummi Ship}}'''|リヴァイアサン|<br>Rivaiasan}}||Defeat Leviathan enemy ships. | ||
|colspan="3"|[[File:Ramuh Model A KH.png|100x100px]]||{{nihongo|'''{{c|Ramuh|Gummi Ship}}'''|ラムウ|<br>Ramuu}}||Defeat Ramuh enemy ships. | |colspan="3"|[[File:Ramuh Model A KH.png|100x100px]]||{{nihongo|'''{{c|Ramuh|Gummi Ship}}'''|ラムウ|<br>Ramuu}}||Defeat Ramuh enemy ships. | ||
|- | |- | ||
|colspan="3"|[[File:Omega Model A KH.png|100x100px]]||{{nihongo|'''[[Omega]]'''|オメガ|<br>Omega}}||Defeat Omega enemy ships. | |colspan="3"|[[File:Omega Model A KH.png|100x100px]]||{{nihongo|'''[[Omega]]'''|オメガ|<br>Omega}}||Defeat Omega enemy ships. | ||
|colspan="2"| ||[[File:Moogles Model KHFM.png|100x100px]]||{{nihongo|'''{{c|Moogles|Gummi Ship}}'''|モーグリ|<br>Mōguri|lit. "Moogle"}}||Complete Gummi Mission: Traverse Town Level 3. | |colspan="2"| ||[[File:Moogles Model KHFM.png|100x100px]]||{{nihongo|'''{{c|Moogles|Gummi Ship}}'''|モーグリ|<br>Mōguri|lit. "Moogle"}}||Complete Gummi Mission: Traverse Town Level 3. | ||
|- | |- | ||
|colspan="2"| ||[[File:Valefor Model KHFM.png|100x100px]]||{{nihongo|'''[[Valefor]]'''|ヴァルファーレ|<br>Varufāre}}||Complete Gummi Mission: Wonderland Level 3. | |colspan="2"| ||[[File:Valefor Model KHFM.png|100x100px]]||{{nihongo|'''[[Valefor]]'''|ヴァルファーレ|<br>Varufāre}}||Complete Gummi Mission: Wonderland Level 3. | ||
|colspan="2"| ||[[File:PuPu Model KHFM.png|100x100px]]||{{nihongo|'''[[PuPu]]'''|コヨコヨ|<br>Koyokoyo}}||Complete Gummi Mission: Olympus Coliseum Level 3. | |colspan="2"| ||[[File:PuPu Model KHFM.png|100x100px]]||{{nihongo|'''[[PuPu]]'''|コヨコヨ|<br>Koyokoyo}}||Complete Gummi Mission: Olympus Coliseum Level 3. | ||
|- | |- | ||
|colspan="2"| ||[[File:Cerberus Model KHFM.png|100x100px]]||{{nihongo|'''{{c|Cerberus|Gummi Ship}}'''|ケルベロス|<br>Keruberosu}}||Complete Gummi Mission: Deep Jungle Level 3. | |colspan="2"| ||[[File:Cerberus Model KHFM.png|100x100px]]||{{nihongo|'''{{c|Cerberus|Gummi Ship}}'''|ケルベロス|<br>Keruberosu}}||Complete Gummi Mission: Deep Jungle Level 3. | ||
|colspan="2"| ||[[File:Tonberry Model KHFM.png|100x100px]]||{{nihongo|'''[[Tonberry]]'''|トンベリ|<br>Tonberi}}||Complete Gummi Mission: Agrabah Level 3. | |colspan="2"| ||[[File:Tonberry Model KHFM.png|100x100px]]||{{nihongo|'''[[Tonberry]]'''|トンベリ|<br>Tonberi}}||Complete Gummi Mission: Agrabah Level 3. | ||
|- | |- | ||
|colspan="2"| ||[[File:Pandaemonium Model KHFM.png|100x100px]]||{{nihongo|'''[[Pandaemonium]]'''|パンデモニウム|<br>Pandemoniumu}}||Complete Gummi Mission: Atlantica Level 3. | |colspan="2"| ||[[File:Pandaemonium Model KHFM.png|100x100px]]||{{nihongo|'''[[Pandaemonium]]'''|パンデモニウム|<br>Pandemoniumu}}||Complete Gummi Mission: Atlantica Level 3. | ||
|colspan="2"| ||[[File:Ixion Model KHFM.png|100x100px]]||{{nihongo|'''[[Ixion]]'''|イクシオン|<br>Ikushion}}||Complete Gummi Mission: Halloween Town Level 3. | |colspan="2"| ||[[File:Ixion Model KHFM.png|100x100px]]||{{nihongo|'''[[Ixion]]'''|イクシオン|<br>Ikushion}}||Complete Gummi Mission: Halloween Town Level 3. | ||
|- | |- | ||
|colspan="2"| ||[[File:Gilgamesh Model KHFM.png|100x100px]]||{{nihongo|''' | |colspan="2"| ||[[File:Gilgamesh Model KHFM.png|100x100px]]||{{nihongo|'''{{c|Gilgamesh|Gummi Ship}}'''|ギルガメッシュ|<br>Girugamesshu}}||Complete Gummi Mission: Neverland Level 3. | ||
|colspan="2"| ||[[File:Phoenix Model KHFM.png|100x100px]]||{{nihongo|'''{{c|Phoenix|Gummi Ship}}'''|フェニックス|<br>Fenikkusu}}||Complete Gummi Mission: Hollow Bastion Level 3. | |colspan="2"| ||[[File:Phoenix Model KHFM.png|100x100px]]||{{nihongo|'''{{c|Phoenix|Gummi Ship}}'''|フェニックス|<br>Fenikkusu}}||Complete Gummi Mission: Hollow Bastion Level 3. | ||
|- | |- | ||
|colspan="2"| ||[[File:Eden Model KHFM.png|100x100px]]||{{nihongo|'''[[Eden]]'''|エデン|<br>Eden}}||Complete Gummi Mission: End of the World Level 3. | |colspan="2"| ||[[File:Eden Model KHFM.png|100x100px]]||{{nihongo|'''[[Eden]]'''|エデン|<br>Eden}}||Complete Gummi Mission: End of the World Level 3. | ||
|colspan="2"| ||[[File:Bahamut Model KHFM.png|100x100px]]||{{nihongo|'''{{c|Bahamut|Gummi Ship}}'''|バハムート|<br>Bahamūto}}||Complete all Gummi Missions. | |colspan="2"| ||[[File:Bahamut Model KHFM.png|100x100px]]||{{nihongo|'''{{c|Bahamut|Gummi Ship}}'''|バハムート|<br>Bahamūto}}||Complete all Gummi Missions. | ||
|} | |} | ||
==''Kingdom Hearts II''== | |||
In ''[[Kingdom Hearts II]]'', Blueprints are divided into {{nihongo|'''Sample Blueprints'''|おすすめ設計図|Osusume Sekkeizu|lit. "Recommended Blueprint"}} and {{nihongo|'''Special Models'''|スペシャルモデル|Supesharu Moderu}}. Sample Blueprints are obtained when collecting the required {{c|Gummi Blocks|kh2}} to create one, while Special Models are obtained as treasures or ranking rewards in [[Gummi Missions]]. | In ''[[Kingdom Hearts II]]'', Blueprints are divided into {{nihongo|'''Sample Blueprints'''|おすすめ設計図|Osusume Sekkeizu|lit. "Recommended Blueprint"}} and {{nihongo|'''Special Models'''|スペシャルモデル|Supesharu Moderu}}. Sample Blueprints are obtained when collecting the required {{c|Gummi Blocks|kh2}} to create one, while Special Models are obtained as treasures or ranking rewards in [[Gummi Missions]]. | ||
Several Blueprints come with one or two [[Teeny Ship]]s, whose Blueprints are unlocked simultaneously. | Several Blueprints come with one or two [[Teeny Ship]]s, whose Blueprints are unlocked simultaneously. | ||
===Sample Blueprints=== | |||
{|border=1 cellpadding=2 cellspacing=0 style="text-align:center; font-size:90%" width=" | {|border=1 cellpadding=2 cellspacing=0 style="text-align:center; font-size:90%" width="1400px" | ||
|- style=" | |- style="{{style|kh2|a}}; font-size:12px" | ||
! | !style="width:8%"|Blueprint | ||
! | !style="width:18%"|Name | ||
! | !style="width:16%"|Obtained | ||
! | !style="width:8%"|Teeny Ship(s) | ||
! | !style="width:8%"|Blueprint | ||
! | !style="width:18%"|Name | ||
! | !style="width:16%"|Obtained | ||
! | !style="width:8%"|Teeny Ship(s) | ||
|- | |- | ||
|[[File:Highwind Model KHII.png|100x100px]]||'''[[Highwind]]'''||Default||None | |[[File:Highwind Model KHII.png|100x100px]]||{{nihongo|'''[[Highwind]]'''|ハイウインド|<br>Haiuindo}}||Default||None | ||
|[[File:Highwind Lv. 1 Model KHII.png|100x100px]]||'''[[Highwind Lv. 1]]'''||Collect the required Gummi Blocks<br>(Asteroid Sweep or later)||None | |[[File:Highwind Lv. 1 Model KHII.png|100x100px]]||{{nihongo|'''[[Highwind Lv. 1]]'''|ハイウインドLV1|<br>Haiuiondo LV1}}||Collect the required Gummi Blocks<br>(Asteroid Sweep or later)||None | ||
|- | |- | ||
|[[File:Invincible Lv. 1 Model KHII.png|100x100px]]||'''[[Invincible Lv. 1]]'''||Collect the required Gummi Blocks<br>(Asteroid Sweep or later)||None | |[[File:Invincible Lv. 1 Model KHII.png|100x100px]]||{{nihongo|'''[[Invincible Lv. 1]]'''|インビンシブルLV1|<br>Inbinshibiru LV1}}||Collect the required Gummi Blocks<br>(Asteroid Sweep or later)||None | ||
|[[File:Falcon Lv. 1 Model KHII.png|100x100px]]||'''[[Falcon Lv. 1]]'''||Collect the required Gummi Blocks<br>(Asteroid Sweep or later)||None | |[[File:Falcon Lv. 1 Model KHII.png|100x100px]]||{{nihongo|'''[[Falcon Lv. 1]]'''|ファルコンLV1|<br>Farukon LV1}}||Collect the required Gummi Blocks<br>(Asteroid Sweep or later)||None | ||
|- | |- | ||
|[[File:Highwind Lv. 2 Model KHII.png|100x100px]]||'''[[Highwind Lv. 2]]'''||Collect the required Gummi Blocks<br>(Stardust Sweep or later)||None | |[[File:Highwind Lv. 2 Model KHII.png|100x100px]]||{{nihongo|'''[[Highwind Lv. 2]]'''|ハイウインドLV2|<br>Haiuiondo LV2}}||Collect the required Gummi Blocks<br>(Stardust Sweep or later)||None | ||
|[[File:Invincible Lv. 2 Model KHII.png|100x100px]]||'''[[Invincible Lv. 2]]'''||Collect the required Gummi Blocks<br>(Stardust Sweep or later)||None | |[[File:Invincible Lv. 2 Model KHII.png|100x100px]]||{{nihongo|'''[[Invincible Lv. 2]]'''|インビンシブルLV2|<br>Inbinshibiru LV2}}||Collect the required Gummi Blocks<br>(Stardust Sweep or later)||None | ||
|- | |- | ||
|[[File:Falcon Lv. 2 Model KHII.png|100x100px]]||'''[[Falcon Lv. 2]]'''||Collect the required Gummi Blocks<br>(Stardust Sweep or later)||None | |[[File:Falcon Lv. 2 Model KHII.png|100x100px]]||{{nihongo|'''[[Falcon Lv. 2]]'''|ファルコンLV2|<br>Farukon LV2}}||Collect the required Gummi Blocks<br>(Stardust Sweep or later)||None | ||
|[[File:Highwind Lv. 3 Model KHII.png|100x100px]]||'''[[Highwind Lv. 3]]'''|| | |[[File:Highwind Lv. 3 Model KHII.png|100x100px]]||{{nihongo|'''[[Highwind Lv. 3]]'''|ハイウインドLV3|<br>Haiuiondo LV3}}||Collect the required Gummi Blocks<br>(Phantom Storm or later)||[[Hawkeye 1]]<br>[[Hawkeye 2]] | ||
|- | |- | ||
|[[File:Invincible Lv. 3 Model KHII.png|100x100px]]||'''[[Invincible Lv. 3]]'''||Collect the required Gummi Blocks<br>(Phantom Storm or later)||[[Edincoat 1]]<br>[[Edincoat 2]] | |[[File:Invincible Lv. 3 Model KHII.png|100x100px]]||{{nihongo|'''[[Invincible Lv. 3]]'''|インビンシブルLV3|<br>Inbinshibiru LV3}}||Collect the required Gummi Blocks<br>(Phantom Storm or later)||[[Edincoat 1]]<br>[[Edincoat 2]] | ||
|[[File:Falcon Lv. 3 Model KHII.png|100x100px]]||'''[[Falcon Lv. 3]]'''||Collect the required Gummi Blocks<br>(Phantom Storm or later)||[[Main Gauche 1]]<br>[[Main Gauche 2]] | |[[File:Falcon Lv. 3 Model KHII.png|100x100px]]||{{nihongo|'''[[Falcon Lv. 3]]'''|ファルコンLV3|<br>Farukon LV3}}||Collect the required Gummi Blocks<br>(Phantom Storm or later)||[[Main Gauche 1]]<br>[[Main Gauche 2]] | ||
|- | |- | ||
|[[File:Highwind Lv. 4 Model KHII.png|100x100px]]||'''[[Highwind Lv. 4]]'''||Collect the required Gummi Blocks<br>(Splash Island or later)||[[Hawkeye 1]]<br>[[Hawkeye 2]] | |[[File:Highwind Lv. 4 Model KHII.png|100x100px]]||{{nihongo|'''[[Highwind Lv. 4]]'''|ハイウインドLV4|<br>Haiuiondo LV4}}||Collect the required Gummi Blocks<br>(Splash Island or later)||[[Hawkeye 1]]<br>[[Hawkeye 2]] | ||
|[[File:Invincible Lv. 4 Model KHII.png|100x100px]]||'''[[Invincible Lv. 4]]'''||Collect the required Gummi Blocks<br>(Splash Island or later)||[[Edincoat 1]]<br>[[Edincoat 2]] | |[[File:Invincible Lv. 4 Model KHII.png|100x100px]]||{{nihongo|'''[[Invincible Lv. 4]]'''|インビンシブルLV4|<br>Inbinshibiru LV4}}||Collect the required Gummi Blocks<br>(Splash Island or later)||[[Edincoat 1]]<br>[[Edincoat 2]] | ||
|- | |- | ||
|[[File:Falcon Lv. 4 Model KHII.png|100x100px]]||'''[[Falcon Lv. 4]]'''||Collect the required Gummi Blocks<br>(Splash Island or later)||[[Main Gauche 1]]<br>[[Main Gauche 2]] | |[[File:Falcon Lv. 4 Model KHII.png|100x100px]]||{{nihongo|'''[[Falcon Lv. 4]]'''|ファルコンLV4|<br>Farukon LV4}}||Collect the required Gummi Blocks<br>(Splash Island or later)||[[Main Gauche 1]]<br>[[Main Gauche 2]] | ||
|[[File:Highwind Lv. 5 Model KHII.png|100x100px]]||'''[[Highwind Lv. 5]]'''|| | |[[File:Highwind Lv. 5 Model KHII.png|100x100px]]||{{nihongo|'''[[Highwind Lv. 5]]'''|ハイウインドLV5|<br>Haiuiondo LV5}}||Collect the required Gummi Blocks<br>(Floating Island or later)||[[Hawkeye 1]]<br>[[Hawkeye 2]] | ||
|- | |- | ||
|[[File:Invincible Lv. 5 Model KHII.png|100x100px]]||'''[[Invincible Lv. 5]]'''||Collect the required Gummi Blocks<br>(Floating Island or later)||[[Edincoat 1]]<br>[[Edincoat 2]] | |[[File:Invincible Lv. 5 Model KHII.png|100x100px]]||{{nihongo|'''[[Invincible Lv. 5]]'''|インビンシブルLV5|<br>Inbinshibiru LV5}}||Collect the required Gummi Blocks<br>(Floating Island or later)||[[Edincoat 1]]<br>[[Edincoat 2]] | ||
|[[File:Falcon Lv. 5 Model KHII.png|100x100px]]||'''[[Falcon Lv. 5]]'''||Collect the required Gummi Blocks<br>(Floating Island or later)||[[Main Gauche 1]]<br>[[Main Gauche 2]] | |[[File:Falcon Lv. 5 Model KHII.png|100x100px]]||{{nihongo|'''[[Falcon Lv. 5]]'''|ファルコンLV5|<br>Farukon LV5}}||Collect the required Gummi Blocks<br>(Floating Island or later)||[[Main Gauche 1]]<br>[[Main Gauche 2]] | ||
|- | |- | ||
|[[File:Highwind Lv. 6 Model KHII.png|100x100px]]||'''[[Highwind Lv. 6]]'''||Collect the required Gummi Blocks<br>(Ancient Highway or later)||[[Hawkeye 1]]<br>[[Hawkeye 2]] | |[[File:Highwind Lv. 6 Model KHII.png|100x100px]]||{{nihongo|'''[[Highwind Lv. 6]]'''|ハイウインドLV6|<br>Haiuiondo LV6}}||Collect the required Gummi Blocks<br>(Ancient Highway or later)||[[Hawkeye 1]]<br>[[Hawkeye 2]] | ||
|[[File:Invincible Lv. 6 Model KHII.png|100x100px]]||'''[[Invincible Lv. 6]]'''||Collect the required Gummi Blocks<br>(Ancient Highway or later)||[[Edincoat 1]]<br>[[Edincoat 2]] | |[[File:Invincible Lv. 6 Model KHII.png|100x100px]]||{{nihongo|'''[[Invincible Lv. 6]]'''|インビンシブルLV6|<br>Inbinshibiru LV6}}||Collect the required Gummi Blocks<br>(Ancient Highway or later)||[[Edincoat 1]]<br>[[Edincoat 2]] | ||
|- | |- | ||
|[[File:Falcon Lv. 6 Model KHII.png|100x100px]]||'''[[Falcon Lv. 6]]'''||Collect the required Gummi Blocks<br>(Ancient Highway or later)||[[Main Gauche 1]]<br>[[Main Gauche 2]] | |[[File:Falcon Lv. 6 Model KHII.png|100x100px]]||{{nihongo|'''[[Falcon Lv. 6]]'''|ファルコンLV6|<br>Farukon LV6}}||Collect the required Gummi Blocks<br>(Ancient Highway or later)||[[Main Gauche 1]]<br>[[Main Gauche 2]] | ||
|[[File:Highwind Lv. 7 Model KHII.png|100x100px]]||'''[[Highwind Lv. 7]]'''|| | |[[File:Highwind Lv. 7 Model KHII.png|100x100px]]||{{nihongo|'''[[Highwind Lv. 7]]'''|ハイウインドLV7|<br>Haiuiondo LV7}}||Collect the required Gummi Blocks<br>(Broken Highway or later)||[[Wingedge 1]]<br>[[Wingedge 2]] | ||
|- | |- | ||
|[[File:Invincible Lv. 7 Model KHII.png|100x100px]]||'''[[Invincible Lv. 7]]'''||Collect the required Gummi Blocks<br>(Broken Highway or later)||[[Mystile 1]]<br>[[Mystile 2]] | |[[File:Invincible Lv. 7 Model KHII.png|100x100px]]||{{nihongo|'''[[Invincible Lv. 7]]'''|インビンシブルLV7|<br>Inbinshibiru LV7}}||Collect the required Gummi Blocks<br>(Broken Highway or later)||[[Mystile 1]]<br>[[Mystile 2]] | ||
|[[File:Falcon Lv. 7 Model KHII.png|100x100px]]||'''[[Falcon Lv. 7]]'''||Collect the required Gummi Blocks<br>(Broken Highway or later)||[[Organics 1]]<br>[[Organics 2]] | |[[File:Falcon Lv. 7 Model KHII.png|100x100px]]||{{nihongo|'''[[Falcon Lv. 7]]'''|ファルコンLV7|<br>Farukon LV7}}||Collect the required Gummi Blocks<br>(Broken Highway or later)||[[Organics 1]]<br>[[Organics 2]] | ||
|- | |- | ||
|[[File:Highwind Lv. 8 Model KHII.png|100x100px]]||'''[[Highwind Lv. 8]]'''||Collect the required Gummi Blocks<br>(Sunlight Storm or later)||[[Hawkeye 1]]<br>[[Hawkeye 2]] | |[[File:Highwind Lv. 8 Model KHII.png|100x100px]]||{{nihongo|'''[[Highwind Lv. 8]]'''|ハイウインドLV8|<br>Haiuiondo LV8}}||Collect the required Gummi Blocks<br>(Sunlight Storm or later)||[[Hawkeye 1]]<br>[[Hawkeye 2]] | ||
|[[File:Invincible Lv. 8 Model KHII.png|100x100px]]||'''[[Invincible Lv. 8]]'''||Collect the required Gummi Blocks<br>(Sunlight Storm or later)||[[Edincoat 1]]<br>[[Edincoat 2]] | |[[File:Invincible Lv. 8 Model KHII.png|100x100px]]||{{nihongo|'''[[Invincible Lv. 8]]'''|インビンシブルLV8|<br>Inbinshibiru LV8}}||Collect the required Gummi Blocks<br>(Sunlight Storm or later)||[[Edincoat 1]]<br>[[Edincoat 2]] | ||
|- | |- | ||
|[[File:Falcon Lv. 8 Model KHII.png|100x100px]]||'''[[Falcon Lv. 8]]'''||Collect the required Gummi Blocks<br>(Sunlight Storm or later)||[[Main Gauche 1]]<br>[[Main Gauche 2]] | |[[File:Falcon Lv. 8 Model KHII.png|100x100px]]||{{nihongo|'''[[Falcon Lv. 8]]'''|ファルコンLV8|<br>Farukon LV8}}||Collect the required Gummi Blocks<br>(Sunlight Storm or later)||[[Main Gauche 1]]<br>[[Main Gauche 2]] | ||
|[[File:Highwind Peak Model KHII.png|100x100px]]||'''[[Highwind Peak]]'''|| | |[[File:Highwind Peak Model KHII.png|100x100px]]||{{nihongo|'''[[Highwind Peak]]'''|ハイウインドMAX|<br>Haiuiondo MAX|lit. "Highwind MAX"}}||Collect the required Gummi Blocks<br>(Assault of the Dreadnought or later)||[[Valkyrie 1]]<br>[[Valkyrie 2]] | ||
|- | |- | ||
|[[File:Invincible Peak Model KHII.png|100x100px]]||'''[[Invincible Peak]]'''||Collect the required Gummi Blocks<br>(Assault of the Dreadnought or later)||[[Ziedrich]] | |[[File:Invincible Peak Model KHII.png|100x100px]]||{{nihongo|'''[[Invincible Peak]]'''|インビンシブルMAX|<br>Inbinshibiru MAX|lit. "Invincible MAX"}}||Collect the required Gummi Blocks<br>(Assault of the Dreadnought or later)||[[Ziedrich]] | ||
|[[File:Falcon Peak Model KHII.png|100x100px]]||'''[[Falcon Peak]]'''||Collect the required Gummi Blocks<br>(Assault of the Dreadnought or later)||[[Durandal 1]]<br>[[Durandal 2]] | |[[File:Falcon Peak Model KHII.png|100x100px]]||{{nihongo|'''[[Falcon Peak]]'''|ファルコンMAX|<br>Farukon MAX|lit. "Falcon MAX"}}||Collect the required Gummi Blocks<br>(Assault of the Dreadnought or later)||[[Durandal 1]]<br>[[Durandal 2]] | ||
|} | |} | ||
===Special Models=== | |||
{|border=1 cellpadding=2 cellspacing=0 style="text-align:center; font-size:90%" width=" | {|border=1 cellpadding=2 cellspacing=0 style="text-align:center; font-size:90%" width="1400px" | ||
|- style=" | |- style="{{style|kh2|a}}; font-size:12px" | ||
! | !style="width:8%"|Blueprint | ||
! | !style="width:18%"|Name | ||
! | !style="width:16%"|Obtained | ||
! | !style="width:8%"|Teeny Ship(s) | ||
! | !style="width:8%"|Blueprint | ||
! | !style="width:18%"|Name | ||
! | !style="width:16%"|Obtained | ||
! | !style="width:8%"|Teeny Ship(s) | ||
|- | |- | ||
|[[File:Secret Model KHII.png|100x100px]]||'''[[Secret]]'''||[[Assault of the Dreadnought]] LV3 treasure||[[Secret]] | |[[File:Secret Model KHII.png|100x100px]]||{{nihongo|'''[[Secret]]'''|シークレットモデル|<br>Shīkuretto Moderu|lit. "Secret Model"}}||[[Assault of the Dreadnought]] LV3 treasure||[[Secret]] | ||
|[[File:Kingdom Model KHII.png|100x100px]]||'''[[Kingdom]]'''||[[Asteroid Sweep]] LV2 treasure||[[Kingdom]] | |[[File:Kingdom Model KHII.png|100x100px]]||{{nihongo|'''[[Kingdom]]'''|キングダムモデル|<br>Kingudamu Moderu|lit. "Kingdom Model"}}||[[Asteroid Sweep]] LV2 treasure||[[Kingdom]] | ||
|- | |- | ||
|[[File:Fenrir Model KHII.png|100x100px]]||'''{{c|Fenrir|Gummi Ship}}'''||[[Assault of the Dreadnought]] LV2 rank S||None | |[[File:Fenrir Model KHII.png|100x100px]]||{{nihongo|'''{{c|Fenrir|Gummi Ship}}'''|フェンリル|<br>Fenriru}}||[[Assault of the Dreadnought]] LV2 rank S||None | ||
|[[File:Cait Sith Model KHII.png|100x100px]]||'''[[Cait Sith]]'''||[[Sunlight Storm]] LV2 rank S||None | |[[File:Cait Sith Model KHII.png|100x100px]]||{{nihongo|'''[[Cait Sith]]'''|ケット・シー|<br>Ketto Shī}}||[[Sunlight Storm]] LV2 rank S||None | ||
|- | |- | ||
|[[File:Cactuar Model KHII.png|100x100px]]||'''[[Cactuar]]'''||[[Broken Highway]] LV2 rank S||None | |[[File:Cactuar Model KHII.png|100x100px]]||{{nihongo|'''[[Cactuar]]'''|サボテンダー|<br>Sabotendā}}||[[Broken Highway]] LV2 rank S||None | ||
|[[File:Chocobo Model KHII.png|100x100px]]||'''[[Chocobo]]'''||[[Ancient Highway]] LV2 rank S||None | |[[File:Chocobo Model KHII.png|100x100px]]||{{nihongo|'''[[Chocobo]]'''|チョコボ|<br>Chokobo}}||[[Ancient Highway]] LV2 rank S||None | ||
|- | |- | ||
|[[File:Mandragora Model KHII.png|100x100px]]||'''[[Mandragora]]'''||[[Floating Island]] LV2 rank S||None | |[[File:Mandragora Model KHII.png|100x100px]]||{{nihongo|'''[[Mandragora]]'''|マンドラゴラ|<br>Mandoragora}}||[[Floating Island]] LV2 rank S||None | ||
|[[File:Moogle Model KHII.png|100x100px]]||'''{{c|Moogle|Gummi Ship}}'''||[[Splash Island]] LV2 rank S||None | |[[File:Moogle Model KHII.png|100x100px]]||{{nihongo|'''{{c|Moogle|Gummi Ship}}'''|モーグリ|<br>Mōguri}}||[[Splash Island]] LV2 rank S||None | ||
|- | |- | ||
|[[File:Tonberry Model KHII.png|100x100px]]||'''[[Tonberry]]'''||[[Phantom Storm]] LV2 rank S||None | |[[File:Tonberry Model KHII.png|100x100px]]||{{nihongo|'''[[Tonberry]]'''|トンベリ|<br>Tonberi}}||[[Phantom Storm]] LV2 rank S||None | ||
|[[File:PuPu Model KHII.png|100x100px]]||'''[[PuPu]]'''||[[Stardust Sweep]] LV2 rank S||None | |[[File:PuPu Model KHII.png|100x100px]]||{{nihongo|'''[[PuPu]]'''|コヨコヨ|<br>Koyokoyo}}||[[Stardust Sweep]] LV2 rank S||None | ||
|- | |- | ||
|[[File:Highwind α Model KHII.png|100x100px]]||'''[[Highwind α]]'''||[[Asteroid Sweep]] LV2 rank S||None | |[[File:Highwind α Model KHII.png|100x100px]]||{{nihongo|'''[[Highwind α]]'''|ハイウインドα|<br>Haiuindo α}}||[[Asteroid Sweep]] LV2 rank S||None | ||
|[[File:Mushroom Model KHII.png|100x100px]]||'''{{c|Mushroom|Gummi Ship}}'''||[[Assault of the Dreadnought]] LV1 rank S||None | |[[File:Mushroom Model KHII.png|100x100px]]||{{nihongo|'''{{c|Mushroom|Gummi Ship}}'''|マッシュルーム|<br>Masshurūmu}}||[[Assault of the Dreadnought]] LV1 rank S||None | ||
|} | |||
==''Kingdom Hearts III''== | |||
In ''[[Kingdom Hearts III]]'', Blueprints are divided into {{nihongo|'''Samples'''|おすすめ|Osusume|lit. "Recommended"}} and {{nihongo|'''Specials'''|スペシャル|Supesharu}}. Samples can be bought from the Gummi Shop, while Specials are obtained as rewards from battles or [[Gummi Mission]]s. | |||
Several Blueprints come with one or two [[Teeny Ship]]s, whose Blueprints are unlocked simultaneously. | |||
Activating the Gummi Ship Meister [[EZ Code]] in ''[[Kingdom Hearts III Re Mind]]'' unlocks all blueprints. | |||
===Samples=== | |||
{|border=1 cellpadding=2 cellspacing=0 style="text-align:center; font-size:90%" width="1400px" | |||
|- style="{{style|kh3|a}}; font-size:12px" | |||
!style="width:8%"|Blueprint | |||
!style="width:18%"|Name | |||
!style="width:16%"|Obtained | |||
!style="width:8%"|Teeny Ship(s) | |||
!style="width:8%"|Blueprint | |||
!style="width:18%"|Name | |||
!style="width:16%"|Obtained | |||
!style="width:8%"|Teeny Ship(s) | |||
|- | |||
|[[File:Highwind Peak Model KHIII.png|100x100px]]||{{nihongo|'''[[Highwind Peak]]'''|ハイウインドMAX|<br>Haiuindo MAX|lit. "Highwind MAX"}}||1000 Munny (Available after completing The Final World)||[[T-Highwind Peak]] | |||
|[[File:Falcon Peak Model KHIII.png|100x100px]]||{{nihongo|'''[[Falcon Peak]]'''|ファルコンMAX|<br>Farukon MAX|lit. "Falcon MAX"}}||1000 Munny (Available after completing The Final World)||[[T-Falcon Peak]] | |||
|- | |||
|[[File:Invincible Peak Model KHIII.png|100x100px]]||{{nihongo|'''[[Invincible Peak]]'''|インビンシブルMAX|<br>Inbinshibiru MAX|lit. "Invincible MAX"}}|||1000 Munny (Available after completing The Final World)||[[T-Invincible Peak]] | |||
|[[File:Highwind LV 4 Model KHIII.png|100x100px]]||{{nihongo|'''[[Highwind LV 4]]'''|ハイウインドLV4|<br>Haiuiondo LV4}}||400 Munny (Available after completing The Caribbean and San Fransokyo)||[[T-Highwind LV 4]] | |||
|- | |||
|[[File:Falcon LV 4 Model KHIII.png|100x100px]]||{{nihongo|'''[[Falcon LV 4]]'''|ファルコンLV4|<br>Farukon LV4}}||400 Munny (Available after completing The Caribbean and San Fransoyko)||[[T-Falcon LV 4]] | |||
|[[File:Invincible LV 4 Model KHIII.png|100x100px]]||{{nihongo|'''[[Invincible LV 4]]'''|インビンシブルLV4|<br>Inbinshibiru LV4}}||400 Munny (Available after completing The Caribbean and San Fransokyo)||[[T-Invincible LV 4]] | |||
|- | |||
|[[File:Highwind LV 3 Model KHIII.png|100x100px]]||{{nihongo|'''[[Highwind LV 3]]'''|ハイウインドLV3|<br>Haiuiondo LV3}}||300 Munny (Available after completing Monstropolis and Arendelle)||[[T-Highwind LV 3]] | |||
|[[File:Falcon LV 3 Model KHIII.png|100x100px]]||{{nihongo|'''[[Falcon LV 3]]'''|ファルコンLV3|<br>Farukon LV3}}||300 Munny (Available after completing Monstropolis and Arendelle)||[[T-Falcon LV 3]] | |||
|- | |||
|[[File:Invincible LV 3 Model KHIII.png|100x100px]]||{{nihongo|'''[[Invincible LV 3]]'''|インビンシブルLV3|<br>Inbinshibiru LV3}}||300 Munny (Available after completing Monstropolis and Arendelle)||[[T-Invincible LV 3]] | |||
|[[File:Highwind LV 2 Model KHIII.png|100x100px]]||{{nihongo|'''[[Highwind LV 2]]'''|ハイウインドLV2|<br>Haiuiondo LV2}}||200 Munny (Available after completing Toy Box and Kingdom of Corona)||[[T-Highwind LV 2]] | |||
|- | |||
|[[File:Falcon LV 2 Model KHIII.png|100x100px]]||{{nihongo|'''[[Falcon LV 2]]'''|ファルコンLV2|<br>Farukon LV2}}||200 Munny (Available after completing Toy Box and Kingdom of Corona)||[[T-Falcon LV 2]] | |||
|[[File:Invincible LV 2 Model KHIII.png|100x100px]]||{{nihongo|'''[[Invincible LV 2]]'''|インビンシブルLV2|<br>Inbinshibiru LV2}}||200 Munny (Available after completing Toy Box and Kingdom of Corona)||[[T-Invincible LV 2]] | |||
|- | |||
|[[File:Highwind LV 1 Model KHIII.png|100x100px]]||{{nihongo|'''[[Highwind LV 1]]'''|ハイウインドLV1|<br>Haiuiondo LV1}}||Initial||[[T-Highwind LV 1]] | |||
|[[File:Falcon LV 1 Model KHIII.png|100x100px]]||{{nihongo|'''[[Falcon LV 1]]'''|ファルコンLV1|<br>Farukon LV1}}||100 Munny||[[T-Falcon LV 1]] | |||
|- | |||
|[[File:Invincible LV 1 Model KHIII.png|100x100px]]||{{nihongo|'''[[Invincible LV 1]]'''|インビンシブルLV1|<br>Inbinshibiru LV1}}||100 Munny||[[T-Invincible LV 1]] | |||
| || || || | |||
|} | |} | ||
==='' | ===Specials=== | ||
{{ | {|border=1 cellpadding=2 cellspacing=0 style="text-align:center; font-size:90%" width="1400px" | ||
|- style="{{style|kh3|a}}; font-size:12px" | |||
!style="width:8%"|Blueprint | |||
!style="width:18%"|Name | |||
!style="width:16%"|Obtained | |||
!style="width:8%"|Teeny Ship(s) | |||
!style="width:8%"|Blueprint | |||
!style="width:18%"|Name | |||
!style="width:16%"|Obtained | |||
!style="width:8%"|Teeny Ship(s) | |||
|- | |||
|[[File:Red Nocturne Model KHIII.png|100x100px]]||{{nihongo|'''{{c|Red Nocturne|Gummi Ship}}'''|レッドノクターン|<br>Reddo Nokutān}}||[[Speed Skirmish 2]] (A-rank)||[[Shadow Head]] | |||
|[[File:Hot Rod Model KHIII.png|100x100px]]||{{nihongo|'''{{c|Hot Rod|Gummi Ship}}'''|ホットロッド|<br>Hotto Roddo}}||[[Speed Skirmish 8]] (A-rank)||None | |||
|- | |||
|[[File:Necho Cat Model KHIII.png|100x100px]]||{{nihongo|'''{{c|Necho Cat|Gummi Ship}}'''|ネコキャット|<br>Nekko Kyatto}}||[[Countdown 9]] (A-rank)||None | |||
|[[File:Ghostabocky Model KHIII.png|100x100px]]||{{nihongo|'''{{c|Ghostabocky|Gummi Ship}}'''|おばけゴースト|<br>Obake Gōsuto}}||[[Speed Skirmish 1]] (A-rank)||[[Ghostabocky Fork]]<br>[[Ghostabocky Knife]] | |||
|- | |||
|[[File:Kooma Panda Model KHIII.png|100x100px]]||{{nihongo|'''{{c|Kooma Panda|Gummi Ship}}'''|クマパンダー|<br>Kuma Pandā}}||[[Speed Skirmish 4]] (A-rank)||None | |||
|[[File:Plush Sora Model KHIII.png|100x100px]]||{{nihongo|'''[[Plush Sora]]'''|ソラぐるみ|<br>Sora-gurumi}}||[[Countdown 4]] (A-rank)||{{c|Sea-Salt Ice Cream|Gummi Ship}} | |||
|- | |||
|[[File:Gigas Model KHIII.png|100x100px]]||{{nihongo|'''{{c|Gigas|Gummi Ship}}'''|ギガース|<br>Gigāsu}}||[[Countdown 7]] (A-rank)||[[Gigas, Jr.]] | |||
|[[File:Schwarzgeist Model KHIII.png|100x100px]]||{{nihongo|'''{{c|Schwarzgeist|Gummi Ship}}'''|シュヴァルツガイスト|<br>Shuvarutsugaisuto}}||[[Clash with the Schwarzgeist]] (C-rank)||{{n|Codymion|1}}<br>{{n|Codymion|2}} | |||
|- | |||
|[[File:Moogle Model KHIII.png|100x100px]]||{{nihongo|'''{{c|Moogle|Gummi Ship}}'''|モーグリ|<br>Mōguri}}||Gummi Mission: Moogle Gazer||None | |||
|[[File:Bomb Model KHIII.png|100x100px]]||{{nihongo|'''[[Bomb]]'''|ボム|<br>Bomu}}||Gummi Mission: Bomb Gazer||None | |||
|- | |||
|[[File:Cactuar Model KHIII.png|100x100px]]||{{nihongo|'''[[Cactuar]]'''|サボテンダー|<br>Sabotendā}}||Gummi Mission: Cactuar Gazer||None | |||
|[[File:Imp Model KHIII.png|100x100px]]||{{nihongo|'''[[Imp]]'''|インプ|<br>Inpu}}||Gummi Mission: Imp Gazer||None | |||
|- | |||
|[[File:Tonberry Model KHIII.png|100x100px]]||{{nihongo|'''[[Tonberry]]'''|トンベリ|<br>Tonberi}}||Gummi Mission: Tonberry Gazer||None | |||
|[[File:Endymion Model KHIII.png|100x100px]]||{{nihongo|'''[[Endymion]]'''|エンディミオン|<br>Endimion}}||Gummi Mission: Endymion Gazer||None | |||
|- | |||
|[[File:Ultros Model KHIII.png|100x100px]]||{{nihongo|'''[[Ultros]]'''|オルトロス|<br>Orutorosu}}||Gummi Mission: Ultros Gazer||None | |||
|[[File:Bismarck Model KHIII.png|100x100px]]||{{nihongo|'''[[Bismarck]]'''|ビスマルク|<br>Bisumaruku}}||Gummi Mission: Bismarck Gazer||None | |||
|- | |||
|[[File:Omega Model KHIII.png|100x100px]]||{{nihongo|'''[[Omega]]'''|オメガ|<br>Omega}}||Gummi Mission: Omega Gazer||None | |||
|[[File:Galleon Model KHIII.png|100x100px]]||{{nihongo|'''[[Galleon]]'''|ガレアス船|<br>Gareasu-fune|lit. "Galleass"}}||[[Countdown 8]] (A-rank)||[[Galleonette]] | |||
|- | |||
|[[File:Submarine Model KHIII.png|100x100px]]||{{nihongo|'''{{c|Submarine|Gummi Ship}}'''|ぶくぶくサブマリン|<br>Bukubuku Sabumarin|lit. "Glub Glub Submarine"}}||[[Speed Skirmish 5]] (A-rank)||[[Pentaguin]]<br>[[Space Sushi]] | |||
|[[File:Locomotive Model KHIII.png|100x100px]]||{{nihongo|'''[[Locomotive]]'''|モクモクきかんしゃ|<br>Mokumoku Kikansha|lit. "Chug Chug Locomotive"}}||[[Countdown 10]] (A-rank)||None | |||
|- | |||
|[[File:Supercar Model KHIII.png|100x100px]]||{{nihongo|'''[[Supercar]]'''|スーパーカー|<br>Sūpākā}}||[[Countdown 2]] (A-rank)||[[Minicar]]<br>[[Bitsy Bike]] | |||
|[[File:Sweet Wheels Model KHIII.png|100x100px]]||{{nihongo|'''[[Sweet Wheels]]'''|スウィーツビークル|<br>Suwītsu Bīkuru|lit. "Sweets Vehicle"}}||[[Speed Skirmish 11]] (A-rank)||[[Cookie Chick]] | |||
|- | |||
|[[File:Airship Model KHIII.png|100x100px]]||{{nihongo|'''[[Airship]]'''|飛空艇|<br>Hikūtei}}||[[Clash with the Space Worm]]||[[Hot-Air Balloon]]<br>[[Balloon Duet]] | |||
|[[File:Craft Airplane Model KHIII.png|100x100px]]||{{nihongo|'''[[Craft Airplane]]'''|クラフトエアプレーン|<br>Kurafuto Eapurēn}}||[[Countdown 3]] (A-rank)||[[Paper Airplane]]<br>[[Paper Crane]] | |||
|- | |||
|[[File:Dino Soarer Model KHIII.png|100x100px]]||{{nihongo|'''[[Dino Soarer]]'''|トイダイナソー|<br>Toi Dainasō|lit. "Toy Dinosaur"}}||[[Countdown 6]] (A-rank)||[[Toy Snake]]<br>[[Toy Turtle]] | |||
|[[File:Cardboard Warrior Model KHIII.png|100x100px]]||{{nihongo|'''[[Cardboard Warrior]]'''|ダンボールファイター|<br>Danbōru Faitā|lit. "Cardboard Fighter"}}||[[Speed Skirmish 6]] (A-rank)||[[Teeny Tank]]<br>[[Teeny Chopper]] | |||
|- | |||
|[[File:Wubber Ducky Model KHIII.png|100x100px]]||{{nihongo|'''[[Wubber Ducky]]'''|アヒルちゃん|<br>Ahiru-chan|lit. "Duck-chan"}}||[[Countdown 5]] (A-rank)||None | |||
|[[File:Rhino Beetle Model KHIII.png|100x100px]]||{{nihongo|'''[[Rhino Beetle]]'''|カブトムシ|<br>Kabutomushi}}||[[Speed Skirmish 1]] (A-rank)||[[Itsy Beetle]]<br>{{c|Blue Fairy|Gummi Ship}} | |||
|- | |||
|[[File:Pavilion Model KHIII.png|100x100px]]||{{nihongo|'''[[Pavilion]]'''|やたい|<br>Yatai|lit. "Food Stall"}}||[[Speed Skirmish 9]] (A-rank)||[[Meunière]] | |||
|[[File:Stationery Squadron Model KHIII.png|100x100px]]||{{nihongo|'''[[Stationery Squadron]]'''|ステーショナリーズ|<br>Sutēshonarīzu|lit. "Stationeries"}}||[[Countdown 11]] (A-rank)||None | |||
|- | |||
|[[File:Home Sweet Home Model KHIII.png|100x100px]]||{{nihongo|'''[[Home Sweet Home]]'''|ファンシーハウス|<br>Fanshī Hausu|lit. "Fancy House"}}||[[Speed Skirmish 7]] (A-rank)||[[Snail]]<br>{{c|Snowman|Gummi Ship}} | |||
|[[File:Palanquin Model KHIII.png|100x100px]]||{{nihongo|'''[[Palanquin]]'''|トレジャーカーゴ|<br>Torejā Kāgo|lit. "Treasure Cargo"}}||[[Speed Skirmish 10]] (A-rank)||None | |||
|- | |||
|[[File:Question Mark Model KHIII.png|100x100px]]||{{nihongo|'''[[Question Mark]]'''|??????|<br>??????|lit. "??????"}}||[[Speed Skirmish 3]] (A-rank)||[[Question Minion]] | |||
|[[File:Vega Model KHIII.png|100x100px]]||{{nihongo|'''[[Vega]]'''|ベガ|<br>Bega}}||Gummi Mission: Pro Builder||[[Altair]]<br>[[Deneb]] | |||
|- | |||
|[[File:Sirius Model KHIII.png|100x100px]]||{{nihongo|'''[[Sirius]]'''|セクスタンス|<br>Sekusutansu|lit. "Sextans"}}||Gummi Mission: Elite Builder||[[Polaris]]<br>{{c|Crux|Gummi Ship}} | |||
|[[File:Shooting Star Model KHIII.png|100x100px]]||{{nihongo|'''{{c|Shooting Star|Gummi Ship}}'''|シューティングスター|<br>Shūtingu Sutā}}||Gummi Mission: Master Builder||[[Nighthawk]]<br>[[Meteor Trail]] | |||
|- | |||
|[[File:Golden Highwind Model KHIII.png|100x100px]]||{{nihongo|'''[[Golden Highwind]]'''|ゴールデンハイウインド|<br>Gōruden Haiuindo}}||[[Clash with the Schwarzgeist]]||[[Golden Falcon]]<br>[[Golden Invincible]] | |||
| || || || | |||
|} | |||
{{ | {{Gummi}} | ||
Latest revision as of 03:10, 24 October 2024
Blueprints (設計図 Sekkeizu) are pre-made Gummi Ship models that can be used to fly.
Kingdom Hearts[edit]
In Kingdom Hearts, Blueprints can be obtained as drops from enemy ships, as rewards from Geppetto and Pinocchio, and in the Final Mix version, as rewards for completing Gummi Missions.
Some Blueprints were changed for the International version, while several more were changed for the Final Mix version of the game.
| Blueprint | Name | Obtained | Blueprint | Name | Obtained | ||||
|---|---|---|---|---|---|---|---|---|---|
| Japanese | International | Final Mix | Japanese | International | Final Mix | ||||
 |
Kingdom (キングダムモデル Kingudamu Moderu, lit. "Kingdom Model") |
Default |  |
Hyperion (ハイペリオン Haiperion) |
Speak with Geppetto after defeating 5000 Heartless and learning all six summons. | ||||
 |
Geppetto (ゼペットモデル Zepetto Moderu, lit. "Geppetto Model") |
Speak with Geppetto. |  |
Cid (シドモデル Shido Moderu, lit. "Cid Model") |
Speak with Geppetto after defeating 500 Heartless. | ||||
 |
Leon (レオンモデル Reon Moderu, lit. "Leon Model") |
Speak with Geppetto after defeating 4000 Heartless. |  |
Yuffie (ユフィモデル Yufi Moderu, lit. "Yuffie Model") |
Speak with Geppetto after defeating 1500 Heartless. | ||||
 |
Aerith (エアリスモデル Earisu Moderu, lit. "Aerith Model") |
Speak with Geppetto after defeating 3000 Heartless. |  |
Cactuar (サボテンダー Sabotendā) |
Speak with Geppetto after defeating 1000 Heartless. | ||||
 |
Chocobo (チョコボ Chokobo) |
Speak with Pinocchio after entering Geppetto's House thirty times. |  |
 |
Cindy (マグ Magu, lit. "Magu") |
Defeat Cindy enemy ships. | |||
 |
 |
 |
Shiva (シヴァ Shiva) |
Defeat Shiva enemy ships. |  |
Lamia (ラミア Ramia) |
Defeat Lamia enemy ships. | ||
 |
 |
Sandy (ドグ Dogu, lit. "Dogu") |
Defeat Sandy enemy ships. |  |
Sylph (シルフ Shirufu) |
Defeat Sylph enemy ships. | |||
 |
 |
Carbuncle (カーバンクル Kābankuru) |
Defeat Carbuncle enemy ships. |  |
 |
Mindy (ラグ Ragu, lit. "Lagu") |
Defeat Mindy enemy ships. | ||
 |
Goblin (ゴブリン Goburin) |
Defeat Goblin enemy ships. |  |
 |
Bomb (ボム Bomu) |
Defeat Bomb enemy ships. | |||
 |
 |
Remora (レモラ Remora) |
Defeat Remora enemy ships. |  |
 |
 |
Ahriman (アーリマン Āriman) |
Defeat Ahriman enemy ships. | |
 |
Imp (インプ Inpu) |
Defeat Imp enemy ships. |  |
 |
Siren (セイレーン Seirēn) |
Defeat Siren enemy ships. | |||
 |
 |
Stingray (スティングレイ Sutingurei) |
Defeat Stingray enemy ships. |  |
Catoblepas (カトブレパス Katoburepasu) |
Defeat Catoblepas enemy ships. | |||
 |
 |
Adamant (アダマンタイマイ Adamantaimai, lit. "Adamantoise") |
Defeat Adamant enemy ships. |  |
Serpent (サーペント Sāpento) |
Defeat Serpent enemy ships. | |||
 |
 |
Ifrit (イフリート Ifurīto) |
Defeat Ifrit enemy ships. |  |
 |
Odin (オーディン Ōdin) |
Defeat Odin enemy ships. | ||
 |
 |
Atomos (アトモス Atomosu) |
Defeat Atomos enemy ships. |  |
 |
Golem (ゴーレム Gōremu) |
Defeat Golem enemy ships. | ||
 |
 |
Diablos (ディアボロス Diaborosu) |
Defeat Diablos enemy ships. |  |
Deathguise (デスゲイズ Desugeizu, lit. "Deathgaze") |
Defeat Deathguise enemy ships. | |||
 |
Typhoon (テュポーン Tyupōn) |
Defeat Typhoon enemy ships. |  |
 |
Alexander (アレクサンダー Arekusandā) |
Defeat Alexander enemy ships. | |||
 |
 |
Leviathan (リヴァイアサン Rivaiasan) |
Defeat Leviathan enemy ships. |  |
Ramuh (ラムウ Ramuu) |
Defeat Ramuh enemy ships. | |||
 |
Omega (オメガ Omega) |
Defeat Omega enemy ships. | Moogles (モーグリ Mōguri, lit. "Moogle") |
Complete Gummi Mission: Traverse Town Level 3. | |||||
 |
Valefor (ヴァルファーレ Varufāre) |
Complete Gummi Mission: Wonderland Level 3. |  |
PuPu (コヨコヨ Koyokoyo) |
Complete Gummi Mission: Olympus Coliseum Level 3. | ||||
 |
Cerberus (ケルベロス Keruberosu) |
Complete Gummi Mission: Deep Jungle Level 3. |  |
Tonberry (トンベリ Tonberi) |
Complete Gummi Mission: Agrabah Level 3. | ||||
 |
Pandaemonium (パンデモニウム Pandemoniumu) |
Complete Gummi Mission: Atlantica Level 3. |  |
Ixion (イクシオン Ikushion) |
Complete Gummi Mission: Halloween Town Level 3. | ||||
 |
Gilgamesh (ギルガメッシュ Girugamesshu) |
Complete Gummi Mission: Neverland Level 3. |  |
Phoenix (フェニックス Fenikkusu) |
Complete Gummi Mission: Hollow Bastion Level 3. | ||||
 |
Eden (エデン Eden) |
Complete Gummi Mission: End of the World Level 3. |  |
Bahamut (バハムート Bahamūto) |
Complete all Gummi Missions. | ||||
Kingdom Hearts II[edit]
In Kingdom Hearts II, Blueprints are divided into Sample Blueprints (おすすめ設計図 Osusume Sekkeizu, lit. "Recommended Blueprint") and Special Models (スペシャルモデル Supesharu Moderu). Sample Blueprints are obtained when collecting the required Gummi Blocks to create one, while Special Models are obtained as treasures or ranking rewards in Gummi Missions.
Several Blueprints come with one or two Teeny Ships, whose Blueprints are unlocked simultaneously.
Sample Blueprints[edit]
| Blueprint | Name | Obtained | Teeny Ship(s) | Blueprint | Name | Obtained | Teeny Ship(s) |
|---|---|---|---|---|---|---|---|
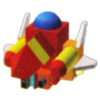 |
Highwind (ハイウインド Haiuindo) |
Default | None | 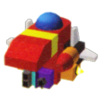 |
Highwind Lv. 1 (ハイウインドLV1 Haiuiondo LV1) |
Collect the required Gummi Blocks (Asteroid Sweep or later) |
None |
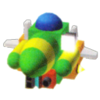 |
Invincible Lv. 1 (インビンシブルLV1 Inbinshibiru LV1) |
Collect the required Gummi Blocks (Asteroid Sweep or later) |
None | 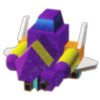 |
Falcon Lv. 1 (ファルコンLV1 Farukon LV1) |
Collect the required Gummi Blocks (Asteroid Sweep or later) |
None |
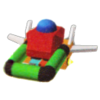 |
Highwind Lv. 2 (ハイウインドLV2 Haiuiondo LV2) |
Collect the required Gummi Blocks (Stardust Sweep or later) |
None | 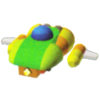 |
Invincible Lv. 2 (インビンシブルLV2 Inbinshibiru LV2) |
Collect the required Gummi Blocks (Stardust Sweep or later) |
None |
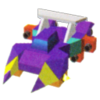 |
Falcon Lv. 2 (ファルコンLV2 Farukon LV2) |
Collect the required Gummi Blocks (Stardust Sweep or later) |
None | 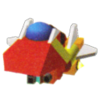 |
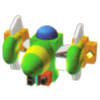
Highwind Lv. 3 (ハイウインドLV3 Haiuiondo LV3) |
Collect the required Gummi Blocks (Phantom Storm or later) |
Hawkeye 1 Hawkeye 2 |
 |
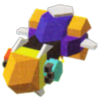
Invincible Lv. 3 (インビンシブルLV3 Inbinshibiru LV3) |
Collect the required Gummi Blocks (Phantom Storm or later) |
Edincoat 1 Edincoat 2 |
 |
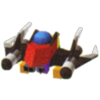
Falcon Lv. 3 (ファルコンLV3 Farukon LV3) |
Collect the required Gummi Blocks (Phantom Storm or later) |
Main Gauche 1 Main Gauche 2 |
 |
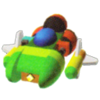
Highwind Lv. 4 (ハイウインドLV4 Haiuiondo LV4) |
Collect the required Gummi Blocks (Splash Island or later) |
Hawkeye 1 Hawkeye 2 |
 |
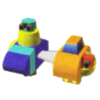
Invincible Lv. 4 (インビンシブルLV4 Inbinshibiru LV4) |
Collect the required Gummi Blocks (Splash Island or later) |
Edincoat 1 Edincoat 2 |
 |
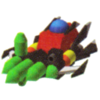
Falcon Lv. 4 (ファルコンLV4 Farukon LV4) |
Collect the required Gummi Blocks (Splash Island or later) |
Main Gauche 1 Main Gauche 2 |
 |
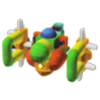
Highwind Lv. 5 (ハイウインドLV5 Haiuiondo LV5) |
Collect the required Gummi Blocks (Floating Island or later) |
Hawkeye 1 Hawkeye 2 |
 |
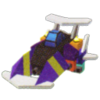
Invincible Lv. 5 (インビンシブルLV5 Inbinshibiru LV5) |
Collect the required Gummi Blocks (Floating Island or later) |
Edincoat 1 Edincoat 2 |
 |
Falcon Lv. 5 (ファルコンLV5 Farukon LV5) |
Collect the required Gummi Blocks (Floating Island or later) |
Main Gauche 1 Main Gauche 2 |
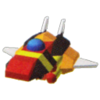 |
Highwind Lv. 6 (ハイウインドLV6 Haiuiondo LV6) |
Collect the required Gummi Blocks (Ancient Highway or later) |
Hawkeye 1 Hawkeye 2 |
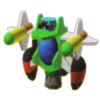 |
Invincible Lv. 6 (インビンシブルLV6 Inbinshibiru LV6) |
Collect the required Gummi Blocks (Ancient Highway or later) |
Edincoat 1 Edincoat 2 |
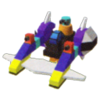 |
Falcon Lv. 6 (ファルコンLV6 Farukon LV6) |
Collect the required Gummi Blocks (Ancient Highway or later) |
Main Gauche 1 Main Gauche 2 |
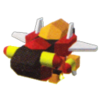 |
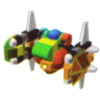
Highwind Lv. 7 (ハイウインドLV7 Haiuiondo LV7) |
Collect the required Gummi Blocks (Broken Highway or later) |
Wingedge 1 Wingedge 2 |
 |
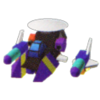
Invincible Lv. 7 (インビンシブルLV7 Inbinshibiru LV7) |
Collect the required Gummi Blocks (Broken Highway or later) |
Mystile 1 Mystile 2 |
 |
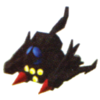
Falcon Lv. 7 (ファルコンLV7 Farukon LV7) |
Collect the required Gummi Blocks (Broken Highway or later) |
Organics 1 Organics 2 |
 |
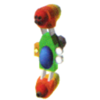
Highwind Lv. 8 (ハイウインドLV8 Haiuiondo LV8) |
Collect the required Gummi Blocks (Sunlight Storm or later) |
Hawkeye 1 Hawkeye 2 |
 |
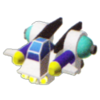
Invincible Lv. 8 (インビンシブルLV8 Inbinshibiru LV8) |
Collect the required Gummi Blocks (Sunlight Storm or later) |
Edincoat 1 Edincoat 2 |
 |
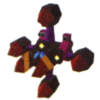
Falcon Lv. 8 (ファルコンLV8 Farukon LV8) |
Collect the required Gummi Blocks (Sunlight Storm or later) |
Main Gauche 1 Main Gauche 2 |
 |
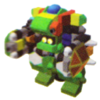
Highwind Peak (ハイウインドMAX Haiuiondo MAX, lit. "Highwind MAX") |
Collect the required Gummi Blocks (Assault of the Dreadnought or later) |
Valkyrie 1 Valkyrie 2 |
 |
Invincible Peak (インビンシブルMAX Inbinshibiru MAX, lit. "Invincible MAX") |
Collect the required Gummi Blocks (Assault of the Dreadnought or later) |
Ziedrich | 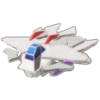 |
Falcon Peak (ファルコンMAX Farukon MAX, lit. "Falcon MAX") |
Collect the required Gummi Blocks (Assault of the Dreadnought or later) |
Durandal 1 Durandal 2 |
Special Models[edit]
| Blueprint | Name | Obtained | Teeny Ship(s) | Blueprint | Name | Obtained | Teeny Ship(s) |
|---|---|---|---|---|---|---|---|
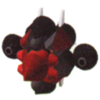 |
Secret (シークレットモデル Shīkuretto Moderu, lit. "Secret Model") |
Assault of the Dreadnought LV3 treasure | Secret | 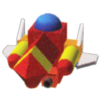 |
Kingdom (キングダムモデル Kingudamu Moderu, lit. "Kingdom Model") |
Asteroid Sweep LV2 treasure | Kingdom |
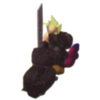 |
Fenrir (フェンリル Fenriru) |
Assault of the Dreadnought LV2 rank S | None | 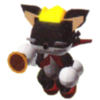 |
Cait Sith (ケット・シー Ketto Shī) |
Sunlight Storm LV2 rank S | None |
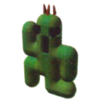 |
Cactuar (サボテンダー Sabotendā) |
Broken Highway LV2 rank S | None | 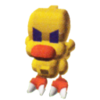 |
Chocobo (チョコボ Chokobo) |
Ancient Highway LV2 rank S | None |
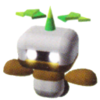 |
Mandragora (マンドラゴラ Mandoragora) |
Floating Island LV2 rank S | None | 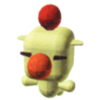 |
Moogle (モーグリ Mōguri) |
Splash Island LV2 rank S | None |
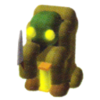 |
Tonberry (トンベリ Tonberi) |
Phantom Storm LV2 rank S | None | 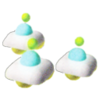 |
PuPu (コヨコヨ Koyokoyo) |
Stardust Sweep LV2 rank S | None |
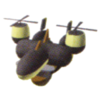 |
Highwind α (ハイウインドα Haiuindo α) |
Asteroid Sweep LV2 rank S | None | 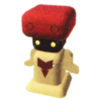 |
Mushroom (マッシュルーム Masshurūmu) |
Assault of the Dreadnought LV1 rank S | None |
Kingdom Hearts III[edit]
In Kingdom Hearts III, Blueprints are divided into Samples (おすすめ Osusume, lit. "Recommended") and Specials (スペシャル Supesharu). Samples can be bought from the Gummi Shop, while Specials are obtained as rewards from battles or Gummi Missions.
Several Blueprints come with one or two Teeny Ships, whose Blueprints are unlocked simultaneously.
Activating the Gummi Ship Meister EZ Code in Kingdom Hearts III Re Mind unlocks all blueprints.
Samples[edit]
| Blueprint | Name | Obtained | Teeny Ship(s) | Blueprint | Name | Obtained | Teeny Ship(s) |
|---|---|---|---|---|---|---|---|
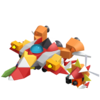 |
Highwind Peak (ハイウインドMAX Haiuindo MAX, lit. "Highwind MAX") |
1000 Munny (Available after completing The Final World) | T-Highwind Peak | 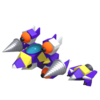 |
Falcon Peak (ファルコンMAX Farukon MAX, lit. "Falcon MAX") |
1000 Munny (Available after completing The Final World) | T-Falcon Peak |
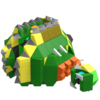 |
Invincible Peak (インビンシブルMAX Inbinshibiru MAX, lit. "Invincible MAX") |
1000 Munny (Available after completing The Final World) | T-Invincible Peak |  |
Highwind LV 4 (ハイウインドLV4 Haiuiondo LV4) |
400 Munny (Available after completing The Caribbean and San Fransokyo) | T-Highwind LV 4 |
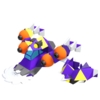 |
Falcon LV 4 (ファルコンLV4 Farukon LV4) |
400 Munny (Available after completing The Caribbean and San Fransoyko) | T-Falcon LV 4 | 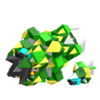 |
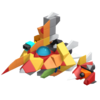
Invincible LV 4 (インビンシブルLV4 Inbinshibiru LV4) |
400 Munny (Available after completing The Caribbean and San Fransokyo) | T-Invincible LV 4 |
 |
Highwind LV 3 (ハイウインドLV3 Haiuiondo LV3) |
300 Munny (Available after completing Monstropolis and Arendelle) | T-Highwind LV 3 | 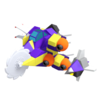 |
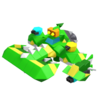
Falcon LV 3 (ファルコンLV3 Farukon LV3) |
300 Munny (Available after completing Monstropolis and Arendelle) | T-Falcon LV 3 |
 |
Invincible LV 3 (インビンシブルLV3 Inbinshibiru LV3) |
300 Munny (Available after completing Monstropolis and Arendelle) | T-Invincible LV 3 | 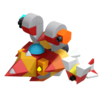 |
Highwind LV 2 (ハイウインドLV2 Haiuiondo LV2) |
200 Munny (Available after completing Toy Box and Kingdom of Corona) | T-Highwind LV 2 |
 |
Falcon LV 2 (ファルコンLV2 Farukon LV2) |
200 Munny (Available after completing Toy Box and Kingdom of Corona) | T-Falcon LV 2 |  |
Invincible LV 2 (インビンシブルLV2 Inbinshibiru LV2) |
200 Munny (Available after completing Toy Box and Kingdom of Corona) | T-Invincible LV 2 |
 |
Highwind LV 1 (ハイウインドLV1 Haiuiondo LV1) |
Initial | T-Highwind LV 1 | 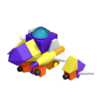 |
Falcon LV 1 (ファルコンLV1 Farukon LV1) |
100 Munny | T-Falcon LV 1 |
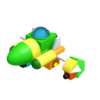 |
Invincible LV 1 (インビンシブルLV1 Inbinshibiru LV1) |
100 Munny | T-Invincible LV 1 |
Specials[edit]
| Blueprint | Name | Obtained | Teeny Ship(s) | Blueprint | Name | Obtained | Teeny Ship(s) |
|---|---|---|---|---|---|---|---|
 |
Red Nocturne (レッドノクターン Reddo Nokutān) |
Speed Skirmish 2 (A-rank) | Shadow Head |  |
Hot Rod (ホットロッド Hotto Roddo) |
Speed Skirmish 8 (A-rank) | None |
 |
Necho Cat (ネコキャット Nekko Kyatto) |
Countdown 9 (A-rank) | None |  |
Ghostabocky (おばけゴースト Obake Gōsuto) |
Speed Skirmish 1 (A-rank) | Ghostabocky Fork Ghostabocky Knife |
 |
Kooma Panda (クマパンダー Kuma Pandā) |
Speed Skirmish 4 (A-rank) | None |  |
Plush Sora (ソラぐるみ Sora-gurumi) |
Countdown 4 (A-rank) | Sea-Salt Ice Cream |
 |
Gigas (ギガース Gigāsu) |
Countdown 7 (A-rank) | Gigas, Jr. |  |
Schwarzgeist (シュヴァルツガイスト Shuvarutsugaisuto) |
Clash with the Schwarzgeist (C-rank) | Codymion #1 Codymion #2 |
 |
Moogle (モーグリ Mōguri) |
Gummi Mission: Moogle Gazer | None |  |
Bomb (ボム Bomu) |
Gummi Mission: Bomb Gazer | None |
 |
Cactuar (サボテンダー Sabotendā) |
Gummi Mission: Cactuar Gazer | None |  |
Imp (インプ Inpu) |
Gummi Mission: Imp Gazer | None |
 |
Tonberry (トンベリ Tonberi) |
Gummi Mission: Tonberry Gazer | None |  |
Endymion (エンディミオン Endimion) |
Gummi Mission: Endymion Gazer | None |
 |
Ultros (オルトロス Orutorosu) |
Gummi Mission: Ultros Gazer | None |  |
Bismarck (ビスマルク Bisumaruku) |
Gummi Mission: Bismarck Gazer | None |
 |
Omega (オメガ Omega) |
Gummi Mission: Omega Gazer | None |  |
Galleon (ガレアス船 Gareasu-fune, lit. "Galleass") |
Countdown 8 (A-rank) | Galleonette |
 |
Submarine (ぶくぶくサブマリン Bukubuku Sabumarin, lit. "Glub Glub Submarine") |
Speed Skirmish 5 (A-rank) | Pentaguin Space Sushi |
 |
Locomotive (モクモクきかんしゃ Mokumoku Kikansha, lit. "Chug Chug Locomotive") |
Countdown 10 (A-rank) | None |
 |
Supercar (スーパーカー Sūpākā) |
Countdown 2 (A-rank) | Minicar Bitsy Bike |
 |
Sweet Wheels (スウィーツビークル Suwītsu Bīkuru, lit. "Sweets Vehicle") |
Speed Skirmish 11 (A-rank) | Cookie Chick |
 |
Airship (飛空艇 Hikūtei) |
Clash with the Space Worm | Hot-Air Balloon Balloon Duet |
 |
Craft Airplane (クラフトエアプレーン Kurafuto Eapurēn) |
Countdown 3 (A-rank) | Paper Airplane Paper Crane |
 |
Dino Soarer (トイダイナソー Toi Dainasō, lit. "Toy Dinosaur") |
Countdown 6 (A-rank) | Toy Snake Toy Turtle |
 |
Cardboard Warrior (ダンボールファイター Danbōru Faitā, lit. "Cardboard Fighter") |
Speed Skirmish 6 (A-rank) | Teeny Tank Teeny Chopper |
 |
Wubber Ducky (アヒルちゃん Ahiru-chan, lit. "Duck-chan") |
Countdown 5 (A-rank) | None |  |
Rhino Beetle (カブトムシ Kabutomushi) |
Speed Skirmish 1 (A-rank) | Itsy Beetle Blue Fairy |
 |
Pavilion (やたい Yatai, lit. "Food Stall") |
Speed Skirmish 9 (A-rank) | Meunière |  |
Stationery Squadron (ステーショナリーズ Sutēshonarīzu, lit. "Stationeries") |
Countdown 11 (A-rank) | None |
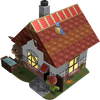 |
Home Sweet Home (ファンシーハウス Fanshī Hausu, lit. "Fancy House") |
Speed Skirmish 7 (A-rank) | Snail Snowman |
 |
Palanquin (トレジャーカーゴ Torejā Kāgo, lit. "Treasure Cargo") |
Speed Skirmish 10 (A-rank) | None |
 |
Question Mark (?????? ??????, lit. "??????") |
Speed Skirmish 3 (A-rank) | Question Minion |  |
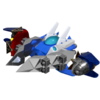
Vega (ベガ Bega) |
Gummi Mission: Pro Builder | Altair Deneb |
 |
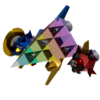
Sirius (セクスタンス Sekusutansu, lit. "Sextans") |
Gummi Mission: Elite Builder | Polaris Crux |
 |
Shooting Star (シューティングスター Shūtingu Sutā) |
Gummi Mission: Master Builder | Nighthawk Meteor Trail |
 |
Golden Highwind (ゴールデンハイウインド Gōruden Haiuindo) |
Clash with the Schwarzgeist | Golden Falcon Golden Invincible |