[dismiss]
| Site Notice |
|---|
|
Remember to pay a visit to our Discord server and chat with our community! See here for more info. Be sure to check out the KHUX Wiki for the latest on Kingdom Hearts Union χ and Kingdom Hearts Dark Road! Go and pitch in! The KHWiki contains spoilers for all Kingdom Hearts games. Read at your own risk. Please remember not to add information about unreleased games from trailers. |
Game:Monstropolis: Difference between revisions
From the Kingdom Hearts Wiki, the Kingdom Hearts encyclopedia
Jump to navigationJump to search
(Created page with "{{suite}} ==''Kingdom Hearts III''== ===Battle Levels=== *Before completing Monstropolis and Arendelle: 24 *After completing Monstropolis and Arendelle: 28 *After completing T...") |
No edit summary |
||
| (4 intermediate revisions by 2 users not shown) | |||
| Line 7: | Line 7: | ||
===Drops=== | ===Drops=== | ||
{|cellspacing="0" cellpadding="5" border="1" align="center" | {|cellspacing="0" cellpadding="5" border="1" align="center" style="width:200px" | ||
!style=" | !style="{{style|kh3|a}}"|Item | ||
|- | |- | ||
|[[Blazing Shard]] | |[[File:Icon Material KHIII.png|20px]] [[Blazing Shard]] | ||
|- | |- | ||
|[[Blazing Stone]] | |[[File:Icon Material KHIII.png|20px]] [[Blazing Stone]] | ||
|- | |- | ||
|[[Lightning Shard]] | |[[File:Icon Material KHIII.png|20px]] [[Lightning Shard]] | ||
|- | |- | ||
|[[Lightning Stone]] | |[[File:Icon Material KHIII.png|20px]] [[Lightning Stone]] | ||
|- | |- | ||
|[[Lightning Gem]] | |[[File:Icon Material KHIII.png|20px]] [[Lightning Gem]] | ||
|- | |- | ||
|[[Mythril Stone]] | |[[File:Icon Material KHIII.png|20px]] [[Mythril Stone]] | ||
|- | |- | ||
|[[Mythril Gem]] | |[[File:Icon Material KHIII.png|20px]] [[Mythril Gem]] | ||
|- | |- | ||
|[[Soothing Shard]] | |[[File:Icon Material KHIII.png|20px]] [[Soothing Shard]] | ||
|- | |- | ||
|[[Soothing Stone]] | |[[File:Icon Material KHIII.png|20px]] [[Soothing Stone]] | ||
|- | |- | ||
|[[Soothing Gem]] | |[[File:Icon Material KHIII.png|20px]] [[Soothing Gem]] | ||
|- | |- | ||
|[[Wellspring Shard]] | |[[File:Icon Material KHIII.png|20px]] [[Wellspring Shard]] | ||
|- | |- | ||
|[[Wellspring Stone]] | |[[File:Icon Material KHIII.png|20px]] [[Wellspring Stone]] | ||
|- | |- | ||
|[[Wellspring Gem]] | |[[File:Icon Material KHIII.png|20px]] [[Wellspring Gem]] | ||
|} | |} | ||
===Treasures=== | ===Treasures=== | ||
{|cellspacing="0" cellpadding="5" border="1" align="center" width=" | {|cellspacing="0" cellpadding="5" border="1" align="center" style="width:900px" | ||
!style=" | |-style="{{style|kh3|a}}" | ||
!style=" | !style="width:2%"|# | ||
!style=" | !style="width:33%"|Item | ||
!style=" | !style="width:25%"|Location | ||
!style="width:40%"|Notes | |||
|- | |- | ||
|1||[[Map: Monsters, Inc.]]||Lobby & Offices||Near save point. | |1||[[File:Icon Key Item KHIII.png|20px]] [[Map: Monsters, Inc.]]||Lobby & Offices||Near save point. | ||
|- | |- | ||
|2||[[Hi-Potion]]||Lobby & Offices||Left end of hallway. | |2||[[File:Icon Item KHIII.png|20px]] [[Hi-Potion]]||Lobby & Offices||Left end of hallway. | ||
|- | |- | ||
|3||[[Technician's Ring+]]||Lobby & Offices||Inside office. | |3||[[File:Icon Accessory KHIII.png|20px]] [[Technician's Ring+]]||Lobby & Offices||Inside office. | ||
|- | |- | ||
|4||[[Refocuser]]||Laugh Floor||Against the back wall. | |4||[[File:Icon Item KHIII.png|20px]] [[Refocuser]]||Laugh Floor||Against the back wall. | ||
|- | |- | ||
|5||[[Fencer's Earring]]||Upper Level||Enter from door at Lower Level. | |5||[[File:Icon Accessory KHIII.png|20px]] [[Fencer's Earring]]||Upper Level||Enter from door at Lower Level. | ||
|- | |- | ||
|6||[[Star Shield+]]||Lower Level||On high ledge. | |6||[[File:Icon Shield KHIII.png|20px]] [[Star Shield+]]||Lower Level||On high ledge. | ||
|- | |- | ||
|7||[[Hi-Potion]]||Service Area||Near save point. | |7||[[File:Icon Item KHIII.png|20px]] [[Hi-Potion]]||Service Area||Near save point. | ||
|- | |- | ||
|8||[[Thunder Cufflink]]||Upper Level / Service Area||Inside elevator. Available after clearing the world. | |8||[[File:Icon Accessory KHIII.png|20px]] [[Thunder Cufflink]]||Upper Level / Service Area||Inside elevator. Available after clearing the world. | ||
|- | |- | ||
|9||[[Map: The Factory]]||Basement|| | |9||[[File:Icon Key Item KHIII.png|20px]] [[Map: The Factory]]||Basement|| | ||
|- | |- | ||
|10||[[How | |10||[[File:Icon Key Item KHIII.png|20px]] [[How to Play Golf]]||Ground Floor||Closed-off area reachable from Second Floor corridor. | ||
|- | |- | ||
|11||[[Damascus]]||Ground Floor||Behind some boxes near end of conveyor belt. | |11||[[File:Icon Material KHIII.png|20px]] [[Damascus]]||Ground Floor||Behind some boxes near end of conveyor belt. | ||
|- | |- | ||
|12||[[Umbrella Rosette]]||Ground Floor||On ledge near save point. | |12||[[File:Icon Armor KHIII.png|20px]] [[Umbrella Rosette]]||Ground Floor||On ledge near save point. | ||
|- | |- | ||
|13||[[Hi-Potion]]||Second Floor||Behind some boxes, next to conveyor belt. | |13||[[File:Icon Item KHIII.png|20px]] [[Hi-Potion]]||Second Floor||Behind some boxes, next to conveyor belt. | ||
|- | |- | ||
|14||[[Valor Ring]]||Second Floor||On ledge, near Accessway entrance. | |14||[[File:Icon Accessory KHIII.png|20px]] [[Valor Ring]]||Second Floor||On ledge, near Accessway entrance. | ||
|- | |- | ||
|15||[[Firefighter Rosette]]||Accessway||Near save point. | |15||[[File:Icon Armor KHIII.png|20px]] [[Firefighter Rosette]]||Accessway||Near save point. | ||
|- | |- | ||
|16||[[Fira Bangle]]||Accessway|| | |16||[[File:Icon Armor KHIII.png|20px]] [[Fira Bangle]]||Accessway|| | ||
|- | |- | ||
|17||[[Damascus]]||Accessway||Near Tank Yard entrance. | |17||[[File:Icon Material KHIII.png|20px]] [[Damascus]]||Accessway||Near Tank Yard entrance. | ||
|- | |- | ||
|18||[[Ether]]||Tank Yard|| | |18||[[File:Icon Item KHIII.png|20px]] [[Ether]]||Tank Yard|| | ||
|- | |- | ||
|19||[[Mickey's Circus]]||Tank Yard||Requires Diving Strike. | |19||[[File:Icon Key Item KHIII.png|20px]] [[Mickey's Circus]]||Tank Yard||Requires Diving Strike. | ||
|- | |- | ||
|20||[[Mega-Ether]]||Door Vault Passage||Underneath stairs. | |20||[[File:Icon Item KHIII.png|20px]] [[Mega-Ether]]||Door Vault Passage||Underneath stairs. | ||
|- | |- | ||
|21||[[Megalixir]]||Door Vault Passage||Available after clearing the world. | |21||[[File:Icon Item KHIII.png|20px]] [[Megalixir]]||Door Vault Passage||Available after clearing the world. | ||
|- | |- | ||
|22||[[Hi-Refocuser]]||Accessway|| | |22||[[File:Icon Item KHIII.png|20px]] [[Hi-Refocuser]]||Accessway|| | ||
|} | |} | ||
==== | ====Rewards==== | ||
{|cellspacing="0" cellpadding="5" border="1" align="center" width=" | {|cellspacing="0" cellpadding="5" border="1" align="center" style="width:900px" | ||
!style=" | |-style="{{style|kh3|a}}" | ||
!style=" | !style="width:35%"|Item | ||
!style=" | !style="width:25%"|Location | ||
!style=" | !style="width:40%"|Notes | ||
|- | |||
|[[File:Icon Accessory KHIII.png|20px]] [[Laughter Pin]]||Second Floor||Defeat the Unversed to fill Boo's Laugh Gauge. | |||
|- | |||
|[[File:Icon Key Item KHIII.png|20px]] [[Pride Heartbinder]]||Tank Yard||Defeat the enemies in the burning area. | |||
|- | |||
|[[File:Icon Keyblade KHIII.png|20px]] [[Happy Gear]]||Service Area||Defeat the Lump of Horror. | |||
|- | |||
|[[File:Icon Material KHIII.png|20px]] [[Illusory Crystal]]<br>[[File:Secret Report KHIII.png|20px]] {{n|Secret Report|8}}||Tank Yard||Clear [[Battlegate 8]]. | |||
|} | |||
===Bonus Levels=== | |||
{|cellspacing="0" cellpadding="5" border="1" align="center" style="width:900px" | |||
|-style="{{style|kh3|a}}" | |||
!style="width:40%"|Objective | |||
!style="width:35%"|Reward | |||
!style="width:25%"|Location | |||
|- | |||
|Defeat the [[Unversed]] at the Lobby & Offices||'''Sora''': [[Counter Impact]]<ref name="crit">In Critical Mode, Sora has this ability by default.</ref>||Lobby & Offices | |||
|- | |||
|Defeat the Unversed at the Laugh Floor||'''Goofy''': [[Share Prizes]]||Laugh Floor | |||
|- | |||
|Defeat the [[Heartless]] at the Upper Level to fill Boo's Laugh Gauge||'''Sora''': [[Fira]]||Upper Level | |||
|- | |||
|Defeat the Heartless in the electrified area||'''Donald''': Armor Slots +1, [[Thunder Boost]]||Second Floor | |||
|- | |||
|Defeat the Unversed at the Second Floor to fill Boo's Laugh Gauge||'''Sora''': [[Combo Master]]<ref name="crit"/>||Second Floor | |||
|- | |||
|Defeat the enemies in the burning area of the Accessway||'''Sora''': [[Watera]]||Accessway | |||
|- | |||
|Defeat the enemies in the burning area of the Tank Yard||'''Sora''': Item Slots +1||Tank Yard | |||
|- | |||
|Defeat the Unversed at the Tank Yard||'''Sora''': [[Triple Rush]]||Tank Yard | |||
|- | |||
|Defeat the [[Lump of Horror]]||'''Sora''': Maximum HP +10, [[Cura]]||Service Area | |||
|} | |||
===Ingredients=== | |||
{|cellspacing="0" cellpadding="5" border="1" align="center" style="width:900px" | |||
|-style="{{style|kh3|a}}" | |||
!style="width:30%"|Ingredient | |||
!style="width:30%"|Location | |||
!style="width:10%"|Appearance rate | |||
!style="width:30%"|Notes | |||
|- | |- | ||
|Lemon x2 / Orange x2||Lobby & Offices||100%||Vending machine. | |Lemon x2 / Orange x2||Lobby & Offices||100%||Vending machine. | ||
| Line 128: | Line 172: | ||
===Lucky Emblems=== | ===Lucky Emblems=== | ||
{|cellspacing="0" cellpadding="5" border="1" align="center" width=" | {|cellspacing="0" cellpadding="5" border="1" align="center" style="width:900px" | ||
!style=" | |-style="{{style|kh3|a}}" | ||
!style=" | !style="width:5%"|# | ||
!style=" | !style="width:25%"|Image | ||
!style=" | !style="width:25%"|Location | ||
!style="width:45%"|Notes | |||
|- | |- | ||
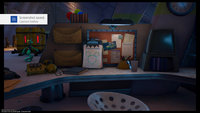
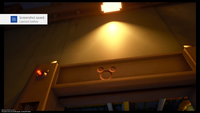
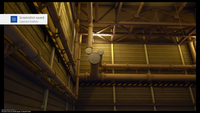
|1||[[File:Lucky Emblem (Monstropolis) 01 KHIII.png|200px]]||Laugh Floor||Drawing on clipboard at one of the far desks. | |1||[[File:Lucky Emblem (Monstropolis) 01 KHIII.png|200px]]||Laugh Floor||Drawing on clipboard at one of the far desks. | ||
| Line 156: | Line 201: | ||
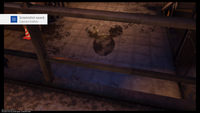
|11||[[File:Lucky Emblem (Monstropolis) 11 KHIII.png|200px]]||Door Vault Passage||Puddle of water; available after clearing the world. | |11||[[File:Lucky Emblem (Monstropolis) 11 KHIII.png|200px]]||Door Vault Passage||Puddle of water; available after clearing the world. | ||
|} | |} | ||
[[Category:Gameplay]] | |||
Latest revision as of 18:21, 13 November 2023
Kingdom Hearts III[edit]
Battle Levels[edit]
- Before completing Monstropolis and Arendelle: 24
- After completing Monstropolis and Arendelle: 28
- After completing The Final World: 36
Drops[edit]
| Item |
|---|
Treasures[edit]
| # | Item | Location | Notes |
|---|---|---|---|
| 1 | Lobby & Offices | Near save point. | |
| 2 | Lobby & Offices | Left end of hallway. | |
| 3 | Lobby & Offices | Inside office. | |
| 4 | Laugh Floor | Against the back wall. | |
| 5 | Upper Level | Enter from door at Lower Level. | |
| 6 | Lower Level | On high ledge. | |
| 7 | Service Area | Near save point. | |
| 8 | Upper Level / Service Area | Inside elevator. Available after clearing the world. | |
| 9 | Basement | ||
| 10 | Ground Floor | Closed-off area reachable from Second Floor corridor. | |
| 11 | Ground Floor | Behind some boxes near end of conveyor belt. | |
| 12 | Ground Floor | On ledge near save point. | |
| 13 | Second Floor | Behind some boxes, next to conveyor belt. | |
| 14 | Second Floor | On ledge, near Accessway entrance. | |
| 15 | Accessway | Near save point. | |
| 16 | Accessway | ||
| 17 | Accessway | Near Tank Yard entrance. | |
| 18 | Tank Yard | ||
| 19 | Tank Yard | Requires Diving Strike. | |
| 20 | Door Vault Passage | Underneath stairs. | |
| 21 | Door Vault Passage | Available after clearing the world. | |
| 22 | Accessway |
Rewards[edit]
| Item | Location | Notes |
|---|---|---|
| Second Floor | Defeat the Unversed to fill Boo's Laugh Gauge. | |
| Tank Yard | Defeat the enemies in the burning area. | |
| Service Area | Defeat the Lump of Horror. | |
| Tank Yard | Clear Battlegate 8. |
Bonus Levels[edit]
| Objective | Reward | Location |
|---|---|---|
| Defeat the Unversed at the Lobby & Offices | Sora: Counter Impact[1] | Lobby & Offices |
| Defeat the Unversed at the Laugh Floor | Goofy: Share Prizes | Laugh Floor |
| Defeat the Heartless at the Upper Level to fill Boo's Laugh Gauge | Sora: Fira | Upper Level |
| Defeat the Heartless in the electrified area | Donald: Armor Slots +1, Thunder Boost | Second Floor |
| Defeat the Unversed at the Second Floor to fill Boo's Laugh Gauge | Sora: Combo Master[1] | Second Floor |
| Defeat the enemies in the burning area of the Accessway | Sora: Watera | Accessway |
| Defeat the enemies in the burning area of the Tank Yard | Sora: Item Slots +1 | Tank Yard |
| Defeat the Unversed at the Tank Yard | Sora: Triple Rush | Tank Yard |
| Defeat the Lump of Horror | Sora: Maximum HP +10, Cura | Service Area |
Ingredients[edit]
| Ingredient | Location | Appearance rate | Notes |
|---|---|---|---|
| Lemon x2 / Orange x2 | Lobby & Offices | 100% | Vending machine. |
| Dill x2 / Saffron x2 | Lobby & Offices | 100% | Vending machine. |
| Rice x2 | Lobby & Offices | 100% | Food box. |
| Filet Mignon x2 | Laugh Floor | 100% | Food box; furthest desk. |
| Lemon x2 / Orange x2 | Lower Level | 100% | Vending machine. |
| Tomato x2 / Dill x2 | Lower Level | 100% | Vending machine. |
| Beef x2 | Lower Level | 100% | Food box. |
| Pear x2 | Lower Level | 100% | Vending machine. |
| Olive Oil x2 | Lower Level | 100% | Vending machine. |
| Cheese x2 | Ground Floor | 100% | Food box; closed-off area reachable from Second Floor corridor. |
| Onion x2 | Second Floor | 100% | Food box. |
| Olive Oil x2 | Accessway | 100% | Vending machine. |
| Mussel x2 | Accessway | 100% | Food box. |
| Orange x2 / Pear x2 | Tank Yard | 100% | Vending machine. |
| Celery x2 / Saffron x2 | Tank Yard | 100% | Vending machine. |
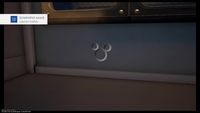
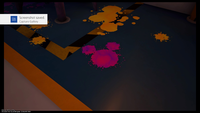
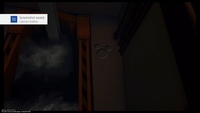
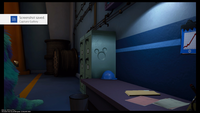
Lucky Emblems[edit]
- ^ Jump up to: a b In Critical Mode, Sora has this ability by default.
