[dismiss]
| Site Notice |
|---|
|
Remember to pay a visit to our Discord server and chat with our community! See here for more info. Be sure to check out the KHUX Wiki for the latest on Kingdom Hearts Union χ and Kingdom Hearts Dark Road! Go and pitch in! The KHWiki contains spoilers for all Kingdom Hearts games. Read at your own risk. Please remember not to add information about unreleased games from trailers. |
Game:Country of the Musketeers: Difference between revisions
From the Kingdom Hearts Wiki, the Kingdom Hearts encyclopedia
Jump to navigationJump to search
No edit summary |
|||
| Line 1: | Line 1: | ||
{{Game|DDD}} | {{Game|DDD}} | ||
{{Suite}} | {{Suite}} | ||
==''Kingdom Hearts 3D: Dream Drop Distance''== | |||
==Battle Levels== | ===Battle Levels=== | ||
{{section-stub}} | {{section-stub}} | ||
==Dive Mode== | ===Dive Mode=== | ||
{{section-stub}} | {{section-stub}} | ||
==Link Portals== | ===Link Portals=== | ||
{{User:MateusinhoEX/InfoPortal | {{User:MateusinhoEX/InfoPortal | ||
|S1images=<gallery>File:Me Me Bunny (Rare) KH3D.png|[[Me Me Bunny]]</gallery> | |S1images=<gallery>File:Me Me Bunny (Rare) KH3D.png|[[Me Me Bunny]]</gallery> | ||
| Line 130: | Line 131: | ||
{{-}} | {{-}} | ||
==Treasures== | ===Treasures=== | ||
{|cellpadding=0 cellspacing=0 border=0 align="center" | {|cellpadding=0 cellspacing=0 border=0 align="center" | ||
| | | | ||
<div class="tabber" style="float:center; width:600px"> | <div class="tabber" style="float:center; width:600px"> | ||
<div class="tabbertab" title="Sora" style="float:center; background-color:white"> | <div class="tabbertab" title="Sora" style="float:center; background-color:white"> | ||
{|border=1 cellpadding=2 cellspacing=0 class="wikitable" style="text-align:center" align="center" width= | {|border=1 cellpadding=2 cellspacing=0 class="wikitable" style="text-align:center" align="center" width=700px | ||
|- bgcolor="#3A3A3A" | |- bgcolor="#3A3A3A" | ||
|style="background:#E51373;"| Type | |style="background:#E51373;"| Type | ||
| Line 141: | Line 142: | ||
|style="background:#E51373;" width="200pt"| Locations | |style="background:#E51373;" width="200pt"| Locations | ||
|style="background:#E51373;" width="200pt"| Notes | |style="background:#E51373;" width="200pt"| Notes | ||
|- style="background:# | |-style="background:#F3BDD6;" | ||
| rowspan=" | | rowspan="4" style="background:#FD86BC;"| '''[[Deck Command (KH3D)|Command]]''' | ||
|[[Sonic Blade]] | |||
|[[Dungeon]] | |||
| | |||
|-style="background:#F3BDD6;" | |||
|[[Tornado Strike]] | |||
|[[Cell]] | |||
| | |||
|-style="background:#F3BDD6;" | |-style="background:#F3BDD6;" | ||
|[[Firaga]] | |[[Firaga]] | ||
| Line 152: | Line 160: | ||
| | | | ||
|-style="background:#F3BDD6;" | |-style="background:#F3BDD6;" | ||
|[[ | | rowspan="4" style="background:#FD86BC;"| '''Item''' | ||
|[[ | |[[Hi-Potion]] x 3 | ||
|[[Mont Saint-Michel]], [[The Opéra]], [[Grand Lobby]] | |||
| | | | ||
|-style="background:#F3BDD6;" | |-style="background:#F3BDD6;" | ||
|[[ | |[[Mega-Potion]] x 2 | ||
|[[ | |[[Training Yard]], [[Grand Lobby]] | ||
| | | | ||
|-style="background:#F3BDD6;" | |-style="background:#F3BDD6;" | ||
|[[Drop-Me-Not]] x 2 | |||
|[[ | |[[Tower]], [[The Opéra]] | ||
| | |||
|-style="background:#F3BDD6;" | |-style="background:#F3BDD6;" | ||
|[[Dream Candy]] x 2 | |||
|[[Shore]], [[Tower Road]] | |||
|[[ | | | ||
|-style="background:#F3BDD6;" | |-style="background:#F3BDD6;" | ||
|rowspan=" | | rowspan="12" style="background:#fd86bc;"| '''Training Toy''' | ||
|[[Water Barrel]] | |||
|[[ | |[[Dungeon]] | ||
| | |||
|[[ | |||
| | |||
|-style="background:#F3BDD6;" | |-style="background:#F3BDD6;" | ||
|[[Treasure Goggles]] | |[[Treasure Goggles]] | ||
|[[Tower]] | |[[Tower]] | ||
| | | | ||
|-style="background:#F3BDD6;" | |-style="background:#F3BDD6;" | ||
| Line 199: | Line 194: | ||
| | | | ||
|-style="background:#F3BDD6;" | |-style="background:#F3BDD6;" | ||
|[[Confetti Candy 2]] | |||
|[[Grand Lobby]] | |||
|[[Grand Lobby | |||
| | | | ||
|-style="background:#F3BDD6;" | |-style="background:#F3BDD6;" | ||
| Line 227: | Line 202: | ||
| | | | ||
|-style="background:#F3BDD6;" | |-style="background:#F3BDD6;" | ||
|[[ | |[[Block-it Chocolate 2]] x 2 | ||
|[[Grand Lobby]] | |[[The Opéra]], [[Grand Lobby]] | ||
| | |||
|-style="background:#F3BDD6;" | |||
|[[Ice Dream Cone 2]] x 2 | |||
|[[Training Yard]], [[Tower]] | |||
| | | | ||
|-style="background:#F3BDD6;" | |-style="background:#F3BDD6;" | ||
|[[Confetti Candy 3]] | |[[Confetti Candy 3]] | ||
|[[Theatre]] | |[[Theatre]] | ||
| | |||
|-style="background:#F3BDD6;" | |||
|[[Block-it Chocolate 3]] | |||
|[[Dungeon]] | |||
| | | | ||
|-style="background:#F3BDD6;" | |-style="background:#F3BDD6;" | ||
| Line 238: | Line 221: | ||
|[[Grand Lobby]] | |[[Grand Lobby]] | ||
| | | | ||
|- style="background:# | |-style="background:#F3BDD6;" | ||
| rowspan=" | |[[Royal Cake]] x 2 | ||
|[[Mont Saint-Michel]], [[Dungeon]] | |||
| | |||
|-style="background:#F3BDD6;" | |||
| rowspan="3" style="background:#FD86BC;"| '''Dream Piece''' | |||
|[[Fleeting Fancy]] | |||
|[[Dungeon]] | |||
| | |||
|-style="background:#F3BDD6;" | |-style="background:#F3BDD6;" | ||
|[[Fleeting Fantasy]] | |[[Fleeting Fantasy]] | ||
| Line 249: | Line 239: | ||
| | | | ||
|-style="background:#F3BDD6;" | |-style="background:#F3BDD6;" | ||
| | | style="background:#FD86BC;"| '''[[Recipe]]''' | ||
|[[Chef Kyroo Recipe]] | |[[Chef Kyroo Recipe]] | ||
|[[Dungeon]] | |[[Dungeon]] | ||
| Line 260: | Line 245: | ||
|} | |} | ||
</div><div class="tabbertab" title="Riku" style="float:center; background-color:white"> | </div><div class="tabbertab" title="Riku" style="float:center; background-color:white"> | ||
{|border=1 cellpadding=2 cellspacing=0 class="wikitable" style="text-align:center" align="center" width= | {|border=1 cellpadding=2 cellspacing=0 class="wikitable" style="text-align:center" align="center" width=700px | ||
|- bgcolor="#3A3A3A" | |- bgcolor="#3A3A3A" | ||
|style="background:#0B70D5;"| Type | |style="background:#0B70D5;"| Type | ||
| Line 266: | Line 251: | ||
|style="background:#0B70D5;" width="200pt"| Locations | |style="background:#0B70D5;" width="200pt"| Locations | ||
|style="background:#0B70D5;" width="200pt"| Notes | |style="background:#0B70D5;" width="200pt"| Notes | ||
|-style="background:#8DC1F6;" | |-style="background:#8DC1F6;" | ||
| rowspan="3" style="background:#3C75AE;"| '''[[Deck Command (KH3D)|Command]]''' | |||
|[[Shadowbreaker]] | |[[Shadowbreaker]] | ||
|[[Grand Lobby]] | |[[Grand Lobby]] | ||
| Line 280: | Line 264: | ||
|[[Green Room]] | |[[Green Room]] | ||
| | | | ||
|-style="background:#8DC1F6;" | |-style="background:#8DC1F6;" | ||
|rowspan=" | | rowspan="5" style="background:#3C75AE;"| '''Item''' | ||
|[[Hi-Potion]] x 3 | |||
|[[ | |[[The Opéra]], [[Machine Room]], [[Green Room]] | ||
| | |||
|-style="background:#8DC1F6;" | |-style="background:#8DC1F6;" | ||
|[[Mega-Potion]] x 2 | |||
|[[Grand Lobby]], [[Backstage]] | |||
| | |||
|[[Grand Lobby]] | |||
|-style="background:#8DC1F6;" | |-style="background:#8DC1F6;" | ||
|[[Drop-Me-Not]] x 3 | |||
|[[Backstage]], [[Machine Room]], [[Green Room]] | |||
| | |||
|[[Backstage]] | |||
|-style="background:#8DC1F6;" | |-style="background:#8DC1F6;" | ||
|[[Panacea]] | |[[Panacea]] | ||
|[[The | |[[The Opéra]] | ||
| | |||
|-style="background:#8DC1F6;" | |||
|[[Dream Candy]] x 2 | |||
|[[The Opéra]], [[Backstage]] | |||
| | | | ||
|-style="background:#8DC1F6;" | |-style="background:#8DC1F6;" | ||
| | | rowspan="9" style="background:#3C75AE;"| '''Training Toy''' | ||
|{{c|Balloon|item}} | |||
|[[Theatre]] | |[[Theatre]] | ||
| | | | ||
| Line 325: | Line 299: | ||
| | | | ||
|-style="background:#8DC1F6;" | |-style="background:#8DC1F6;" | ||
|[[Confetti Candy 2]] | |||
|[[Theatre]] | |||
| | |||
|[[ | |||
|-style="background:#8DC1F6;" | |-style="background:#8DC1F6;" | ||
|[[Shield Cookie 2]] | |[[Shield Cookie 2]] | ||
|[[The Opera]] | |[[The Opera]] | ||
| | | | ||
|-style="background:#8DC1F6;" | |-style="background:#8DC1F6;" | ||
| Line 351: | Line 311: | ||
| | | | ||
|-style="background:#8DC1F6;" | |-style="background:#8DC1F6;" | ||
|[[Confetti Candy | |[[Confetti Candy 3]] | ||
|[[ | |[[Green Room]] | ||
| | | | ||
|-style="background:#8DC1F6;" | |-style="background:#8DC1F6;" | ||
|[[ | |[[Shield Cookie 3]] | ||
|[[Green Room]] | |[[Green Room]] | ||
| | | | ||
|-style="background:#8DC1F6;" | |-style="background:#8DC1F6;" | ||
| | |[[Royal Cake]] x 2 | ||
|-style="background:# | |[[Grand Lobby]], [[Backstage]] | ||
| | | | ||
|[[ | |-style="background:#8DC1F6;" | ||
| rowspan="2" style="background:#3C75AE;"| '''Dream Piece''' | |||
|[[Green Room]] | |[[Fleeting Fantasy]] x 2 | ||
|[[Backstage]], [[Green Room]] | |||
| | |||
|-style="background:#8DC1F6;" | |-style="background:#8DC1F6;" | ||
|[[Prickly Fantasy]] | |[[Prickly Fantasy]] | ||
|[[Green Room]] | |[[Green Room]] | ||
| | | | ||
|-style="background:#8DC1F6;" | |-style="background:#8DC1F6;" | ||
| rowspan="2" style="background:#3C75AE;"| '''[[Recipe]]''' | |||
|[[Staggerceps Recipe]] | |[[Staggerceps Recipe]] | ||
|[[Backstage]] | |[[Backstage]] | ||
| Line 381: | Line 340: | ||
|[[Machine Room]] | |[[Machine Room]] | ||
| | | | ||
|} | |||
</div></div> | |||
|} | |} | ||
{{-}} | {{-}} | ||
Revision as of 18:48, 7 February 2018
Kingdom Hearts 3D: Dream Drop Distance
Battle Levels
Dive Mode
Link Portals
| Rare Nightmare | Location | |||
| Mont Saint-Michel | ||||
| Bonus Objective | ||||
| Achieve victory in 20 seconds or less! | ||||
| Point Prize | 50 DP | |||
| Other Prize | Fleeting Fantasy Grim Fantasy | |||
| Bonus Prize | ??? | |||
| Enemies | ||||
| Me Me Bunny (Rare) x2, Me Me Bunny x3 | ||||
| Forecast Description | Difficulty Rank | |||
| ??? | ★★★★★ | |||
_KH3D.png)
| Rare Nightmare | Location | |||
| Shore | ||||
| Bonus Objective | ||||
| Achieve victory without using | ||||
| Point Prize | 50 DP | |||
| Other Prize | Fleeting Fantasy Grim Fantasy | |||
| Bonus Prize | Royal Cake | |||
| Enemies | ||||
| Iceguin Ace x3 Peepsta Hoo x2 Halbird (Rare) x1, Halbird x2 | ||||
| Forecast Description | Difficulty Rank | |||
| ??? | ★★★★★ | |||
_KH3D.png)
| Rare Nightmare | Location | |||
| Tower Road | ||||
| Bonus Objective | ||||
| Pull off at least three succesful counters! | ||||
| Point Prize | 50 DP | |||
| Other Prize | Fleeting Fantasy Grim Fantasy | |||
| Bonus Prize | Royal Cake Treasure Goggles | |||
| Enemies | ||||
| Hebby Repp x2 Pricklemnae x2 Tyranto Rex (Rare) x1, Ryu Dragon x1 | ||||
| Forecast Description | Difficulty Rank | |||
| ??? | ★★★★★ | |||
_KH3D.png)
| Rare Nightmare | Location | |||
| Dungeon | ||||
| Bonus Objective | ||||
| Pull off at least three Flowmotion Attacks! | ||||
| Point Prize | 60 DP | |||
| Other Prize | Prickly Fantasy | |||
| Bonus Prize | Royal Cake | |||
| Enemies | ||||
| Ducky Goose (Rare) x1, Tyranto Rex (Rare) x2 | ||||
| Forecast Description | Difficulty Rank | |||
| ??? | ★★★★★ | |||
_KH3D.png)
| Rare Nightmare | Location | |||
| Training Yard | ||||
| Bonus Objective | ||||
| Block at least three enemy attacks! | ||||
| Point Prize | 60 DP | |||
| Other Prize | Prickly Fantasy | |||
| Bonus Prize | Royal Cake Treasure Goggles | |||
| Enemies | ||||
| Halbird (Rare) x3, Thunderaffe x2 | ||||
| Forecast Description | Difficulty Rank | |||
| ??? | ★★★★★ | |||
| Rare Nightmare | Location | |||
| Theatre | ||||
| Bonus Objective | ||||
| Take damage no more than two times! | ||||
| Point Prize | 85 DP | |||
| Other Prize | Prickly Fantasy | |||
| Bonus Prize | Royal Cake | |||
| Enemies | ||||
| Aura Lion (Rare) x2 | ||||
| Forecast Description | Difficulty Rank | |||
| ??? | ★★★★★ | |||
_KH3D.png)
| Rare Nightmare | Location | |||
| Grand Lobby | ||||
| Bonus Objective | ||||
| Achieve victory without using | ||||
| Point Prize | 50 DP | |||
| Other Prize | Fleeting Fantasy Grim Fantasy | |||
| Bonus Prize | Royal Cake | |||
| Enemies | ||||
| Aura Lion (Rare) x1, Aura Lion x2 | ||||
| Forecast Description | Difficulty Rank | |||
| King of the beasts sighted! | ★★★★★
| |||
| Extra Prize | Aura Lion Recipe | |||
| Rare Nightmare | Location | |||
| The Opéra | ||||
| Bonus Objective | ||||
| Pull off at least three Flowmotion Attacks! | ||||
| Point Prize | 50 DP | |||
| Other Prize | Fleeting Fantasy Grim Fantasy | |||
| Bonus Prize | Royal Cake Treasure Goggles | |||
| Enemies | ||||
| Me Me Bunny (Rare) x3, Peepsta Hoo x2 Ducky Goose (Rare) x3 | ||||
| Forecast Description | Difficulty Rank | |||
| ??? | ★★★★★ | |||
| Rare Nightmare | Location | |||
| Machine Room | ||||
| Bonus Objective | ||||
| Land at least 10 attacks while linked! | ||||
| Point Prize | 50 DP | |||
| Other Prize | Fleeting Fantasy Grim Fantasy | |||
| Bonus Prize | Royal Cake | |||
| Enemies | ||||
| Ducky Goose x2 Cera Terror x1, Aura Lion x2 Me Me Bunny (Rare) x3 | ||||
| Forecast Description | Difficulty Rank | |||
| ??? | ★★★★★ | |||
| Rare Nightmare | Location | |||
| Backstage | ||||
| Bonus Objective | ||||
| Pull off at least three succesful counters! | ||||
| Point Prize | 60 DP | |||
| Other Prize | Epic Fantasy | |||
| Bonus Prize | Royal Cake | |||
| Enemies | ||||
| Aura Lion (Rare) x1, Aura Lion x2 | ||||
| Forecast Description | Difficulty Rank | |||
| King of the beasts sighted! | ★★★★★ | |||
| Rare Nightmare | Location | |||
| Theatre | ||||
| Bonus Objective | ||||
| Pull off at least three Flowmotion Attacks! | ||||
| Point Prize | 60 DP | |||
| Other Prize | Epic Fantasy | |||
| Bonus Prize | Royal Cake | |||
| Enemies | ||||
| Halbird (Rare) x3 | ||||
| Forecast Description | Difficulty Rank | |||
| Winged wanderer sighted! | ★★★★★ | |||
| Rare Nightmare | Location | |||
| Green Room | ||||
| Bonus Objective | ||||
| Achieve victory in 20 seconds or less! | ||||
| Point Prize | 85 DP | |||
| Other Prize | Epic Fantasy | |||
| Bonus Prize | Royal Cake | |||
| Enemies | ||||
| Aura Lion (Rare) x1, Me Me Bunny (Rare) x2 Skelterwild x1 | ||||
| Forecast Description | Difficulty Rank | |||
| King of the beast sighted! | ★★★★★ | |||
| Boss | ||
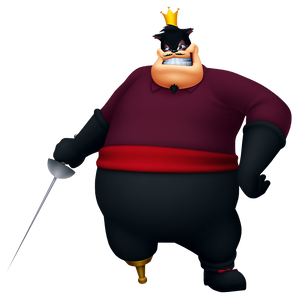 Pete | ||
| Location | Reward | Difficulty Rank |
| Theatre | HP Boost | ★★★★★ |
| Boss | ||
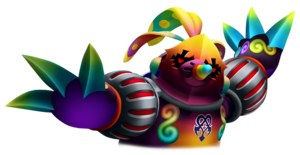 Holey Moley | ||
| Location | Reward | Difficulty Rank |
| Backstage | HP Boost | ★★★★★ |