| Site Notice |
|---|
|
Remember to pay a visit to our Discord server and chat with our community! See here for more info. Be sure to check out the KHUX Wiki for the latest on Kingdom Hearts Union χ and Kingdom Hearts Dark Road! Go and pitch in! The KHWiki contains spoilers for all Kingdom Hearts games. Read at your own risk. Please remember not to add information about unreleased games from trailers. |
Game:Ansem, Seeker of Darkness
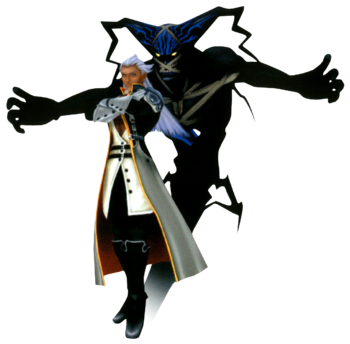
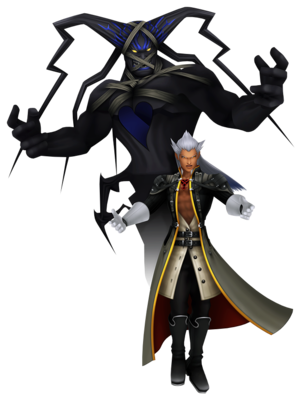
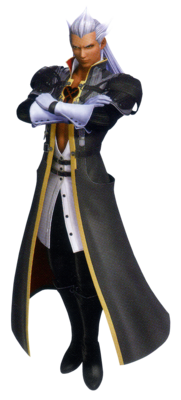
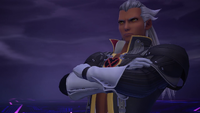
Ansem, Seeker of Darkness is a boss in Kingdom Hearts, Kingdom Hearts Chain of Memories, Kingdom Hearts 3D: Dream Drop Distance, and Kingdom Hearts III. He is the Heartless of Terra-Xehanort, and leader of the Heartless.
In Kingdom Hearts III, Ansem is fought in the Keyblade Graveyard, initially alongside Xigbar and Dark Riku, although he retreats not long into the battle, and later fights alongside Xemnas and Young Xehanort. A data replica of him is also an optional boss in Kingdom Hearts III Re Mind.
Strategy[edit]
Kingdom Hearts[edit]
First battle[edit]
Ansem's first fight is a battle against Sora, Donald Duck, and Goofy at the End of the World's simulation of Destiny Islands. While his attacks are few, they are devastating.
During the fight, Ansem attacks with energy disks as he laughs, which can be blocked with Guard. He can also make the Dark Figure swipe at the party, or defend himself with it. However, with the right timing, Sora can just end up behind Ansem and deal damage to him. Special attacks like Ragnarok can pierce through the Dark Figure's defenses. When Sora is able to get past the Dark Figure and hit Ansem, he will have it turn around and swing at Sora from behind.
Ansem's most infamous attack is when he has the Dark Figure dash at Sora and swipe at him with a slight delay. He always yells, "Submit!" as he does this, so Dodge Roll at the right time to evade the Dark Figure, as Guard will not stop it. While the Dark Figure will always target Sora, there is a chance for Donald or Goofy to intercept the blow. If the Dark Figure's hit connects, it will possess its target, and Ansem will use a different attack where he surrounds himself with an energy barrier and tries to hit Sora with it, closing in.
If Sora is possessed by the Dark Figure, the Attack command will be occasionally replaced with "Freeze." Pressing it causes the Dark Figure to hold Sora in place for a brief moment leaving him open for Ansem's energy barrier to damage him; otherwise, the Dark Figure will damage Sora from within. Using the Freeze command therefore prevents Sora from taking the Possession Damage while restrained. While the Dark Figure will eventually be called back to Ansem's side, Sora can shorten the Dark Figure's hold on its target either with simple combos or with special attacks like Strike Raid.
Any experience earned from this fight onwards cannot be kept once the final battle against the World of Chaos ends.
Second battle[edit]
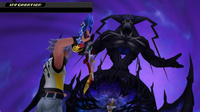
In the second battle against Ansem, Sora fights solo, so remember to heal with Curaga. Ansem will now use his Rush attack, in which he shoots back and forth across the arena with a shield over his front side. This inflicts heavy damage if it connects, so try to High Jump, Guard or cast Aeroga.
When Ansem says "My strength returns!", the Dark Figure will dive into the ground, creating dark pools underneath Sora which shoot out of the ground. During this time, Ansem is invincible and the attack must be avoided, either by dodging or Guarding. Failing to evade this attack can be highly damaging or even fatal, depending on the amount of HP Sora has at the time. The attack ends with the Dark Figure striking the ground, creating a shockwave.
Like in the last battle, Ansem still has a habit of siccing the Dark Figure on Sora. However, he will do this much more frequently than in the first battle. Ansem is especially vulnerable when he calls the Dark Figure to return to him, so unleash combos at this time for massive damage.
| Technique | Element | Tech | Power Bonus | Guard? | ||
|---|---|---|---|---|---|---|
| Dark Blow (ダークブロウ Dāku Burou) |
Dark | x0 | 4 | Repellable (Recoil: 100) | ||
| The Dark Figure swings its right hand sideways. | ||||||
| Shock Slash (衝撃斬 Shōgekizan) |
Dark | x0.01 | 4 | Returnable (Recoil: 0) | ||
| The Dark Figure's hands glow red, and it fires 6 rings of light.
| ||||||
| Only used in the first battle. | ||||||
| Possession (Punch) (憑依(パンチ) Hyōi (Panchi)) |
None | — | 4 | — | ||
| The Dark Figure attacks, and possesses the opponent for about 30 seconds when it hits.
| ||||||
| Can be avoided by approaching Ansem from the left side. When Sora is possessed, his Attack command may occasionnally get replaced by Freeze which causes the Dark Figure to immobilize him for a few seconds. Once an opponent is posessed, Ansem can only use Possession Damage and Barrier Deployment, until he summons the Dark Figure back. | ||||||
| Possession (Possession Damage) (憑依(憑依ダメージ) Hyōi (Hyōi Damēji)) |
Dark | — | 4 | — | ||
| The Dark Figure appears and attacks.
| ||||||
| Used on the possessed opponent. | ||||||
| Barrier Deployment (結界展開 Kekkai Tenkai) |
None | x0 | 8 | Repellable (Recoil: 100) | ||
| Ansem wraps himself in a purple sphere, and moves forward.
| ||||||
| Only used while an opponent is under the effects of Possession. | ||||||
| Rush (突進 Tosshin) |
Dark | x0.01 | 8 | Repellable (Recoil: 1) | ||
| Summons a barrier in front, and charges multiple times.
| ||||||
| Only used in the second battle. | ||||||
| Racing Shock Wave (Both Arms) (地走り衝撃波(両腕) Jibashiri Shōgekiha (Ryōude)) |
None | x0 | 6 | Repellable (Recoil: 100) | ||
| The Dark Figure swings both arms forward.
| ||||||
| Only used in the second battle. | ||||||
| Racing Shock Wave (Shock Wave) (地走り衝撃波(衝撃波) Jibashiri Shōgekiha (Shōgekiha)) |
Dark | — | 6 | — | ||
| Waves of light are released from the Dark Figure's arms.
| ||||||
| Only used in the second battle. | ||||||
| Aura of Darkness (Appearance Technique) (暗黒のオーラ(出現技) Ankoku no Ōra (Shutsugen-waza)) |
(appearance) | None | x0 | 10 | Repellable (Recoil: 100)
| |
| (shock wave) | Dark | — | 10
|
— | ||
| The Dark Figure emerges from the ground 10 times.
| ||||||
| Only used in the second battle. Ansem is invincible during this attack. | ||||||
| Aura of Darkness (Final Run) (暗黒のオーラ(究極地走り) Ankoku no Ōra (Kyūkyoku Jibashiri))) |
Dark | — | 10 | — | ||
| After the Dark Figure finishes attacking, it releases a wave of light around itself.
| ||||||
| Only used in the second battle. Ansem is invincible during this attack. The four racing shockwaves are aimed according to the angle Ansem is facing, with one aimed in front of him.
| ||||||
| During both fights, the Dark Figure may protect Ansem from attacks, with the exception of special attacks. If Ansem is attacked from behind, he responds with a Dark Blow. | ||||||
| Guard: Repellable = Can be blocked and interrupted | ||||||
Third battle[edit]
Kingdom Hearts Chain of Memories[edit]
- First battle
This battle is rather straightforward, Riku should keep his combos going and card break Ansem's Dark Rush sleight to avoid damage. He can move up and down to avoid it as well.
- Second battle
The second time Ansem is fought is during the final battle of Riku's Story. This time around, he brings a new sleight, Dark Shadow, wher he sends the Dark Figure into the floor, creating pools of darkness that the Dark Figure rises out of, fist raised, that can deal chained up damage. It's best to use 0 cards to break Dark Shadow when he is preparing it, but it can be avoided by dodging with the right timing. There is one unorthodox strategy that involves losing all of Riku's cards (from Sleights) except one 0 card. If he gets left with one 0 card, immediately reload after (because Riku has instant reload, unlike Sora) and continue a combo. This works because the zero will always break Ansem's next card and if he breaks Riku's, reloading will give Riku a zero card.
Ansem's Sleights tend to be reserved for later, and he initially just bothers with single card attacks. Once he loses 1.5-2 bars of HP he will start using his Sleights more regularly and attempt to break the player's. He will always start using his own card to hide his Sleight's value, but the Parasite Cage card can dispel this. A good idea is to use simple Sleights at the beginning to hit Ansem quick and for high damage all the while accumulating DP. Following this the player should have Dark Mode and Ansem will start using his own Sleights so having a few 0 cards nearby is advisable. Otherwise assaulting Ansem with Sleights like Dark Break or Dark Aura is helpful, esspecially the latter as it can prevent Ansem from using his cards during the assault, although special care should be placed during the execution as he can break it with a 0 card of his own so it is advisable (for the entire battle) to use these Sleights instantly after Ansem attempts to use his own cards to Card Break him, thus leaving him vulnerable to the attacks. The Jafar-Genie Card can be used to prevent card breaks, but only if Riku uses cards one after another.
- Deck
- Attacks
| Technique | Element | Status | Power | Cards | ||
|---|---|---|---|---|---|---|
| Dark Blow (ダークブロウ Dāku Burou) |
— | — | x0.5 | |||
| The Dark Figure attacks with a punch, tracking the opponent throughout the movement.
| ||||||
| Used at close range. | ||||||
| Racing Shockwave (地走り衝撃波 Jibashiri Shougekiha) |
Neutral | — | x0.5 | |||
| The Dark Figure spreads its arms, and at the same time, releases a shock wave forward that moves along the ground at high speed.
| ||||||
| Used at close to medium range. | ||||||
| Dark Rush[4] (ダークラッシュ Dāku Rasshu) |
— | — | x1.0 | |||
| Performs a series of high-speed shoulder tackles as he runs back and forth across the field. | ||||||
| Dark Shadow (ダークシャドウ Dāku Shadou) |
Neutral | — | x1.0 | |||
| The Dark Figure appears from under the opponent's feet a total of 8 times. If it hits, the opponent will be knocked straight up and take continuous damage.
| ||||||
| Only used in second battle. | ||||||
| Elixir (エリクサー Erikusā) |
— | — | — | |||
| Quickly reloads attack cards and magic cards, including normally unreloadable cards.
| ||||||
| During the second fight, the Dark Figure may frequently protect Ansem from attacks for short periods of time. | ||||||
Kingdom Hearts Re:Chain of Memories[edit]
- First battle
Riku's first fight with Ansem is meant to act as a tutorial on basic combat, and is very short. It requires Riku to perform a Rapid Break and a Card Duel, and ends as soon as Riku successfully performs them.
Ansem will also use the "Shock Slash" technique, which can be easily dodged, as well as a toned-down version of Racing Shockwave.
- Second battle
The second fight with Ansem is more or less the same as in the original game, with the addition of "Shock Slash", and the finisher shockwave of "Dark Shadow". In addition, Ansem uses the Dark Figure to protect himself the same way as in Kingdom Hearts, not frequently during short periods of time like he does in Kingdom Hearts Chain of Memories.
Start with the Maleficent Dragon Enemy Card and attack Ansem with combos. Make a Card Break every time to gain Dark Points and after Riku transform into Dark Mode, use the Jafar-Genie enemy card and use Sleights like Dark Break, Dark Firaga and Dark Aura to inflict heavy damage. After taking three (or more) King Mickey Friend Cards, use the MM Miracle Lv. 2 or MM Miracle Lv. 3 sleights to recover HP, reload cards, and damage Ansem. Break Ansem's Sleights every time and continue the attacks. If Riku transforms into his normal form again, keep attacking and use the Item Card Hi-Potion to reload his Attack Cards. Win the Card Duels for heavy damage to Ansem. Never attack Ansem with the Dark Figure in front of him, and instead use that time to reload Riku's cards or use MM Miracle Lv. 3 to recover cards and HP. Use the Oogie Boogie Enemy Card to help keep up Riku's HP in the battle. Watch out for certain Sleights used by Ansem, as some can deal heavy damage to Riku. With a high level, deft dodging, and good use of the Enemy Cards, Ansem should fall eventually.
- Deck
| Card | 0 | 1 | 2 | 3 | 4 | 5 | 6 | 7 | 8 | 9 | Total
| |
|---|---|---|---|---|---|---|---|---|---|---|---|---|
| Attack Card | 8 | 0 | 0 | 0 | 1 | 2 | 4 | 6 | 8 | 10 | 39 | |
| Magic Card | 5 | 0 | 0 | 0 | 1 | 2 | 4 | 6 | 8 | 10 | 36 | |
| Elixir | 0 | 0 | 0 | 0 | 0 | 0 | 0 | 0 | 0 | 2 | 2 | |
| Enemy Card | — | |||||||||||
- Attacks
Kingdom Hearts 3D: Dream Drop Distance[edit]
First form[edit]
The battle starts with both parties in midair in Darkness's Call. As Riku is fully in midair, his Dream Eaters won't be active during this phase of the fight, and won't be able to give him support through spells like Cure commands, Haste, or Spirit Roar. Due to the absence of the latter, his damage will be very limited if he is underleveled, and nearly null at level 1.
Ansem's Shock Slash has been upgraded and now homes in on Riku, and he has a habit of chaining them together for combos. Riku may block it, but as he is floating, only Dark Barrier can allow him to. Whenever his attacks land a hit on Riku, there's a chance, depending on the difficulty, that Ansem responds with a taunt, leaving him vulnerable during a few seconds. His Rush is slightly different from other versions of the attack, and must be dodged. Riku can either just fly sideways when Ansem is about to charge at him or Air Slide either out of the way at each charge, or straight at him, taking advantage of its invincibility frames, in order to follow with Sonic Impact and Sliding Crescent once the enemy's attack is over.
Ansem cannot aim at Riku once he uses Vanish, so he may use it to his advantage and stay in a blind spot while attacking him from the distance. If Riku deals enough consecutive damage, the Reality Shift marker will appear and he can use Mirage Split to damage Ansem and make a platform appear.
Now the battle is on a platform on Darkness's Call. Riku's Dream Eaters are back, and he may benefit from their active support. If he uses Vanish, or gets revived thanks to Auto-Life, Ansem will aim at one of the two Dream Eaters of Riku's party instead. When the platform is created, Ansem almost always starts by shielding himself with the Dark Figure, and thus it might not be recommended to use a long-lasting command right away as they will most likely be interrupted, but rather after the first time he shields himself. The Dark Figure now serves as a lock-on target for the time it protects Ansem, and despite it having its own HP bar in the meantime, it cannot be depleted. He remains vulnerable to commands that circumvent the Dark Figure's protection like Balloon or Triple Plasma during that time, and Flowmotion may be used on the Dark Figure the same way as on wall, interrupting the protection, where Riku can attack Ansem with a Shock Dive attack.
Once enough time has passed, he starts to use his old Racing Shockwave which now has the Dark Figure charge the attack before unleashing the powerful blasts that cannot be blocked. He will try to stay outside of the arena's bounds each time he is about to attack, making short-ranged commands almost useless. Each Racing Shockwave destroys a layer of the platform Riku stands on, but he may interrupt the process for a while if he manages to make Ansem flinch. Once Racing Shockwave has been used three times, the platform completely disappears, along with Riku's dream eaters, and the battle goes back to its initial state, with Ansem's Rush and Shock Slash and Riku's floating combat abilities. Until Ansem uses Rush at least once, he will remain hard to hit due to the fact he stayed outside of the arena's bounds while using Racing Shockwave.
The fight itself is relatively straightforward and the same strategies from before can defeat the Heartless once more.
On the 3DS version only, it was possible to either use a second Reality Shift or stunlock Ansem by repeatedly using the Attack command right after a successful first Reality Shift until his HP reaches 1, where then either using another Reality Shift if prompted or waiting for a few seconds and attacking him would finish him off. This strategy would fail if Ansem would immediatly get the Dark Figure to protect himself. If Riku ever triggers a Reality Shift while Ansem is facing downwards or upwards (by using Aerial Slam to knock him upwards and then having him use Rush for example), Ansem will get stuck facing one of these angles and his attacks are rendered ineffective if he faces downwards. The Dark Figure's protection may also send Ansem flying around the ceiling of the arena.
| Technique | Element | Status | Power | Block? | ||
|---|---|---|---|---|---|---|
| Shock Slash (衝撃斬 Shōgekizan) |
— | 0.2 x6 | △ | |||
| The Dark Figure launches six ring projectiles. The projectiles fly, halfway chasing the opponent, then straight ahead.
| ||||||
| If Riku is under the effects of Vanish while there is no Reality Shift platform on, the projectiles will fly towards a specific spot of the arena instead of him. | ||||||
| Rush (突進 Tosshin) |
— | 1.2 x5 | X | |||
| Enveloped in a dark aura, launches five body slams.
| ||||||
| Used during normal combat only. | ||||||
| Dark Blow (ダークブロウ Dāku Burou) |
— | 1.0 | O | |||
| The Dark Figure strikes with its right hand.
| ||||||
| Used with the Reality Shift platform on. Ansem approaches Riku before the attack, but won't attack if Riku is airborne and will instead keep moving around his position and attack whenever he lands. | ||||||
| Sledgehammer (スレッジハンマー Suredjihanmā) |
— | 1.5 | O | |||
| The Dark Figure clasps both hands over its head and swings downwards.
| ||||||
| Used with the Reality Shift platform on. The attack can hit Riku even if he is using Doubleflight. | ||||||
| Racing Shockwave (地走り衝撃波 Jibashiri Shōgekiha) |
— | 1.0 per hit | X | |||
| The Dark Figure charges and shoots a dark light onto the ground, sending out a shock wave towards the opponent.
| ||||||
| Used with the Reality Shift platform on, after enough time has passed. Moves outside the arena before attacking. Each shockwave destroys one layer of the Reality Shift platform. Once three are destroyed, the platform disappears.
| ||||||
| With the Reality Shift platforms on, the Dark Figure may protect Ansem from most attacks, with the exception of commands that bypass its protection. When it protects him, the Dark Figure serves as a target substitute, has a HP bar that cannot be depleted, and acts as a wall on which Flowmotion can be used. | ||||||
| Guard/Block: △ = Can be blocked; O = Can be blocked and interrupted (melee) or deflected back (projectile); X = Cannot be blocked. | ||||||
Second form[edit]
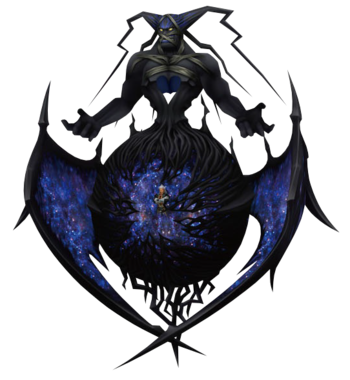
Ansem merges with the Dark Figure as he transports both himself and Riku to the Darkest End area. Ansem is now sealed inside a massive organic sphere with his Dark Figure attached to the top. Riku should pre-emptively have the Second Chance, Once More, Poison Block, Slow Block, Blindness Block, and Confusion Block abilities equipped before the battle against Anti Black Coat starts. During this battle, the Lock-On range has been improved to reach Ansem from very far. Long-ranged commands are recommended in the case Ansem uses Dark Wave to back away, and as he will never use his Dark Rush attack if Riku is at a minimum of distance. Once More can make the use of Firaga Burst safe during the potentially lethal mult-hit blows of Dark Rush and Dark Shot. The repetitive use of Balloonra can also deal a lot of damage to Ansem as well. Just like the previous fight, Ansem may respond with a taunt once his attacks succeed.
After a while, Ansem starts Dark Matter, pushing Riku and his Spirits to the back of the arena.
Riku can pre-emptively use Firaga Burst (where the big fireball stays where it is) before Ansem starts pushing Riku back, and once at the back, finish with Ice Barrage to deal extra damage, with the Lock-On required. Once Riku is at the back of the arena, he can use Dark Splicer, Dark Aura or Zantetsuken, or the Ghost Drive Dual Style, when he reaches the end of the pathway to warp right up to Ansem and deal damage. This is a risky tactic, as Riku can easily be captured by the Dark Web into the spheres of darkness, or get punched by Dark Rush. Dark Matter can get cancelled if Riku manages to make Ansem flinch.
In other cases, Riku needs to go back to Ansem by rolling forwards, with Dark Roll helping him move faster, or using Flowmotion with the walls on the sides.
The Dark Laser attack can be deadly if Ansem uses it repeatedly. In order to avoid it, Riku should dodge aside the moment the Dark Figure's shots merge into the spheres. The Chaos Firaga attack can be dodged by rolling forward. Beware of Riku's Dream Eaters when they get afflicted by Confuse, as the status may have them backstab him. The Dark Rain can be dodged the same way. Both latter techniques shouldn't be blocked, as Riku can get hit by a Dark Laser during a block if Ansem uses it next.
If Riku gets any closer, Ansem uses the Dark Webs that will drag Riku into the spheres. Beware if Ansem uses Dark Rain right before a Dark Web, as it can alter the timing of Riku's blocks, or worse, hit him while the Dark Webs are getting close, and those may catch him. They may as well hit him between two dodge rolls. In the case Riku gets caught by the Dark Webs or the spheres themselves, he will get immobilized in the sphere and struck by Planet Buster. For the reason that they can catch him off-guard once Dark Matter is over, Riku should never stay on the sides of the arena and stay instead in the middle.
Once Riku is near Ansem, multiple tactics are available:
- Willingly letting Riku get caught by the Dark Web to skip Dark Matter is a viable option if a Cure command is available for him to use afterwards. Planet Buster isn't a deadly attack and will put an end to Dark Matter once it is over.
- If Dark Barrier is equipped, Riku can alternately repeatedly use it to block the Dark Web when close enough to Ansem, and use Counter Aura at the last moment each time. If Riku is too close though, Ansem might want to punch him using Dark Rush.
- Riku may use Flowmotion to evade the Dark Webs and wall kick from wall to wall, as they last for quite a while and cannot catch him in midair, until Dark Matter ends. Riku should mind the fling dark spheres when the attack ends and shouldn't stay near the walls or in the spheres's way.
- Use Firaga Burst with Doubleflight to stay in the air so he won't be able to drag Riku in. Riku should avoid using commands such as Ice Barrage at this moment in midair, since it has him fall while using such commands. Once Riku can move, use Flowmotion with Sonic Impact, if possible, to go back to the walls, and repeat either of the three latter tactics.
Once Dark Matter is over, press L/R (3DS) or L3 (PS4) to have the Spirits warp to Riku's position (on the 3DS, press L/R again to reactivate the Lock-On) so they will be able to help, but not anytime sooner, as they may get caught by the Dark Webs, become unable to help, and get sent to the back along with the spheres.
As soon as his HP has dropped below 50%, 70% on Critical Mode, Ansem starts using Dark Galaxy.
Riku should maintain a defensive stance during this attack. One way to deal with it is to keep blocking the torrents while Ansem drags Riku in front of him, and, afterwards, to keep dodge rolling backwards. The fact the torrents of darkness appear randomly across the arena and may also hit him multiple times if unlucky can make this attack become one of the most lethal attacks of the fight.
Once Ansem finishes this part of the attack, he sends Riku to the back of the arena akin to Dark Matter. The black spheres can easily defeat Riku if he gets hit even once as the others may follow up for chained up damage. Riku shouldn't attempt activating Flowmotion, as it cannot be activated on the walls during this attack.
Two tactics are available for this attack:
- Dodge rolling forwards along the walls with no fear of activating Flowmotion and return to Ansem rapidly. However it isn't recommended to permanently dodge roll, because he may get hit if the timing is wrong, meaning he must dodge roll only when a sphere gets near him while keeping running back. Mashing the button may also result in Riku performing a Sonic Impact, therefore leaving him potentially vulnerable. If Riku uses Dark Roll, he will have to dodge only one sphere at a time while going back, but when he gets closer, he will have to dodge three in a row and will have to chain the Dark Rolls a bit more frequently, and Dark Galaxy should end by the moment he arrives to Ansem.
- With Second Chance/Once More equipped in order to survive, Riku can use Dark Splicer just as the black spheres reach him to go near Ansem and deal some damage, while staying at his position. Dark Splicer lasts long enough until the end of Dark Galaxy and prevents knockbacks, in this case from the spheres, when using it. Riku should immediately heal after this.
After this, just repeat the cycle of pounding Ansem and running back to him and he'll go down.
If Riku deals a lot of consecutive damage, the Mirage Split Reality Shift prompt can eventually appear. Dealing huge damage when close and interrupting Ansem for 10 seconds. This interruption may get cancelled if he flinches. Whenever he recovers, he will tend to use Dark Galaxy immediatly due to the heavy HP loss.
In the 3DS version only, it was possible that if Riku pounds him with the Attack command right after his Reality Shift finishes, he can get Ansem to be stunlocked and Riku may repeat the same Attack combo on him until Ansem's HP reaches 1. After some time, while hitting him again and again, the Reality Shift prompt can reappear, so Riku will be able to finish him off with it. Otherwise, wait until Ansem reacts to the Reality Shift normally and defeat him with one final blow.
Additionally, it was also possible to trigger a glitch to alter the direction Ansem is facing by default by triggering the Reality Shift on the side, and hitting him from other angles. With Balloonga it is also possible to have Ansem face backwards. Once he recovers, the direction he sends Riku towards during Dark Matter and Dark Galaxy is altered as well, including the positions of the purple spheres and the angle of the black spheres he sends rolling towards, excluding those aimed at Riku. Once Riku is captured by the Dark Web attack, it was also possible to get him out of bounds, but he will eventually warp back to the center of the arena if he ever falls. Mind that Ansem will reset to his initial direction if he uses Dark Rush, which can only happen if Riku is too close to Ansem.
| Technique | Element | Status | Power | Block? | ||
|---|---|---|---|---|---|---|
| Dark Rush (ダークラッシュ Dāku Rasshu) |
— | 1.0 x3 | ◯ | |||
| The Dark Figure swings its fist down three times.
| ||||||
| Only used at very close range, anytime. | ||||||
| Dark Shot (ダークショット Dāku Shotto) |
— | 0.25 per hit | △ | |||
| Fires 6 or 8 dark bullets that aim either forward or directly at Riku. When the bullets fly close, they start chasing him.
| ||||||
| Used during normal combat only. Telegraphed by the Dark Figure firing the shots hand forward glowing purple. | ||||||
| Dark Firaga (Level) (ダークファイガ(水平) Dāku Faiga (Suihei), lit. "Dark Figa (Level)") |
— | 1.2 per hit | △ | |||
| Fires 2 blue bullets. When the bullets fly close to Riku, they split and follow him for a short distance before flying straight.
| ||||||
| Used during normal combat only. Telegraphed by the Dark Figure crossing its arms and its hands glowing blue. The split bullets can miss Riku if he stays immobile in front of Ansem the moment the split happens. | ||||||
| Dark Firaga (Upper) (ダークファイガ(上方) Dāku Faiga (Jōhō), lit. "Dark Figa (Upper)") |
— | 1.2 per hit | △ | |||
| Scatters a large amount of blue bullets from both hands, aiming at the area surrounding Riku.
| ||||||
| Used during normal combat only. Telegraphed by the Dark Figure dropping the dark orbs hands upwards. | ||||||
| Dark Wave (ダークウェーブ Dāku Wēbu) |
— | 1.0 x6 | △[5] | |||
| Releases 6 crescent-shaped dark waves (if used at close range, they are fired while retreating). The waves travel straight at low altitude and then rise diagonally in front of Riku.
| ||||||
| Used during normal combat only. Telegraphed by the Dark Figure crossing its arms and its hands glowing orange. | ||||||
| Dark Galaxy (ダークギャラクシー Dāku Gyarakushī) |
(dark pillars) | — | 0.8 per hit | △
| ||
| (black spheres) | — | 1.0 per hit
|
△ | |||
| (explosion) | — | 1.2 per hit | X | |||
| Pillars of darkness erupt from the surrounding ground, while the opponents are drawn to a medium distance in front of him. Afterwards, Ansem pulls them far away and unleashes black spheres forwards one after another. The spheres, once charged with lightning, curve toward Riku and explode. Some of the spheres are directly aimed at him.
| ||||||
| Only used during normal combat, and below 50% of his HP, 70% on Critical Mode. Reality Shift prompts cannot appear, Ansem cannot flinch, and Flowmotion cannot be used on the walls during this attack. While the opponents get pulled, Riku may still perform any action including walking or running while immobilized, but his Dream Eaters are unable to perform any action. | ||||||
| Dark Matter (ダークマター Dāku Matā) |
— | 0 | △ | |||
| After pulling the opponents far away, Ansem creates two dark spheres which transform his techniques (except Dark Rush), and some time later, the dark spheres fly forward and disappear. The flying dark orbs pull in and carry away anyone they touch. If Riku is pulled in, Ansem will use Planet Buster.
| ||||||
| Used during normal combat only. Starts being used after enough time has passed. The attack ends early after Ansem uses Planet Buster. The spheres disappear and the attack stops whenever Ansem flinches. While the opponents get pulled away, Riku may still perform any action including walking or running while immobilized, but his Dream Eaters are unable to perform any action, Reality Shift prompts cannot appear and the arena darkens[KH DDD HD]. | ||||||
| Dark Laser (ダークレーザー Dāku Rēzā) |
— | 0.4 per hit | X | |||
| Hits the dark spheres with Dark Shot and fires high-speed lasers.
| ||||||
| Used during Dark Matter only, at medium range and in the distance. Although the hit animations and sounds tell otherwise, the lasers do not deal light-based damage. Each laser can only hit once. | ||||||
| Chaos Firaga (カオスファイガ Kaosu Faiga, lit. "Chaos Figa") |
Blind[6], Confuse[7], Poison[8], or Slow[9] (100%/10s) | 0.2 per hit | △ | |||
| Hits the dark spheres with Dark Firaga (Level) and scatters bubbles inflicting various status.
| ||||||
| Used during Dark Matter only, at medium range. Unlike the regular Dark Firaga (Level), this attack is telegraphed by the Dark Figure firing the orbs hand forward, akin to Dark Shot, but with the hands glowing blue. The Dark Firaga (Level) can still turn into the bubbles if the spheres become absent, with more or less delay, unlike the other attacks. | ||||||
| Dark Rain (ダークレイン Dāku Rein) |
Poison (100%/10s) | 0.1 per hit | △ | |||
| Hits the dark spheres with Dark Firaga (Upper) and scatters blue bullets around Riku.
| ||||||
| Used during Dark Matter only, at medium range and in the distance. | ||||||
| Dark Web (ダークウェブ Dāku Webu) |
— | 0 | △[10] | |||
| Hits the dark spheres with Dark Wave and releases threads of darkness which follow Riku along the ground and unfold when close. When an unfold thread hits, the victim gets pulled into a dark sphere. If Riku gets pulled in, Ansem will use Planet Buster.
| ||||||
| Used during Dark Matter only, at medium and close ranges. Riku is invulnerable to other attacks while captured. If the spheres become absent while an opponent is captured by the Dark Web, they will get blown away and released a few seconds later. | ||||||
| Planet Buster (プラネットバスター Puranetto Basutā) |
— | 0.5 x8[11] | X | |||
| Used when Riku is pulled into a dark sphere. Ansem brings the dark sphere in front of him, fires dark bullets from all around into the sphere, and has it explode.
| ||||||
| Used during Dark Matter and ends it. The other sphere disappears when Riku gets captured, and he gets invulnerable to other attacks while in the sphere. Ansem always taunts afterwards, and doesn't act for around 5 seconds. | ||||||
| Guard/Block: △ = Can be blocked; O = Can be blocked and interrupted (melee) or deflected back (projectile); X = Cannot be blocked. | ||||||
Kingdom Hearts III[edit]
Ansem is first fought when he fights Riku and Sora along with Xigbar and Dark Riku, but he leaves the battle after 30 seconds and is finally fought for real alongside Xemnas and Young Xehanort at the end of the Keyblade Graveyard.
Ansem's attacks include him creating violet spheres of light around Sora that launch lasers at him, surrounding himself in those spheres to generate a damaging barrier as he rushes to attack Sora, creating multiple dark crests that explode upon contact, spawning a dark circle that follows Sora and eventually transforms into a cage of dark claws, and his deadliest has Ansem exert red energy around him which pulls in and knocks back Sora before he unleashes tendrils of darkness that deal heavy damage; however if timed correctly, one can use Aerial Recovery and Payback Strike, as the knockbacks before the blast deal no damage and it's possible to Glide away before getting trapped. During his attacks with the spheres, he cannot be flinched when hit. When he creates dark mines, the best way to clear them is to use Thunder magic. Sora can also use the explosions to trigger a reprisal by standing near the mines and blocking the explosions. This can work regardless of whether of not flash step is equipped.
Each member will have a dark aura whenever they disappear and reappear, meaning that Sora will be their only target. Each time they reappear, they will use a specific attack with the one with the aura appearing last. For Ansem, Young Xehanort will use his whip-snaring attack followed by Xemnas launching energy balls and Ansem using his shockwave last. To avoid this, Sora should Dodge Roll or jump to avoid Young Xehanort's attack, block Xemnas's energy balls, and if Ansem hits Sora, time Aerial Recovery and then Payback Strike. Each time a member is defeated or if all three disappear after attacking with the dark aura, the cyclone sequence will repeat itself with each member using a specific attack. If Young Xehanort is defeated first, Ansem will launch spheres of light that will extend into beams, then will release the cage of claws which will launch Sora into the air followed by Xemnas's rolling attack. First jump to avoid the cage and block all the beams and finally Xemnas. If Xemnas falls first, Young Xehanort will launch missiles of ice that will freeze Sora, followed by Ansem's shockwave attack. If Ansem's the only one left, he'll release the spheres like with Xemnas and use his shockwave attack. Sora can either block the beams and use Payback Strike or Dodge Roll the beams and Glide away, but the timing of the spheres can be a little tricky to dodge.
| Technique | Element | Status | Power | Block? | Repel LV | |
|---|---|---|---|---|---|---|
| Dark Laser (ダークレーザー Dāku Rēzā) |
Dark | — | 0.5 per hit | △ |
— | |
| Places 3–15 light orbs above an opponent's head; each light orb fires a laser immediately after glowing. | ||||||
| Barrier Laser (バリアレーザー Baria Rēzā) | Dark | — | 0.5 per hit | △ | — | |
| Surrounds himself in lasers and moves forward. | ||||||
| True Dark Bite (真ダークバイト Ma Dāku Baito) |
Dark | — | 1.5 | X | — | |
| Fires a shadow deep into the ground; this shadow follows the opponent for 2.5 seconds, after which fangs emerge and attack. | ||||||
| Only used in the Tower of Endings. | ||||||
| True Dark Mine (真ダークマイン Ma Dāku Main) |
Dark | — | 1.0 per hit | △ | — | |
| 3–12 dark crystals surround himself and his opponents; a dark crystal explodes when an opponent approaches it, when struck by an attack, or after 5 seconds pass. | ||||||
| Only used in the Tower of Endings. The crystals can be targetted by shotlocks. | ||||||
| Darkness Ruler (ダークネスルーラー Dākunesu Rūrā) |
(dark power) | Physical | — | 0.05 per hit | X | —
|
| (explosion) | Dark | — | 3.5 | X | — | |
| Envelops himself in darkness, draws opponents in, then unleashes dark power. | ||||||
| Only used in the Tower of Endings. | ||||||
| Guard/Block: △ = Can be blocked; O = Can be blocked and interrupted (melee) or deflected back (projectile); X = Cannot be blocked. | ||||||
- Techniques used by all enemies in the Tower of Endings
| Technique | Element | Status | Power | Block? | Repel LV | |
|---|---|---|---|---|---|---|
| Annihilation (アナイアレイション Anaiareishon) |
Physical | — | 1.5 per hit | △ |
2 | |
| Master Xehanort summons a storm of Keyblades that temporarily removes Riku and Mickey and surrounds the battlefield. Bundles of Keyblades will fly around Sora one-by-one (the last four bundles directly target him). Afterward, remaining enemies attack in succession; techniques used depend on those remaining.
| ||||||
| Leader Cooperation (リーダー連携 Rīdā Renkei) has one enemy designated as the leader. The non-leaders attack first, then the leader after them; the order depends on those remaining. When Leader Cooperation is used, one enemy is designated the "leader"; the leader is surrounded by an aura and targets Sora until the next use of Leader Cooperation. The initial leader is the one with the lowest maximum HP in terms of percentage, and they rotate between each other. When only one enemy remains, they automatically become the leader and use of Leader Cooperation is discontinued. | ||||||
| Guard/Block: △ = Can be blocked; O = Can be blocked and interrupted (melee) or deflected back (projectile); X = Cannot be blocked. | ||||||
Kingdom Hearts III Re Mind[edit]
Data Rematch[edit]
Ansem's data rematch pits Sora against a much stronger Ansem with multiple new abilities.
Ansem starts by summoning several laser orbs that float around Sora, then he summons a line of dark crests, and he'll follow up with firing sets of four projectiles and two projectiles shortly after that, four times. Once the first orbs start glowing, guard to block the lasers, then cast Thundaga to stun Ansem, airstep to him and attack to skip the projectiles. Additionally, wait until he fires the projectiles and airstep to him to attack. However, the timing is more strict this time as he might fire the second set, or the first set might still hit Sora. When his HP gets lower, he'll fire the projectiles immediately upon summoning the crests, giving no time to stun him with Thundaga.
Ansem frequently summons a circle of lasers around himself and chases Sora. This attack can easily be dodged or blocked consecutively. You can use a reprisal near the end to deal minor damage to Ansem, but don't follow up with a combo, as he'll immediately start the next attack.
Next, Ansem summons a shadow that follows Sora underneath him, along with a circle of crests around Sora. Wait for the shadow to expand, and dodge to avoid the dark claws. Wait for the crests to move before dodging those as they close in. After this, Ansem is open for a combo, so attack, using airstep if necessary.
Ansem retains his old Dark Rush ability. He will rush Sora twice, then charge up and perform a more powerful dash. Block the first two dashes, then quickly airstep and immediately block without attacking. The third rush breaks Sora's guard, so use Risk Dodge to counter before landing a combo.
After losing some HP, Ansem will perform his ultimate move, where he covers the entire arena in darkness and summons two giant orbs of darkness. The orbs will fire shots that will inflict the Burn, Freeze, Cloud or Sneeze status. Ansem can also trap Sora with the orbs, dealing heavy damage and inflicting the Cloud status effect. When activating his ultimate move, Ansem will first move sideways in front of Sora. Once one of the orbs starts shaking, guard to block the shots. After blocking four times, airstep to Ansem and attack him. Next, he'll warp further away and the orbs will be at your side. Wait for one of them to move away slightly before blocking. After doing this three times, Ansem will try to trap Sora with the orbs. Dodge Roll forwards to dodge the orbs, then airstep to Ansem to counter.
After using his ultimate move, Ansem will have some new attacks. One involves him standing in the center of the arena, glowing red, and pulling Sora in. During this move, two sets of laser orbs will appear to damage Sora. Dodge the lasers instead of blocking to avoid getting sucked in, and keep dodging to avoid Ansem unleashing a shock wave. Afterwards, he'll be open to attack, so airstep to him and strike.
Ansem will have a different version of the laser orb attack after his ultimate move. He'll start by summoning a wall of lasers in front of himself, summoning lines of dark crests, and summoning the laser orbs. Block the lasers and use Counter Kick after the final laser to dash through another wall of lasers and attack Ansem.
Once his HP gets low, he'll perform a variation of his ultimate move. Once again, he'll cover the arena in darkness and summons the giant orbs. However, once this starts, quickly dodge away as he'll try to trap Sora right away. After this, he'll place the orbs behind one another. After a short pause, the front orb will fire a barrage of shots that can inflict Sneeze before shooting itself forwards to trap Sora. Guard repeatedly to block the shots, then Dodge Roll through the orb. Repeat this with the second orb, and after Dodge Rolling though that, airstep to Ansem and attack. Next, he'll stand in the center, firing striped orb projectiles. These can't be blocked, so dodge them. He'll continue with the other attack afterwards, so block, dodge and attack until he falls.
If Sora is having trouble blocking and dodging his ultimate move, try to equip armor to protect against the status effects it causes.
Kingdom Hearts Melody of Memory[edit]
Videos[edit]
| Ansem I – Kingdom Hearts | Ansem II – Kingdom Hearts |
|---|---|
| Ansem I – Kingdom Hearts Chain of Memories (R/R) | Ansem II – Kingdom Hearts Chain of Memories (R/R) |
| Ansem – Kingdom Hearts Re:Chain of Memories (R/R) | Ansem – Kingdom Hearts Dream Drop Distance HD (Riku) |
| Ansem, Xemnas, and Young Xehanort – Kingdom Hearts III | Ansem – Kingdom Hearts III |
| Ansem, Xemnas, and Young Xehanort – Kingdom Hearts III Re Mind | Ansem's Recreated Data – Kingdom Hearts III Re Mind |
| Ansem's Desperation Move – Kingdom Hearts III Re Mind | |
Notes and references[edit]
- ^ During the first battle in Kingdom Hearts Chain of Memories only. In Kingdom Hearts Re:Chain of Memories, Revenge of Chaos is played instead.
- ^ Jump up to: a b Available after clearing Reverse/Rebirth and having defeated Marluxia for the first time.
- ^ Shared with Xemnas and Young Xehanort
- ^ Dark Rush was erroneously written as Lexaeus's "Rockshatter" in the North American release of Kingdom Hearts Chain of Memories. It is correctly written in all other versions.
- ^ The waves may sometimes bypass Riku's Block. The parry remains guaranteed with Dark Barrier.
- ^ Dark blue bubbles.
- ^ White bubbles.
- ^ Dark purple bubbles.
- ^ Light purple bubbles with spiral effect.
- ^ The blockability depends on the angle from which the threads transform. The parry remains guaranteed with Dark Barrier.
- ^ Can only hit Riku, and cannot drop his HP below 1.
| showHeartless bosses |
|---|
- Heartless
- Original characters
- Kingdom Hearts characters
- Kingdom Hearts Chain of Memories characters
- Kingdom Hearts 3D: Dream Drop Distance characters
- Kingdom Hearts III characters
- Kingdom Hearts Melody of Memory characters
- Kingdom Hearts bosses
- Kingdom Hearts Chain of Memories enemies
- Kingdom Hearts 3D: Dream Drop Distance bosses
- Kingdom Hearts III bosses
- Kingdom Hearts Melody of Memory bosses
- Kingdom Hearts III Re Mind characters
- Gameplay
