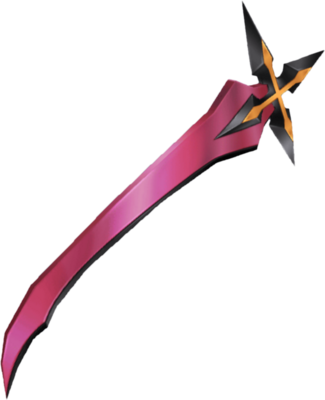
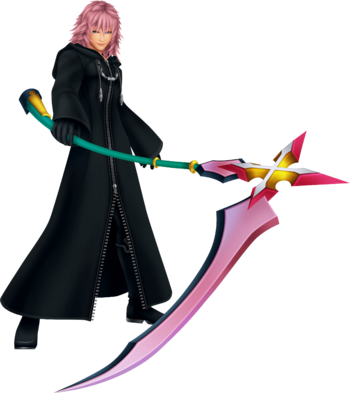
Game:Marluxia
Oh no! The water! I'm in big trouble if I don't fetch it!
| |
| This article requires cleanup or improvement.
Please help out by editing this page. Please see the Manual of Style and editing help before getting started. Issues: Fill the Bit stats for both Re:CoM Third Form and KH3 Re:Mind Data Rematch. | |
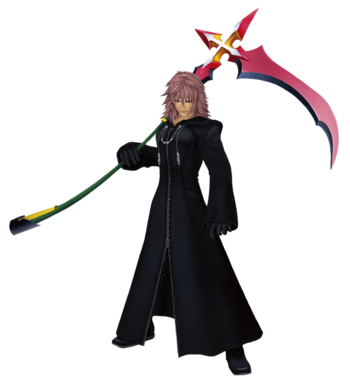
| Marluxia | ||||||||||||||
|---|---|---|---|---|---|---|---|---|---|---|---|---|---|---|
| Japanese | マールーシャ(1回目) | |||||||||||||
| Rōmaji | Mārūsha (1-kaime) | |||||||||||||
| Translation | Marluxia (First Form)
| |||||||||||||
| Type | Organization XIII | |||||||||||||
| Games | Kingdom Hearts Chain of Memories Kingdom Hearts III | |||||||||||||
| ||||||||||||||
| ||||||||||||||
| Floor | HP | AP | EXP | ||||
|---|---|---|---|---|---|---|---|
| Sora | Riku
| ||||||
| 13F | 2240 | 27 | 13131 | ||||
| Physical | Fire | Ice | Lightning | Neutral | |||
| x1.5 | x0.5 | x0.5 | x0.5 | x0.5 | |||
| Stun | Percentage | Stop | |||||
| x0.5 | x0 | x0 | |||||
| Warp | Bind | Confuse | Terror | ||||
| x0 | x1.0 | x0 | x0 | ||||
| World(s) | |||||||
| Castle Oblivion | |||||||
| Enemy Card | |||||||

| |||||||
| Ability | Duration | Cost | |||||
| Double Sleight | 3 sleights | 99 CP | |||||
| Description | |||||||
| Use stocked cards and sleights twice in a row. However, during versus battles it bumps up the reload counter.
-Resistant to fire, ice, lightning, and special attacks -Weak against physical attacks | |||||||
| Floor | HP | AP | EXP | ||||||
|---|---|---|---|---|---|---|---|---|---|
| Sora | Riku | Regular | Beginner
| ||||||
| 13F | 1740 | 1305 | 25 | 12931 | |||||
| Physical | Fire | Ice | Lightning | Neutral | |||||
| x1.5 | x0.5 | x0.5 | x0.5 | x0.5 | |||||
| Stun | Percentage | Stop | Warp | ||||||
| x0.5 | x0 | x0 | x0 | ||||||
| Bind | Confuse | Terror | Magnet | Freeze | |||||
| x1.0 | x0 | x0 | x0.33 | x0.5 | |||||
| World(s) | |||||||||
| Castle Oblivion | |||||||||
| Enemy Card | |||||||||

| |||||||||
| Ability | Duration | Cost | |||||||
| Double Sleight | 3 sleights | 99 CP | |||||||
| Description | |||||||||
| Use stocked cards and sleights twice in a row. Resistant to fire, ice, lightning, and special attacks, but weak against physical attacks. | |||||||||
| Location | HP | Strength | Defense | EXP | |||||||
| Keyblade Graveyard | 1800 | 59 | 30 | 0 | |||||||
| Physical | Fire | Blizzard | Thunder | Water | |||||||
| ×1.0 | ×0.5 | ×0.5 | ×0.5 | ×0.5 | |||||||
| Aero | Dark | Neutral | Rapid-fire | ||||||||
| ×0.5 | ×0.5 | ×1.0 | ×0.5 | ||||||||
| Freeze | Electrify | Stun | Hunny | ||||||||
| ✕ | ✕ | ✕ | ✕ | ||||||||
| Reaction Endurance |
Revenge Value |
Attraction Magnification |
Damage Limit | ||||||||
| 0 | 6.5 | ×0.5 | 24
| ||||||||
| Rewards | |||||||||||
| Sora: Max MP +5[3] | |||||||||||
| World(s) | |||||||||||
| Keyblade Graveyard | |||||||||||
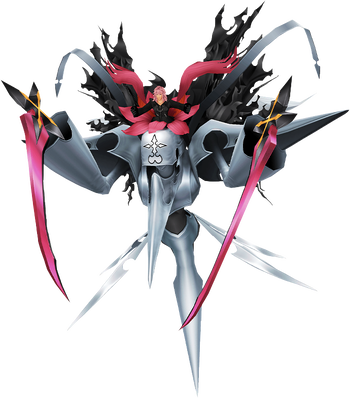
| Marluxia (Second Form) | |||||||
|---|---|---|---|---|---|---|---|
| Japanese | マールーシャ(2回目) | ||||||
| Rōmaji | Mārūsha (2-kaime)
| ||||||
| Type | Organization XIII | ||||||
| Game | Kingdom Hearts Chain of Memories | ||||||
| |||||||
| |||||||
| Floor | HP | AP | EXP | ||||
|---|---|---|---|---|---|---|---|
| Sora | Riku
| ||||||
| 13F | 2237 | 27 | 0 | ||||
| Physical | Fire | Ice | Lightning | Neutral | |||
| x1.5 | x0.5 | x0.5 | x0.5 | x0.5 | |||
| Stun | Percentage | Stop | |||||
| x0 | x0 | x0 | |||||
| Warp | Bind | Confuse | Terror | ||||
| x0 | x0 | x0 | x0 | ||||
| World(s) | |||||||
| Castle Oblivion | |||||||
| Floor | HP | AP | EXP | ||||||
|---|---|---|---|---|---|---|---|---|---|
| Sora | Riku | Regular | Beginner
| ||||||
| 13F | 1440 | 1080 | 28 | 0 | |||||
| Physical | Fire | Ice | Lightning | Neutral | |||||
| x1.5 | x0.5 | x0.5 | x0.5 | x0.5 | |||||
| Stun | Percentage | Stop | Warp | ||||||
| x0 | x0 | x0 | x0 | ||||||
| Bind | Confuse | Terror | Magnet | Freeze | |||||
| x0 | x0 | x0 | x0 | x0 | |||||
| World(s) | |||||||||
| Castle Oblivion | |||||||||
| Floor | HP | AP | EXP | ||||
|---|---|---|---|---|---|---|---|
| Sora | Riku
| ||||||
| 13F | 660 | 27 | 0 | ||||
| Physical | Fire | Ice | Lightning | Neutral | |||
| x1.5 | x0.5 | x0.5 | x0.5 | x0.5 | |||
| Stun | Percentage | Stop | |||||
| x0 | x0 | x0 | |||||
| Warp | Bind | Confuse | Terror | ||||
| x0 | x0 | x0 | x0 | ||||
| World(s) | |||||||
| Castle Oblivion | |||||||
| Floor | HP | AP | EXP | ||||||
|---|---|---|---|---|---|---|---|---|---|
| Sora | Riku | Regular | Beginner
| ||||||
| 13F | 320 | 240 | 28 | 0 | |||||
| Physical | Fire | Ice | Lightning | Neutral | |||||
| x1.5 | x0.5 | x0.5 | x0.5 | x0.5 | |||||
| Stun | Percentage | Stop | Warp | ||||||
| x0 | x0 | x0 | x0 | ||||||
| Bind | Confuse | Terror | Magnet | Freeze | |||||
| x0 | x0 | x0 | x0 | x0 | |||||
| Rewards | |||||||||
| If the scythe is reduced to 0 HP HP orb x3 If the scythe is destroyed due to Marluxia being reduced to below half HP None | |||||||||
| World(s) | |||||||||
| Castle Oblivion | |||||||||
| Floor | HP | AP | EXP | ||||
|---|---|---|---|---|---|---|---|
| Sora | Riku
| ||||||
| 13F | 111 | 27 | 0 | ||||
| Physical | Fire | Ice | Lightning | Neutral | |||
| x1.0 | x1.0 | x1.0 | x1.0 | x1.0 | |||
| Stun | Percentage | Stop | |||||
| x0 | x0 | x0 | |||||
| Warp | Bind | Confuse | Terror | ||||
| x0 | x0 | x0 | x0 | ||||
| World(s) | |||||||
| Castle Oblivion | |||||||
| Floor | HP | AP | EXP | ||||||
|---|---|---|---|---|---|---|---|---|---|
| Sora | Riku | Regular | Beginner
| ||||||
| 13F | 99 | 74 | 28 | 0 | |||||
| Physical | Fire | Ice | Lightning | Neutral | |||||
| x1.0 | x1.0 | x1.0 | x1.0 | x1.0 | |||||
| Stun | Percentage | Stop | Warp | ||||||
| x0 | x0 | x0 | x0 | ||||||
| Bind | Confuse | Terror | Magnet | Freeze | |||||
| x0 | x0 | x0 | x0 | x0 | |||||
| World(s) | |||||||||
| Castle Oblivion | |||||||||
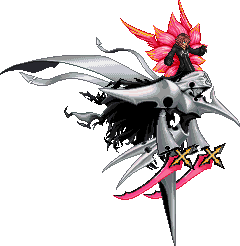
| Marluxia (Third Form) | |||||||
|---|---|---|---|---|---|---|---|
| Japanese | マールーシャ(3回目) | ||||||
| Rōmaji | Mārūsha (3-kaime)
| ||||||
| Type | Organization XIII | ||||||
| Game | Kingdom Hearts Re:Chain of Memories | ||||||
| |||||||
| |||||||
| Floor | HP | AP | EXP | ||||||
|---|---|---|---|---|---|---|---|---|---|
| Sora | Riku | Regular | Beginner
| ||||||
| 13F | 1937 | 1453 | 29 | 0 | |||||
| Physical | Fire | Ice | Lightning | Neutral | |||||
| x1.5 | x0.5 | x0.5 | x0.5 | x0.5 | |||||
| Stun | Percentage | Stop | Warp | ||||||
| x0 | x0 | x0 | x0 | ||||||
| Bind | Confuse | Terror | Magnet | Freeze | |||||
| x0 | x0 | x0 | x0 | x0 | |||||
| World(s) | |||||||||
| Castle Oblivion | |||||||||
| Floor | HP | AP | EXP | ||||||
|---|---|---|---|---|---|---|---|---|---|
| Sora | Riku | Regular | Beginner
| ||||||
| 13F | 99 | 74 | ? | 0 | |||||
| Physical | Fire | Ice | Lightning | Neutral | |||||
| ? | ? | ? | ? | ? | |||||
| Stun | Percentage | Stop | Warp | ||||||
| x0 | x0 | x0 | x0 | ||||||
| Bind | Confuse | Terror | Magnet | Freeze | |||||
| x0 | x0 | x0 | x0 | x0 | |||||
| World(s) | |||||||||
| Castle Oblivion | |||||||||
| Marluxia | |||||||
|---|---|---|---|---|---|---|---|
| Japanese | マールーシャ | ||||||
| Rōmaji | Mārūsha | ||||||
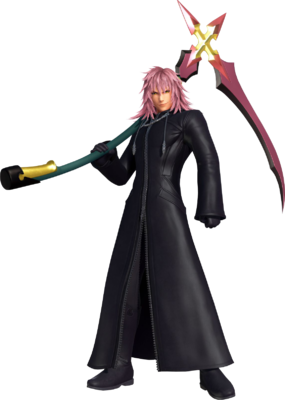
| Translation | Marluxia
| ||||||
| Type | Organization XIII | ||||||
| Game | Kingdom Hearts II Final Mix | ||||||
| |||||||
| |||||||
| Location | HP | Strength | Defense | EXP | ||
| Beast's Castle | 2817 | 70 | 41 | 0 | ||
| Physical | Fire | Blizzard | ||||
| ×1.0 | ×0.5 | ×0.5 | ||||
| Thunder | Dark | Neutral | ||||
| ×0.5 | ×0.5 | ×1.0
| ||||
| Rewards | ||||||
| Sora: Drive gauge +1 Donald: Max HP +3 Goofy: Max HP +4 Eternal Blossom, Lost Illusion (100%) | ||||||
| World(s) | ||||||
| Beast's Castle | ||||||
| Marluxia's Recreated Data | ||||||||||||
|---|---|---|---|---|---|---|---|---|---|---|---|---|
| Japanese | マールーシャの再現データ | |||||||||||
| Rōmaji | Mārūsha no Saigen Dēta | |||||||||||
| Translation | Marluxia's Recreated Data
| |||||||||||
| Type | Organization XIII | |||||||||||
| Games | Kingdom Hearts II Final Mix Kingdom Hearts Union χ Kingdom Hearts III Re Mind | |||||||||||
| ||||||||||||
| ||||||||||||
| Location | HP | Strength | Defense | EXP | ||
| Radiant Garden Garden of Assemblage |
3400 | 86 | 51 | 0 | ||
| Physical | Fire | Blizzard | ||||
| ×1.0 | ×0.5 | ×0.5 | ||||
| Thunder | Dark | Neutral | ||||
| ×0.5 | ×0.5 | ×1.0
| ||||
| Rewards | ||||||
| Lost Illusion (100%) | ||||||
| World(s) | ||||||
| Radiant Garden | ||||||
| Location | HP | Strength | Defense | EXP | |||||||
| Radiant Garden (Garden of Assemblage) |
3000 | 0 | |||||||||
| Physical | Fire | Blizzard | Thunder | Water | |||||||
| ×1.0 | ×0.5 | ×0.5 | ×0.5 | ×0.5 | |||||||
| Aero | Dark | Neutral | Rapid-fire | ||||||||
| ×0.5 | ×0.5 | ×0.85 | ? | ||||||||
| Freeze | Electrify | Stun | Hunny | ||||||||
| ✕ | ✕ | ✕ | ✕ | ||||||||
| Reaction Endurance |
Revenge Value |
Attraction Magnification |
Damage Limit | ||||||||
| ? | 6.5 | — | ?
| ||||||||
| Rewards | |||||||||||
| Magic Weight | |||||||||||
| World(s) | |||||||||||
| Radiant Garden | |||||||||||
| Location | HP | Strength | Defense | EXP | |||||||
| Radiant Garden (Garden of Assemblage) |
? | 0 | |||||||||
| Physical | Fire | Blizzard | Thunder | Water | |||||||
| ×1.0 | ×0.5 | ×0.5 | ×0.5 | ×0.5 | |||||||
| Aero | Dark | Neutral | Rapid-fire | ||||||||
| ×0.5 | ×0.5 | ×0.85 | ? | ||||||||
| Freeze | Electrify | Stun | Hunny | ||||||||
| ✕ | ✕ | ✕ | ✕ | ||||||||
| Reaction Endurance |
Revenge Value |
Attraction Magnification |
Damage Limit | ||||||||
| ? | 6.5 | — | ? | ||||||||
| World(s) | |||||||||||
| Radiant Garden | |||||||||||
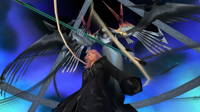
Marluxia appears as the final boss of Sora's Story in Kingdom Hearts Chain of Memories.
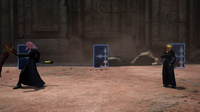
In Kingdom Hearts II Final Mix, his Absent Silhouette and Data Rematch appear as optional bosses.
In Kingdom Hearts Union χ, his data can be fought.
In Kingdom Hearts III, Marluxia, along with Luxord and Larxene, appear as a boss battle in the Keyblade Graveyard. A data replica of him is also a optional boss in Kingdom Hearts III Re Mind.
Strategy
Kingdom Hearts Chain of Memories
Marluxia (First Form)
Marluxia is the first boss with 4 full HP bars, meaning this will be a long fight. A good tactic for Phantom Saber is to use a 0 attack card to break the attack and deal damage. Beware of his Card Breaks if he uses a 0-valued Phantom Saber within range. To avoid that, the Jafar card can prove to be useful by using and breaking one card at a time and taking advantage of Marluxia's weakness to physical combos. The other attacks can be dodged by jumping over them. His two sleights, Deathscythe and Blossom Shower, on the other hand, are easy to dodge. For Deathscythe, all Sora has to do is head up or down towards the wall after he swings the scythe. If timed well, this can allow Sora to dodge the attack. Blossom Shower can also be dodged. If Dodge Roll is used at the right moment, it can nullify the damage the sleight would have otherwise caused. Dodging Marluxia's attacks as often as possible is the key to victory.
- Deck
| Card | 0 | 1 | 2 | 3 | 4 | 5 | 6 | 7 | 8 | 9 | Total
| |
|---|---|---|---|---|---|---|---|---|---|---|---|---|
| Attack Card A | 2 | 1 | 1 | 1 | 2 | 2 | 2 | 3 | 3 | 3 | 20 | |
| Attack Card B | 2 | 1 | 1 | 1 | 2 | 2 | 2 | 3 | 3 | 3 | 20 | |
| Magic Card | 2 | 1 | 1 | 1 | 2 | 2 | 2 | 3 | 3 | 3 | 20 | |
| Elixir | 0 | 0 | 0 | 0 | 0 | 0 | 0 | 0 | 0 | 2 | 2 | |
| Enemy Card | — | |||||||||||
- Attacks
Marluxia (Second Form)
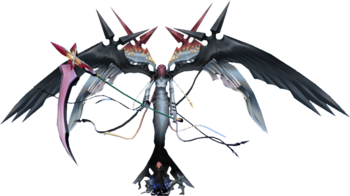
This battle is the first time the real Marluxia is fought. Marluxia fuses with the giant Specter and is fought largely in two stages. In the first stage, the objective is to destroy the scythe hands. The main attack it uses in this stage is a Deathscythe. It is possible to damage the main body in this stage, but Marluxia is only vulnerable after a card break, making Omnislash useless at this point of the fight, and there's a chance the game would start targetting a blade instead.
He fires 5 Crescent Shockwaves which can be dodged by jumping and heading to the fore/background. He summons that shoot lasers first using Bit Attack, which can be easily destroyed simply by card breaking them. He occasionally uses Blossom Shower, which can be dodged with a well-timed Dodge Roll if not card broken.
Marluxia hovers above Sora and slams the mechanical vehicle down using Circle Reject, creating a shockwave that can be avoided by jumping at the right time. He does this three times in succession, and it is important to note that as his HP get lower, the succession becomes faster and harder to dodge. Sora can always break those cards with one Cure card at a time whenever he is in a pinch. Using 9-valued ones guarantees a card break, and using only one at a time makes them reloadable without the need of an item card.
After this attack, Marluxia rears back and uses Body Blow. Card breaking this is important, as doing so puts Marluxia in his most vulnerable position. Once the attack is broken, Sora gets an opportunity to get on the back of the mech and Marluxia sends out three more bits to protect him, and becomes permanently targettable during that time. It's important to note is that the less bits remain on screen, the harder Sora gets pushed away from from Marluxia. A good strategy is to use high level Cloud cards (around 7-9) in succession (one at a time, not in a sleight) while in front of Marluxia, while boosted by the Crescendo's enemy card. Doing so deals a lot of damage in a short amount of time, and can also deal with the shot buds when card breaking them. Alternatively, and given Marluxia being targettable, Sora can now use Omnislash with no fear of the sleight getting cancelled, and if he has Marluxia's Double Sleight Enemy Card equipped, he might deal even more damage, but must make use of that strategy only when all bits are destroyed. Eventually, Sora is forced off and the pattern repeats until Marluxia is defeated.
- Deck
| Card | 0 | 1 | 2 | 3 | 4 | 5 | 6 | 7 | 8 | 9 | Total
| |
|---|---|---|---|---|---|---|---|---|---|---|---|---|
| Enemy Card | 0-8 | |||||||||||
- Attacks
Kingdom Hearts Re:Chain of Memories
Marluxia (First Form)
In Kingdom Hearts Re:Chain of Memories, Marluxia's attacks are drastically redesigned. For example, Blossom Shower has changed completely from being just a rose petal shower, to a long, virtually unavoidable Sleight, and the Deathscythe Sleight has gone from one strike to three, much faster strikes.
When the battle begins, Sora should be ready to Dodge Roll or Card Break, because as soon as Marluxia plays an attack card, he takes no time in attacking. During Phantom Saber, Marluxia dashes towards Sora and immediately start striking, so Sora should always keep a good distance from Marluxia in case he pulls this card. In Crescent Shock Wave, Sora has a little bit more time to react and should either have a higher card ready or just Dodge Roll towards Marluxia.
When Marluxia uses Circle Reject, it is always a good thing to be as far away as possible before he plays it, that way Sora has time to run and find a card to break it.
The only sure way to survive Marluxia's Blossom Shower is to have the Auto-Life Vexen card or have a 0 card in place before the Sleight is played. During Deathscythe, if Sora doesn't break it, he should wait until his scythe spinning and immediately Dodge Roll to the left or right of him. In Drop Shot, either try to Dodge Roll and continue moving around or the fissure will hit you, but this sleight should give enough time to pull a 0 card.
Strategies include :
- A deck containing only cards with a value of 0, as well as three Cures of a high value,
- A strong Firaga deck and add a Curaga and Elixirs at the end, with the repetitive use of Firaga cards dealing a lot of damage, enough to defeat him pretty quickly,
- Using the Roxas Enemy Card, or alternatively the Dragon Maleficent Enemy Card if the former isn't available, and pounding Marluxia with mere Keyblade combos, taking advantage of his weakness to physical attacks.
- Deck
| Card | 0 | 1 | 2 | 3 | 4 | 5 | 6 | 7 | 8 | 9 | Total
| |
|---|---|---|---|---|---|---|---|---|---|---|---|---|
| Attack Card A | 4 | 0 | 0 | 1 | 1 | 1 | 2 | 4 | 6 | 4 | 23 | |
| Attack Card B | 4 | 0 | 0 | 1 | 1 | 1 | 2 | 5 | 3 | 6 | 23 | |
| Magic Card | 3 | 0 | 0 | 1 | 1 | 1 | 3 | 4 | 5 | 6 | 24 | |
| Elixir | 0 | 0 | 0 | 0 | 0 | 0 | 0 | 0 | 0 | 2 | 2 | |
| Enemy Card | — | |||||||||||
- Attacks
Marluxia (Second Form)
The battle in Kingdom Hearts Re:Chain of Memories is very similar to the battle in Kingdom Hearts Chain of Memories, although Marluxia is always targettable, the field is much large and the arena itself is different, and Marluxia will often glide away from Sora. He uses many of his attacks from Kingdom Hearts Chain of Memories, including the Bit Attack, Crescent Shock Wave, and Circle Reject. Marluxia still uses only one card at a time, but his new attacks are more like sleights. The first of which is when he engulfs the field in darkness using Radiance of Darkness, preventing Sora from seeing his cards (except for the reload card), while also turning the skies of the arena into a night sky full of shooting stars, similar to that from the original fight, and the second is when he creates a massive Blossom Shower. The perspective in these attacks changes to Marluxia, which can make it difficult to dodge these attacks. There is a way around the card seeing, stock cards and keep using sleights or removing when they are memorized.
For the first part of the battle, the objective is nearly the same as in Kingdom Hearts Chain of Memories: destroy the scythes. Marluxia will swing at Sora with his scythes in a manner similar to Deathscythe. This can be avoided by dodge rolling around the machine he rides. When destroyed on Sora's own, each of the blades releases a few HP orbs. It is possible to attack Marluxia directly and lock on to him when his HP is visible by moving past the blades and avoid dealing with them. When Marluxia's HP Gauge is reduced to three bars, any remaining scythe blades will be destroyed. After both are destroyed, Marluxia will rocket across the field in an attempt to ram into Sora, though this can easily be dodged with a well-timed Dodge Roll. Unlike Kingdom Hearts Chain of Memories, this attack, once broken, doesn't give Sora the opportunity to jump on the nobody's back.
He will summon three shot buds, but they can be disposed of easily by simply card breaking Marluxia when he uses Bit Attack. Afterwards, he will create a rotating ring of three to five "X"-shaped flower waves and fire them at Sora. He does this faster as his HP gets lower, and uses more the less blades remain. At regular intervals, he will use his sleight-like attacks: the mega Blossom Shower and the Radiance of Darkness. As previously mentioned, the Radiance of Darkness attack turns the entire deck completely black (with the exception of the reload card), preventing Sora from seeing them. He repeats this attack pattern until his HP almost reaches halfway, then he begins using the drop down shockwave attack. Marluxia does this three times in a row, then repeats the previous attack pattern. This continues until he is defeated.
- Deck
| Card | 0 | 1 | 2 | 3 | 4 | 5 | 6 | 7 | 8 | 9 | Total
| |
|---|---|---|---|---|---|---|---|---|---|---|---|---|
| Enemy Card | 0-9 | |||||||||||
- Attacks
Marluxia (Third Form)
Marluxia has three regular attacks, the first of which are the shot buds from the second battle which have higher accuracy and card value than last time, the second attack is Marluxia's mega Blossom Shower which has not changed from the last battle, and the third attack is a blast of energy similar to Deathscythe.
As this fight takes place as soon as Marluxia's second form is defeated and there is no chance to modify the deck. So what will work well is before the battle with Marluxia, put in at least 12 attack cards, three or six of which are zeroes. Put in several Cure and Thunder cards and if possible some Cloud and Stop cards to use Cross Slash+. Finally, put in the Vexen, Oogie Boogie, Jafar, Shadow, Trickmaster, Barrel Spider, and Air Soldier Enemy Cards. Guard Armor and Axel are also useful as Guard Armor lets Sora attack Marluxia from a greater distance and Axel gives a slightly better chance of escaping Omni Laser. Marluxia cannot break any of Sora's sleights if their values are higher than 24, as the enemy doesn't use any zeroes.
When the battle begins use either the Jafar or Trickmaster cards to make attack cards invincible or decrease the value of Marluxia's cards, respectively; these are pretty strategic as Marluxia uses high value cards at the start of the battle. Then follow with the Shadow card to boost card values and even try to activate Ars Arcanum, Blitz or Strike Raid to deal more damage; Ars Arcanum (three 1s) and Blitz (two 1s and a 9) become possible due to Shadow's effect. Marluxia's sleights have a maximum value of 24, so take advantage of Shadow to top this and deal some damage. When Shadow is used up, reload with an item card or let Marluxia use Gale of Severance so Sora can reload without interruption. Omni Laser is likely to follow, so use the Vexen card to increase chances of survival; if revived, follow up with Oogie Boogie to heal. Afterwards, simply attack Marluxia to finish him off; use the Air Soldier card to dodge Marluxia's attacks and reload at the same time, and then use the Barrel spider card for faster reloading from here on out.
- Deck
| Card | 0 | 1 | 2 | 3 | 4 | 5 | 6 | 7 | 8 | 9 | Total
| |
|---|---|---|---|---|---|---|---|---|---|---|---|---|
| Enemy Card | 1-9 | |||||||||||
- Attacks
| Technique | Element | Status | Power | Cards | ||
|---|---|---|---|---|---|---|
| Bit Attack (ビット攻撃 Bitto Kōgeki) |
Neutral | — | x0.5 | Cards valued 1~7 | ||
| Used when 50% HP of maximum or higher. After summoning the bits, one of them fires a bullet. Compared to the previous battle, it has less power and 0 cards aren't used.
| ||||||
| Used as long as Marluxia has a pink aura, while his arms are horizontal. One of the bits is destroyed when Marluxia takes a Card Break, and all disappear after 7 attacks (50% chance that one more attack is added for each destroyed bit) if not destroyed. Once all are destroyed, Marluxia moves on to the next technique. | ||||||
| Doom (死の宣告 Shi no Senkoku, lit. "Death Sentence") |
Neutral | — | x0.8 | Three cards with a value of 6 - Total: 18 | ||
| Marluxia shoots thorn-shaped beams towards Sora. When hit, the screen zooms focuses on Sora, while he gets a counter above his head starting at 6 and the specter slowly approaches him. Sora has to break 6 of Marluxia's cards (valued 1~8) before the counter reaches 0 (within 18 seconds). When succesful, the screen returns to normal. If the counter reaches 0, the Specter will make Sora's HP drop to 0 with a scythe swing, ignoring any Enemy/Special Card effects. The thorns can be evaded with Dodge Roll.
| ||||||
| Used as long as Marluxia has a white aura. Is repeated 3 times, unless the attack hits. | ||||||
| Mega Deathscythe (超ド級デスサイズ Chō do-kyū Desusaizu) |
Neutral | — | x1.5 | Cards valued 5~9 | ||
| The Specter warps to Sora and swings and plants its scythe, shooting a vacuum blade, before pulling it back up. Unlike the previous battle's Deathscythe, no shock waves appear. The attack can linger even after taking a Card Break.
| ||||||
| Used as long as Marluxia has a pink aura while crossing his arms. Is repeated 3 times. | ||||||
| Whirlwind to the Void[4] (虚無への旋風 Kyomu e no Senpū, lit. "Whirlwind to Nothingness") |
Neutral | — | x1.0 | Three cards with a value of 7 - Total: 21 | ||
| Marluxia and the Specter generate 3 tornadoes that chase Sora and circle around. When hit, they scatter the Cards from Sora's Deck across the arena (excluding stocked Cards, unreloadable Cards, Enemy Cards, and Special Cards; Friend Cards are permanently lost). Sora can retrieve the Cards by walking over them. After about 20 seconds, Cards that haven't been picked up will fly away (except the Reload Card), but will return to the Deck when reloading.
| ||||||
| Used as long as Marluxia has a pink aura. Is repeated 3 times, unless the attack hits. The effect of this sleight acts like an instant manual reload on Sora's deck. It adds 1 to the Reload Count if it is less than 3, uses up 1 Reload on Enemy/Special Cards in use, and renders every reloadable card available for Sora to retrieve and use. | ||||||
| Blossom Shower (ブロッサムシャワー Burossamu Shawā) |
Neutral | — | x1.5 | Cards valued 6~8 | ||
| Attack the entire arena with a storm of petals. Almost identical to the previous battle's attack. | ||||||
| Circle Reject (サークルリジェクト Sākuru Rijekuto) |
Neutral | — | x1.0 | Three cards with a value of 5 - Total: 15 | ||
| Used when Marluxia's HP is less than 50% of maximum. The Specter warps to Sora and strikes the ground with the scythe's hilt, creating a shock wave. Has a shorter attack range compared to the previous battle.
| ||||||
| Used as long as Marluxia has a pink aura while crossing his arms. Is repeated 3 times. | ||||||
| Gale of Severance (断絶の烈風 Danzetsu no Reppū, lit. "Gale of Extinction") |
Neutral | — | x1.3[5] | Three cards with a value of 8 - Total: 24 | ||
| Used at short range. A shock wave sends Sora flying, and a gust of wind from the Specter prevents him from approaching. However, Sora can still glide to get closer.
| ||||||
| Can only be used between two series of attacks. | ||||||
| Omni Laser (全方位レーザー Zenhoui Rēzā, lit. "Omni-directional Laser") |
Neutral | — | x1.5 | Three cards with a value of 4 - Total: 12 | ||
| Used when Marluxia's HP is less than 50% of maximum. Surrounds Sora with 16 bits from the outer ring of the arena that simultaneously shoot a ray of light. The ray is fired for 6 seconds, and hits up to 6 times (1 per second), but it can be avoided with Dodge Roll.
| ||||||
| Used as long as Marluxia has a pink aura, while his arms are horizontal. Is repeated 3 times.
| ||||||
| Marluxia repeats a set pattern: summon the bits for Bit Attacks, Doom, Mega Deathscythe, Whirlwind to the Void, Blossom Shower. Once below 50% HP, the pattern changes to: Doom, Mega Deathscythe, Whirlwind to the Void, Blossom Shower, Circle Reject, Omni Laser. | ||||||
Kingdom Hearts II Final Mix
Absent Silhouette
Due to the absence of cards, Marluxia's battle strategies are changed. At the start of the fight, a small scene occurs in which Marluxia teleports next to Sora, whispers in his ear, and curses him with a counter above his head, its maximum value being Sora's current level. Every strike from Marluxia's scythe decreases this counter by one, and it is game over if the counter hits zero. This means that on Level 1 Critical Mode, almost all of Marluxia's attacks are guaranteed to defeat Sora instantly in one fell swoop.
As the battle commences, Marluxia will begin to perform a combo with his scythe. While this combo can be blocked, it cannot be interrupted; as such, Keyblade strikes must be done after Marluxia finishes his or is stunned by blocks. After two finishers, Marluxia will teleport to Sora and swing his scythe, which can be easily dodged with Dodge Roll. If the attack connects, Sora is flung into the air, allowing Marluxia to perform a lengthy combo. Aerial Recovery is necessary at this point, as it can nullify Marluxia's scythe slash. Marluxia will also create a whirlwind that sucks the party towards him and follow it up with a barrage of scythe attacks. Successfully Guarding or Reflecting the attack grants access to two Reaction Commands. If Sora is near the scythe, he can use Restore Count, in which he steals Marluxia's scythe, swings it several times, and hurls it back to its owner, restoring 13 points of Sora's counter. If near Marluxia himself, Sora can use Aerial Strike, in which he narrowly evades Marluxia's scythe swing, leaps from atop the scythe itself, and bombards him with an aerial combo before sending him flying with a backswing.
As Marluxia's health dwindles, he gains several additional attacks. He can teleport into the center of the arena and generate three circles surrounded by wisps of thorns, which cannot deplete Sora's counter but can deplete his health. The circles can dissipate after a while. Casting Firaga or quickly initiating a combo as he emerges can prevent him from attacking. During this phase, Marluxia can repeat his scythe combo, draw the party towards him with the whirlwind, or sink into the ground and spin towards Sora, the blade of his scythe visible. During the latter attack, Marluxia will only emerge once he hits Sora, or if Sora guards the attack. Marluxia can also slash Sora multiple times, each time preceded by him teleporting in a portal of flowers.
The final phase introduces Marluxia's two ultimate attacks. His first is an extended version of his scythe wheel attack that does not end when it lands or is blocked. The second begins with the screen darkening as Marluxia rises upward before appearing above Sora and following his position, surrounded by a pink aura and laughing. Portals of darkness can appear and erupt within the radius of Sora's position, which can be evaded by Gliding or running in a close (but not tight) circle. Eventually, Marluxia will hurl his scythe towards Sora, which can hit multiple times, and then dive to and slam the ground. Reflect magic is necessary to survive the final hit.
Both forms of Marluxia can be looped until his final phase. When Marluxia is teleporting to the middle of the arena before using the thorn circle attack, he is briefly vulnerable to damage, and attacking him will stagger him and create an opening. The vulnerability is short-lived, and the easiest way to exploit it is through landing a Slapshot or casting Fire as Marluxia is arriving at the middle of the arena. After landing a combo and hitting a revenge trigger, Marluxia will retaliate by vanishing, slashing Sora once, teleporting away, and then attempting to teleport to the middle of the arena to use the thorn attack again; leaving him open to an interruption and another combo. This loop works until his final phase, where he randomly begins to use his two desperation moves.
Data Rematch

The strategy for taking down Marluxia's Data Rematch is the same, but he has more health. Marluxia, however, now begins the match by warping to the center of the arena, so try to intercept him quickly or spam Firaga until he emerges. Whenever he does this, he now instantly surrounds Sora with an aura of thorns. In addition, every successive time after the first that Sora uses Restore Count, the amount of points he regains is cut by a half (13, 7, 3, 2, 1). As such, it's even more crucial to utilize Sora's defensive options this time around than ever. If Sora is close to level 99, his normal strikes should not be an issue.
| Technique | Element | Power | Guard? | |||
|---|---|---|---|---|---|---|
| Continuous Slash (連続斬り Renzokukiri) |
Physical | x0 | △ (Last hit: O) | |||
| Marluxia performs a series of strikes with his scythe.
| ||||||
| Starts with this attack in the Absent Silhouette fight. At low HP, he may use a longer version of this ability. | ||||||
| Tornado Slash (竜巻斬り Tatsumakigiri) |
Physical | x0 | △ | |||
| Marluxia spins his scythe over his head, drawing opponents in, and slashing continuously. | ||||||
| Warp Slash (ワープ斬り Wāpu Kiri) |
Physical | x0 | △ | |||
| Marluxia teleports to the opponent and slashes.
| ||||||
| Can end early if a slash either misses or gets parried. | ||||||
| Phantom Saber (ファントムセイバー Fantomu Seibā) |
Physical | x0 | △ | |||
| Marluxia moves forward while slashing.
| ||||||
| Used as retaliation after getting interrupted and left unharmed. | ||||||
| Ambush Slash (奇襲斬り Kishū Kiri) |
Physical | x0 | △ | |||
| Marluxia emerges from the ground and slashes, before sinking back in the floor. | ||||||
| Bloom Shark (ブルームシャーク Burūmu Shāku) |
Physical | x0 | △ | |||
| Marluxia sinks in the floor and spins his scythe vertically. | ||||||
| Super Bloom Shark (超ブルームシャーク Chō Burūmu Shāku) |
Physical | x0 | △ | |||
| While dimming the light, Marluxia sinks in the floor and spins his scythe vertically for a long time.
| ||||||
| Used below a certain amount of HP. Marluxia is invincible as long as he is underground. | ||||||
| Flower Wreath (花まとい Hana Matoi) |
Dark | x2.0 | X | |||
| Marluxia envelops the party in thorns, which explode after 3 seconds.
| ||||||
| The thorns stop moving along with the targets a split second before exploding. Used along with Disturbed Bloom. | ||||||
| Disturbed Bloom (乱れ咲き Midare Saki) |
Dark | x2.5 | X | |||
| After warping to the middle of the arena, Marluxia hits the ground with the scythe's hilt, generating three huge red circles that cover most of the field.
| ||||||
| Used either below two thirds of his HP or at the start of the fight (Data). Marluxia becomes invincible a split second after he teleports. | ||||||
| Final Judgment (最後の審判 Saigo no Shinpan) |
Scythe & Swoop | Dark | x0 | △
| ||
| Light | Dark | x1.5 | X | |||
| The light dims and petals fall. Marluxia follows Sora around, summoning red light from the floor 15 times, before throwing his scythe down, and ends with a plunging attack.
| ||||||
| Used at low HP. Marluxia is invincible during the attack, and stops following Sora around once he throws his scythe down, but the plunging attack warps him above Sora.
| ||||||
| Marluxia starts the battle by whispering to Sora, which causes a count to appear over his head, with the starting value corresponding to Sora's current level. Hits on Sora from attacks with a x0 power modifier decrease the count on his head by 1. When the count is reduced to 0, it results in his instant defeat. | ||||||
| Guard/Block: △ = Can be blocked; O = Can be blocked and interrupted (melee) or deflected back (projectile); X = Cannot be blocked. | ||||||
| Reaction Commands | |||||||
|---|---|---|---|---|---|---|---|
| Reaction Command | Element | Power | Description | ||||
| Aerial Strike (エアトランプル Ea Toranpuru, lit. "Air Trample") |
Physical | x1.0 Knockback: x10.0 |
Can be used when near Marluxia as he rests after using Tornado Slash. Attack Marluxia three times and knock him back. The knockback acts as a finisher. | ||||
| Restore Count (ロブカウント Robu Kaunto, lit. "Rob Count") |
— | — | Can be used when near Marluxia's scythe as he rests after using Tornado Slash. Steal Marluxia's scythe, slash with it, then throw it at him, knocking him back. Does not deal damage, but Sora's overhead count recovers up to its starting value by 13. When fighting Marluxia's Replica Data, the amount recovered is reduced each time Restore Count is used as such: 13 → 7 → 3, and is thereafter fixed at 1. | ||||
Kingdom Hearts III
During the first part of the fight, Xemnas stays behind while Luxord, Marluxia and Larxene attack. Chain some combos to the target of your choice until Xemnas leaves the arena.
Following Luxord's defeat, the real fight against Marluxia and Larxene begins. He and Larxene will begin with their ultimate attacks. For his ultimate attack, when the screen darkens, Marluxia spins at high speed across the area. Watch his movements and dodge just before each impact. This technique ends when Marluxia strikes the ground, creating a zone of darkness on the entire terrain and causing petals to emerge from the ground to launch Sora skyward.
Following this, Marluxia has only two main attacks. His most used attack is simply teleporting in front of either Sora or Mickey, and slashing them upward. He will slash around 1-3 times before teleporting back to the ground. He is wide open for a lot of the fight, as, sometimes, he simply walks around the arena without a care in the world. When you see him walking around, immediately airstep to him and combo him. Sometimes, however, he will teleport away and use his other main attack, of which he creates a field that draws Sora towards him before repeatedly striking with his scythe, dealing heavy damage which can and will reduce Sora's HP to 0 unless he has Withstand Combo active. His slashes can be blocked, but his finisher will break Sora's guard and trigger Risk Dodge, which Sora can use to attack Marluxia, who is vulnerable after this combo.
With patience, Marluxia should fall with ease.
| Technique | Element | Status | Power | Block? | Repel LV | |
|---|---|---|---|---|---|---|
| Warp Slash (ワープ斬り Wāpu-kiri) |
Physical | — | 0.7 per hit | △ | 2 | |
| Marluxia warps near the opponent and slashes 1-5 times. | ||||||
| Tornado Slash (竜巻斬り Tatsumakigiri) |
(Weapon Spin) | Physical | — | 0.1 per hit | △ | 2
|
| (Swings) | Physical | — | 0.3 per hit | △ | 2 | |
| (Final Blow) | Physical | — | 1.2 | △ (Risk Dodge) | 3 | |
| Marluxia covers the ground in darkness, spins his scythe overhead to draw opponents in, then swings the scythe around. He pauses a second before delivering the final blow. | ||||||
| Phantom Blitz (ファントムブリッツ Fantomu Burittsu) |
(Weapon) | Physical | — | 0.8 per hit | △ | 2
|
| (Cracks) | Physical | — | 3.0 | X | — | |
| Marluxia throws his scythe, which flies around, attacking opponents 5 times, before he strikes the ground, cracking it. Marluxia disappears while the scythe flies around, but may appear for a moment to throw the scythe again. | ||||||
| Used below half HP along with Larxene's Thunder Lion attack, and at the outset of the fight if he is the only remaining target. | ||||||
| Guard/Block: △ = Can be blocked; O = Can be blocked and interrupted (melee) or deflected back (projectile); X = Cannot be blocked. | ||||||
Kingdom Hearts III Re Mind
Data Rematch
Marluxia's data rematch is naturally significantly stronger and has more HP. He gains access to the abilities used by his Absent Silhouette and Chain of Memories boss fights, only modified and expanded.
It is recommended to equip Counter Impact to deal with certain moves in this fight. Its high speed and wide area of attack are very important. Counter Kick is not recommended, as it lasts too long and covers a smaller area.
If Marluxia teleports close to Sora, he is doing his five-hit combo. He will start with one slash, teleport, do one slash, teleport, do two slashes, and do one final slash where he is glowing pink, which is unblockable. He will then re-appear and be open for attack. Block the first four hits, dodge the fifth, then jump and attack to close on on his position for a combo.
If Marluxia throws a large spinning scythe, he is doing his three-hit scythe spin combo. The scythe will start by spinning vertically along the ground toward Sora, then spin horizontally, then Marluxia will re-appear with a pink aura and catch the scythe, then throw his scythe vertically for the final hit. This final hit is unblockable. Marluxia will re-appear in the last scythe's path to catch it, and will be open to attack. Block the first two hits, dodge the third, then jump and attack to get to Marluxia's position. Alternatively, enter focus at the end and Airstep to him to attack.
If Marluxia charges up a large black tornado under him, he will do his tornadoes-into-armor combo. The tornado will pull Sora in, then Marluxia will do one unblockable pink swing. He will follow up with another tornado, then jump into the air and crash down with a large pink shockwave. This shockwave move will give him armor, and will make him immune to stagger for its duration. However, one Fire spell will instantly destroy his armor. If his armor is not destroyed, then he will resume using other moves, and the armor should wear off after a couple moves have completed. There are several ways to handle this:
- Guard the first tornado and reprisal the pink hit to get an opening to attack. The rest of the move is cancelled.
- Roll a couple times to avoid the first tornado and unblockable slash, then guard as the second tornado pulls Sora in to block some small hits. Retreat and jump to avoid the pink shockwave, then cast a Fire to break Marluxia's armor. If Sora is close enough, then attack to reach him and combo, but if Sora is far away, then Airstep and attack instead.
- Jump and air slide away to avoid the first tornado, then glide and Sora will still be too far away for the second tornado to connect. When Marluxia jumps, cast a Fire and Airstep to combo him after the Fire connects.
- If Sora does not have any MP to cast Fire for removing the armor, focus on blocking and dodging Marluxia's attacks as normal until MP recharge completes, or the armor goes away on its own. While it is possible to deplete his armor earlier through reprisals, doing so is very dangerous since he cannot stagger in this state.
If Marluxia summons five floating pink flower buds, he will be doing his flower buds combo. The buds will automatically shoot at Sora, but not until after Marluxia finishes some physical combos. He will do three slashes followed by one unblockable pink slash, one upper slash, pause, then two slashes and one unblockable pink slash. Once Sora has destroyed all of the flower buds, Marluxia will re-appear in the center of the stage. Block Marluxia's first three swings, use Counter Impact to destroy some buds and be invincible to the unblockable swing, then immediately guard to block Marluxia's next swing. Wait a short moment, then guard two hits and reprisal the unblockable third. Use Thunder quickly to destroy any remaining buds, or guard their shots and reprisal to destroy them instead. Once all buds are destroyed, run to the middle of the stage to attack Marluxia as he re-appears. If Sora takes too long, then Marluxia will start using his other moves while the buds are still flying around, which may be difficult to deal with.
If Marluxia twirls his scythe and hits the ground with its base, he will do one of his dark pool combos. A small dark pool will appear below Sora, and Marluxia will do a twirling overhead swing. When he lands, a second pool will appear, then Marluxia will rush with an unblockable pink swing as a third pool appears. The twirling swing can be blocked, however the rest of the move cannot. When this move starts, run out of the first pool and be prepared to block Marluxia's twirling swing. The knockback should push Sora away from the second pool. Continue running and Marluxia will rush with the pink slash, so dodge as he approaches. This dodge should get Sora away from the third pool as well.
The second dark pool combo instead summons four large pools around the arena, each centered on one of the Nobody crosses. He will perform a tornado in three of the pools, one at a time, then slash at Sora six times rapidly, with the last hit breaking Sora's guard. Dodge roll repeatedly to avoid getting sucked into the pools, but be prepared to block after the third tornado. Risk dodge after the guard break and attack.
- Marluxia will often perform this dark pool combo right after the other one, but not always. Be prepared just in case.
- It is also possible to air slide away from the tornadoes, however it must be timed so that Sora will either land on the ground before he needs to block, or still be in the air when he needs to mid-air block. If Sora lands too close to the moment he needs to block, then his landing animation may make the block timing difficult.
- You can reduce the number of dark pools by casting aero as soon as he summons them to make dodging them easier. Do note, while you could punish him if all pools disappeared, it is not ideal to do it physically since the window is too short, the springboard will cause Sora to jump.
When Marluxia's revenge value is hit, he will yell "Settle down!" and sometimes perform a quick pink unblockable slash. Sometimes his slash will be blocked by the arena's edge and be cancelled, but be ready to dodge whenever he says that line, just in case.
After about four bars of HP have been depleted, Marluxia will start his ultimate attack. He will rise into the air with his scythe swinging like a pendulum, then trigger a small scene where he whispers in Sora's ear and casts a Doom counter on him, which starts at 15 and decrements every few seconds. The stage will turn black with a pool of darkness in the middle, and Marluxia will gain armor, which will need to be depleted to end the move. He will start with a tornado in the center of the pool, then teleport to Sora and do a five-hit slash combo, with the last slash being unblockable. He will re-appear in the middle of the stage, where he will be open to attack. Occasionally the air above the pool will have a red glow, meaning a gigantic black skull will emerge from it soon after. This tends to line up with when Marluxia goes back to the center, but if he is in the center and the skull is about to appear, do not approach until it does - Sora can take damage when the skull rises. Marluxia will repeat his five-hit combo into middle-teleport until his armor is depleted. Run away immediately when this move starts, and dodge roll to avoid getting pulled in by the tornado. For the five-hit combo, block the first four hits, use Counter Impact to deal some quick damage and be immune to the fifth hit, then Airstep to Marluxia when he appears with the skull above him at the center of the stage, and attack. When Marluxia's armor has been depleted, use the Dispel Situation Command to remove the Doom counter and end the move.
- Using a Shotlock after Airstepping to Marluxia will usually deplete most, if not all, of his remaining armor.
- PRO Code players will need to use a very specific, very aggressive combo to deplete all of Marluxia's armor in time. When attacking Marluxia in the center after the Airstep, Marluxia will break out after one full combo and retaliate with a pink slash, but he will not yell "settle down!". Dodge the pink slash, then enter focus to slow time and carefully watch where Marluxia teleports afterwards. Airstep to him and attack until he vanishes, where now he will actually yell "settle down!". Marluxia will re-appear in the center with a tornado attack, but it will go into his six-hit guard-break spin from the dark pool combo. Block as Sora is pulled in, then risk dodge after the guard break and relentlessly attack Marluxia. He will take about two full combos before teleporting out, but he is still vulnerable and close by, so continue to mash attack to deplete the last bit of armor, and activate the Dispel command immediately.
- Dispel will also reset Marluxia's revenge value, and he will immediately be open to attack after Sora uses it, so continue to attack him if he is nearby.
After Marluxia's ultimate attack has ended, he will be in his second phase. During this phase he has a couple of new attacks:
- He can go directly into his armor-granting move without doing two tornadoes at the start. Deal with this the same as before, by casting a quick Fire at him, or otherwise stalling until the armor runs out on its own.
- He can turn the stage black and re-summon the black skull from his ultimate attack. His sequence of actions will be the same: tornado, then five-hit combo with unblockable finisher, then teleport to the center of the stage and open to attack after the skull rises. Dodge roll away from the tornado and stay at the edge of the stage, block four hits but dodge the fifth this time, and Airstep to Marluxia at the center to attack. If Sora misses the attack window, Marluxia will teleport away and move on to his next attack, even though the stage is still black for a few moments.
At about five bars of HP left, Marluxia will enter his third phase, starting with his dark explosion combo. He starts by rising in the air with his scythe spinning behind him, gains armor, then will throw his scythe vertically along the ground, catch it, throw an unblockable scythe, and lose his armor. Next he will summon four black pools and slam the ground, turning the entire arena black for a few moments. Block the first spinning scythe, dodge the second, Doubleflight into the air to gain height, and wait until Marluxia slams the ground. Wait until the pink pillar around him has disappeared, but his Scythe is still stuck in the ground, then Airstep to him for a chance to attack.
During the third phase, Marluxia gains one new move:
- He can perform an extended version of his scythe spin combo. He will perform the three-hit combo, rush to Sora for a quick unblockable pink slash, then perform the three-hit combo again and be open to attack when he catches the scythe. Block the first two hits, dodge the next two, block the next two, dodge the last one, and finally Airstep to him to attack.
When Marluxia's HP has been depleted to 1, he will do a variation of his ultimate attack. He will rise into the air with his pendulum-swinging scythe and whisper in Sora's ear again, this time giving him a Doom counter of 99 that decrements rapidly. He will gain armor, then throw a vertically-spinning scythe that will repeatedly attack Sora. Block the first five hits, then dodge the sixth. Block four more hits, and dodge the fifth. Block two hits, and dodge three hits in a row. Afterwards, Marluxia will lose his armor, summon four dark pools and slam the ground one last time, turning the arena black. Try to get close to him, then jump to avoid the slam and attack to use Falling Slash on him for the final blow.
- It is also possible to cast Fire and have it fly into Marluxia for the final blow, however this must be cast some moments in advance to have enough time.
- Alternatively, if Marluxia is hit by Fire during the long scythe combo sequence, he will instantly lose his armor and be stunned in place for the remainder of the fight. Landing a Fire on him to do this can be tricky however, as he teleports frequently during the scythe combo, and the window to actually cast Fire amidst all the blocking and dodging is small.
For PRO Code players, due to the heavy reliance on magic to make the fight easier (Fire on the armor, Thunder on the buds), it is not recommended to use Wizard's Ruse healing unless Marluxia is close to defeat, and Sora has a lot of MP available.
Videos
| Marluxia I – Kingdom Hearts Chain of Memories | Marluxia II – Kingdom Hearts Chain of Memories |
|---|---|
| Marluxia – Kingdom Hearts: Re:Chain of Memories | |
| Marluxia's Absent Silhouette – Kingdom Hearts II Final Mix | Marluxia's Replica Data – Kingdom Hearts II Final Mix |
| Luxord, Marluxia, and Larxene – Kingdom Hearts III | Marluxia – Kingdom Hearts III |
| Marluxia and Larxene – Kingdom Hearts III Re Mind | Marluxia's Recreated Data – Kingdom Hearts III Re Mind |
Notes and references
| Nobodies |
|---|
| Organization XIII |
| I. Xemnas | II. Xigbar | III. Xaldin | IV. Vexen | V. Lexaeus | VI. Zexion | VII. Saïx | VIII. Axel | IX. Demyx | X. Luxord | XI. Marluxia | XII. Larxene | XIII. Roxas |
| Enemy Nobodies |
| Sorcerer - Sniper - Dragoon - Berserker - Assassin - Dancer - Gambler - Reaper - Ninja - Samurai Dusk - Creeper - Specter - Twilight Thorn - Fake Vivi |
| Special Nobodies |
| Naminé - Absent Silhouettes - Organization XIII's Replica Data - Anti-Saïx - Data-Roxas - Data-Naminé |
- Organization XIII
- Original characters
- Kingdom Hearts Chain of Memories characters
- Kingdom Hearts III characters
- Kingdom Hearts Chain of Memories enemies
- Kingdom Hearts III bosses
- Kingdom Hearts Re:Chain of Memories characters
- Kingdom Hearts II Final Mix characters
- Kingdom Hearts II bosses
- Kingdom Hearts Union χ characters
- Kingdom Hearts III Re Mind characters
- Gameplay

