Walkthrough:Kingdom Hearts/Halloween Town
Halloween Town
Upon entering this world, you'll notice that Sora, Donald and Goofy look different. Sora now wears a unique black outfit similar to that of a vampire, complete with a pumpkin mask covering his right eye. Donald is now wrapped like a mummy, and Goofy wears rag-like clothing and has a screw coming out of his head. Based on Donald's quote upon entering, it's assumed he used his magic to transform them, much like with Atlantica.
Once you enter Guillotine Square, you'll notice mutiple Search Ghosts floating around, but they won't attack you. You'll soon see someone announcing a rehearsal for this year's Halloween show. The star of the show is Jack Skellington, also known as the Pumpkin King. After the Mayor approves his performace, Jack is concerened that the Heartless won't dance, and then goes off to see the Doctor. If you talk to the Mayor, he'll also comment positivly on Sora's Vampire Form, claiming it's a nice costume.
Go the the Lab, and you'll see a cutscene involving Doctor Finkelstein trying to create a Heart, but it is locked. Sora unlocks it, and they test it, but it fails, causing the Heartless to become fightable. You'll need to find Sally, who's at the Graveyard. At this point, Jack will join the party.
After speaking with her, she'll give you a bunch of flowers, otherwise known as Forget-Me-Not. Return to the Doctor, then you'll need to find the Mayor. He can be found at a hidden spot at the Graveyard. Talk to him, then follow the pattens of the tombstones with the ghosts. If you get it right, the pumpkin behind you will blow up, revealing a treasure chest containing a Jack-in-the-Box. Go back to the lab, and watch the cutscene where three children will steal the heart.
You now must chase them into the graveyard, where they will lead you to Oogie's Manor. Now, you must reach the top of the manor while fighting the Heartless. Don't worry if you fall off. Just find the Bathtub, and it will take you back to the starting point. Also, if you see a Red Trinity, use it now, since it cannot be reached later on.
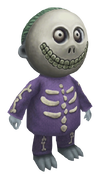
Upon reaching the Evil Playroom, a battle with Lock, Shock and Barrel will begin. They don't have too much health, but they are very small and agile, and this can make hitting them difficult. Lock-on and fight them one at a time to dispatch them quickest.
<tabber> Boss: Lock=
| Lock | |||||
|---|---|---|---|---|---|
| HP | STR | DEF | MP R | EXP | |
| 150 | 24 | 20 | 36 | 180 | |
| Resistances | Weapon | Fire | Blizzard | Thunder | |
| x1.0 | x0.49 | x0.5 | x1.0 | ||
| Gravity | Stop | KO | Other | ||
| x0.4 | x0.3 | x0.5 | x0.5 | ||
| Rewards | HP Ball x5 | ||||
|-| Boss: Shock=
| Shock | |||||
|---|---|---|---|---|---|
| HP | STR | DEF | MP R | EXP | |
| 120 | 24 | 20 | 36 | 120 | |
| Resistances | Weapon | Fire | Blizzard | Thunder | |
| x1.0 | x0.49 | x0.5 | x1.0 | ||
| Gravity | Stop | KO | Other | ||
| x0.4 | x0.3 | x0.5 | x0.5 | ||
| Rewards | MP Balls x5 | ||||
|-| Boss: Barrel=
| Barrel | |||||
|---|---|---|---|---|---|
| HP | STR | DEF | MP R | EXP | |
| 180 | 24 | 20 | 36 | 240 | |
| Resistances | Weapon | Fire | Blizzard | Thunder | |
| x1.0 | x0.49 | x0.5 | x1.0 | ||
| Gravity | Stop | KO | Other | ||
| x0.4 | x0.3 | x0.5 | x0.5 | ||
| Rewards | N/A | ||||
</tabber>
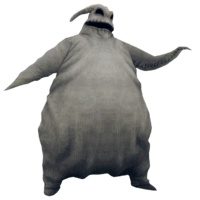
After defeating Lock, Shock and Barrel, a save point (type A) will be present; save and heal. After that, attack a nearby lever to activate the green door below. This is your last chance to activate the Red Trinity, so activate it before entering the green door. After that, enter the Torture Chamber, and fight Oogie Boogie.
| Oogie Boogie | |||||
|---|---|---|---|---|---|
| HP | STR | DEF | MP R | EXP | |
| 450 | 24 | 20 | 38 | 2,500 | |
| Resistances | Weapon | Fire | Blizzard | Thunder | |
| x1.5 | X0.25 | X0.25 | X0.5 | ||
| Gravity | Stop | KO | Other | ||
| X0.2 | X0.0 | ||||
| Rewards | Holy Circlet, Ansem's Report 7 | ||||
| The battle with Oogie Boogie is less about fighting and more about logic and timing. Avoid his attacks on the spinner, and jump onto the button at the right time to leave him vulnerable to attack. Repeat this tactic and Oogie should fall. | |||||
After defeating Oogie Boogie, you'll find yourself on the remains of the brige to the manor, which Oogie has now taken control of. If you want to leave the battle for later, you may use it to exit the area. Also, should you have already dropped down, there is a hidden exit in the river.
| Oogie's Manor | |||||
|---|---|---|---|---|---|
| HP | STR | DEF | MP R | EXP | |
| 90 | 24 | 20 | 40 | 2,500 | |
| Resistances | Weapon | Fire | Blizzard | Thunder | |
| x1.0 | x0.49 | x0.5 | x0.0 | ||
| Gravity | Stop | KO | Other | ||
| x0.0 | x0.0 | x0.0 | x0.0 | ||
| Rewards | Gravity | ||||
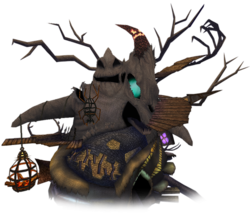
| Defeating the Manor can be tricky simply because of the structure of the manor; several of the Shadow Globs are hard to reach and can require some precision jumping to get to. The large amounts of Gargoyle Heartless can also create problems, so try to stop them when possible. After destroying all the globs, the battle ends. | |||||
After defeating the manor, a cutscene will show that the world's Keyhole was underneath it all along. Sora then seals it, ending the story for the world. Any treasure on the manor not collected before the battle can be found in a hidden location in the graveyard, but if you did not get the Trinity Mark, you'll not be able to get it now.

