| Saïx | ||||||||||||
|---|---|---|---|---|---|---|---|---|---|---|---|---|
| Japanese | サイクス | |||||||||||
| Rōmaji | Saikusu | |||||||||||
| Translation | Saix
| |||||||||||
| Type | Organization XIII | |||||||||||
| Games | Kingdom Hearts II Kingdom Hearts 358/2 Days Kingdom Hearts III | |||||||||||
| ||||||||||||
| ||||||||||||
| Saïx
|
|---|
| Kingdom Hearts 358/2 Days |
| The Organization's No. VII. Usually cool and calm, he turns into a berserker when he grips his giant blade in combat. Dodge his attacks as you watch for a rare opening. After taking damage, he will revert to his normal self, making him more susceptible to attack. Finish him quickly. |
| Enemy Card | ||||
|---|---|---|---|---|

| ||||
| Ability | Duration | Cost | ||
| Combo Boost | 20 attacks | 80 CP | ||
| Description | ||||
| Boosts power with every strike with an attack card. Returns to normal when a card is broken. Resistant to fire, ice, lightning, and special attacks. | ||||
| Obtained | ||||
| [1] | ||||
| Location | HP | Strength | Defense | EXP | ||
| The World That Never Was | 1500 | 45 | 26 | 0 | ||
| Physical | Fire | Blizzard | ||||
| ×1.0 | ×0.5 | ×0.5 | ||||
| Thunder | Dark | Neutral | ||||
| ×0.5 | ×0.5 | ×0.5
| ||||
| Rewards | ||||||
| Sora: Drive gauge +1 Donald: Max HP +4 Goofy: Item slot Secret Ansem Report 9[2]/Secret Ansem Report 12[3] | ||||||
| World(s) | ||||||
| The World That Never Was | ||||||
| Location | HP | Strength | Defense | EXP | ||
| The World That Never Was | 1500 | 45 | 26 | 0 | ||
| Physical | Fire | Blizzard | ||||
| ×1.0 | ×0.5 | ×0.5 | ||||
| Thunder | Dark | Neutral | ||||
| ×0.5 | ×0.5 | ×1.0
| ||||
| Rewards | ||||||
| Sora: Max HP +5 Donald: Max HP +3 Goofy: Item slot Secret Ansem Report 12 | ||||||
| World(s) | ||||||
| The World That Never Was | ||||||
| Mission | HP | EXP | STR/DEF | ||||
|---|---|---|---|---|---|---|---|
| Story Mode | Mission Mode | ||||||
| 91 | 1316 | 3949 | 1480 | 98 | |||
| Fire | Blizzard | Thunder | Aero | ||||
| x0.63 | x0.66 | x0.24 | x0.70 | ||||
| Ignite | Freeze | Jolt | Air-Toss | ||||
| x0 | x0 | x0 | x0 | ||||
| Defense Power Adjustment | Heart Points | ||||||
| • Full Body: ? | — | ||||||
| Flinch? | Bloom-Out? | ||||||
| X | X | ||||||
| Rewards | |||||||
|
Missions 73-93 | |||||||
| Story Mode | |||||||
| Munny x— | |||||||
| Mission Mode | |||||||
| Munny xExpression error: Unrecognized punctuation character "—". | |||||||
| World(s) | |||||||
| The World That Never Was | |||||||
| Location | HP | Strength | Defense | EXP | |||||||
| Keyblade Graveyard | 3400 | 59 | 30 | 0 | |||||||
| Physical | Fire | Blizzard | Thunder | Water | |||||||
| ×1.0 | ×0.7 | ×0.7 | ×0.7 | ×0.7 | |||||||
| Aero | Dark | Neutral | Rapid-fire | ||||||||
| ×0.7 | ×0.7 | ×0.7 | ×0.5 | ||||||||
| Freeze | Electrify | Stun | Hunny | ||||||||
| ✕ | ✕ | ✕ | ✕ | ||||||||
| Reaction Endurance |
Revenge Value |
Attraction Magnification |
Damage Limit | ||||||||
| 5 | 6.5 | ×0.35 | 24
| ||||||||
| Rewards | |||||||||||
| Sora: HP +10 | |||||||||||
| World(s) | |||||||||||
| Keyblade Graveyard | |||||||||||
| Saïx | |||||||
|---|---|---|---|---|---|---|---|
| Japanese | サイクス | ||||||
| Rōmaji | Saikusu | ||||||
| Translation | Saix
| ||||||
| Type | Organization XIII | ||||||
| Games | Kingdom Hearts II Final Mix Kingdom Hearts Union χ | ||||||
| |||||||
| |||||||
| Location | HP | Strength | Defense | EXP | ||
| Radiant Garden Garden of Assemblage |
3400 | 86 | 51 | 0 | ||
| Physical | Fire | Blizzard | ||||
| ×1.0 | ×0.5 | ×0.5 | ||||
| Thunder | Dark | Neutral | ||||
| ×0.5 | ×0.5 | ×1.0
| ||||
| Rewards | ||||||
| Defense Boost | ||||||
| World(s) | ||||||
| Radiant Garden | ||||||
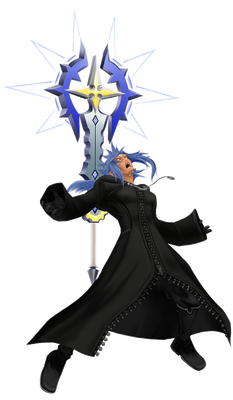
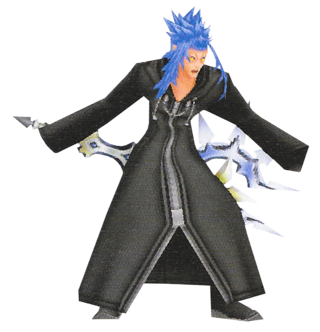
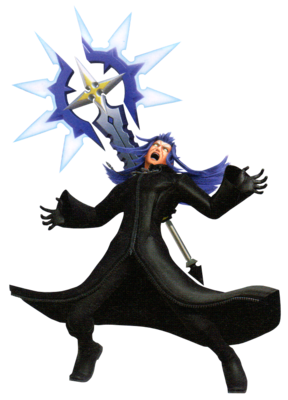
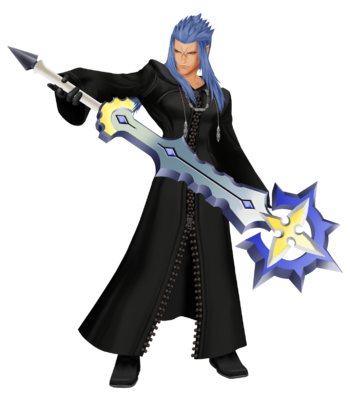
Saïx is fought as a boss in Kingdom Hearts II, Kingdom Hearts 358/2 Days, and Kingdom Hearts III, and Kingdom Hearts Union χ. In Kingdom Hearts II, he is the last of the Organization XIII members to fall before Sora faces Xemnas, attacking Sora near the top of the Castle That Never Was, in his chamber overlooked by Kingdom Hearts. In Kingdom Hearts 358/2 Days, he attacks Roxas when the Nobody tries to leave the Organization. In Kingdom Hearts III, he battles Sora, Lea, and Kairi at the Keyblade Graveyard alongside Xion, but once Xion allies with the Guardians alongside Roxas, Saïx engages Sora, Roxas, and Xion in one last stand.
Strategies
Kingdom Hearts II
- "Defeat Saïx! Try using his weapon to your advantage!"
- —Battle hint
Throughout this battle, Saïx's attack pattern is determined by a "Berserk Gauge" in the top-left corner of the screen. When the battle begins, the gauge will be full and Saïx will rise into the air and enter his "Berserk" state. The gauge will begin slowly emptying and once empty, he will revert to a calmer attack pattern, wherein the gauge begins filling again. Note that the burst of light that emanates from Saïx's body when he enters his berserk state can damage Sora.
While in Berserk mode, Saïx attacks very quickly with powerful attacks, slamming his claymore into the ground to unleash large shockwaves of energy. He also throws his claymores at Sora, unleashing streams of energy when they impact. While in this state, Saïx's attacks have a large range and high power. In addition, he is invulnerable to normal attacks and extremely resistant to magic attacks. However, Sora can pick up his thrown claymores with the Reaction Command "Berserk", then use the Command "Eclipse" to slam Saïx into the air and finally "Magna Storm" to attack him rapidly. If "Magna Storm" connects with Saïx, his Berserk gauge immediately empties and he reverts to his "normal" state.
While in this state, he walks slowly and attacks with slow, but powerful combos. At this time he is more vulnerable to damage, but he can still defend himself, so it's best to use Guard when he attacks or deflect his attack with one of Sora's own, to make him drop his claymore. This will cause him to cease attacking for a while, as well as give Sora the opportunity to use Reaction Commands and attack with the dropped claymore for massive damage. At times, Saïx will stand still and raise his arms to hasten the speed the Berserk Gauge fills. As Saïx loses more health, the Berserk Gauge fills at a much faster rate.
As long as Sora uses Reaction Commands to revert Saïx's transformation as soon as possible, he is not an overly difficult opponent. If in a tight spot, avoid Saïx's berserk attacks by gliding or dashing away, healing when necessary. Be cautious if using Drive Forms, as AntiForm is more likely to activate due to the nature of battling an Organization XIII member. Using Final Form is a big help if accessible, while Saïx is in his normal state.
Kingdom Hearts II Final Mix
Data Rematch
Saïx's Data Rematch begins slightly differently from his first encounter. His Berserk bar will begin empty and he will immediately call to the moon and start charging it for a short period. Sora can use a finishing move to interrupt Saïx' charge early, so it is recommended to remove any Combo Plus abilities prior to the battle.
Once Saïx enters his Berserk state the battle becomes purely survival and waiting for him to drop a claymore. Saïx will take damage in his Berserk state, but it is not without risk because of the large amount of damage that can be dealt. The best strategy is to keep as much distance between Saïx and Sora as possible and look for one of three things to happen: Saïx will stand in place and use his "All shall be lost to you!" desperation move (which he uses very often); it is at this time that he is truly invincible and Sora must stay away. Saïx may also begin his "Move aside!" combo, provided enough distance is put between Saïx and Sora, simply stand in place and wait for his claymores to drop close by. The third thing that will happen is Saïx will begin to run towards Sora, once close Saïx will either perform his "Begone!" combo or leap into the air and perform his large shockwave attack. If not Reflected, do not count on grabbing the large shockwave claymore, by the time Sora is close enough it will vanish and Sora will be close to Saïx and vulnerable. After every one of his combos, he will recharge his Berserk bar and the only way to stop this is to attack him. However, this comes as a risk because he will attack back with one of his combos, except his "All shall be lost to you!" desperation move since it requires a full Berserk bar to perform.
The Lunatics that Saïx throws disappear very quickly, so get to them quickly by using Dodge Roll or guarding the attack that launched them with Reflect. Unlike in the original battle, Sora will be invulnerable while holding a Lunatic, and the "Berserk" Reaction Command after grabbing one becomes available almost instantly.
After breaking Saïx's berserk state, it is pivotal to guard in order to block his attacks, as they can still deal heavy damage and will allow Saïx to call to the moon to charge his Berserk gauge faster. The "Magna Storm" Reaction Command will still reset Saïx's Berserk gauge in the Data Rematch, but the dropped claymores vanish much faster and the window to use Magna Storm after seizing one is shorter.
Kingdom Hearts 358/2 Days
| Technique | Element | Status | Power | Block? | |||||
|---|---|---|---|---|---|---|---|---|---|
| Berserk (バーサク Bāsaku) Attack |
Moon | Silence (100%) | 0.30 | △ | |||||
| Releases light around him and enters Berserk state.|- | Berserk Charge (バーサク突撃 Bāsaku Totsugeki) Attack |
Physical | — | 0.21 | △ | ||||
| Performs a continuous attack while stepping forward.|- | Berserk Dance (バーサク乱舞 Bāsaku Ranbu) Attack |
Weapon attack | Physical | — | 0.19 | △
| |||
| Shock wave | Moon | Silence (10%) | [note 1]
|
X | |||||
| Performs a continuous attack that emits a shock wave moving along the ground, and throws his weapon. | |||||||||
| Berserk Leap Attack (バーサク大ジャンプ攻撃 Bāsaku Dai Jampu Kōgeki) Attack |
Moon | Silence (35%) | 1.65 | X | |||||
| Moves to high ground, and jumps down, emitting a shock wave.|- | Warp Attack (ワープ攻撃 Wāpu Kōgeki) Attack |
Physical | — | 1.17 | △ | ||||
| Warps into the air, and attacks while falling down.|- | Continuous Attack (連続攻撃 Renzoku Kōgeki) Attack |
Physical | — | 0.13 | △ | ||||
| Swings weapon up, then swings twice while stepping forward.|- | Shock Wave (衝撃波 Shōgekiha) Attack |
Moon | Silence (10%) | 1.43 | X | ||||
| Raises weapon and emits a shock wave that moves along the ground. | |||||||||
| Guard/Block: △ = Can be blocked; O = Can be blocked and interrupted (melee) or deflected back (projectile); X = Cannot be blocked. | |||||||||
- ^ The shock wave that moves along the ground has a power of 1.43, while the shock wave that comes from the thrown weapon has a power of 1.30.
Saïx's main tactic is his berserk mode, which he starts almost at the exact start of the fight. Don't move towards Saïx until he activates his berserk state, as being near him when he activates will deal damage. In this state, his Claymore has its signature extended white edges. He himself has an aura of blue light surrounding him.
He has a diverse range of attacks and combos at his expense. He has a few close range combos in which he swings his Claymore around. If Roxas gets caught by one attack, he may get drawn into the rest of the attacks he does for that combo. Saïx has five types of combos.
The first one is his most common attack, where he swings the Claymore for about 2–3 seconds ending in a spin. There is about a 2-3 second gap until his next combo, so get a few quality strikes in before retreating to avoid his next move.
The second pattern is where he also swings his Claymore around, but there are distinct differences between this and the first. After about four seconds, Saïx will swing the Claymore down in a straight, vertical slash. That's a hint to escape into the air, because he will follow up that slash with another of the same slashes, but it will produce a blue energy wave in its direction. Immediately afterward, he will jump in the air and throw down his Claymore, which will strike down anything in its vertical path (including the air) and produce an 360 shockwave which will hit anything on the ground that is near it, even while blocking. This will open up him to a few strikes from the Keyblade. However, Roxas can't use the Claymore to hit him and the damage done is the same as usual in his berserk defense. After 2–3 seconds, he will summon his Claymore to him and start attacking again.
The third is a simple two strike move with one swing and spin. This move takes about 1 second to execute and the traditional 2-3 second gap after.
The fourth is a mix of the second and third with the third coming first. Right where Saïx should throw the Claymore, he starts the second combo. After this, again comes the 2-3 second gap.
The fifth is a truly berserk state where Saïx moves in circles, swinging wildly.
Another of his attacks is where Saïx teleports to the top of one of the towers in the room. After another 2–3 seconds, he will leap over Roxas and drop down to smash him. On occasion, if Roxas moves right after he leaps, he will stop near the ground and teleport above Roxas to smash him again. Either way, he will immediately follow up with a combo.
After he has been dealt a sufficient amount of damage, his aura will "break" off and he will slide backwards, where he will become inanimate for a short while. That's where Roxas should hit him with everything he's got: magic, critical hits, combos, anything. After that short while, he will start to defend himself with blocks, jump strikes, and three hit combos. It's important to still prioritize defense, and Saïx is still a danger even when he's not in his Berserk Mode, as he still will not stagger from attacks. Soon after, he will restart his aura.
Saïx's attacks and Aura can randomly inflict Silence, preventing the use of magic. So be wary of getting hit or too close to him. His Aura also provides extra defense against both magic and attacks. Attack whenever possible: Set up Blizzaga to hit him when he's attacking and Thundaga while he's on the tower. If Roxas uses Thundaga and breaks Saïx's Aura while he's on the tower, he will slide back and fall off the floor. For a while, he will continue falling, but he will teleport behind Roxas. Try not to block any of his attacks unless Perfect Block is linked. Saïx may break through the block if Roxas is pushed back. Glide, Dodge Roll (especially Block Dodge Roll), and Haste are very useful for avoiding damage.
- Recommended Gears
Kingdom Hearts III
Saïx is one of the bosses at the Keyblade Graveyard. In the first part of the fight, in which Saïx fights alongside Xion, Sora has Lea and Kairi as allies. In the second, in which Xion has defected to the Guardians of Light, Roxas and Xion serve as Sora's allies. In the second battle, Roxas is invincible and will not sustain damage. He also inflicts powerful attacks, which means Sora can retreat to a safe distance, wait for Roxas to weaken Saïx to 1 HP and move in to finish the battle.
Saïx has the most amount of health out of all the Keyblade Graveyard bosses and his Berserk Gauge can no longer be depleted by hitting him nor will it run out of power normally. Instead, Saïx's Berserk Gauge will only deplete once he accesses his second Berserk State. In addition to retaining all his energy attacks in his fights in the previous games, Saïx also becomes able to use melee attacks in his Berserk State as he does in his normal form previously. His second Berserk State greatly augments his attacks as he gains access to several Claymores that he can plant on the ground before exploding when he slams his Claymore to the ground, launch several Claymores at once and create nearly omnidirectional shockwaves by slamming all the Claymores into the ground.
Kingdom Hearts III Re Mind
Saïx's fight is revisited in Kingdom Hearts III Re Mind. Though the first part with Xion goes the same as in the base game, once Roxas arrives the battle becomes different. With Sora and Kairi incapacitated, the player plays as Roxas against Saïx and Xemnas, who personally joins the fight. During this phase, Roxas has Xion and Lea as allies, and can perform the Thinking of You Team Attack. After some time, Xemnas leaves with Kairi, and the battle once again occurs as in the base game. This time, however, the player can choose to play as Sora or Roxas.
Data Rematch
Saix's data rematch is less upgraded compared to the other Real Organization XIII members but he is still among the strongest of them. The differences include him having more melee attacks in his Berserk Form and in his secondary Berserk Form being able to fire all of his Claymores as spinning projectiles that explode upon hitting the ground. The major difference is that all of his streams and shockwaves, as well as his thrown claymores are now purple in color and are unblockable. His secondary Berserk Form attacks have more range both width and length wise and cover most of the arena. Also, his thrown claymores inflict stun on Sora unless he's using a Formchange or has stun protection.
Videos
| Saïx—Kingdom Hearts II | Data Saïx—Kingdom Hearts II Final Mix |
| Saïx—Kingdom Hearts 358/2 Days | |
| Saïx—Kingdom Hearts III | Saïx's Recreated Data—Kingdom Hearts III Re Mind |
| Nobodies |
|---|
| Organization XIII |
| I. Xemnas | II. Xigbar | III. Xaldin | IV. Vexen | V. Lexaeus | VI. Zexion | VII. Saïx | VIII. Axel | IX. Demyx | X. Luxord | XI. Marluxia | XII. Larxene | XIII. Roxas |
| Enemy Nobodies |
| Sorcerer - Sniper - Dragoon - Berserker - Assassin - Dancer - Gambler - Reaper - Ninja - Samurai Dusk - Creeper - Specter - Twilight Thorn - Fake Vivi |
| Special Nobodies |
| Naminé - Absent Silhouettes - Organization XIII's Replica Data - Anti-Saïx - Data-Roxas - Data-Naminé |
