Mission 34: Eliminate the Aerial Masters: Difference between revisions
No edit summary |
|||
| Line 25: | Line 25: | ||
==Story summary== | ==Story summary== | ||
Roxas and Demyx head out on their mission to take out the four powerful [[Heartless]] in Agrabah. Afterward, it's time for [[Sea- | Roxas and Demyx head out on their mission to take out the four powerful [[Heartless]] in Agrabah. Afterward, it's time for [[Sea-salt ice cream|ice cream]]! | ||
==Mission walkthrough== | ==Mission walkthrough== | ||
Revision as of 16:47, 7 January 2014
| Mission 34 Eliminate the Aerial Masters Day(s): 97-100 | |||
|---|---|---|---|
 Ally: Demyx | |||
| Rank | Badges | Chests | |
| Novice | Unity Badge Ordeal Badge |
8 | |
| Heart factor | Munny factor | EXP factor | |
| x3.10 | x9.30 | x1.50 | |
| Clear Bonuses | Random Bonuses | ||
| Cure Shining Shard Blazing Shard |
Shining Shard (20%) Iron (20%) Potion (30%) None (30%) | ||
Mission 34 in Kingdom Hearts 358/2 Days takes Roxas back to Agrabah for an extermination mission. Despite Saïx saying that Roxas would be working solo after spending much time with Xion, Roxas embarks on this mission with Demyx.
Mission assignment
Summary
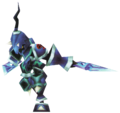
Aerial Masters have surfaced in the desert. Team up with Demyx, and eliminate them all.
Objectives
- Defeat all four Aerial Masters!
Story summary
Roxas and Demyx head out on their mission to take out the four powerful Heartless in Agrabah. Afterward, it's time for ice cream!
Mission walkthrough
Enter in the Agrabah Streets. There will be no enemies around, so now is a good time to snag the chest and Ordeal Badge. Alas, you will probably lack High Jump the first time through, and so the chest on the west scaffold will be unreachable at the moment. Continue on to Agrabah Gate. The first Aerial Master will be here, accompanied by a few Loudmouths. You will probably want to take them out first, as they can easily heal the Aerial Master through sheer numbers alone. Grab chests and then head out into the Sandswept Ruins.
The three remaining Aerial Masters will be scattered through the large area of the Ruins. One will be in the northwest corner near the sand falls, one will be in the very south end of the Ruins, and one will be in the east, between the two buildings near the east wall. There are no Loudmouths in this area, but there are Scarlet Tangos, so watch your back for Fire magic. The Unity Badge is not too far from the entrance, and it should be easy to pick up.
When you head back to the RTC point, beware. A Large Armor replaces the Aerial Master in Agrabah Gate. If you need extra heart points, you can take out him and his Loudmouth companions. If you really want extra heart points (or a Combo Tech), you can go back into the Sandswept Ruins and fight a Zip Slasher. Otherwise, head onto Agrabah Street to finish things out.
| Video |
| <youtube>TLnYRy0w3Ek</youtube> |
Challenge Mission
| Challenge Mission 34 Finish in record time | |
|---|---|
| Restrictions | |
| Level capped at 10 Enemy level +1 | |
| Grading | |
| 3 | 2:40:00 or less |
| 2 | 2:40:01-3:40:00 |
| 1 | 3:40:01-5:00:00 |
Enemies
Heartless
Treasures
| Type | Items found | Locations | Notes |
|---|---|---|---|
| Regular | Ether | Sandswept Ruins | South end. |
| Potion | Agrabah Street | Southeastern scaffolding. | |
| Potion | Agrabah Gate | Eastern rooftop. | |
| Potion | Sandswept Ruins | Northwestern corner, near sand falls. | |
| Potion | Sandswept Ruins | North end. | |
| Synthesis | Iron | Agrabah Gate | Southwest rooftop. |
| Shining Shard | Sandswept Ruins | Southeastern corner. | |
| Special | Backpack | Agrabah Streets | On the west scaffolding. High Jump required. |
| Badges | Unity Badge | Sandswept Ruins | North end. |
| Ordeal Badge | Agrabah Street | Southwest corner. |
| Kingdom Hearts 358/2 Days Missions |
|---|
| 01 | 02 | 03 | 04 | 05 | 06 | 07 | 08 | 09 | 10 | 11 | 12 | 13 | 14 | 15 | 16 | 17 | 18 | 19 | 20 | 21 | 22 | 23 | 24 | 25 | 26 | 27 | 28 | 29 | 30 | 31 | 32 | 33 | 34 | 35 | 36 | 37 | 38 | 39 | 40 | 41 | 42 | 43 | 44 | 45 | 46 | 47 | 48 | 49 | 50 | 51 | 52 | 53 | 54 | 55 | 56 | 57 | 58 | 59 | 60 | 61 | 62 | 63 | 64 | 65 | 66 | 67 | 68 | 69 | 70 | 71 | 72 | 73 | 74 | 75 | 76 | 77 | 78 | 79 | 80 | 81 | 82 | 83 | 84 | 85 | 86 | 87 | 88 | 89 | 90 | 91 | 92 | 93 |
| — Mission 00: Mission Mode Tutorial — |


