Walkthrough:Kingdom Hearts/Hollow Bastion: Difference between revisions
No edit summary |
No edit summary |
||
| Line 1: | Line 1: | ||
==<center> | ==<center><center>[[File:Hollow Bastion Logo KH.png|300px|link=]]</center></center>== | ||
<center>[[File:Hollow Bastion Logo KH.png|300px|link=]]</center> | |||
===First Visit=== | ===First Visit=== | ||
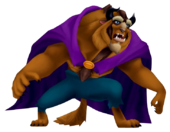
Once you land {{Wtext|Sora|c}} will feel a warmth inside, as if he's been to this place, {{Wtext|Donald|c}} makes it out that {{Wtext|Sora|c}}'s hungry, but {{Wtext|Sora|c}} blasts out that he's serious, then a roar is heard. Once you're in control, save and freeze the two bubbles with {{Wtext|Blizzard|w}} and jump on them to the {{Wtext|chest|t}} to get a {{Wtext|Dispel-G|i}}. Jump down and open the chest above the water to get Dalmatians 91, 92 and 93. Head over to the 3rd bubble and get in it and you'll find a {{Wtext|chest|t}} underwater with a {{Wtext|Dispel-G|i}} inside it. Now head back to the same bubble but this time freeze it with magic and jump onto the platform to the left and open the {{Wtext|chest|t}} there to get a {{Wtext|Blizzaga Ring|a}}. Then glide ahead to the platform with an arch for a cutscene. {{Wtext|The Beast|c}} is there and claims he simply believed to find {{Wtext|Belle|c}} and that his world fell into Darkness once she was taken. {{Wtext|Riku|c}} avoids {{Wtext|The Beast|c}}'s hit and attacks him back and {{Wtext|The Beast|c}} falls to the ground when {{Wtext|Sora|c}} appears to stop {{Wtext|Riku|c}}. Soon {{Wtext|Riku|c}} takes the Keyblade from {{Wtext|Sora|c}}, and calls him the "delivery boy". And throws the {{Wtext|Wooden Sword|w}} at him. {{Wtext|Donald|c}} and {{Wtext|Goofy|c}} leave {{Wtext|Sora|c}} to follow {{Wtext|Riku|c}} as he holds the Key. {{Wtext|Sora|c}} and {{Wtext|The Beast|c}} join together to get their loved ones. Now that you have a weak weapon, you must rely on {{Wtext|The Beast|c}} and items. Glide to the {{Wtext|chest|t}} just behind this platform to get a {{Wtext|Megalixir|i}}. Now jump to the two moving platforms and head to the {{Wtext|Castle Gates|l}}. | |||
[[File:Beast KH.png|right|170px|The Beast]] | [[File:Beast KH.png|right|170px|The Beast]] | ||
Now from here, head right and the gates will open to another section of this area. Examine the switch near the wall to cause a hanging platform to move. Then examine the other to go down to the {{Wtext|Base Level|l}}. Jump into the bubble on the left to go to the other half of this area and jump onto the platform, then backwards to get to a {{Wtext|chest|t}}, open it to get a {{Wtext|Mythril|i}}. Jump to the ice switch and "Release", it will cause a platform to extend out of the wall. Turn around for a {{Wtext|chest|i}}, open it to get a {{Wtext|Tornado-G|i}}. Glide from the left side onto the other platform and use the other ice switch and "Release". You'll have both platforms extended and can easily get across. If you spot a {{Wtext|chest|t}} on a platform to the right, open it to get a {{Wtext|Tornado-G|i}} then head back to the 2 extended platforms and go through the exit to the {{Wtext|Waterway|l}}. Inside you'll find a wall with iron bars, "Call" and {{Wtext|The Beast|c}} will clear the way. Head in and open the {{Wtext|chest|t}} to get an {{Wtext|Esuna-G|i}}. Head back to the {{Wtext|Base Level|l}} and jump into the bubble on the right to get back to the {{Wtext|Waterway|l}}. | |||
In this room there is a Save Point with a {{Wtext|chest|t}} to its left, open it to get a {{Wtext|Firaga Ring|a}}, then "Call" to clear the way. Now from here head into the bubble on the left to go further in. "Call" to get into the {{Wtext|Dungeon|l}}, there are two {{Wtext|chests|t}} here both containing {{Wtext|Float-G|i}}. There is also a {{Wtext|Blue Trinity|i}} here, but now head back and go left. | |||
Here interact with the first button on your left, then head to the button on the gate and interact with it to lock you into a small area, from here go into the new area and use the button there, it will move another wall over, then head through to where it was and interact with the button on the floor and it will move a wall revealing a bubble, jump into it to get to the next area. The button here will take you higher, use it and then go ahead to the last button to move a number of gears which eventually opens the door into the castle. Head back through the bubble and then use the buttons in reverse and head all the way back to the {{Wtext|Castle Gates|l}} and head through the great door. | |||
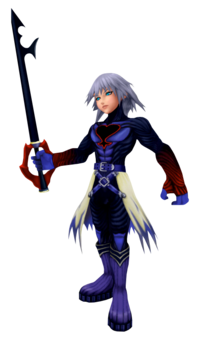
Once inside a cutscene will play showing all the Princesses of Heart in stasis with {{Wtext|Maleficent|c}} calling to the Princesses to reveal the Keyhole. In the {{Wtext|Entrance Hall|l}}, {{Wtext|Sora|c}} and {{Wtext|The Beast|c}} enter but {{Wtext|The Beast|c}} feels {{Wtext|Belle|c}} and turns around to find her, however she soon turns to a {{Wtext|Shadow|e}} and he jumps at it closing the doors behind him. {{Wtext|Riku|c}}, {{Wtext|Donald|c}} and {{Wtext|Goofy|c}} appear, where {{Wtext|Riku|c}} turns into his dark mode and casts a fireball onto {{Wtext|Sora|c}}, {{Wtext|Goofy|c}} appears out of nowhere and guards him. {{Wtext|Donald|c}} soon follows, the {{Wtext|Keyblade|w}} disappears from {{Wtext|Riku|c}}'s hand and goes into {{Wtext|Sora|c}}'s. {{Wtext|Riku|c}} calls onto his {{Wtext|Soul Eater|w}} and a boss battle begins. | |||
{{Template:WKH1SBoss | {{Template:WKH1SBoss | ||
| Line 21: | Line 17: | ||
|image=Riku Replica KH.png | |image=Riku Replica KH.png | ||
|size=200px | |size=200px | ||
|hp= | |hp=500 | ||
|strength= | |strength=31 | ||
|defense= | |defense=24 | ||
|mpr=45 | |||
|mpr= | |exp=2000 | ||
|exp= | |physical=x1.0 | ||
|physical= | |fire=x0 | ||
|fire= | |blizzard=x0 | ||
|blizzard= | |thunder=x0 | ||
|thunder= | |gravity=x0 | ||
|gravity= | |stop=x0 | ||
|stop= | |ko=x0.5 | ||
| | |other=x0.5 | ||
|prize= | |prize={{Wtext|Trinity Detect|w}} | ||
| | |strategy=When the battle starts block his initial attack to get 4 Tech EXP then counterattack to get a quick combo on him, {{Wtext|Cure|w}} after you've taken a few hits as his strength is very high for a boss. Keep attacking him and dodging and blocking him and you'll finish him in no time. | ||
|strategy= | |||
}} | }} | ||
Revision as of 15:47, 27 December 2011

First Visit
Once you land Sora will feel a warmth inside, as if he's been to this place, Donald makes it out that Sora's hungry, but Sora blasts out that he's serious, then a roar is heard. Once you're in control, save and freeze the two bubbles with Blizzard and jump on them to the chest to get a Dispel-G. Jump down and open the chest above the water to get Dalmatians 91, 92 and 93. Head over to the 3rd bubble and get in it and you'll find a chest underwater with a Dispel-G inside it. Now head back to the same bubble but this time freeze it with magic and jump onto the platform to the left and open the chest there to get a Blizzaga Ring. Then glide ahead to the platform with an arch for a cutscene. The Beast is there and claims he simply believed to find Belle and that his world fell into Darkness once she was taken. Riku avoids The Beast's hit and attacks him back and The Beast falls to the ground when Sora appears to stop Riku. Soon Riku takes the Keyblade from Sora, and calls him the "delivery boy". And throws the Wooden Sword at him. Donald and Goofy leave Sora to follow Riku as he holds the Key. Sora and The Beast join together to get their loved ones. Now that you have a weak weapon, you must rely on The Beast and items. Glide to the chest just behind this platform to get a Megalixir. Now jump to the two moving platforms and head to the Castle Gates.
Now from here, head right and the gates will open to another section of this area. Examine the switch near the wall to cause a hanging platform to move. Then examine the other to go down to the Base Level. Jump into the bubble on the left to go to the other half of this area and jump onto the platform, then backwards to get to a chest, open it to get a Mythril. Jump to the ice switch and "Release", it will cause a platform to extend out of the wall. Turn around for a chest, open it to get a Tornado-G. Glide from the left side onto the other platform and use the other ice switch and "Release". You'll have both platforms extended and can easily get across. If you spot a chest on a platform to the right, open it to get a Tornado-G then head back to the 2 extended platforms and go through the exit to the Waterway. Inside you'll find a wall with iron bars, "Call" and The Beast will clear the way. Head in and open the chest to get an Esuna-G. Head back to the Base Level and jump into the bubble on the right to get back to the Waterway.
In this room there is a Save Point with a chest to its left, open it to get a Firaga Ring, then "Call" to clear the way. Now from here head into the bubble on the left to go further in. "Call" to get into the Dungeon, there are two chests here both containing Float-G. There is also a Blue Trinity here, but now head back and go left.
Here interact with the first button on your left, then head to the button on the gate and interact with it to lock you into a small area, from here go into the new area and use the button there, it will move another wall over, then head through to where it was and interact with the button on the floor and it will move a wall revealing a bubble, jump into it to get to the next area. The button here will take you higher, use it and then go ahead to the last button to move a number of gears which eventually opens the door into the castle. Head back through the bubble and then use the buttons in reverse and head all the way back to the Castle Gates and head through the great door.
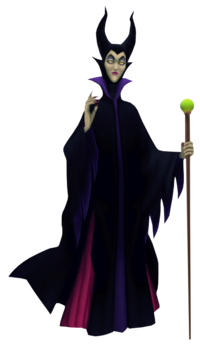
Once inside a cutscene will play showing all the Princesses of Heart in stasis with Maleficent calling to the Princesses to reveal the Keyhole. In the Entrance Hall, Sora and The Beast enter but The Beast feels Belle and turns around to find her, however she soon turns to a Shadow and he jumps at it closing the doors behind him. Riku, Donald and Goofy appear, where Riku turns into his dark mode and casts a fireball onto Sora, Goofy appears out of nowhere and guards him. Donald soon follows, the Keyblade disappears from Riku's hand and goes into Sora's. Riku calls onto his Soul Eater and a boss battle begins.
| Riku | |||||
|---|---|---|---|---|---|
| HP | STR | DEF | MP R | EXP | |
| 500 | 31 | 24 | 45 | 2000 | |
| Resistances | Weapon | Fire | Blizzard | Thunder | |
| x1.0 | x0 | x0 | x0 | ||
| Gravity | Stop | KO | Other | ||
| x0 | x0 | x0.5 | x0.5 | ||
| Rewards | Trinity Detect | ||||
| When the battle starts block his initial attack to get 4 Tech EXP then counterattack to get a quick combo on him, Cure after you've taken a few hits as his strength is very high for a boss. Keep attacking him and dodging and blocking him and you'll finish him in no time. | |||||
After this battle, Riku will flee, and the Beast will re-appear and rejoin the party. Your main goal now is to solve the puzzles of the castle and reach the top of it.
During this point, a mysterious figure in a brown coat will posses Riku.
Soon, you'll reach the top of the castle, where a battle with Maleficent will begin.
| Maleficent | |||||
|---|---|---|---|---|---|
| HP | STR | DEF | MP R | EXP | |
| Resistances | Weapon | Fire | Blizzard | Thunder | |
| Gravity | Stop | KO | Other | ||
| Rewards | [[|]] | ||||
After defeating Maleficent, another area will become avalible. Before entering, don't forget to save the game at the nearby Save Point (Type A).
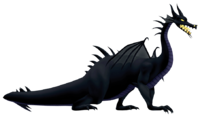
Once you enter the next room, "Riku" will stab Maleficent with a Keyblade, allowing her to unlock the true darkness in her heart. As part of this, she will transform into a Dragon.
| Dragon Maleficent | |||||
|---|---|---|---|---|---|
| HP | STR | DEF | MP R | EXP | |
| 1,200 | 31 | 24 | 48 | 6,000 | |
| Resistances | Weapon | Fire | Blizzard | Thunder | |
| x1.0 | x0.49 | x0.5 | x1.0 | ||
| Gravity | Stop | KO | Other | ||
| x0.4 | x0.3 | x0.5 | x0.5 | ||
| Rewards | Fireglow | ||||
After defeating Dragon Maleficent, a new route is open behind the Save Point. Insure your party is at high levels, as this next boss will be difficult, and only Sora will be able to fight this one. Take the path, and you'll soon encounter a large room, with stools containing the bodies of six of the Princesses of Heart:
Sora and Donald will then find themselves in front of the Keyhole (a forcefield will appear before Goofy will be able to enter), where they finally discover Kairi's comatose body lying on the ground. Sora tries to get her to wake up, but "Riku" suddenly appears and tells Sora and Donald that Kairi's heart has been within Sora's body all along, explaining a few things. He'll also mention that Kairi is a Princess of Heart, and that her Heart is needed to complete the Keyhole.
Sora suddenly grows weak, and Donald attempts to attack "Riku" to defend him, but is tossed out of the room. "Riku" will then reveal himself to be Ansem, Seeker of Darkness, and then prepares to attack Sora to get Kairi's Heart, but Sora gets back his strength and tells Ansem that there was no way he'd get Kairi's Heart.
| Ansem | |||||
|---|---|---|---|---|---|
| HP | STR | DEF | MP R | EXP | |
| Resistances | Weapon | Fire | Blizzard | Thunder | |
| Gravity | Stop | KO | Other | ||
| Rewards | [[|]] | ||||
| Sora will fight alone in this battle, as Ansem has chucked out his friends just before the battle. Ansem's moves are quite powerful, and agile, so keep your HP topped at all times. Using Glide can help you dodge a few moves. Be careful once his HP is low | |||||
After this battle, Ansem will flee, and Donald and Goofy will enter the room. Sora will then attempt to seal the Keyhole, but as it is incomplete, he is unable. Sora then spots the Keyblade that Ansem was using and will then stab himself with it, despite the protests of his friends. This releases his Heart, along with Kairi's. The Keyhole will then be completed, and the Hearts belonging to the other Princesses will return to their bodies.
Kairi's Heart returns to her body, and she wakes up, but spots a fading Sora and she runs up to him. Sadly, Sora fades away before she could touch him. Ansem then reappears, and attempts to put an end to Kairi, Donald and Goofy, but Riku suddenly gains control of his body and tells the trio to run, which they do, before Ansem retakes control of it. A lone Shadow will then appear and you'll gain control of it.
Your main mission here is to reach the entrance to the castle. You might want to jump off the castle to reach it. If the Shadow reaches the Waterway, it will automatically be taken to the first floor outside. Soon, a cutscene involving Kairi, Donald and Goofy will be shown. Donald spots the Shadow and will then attack it on the head with his staff. Kairi, however, suspects the Shadow to be Sora. Suddenly, more Shadows will appear to attack the trio. Kairi will then embrace the friendly Shadow, restoring it to it's true form: Sora!
With Sora restored, the four will then leave Hollow Bastion. The Beast, however, refuses to leave, since Belle is still inside. The party will be automatically taken back to Traverse Town.
Second Visit
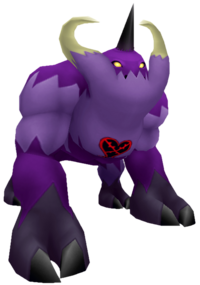
| Behemoth | |||||
|---|---|---|---|---|---|
| HP | STR | DEF | MP R | EXP | |
| 1,050 | 35 | 27 | 57 | 450 | |
| Resistances | Weapon | Fire | Blizzard | Thunder | |
| x1.0 | x0.0 | x0.0 | x0.0 | ||
| Gravity | Stop | KO | Other | ||
| x0.3 | x0.30 | x0.5 | x0.5 | ||
| Rewards | Omega Arts | ||||
| Kingdom Hearts |
|---|
| Walkthrough |
| Dive to the Heart - Destiny Islands - Traverse Town - Wonderland - Olympus Coliseum - Deep Jungle - 100 Acre Wood - Agrabah - Monstro - Atlantica - Halloween Town - Neverland - Hollow Bastion - End of the World |
| Other |
| 99 Puppies - Trinity Marks - Gummi Missions - Trophies |
