Kingdom Hearts (series)/Timeline: Difference between revisions
From the Kingdom Hearts Wiki, the Kingdom Hearts encyclopedia
Jump to navigationJump to search
No edit summary |
|||
| (28 intermediate revisions by 11 users not shown) | |||
| Line 2: | Line 2: | ||
===Official media in chronological order=== | ===Official media in chronological order=== | ||
[[File:Kingdom Hearts Series Timeline.png|thumb | [[File:Kingdom Hearts Series Timeline.png|thumb|135px]] | ||
{|cellspacing="0" cellpadding="2" style="width:86%; border-collapse:collapse" | |||
|-style="border-bottom:1px dotted" | |||
|style="width:33%" colspan="2"|'''''[[Kingdom Hearts χ Back Cover]]'''''||style="width:67%"| | |||
|-style="border-bottom:1px dotted" | |||
|style="width:3%"| | |||
|'''''[[Kingdom Hearts χ]]'''''||Runs concurrently with the latter half of ''Kingdom Hearts χ Back Cover'' and continues past its ending. | |||
|-style="border-bottom:1px dotted" | |||
| ||"[[Heart & Key]]"|| | |||
|-style="border-bottom:1px dotted" | |||
|colspan="2"|'''''[[Kingdom Hearts Union χ]]'''''|| | |||
|-style="border-bottom:1px dotted" | |||
| ||"[[Dark Footsteps]]"||Takes place before [[Quest 681: Protect the Prince Pt. 1|Quest 681]] of ''Kingdom Hearts Union χ''. | |||
|-style="border-bottom:1px dotted" | |||
|colspan="2"|"[[Destinations]]"||Includes scenes from various points in the future. | |||
|-style="border-bottom:1px dotted" | |||
|colspan="2"|"[[An Unfamiliar Town]]"||<!-- | |||
|-style="border-bottom:1px dotted" | |||
|colspan="2"|'''''[[Kingdom Hearts Missing-Link]]'''''||--> | |||
|-style="border-bottom:1px dotted" | |||
|colspan="2"|"[[Child of Destiny]]" | |||
|9 years before ''Kingdom Hearts Dark Road''. | |||
|-style="border-bottom:1px dotted" | |||
|colspan="2"|'''''[[Kingdom Hearts Dark Road]]'''''|| | |||
|-style="border-bottom:1px dotted" | |||
|colspan="2"|'''''[[Kingdom Hearts Birth by Sleep]]'''''||65 years after ''Kingdom Hearts Dark Road''. | |||
|-style="border-bottom:1px dotted" | |||
| ||"[[The Gathering]]"||Takes place during the finale of ''Kingdom Hearts Birth by Sleep''. | |||
|-style="border-bottom:1px dotted" | |||
| ||"{{c|Birth by Sleep|video}}"||Takes place during the finale of ''Kingdom Hearts Birth by Sleep''. | |||
|-style="border-bottom:1px dotted" | |||
|colspan="2"|"[[A Fragmentary Passage]]"|| | |||
|-style="border-bottom:1px dotted" | |||
|colspan="2"|'''''[[Kingdom Hearts 0.2 Birth by Sleep -A fragmentary passage-]]'''''||Takes place after ''Kingdom Hearts Birth by Sleep'' and runs concurrently with ''Kingdom Hearts'' to the end. | |||
|-style="border-bottom:1px dotted" | |||
| ||"[[Blank Points]]"||Extends from the end of ''Kingdom Hearts Birth by Sleep'' until sometime between the end of ''Kingdom Hearts II'' and ''Kingdom Hearts III''. | |||
|-style="border-bottom:1px dotted" | |||
|colspan="2"|'''''{{c|Kingdom Hearts|game}}'''''||10 years after ''Kingdom Hearts Birth by Sleep''. | |||
|-style="border-bottom:1px dotted" | |||
| ||'''''[[Kingdom Hearts 358/2 Days]]''''' (Days 1-24)||Runs concurrently with the finale of ''Kingdom Hearts'', from Kairi's rescue to the end of the game. | |||
|-style="border-bottom:1px dotted" | |||
| ||"[[Secret Story from Kingdom Hearts Concert -First Breath-]]"||Takes place during the end ''Kingdom Hearts'', sometime in days 1-16 of ''Kingdom Hearts 358/2 Days''. | |||
|-style="border-bottom:1px dotted" | |||
|colspan="2"|'''''[[Kingdom Hearts Chain of Memories]]'''''|| | |||
|-style="border-bottom:1px dotted" | |||
| ||''[[Kingdom Hearts 358/2 Days]]'' (Days 25-49)||Runs concurrently with ''Kingdom Hearts Chain of Memories''. | |||
|-style="border-bottom:1px dotted" | |||
|colspan="2"|''[[Kingdom Hearts 358/2 Days]]'' (Days 50-358)|| | |||
|-style="border-bottom:1px dotted" | |||
| ||"[[Another side, Another story...]]"||Takes place during the finale of ''Kingdom Hearts 358/2 Days''. | |||
|-style="border-bottom:1px dotted" | |||
|colspan="2"|'''''[[Kingdom Hearts II]]'''''||1 year after ''Kingdom Hearts''. | |||
|-style="border-bottom:1px dotted" | |||
| ||'''''[[Kingdom Hearts coded]]'''''||Takes place between the finale of ''Kingdom Hearts II'' and its epilogue. | |||
|-style="border-bottom:1px dotted" | |||
|colspan="2"|"[[Signs of What's Next]]"|| | |||
|-style="border-bottom:1px dotted" | |||
| ||"[[Destiny]]"|| | |||
|-style="border-bottom:1px dotted" | |||
|colspan="2"|'''''[[Kingdom Hearts 3D: Dream Drop Distance]]'''''|| | |||
|-style="border-bottom:1px dotted" | |||
|colspan="2"|"[[Another Guardian of Light]]"|| | |||
|-style="border-bottom:1px dotted" | |||
|colspan="2"|"[[2.9 - The First Volume]]"|| | |||
|-style="border-bottom:1px dotted" | |||
|colspan="2"|'''''[[Kingdom Hearts III]]'''''|| | |||
|-style="border-bottom:1px dotted" | |||
| ||''[[Kingdom Hearts III Re Mind]]''||Takes place between the finale of ''Kingdom Hearts III'' and its ending. | |||
|-style="border-bottom:1px dotted" | |||
|colspan="2"|"{{c|Yozora|video}}"|| | |||
|-style="border-bottom:1px dotted" | |||
| ||{{c|Secret Episode|3rm}}|| | |||
|-style="border-bottom:1px dotted" | |||
| ||"[[Like, Is Any of This for Real or Not?]]"|| | |||
|-style="border-bottom:1px dotted" | |||
|colspan="2"|'''''[[Kingdom Hearts Melody of Memory]]'''''||Ending takes place 1 year after ''Kingdom Hearts III''. | |||
|-style="border-bottom:1px dotted" | |||
| ||[[Limitcut Episode]]||Runs concurrently with ''Kingdom Hearts Melody of Memory''. | |||
|- | |||
|colspan="2"|"[[Another Key]]"|| | |||
|} | |||
===Timeline of Events=== | ===Timeline of Events=== | ||
| Line 79: | Line 122: | ||
|[[File:The Third to Arrive 01 KHUX.png|200px]]||The five leaders of the Dandelions gather in the Keyblade Graveyard: Ephemer, Skuld, Lauriam, [[Brain]] and Ventus.||[[File:KHUCHI icon.png]] | |[[File:The Third to Arrive 01 KHUX.png|200px]]||The five leaders of the Dandelions gather in the Keyblade Graveyard: Ephemer, Skuld, Lauriam, [[Brain]] and Ventus.||[[File:KHUCHI icon.png]] | ||
|- | |- | ||
|[[File:A Witch Out Of Time 01 KHUX.png|200px]]||Daybreak Town is rebuilt as a | |[[File:A Witch Out Of Time 01 KHUX.png|200px]]||Daybreak Town is rebuilt as a [[data world]] to serve as the new home to the Dandelions. All of its residents have their memories of the Keyblade War erased as if it never happened, repeating their training and adventures. [[Maleficent]] appears from the future following her demise in [[Hollow Bastion]], showing up in one of the hologram worlds.||[[File:KHCHI icon.png]]<br>[[File:KHUCHI icon.png]] | ||
|- | |- | ||
|[[File:The Plan 01 KHUX.png|200px]]||The Dandelions leaders try to figure out their roles and how to rebuild their world. Brain voices his intent to be the "virus in the system" and change destiny from what is written in the Book. Meanwhile, Maleficent is approached by a shadowy entity known only as "{{c|Darkness|character}}" who promises to return her to her own time.||[[File:KHUCHI icon.png]] | |[[File:The Plan 01 KHUX.png|200px]]||The Dandelions leaders try to figure out their roles and how to rebuild their world. Brain voices his intent to be the "virus in the system" and change destiny from what is written in the Book. Meanwhile, Maleficent is approached by a shadowy entity known only as "{{c|Darkness|character}}" who promises to return her to her own time.||[[File:KHUCHI icon.png]] | ||
|- | |- | ||
|[[File:It's Already Begun 01 KHUX.png|200px]]||Player continues to go on adventures with fellow Dandelions in data versions of worlds. However, this peaceful stasis is | |[[File:It's Already Begun 01 KHUX.png|200px]]||Player continues to go on adventures with fellow Dandelions in data versions of worlds. However, this peaceful stasis is interrupted when data glitches, apparitions, and Darklings appear. Through Brain's deductive reasoning, the Union leaders discover that in escaping the Keyblade War, they were all trapped in a data version of Daybreak Town.||[[File:KHUCHI icon.png]] | ||
|- | |- | ||
|[[File:Elrena 01 KHUX.png|200px]]||Lauriam begins his investigation into his sister's murder while Brain concocts his own plans to thwart the prophesied triumph of darkness. Meanwhile, "Darkness" informs Maleficent of a device known as the [[lifeboat]], which can purportedly return her to her own time. Lauriam confronts her, but she defeats him and manages to escape in one of the pods.||[[File:KHUCHI icon.png]] | |[[File:Elrena 01 KHUX.png|200px]]||Lauriam begins his investigation into his sister's murder while Brain concocts his own plans to thwart the prophesied triumph of darkness. Meanwhile, "Darkness" informs Maleficent of a device known as the [[lifeboat]], which can purportedly return her to her own time. Lauriam confronts her, but she defeats him and manages to escape in one of the pods.||[[File:KHUCHI icon.png]] | ||
|- | |- | ||
|[[File:The | |[[File:The Plot Thickens 01 KHUX.png|200px]]||While investigating the glitches, Brain discovers that Ventus was never meant to be one of the Dandelion's leaders. Together with Ephemer, they confront him to try and ascertain who appointed him among their ranks. They eventually reach the conclusion that Darkness disguised themselves as Ava to appoint Ventus among their ranks, replacing Strelitzia. They head back to the clock tower to inform Lauriam.||[[File:KHUCHI icon.png]] | ||
|- | |- | ||
|[[File:The Escape 01 KHUX.png|200px]]||With Darkness's help, Maleficient escapes to the real world from the data world, but not her own time. The entity suggests using a second pod to get there; it will not be joining her, however, since it has some unfinished business.||[[File:KHUCHI icon.png]] | |[[File:The Escape 01 KHUX.png|200px]]||With Darkness's help, Maleficient escapes to the real world from the data world, but not her own time. The entity suggests using a second pod to get there; it will not be joining her, however, since it has some unfinished business.||[[File:KHUCHI icon.png]] | ||
| Line 103: | Line 146: | ||
|[[File:A Seed of Light 01 KHUX.png|200px]]||Although he was tasked only with observing, Luxu makes his way into Data-Daybreak Town. He finds the data of one individual, calling them the "true Dandelion", and takes them back to the real world. There, he meets another Darkness, and discovers the dark entities' true goal: expansion and infection. Luxu uses a lifeboat pod to send the "true Dandelion" into the future.||[[File:KHUCHI icon.png]] | |[[File:A Seed of Light 01 KHUX.png|200px]]||Although he was tasked only with observing, Luxu makes his way into Data-Daybreak Town. He finds the data of one individual, calling them the "true Dandelion", and takes them back to the real world. There, he meets another Darkness, and discovers the dark entities' true goal: expansion and infection. Luxu uses a lifeboat pod to send the "true Dandelion" into the future.||[[File:KHUCHI icon.png]] | ||
|- | |- | ||
|[[File:Resolutions 02 KHUX.png|200px]]||The fight with Darkness leaves Ventus unconscious, while the others are trying to figure out their next move. Elrena and her Chirithy with news of seeing Strelitzia, further evidence of the glitches caused by the data world's increasingly unstable state. The seven head to the basement of the Clock Tower where the lifeboats are | |[[File:Resolutions 02 KHUX.png|200px]]||The fight with Darkness leaves Ventus unconscious, while the others are trying to figure out their next move. Elrena and her Chirithy arrive with news of seeing Strelitzia, further evidence of the glitches caused by the data world's increasingly unstable state. The seven head to the basement of the Clock Tower where the lifeboats are contained. The Union Leaders split up: Brain, Lauriam, Elrena, and Ventus take pods into the real world, while Skuld, Player and Ephemer remain in the Data World to attend to the other Dandelions. Before leaving, Brain passes down his [[Master's Defender]] Keyblade and the Book of Prophecies to Ephemer, who was originally the intended recipient.||[[File:KHUCHI icon.png]] | ||
|- | |- | ||
|[[File:I'll Figure It Out 01 KHUX.png|200px]]||As Brain and the others make it to the real world, they realize that the real Daybreak Town is also collapsing. Brain quickly sends Ventus, Lauriam, and Elrena into the future. While he waits the for the others, he encounters Luxu. Luxu explains that the lifeboat was an incomplete form of travel: one would need a medium and someone who remembers them at their destination in order to regain both their body and their memories. What a shame, Luxu continues, that Brain is so smart but only has one lifetime to work with.||[[File:KHUCHI icon.png]] | |[[File:I'll Figure It Out 01 KHUX.png|200px]]||As Brain and the others make it to the real world, they realize that the real Daybreak Town is also collapsing. Brain quickly sends Ventus, Lauriam, and Elrena into the future. While he waits the for the others, he encounters Luxu. Luxu explains that the lifeboat was an incomplete form of travel: one would need a medium and someone who remembers them at their destination in order to regain both their body and their memories. What a shame, Luxu continues, that Brain is so smart but only has one lifetime to work with.||[[File:KHUCHI icon.png]] | ||
| Line 131: | Line 174: | ||
|[[File:Opening 03 KHIII.png|200px]]||Over the course of two years, Xehanort and Eraqus become very close. They often play [[Alba & Ater]] together, a type of chess. Even from this young age, Xehanort shows great interest in the Keyblade War and the Lost Masters of yore.||[[File:KH3 icon.png]]<br>[[File:KHDR icon.png]] | |[[File:Opening 03 KHIII.png|200px]]||Over the course of two years, Xehanort and Eraqus become very close. They often play [[Alba & Ater]] together, a type of chess. Even from this young age, Xehanort shows great interest in the Keyblade War and the Lost Masters of yore.||[[File:KH3 icon.png]]<br>[[File:KHDR icon.png]] | ||
|- | |- | ||
|[[File:Gone Missing 01 KHDR.png|200px]]||Master Odin sends a group of seven | |[[File:Gone Missing 01 KHDR.png|200px]]||Master Odin sends a group of seven upper classmen on a trip to other worlds to prepare for their [[Mark of Mastery Exam]]. On this journey, [[Hoder]], [[Heimdall]], [[Helgi]], and [[Sigrun]] meet an unfortunate end at Maleficent's hands.||[[File:KHDR icon.png]] | ||
|- | |- | ||
|[[File:An Unexpected Task 01 KHDR.png|200px]]||Master Oding informs Xehanort and his classmates of the seven | |[[File:An Unexpected Task 01 KHDR.png|200px]]||Master Oding informs Xehanort and his classmates of the seven upper classmen's disappearance. The young wielders are tasked with finding their whereabouts. One of the group, [[Baldr]], remains behind, as his sister Hoder is one of the missing.||[[File:KHDR icon.png]] | ||
|- | |- | ||
|[[File:Where Monsters Roam 01 KHDR.png|200px]]||Xehanort and his friends' first stop is [[Agrabah]]. The world is still in the process of reforming following the Keyblade War, so it is uninhabited. The wielders continue their search in [[Wonderland]], where they learn that someone can unknowingly harbor darkness in their heart. They also discuss the possibility of a world's order being founded in darkness.||[[File:KHDR icon.png]] | |[[File:Where Monsters Roam 01 KHDR.png|200px]]||Xehanort and his friends' first stop is [[Agrabah]]. The world is still in the process of reforming following the Keyblade War, so it is uninhabited. The wielders continue their search in [[Wonderland]], where they learn that someone can unknowingly harbor darkness in their heart. They also discuss the possibility of a world's order being founded in darkness.||[[File:KHDR icon.png]] | ||
| Line 139: | Line 182: | ||
|[[File:Fallen to Darkness 01 KHDR.png|200px]]||Baldr learns of his sister's death, falling into a deep depression. Over the course of a week, his exceptionally sensative heart is overtaken by darkness. He emerges convinced that he must purge the light.||[[File:KHDR icon.png]] | |[[File:Fallen to Darkness 01 KHDR.png|200px]]||Baldr learns of his sister's death, falling into a deep depression. Over the course of a week, his exceptionally sensative heart is overtaken by darkness. He emerges convinced that he must purge the light.||[[File:KHDR icon.png]] | ||
|- | |- | ||
|[[File:A Bitter Clue 01 KHDR.png|200px]]||While investigating [[Dwarf Woodlands]], [[Vor]] consults the [[Magic Mirror]] about her future, confirming her doubts about her current trajectory. As Xehanort, Eraqus, and Vor continue to search the world, the | |[[File:A Bitter Clue 01 KHDR.png|200px]]||While investigating [[Dwarf Woodlands]], [[Vor]] consults the [[Magic Mirror]] about her future, confirming her doubts about her current trajectory. As Xehanort, Eraqus, and Vor continue to search the world, the upper classman [[Vidar]] reveals himself. He offers Vor the opportunity to join him in completing some important task, and the two depart despite Eraqus's protests.||[[File:KHDR icon.png]] | ||
|- | |- | ||
|[[File:What Order Needs 01 KHDR.png|200px]]||After regrouping in Scala ad Caelum, Eraqus and [[Bragi]] leave in search of Vor, while Xehanort, [[Hermod]], and [[Urd]] decide to look for more answers in [[Beast's Castle]]. There, Urd encounters another one of the | |[[File:What Order Needs 01 KHDR.png|200px]]||After regrouping in Scala ad Caelum, Eraqus and [[Bragi]] leave in search of Vor, while Xehanort, [[Hermod]], and [[Urd]] decide to look for more answers in [[Beast's Castle]]. There, Urd encounters another one of the upper classmen, [[Vala]], who offers Urd a chance to join their mission. Urd declines, and [[Vali]] returns the magic rose, which the upper classmen had mysteriously stolen from the [[Beast]].||[[File:KHDR icon.png]] | ||
|- | |- | ||
|[[File:Uneasy Order 01 KHDR.png|200px]]||Xehanort, Hermod, Urd, Eraqus, and Bragi reunite in Agrabah's [[Cave of Wonders]], all searching for the Magic Lamp. Upon reaching the artifact, Vidar and Vor appear. They explain that the | |[[File:Uneasy Order 01 KHDR.png|200px]]||Xehanort, Hermod, Urd, Eraqus, and Bragi reunite in Agrabah's [[Cave of Wonders]], all searching for the Magic Lamp. Upon reaching the artifact, Vidar and Vor appear. They explain that the upper classmen were plotting to steal items that are central to each world's order, thus disrupting the order and forcing a pure light to emerge from the chaos.||[[File:KHDR icon.png]] | ||
|- | |- | ||
|[[File:To Face True Darkness 01 KHDR.png|200px]]||Xehanort and his peers return to Master Odin, who determines that the young wielders are not equipped to handle the sitation. Odin informs his pupils of {{c|Darkness|character|true darkness}}, the thirteen ancient formless Darknesses that pose a serious threat. He reveals that Vidar is gathering pure lights to summon [[Kingdom Hearts]], hoping to purge the worlds and, with them, true darkness.||[[File:KHDR icon.png]] | |[[File:To Face True Darkness 01 KHDR.png|200px]]||Xehanort and his peers return to Master Odin, who determines that the young wielders are not equipped to handle the sitation. Odin informs his pupils of {{c|Darkness|character|true darkness}}, the thirteen ancient formless Darknesses that pose a serious threat. He reveals that Vidar is gathering pure lights to summon [[Kingdom Hearts]], hoping to purge the worlds and, with them, true darkness.||[[File:KHDR icon.png]] | ||
|- | |- | ||
|[[File:Darkness or Light 01 KHDR.png|200px]]||Baldr unexpectedly returns to his peers, explaining that he was tasked with learning more about darkness and relating his sister's fate. To help continue their investigation, he opens a gate to [[Olympus Coliseum]]. The wielders are split up in the [[Underworld]]: Xehanot and Eraqus make a deal with [[Hades]], Baldr and Bragi are left to fight [[Cerberus]], and Hermod and Urd try to regroup with the others. Hades summons the four felled | |[[File:Darkness or Light 01 KHDR.png|200px]]||Baldr unexpectedly returns to his peers, explaining that he was tasked with learning more about darkness and relating his sister's fate. To help continue their investigation, he opens a gate to [[Olympus Coliseum]]. The wielders are split up in the [[Underworld]]: Xehanot and Eraqus make a deal with [[Hades]], Baldr and Bragi are left to fight [[Cerberus]], and Hermod and Urd try to regroup with the others. Hades summons the four felled upper classmen's spirits from [[The Final World]], allowing Xehanort and Eraqus to learn more about what had transpired.||[[File:KHDR icon.png]] | ||
|- | |- | ||
|[[File:Bragi's True Form 01 KHDR.png|200px]]||Baldr, who had previously been hiding his darkness, turns his Keyblade on Bragi, but is quickly and decisively overpowerd. Deciding that Baldr is unfit to be a vessel, Bragi tells him that he is choosing to disappear forever. Bragi walks off, never to be seen by any of his classmates again.||[[File:KHDR icon.png]] | |[[File:Bragi's True Form 01 KHDR.png|200px]]||Baldr, who had previously been hiding his darkness, turns his Keyblade on Bragi, but is quickly and decisively overpowerd. Deciding that Baldr is unfit to be a vessel, Bragi tells him that he is choosing to disappear forever. Bragi walks off, never to be seen by any of his classmates again.||[[File:KHDR icon.png]] | ||
| Line 153: | Line 196: | ||
|[[File:Left Behind 01 KHDR.png|200px]]||Xehanort, Eraqus, Hermod, and Urd are hurled into a [[Corridor of Darkness]]. Hermod and Urd try to resist but eventually succumb to the darkness, with Baldr delivering the finishing blow. Xehanort and Eraqus collapse, but they are found by Master Odin.||[[File:KHDR icon.png]] | |[[File:Left Behind 01 KHDR.png|200px]]||Xehanort, Eraqus, Hermod, and Urd are hurled into a [[Corridor of Darkness]]. Hermod and Urd try to resist but eventually succumb to the darkness, with Baldr delivering the finishing blow. Xehanort and Eraqus collapse, but they are found by Master Odin.||[[File:KHDR icon.png]] | ||
|- | |- | ||
|[[File:VS Vidar 01 KHDR.png|200px]]||Scala ad Caelum falls under attack from Baldr's darkness. As Master Odin rushes to defend the city, Xehanort and Eraqus encounter [[Vali, Vala, and Vidar]]. Upon learning that Vidar had known about Baldr's darkness, Eraqus becomes angered and clashes with the | |[[File:VS Vidar 01 KHDR.png|200px]]||Scala ad Caelum falls under attack from Baldr's darkness. As Master Odin rushes to defend the city, Xehanort and Eraqus encounter [[Vali, Vala, and Vidar]]. Upon learning that Vidar had known about Baldr's darkness, Eraqus becomes angered and clashes with the upper classmen. Ultimately, the fight calms down, and all of the wielders race to the central tower to rescue Vor.||[[File:KHDR icon.png]] | ||
|- | |- | ||
|[[File:A Place to Return 01 KHDR.png|200px]]||Baldr reveals to Vor that he – or, his darkness – was responsible for the deaths of Hoder, Heimdall, Helgi, Sigrun, Bragi, Urd, and Hermod. A fight breaks out, and Vali, Vala, and Vidar manage to save Vor from one of Baldr's attacks. However, Vor and the | |[[File:A Place to Return 01 KHDR.png|200px]]||Baldr reveals to Vor that he – or, his darkness – was responsible for the deaths of Hoder, Heimdall, Helgi, Sigrun, Bragi, Urd, and Hermod. A fight breaks out, and Vali, Vala, and Vidar manage to save Vor from one of Baldr's attacks. However, Vor and the upper classmen are struck down when Baldr's darkness manifests as [[Hringhorn]], leaving only Xehanort and Eraqus left to stop him.||[[File:KHDR icon.png]] | ||
|- | |- | ||
|[[File:Two Kinds of People 01 KHDR.png|200px]]||Atop Scala ad Caelum's tower, Xehanort and Eraqus meet with Baldr for the final showdown. Baldr explains that he is purging thirteen lights – the seven | |[[File:Two Kinds of People 01 KHDR.png|200px]]||Atop Scala ad Caelum's tower, Xehanort and Eraqus meet with Baldr for the final showdown. Baldr explains that he is purging thirteen lights – the seven upper classmen and his six classmates – in order to summon Kingdom Hearts, and had indeed manipluated Vidar into persuing the same. Xehanort overpowers Hringhorn, and Hoder's spirit emerges from Xehanort to quell Baldr. Baldr claims that he and Xehanort are alike, and urges his former friend to seek answers in the darkness. In the end, Xehanort is forced to finish Baldr with Master Odin's assistance.||[[File:KHDR icon.png]] | ||
|- | |- | ||
|[[File:Bragi's True Form 02 KHDR.png|200px]]||One month later, Xehanort and Eraqus place flowers in the cemetery at Scala ad Caelum. Xehanort, Eraqus, and Master Odin have all been greatly affected by the events that had taken place. Odin plans to retire, so he wants the wielders to prepare for their Mark of Mastery exam. As the two friends leave the cemetery, [[Luxu]] appears behind them. He lifts his hood, revealing Bragi's face.||[[File:KHDR icon.png]] | |[[File:Bragi's True Form 02 KHDR.png|200px]]||One month later, Xehanort and Eraqus place flowers in the cemetery at Scala ad Caelum. Xehanort, Eraqus, and Master Odin have all been greatly affected by the events that had taken place. Odin plans to retire, so he wants the wielders to prepare for their Mark of Mastery exam. As the two friends leave the cemetery, [[Luxu]] appears behind them. He lifts his hood, revealing Bragi's face.||[[File:KHDR icon.png]] | ||
|- | |- | ||
|[[File:A Cloaked Stranger 01 KHDR.png|200px]]||One year after the | |[[File:A Cloaked Stranger 01 KHDR.png|200px]]||One year after the upper classmen incident, Xehanort embarks on a journey to other worlds in preparation for their Mark of Mastery exam. Xehanort meets the Master of Masters and is gifted a [[Black Coat]] which will shield him from darkness. In exchange, the Lost Master only wants Xehanort to look at the hearts of others and broaden his view of the world.||[[File:KHDR icon.png]] | ||
|- | |- | ||
|[[File:An Encounter 01 KHIIIRM.png|200px]]||Xehanort returns to the Keyblade Graveyard, now jaded and cynical of what he has seen of the worlds and of human nature. He confides the results of his journey with the Master of Masters. With a little bit of coaxing from him, Xehanort is determined to become the Dark Seeker, with the aim to save the worlds from a "false light" and return balance.||[[File:3RM icon.png]]<br>[[File:KHDR icon.png]] | |[[File:An Encounter 01 KHIIIRM.png|200px]]||Xehanort returns to the Keyblade Graveyard, now jaded and cynical of what he has seen of the worlds and of human nature. He confides the results of his journey with the Master of Masters. With a little bit of coaxing from him, Xehanort is determined to become the Dark Seeker, with the aim to save the worlds from a "false light" and return balance.||[[File:3RM icon.png]]<br>[[File:KHDR icon.png]] | ||
| Line 167: | Line 210: | ||
|[[File:Where It Started 01 KH3D.png|200px]]||Sometime during his travels, Xehanort is approached by Ansem and is recruited into the [[Real Organization XIII]], destined to take part in the Second Keyblade War. After this foray into the future, Xehanort is returned to his own time with no memories of the trip.||[[File:KH3D icon.png]]<br>[[File:KHDR icon.png]] | |[[File:Where It Started 01 KH3D.png|200px]]||Sometime during his travels, Xehanort is approached by Ansem and is recruited into the [[Real Organization XIII]], destined to take part in the Second Keyblade War. After this foray into the future, Xehanort is returned to his own time with no memories of the trip.||[[File:KH3D icon.png]]<br>[[File:KHDR icon.png]] | ||
|- | |- | ||
|[[File:The Departure 01 KHDR.png|200px]]||Four years after the | |[[File:The Departure 01 KHDR.png|200px]]||Four years after the upper classmen incident, Xehanort and Eraqus visit a cemetery in Scala ad Caelum. Xehanort places flowers on four gravestones, determined to see still more other worlds before undertaking the Mark of Mastery exam. Embarking on another journey, Xehanort returns to Wonderland and speaks to the Queen of Hearts, hoping to better understand the nature of her darkness.||[[File:KHDR icon.png]] | ||
|- | |- | ||
|[[File:Gambit 01 KHIII.png|200px]]||Six years after the incident, Xehanort and Eraqus both pass their exams and earn the Mark of Mastery. Xehanort is bequeathed the No Name, while Eraqus is bequeathed the Master's Defender.||[[File:KHDR icon.png]] | |[[File:Gambit 01 KHIII.png|200px]]||Six years after the incident, Xehanort and Eraqus both pass their exams and earn the Mark of Mastery. Xehanort is bequeathed the No Name, while Eraqus is bequeathed the Master's Defender.||[[File:KHDR icon.png]] | ||
| Line 175: | Line 218: | ||
|[[File:Flashback The Keyblade Masters 01 KHBBS.png|200px]]||54 have passed since the uppserclassmen incident. Xehanort and Eraqus have both grown into old men, but Xehanort remains fixated on Kingdom Hearts and the Lost Masters. In the Land of Departure, Xehanort reveals his intentions to restart the Keyblade War and learn its many secrets. Eraqus, outraged by his recklessness, confronts him. In the ensuing clash, Xehanort scars his old friend's face. The two bitterly part ways.||[[File:BBS icon.png]]<br>[[File:KHDR icon.png]] | |[[File:Flashback The Keyblade Masters 01 KHBBS.png|200px]]||54 have passed since the uppserclassmen incident. Xehanort and Eraqus have both grown into old men, but Xehanort remains fixated on Kingdom Hearts and the Lost Masters. In the Land of Departure, Xehanort reveals his intentions to restart the Keyblade War and learn its many secrets. Eraqus, outraged by his recklessness, confronts him. In the ensuing clash, Xehanort scars his old friend's face. The two bitterly part ways.||[[File:BBS icon.png]]<br>[[File:KHDR icon.png]] | ||
|- | |- | ||
|[[File:Former Friends 01 KHDR.png|200px]]||Xehanort continues his investigation of anicient mysteries, but even though 64 years have passed since the | |[[File:Former Friends 01 KHDR.png|200px]]||Xehanort continues his investigation of anicient mysteries, but even though 64 years have passed since the upper classmen incident, Xehanort cannot let something from his childhood go. In his dreams, he had seen a group of friends. Desparate for answers, he consults the Magic Mirror, who reveals that those friends were indeed real people. One of then, Ventus, is even still alive, having just arrived in the Keyblade Graveyard from the past.||[[File:KHUCHI icon.png]]<br>[[File:KHDR icon.png]] | ||
|- | |- | ||
|[[File:Flashback Vanitas's Making 01 KHBBS.png|200px]]||Xehanort discovers Ventus and trains him as his apprentice over the course of a year. To help recreate the Keyblade War and summon Kingdom Hearts, Xehanort would remove the darkness from the boy's heart and split it into pure light and pure darkness. Ventus, however, would not unleash his inner darkness willingly, so Xehanort extracts the darkness himself, creating [[Vanitas]]. This severely damages Ventus's heart and leaves him in a comatose state and without memories of the incident.||[[File:BBS icon.png]]<br>[[File:KHDR icon.png]] | |[[File:Flashback Vanitas's Making 01 KHBBS.png|200px]]||Xehanort discovers Ventus and trains him as his apprentice over the course of a year. To help recreate the Keyblade War and summon Kingdom Hearts, Xehanort would remove the darkness from the boy's heart and split it into pure light and pure darkness. Ventus, however, would not unleash his inner darkness willingly, so Xehanort extracts the darkness himself, creating [[Vanitas]]. This severely damages Ventus's heart and leaves him in a comatose state and without memories of the incident.||[[File:BBS icon.png]]<br>[[File:KHDR icon.png]] | ||
| Line 181: | Line 224: | ||
|[[File:Birth by Sleep 01 KHBBS.png|200px]]||Xehanort decides to lay Ventus's comatose body to rest on his home world of Destiny Islands. What is left of Ventus's fractured heart forms a connection with another young heart – that of a boy on Destiny Islands, [[Sora]]. With Sora's help, Ventus is slowly able to heal his own heart. Before Xehanort leaves Ventus for good, Ventus regains some vague consciousness, summoning his Keyblade. Xehanort, once again seeing opportunity in the young Ventus, decides to visit his old friend Eraqus. ||[[File:BBS icon.png]] | |[[File:Birth by Sleep 01 KHBBS.png|200px]]||Xehanort decides to lay Ventus's comatose body to rest on his home world of Destiny Islands. What is left of Ventus's fractured heart forms a connection with another young heart – that of a boy on Destiny Islands, [[Sora]]. With Sora's help, Ventus is slowly able to heal his own heart. Before Xehanort leaves Ventus for good, Ventus regains some vague consciousness, summoning his Keyblade. Xehanort, once again seeing opportunity in the young Ventus, decides to visit his old friend Eraqus. ||[[File:BBS icon.png]] | ||
|- | |- | ||
|[[File:Reunited 01 KHDR.png|200px]]|| | |[[File:Reunited 01 KHDR.png|200px]]||Xehanort brings Ventus to the Land of Departure, where he meets Eraqus's pupils [[Terra]] and [[Aqua]]. Eraqus welcomes his old friend, willing to put their past behind them. Xehanort explains that he belives Ventus could be the prophesised Child of Destiny – as Xehanort stands too close to the darkness, it would be better for a true heir to light to train the boy. Their musings are inturrupted as Ventus lets out a scream, his injured heart not being able to withstand the new environment.||[[File:BBS icon.png]]<br>[[File:KHDR icon.png]] | ||
|- | |- | ||
|[[File:Darkness Disguised 01 KHDR.png|200px]]||On his way out of the Land of Departure, Xehanort speaks with Vanitas about the original thirteen Darknesses. Many of ancient entities are trapped within the Lost Masters or in a data world; one, however, was said to be disguised as an ally of light. Xehanort probes Vanitas, himself a dark being, about what he knows of these original Darknesses. Although Vanitas denies any relation, Xehanort remains convinced that he is a true Darkness that was lingering inside Ventus.||[[File:KHDR icon.png]] | |[[File:Darkness Disguised 01 KHDR.png|200px]]||On his way out of the Land of Departure, Xehanort speaks with Vanitas about the original thirteen Darknesses. Many of ancient entities are trapped within the Lost Masters or in a data world; one, however, was said to be disguised as an ally of light. Xehanort probes Vanitas, himself a dark being, about what he knows of these original Darknesses. Although Vanitas denies any relation, Xehanort remains convinced that he is a true Darkness that was lingering inside Ventus.||[[File:KHDR icon.png]] | ||
| Line 193: | Line 236: | ||
|[[File:Mark of Mastery 01 KHBBS.png|200px]]||Terra and Aqua prepare to take their Mark of Mastery exam. Eraqus, wanting to bury the hatchet with Xehanort, invites his old friend to observe the exam. Xehanort accepts, but secretly starts to put his plans into motion.||[[File:BBS icon.png]] | |[[File:Mark of Mastery 01 KHBBS.png|200px]]||Terra and Aqua prepare to take their Mark of Mastery exam. Eraqus, wanting to bury the hatchet with Xehanort, invites his old friend to observe the exam. Xehanort accepts, but secretly starts to put his plans into motion.||[[File:BBS icon.png]] | ||
|- | |- | ||
|[[File:Another Road 02 KHBBS.png|200px]]||Aqua passes the exam, while Terra fails, as Eraqus is concerned about the young man's ability to control his | |[[File:Another Road 02 KHBBS.png|200px]]||Aqua passes the exam, while Terra fails, as Eraqus is concerned about the young man's ability to control his inner darkness. Seeing opportunity in his instability, Xehanort coaches the Terra into channeling his darkness, not resisting it, as the surest way of obtaining more power.||[[File:BBS icon.png]] | ||
|- | |- | ||
|[[File:The Masked Boy 01 KHBBS.png|200px]]||Shortly after, Xehanort disappears. Meanwhile, [[Yen Sid]] informs Eraqus of a new threat: the [[Unversed]], monsters who feed on negative emotions and have been causing a ruckus in many worlds. Eraqus tasks Terra and Aqua to deal with the threat, presenting Terra with a second chance at proving himself. Secretly, however, he tasks Aqua to observe and keep an eye on him, and to immediately bring him back should he be seduced by the darkness. As Terra departs on his mission, Vanitas appears before Ventus and taunts him regarding Terra's well-being and future. Worried about his friend, Ventus rushes after him, leaving his home behind. Eraqus tasks Aqua to bring him back immediately.||[[File:BBS icon.png]] | |[[File:The Masked Boy 01 KHBBS.png|200px]]||Shortly after, Xehanort disappears. Meanwhile, [[Yen Sid]] informs Eraqus of a new threat: the [[Unversed]], monsters who feed on negative emotions and have been causing a ruckus in many worlds. Eraqus tasks Terra and Aqua to deal with the threat, presenting Terra with a second chance at proving himself. Secretly, however, he tasks Aqua to observe and keep an eye on him, and to immediately bring him back should he be seduced by the darkness. As Terra departs on his mission, Vanitas appears before Ventus and taunts him regarding Terra's well-being and future. Worried about his friend, Ventus rushes after him, leaving his home behind. Eraqus tasks Aqua to bring him back immediately.||[[File:BBS icon.png]] | ||
| Line 213: | Line 256: | ||
|[[File:Memorized 04 KHBBS.png|200px]]||Ventus, depressed and despondent, encounters the exuberant [[Lea]] and his sarcastic best friend [[Isa]]. He is immediately challenged into a friendly fight with Lea and wins. His spirits lifted from the banter between the friendly duo, Ventus returns to his own mission of finding Terra.||[[File:BBS icon.png]] | |[[File:Memorized 04 KHBBS.png|200px]]||Ventus, depressed and despondent, encounters the exuberant [[Lea]] and his sarcastic best friend [[Isa]]. He is immediately challenged into a friendly fight with Lea and wins. His spirits lifted from the banter between the friendly duo, Ventus returns to his own mission of finding Terra.||[[File:BBS icon.png]] | ||
|- | |- | ||
|[[File:Where the Heart Goes 04 KHBBS.png|200px]]||Much to the annoyance and dismay of castle guards [[Dilan]] and [[Aeleus]], Lea and Isa repeatedly infiltrate the castle dungeon where they meet and befriend a mysterious young girl, dubbed merely "[[Subject X]]." The two swear | |[[File:Where the Heart Goes 04 KHBBS.png|200px]]||Much to the annoyance and dismay of castle guards [[Dilan]] and [[Aeleus]], Lea and Isa repeatedly infiltrate the castle dungeon where they meet and befriend a mysterious young girl, dubbed merely "[[Subject X]]." The two swear an oath to break her out one day.||[[File:BBS icon.png]]<br>[[File:KH3 icon.png]] | ||
|- | |- | ||
|[[File:The Million Dreams Award 02 KHBBS.png|200px]]||On their adventure, each of the three young wielders run into [[Pete]] at [[Disney Town]], causing a ruckus as per usual. Finally fed up with Pete's antagonistic behavior, [[Queen Minnie]] banishes him to the Lanes Bewteen. To regain his freedom, Pete accepts Malificent's offer to help her conquer the worlds.||[[File:BBS icon.png]] | |[[File:The Million Dreams Award 02 KHBBS.png|200px]]||On their adventure, each of the three young wielders run into [[Pete]] at [[Disney Town]], causing a ruckus as per usual. Finally fed up with Pete's antagonistic behavior, [[Queen Minnie]] banishes him to the Lanes Bewteen. To regain his freedom, Pete accepts Malificent's offer to help her conquer the worlds.||[[File:BBS icon.png]] | ||
| Line 235: | Line 278: | ||
|[[File:The Chamber of Waking 01 KHBBS.png|200px]]||Now safe in the sanctuary of Yen Sid's [[Mysterious Tower]], Aqua finds herself unable to wake Ventus. She resolves to return to the Land of Departure, the one place where she can keep him safe. Recalling a certain trick Master Eraqus has taught her, Aqua uses Eraqus's Keyblade and transforms the Land of Departure into [[Castle Oblivion]], a labyrinthine world said to be impossible to navigate to anyone but her, content that Ventus will be safe within the [[Chamber of Waking]].||[[File:BBS icon.png]] | |[[File:The Chamber of Waking 01 KHBBS.png|200px]]||Now safe in the sanctuary of Yen Sid's [[Mysterious Tower]], Aqua finds herself unable to wake Ventus. She resolves to return to the Land of Departure, the one place where she can keep him safe. Recalling a certain trick Master Eraqus has taught her, Aqua uses Eraqus's Keyblade and transforms the Land of Departure into [[Castle Oblivion]], a labyrinthine world said to be impossible to navigate to anyone but her, content that Ventus will be safe within the [[Chamber of Waking]].||[[File:BBS icon.png]] | ||
|- | |- | ||
|[[File: | |[[File:Versus Terra-Xehanort (Final Episode) 3 KHBBS.png|200px]]||Sensing a strong darkness emanating from Radiant Garden, Aqua makes her way there, discovering Terra in a complete daze, his hair now white. Despite repeated attempts to reach out to him, Xehanort once more takes over his body and engages Aqua in combat. She wins, however, and with a little bit of help from Terra, lands a definitive blow. Xehanort, wanting to rid himself of Terra's resistance, uses his Keyblade on his own heart: this seals Terra's heart in the [[Dark Figure]] and gives Xehanort full control, but it also leaves him devoid of all his memories. Terra's body begins to sink into the darkness. Desperate to save her friend, Aqua sacrifices both her Armor and her Keyblade to spirit him away out of the darkness, condemning herself to the dark abyss instead.||[[File:BBS icon.png]] | ||
|- | |- | ||
|[[File:Blank Points 03 KHBBS.png|200px]]||Terra's body is discovered by the leader of Radiant Garden, [[Ansem the Wise]], identifying himself as "Xehanort". Devoid of all of his memories, the young man becomes an apprentice scientist of Ansem, growing close to Braig in the process – who himself is suspect of the amnesia. The Sage-King Ansem, however, looks upon this "friendship" with uneasy eyes. Unknown to everyone inside, deep within Terra's heart, the young man and Master Xehanort continue their "property dispute", debating over who will ultimately take control. Xehanort reveals that Terra is simply one of many seeds he has planted for his future plans, while Terra reveals that Eraqus's heart has taken refuge in his.||[[File:BBS icon.png]] | |[[File:Blank Points 03 KHBBS.png|200px]]||Terra's body is discovered by the leader of Radiant Garden, [[Ansem the Wise]], identifying himself as "Xehanort". Devoid of all of his memories, the young man becomes an apprentice scientist of Ansem, growing close to Braig in the process – who himself is suspect of the amnesia. The Sage-King Ansem, however, looks upon this "friendship" with uneasy eyes. Unknown to everyone inside, deep within Terra's heart, the young man and Master Xehanort continue their "property dispute", debating over who will ultimately take control. Xehanort reveals that Terra is simply one of many seeds he has planted for his future plans, while Terra reveals that Eraqus's heart has taken refuge in his.||[[File:BBS icon.png]] | ||
| Line 335: | Line 378: | ||
|[[File:Resolve 01 KHD.png|200px]]||Labeled as useless to the Organization, Xemnas orders Xion to be either captured or destroyed. When Axel and Xigbar confront her, she suddenly appears to Xigbar as Ventus, catching him off guard and quickly defeating him. Fed up with everything that has been happening, Roxas defects from the Organization.||[[File:358 icon.png]] | |[[File:Resolve 01 KHD.png|200px]]||Labeled as useless to the Organization, Xemnas orders Xion to be either captured or destroyed. When Axel and Xigbar confront her, she suddenly appears to Xigbar as Ventus, catching him off guard and quickly defeating him. Fed up with everything that has been happening, Roxas defects from the Organization.||[[File:358 icon.png]] | ||
|- | |- | ||
|[[File:Xion's End 01 KHD.png|200px]]|| | |[[File:Xion's End 01 KHD.png|200px]]||Having nowhere to go, Roxas returns to the only other place he can call home: the Twilight Town clock tower. There, he encounters Xion. She reveals her face has become a reflection of Sora's, and in a series of battles Xion forces Roxas to destroy her so she'll cease to exist and return to Sora. Following her defeat, she starts to crystallize and Roxas immediately begins to lose his memories of her. With her last words, she begs Roxas to stop Xemnas and his plans.||[[File:358 icon.png]] | ||
|- | |- | ||
|[[File:The Beginning of Everything 01 KHIIFM.png|200px]]||Having awakened Ventus's Keyblade due to Xion's demise, Roxas begins to dual-wield a pair of his own: the [[Oathkeeper & Oblivion]]. He returns to The World That Never Was, intent on stopping Xemnas and claiming control over his life. He is confronted by Riku, who knows that without Roxas; Sora will never regain his memories and wake up. The two engage in a fierce duel, with Roxas winning the first round. Upon removing his blindfold, Riku accepts the darkness in his Heart and transforms into a visage of Ansem, the Seeker of Darkness. With newfound strength, he easily overpowers Roxas and defeats him. DiZ appears, and takes the unconscious Roxas back to his lair in Twilight Town.||[[File:FM1 icon.png]]<br>[[File:KH2 icon.png]]<br>[[File:358 icon.png]] | |[[File:The Beginning of Everything 01 KHIIFM.png|200px]]||Having awakened Ventus's Keyblade due to Xion's demise, Roxas begins to dual-wield a pair of his own: the [[Oathkeeper & Oblivion]]. He returns to The World That Never Was, intent on stopping Xemnas and claiming control over his life. He is confronted by Riku, who knows that without Roxas; Sora will never regain his memories and wake up. The two engage in a fierce duel, with Roxas winning the first round. Upon removing his blindfold, Riku accepts the darkness in his Heart and transforms into a visage of Ansem, the Seeker of Darkness. With newfound strength, he easily overpowers Roxas and defeats him. DiZ appears, and takes the unconscious Roxas back to his lair in Twilight Town.||[[File:FM1 icon.png]]<br>[[File:KH2 icon.png]]<br>[[File:358 icon.png]] | ||
| Line 345: | Line 388: | ||
!colspan="3"|The Dark Seeker Saga - Part 2 | !colspan="3"|The Dark Seeker Saga - Part 2 | ||
|- | |- | ||
|[[File:Their Treasure 02 KHII.png|200px]]||Roxas, devoid of all memories of his past life, tries to enjoy the last week of his summer vacation in | |[[File:Their Treasure 02 KHII.png|200px]]||Roxas, devoid of all memories of his past life, tries to enjoy the last week of his summer vacation in [[The Other Twilight Town]]. Shadowy forces are at work, however. Axel is desperate to get his friend back. Meanwhile, DiZ, a man thirsting for revenge against Organization XIII, meets with Naminé as she repairs Sora's memory. For seven days, they continue to upend Roxas's simulated life until it culminates in his memories returning to him and a fateful encounter with Sora. Roxas has no choice but to become one with him again if Sora is to ever regain his memories and awaken. Roxas's summer vacation has come to an end.||[[File:KH2 icon.png]] | ||
|- | |- | ||
|[[File:I'm Pete 01 KHII.png|200px]]||Sora, Donald, and Goofy wake from their slumber in Twilight Town, meeting some friendly faces with [[Hayner]]'s gang, and some not so friendly ones in [[Seifer]]'s crew. After getting their bearings from Master Yen Sid, and reciving a little bit of help from King Mickey, the three set off on another adventure, determined to stop Organization XIII's machinations. Meanwhile, Maleficent is revived, having returned back to her natural timeline following her sojourn in Daybreak Town. [[Pete]] is back to assist Maleficent, but despite his powers over the Heartless, it's hard for Sora to consider him a serious threat.||[[File:KH2 icon.png]]<br>[[File:KHUCHI icon.png]] | |[[File:I'm Pete 01 KHII.png|200px]]||Sora, Donald, and Goofy wake from their slumber in Twilight Town, meeting some friendly faces with [[Hayner]]'s gang, and some not so friendly ones in [[Seifer]]'s crew. After getting their bearings from Master Yen Sid, and reciving a little bit of help from King Mickey, the three set off on another adventure, determined to stop Organization XIII's machinations. Meanwhile, Maleficent is revived, having returned back to her natural timeline following her sojourn in Daybreak Town. [[Pete]] is back to assist Maleficent, but despite his powers over the Heartless, it's hard for Sora to consider him a serious threat.||[[File:KH2 icon.png]]<br>[[File:KHUCHI icon.png]] | ||
| Line 361: | Line 404: | ||
|[[File:Sephiroth Descends 01 KHII.png|200px]]||The encroaching darkness has finally arrived at Hollow Bastion. A wave of over a thousand Heartless appears and begins to attack. Everyone begins to work together to fight off the invasion. [[Sephiroth]] appears before Sora and begins to seek out Cloud, intent to settle the score.||[[File:KH2 icon.png]] | |[[File:Sephiroth Descends 01 KHII.png|200px]]||The encroaching darkness has finally arrived at Hollow Bastion. A wave of over a thousand Heartless appears and begins to attack. Everyone begins to work together to fight off the invasion. [[Sephiroth]] appears before Sora and begins to seek out Cloud, intent to settle the score.||[[File:KH2 icon.png]] | ||
|- | |- | ||
|[[File: | |[[File:To the Hidden Stage 02 KHIIFM.png|200px]]||While everyone is busy dealing with the invasion, Xemnas sneaks into the castle's computer room and accesses a hidden spiral staircase that leads to some sort of dungeon. At the end of the hall, he enters the [[Chamber of Repose]], where Aqua's rusted armor has been laid to rest. He sits down on the large chair and is once more reunited with his "friend".||[[File:FM2 icon.png]] | ||
|- | |- | ||
|[[File:Nocturne Melody Demyx 01 KHII.png|200px]]||As they run to where the Heartless are gathering, Sora and the gang are confronted once more by [[Demyx]], the cowardly Organization member they had a brief encounter with in [[Olympus Coliseum]]. Sora's dismissive attitude, however, seems to trigger an emotional response from Demyx. The Melodious Nocturne snaps and relentlessly attacks the "traitor." After a difficult fight, Demyx is defeated and begins to fade into the darkness, while Sora is left to wonder at what had just happened.||[[File:KH2 icon.png]] | |[[File:Nocturne Melody Demyx 01 KHII.png|200px]]||As they run to where the Heartless are gathering, Sora and the gang are confronted once more by [[Demyx]], the cowardly Organization member they had a brief encounter with in [[Olympus Coliseum]]. Sora's dismissive attitude, however, seems to trigger an emotional response from Demyx. The Melodious Nocturne snaps and relentlessly attacks the "traitor." After a difficult fight, Demyx is defeated and begins to fade into the darkness, while Sora is left to wonder at what had just happened.||[[File:KH2 icon.png]] | ||
| Line 371: | Line 414: | ||
|[[File:Parle from Organization XIII 01 KHII.png|200px]]||The trio continue ever onward in their journey, determined to rescue Kairi, Riku, Mickey, and foil the Organization – despite the group raising the stakes more than ever. As they revisit the many friends have have made, they make some encounters with the Organization as well. In [[Beast's Castle]], the group runs into the vicious [[Xaldin]], who attempts to turn Beast into a Heartless and Nobody, but is defeated and destroyed. In [[Port Royal]], the group also meets [[Luxord]], the affable and gentlemanly gambler who has been conducting experiments on the [[Cursed Medallion]]s.||[[File:KH2 icon.png]] | |[[File:Parle from Organization XIII 01 KHII.png|200px]]||The trio continue ever onward in their journey, determined to rescue Kairi, Riku, Mickey, and foil the Organization – despite the group raising the stakes more than ever. As they revisit the many friends have have made, they make some encounters with the Organization as well. In [[Beast's Castle]], the group runs into the vicious [[Xaldin]], who attempts to turn Beast into a Heartless and Nobody, but is defeated and destroyed. In [[Port Royal]], the group also meets [[Luxord]], the affable and gentlemanly gambler who has been conducting experiments on the [[Cursed Medallion]]s.||[[File:KH2 icon.png]] | ||
|- | |- | ||
|[[File: | |[[File:Versus Riku-Ansem KHII.png|200px]]||On his journey, Sora encounters the mysterious hooded man once more. They engage in comat in the [[Land of Dragons]]. Curiously, the hooded figure wields the [[Soul Eater]], the same weapon Riku uses.||[[File:KH2 icon.png]] | ||
|- | |- | ||
|[[File:Conclusion 01 KHII.png|200px]]||A return trip to Hollow Bastion, and to Space Paranoids, finally allows Leon's group to truly begin work on restoring Hollow Bastion to what it truly was – the city of light, Radiant Garden. Later, Sora encounters Sephiroth, who wishes to test the Keyblade bearer's mettle, curious if it will choose ''him'' as its new wielder. Despite the master swordsman's formidable skill, Sora ekes out a victory, but Sephiroth shrugs it off and claims only Cloud can defeat him, requesting Sora bring him along. Once Cloud arrives, a fierce battle ensues. Tifa appears and tries to help, but the two fly off into the sky and continue their clash. Tifa departs, still determined to find Cloud.||[[File:KH2 icon.png]] | |[[File:Conclusion 01 KHII.png|200px]]||A return trip to Hollow Bastion, and to Space Paranoids, finally allows Leon's group to truly begin work on restoring Hollow Bastion to what it truly was – the city of light, Radiant Garden. Later, Sora encounters Sephiroth, who wishes to test the Keyblade bearer's mettle, curious if it will choose ''him'' as its new wielder. Despite the master swordsman's formidable skill, Sora ekes out a victory, but Sephiroth shrugs it off and claims only Cloud can defeat him, requesting Sora bring him along. Once Cloud arrives, a fierce battle ensues. Tifa appears and tries to help, but the two fly off into the sky and continue their clash. Tifa departs, still determined to find Cloud.||[[File:KH2 icon.png]] | ||
| Line 377: | Line 420: | ||
|[[File:Encounter with Lingering Will 01 KHIIFM.png|200px]]||A strange portal opens in [[Disney Castle]]. Sora and the gang pass through it and find themselves in the middle of a dusty badland - the Keyblade Graveyard. There, they encounter the Lingering Will. The Will senses the power in Sora, but confuses him for Xehanort and attacks in a blind rage. Despite the nearly insurmountable odds of facing against the Will's strength, Sora manages to claim victory. The Will however claims it has nothing to give Sora but its sheer hatred for Xehanort, and returns to its rest.||[[File:FM2 icon.png]] | |[[File:Encounter with Lingering Will 01 KHIIFM.png|200px]]||A strange portal opens in [[Disney Castle]]. Sora and the gang pass through it and find themselves in the middle of a dusty badland - the Keyblade Graveyard. There, they encounter the Lingering Will. The Will senses the power in Sora, but confuses him for Xehanort and attacks in a blind rage. Despite the nearly insurmountable odds of facing against the Will's strength, Sora manages to claim victory. The Will however claims it has nothing to give Sora but its sheer hatred for Xehanort, and returns to its rest.||[[File:FM2 icon.png]] | ||
|- | |- | ||
|[[File:The Old Mansion KHII.png|200px]]||Something strange is afoot in Twilight Town – [[Chip]] and [[Dale]]'s scanners are picking up ''two'' Twilight Towns! The trio returns to investigate and find that Mickey has located Ansem the Wise. He believes that he has infiltrated the Organization's world and plans to enact his revenge plot. The trio, Mickey, and Hayney's group locate the computer that DiZ used to create | |[[File:The Old Mansion KHII.png|200px]]||Something strange is afoot in Twilight Town – [[Chip]] and [[Dale]]'s scanners are picking up ''two'' Twilight Towns! The trio returns to investigate and find that Mickey has located Ansem the Wise. He believes that he has infiltrated the Organization's world and plans to enact his revenge plot. The trio, Mickey, and Hayney's group locate the computer that DiZ used to create The Other Twilight Town where Roxas once resided. Once they enter, they locate the portal to the Organization's homeworld, [[The World That Never Was]].||[[File:KH2 icon.png]] | ||
|- | |- | ||
|[[File:The Words I Wanted to Say 01 KHII.png|200px]]||On their way to the World that Never Was, the trio is attacked by countless Nobodies, but Axel appears to lend a hand. In an explosive attack, Axel eliminates all of the Nobodies, but fatally injures himself in the process. As he fades away, he admits to Sora that he made him feel the same way Roxas did, and dies with content. The group passes through the gateway and arrive in the alley of a dark city, finally ready to confront the Organization.||[[File:KH2 icon.png]] | |[[File:The Words I Wanted to Say 01 KHII.png|200px]]||On their way to the World that Never Was, the trio is attacked by countless Nobodies, but Axel appears to lend a hand. In an explosive attack, Axel eliminates all of the Nobodies, but fatally injures himself in the process. As he fades away, he admits to Sora that he made him feel the same way Roxas did, and dies with content. The group passes through the gateway and arrive in the alley of a dark city, finally ready to confront the Organization.||[[File:KH2 icon.png]] | ||
| Line 383: | Line 426: | ||
|[[File:While Roxas Was Sleeping 01 KHII.png|200px]]||As the group makes their way through the Dark City, Sora is suddenly attacked by a young man in a Black Coat who transports him to the Station of Awakening. Summoning two Keyblades in hand, a battle ensues with Sora narrowly scraping out a victory. Content with the result, the young man lowers his hood, revealing himself to be Roxas, admitting to Sora that "you make a good other". Sora returns to the Dark City, leaving Donald and Goofy confused as to what just happened.||[[File:KH2 icon.png]] | |[[File:While Roxas Was Sleeping 01 KHII.png|200px]]||As the group makes their way through the Dark City, Sora is suddenly attacked by a young man in a Black Coat who transports him to the Station of Awakening. Summoning two Keyblades in hand, a battle ensues with Sora narrowly scraping out a victory. Content with the result, the young man lowers his hood, revealing himself to be Roxas, admitting to Sora that "you make a good other". Sora returns to the Dark City, leaving Donald and Goofy confused as to what just happened.||[[File:KH2 icon.png]] | ||
|- | |- | ||
|[[File:The Freeshooter Xigbar 02 KHII.png|200px]]||The group finally arrives at Xemnas's castle, and encounter one member of the Organization after another: [[Xigbar]], who appears to know a lot more about Sora and the Keyblade than he lets on; Luxord, who seemed genuinely distraught at "Roxas" slaying him; and lastly, Saïx, desperate for a Heart. All three are defeated and fade into the darkness. Along the way, Kairi escapes, finally learning to wield a Keyblade of her own; Riku, likewise armed with a Keyblade, reveals himself to Sora as the cloaked man, though he still has Ansem's appearance; and, Mickey encounters DiZ, who removes his bandages to reveal he was Ansem the Wise all along. Realizing how much damage his quest for vengeance has hurt the people around him, Ansem departs with Mickey, intent to stop Xemnas and atone for his actions. Meanwhile, Maleficent and Pete have also infiltrated the castle, intent to take it for themselves.||[[File:KH2 icon.png]] | |[[File:The Freeshooter, Xigbar 02 KHII.png|200px]]||The group finally arrives at Xemnas's castle, and encounter one member of the Organization after another: [[Xigbar]], who appears to know a lot more about Sora and the Keyblade than he lets on; Luxord, who seemed genuinely distraught at "Roxas" slaying him; and lastly, Saïx, desperate for a Heart. All three are defeated and fade into the darkness. Along the way, Kairi escapes, finally learning to wield a Keyblade of her own; Riku, likewise armed with a Keyblade, reveals himself to Sora as the cloaked man, though he still has Ansem's appearance; and, Mickey encounters DiZ, who removes his bandages to reveal he was Ansem the Wise all along. Realizing how much damage his quest for vengeance has hurt the people around him, Ansem departs with Mickey, intent to stop Xemnas and atone for his actions. Meanwhile, Maleficent and Pete have also infiltrated the castle, intent to take it for themselves.||[[File:KH2 icon.png]] | ||
|- | |- | ||
|[[File:Why Do You Hate the Darkness 01 KHII.png|200px]]||After a battle of ideologies with Xemnas, Ansem sacrifices himself and destroys Xemnas's artificial Kingdom Hearts. The explosion manages to restore Riku to his true form, and the group pursues Xemnas to the top of the Castle. They defeat him, but Xemnas manages to absorb what is left of Kingdom Hearts for a last ditch effort to destroy Sora and his friends. After a difficult struggle, the group finally defeats Xemnas – seemingly for good.||[[File:KH2 icon.png]] | |[[File:Why Do You Hate the Darkness 01 KHII.png|200px]]||After a battle of ideologies with Xemnas, Ansem sacrifices himself and destroys Xemnas's artificial Kingdom Hearts. The explosion manages to restore Riku to his true form, and the group pursues Xemnas to the top of the Castle. They defeat him, but Xemnas manages to absorb what is left of Kingdom Hearts for a last ditch effort to destroy Sora and his friends. After a difficult struggle, the group finally defeats Xemnas – seemingly for good.||[[File:KH2 icon.png]] | ||
|- | |- | ||
|[[File:Blank Points 02 KHBBS.png|200px]]||Following the explosion of his device, Ansem once again finds himself on the shores of the Dark Margin, the place where Xehanort had initially exiled him too. He encounters Aqua, and the two converse. He reveals to her that the worlds had nearly fallen to darkness multiple times, but each time a boy with a Keyblade in hand saved the day. Aqua wonders if this boy was either Terra or Ventus, but Ansem confirms it was neither of them - that it was instead a boy named Sora. Aqua recalls her encounter with Sora, and she smiles as tears of joy stream down her face, | |[[File:Blank Points 02 KHBBS.png|200px]]||Following the explosion of his device, Ansem once again finds himself on the shores of the Dark Margin, the place where Xehanort had initially exiled him too. He encounters Aqua, and the two converse. He reveals to her that the worlds had nearly fallen to darkness multiple times, but each time a boy with a Keyblade in hand saved the day. Aqua wonders if this boy was either Terra or Ventus, but Ansem confirms it was neither of them - that it was instead a boy named Sora. Aqua recalls her encounter with Sora, and she smiles as tears of joy stream down her face, her sense of hope renewed at long last.||[[File:BBS icon.png]]<br>[[File:BBS0.2 icon.png]] | ||
|- | |- | ||
|[[File:Ending 01 KHII.png|200px]]||Back at The Castle that Never Was, the group is preparing to depart, when Sora and Kairi are suddenly approached by Roxas and Naminé. As their respective Nobodies, the two decide to finally return from whence they came and become one with them. Xemnas, however, is not done, and by summoning a massive Dragon-like machine, isolates Sora and Riku and confronts them in a series of battles. The two eventually win, though Riku sustains some injuries. The two are stranded in the Dark Margin and nearly resign to their fates until Riku chances upon a message-in-a-bottle Kairi had written earlier. This opens a door of pure light that allows the two to finally reunite with everyone in Destiny Islands.||[[File:KH2 icon.png]] | |[[File:Ending 01 KHII.png|200px]]||Back at The Castle that Never Was, the group is preparing to depart, when Sora and Kairi are suddenly approached by Roxas and Naminé. As their respective Nobodies, the two decide to finally return from whence they came and become one with them. Xemnas, however, is not done, and by summoning a massive Dragon-like machine, isolates Sora and Riku and confronts them in a series of battles. The two eventually win, though Riku sustains some injuries. The two are stranded in the Dark Margin and nearly resign to their fates until Riku chances upon a message-in-a-bottle Kairi had written earlier. This opens a door of pure light that allows the two to finally reunite with everyone in Destiny Islands.||[[File:KH2 icon.png]] | ||
| Line 393: | Line 436: | ||
|[[File:Beneath the Hood 01 KHREC.png|200px]]||Not too long after Xemnas's defeat, [[Jiminy Cricket]] discovers a strange message in his [[journal]] that he does not recall writing: "Their hurting will be mended when you return to end it". Mickey, Chip, and Dale digitize the journal into data in an attempt to decipher the meaning of the message, while Donald and Goofy stick around to see what the fuss is about. The data ends up being corrupted by numerous bugs, so they summon a Sora's data to try and fix it.||[[File:KHC icon.png]] | |[[File:Beneath the Hood 01 KHREC.png|200px]]||Not too long after Xemnas's defeat, [[Jiminy Cricket]] discovers a strange message in his [[journal]] that he does not recall writing: "Their hurting will be mended when you return to end it". Mickey, Chip, and Dale digitize the journal into data in an attempt to decipher the meaning of the message, while Donald and Goofy stick around to see what the fuss is about. The data ends up being corrupted by numerous bugs, so they summon a Sora's data to try and fix it.||[[File:KHC icon.png]] | ||
|- | |- | ||
|[[File:Beneath the Hood 04 KHREC.png|200px]]||[[Data-Sora]] relives many of Sora's own adventures from his first journey, though with some differences here and there | |[[File:Beneath the Hood 04 KHREC.png|200px]]||[[Data-Sora]] relives many of Sora's own adventures from his first journey, though with some differences here and there. The bugs continue to disrupt the many worlds, and Maleficent and Pete have found their way into the {{c|Datascape|khc}}. [[Data-Riku]], who has been entrusted with the memories contained inside the journal, summons Mickey, Donald, and Goofy into the Datascape to help eliminate the bugs.||[[File:KHC icon.png]] | ||
|- | |- | ||
|[[File:Maleficent's Designs 01 KHREC.png|200px]]||Maleficent and Pete continue to antagonize Data-Sora and company, cutting of the link to the real world and trapping them all inside the Datascape. She abuses the nature of the data world to destroy Data-Sora's Keyblade and takes Data-Riku hostage. Data-Sora, with the help of | |[[File:Maleficent's Designs 01 KHREC.png|200px]]||Maleficent and Pete continue to antagonize Data-Sora and company, cutting of the link to the real world and trapping them all inside the Datascape. She abuses the nature of the data world to destroy Data-Sora's Keyblade and takes Data-Riku hostage. Data-Sora, with the help of Donald and Goofy, travels to Hollow Bastion to save his friend and the journal.||[[File:KHC icon.png]] | ||
|- | |- | ||
|[[File:What Friends Are For 01 KHREC.png|200px]]||In a battle with Pete, Data-Sora is able to summon back a Keyblade to save Donald and Goofy, but Data-Riku is plagued with bugs. Unless he is debugged, the journal contained inside him cannot be awakened, and they will never escape from the data world. Data-Sora ventures alone into Data-Riku's mind to find the source of the problem.||[[File:KHC icon.png]] | |[[File:What Friends Are For 01 KHREC.png|200px]]||In a battle with Pete, Data-Sora is able to summon back a Keyblade to save Donald and Goofy, but Data-Riku is plagued with bugs. Unless he is debugged, the journal contained inside him cannot be awakened, and they will never escape from the data world. Data-Sora ventures alone into Data-Riku's mind to find the source of the problem.||[[File:KHC icon.png]] | ||
| Line 401: | Line 444: | ||
|[[File:Story Scene No. 47 KHMOM.png|200px]]||Data-Sora discovers the problem with the journal: [[Sora's Heartless]]. For every Heartless that Data-Sora defeated, Sora's Heartless had been absorbing its data and evolving. In a tense battle, Data-Sora defeats the Heartless, saving Maleficent and Pete in the process. After saying their goodbyes, Mickey, Donald, and Goofy return to the real world and wipe the journal's data. Maleficent and Pete also depart the Datascape, and Maleficent confides that the "Date Escape" reminds her of the worlds created by the Book of Prophecies – a power she intends to take for herself.||[[File:KHC icon.png]]<br>[[File:KHREC icon.png]] | |[[File:Story Scene No. 47 KHMOM.png|200px]]||Data-Sora discovers the problem with the journal: [[Sora's Heartless]]. For every Heartless that Data-Sora defeated, Sora's Heartless had been absorbing its data and evolving. In a tense battle, Data-Sora defeats the Heartless, saving Maleficent and Pete in the process. After saying their goodbyes, Mickey, Donald, and Goofy return to the real world and wipe the journal's data. Maleficent and Pete also depart the Datascape, and Maleficent confides that the "Date Escape" reminds her of the worlds created by the Book of Prophecies – a power she intends to take for herself.||[[File:KHC icon.png]]<br>[[File:KHREC icon.png]] | ||
|- | |- | ||
|[[File:An Unexpected Bond | |[[File:An Unexpected Bond 02 KHREC.png|200px]]||Despite Data-Sora's victory, Mickey is no closer to an answer about the mysterious message. When a message appears indicating the presence of a new data world, Mickey calls on his data pal once more. Data-Sora makes his way through Castle Oblivion, taunted by a hooded figure at every step. Data-Sora begins to feel an immense amount of hurt. It all culminates in a battle with the hooded figure, [[Data-Roxas]].||[[File:KHC icon.png]] | ||
|- | |- | ||
|[[File:Ending 02 KHREC.png|200px]]||At the end of the castle, Data-Sora meets [[Data-Naminé]]. It was she that left the mysterious messages, and it was her medling that caused the bugs in the first place. Sora's heart contains painful memories that do not belong to him; through Data-Roxas, Data-Naminé was testing Data-Sora to see if he could endure the hurt. If he proved successful, then perhaps the real Sora was ready for the task ahead. Mickey departs, knowing a difficult new journey lies ahead.||[[File:KHC icon.png]] | |[[File:Ending 02 KHREC.png|200px]]||At the end of the castle, Data-Sora meets [[Data-Naminé]]. It was she that left the mysterious messages, and it was her medling that caused the bugs in the first place. Sora's heart contains painful memories that do not belong to him; through Data-Roxas, Data-Naminé was testing Data-Sora to see if he could endure the hurt. If he proved successful, then perhaps the real Sora was ready for the task ahead. Mickey departs, knowing a difficult new journey lies ahead.||[[File:KHC icon.png]] | ||
| Line 431: | Line 474: | ||
|[[File:Seven Lights, Thirteen Darknesses 08 KH3D.png|200px]]||Young Xehanort appears before Sora, gloating that he has worn himself down to nothing. With his body and mind now completely vulnerable, Young Xehanort reveals that Sora has been their true objective the entire time: he is their intended new vessel for Xehanort's Heart. As Sora falls into a deep sleep, his body is placed upon one of the chairs in Where Nothing Gathers, the meeting room of the Organization.||[[File:KH3D icon.png]] | |[[File:Seven Lights, Thirteen Darknesses 08 KH3D.png|200px]]||Young Xehanort appears before Sora, gloating that he has worn himself down to nothing. With his body and mind now completely vulnerable, Young Xehanort reveals that Sora has been their true objective the entire time: he is their intended new vessel for Xehanort's Heart. As Sora falls into a deep sleep, his body is placed upon one of the chairs in Where Nothing Gathers, the meeting room of the Organization.||[[File:KH3D icon.png]] | ||
|- | |- | ||
|[[File:Sora's Nightmare 01 KH3D.png|200px]]||Riku reaches the Castle That Never Was and begins to scale its walls and pathways. Upon reaching the top, he discovers Sora asleep trapped in an orb of darkness, chasing after dreams that will only further drown him. Despite repeated attempts to reach him, Sora's dreams physically manifest as a Nightmare æ the terrifying [[Anti Black Coat]] – and engages Riku in combat. Despite winning, Sora sinks into the darkness, while Riku is confronted by Ansem. He reveals that while Sora has been experiencing the dreams of the Sleeping Worlds, Riku has been inside Sora's dreams the whole time, thus explaining their split. The Sleeping Worlds have designated Riku as Sora's Dream Eater, meant to shield him from the Nightmares – symbolized by the Spirit sigil on Riku's back. Riku eventually defeats Ansem.||[[File:KH3D icon.png]] | |[[File:Sora's Nightmare 01 KH3D.png|200px]]||Riku reaches the Castle That Never Was and begins to scale its walls and pathways. Upon reaching the top, he discovers Sora asleep trapped in an orb of darkness, chasing after dreams that will only further drown him. Despite repeated attempts to reach him, Sora's dreams physically manifest as a Nightmare æ the terrifying [[Anti Black Coat]] – and engages Riku in combat. Despite winning, Sora sinks into the darkness, while Riku is confronted by Ansem. He reveals that while Sora has been experiencing the dreams of the Sleeping Worlds, Riku has been inside Sora's dreams the whole time, thus explaining their split. The Sleeping Worlds have designated Riku as Sora's Dream Eater, meant to shield him from the Nightmares – symbolized by the Spirit sigil on Riku's back. Riku eventually defeats Ansem, and is transported out of Sora's dreams into the true Sleeping Worlds.||[[File:KH3D icon.png]] | ||
|- | |- | ||
|[[File:Power Over Time 02 KH3D.png|200px]]||Riku and Mickey confront Young Xehanort in the heart of the castle, where he reveals that Xehanort's vessels are nearly gathered – Master Xehanort himself and Sora are the only ones not quite ready. These thirteen Xehanorts will be the [[real Organization XIII]]. Riku attempts to rescue Sora, but is forced to fight against Young Xehanort, with his time manipulation powers in full display.||[[File:KH3D icon.png]] | |[[File:Power Over Time 02 KH3D.png|200px]]||Riku and Mickey confront Young Xehanort in the heart of the castle, where he reveals that Xehanort's vessels are nearly gathered – Master Xehanort himself and Sora are the only ones not quite ready. These thirteen Xehanorts will be the [[real Organization XIII]]. Riku attempts to rescue Sora, but is forced to fight against Young Xehanort, with his time manipulation powers in full display.||[[File:KH3D icon.png]] | ||
| Line 461: | Line 504: | ||
|[[File:Commercial Break 04 KHIII.png|200px]]||During their journey in the [[Toy Box]] while dealing with Young Xehanort's machinations, Sora first learns of the popular action-RPG video game franchise ''[[Verum Rex]]''. [[Rex]] the Dinosaur is convinced that Sora is an action figure of the game's main hero, [[Yozora]]. Sora, upon looking at the poster, remarks that he looks much more like Riku than himself.||[[File:KH3 icon.png]] | |[[File:Commercial Break 04 KHIII.png|200px]]||During their journey in the [[Toy Box]] while dealing with Young Xehanort's machinations, Sora first learns of the popular action-RPG video game franchise ''[[Verum Rex]]''. [[Rex]] the Dinosaur is convinced that Sora is an action figure of the game's main hero, [[Yozora]]. Sora, upon looking at the poster, remarks that he looks much more like Riku than himself.||[[File:KH3 icon.png]] | ||
|- | |- | ||
|[[File:Nothing's As It Should Be 01 KHIII.png|200px]]||Sora | |[[File:Nothing's As It Should Be 01 KHIII.png|200px]]||Sora continues his quest for the Power of Waking, learning more about the many hearts contained within his own. Meanwhile, Riku and Mickey continue with their own journey through the Realm of Darkness. In Radiant Garden, Ienzo begins his analysis of the data Ansem the Wise placed inside Sora, hopeful to find a way to resurrect Roxas. In the [[Secret Forest]], Lea and Kairi continue their training.||[[File:KH3 icon.png]] | ||
|- | |- | ||
|[[File:The Organization's Origins 01 KHIII.png|200px]]||Two more members of the real Organization XIII are revealed: Vexen and Demyx, although for the time being they are "benched." As Xigbar continues to order them to search for the Black Box, Vexen and Demyx plot to betray Master Xehanort.||[[File:KH3 icon.png]] | |[[File:The Organization's Origins 01 KHIII.png|200px]]||Two more members of the real Organization XIII are revealed: Vexen and Demyx, although for the time being they are "benched." As Xigbar continues to order them to search for the Black Box, Vexen and Demyx plot to betray Master Xehanort.||[[File:KH3 icon.png]] | ||
| Line 503: | Line 546: | ||
|[[File:Ending_05_KHIII.png|200px]]||With Xehanort gone, the Guardians return home: Roxas, Lea, and Xion reunite in Twilight Town with Hayner, Pence, Olette, and a revived Isa; Terra, Ventus, and Aqua pay their respects to Eraqus before Ventus reunites with his Chirithy; and Sora and Kairi assist Ansem the Wise in reviving Naminé. The Guardians and their allies gather on Destiny Islands. But, Sora had abused Power of Waking, and he must face the consequences. Sharing one final moment with Kairi, Sora fades away.||[[File:KH3 icon.png]]<br>[[File:3RM icon.png]] | |[[File:Ending_05_KHIII.png|200px]]||With Xehanort gone, the Guardians return home: Roxas, Lea, and Xion reunite in Twilight Town with Hayner, Pence, Olette, and a revived Isa; Terra, Ventus, and Aqua pay their respects to Eraqus before Ventus reunites with his Chirithy; and Sora and Kairi assist Ansem the Wise in reviving Naminé. The Guardians and their allies gather on Destiny Islands. But, Sora had abused Power of Waking, and he must face the consequences. Sharing one final moment with Kairi, Sora fades away.||[[File:KH3 icon.png]]<br>[[File:3RM icon.png]] | ||
|- | |- | ||
|[[File:Lost Masters 01 KHIII.png|200px]]||Back in the Keyblade Graveyard, Xehanort's No Name Keyblade falls to the ground. Xigbar, having faked his death, reclaims Keyblade. With the Black Box beside him, he summons four of the Foretellers: Aced, Ira, Invi and Gula. Xigbar reveals himself to be the latest incarnation of the Master's sixth apprentice, Luxu | |[[File:Lost Masters 01 KHIII.png|200px]]||Back in the Keyblade Graveyard, Xehanort's No Name Keyblade falls to the ground. Xigbar, having faked his death, reclaims Keyblade. With the Black Box beside him, he summons four of the Foretellers: Aced, Ira, Invi and Gula. Xigbar reveals himself to be the latest incarnation of the Master's sixth apprentice, Luxu. Aced demands to know what Luxu's true role was. Luxu sighs: "I hope you like ''long'' stories". In the distance, Maleficent and Pete observe the reunion of the Lost Masters.||[[File:KH3 icon.png]] | ||
|- | |- | ||
|[[File:Yozora 01 KHIII.png|200px]]||Riku begins having a peculiar, recurring dream. In a mysterious city filled with tall buildings and skyscrapers, he and Sora awaken separated and disoriented. As Riku walks off to search for him, he feels the presence of Yozora watching him from atop a skyscraper. Some distance away, the Master of Masters appears overlooking the city, and with his hands compares the gleaming full moon to the light of Kingdom Hearts.||[[File:KH3 icon.png]] | |[[File:Yozora 01 KHIII.png|200px]]||Riku begins having a peculiar, recurring dream. In a mysterious city filled with tall buildings and skyscrapers, he and Sora awaken separated and disoriented. As Riku walks off to search for him, he feels the presence of Yozora watching him from atop a skyscraper. Some distance away, the Master of Masters appears overlooking the city, and with his hands compares the gleaming full moon to the light of Kingdom Hearts.||[[File:KH3 icon.png]] | ||
Latest revision as of 20:36, 3 December 2024
Official media in chronological order[edit]
| Kingdom Hearts χ Back Cover | ||
| Kingdom Hearts χ | Runs concurrently with the latter half of Kingdom Hearts χ Back Cover and continues past its ending. | |
| "Heart & Key" | ||
| Kingdom Hearts Union χ | ||
| "Dark Footsteps" | Takes place before Quest 681 of Kingdom Hearts Union χ. | |
| "Destinations" | Includes scenes from various points in the future. | |
| "An Unfamiliar Town" | ||
| "Child of Destiny" | 9 years before Kingdom Hearts Dark Road. | |
| Kingdom Hearts Dark Road | ||
| Kingdom Hearts Birth by Sleep | 65 years after Kingdom Hearts Dark Road. | |
| "The Gathering" | Takes place during the finale of Kingdom Hearts Birth by Sleep. | |
| "Birth by Sleep" | Takes place during the finale of Kingdom Hearts Birth by Sleep. | |
| "A Fragmentary Passage" | ||
| Kingdom Hearts 0.2 Birth by Sleep -A fragmentary passage- | Takes place after Kingdom Hearts Birth by Sleep and runs concurrently with Kingdom Hearts to the end. | |
| "Blank Points" | Extends from the end of Kingdom Hearts Birth by Sleep until sometime between the end of Kingdom Hearts II and Kingdom Hearts III. | |
| Kingdom Hearts | 10 years after Kingdom Hearts Birth by Sleep. | |
| Kingdom Hearts 358/2 Days (Days 1-24) | Runs concurrently with the finale of Kingdom Hearts, from Kairi's rescue to the end of the game. | |
| "Secret Story from Kingdom Hearts Concert -First Breath-" | Takes place during the end Kingdom Hearts, sometime in days 1-16 of Kingdom Hearts 358/2 Days. | |
| Kingdom Hearts Chain of Memories | ||
| Kingdom Hearts 358/2 Days (Days 25-49) | Runs concurrently with Kingdom Hearts Chain of Memories. | |
| Kingdom Hearts 358/2 Days (Days 50-358) | ||
| "Another side, Another story..." | Takes place during the finale of Kingdom Hearts 358/2 Days. | |
| Kingdom Hearts II | 1 year after Kingdom Hearts. | |
| Kingdom Hearts coded | Takes place between the finale of Kingdom Hearts II and its epilogue. | |
| "Signs of What's Next" | ||
| "Destiny" | ||
| Kingdom Hearts 3D: Dream Drop Distance | ||
| "Another Guardian of Light" | ||
| "2.9 - The First Volume" | ||
| Kingdom Hearts III | ||
| Kingdom Hearts III Re Mind | Takes place between the finale of Kingdom Hearts III and its ending. | |
| "Yozora" | ||
| Secret Episode | ||
| "Like, Is Any of This for Real or Not?" | ||
| Kingdom Hearts Melody of Memory | Ending takes place 1 year after Kingdom Hearts III. | |
| Limitcut Episode | Runs concurrently with Kingdom Hearts Melody of Memory. | |
| "Another Key" | ||
Timeline of Events[edit]
| Age of Fairy Tales - The First Keyblade War | ||
|---|---|---|
 |
When the Master of Masters is a boy, a war rages between the physical manifestations of light and darknesses. To finally win against light, Darkness abandoned its physical form and became a whole entity, but its will could not be maintained. In order to propagate and increase their numbers, it begins to infect people's hearts with darkness, turning them into Pureblood Heartless. In the end, thirteen sentient Darknesses remain. | |
 |
Using the power of his Gazing Eye, the Master of Masters writes the Book of Prophecies, containing events of the future, while Darkness watches from nearby. Among other things, the Book tells of a great Keyblade War, warning that darkness will prevail and light expire. | |
 |
The Master of Masters has many conversations with Darkness. Although they are eternal enemies, both parties understand that they will never truly understand the other. On one occasion, the Master explains that he plans to go off to a new world, one ruled by neither darkness or light. A world even he cannot concieve: a world of fiction. | |
 |
Master of Masters takes six apprentices, gifting each of them Keyblades forged from their hearts: Aced, Ava, Gula, Invi, Ira, and Luxu. Aware that Darkness could not be defeated without a physical form, the Master of Masters's real purpose of training his students was to make their hearts strong enough so they could lock the seven strongest darknesses away. | |
 |
The Unions are created in Daybreak Town, each led by a Foreteller, with the aim to recruit Keyblade wielders and collect Lux to battle Darkness. | |
 |
The Master of Masters tasks each of his apprentices with a crucial role they must carry out if he should ever disappear. Luxu is tasked to observe the events to come with the No Name and ensure the Book of Prophecies is written, pass it along to worthy apprentices down the generations, and safeguard a mysterious black box. The Foretellers are each given a copy of the Book of Prophecies. | |
 |
The Master of Masters speaks to Luxu about the past and the future of the world. Luxu expresses disappointment that the Dandelions will have to flee to a new world to rebuild once the Keyblade War arrived, rather than aid in the fight against Darkness. However, the Master of Masters assures him that there is a way to defeat Darkness, but it will take many lifetimes to accomplish it. He explains that, using a passage in the Book about a traitor, he will plant doubt in the Foretellers' minds, manipulating them into becoming vessels for Darkness. | |
 |
The Master of Masters vanishes without a trace, leaving the Unions to carry on without him. | |
 |
Player is recruited into one of the Unions. Together with their chosen Union and newfound friends Ephemer and Skuld, they experience many adventures in Daybreak Town and the hologram worlds created by the Book of Prophecies. | |
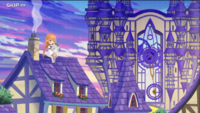 |
While Player is going on adventures, Strelitzia watches from afar. Although she would like to be friends with them, she is too timid to approach. | |
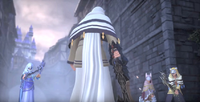 |
The Foretellers discover a traitor in their midst, signaled by the appearance of a Nightmare Chirithy. Due to the loss of a security blanket in the Master's guidance, as well as their own ineptitude in carrying out their roles, they begin to suspect one another of treason. Their squabbling eventually turns into all-out battles between the Unions, all but ensuring the coming of the prophesied Keyblade War, just as the Master intended. | |
 |
Unbeknownst to the Foretellers, it was the Nightmare Chirithy that stole Lux, causing the Keyblade wielder's hearts to be consumed by darkness and turning them into Darklings. | |
 |
Master Ava forms the Dandelions, an organization of gifted Keyblade wielders from all Unions. These wielders will avoid the Keyblade War and work to rebuild the new world to come. Ephemer and Skuld join; however, Player refuses. | |
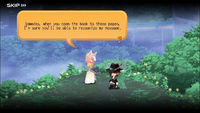 |
Ava is given a list of names by the Master of Masters: it lists five wielders who will become the new Union leaders following the war, one of whom will recieve a copy of the Book of Prophecies. Ava defies her Master's orders by gifting the Book to Brain instead of his original pick. | |
 |
Strelitzia, Lauriam's sister and one of the chosen leaders of the Dandelions, secretly tries to recruit Player into their ranks, afraid that they will be harmed in the upcoming Keyblade War. However, she is murdered by a Darkness-possessed Ventus before she gets an opportunity to warn Player, and her Rulebook is stolen. | |
 |
The First Keyblade War takes place in the badlands of the Keyblade Graveyard. Tens of thousands of Keyblade wielders lose their lives in the battle. Player barely survives, being rescued by Ephemer and Skuld. The Foretellers disappear sometime before the War's conclusion. Luxu watches from a distance with the No Name in hand as thousands of Hearts are engulfed into Kingdom Hearts. | |
 |
The five leaders of the Dandelions gather in the Keyblade Graveyard: Ephemer, Skuld, Lauriam, Brain and Ventus. | |
 |
Daybreak Town is rebuilt as a data world to serve as the new home to the Dandelions. All of its residents have their memories of the Keyblade War erased as if it never happened, repeating their training and adventures. Maleficent appears from the future following her demise in Hollow Bastion, showing up in one of the hologram worlds. | |
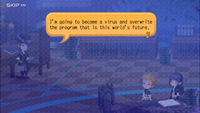 |
The Dandelions leaders try to figure out their roles and how to rebuild their world. Brain voices his intent to be the "virus in the system" and change destiny from what is written in the Book. Meanwhile, Maleficent is approached by a shadowy entity known only as "Darkness" who promises to return her to her own time. | |
 |
Player continues to go on adventures with fellow Dandelions in data versions of worlds. However, this peaceful stasis is interrupted when data glitches, apparitions, and Darklings appear. Through Brain's deductive reasoning, the Union leaders discover that in escaping the Keyblade War, they were all trapped in a data version of Daybreak Town. | |
 |
Lauriam begins his investigation into his sister's murder while Brain concocts his own plans to thwart the prophesied triumph of darkness. Meanwhile, "Darkness" informs Maleficent of a device known as the lifeboat, which can purportedly return her to her own time. Lauriam confronts her, but she defeats him and manages to escape in one of the pods. | |
 |
While investigating the glitches, Brain discovers that Ventus was never meant to be one of the Dandelion's leaders. Together with Ephemer, they confront him to try and ascertain who appointed him among their ranks. They eventually reach the conclusion that Darkness disguised themselves as Ava to appoint Ventus among their ranks, replacing Strelitzia. They head back to the clock tower to inform Lauriam. | |
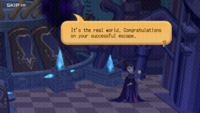 |
With Darkness's help, Maleficient escapes to the real world from the data world, but not her own time. The entity suggests using a second pod to get there; it will not be joining her, however, since it has some unfinished business. | |
 |
The strain of trying to remember what happened with Strelitzia puts Ventus in his sleeping corridors. Meanwhile, the other union leaders realize that Darkness is drawing near. Their investigation cut short by a grief-stricken and injured Lauriam. Ventus returns, now with a full understanding of what had happened, and informs him that he was responsible for Strelitzia's demise. As Lauriam turns his anger on Ventus, Darkness emerges from him, making its presence known to everyone and causing Ventus to fall unconscious. | |
 |
The Union leaders converse with Darkness, who reveals that it was Strelitzia's true killer; by reading the Book of Prophecies, they learned that Ventus is meant to harbor the Darkness as the "fated child", inspiring them to possess Ventus in the present. Darkness also claims that they are an old acquaintance of the Master of Masters. Brain leads the others in a fight to destroy Darkness. | |
 |
Meanwhile, despite Nightmare Chirithy's defeat at Player's hands during the Keyblade War, the Darklings continue to follow Player through their investigation of the glitches in Game Central Station. It appears as though the Darklings are searching for someone. Left with more answers than questions, Player returns to Daybreak Town. | |
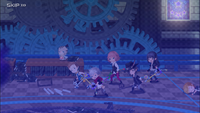 |
As fight between Darkness and the Union leaders continues, they begin to get a better understanding of Darkness's plans. However, the ancient entity proves quite the formidable opponent. Then, Player arrives to help fight the Darkness once more. | |
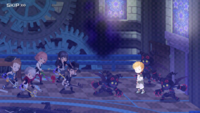 |
Darkness reveals that Maleficient's departure in the lifeboat had already begun the lock-down and destruction of the data world. The Union leaders resolve to fight Darkness anyway, but because it has no form, it cannot be defeated. Suddenly, the Darklings return – it was Ventus they were after. Ventus wakes up enveloped in light, dispelling the creatures of darkness and forcing Darkness into a fightable form. | |
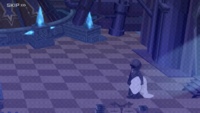 |
Although he was tasked only with observing, Luxu makes his way into Data-Daybreak Town. He finds the data of one individual, calling them the "true Dandelion", and takes them back to the real world. There, he meets another Darkness, and discovers the dark entities' true goal: expansion and infection. Luxu uses a lifeboat pod to send the "true Dandelion" into the future. | |
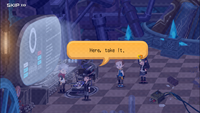 |
The fight with Darkness leaves Ventus unconscious, while the others are trying to figure out their next move. Elrena and her Chirithy arrive with news of seeing Strelitzia, further evidence of the glitches caused by the data world's increasingly unstable state. The seven head to the basement of the Clock Tower where the lifeboats are contained. The Union Leaders split up: Brain, Lauriam, Elrena, and Ventus take pods into the real world, while Skuld, Player and Ephemer remain in the Data World to attend to the other Dandelions. Before leaving, Brain passes down his Master's Defender Keyblade and the Book of Prophecies to Ephemer, who was originally the intended recipient. | |
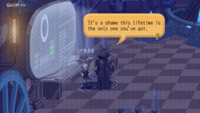 |
As Brain and the others make it to the real world, they realize that the real Daybreak Town is also collapsing. Brain quickly sends Ventus, Lauriam, and Elrena into the future. While he waits the for the others, he encounters Luxu. Luxu explains that the lifeboat was an incomplete form of travel: one would need a medium and someone who remembers them at their destination in order to regain both their body and their memories. What a shame, Luxu continues, that Brain is so smart but only has one lifetime to work with. | |
 |
Despite their previous defeat, Darkness returns with reinforcements to antagonize Ephemer, Skuld and Player. Knowing they are one lifeboat short, and desperate to save their friends, Player pretends to be possessed Darkness and attacks Ephemer and Skuld. Player triumphs, but with his last bit of strength, Ephemer unleashes a beam of light, sealing Player and the four Darknesses in the Cable Tunnels of the data workd. | |
 |
Ephemer and Skuld return to the real world just in time to see it engulfed in darkness. They return to their pods and teleport to the future. Ephemer, Skuld, Ventus, Lauriam, and Elrena are flung into different points in time. | |
 |
Back in the data world, Player reveals their trick to the Darknesses, using their Keyblade to seal them inside the tunnel. Trapped in the collapsing data world, Player and the Darknesses are engulfed in a bright beam of light as the world goes to sleep. Player finds themselves and their Chirithy surrounded by fellow sleeping wielders. The Dandelions' Chirithies transform into Dream Eaters to protect their sleeping hearts. Faced with the choice to sleep forever or pass on and reincarnate, Player chooses to let go and allow their heart meld into a new one. | |
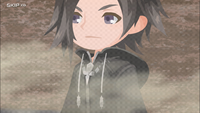 |
Luxu walks the Keyblade Graveyard in the aftermath of the events at Daybreak Town, dutifully carrying the No Name Keybalde and Black Box. He lifts his hood, revealing Brain's face. "May your heart be your guiding key." |
|
| Intermediate Years | ||
|---|---|---|
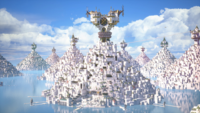 |
Ephemer founds the picturesque city of Scala ad Caelum, the "city of Keyblade wielders", over the remains of Daybreak Town. | |
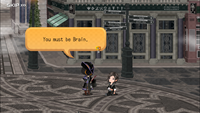 |
Brain awakens at Scala ad Caelum, where he meets Sigurd and learns of Ephemer's founding of the town. | |
 |
Player's heart melds with that of a resident of Scala ad Caelum, a mysterious figure in a blue cloak. | |
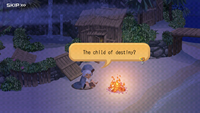 |
One day, believing that the newborn Xehanort was the fabled "Child of Destiny", the blue cloaked figure takes him to Destiny Islands for safety, watching as Xehanort grows up. As Xehanort grows up, he starts having dreams of Player's adventures and their experience in the Keyblade War; these memories resided in the heart of his caretaker, who Xehanort formed a connection with due to the excptional strength of his heart. Eventually, the cloaked figure passes away, their task complete. | |
 |
One day in his youth, Xehanort meets his future Heartless, Ansem, Seeker of Darkness, who opens up a portal to leave the islands and seek the answers to his dreams. The portal sends Xehanort to Scala ad Caelum, and together with his newfound friends Eraqus, Hermod, Bragi, Urd, Vor, and Baldr, he begins his training under the watchful eye of Master Odin. | |
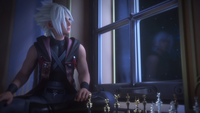 |
Over the course of two years, Xehanort and Eraqus become very close. They often play Alba & Ater together, a type of chess. Even from this young age, Xehanort shows great interest in the Keyblade War and the Lost Masters of yore. | |
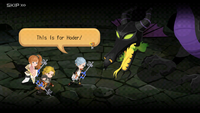 |
Master Odin sends a group of seven upper classmen on a trip to other worlds to prepare for their Mark of Mastery Exam. On this journey, Hoder, Heimdall, Helgi, and Sigrun meet an unfortunate end at Maleficent's hands. | |
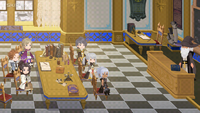 |
Master Oding informs Xehanort and his classmates of the seven upper classmen's disappearance. The young wielders are tasked with finding their whereabouts. One of the group, Baldr, remains behind, as his sister Hoder is one of the missing. | |
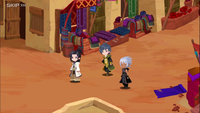 |
Xehanort and his friends' first stop is Agrabah. The world is still in the process of reforming following the Keyblade War, so it is uninhabited. The wielders continue their search in Wonderland, where they learn that someone can unknowingly harbor darkness in their heart. They also discuss the possibility of a world's order being founded in darkness. | |
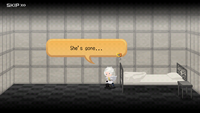 |
Baldr learns of his sister's death, falling into a deep depression. Over the course of a week, his exceptionally sensative heart is overtaken by darkness. He emerges convinced that he must purge the light. | |
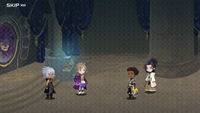 |
While investigating Dwarf Woodlands, Vor consults the Magic Mirror about her future, confirming her doubts about her current trajectory. As Xehanort, Eraqus, and Vor continue to search the world, the upper classman Vidar reveals himself. He offers Vor the opportunity to join him in completing some important task, and the two depart despite Eraqus's protests. | |
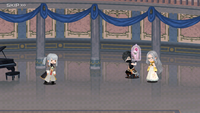 |
After regrouping in Scala ad Caelum, Eraqus and Bragi leave in search of Vor, while Xehanort, Hermod, and Urd decide to look for more answers in Beast's Castle. There, Urd encounters another one of the upper classmen, Vala, who offers Urd a chance to join their mission. Urd declines, and Vali returns the magic rose, which the upper classmen had mysteriously stolen from the Beast. | |
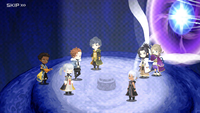 |
Xehanort, Hermod, Urd, Eraqus, and Bragi reunite in Agrabah's Cave of Wonders, all searching for the Magic Lamp. Upon reaching the artifact, Vidar and Vor appear. They explain that the upper classmen were plotting to steal items that are central to each world's order, thus disrupting the order and forcing a pure light to emerge from the chaos. | |
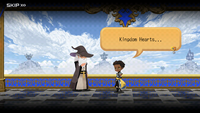 |
Xehanort and his peers return to Master Odin, who determines that the young wielders are not equipped to handle the sitation. Odin informs his pupils of true darkness, the thirteen ancient formless Darknesses that pose a serious threat. He reveals that Vidar is gathering pure lights to summon Kingdom Hearts, hoping to purge the worlds and, with them, true darkness. | |
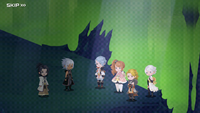 |
Baldr unexpectedly returns to his peers, explaining that he was tasked with learning more about darkness and relating his sister's fate. To help continue their investigation, he opens a gate to Olympus Coliseum. The wielders are split up in the Underworld: Xehanot and Eraqus make a deal with Hades, Baldr and Bragi are left to fight Cerberus, and Hermod and Urd try to regroup with the others. Hades summons the four felled upper classmen's spirits from The Final World, allowing Xehanort and Eraqus to learn more about what had transpired. | |
 |
Baldr, who had previously been hiding his darkness, turns his Keyblade on Bragi, but is quickly and decisively overpowerd. Deciding that Baldr is unfit to be a vessel, Bragi tells him that he is choosing to disappear forever. Bragi walks off, never to be seen by any of his classmates again. | |
 |
Xehanort, Eraqus, Hermod, and Urd are hurled into a Corridor of Darkness. Hermod and Urd try to resist but eventually succumb to the darkness, with Baldr delivering the finishing blow. Xehanort and Eraqus collapse, but they are found by Master Odin. | |
 |
Scala ad Caelum falls under attack from Baldr's darkness. As Master Odin rushes to defend the city, Xehanort and Eraqus encounter Vali, Vala, and Vidar. Upon learning that Vidar had known about Baldr's darkness, Eraqus becomes angered and clashes with the upper classmen. Ultimately, the fight calms down, and all of the wielders race to the central tower to rescue Vor. | |
 |
Baldr reveals to Vor that he – or, his darkness – was responsible for the deaths of Hoder, Heimdall, Helgi, Sigrun, Bragi, Urd, and Hermod. A fight breaks out, and Vali, Vala, and Vidar manage to save Vor from one of Baldr's attacks. However, Vor and the upper classmen are struck down when Baldr's darkness manifests as Hringhorn, leaving only Xehanort and Eraqus left to stop him. | |
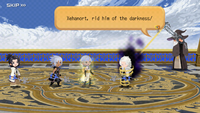 |
Atop Scala ad Caelum's tower, Xehanort and Eraqus meet with Baldr for the final showdown. Baldr explains that he is purging thirteen lights – the seven upper classmen and his six classmates – in order to summon Kingdom Hearts, and had indeed manipluated Vidar into persuing the same. Xehanort overpowers Hringhorn, and Hoder's spirit emerges from Xehanort to quell Baldr. Baldr claims that he and Xehanort are alike, and urges his former friend to seek answers in the darkness. In the end, Xehanort is forced to finish Baldr with Master Odin's assistance. | |
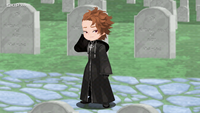 |
One month later, Xehanort and Eraqus place flowers in the cemetery at Scala ad Caelum. Xehanort, Eraqus, and Master Odin have all been greatly affected by the events that had taken place. Odin plans to retire, so he wants the wielders to prepare for their Mark of Mastery exam. As the two friends leave the cemetery, Luxu appears behind them. He lifts his hood, revealing Bragi's face. | |
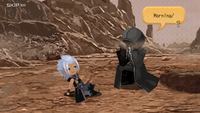 |
One year after the upper classmen incident, Xehanort embarks on a journey to other worlds in preparation for their Mark of Mastery exam. Xehanort meets the Master of Masters and is gifted a Black Coat which will shield him from darkness. In exchange, the Lost Master only wants Xehanort to look at the hearts of others and broaden his view of the world. | |
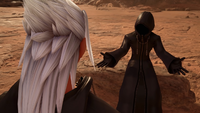 |
Xehanort returns to the Keyblade Graveyard, now jaded and cynical of what he has seen of the worlds and of human nature. He confides the results of his journey with the Master of Masters. With a little bit of coaxing from him, Xehanort is determined to become the Dark Seeker, with the aim to save the worlds from a "false light" and return balance. | |
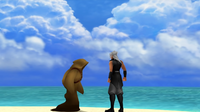 |
Sometime during his travels, Xehanort is approached by Ansem and is recruited into the Real Organization XIII, destined to take part in the Second Keyblade War. After this foray into the future, Xehanort is returned to his own time with no memories of the trip. | |
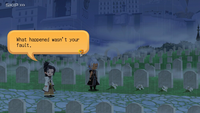 |
Four years after the upper classmen incident, Xehanort and Eraqus visit a cemetery in Scala ad Caelum. Xehanort places flowers on four gravestones, determined to see still more other worlds before undertaking the Mark of Mastery exam. Embarking on another journey, Xehanort returns to Wonderland and speaks to the Queen of Hearts, hoping to better understand the nature of her darkness. | |
 |
Six years after the incident, Xehanort and Eraqus both pass their exams and earn the Mark of Mastery. Xehanort is bequeathed the No Name, while Eraqus is bequeathed the Master's Defender. | |
 |
Seven years after the incident, Xehanort leaves Scala ad Caelum for good. After much deliberation, he has come to the conclusion that Kingdom Hearts is the only way to protect the world. Eraqus opposes him, beliving Kingdom Hearts to be too drastic a measure. Sometime following Xehanort's departure, Eraqus begins his dutiful watch over the Land of Departure. | |
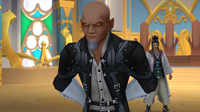 |
54 have passed since the uppserclassmen incident. Xehanort and Eraqus have both grown into old men, but Xehanort remains fixated on Kingdom Hearts and the Lost Masters. In the Land of Departure, Xehanort reveals his intentions to restart the Keyblade War and learn its many secrets. Eraqus, outraged by his recklessness, confronts him. In the ensuing clash, Xehanort scars his old friend's face. The two bitterly part ways. | |
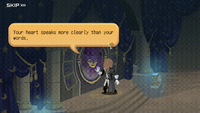 |
Xehanort continues his investigation of anicient mysteries, but even though 64 years have passed since the upper classmen incident, Xehanort cannot let something from his childhood go. In his dreams, he had seen a group of friends. Desparate for answers, he consults the Magic Mirror, who reveals that those friends were indeed real people. One of then, Ventus, is even still alive, having just arrived in the Keyblade Graveyard from the past. | |
 |
Xehanort discovers Ventus and trains him as his apprentice over the course of a year. To help recreate the Keyblade War and summon Kingdom Hearts, Xehanort would remove the darkness from the boy's heart and split it into pure light and pure darkness. Ventus, however, would not unleash his inner darkness willingly, so Xehanort extracts the darkness himself, creating Vanitas. This severely damages Ventus's heart and leaves him in a comatose state and without memories of the incident. | |
 |
Xehanort decides to lay Ventus's comatose body to rest on his home world of Destiny Islands. What is left of Ventus's fractured heart forms a connection with another young heart – that of a boy on Destiny Islands, Sora. With Sora's help, Ventus is slowly able to heal his own heart. Before Xehanort leaves Ventus for good, Ventus regains some vague consciousness, summoning his Keyblade. Xehanort, once again seeing opportunity in the young Ventus, decides to visit his old friend Eraqus. | |
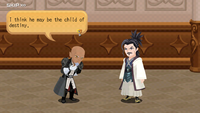 |
Xehanort brings Ventus to the Land of Departure, where he meets Eraqus's pupils Terra and Aqua. Eraqus welcomes his old friend, willing to put their past behind them. Xehanort explains that he belives Ventus could be the prophesised Child of Destiny – as Xehanort stands too close to the darkness, it would be better for a true heir to light to train the boy. Their musings are inturrupted as Ventus lets out a scream, his injured heart not being able to withstand the new environment. | |
 |
On his way out of the Land of Departure, Xehanort speaks with Vanitas about the original thirteen Darknesses. Many of ancient entities are trapped within the Lost Masters or in a data world; one, however, was said to be disguised as an ally of light. Xehanort probes Vanitas, himself a dark being, about what he knows of these original Darknesses. Although Vanitas denies any relation, Xehanort remains convinced that he is a true Darkness that was lingering inside Ventus. | |
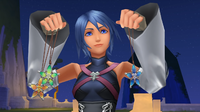 |
With time, Ventus begins to recover. He trains under Master Eraqus with Terra and Aqua, becoming close friends. They all share the same dream of becoming Keyblade Masters. The day before Terra and Aqua's Mark of Mastery exam, Aqua makes Wayfinders for the trio, reminding them that they'll always be connected. | |
| The Search for Master Xehanort | ||
|---|---|---|
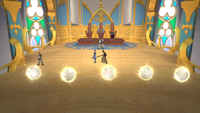 |
Terra and Aqua prepare to take their Mark of Mastery exam. Eraqus, wanting to bury the hatchet with Xehanort, invites his old friend to observe the exam. Xehanort accepts, but secretly starts to put his plans into motion. | |
 |
Aqua passes the exam, while Terra fails, as Eraqus is concerned about the young man's ability to control his inner darkness. Seeing opportunity in his instability, Xehanort coaches the Terra into channeling his darkness, not resisting it, as the surest way of obtaining more power. | |
 |
Shortly after, Xehanort disappears. Meanwhile, Yen Sid informs Eraqus of a new threat: the Unversed, monsters who feed on negative emotions and have been causing a ruckus in many worlds. Eraqus tasks Terra and Aqua to deal with the threat, presenting Terra with a second chance at proving himself. Secretly, however, he tasks Aqua to observe and keep an eye on him, and to immediately bring him back should he be seduced by the darkness. As Terra departs on his mission, Vanitas appears before Ventus and taunts him regarding Terra's well-being and future. Worried about his friend, Ventus rushes after him, leaving his home behind. Eraqus tasks Aqua to bring him back immediately. | |
 |
Throughout a series of adventures on multiple worlds, Aqua and Ventus both try to catch up to Terra to no avail. Terra, however, has been in contact with Master Xehanort multiple times. Xehanort explains that Vanitas is the source of the Unversed and a monster of his own making, begging Terra to stop him at all costs. As Terra departs, Xehanort can only laugh at the young man's naivete as his plans grow closer to fruition. | |
 |
Ventus clashes with Vanitas for the first time in the Keyblade Graveyard, but loses the battle. Yen Sid's apprentice King Mickey comes to his rescue, and the two manage to fight him back. Slightly more satisfied with the second result, Vanitas places Ventus "on probation" and departs. The Star Shard Mickey used to reach Ventus begins to malfunction once again and throws him out into another world. | |
 |
The trio gathers in the city of light, Radiant Garden. Aqua encounters the young girl Kairi, a Princess of Heart who is devoid of any darkness. In a fight against a pack of Unversed with Mickey, she unintentionally bequeaths Kairi a Keyblade. Aqua, sensing the light in Kairi's heart, places a protective spell on the young girl. | |
 |
Kairi's Grandma arrives to take the young girl home. She begins to reccoung Kairi's favorite fairy tale, as she has many times before: it is one of ancient worlds, the spread of darkness, and the power of light. Perhaps it's more than just a fairy tale... | |
 |
Reunited in battle, Terra, Aqua, and Ventus fight together against a powerful Unversed, their friendship begins to crack as Terra's insecurity clashes with Aqua's apparent callousness. Terra continues his mission on his own while Ventus continues to chase after him, leaving Aqua to ponder just how much her own task has hurt them. | |
 |
Terra encounters the rough-and-tumble ruffian Braig, one of Radiant Garden's guards. The mysterious man has apparently taken Master Xehanort hostage, hoping to wrest a Keyblade for himself either from Terra or Xehanort. In the ensuing battle, Terra gives into the darkness and horrifically injures Braig, forcing him to flee. Terra, horrified at what he has done, accepts that he can no longer return to his home as he is. Xehanort comforts him and accepts him as his own apprentice, naming him "Master Terra". After Terra departs, it is revealed that Xehanort and Braig were in cahoots the entire time. | |
 |
Aqua encounters Vanitas in Radiant Garden. Despite barely winning, the masked boy laughs in her face and claims she is merely a "backup" in case Ventus turns out to be a failure, then disappears into a Dark Corridor. | |
 |
Ventus, depressed and despondent, encounters the exuberant Lea and his sarcastic best friend Isa. He is immediately challenged into a friendly fight with Lea and wins. His spirits lifted from the banter between the friendly duo, Ventus returns to his own mission of finding Terra. | |
 |
Much to the annoyance and dismay of castle guards Dilan and Aeleus, Lea and Isa repeatedly infiltrate the castle dungeon where they meet and befriend a mysterious young girl, dubbed merely "Subject X." The two swear an oath to break her out one day. | |
 |
On their adventure, each of the three young wielders run into Pete at Disney Town, causing a ruckus as per usual. Finally fed up with Pete's antagonistic behavior, Queen Minnie banishes him to the Lanes Bewteen. To regain his freedom, Pete accepts Malificent's offer to help her conquer the worlds. | |
 |
During his journey, Terra comes across two young boys on Destiny Islands – Sora and Riku. Sensing the earnestness and sense of justice in Riku's heart, Terra performs the Keyblade Inheritance Ceremony, ensuring the child will one day be able to wield a Keyblade of his own, and makes him promise to keep their meeting a secret. Shortly after, Aqua meets the two boys herself. Sensing that Terra has already passed a Keyblade to Riku, she makes the two boys promise to always look out for each other. | |
 |
Ventus learns of his origins from Vanitas, discovering that he is one-half of Xehanort's plan to recreate the Keyblade War and forge the χ-Blade. Confused, he returns to the Land of Departure and confronts Master Eraqus, demanding to know the truth. Once again heartbroken over Xehanort's intentions, Eraqus steels himself to eliminate Ventus, seeing that as the only choice to stop his plans. | |
 |
Master Xehanort informs Terra of Eraqus's intention to kill Ventus. Rushing to his friend's aid, Terra engages in a fierce duel against his Master, fully giving into the power of darkness in the process. While he wins the fight, it is Xehanort who appears and murders Eraqus, stabbing his friend in the back with his Keyblade. As his Master – and father – fades away in Terra's arms, Xehanort appears before Terra to gloat of his intentions. Summoning a large orb of darkness, he lays waste to the Land of Departure before vanishing. Meanwhile, Aqua learns of everything that has transpired from Yen Sid. | |
 |
The three friends meet at the Keyblade Graveyard, ready to confront Xehanort and their own demons. As Xehanort and Vanitas appear before them, a fierce battle ensues that shakes the very foundations of the land. In the distance, Mickey appears ready to lend a hand. | |
 |
Terra confronts Master Xehanort, enraged and ready to slay him. After they fight, Xehanort reveals that he planned on losing to begin with: with Terra succumbing to the darkness, his body has now become the perfect young vessel to host Xehanort's heart. With the power of the No Name, Xehanort extracts his own heart and inserts it into Terra, his Keyblade Armor falling to the ground dismantled. Now Terra-Xehanort, the old Master begins to walk away to enact the next stage of his plan when he is suddenly engulfed in a cage made of pure energy – Terra's own armor has taken a life of its own. Now nothing more than a Lingering Will, full of hate and regret, it engages Xehanort and defeats him. As they are engulfed by a powerful light, the Will vows to set things right. | |
 |
Ventus engages in battle against Vanitas; however, he is not able to defeat him. With the requirements to forge the legendary weapon now met, they merge and create the χ-Blade. However, within his own heart in the Station of Awakening, Ventus engages with Vanitas one more time. He defeats and destroys his dark half, but in the process, also damages the χ-Blade and his own heart. | |
 |
Aqua prepares to assist Terra in his fight against Xehanort, but ends up in a fight against Braig instead. Despite losing, the thug reveals that his only goal was to buy Xehanort enough time to possess Terra and promptly skedaddles. Aqua is suddenly attacked by Vanitas and knocked out. When she comes to, she discovers Ventus holding the χ-Blade, but her friend is not himself: He has been completely taken over by Vanitas. Mickey shows up and comes to her aid and the two battle and defeat Ventus-Vanitas. With Ventus's defeat by Aqua's hand on the outside, and Ventus' hand from within, the χ-Blade shatters and blows them all away out into the Ocean Between the worlds. Aqua managed to hold onto Ventus, protected by their Keyblade Armor. | |
 |
Due to their connection, Sora senses Ventus' sadness and they meet again in the young boy's Station of Awakening. There, Ventus asks if he could stay with Sora to help him mend the damage in his heart once more. Sora accepts, stopping the wielder's heart from being lost, while Ventus's body is left conatose once again. | |
 |
Now safe in the sanctuary of Yen Sid's Mysterious Tower, Aqua finds herself unable to wake Ventus. She resolves to return to the Land of Departure, the one place where she can keep him safe. Recalling a certain trick Master Eraqus has taught her, Aqua uses Eraqus's Keyblade and transforms the Land of Departure into Castle Oblivion, a labyrinthine world said to be impossible to navigate to anyone but her, content that Ventus will be safe within the Chamber of Waking. | |
 |
Sensing a strong darkness emanating from Radiant Garden, Aqua makes her way there, discovering Terra in a complete daze, his hair now white. Despite repeated attempts to reach out to him, Xehanort once more takes over his body and engages Aqua in combat. She wins, however, and with a little bit of help from Terra, lands a definitive blow. Xehanort, wanting to rid himself of Terra's resistance, uses his Keyblade on his own heart: this seals Terra's heart in the Dark Figure and gives Xehanort full control, but it also leaves him devoid of all his memories. Terra's body begins to sink into the darkness. Desperate to save her friend, Aqua sacrifices both her Armor and her Keyblade to spirit him away out of the darkness, condemning herself to the dark abyss instead. | |
 |
Terra's body is discovered by the leader of Radiant Garden, Ansem the Wise, identifying himself as "Xehanort". Devoid of all of his memories, the young man becomes an apprentice scientist of Ansem, growing close to Braig in the process – who himself is suspect of the amnesia. The Sage-King Ansem, however, looks upon this "friendship" with uneasy eyes. Unknown to everyone inside, deep within Terra's heart, the young man and Master Xehanort continue their "property dispute", debating over who will ultimately take control. Xehanort reveals that Terra is simply one of many seeds he has planted for his future plans, while Terra reveals that Eraqus's heart has taken refuge in his. | |
 |
Aqua wanders the barren Realm of Darkness aimlessly, with her hope of getting out fading with each day. Upon being confronted by numerous Darksides, Terra and Ventus's Keyblades suddenly appear to her rescue, renewing her sense of hope. After battling the vicious Dark Hide, she discovers to her horror that the Castle of Dreams has fallen to the darkness. | |
 |
Mickey appears before Ansem the Wise, warning him that his experiments of the heart are treading into dangerous territory. Ansem, now aware of the horrors he could have unleashed, orders Xehanort to immediately halt their experiments and release their remaining test subjects. | |
 |
Lea and Isa continue their infiltration into the castle to rescue Subject X. However, one day, Braig appears before her and takes her away. The two become despondent to discover she is no longer there, while Xehanort believes that Ansem is responsible for her release. | |
 |
Lea and Isa are finally welcomed into the castle as Ansem's apprentices. | |
 |
Xehanort defies Master Ansem, not only continuing their ghastly human experiments, but ultimately betraying Ansem and even stealing his name. With the help of Braig, Even, Dilan, and Aeleus, the five of them banish Ansem to the Realm of Darkness. | |
 |
Radiant Garden is overrun with Heartless. In the midst of the takeover, a young Kairi is found by researcher Terra-Xehanort and cast out of her world in a lifeboat to test the connection between a Princesses of Heart and a Keyblade wielder. Thanks to Aqua's spell, she ends up on Destiny Islands. | |
 |
Shortly after, Xehanort turns his Keyblade on everyone else, transforming them and himself into Nobodies. In the process, his Heartless – Ansem, Seeker of Darkness – is born. Some time later, Lea and Isa too are turned into Nobodies. | |
 |
Xehanort's Heartless, Ansem, travels nearly 70 years back in time to visit his younger self on Destiny Islands. Teaching him the method of time travel, both become members of the real Organization XIII. | |
 |
Radiant Garden is turned into nothing but a ruin, now known as Hollow Bastion. Leon, Yuffie, Cid, and Aerith manage to escape and find sanctuary in Traverse Town, while Maleficent takes Hollow Bastion as her own. | |
 |
At some point, Lauriam awakens in Dwarf Woodlands and Elrena awakens in Enchanted Dominion. Following, Xigbar recruits Lauriam into the Organization as Marluxia; combined with Elrena (now Larxene) and two other new recruits (Luxord and Demyx), the Organization is up to twelve members. | |
| The Dark Seeker Saga - Part 1 | ||
|---|---|---|
 |
Aqua continues her lonely trek through the Realm of Darkness. As time moves differently in this realm, ten whole years pass on the outside. | |
 |
"I've been having these weird thoughts lately... like, is any of this for real or not?" Sora finds himself at the mysterious Station of Awakening. He is assaulted by monsters – Heartless – and must choose a weapon to which to defend himself with; the Sword, Shield, or Staff. After battling a Darkside, he finds himself drowning in darkness... |
|
 |
...only to discover it was all a dream. Sora, Riku and Kairi plan to sail away from their small island and see what lies beyond. Together, they build a raft that will take them past their own shores. | |
 |
Riku, however, grows impatient. He opens the Door that protects the Heart of their world, and allows a swarm of Heartless to render it asunder. Riku vanishes into the Darkness while Kairi disappears without a trace. Now armed with the Keyblade, Sora once more battles a Darkside amidst the storm, but is whisked away to a brand new world: Traverse Town. | |
 |
King Mickey has been investigating the disappearances of the stars – signs of worlds fading to the darkness one by one. He tasks Goofy, captain of his royal guard, and Donald, his court magician, to head to Traverse Town and locate a man named Leon, who will lead them to the "key". | |
 |
Sora runs into Leon and Yuffie, while Donald and Goofy converse with Aerith on the state of the worlds. They learn that Sora is the bearer of the Keyblade and only he can fight the Heartless, while a man named Ansem may hold the truth to everything. Together, they set out to find King Mickey and Sora's friends. | |
 |
The three half-pints experience a wondrous adventure through many different worlds, meeting many different faces – some familiar, some not, from the wild Tarzan to the tortured soldier Cloud Strife. As they journey to seal the keyholes and prevent the Heartless from ruining the worlds, Maleficent gathers her own forces – the Villains – to plot her domination and get in Sora's way every once in a while. She manages to manipulate Riku into serving her, under the pretense of being able to save Kairi. As Sora continues his quest, he begins to have mysterious hallucations of Kairi. | |
 |
Sora and Riku reunite in Traverse Town. However, Riku has seemingly grown jealous that Sora simply "replaced" him and Kairi with new friends. With further goading from Maleficent, Riku abandons Sora altogether. | |
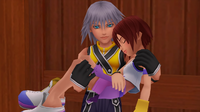 |
Sora and the gang continue their quest, with Riku now treating them with outright hostility. Everything culminates in a fateful encounter aboard Captain Hook's ship in Neverland. Riku reveals that Kairi lost her heart and he has been safeguarding her lifeless body. Now possessing control over the Heartless and the darkness, he summons a shadowy copy of Sora to attack them while he returns to the ruins of Hollow Bastion with Kairi in tow. | |
 |
Sora confronts Riku in Hollow Bastion. Riku reveals that he was the original bearer of the Keyblade, with Sora as nothing more than a mere delivery boy. He takes his weapon, and along with Sora's companions, who promised to follow whoever wields it. Beast, determined to rescue Belle from Maleficent, has arrived and joins forces with Sora to reclaim what they have lost. | |
 |
Goofy and Donald betray Riku, and along with the strength of his heart, Sora reclaims the Keyblade. They battle and Riku loses, but he manages to flee. They learn that Maleficent plans to use the Princesses of Heart to open the keyhole in Hollow Bastion, granting her greater control over the darkness. They manage to foil her, and she is destroyed – in the battle, Riku releases Maleficent's heart, allowing her to travel back in time following her defeat. | |
 |
Sora once again confronts Riku, discovering that his friend has not been himself for a very long time. Xehanort's Heartless, known as Ansem, Seeker of Darkness, has taken Riku's body as his own. They battle, and Sora narrowly wins. He discovers that Kairi's heart has been inside him the entire time – and that was the reason why he had been seeing visions of her. He uses the power of the Keyblade to free her heart, but in the process turns into a Heartless. | |
 |
In Twilight Town, Sora's Nobody is born following the release of Sora's heart. Unable to feel or remember anything, he is approached by Xemnas, Xehanort's Nobody. He is given the name Roxas and inducted into Organization XIII. Elsewhere, Kairi's Nobody Naminé is created from her heart and Sora's body as a result of the same moment. | |
 |
Sora, as a Heartless, wanders around Hollow Bastion for a short while until he runs into Kairi, Donald, and Goofy. Despite his nature, he refuses to attack them, leading Kairi to quickly realize what – or who – the Shadow really is. Protecting him from the rest of the Heartless with an embrace, Kairi restores Sora's human form and the four escape the castle back to Traverse Town. | |
 |
With Cid's help, the trio return to Hollow Bastion, as they must seal the keyhole and stop the outpouring of Heartless from it. They discover the Princesses have been freed, but alarmingly sense a strange power other than darkness. Upon entering the Castle Chapel, Sora, Donald, Goofy and Beast are confronted by Xemnas, who tests Sora's strength before disappearing. The trio seal the keyhole while Leon and his friends return to Hollow Bastion, their old home. They learn that Ansem has fled to End of the World, and to truly stop the Heartless, they must travel there and put an end to him. Elsewhere, at the End of Sea, Xemnas informs Roxas that he has been to see Sora. | |
 |
Roxas is formally introduced to as the thirteenth member of the Organization. | |
 |
Seven days later, Xion is also introduced to the Organization as their fourteenth member. Roxas begins undertaking his first missions under the tutelage of Axel and the group's many colorful characters. He learns that his usage of the Keyblade is vital, as he is the only one who can supply their Kingdom Hearts with fresh hearts, in the hope that it will make them whole one day. | |
 |
Naminé speaks to Terra in his memories, using her powers to trace the connection from memories of those he has met before. Naminé warns Terra that he will soon encounter a familiar light; even though half of Terra belongs to unspeakable darkness, he must guide this light to ensure she isn't lost to the darkness. Terra promises to keep fighting, reaffirming his pledge to Aqua and Ventus. | |
 |
Meanwhile, as Aqua navigates the Realm of Darkness, she sinks further and further into despair. She is forced to face off against Phantom Aqua, a personification of her doubts and insecurities. Eventually, Terra's spirit reaches out to Aqua – having close ties to darkness, he is able to communicate with her in the Dark World, and he encourages her to keep fighting. However, Master Xehanort begins to manipulate Terra's connection, forcing Aqua to flee. She continues her treck, alone once more. | |
 |
Sinking further into Darkness, Aqua is rescued by King Mickey, who has arrived there to find the Keyblade from the Realm of Darkness – the Kingdom Key D. He explains that they must close the door lest ruin will befall more worlds. The two fight against wave after wave of Heartless to protect Riku as races to the Door to Light. They successfully protect him, but in the attack Aqua is once again stranded in the Realm of Darkness while her Keyblade, the Master's Defender, is left behind on Destiny Islands. | |
 |
The trio arrive at End of the World and confront Ansem in a series of epic battles. Ansem summons Kingdom Hearts, intent to take its darkness for himself. Sora, however, is certain that Kingdom Hearts is truly light. With the door open, the light engulfs and destroys Ansem, but they must close quickly it to begin restoration of the worlds destroyed. King Mickey and Riku arrive to help, but the only way to close it fully is from both sides, leaving the latter two trapped in the Realm of Darkness. The door is successfully closed, and Destiny Islands begin to return, with Kairi already back on the beach. Sora, however, is on the other side and cannot reach her, only promising her that he will return one day. | |
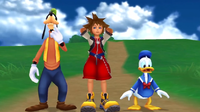 |
Sora, Donald, and Goofy find themselves on an expansive plain in the realm between light and darkness. The trio catches glimpse of Pluto with a letter in his mouth bearing the Hidden Mickey symbol and they begin to chase after him. | |
 |
The Organization prepares to staff their newest headquarters, Castle Oblivion. Marluxia is made to be its lord, with Larxene, Vexen, Lexaeus, and Zexion being sent as well. Saïx orders Axel to Castle Oblivion, certain that some of the younger members plot to commit treason. | |
 |
In the middle of the grassy plains, Sora is confronted by a man in a Black Coat – Marluxia – and goaded into setting foot in Castle Oblivion, with the potential of maybe finding Riku or King Mickey inside. As the three journey up the castle and experience the memories of their past adventures, their memories are slowly being rewritten by the witch Naminé, while a copy of Riku, the Riku Replica, constantly antagonizes them. Marluxia and Larxene plot to use Naminé's power to turn Sora into their puppet in an attempt to initiate a coup within Organization XIII. | |
 |
As Sora ventures upwards in Castle Oblivion, Riku is spirited away to its basement levels by an unknown "voice". Three other members of the Organization – Zexion, Lexaeus, and Vexen – are aware of Marluxia's treachery, and they plot to turn Riku into their own puppet of darkness as a countermeasure. They, too, are foiled at every step. As Riku climbs the basement floors, he is forced to confront his past weakness and his own replica, but is guided by the spirit of King Mickey. | |
 |
Sora continues his climb, hoping to save his newly-remembered childhood friend Naminé. He clashes with the Riku Replica, defeats Larxene, and nearly destroys Vexen, who is promptly incinerated by Axel. In the basement, Riku strikes down Lexaeus, refusing to yield to the darkness within him. Axel then betrays Marluxia, setting Naminé free and confronting his traitorous comrade. | |
 |
Sora's journey culminates in a fierce battle against Marluxia at the top of the castle, and the powerful Nobody is destroyed. By this point, however, Naminé has completely disrupted Sora's memories and replaced Kairi with herself in his heart. Sora opts to restore his original memories forget everything that has transpired in the castle, but to do that he must sleep inside a pod for a year. Meanwhile, Axel takes the Riku Replica with him to enact the next stage of his plan. | |
 |
As Sora defeats Marluxia at the castle's peak, Zexion confronts Riku in a facsimile of Destiny Islands. Riku learns to embrace both the darkness and the light with Naminé's encouragement. Zexion is bested and retreats, only to be executed by Riku Replica at Axel's behest. Riku confronts and destroys the Replica and proceeds onward, intent on not letting the darkness consume him. | |
 |
Riku is finally reunited with King Mickey as he approaches the ground level. The mysterious voice Riku heard is revealed to be a man named DiZ, who needs Riku to make a certain choice. With Naminé's help and Mickey's encouragement, Riku otps to face the darkness in his heart – Ansem – and triumphs. Choosing the "road to dawn," Riku and Mickey don the Organization's black coats and ready themselves to protect Sora as he sleeps to regain his memories. | |
 |
Roxas begins undertaking missions with Xion and learns that she too is capable of wielding the Keyblade. The reclusive Xion begins to open up to Roxas, and the two begin to bond. | |
 |
While Naminé had been disrupting Sora's memories, Roxas fell into a coma for several weeks. Right after Sora is placed into his pod to regain his memories, Roxas finally wakes up, he learns that everyone who was dispatched to Castle Oblivion has been terminated. He continues to carry out missions with the help of Xigbar, whose dismissive and nonplussed attitude is of little comfort. | |
 |
It turns out not everyone at Castle Oblivion expired, as Axel returns from his mission. At Roxas's insistence, he, Axel, and Xion all begin to grow into close friends. However, Roxas begins to experience Sora's memories and grows increasingly suspicious of the Organization's motives and his role within the group. | |
 |
As Roxas completes his daily missions with the Organization, he occasionally encounters Pete. Unnaware of Maleficent's demise, Pete is trying to manipulate the darkness in people's hearts, such as Captain Hook, to create strong Heartless for their army. His efforts are thwarted by Roxas. | |
 |
To stay one step ahead of the Organization, Sora is moved from Castle Oblivion to the Old Mansion in Twilight Town. Xion confronts Riku, wearing the Organization's coat and a blindfold, who claims her identity and Keyblade to be a sham. He urges her to "merge" with her original self, and she becomes torn between that and of staying with Axel and Roxas. | |
 |
Xion discovers that she is an imperfect replica created by Xemnas and Vexen. She was created as a backup, should Sora or Roxas become of no use to the Organization's plans. Her physical appearance is the result of Sora's strong memories and feelings towards Kairi. As Naminé continues restoring Sora's memories, they begin to affect Xion by scrambling her own. Wanting to be her own person, Xion has a falling out with Roxas and Axel and leaves the Organization. | |
 |
Labeled as useless to the Organization, Xemnas orders Xion to be either captured or destroyed. When Axel and Xigbar confront her, she suddenly appears to Xigbar as Ventus, catching him off guard and quickly defeating him. Fed up with everything that has been happening, Roxas defects from the Organization. | |
 |
Having nowhere to go, Roxas returns to the only other place he can call home: the Twilight Town clock tower. There, he encounters Xion. She reveals her face has become a reflection of Sora's, and in a series of battles Xion forces Roxas to destroy her so she'll cease to exist and return to Sora. Following her defeat, she starts to crystallize and Roxas immediately begins to lose his memories of her. With her last words, she begs Roxas to stop Xemnas and his plans. | |
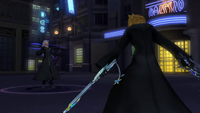 |
Having awakened Ventus's Keyblade due to Xion's demise, Roxas begins to dual-wield a pair of his own: the Oathkeeper & Oblivion. He returns to The World That Never Was, intent on stopping Xemnas and claiming control over his life. He is confronted by Riku, who knows that without Roxas; Sora will never regain his memories and wake up. The two engage in a fierce duel, with Roxas winning the first round. Upon removing his blindfold, Riku accepts the darkness in his Heart and transforms into a visage of Ansem, the Seeker of Darkness. With newfound strength, he easily overpowers Roxas and defeats him. DiZ appears, and takes the unconscious Roxas back to his lair in Twilight Town. | |
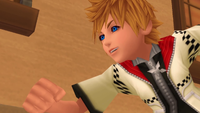 |
DiZ digitizes Roxas into a simulated copy of Twilight Town, his memories and personality replaced with a new one to throw the Organization off his scent. As Roxas wakes up in his bedroom, he excitedly runs outside as summer vacation is coming to a close, wondering if he and his friends will finally visit the beach today. | |
| The Dark Seeker Saga - Part 2 | ||
|---|---|---|
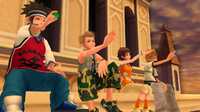 |
Roxas, devoid of all memories of his past life, tries to enjoy the last week of his summer vacation in The Other Twilight Town. Shadowy forces are at work, however. Axel is desperate to get his friend back. Meanwhile, DiZ, a man thirsting for revenge against Organization XIII, meets with Naminé as she repairs Sora's memory. For seven days, they continue to upend Roxas's simulated life until it culminates in his memories returning to him and a fateful encounter with Sora. Roxas has no choice but to become one with him again if Sora is to ever regain his memories and awaken. Roxas's summer vacation has come to an end. | |
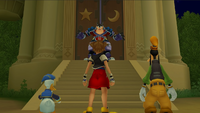 |
Sora, Donald, and Goofy wake from their slumber in Twilight Town, meeting some friendly faces with Hayner's gang, and some not so friendly ones in Seifer's crew. After getting their bearings from Master Yen Sid, and reciving a little bit of help from King Mickey, the three set off on another adventure, determined to stop Organization XIII's machinations. Meanwhile, Maleficent is revived, having returned back to her natural timeline following her sojourn in Daybreak Town. Pete is back to assist Maleficent, but despite his powers over the Heartless, it's hard for Sora to consider him a serious threat. | |
 |
The pint-and-a-half trio reunite with Leon's gang in Hollow Bastion. They have been working hard to rebuild the world back to Radiant Garden, and have officially invited Sora and his companions to be the Restoration Committee's honorary members. The celebration is short-lived however, as Xemnas and the rest of the survivors of the Organization confront the Keyblade bearer. | |
 |
The trio begin their latest quest to protect the worlds from the darkness. Throughout their journey, they encounter many new friends, villains, a few members of the Organization, and foil Pete's many pathetic schemes at every turn. | |
 |
Axel goes rogue and plots to turn Sora back into a Heartless, seeing this as the only way to reunite with his best friend Roxas. His latest scheme involves kidnapping Kairi; however, she manages to get away from him and find herself in Hayner's hideout. The sanctuary is short-lived, as Axel quickly finds her and takes her. This victory, too, is short-lived, as she is promptly taken away from him by Saïx, the Organization's second-in-command. Sora returns to Twilight Town and learns of her appearance and subsequent disappearance. He confronts Saïx, who reveals that Axel is no longer acting in the Organization's best interests and has become a threat to them both. Sora returns to his quest, determined to foil the Organization, find the King and Riku, and rescue Kairi. | |
 |
A great darkness approaches Hollow Bastion. Facing an impending attack, the team returns to Leon's gang to help out. On the way, they are reunited with Cloud Strife, meet the perky Tifa, and at long last find King Mickey. Leon's group has discovered Ansem's computer, which they believe will give them some information on Organization XIII and Riku's whereabouts. Sora's careless handling of the computer, however, results in the three of them getting zapped into Space Paranoids, the world that happens to be the operating system that runs the entire castle. After a short adventure with Tron, the three find their way back to the real world. | |
 |
King Mickey drops a major bombshell on everyone: the man they had defeated at End of the World wasn't Ansem at all! He was in fact his apprentice, Xehanort – or, more aptly, Xehanort's Heartless – who had taken his master's name and work shortly after banishing him. Some time later, he had turned himself and the rest of the apprentices into Nobodies, thus creating the Organization. Xehanort's Nobody, Xemnas, is now the leader of Organization XIII. | |
 |
The encroaching darkness has finally arrived at Hollow Bastion. A wave of over a thousand Heartless appears and begins to attack. Everyone begins to work together to fight off the invasion. Sephiroth appears before Sora and begins to seek out Cloud, intent to settle the score. | |
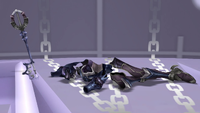 |
While everyone is busy dealing with the invasion, Xemnas sneaks into the castle's computer room and accesses a hidden spiral staircase that leads to some sort of dungeon. At the end of the hall, he enters the Chamber of Repose, where Aqua's rusted armor has been laid to rest. He sits down on the large chair and is once more reunited with his "friend". | |
 |
As they run to where the Heartless are gathering, Sora and the gang are confronted once more by Demyx, the cowardly Organization member they had a brief encounter with in Olympus Coliseum. Sora's dismissive attitude, however, seems to trigger an emotional response from Demyx. The Melodious Nocturne snaps and relentlessly attacks the "traitor." After a difficult fight, Demyx is defeated and begins to fade into the darkness, while Sora is left to wonder at what had just happened. | |
 |
The Battle of the 1000 Heartless begins. Xemnas removes his hood at long last and reveals his face, gleefully overlooking the battle. | |
 |
After the long and arduous battle, the trio and King Mickey confront Xemnas. Xemnas knows nothing of Kairi's whereabouts; however, he leaves behind a cryptic clue that Mickey may know something about Riku. Xemnas disappears into a Corridor while Mickey jumps in after him. Suddenly, Axel appears behind them, disappointed that Sora has so easily fell into the Organization's trap. He reveals that their true aim is to use Sora to destroy Heartless and set their Hearts free, thereby allowing Xemnas to create his own artificial Kingdom Hearts. With it, they will have the power to be whole at last. However, Axel is forced to flee when Saïx appears. Saïx cruelly taunts Sora and attempts to goad him into destroying more Heartless, but help arrives from the most unlikely of places: Maleficent. Seeing the Organization as a common enemy, she comes to their aid and buys them time to escape. Shortly before leaving, Sora finds himself in the Realm of Darkness, where a hooded man gifts him with a white box. Inside the box: a photograph and a bar of sea-salt ice cream. The three depart to continue their quest. | |
 |
The trio continue ever onward in their journey, determined to rescue Kairi, Riku, Mickey, and foil the Organization – despite the group raising the stakes more than ever. As they revisit the many friends have have made, they make some encounters with the Organization as well. In Beast's Castle, the group runs into the vicious Xaldin, who attempts to turn Beast into a Heartless and Nobody, but is defeated and destroyed. In Port Royal, the group also meets Luxord, the affable and gentlemanly gambler who has been conducting experiments on the Cursed Medallions. | |
 |
On his journey, Sora encounters the mysterious hooded man once more. They engage in comat in the Land of Dragons. Curiously, the hooded figure wields the Soul Eater, the same weapon Riku uses. | |
 |
A return trip to Hollow Bastion, and to Space Paranoids, finally allows Leon's group to truly begin work on restoring Hollow Bastion to what it truly was – the city of light, Radiant Garden. Later, Sora encounters Sephiroth, who wishes to test the Keyblade bearer's mettle, curious if it will choose him as its new wielder. Despite the master swordsman's formidable skill, Sora ekes out a victory, but Sephiroth shrugs it off and claims only Cloud can defeat him, requesting Sora bring him along. Once Cloud arrives, a fierce battle ensues. Tifa appears and tries to help, but the two fly off into the sky and continue their clash. Tifa departs, still determined to find Cloud. | |
 |
A strange portal opens in Disney Castle. Sora and the gang pass through it and find themselves in the middle of a dusty badland - the Keyblade Graveyard. There, they encounter the Lingering Will. The Will senses the power in Sora, but confuses him for Xehanort and attacks in a blind rage. Despite the nearly insurmountable odds of facing against the Will's strength, Sora manages to claim victory. The Will however claims it has nothing to give Sora but its sheer hatred for Xehanort, and returns to its rest. | |
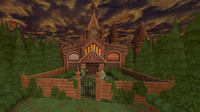 |
Something strange is afoot in Twilight Town – Chip and Dale's scanners are picking up two Twilight Towns! The trio returns to investigate and find that Mickey has located Ansem the Wise. He believes that he has infiltrated the Organization's world and plans to enact his revenge plot. The trio, Mickey, and Hayney's group locate the computer that DiZ used to create The Other Twilight Town where Roxas once resided. Once they enter, they locate the portal to the Organization's homeworld, The World That Never Was. | |
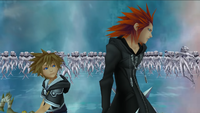 |
On their way to the World that Never Was, the trio is attacked by countless Nobodies, but Axel appears to lend a hand. In an explosive attack, Axel eliminates all of the Nobodies, but fatally injures himself in the process. As he fades away, he admits to Sora that he made him feel the same way Roxas did, and dies with content. The group passes through the gateway and arrive in the alley of a dark city, finally ready to confront the Organization. | |
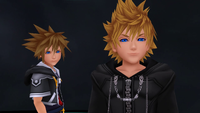 |
As the group makes their way through the Dark City, Sora is suddenly attacked by a young man in a Black Coat who transports him to the Station of Awakening. Summoning two Keyblades in hand, a battle ensues with Sora narrowly scraping out a victory. Content with the result, the young man lowers his hood, revealing himself to be Roxas, admitting to Sora that "you make a good other". Sora returns to the Dark City, leaving Donald and Goofy confused as to what just happened. | |
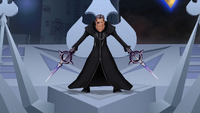 |
The group finally arrives at Xemnas's castle, and encounter one member of the Organization after another: Xigbar, who appears to know a lot more about Sora and the Keyblade than he lets on; Luxord, who seemed genuinely distraught at "Roxas" slaying him; and lastly, Saïx, desperate for a Heart. All three are defeated and fade into the darkness. Along the way, Kairi escapes, finally learning to wield a Keyblade of her own; Riku, likewise armed with a Keyblade, reveals himself to Sora as the cloaked man, though he still has Ansem's appearance; and, Mickey encounters DiZ, who removes his bandages to reveal he was Ansem the Wise all along. Realizing how much damage his quest for vengeance has hurt the people around him, Ansem departs with Mickey, intent to stop Xemnas and atone for his actions. Meanwhile, Maleficent and Pete have also infiltrated the castle, intent to take it for themselves. | |
 |
After a battle of ideologies with Xemnas, Ansem sacrifices himself and destroys Xemnas's artificial Kingdom Hearts. The explosion manages to restore Riku to his true form, and the group pursues Xemnas to the top of the Castle. They defeat him, but Xemnas manages to absorb what is left of Kingdom Hearts for a last ditch effort to destroy Sora and his friends. After a difficult struggle, the group finally defeats Xemnas – seemingly for good. | |
 |
Following the explosion of his device, Ansem once again finds himself on the shores of the Dark Margin, the place where Xehanort had initially exiled him too. He encounters Aqua, and the two converse. He reveals to her that the worlds had nearly fallen to darkness multiple times, but each time a boy with a Keyblade in hand saved the day. Aqua wonders if this boy was either Terra or Ventus, but Ansem confirms it was neither of them - that it was instead a boy named Sora. Aqua recalls her encounter with Sora, and she smiles as tears of joy stream down her face, her sense of hope renewed at long last. | |
 |
Back at The Castle that Never Was, the group is preparing to depart, when Sora and Kairi are suddenly approached by Roxas and Naminé. As their respective Nobodies, the two decide to finally return from whence they came and become one with them. Xemnas, however, is not done, and by summoning a massive Dragon-like machine, isolates Sora and Riku and confronts them in a series of battles. The two eventually win, though Riku sustains some injuries. The two are stranded in the Dark Margin and nearly resign to their fates until Riku chances upon a message-in-a-bottle Kairi had written earlier. This opens a door of pure light that allows the two to finally reunite with everyone in Destiny Islands. | |
 |
Not too long after Xemnas's defeat, Jiminy Cricket discovers a strange message in his journal that he does not recall writing: "Their hurting will be mended when you return to end it". Mickey, Chip, and Dale digitize the journal into data in an attempt to decipher the meaning of the message, while Donald and Goofy stick around to see what the fuss is about. The data ends up being corrupted by numerous bugs, so they summon a Sora's data to try and fix it. | |
 |
Data-Sora relives many of Sora's own adventures from his first journey, though with some differences here and there. The bugs continue to disrupt the many worlds, and Maleficent and Pete have found their way into the Datascape. Data-Riku, who has been entrusted with the memories contained inside the journal, summons Mickey, Donald, and Goofy into the Datascape to help eliminate the bugs. | |
 |
Maleficent and Pete continue to antagonize Data-Sora and company, cutting of the link to the real world and trapping them all inside the Datascape. She abuses the nature of the data world to destroy Data-Sora's Keyblade and takes Data-Riku hostage. Data-Sora, with the help of Donald and Goofy, travels to Hollow Bastion to save his friend and the journal. | |
 |
In a battle with Pete, Data-Sora is able to summon back a Keyblade to save Donald and Goofy, but Data-Riku is plagued with bugs. Unless he is debugged, the journal contained inside him cannot be awakened, and they will never escape from the data world. Data-Sora ventures alone into Data-Riku's mind to find the source of the problem. | |
 |
Data-Sora discovers the problem with the journal: Sora's Heartless. For every Heartless that Data-Sora defeated, Sora's Heartless had been absorbing its data and evolving. In a tense battle, Data-Sora defeats the Heartless, saving Maleficent and Pete in the process. After saying their goodbyes, Mickey, Donald, and Goofy return to the real world and wipe the journal's data. Maleficent and Pete also depart the Datascape, and Maleficent confides that the "Date Escape" reminds her of the worlds created by the Book of Prophecies – a power she intends to take for herself. | |
 |
Despite Data-Sora's victory, Mickey is no closer to an answer about the mysterious message. When a message appears indicating the presence of a new data world, Mickey calls on his data pal once more. Data-Sora makes his way through Castle Oblivion, taunted by a hooded figure at every step. Data-Sora begins to feel an immense amount of hurt. It all culminates in a battle with the hooded figure, Data-Roxas. | |
 |
At the end of the castle, Data-Sora meets Data-Naminé. It was she that left the mysterious messages, and it was her medling that caused the bugs in the first place. Sora's heart contains painful memories that do not belong to him; through Data-Roxas, Data-Naminé was testing Data-Sora to see if he could endure the hurt. If he proved successful, then perhaps the real Sora was ready for the task ahead. Mickey departs, knowing a difficult new journey lies ahead. | |
 |
Mickey returns to Yen Sid's tower to explain everything that had transpired. Upon learning that both Xehanort's Heartless, Ansem, and Nobody, Xemnas, have been felled, Yen Sid comes to a frightening realization. This has paved the way for the real Xehanort to revive – Master Xehanort. He orders Mickey to summon Sora and Riku at once; if they are to triumph in the battle that lies ahead, the boys must undergo real training and earn the Mark of Mastery. Mickey writes a letter to Sora which washes up on Destiny Islands. Realizing that the stakes have never been higher, Sora resoundly answers the call, determined to save everyone hurt by Xehanort's machinations and put a stop to him. | |
 |
Meanwhile, Braig awakens in the computer room of Ansem's Study in Radiant Garden. Dilan, Even, Aeleus, Ienzo, Isa, and Lea all lie unconcious behind him. Braig speaks with Young Xehanort, noting that the absent Master Xehanort's intentions are difficult to understand, while deducing that they are somehow connected to the ancient Keyblade War. Young Xehanort merely states that he is following destiny. Braig contemplates which of the recompleted Organization XIII members should be taken along, and Young Xehanort begins to speak Saïx's name. | |
| Dark Seeker Saga Finale - The Second Keyblade War | ||
|---|---|---|
 |
Sora and Riku are summoned to Yen Sid's tower to begin their Mark of Mastery exam. Yen Sid explains Xehanort's history and the history of the Keyblade War. He uses his magic to send them one year back in time, just before they began their journey. Sora and Riku must journey to the Sleeping Worlds and unlock seven keyholes that will grant them the Power of waking, a power vital for the upcoming battle. Aboard their raft, they are attacked by a phantom of Ursula. They defeat her, but their raft is demolished and they sink into the sea while a Robed Figure looks on. Despite being unconscious and drowning, their Keyblades appear before them and open a pathway to the Sleeping Worlds. They enter the dreams. Their test has begun. | |
 |
Their first stop is strangely familiar: Traverse Town. However, Sora and Riku have somehow been split apart. There, they meet Neku, Shiki, Joshua, Beat and Rhyme, who all appear to be taking part in some sort of "Reaper's Game." However, they are both confronted by a young man in a black coat who bears an uncanny resemblance to a younger Master Xehanort. Joshua theorizes that Traverse Town has been split into two entirely separate dimensions, and the young-man is most likely to blame for it. After defeating the Dream Eater he summoned, they continue with their exam – still separated. | |
 |
As Sora and Riku continue on their individual journeys throughout the Sleeping Worlds, they are constantly hounded and tormented by the enigmatic young man. Not only that, but he always appears with a guest in tow – either Xemnas, or Ansem, Seeker of Darkness. A curiosity, as both of them have been definitively vanquished in their past journeys. | |
 |
Meanwhile, Lea, Aeleus, and Ienzo find themselves wide awake in Ansem's computer room at Radiant Garden, while Dilan and Even are still unconcious and recovering from their ordeals. The Nobodies of all of the Organization members had been slain, precipitating their resurrections as humans. Lea and Ienzo quickly take notice that Isa and Braig are nowhere to be found. | |
 |
During the exam, Maleficent and Pete storm Disney Castle and take Queen Minnie hostage. They demand Jiminy's Journal, the source of the Datascape – perhaps learning about the data worlds can help them conquer the real ones. Their plans are quickly foiled by Lea's timely arrival, as he rescues the Queen and forces Maleficent to retreat. | |
 |
Back at Yen Sid's tower, Lea agrees to undertake some sort of trial of his own. Yen Sid ponders just what Xehanort's true intentions are, though he assures that Xehanort cannot interfere with the exam; since Sora and Riku never met Xehanort before the start of their journey, he would have no point of entry into their journey in the dream world. To his horror, Yen Sid realizes that they did meet him: Xehanort's formless heart appeared to them at the Secret Place on the Destiny Islands. He quickly realizes that Xehanort has used this event as his anchorpoint to travel to the past, and he has secretly been guiding and manipulating their exam from the very beginning. | |
 |
Sora lands before Memory's Skyscraper in the Dark City, wondering why he has landed in The World That Never Was – after all, the world should not be sleeping. He is attacked and taunted by Xigbar, then put to sleep by the mysterious young man. As Sora wakes up, he learns that the young man is in fact Master Xehanort himself, from a time before he became a Keyblade wielder. Xehanort's Heartless had travelled back in time and parted upon him the gift of time travel, instructing him to gather his future selves for Master Xehanort's rebirth. Sora is once again placed into sleep, finally awakening in the Dark City once more. | |
 |
As Sora makes his way throughout the Dark City, he is faced with memories and phantoms of people he has met before: Terra, Aqua, Roxas, Xion, Naminé, and more. He attempts to chase after them, while Riku's voice in the distance begs him not to. Sora eventually comes face to face with Xigbar and Xemnas. Xigbar reveals that they are all now vessels of Xehanort, carrying a small piece of his Heart within them. Despite the threats, Sora still aims to fight with his heart: his friends are his power. Xigbar, rattled, flees, leaving Xemnas to deal with Sora. Despite defeating the Nobody, Sora collapses to the ground and darkness begins to enshroud him. | |
 |
Young Xehanort appears before Sora, gloating that he has worn himself down to nothing. With his body and mind now completely vulnerable, Young Xehanort reveals that Sora has been their true objective the entire time: he is their intended new vessel for Xehanort's Heart. As Sora falls into a deep sleep, his body is placed upon one of the chairs in Where Nothing Gathers, the meeting room of the Organization. | |
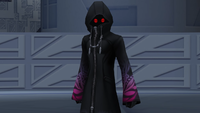 |
Riku reaches the Castle That Never Was and begins to scale its walls and pathways. Upon reaching the top, he discovers Sora asleep trapped in an orb of darkness, chasing after dreams that will only further drown him. Despite repeated attempts to reach him, Sora's dreams physically manifest as a Nightmare æ the terrifying Anti Black Coat – and engages Riku in combat. Despite winning, Sora sinks into the darkness, while Riku is confronted by Ansem. He reveals that while Sora has been experiencing the dreams of the Sleeping Worlds, Riku has been inside Sora's dreams the whole time, thus explaining their split. The Sleeping Worlds have designated Riku as Sora's Dream Eater, meant to shield him from the Nightmares – symbolized by the Spirit sigil on Riku's back. Riku eventually defeats Ansem, and is transported out of Sora's dreams into the true Sleeping Worlds. | |
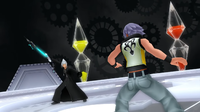 |
Riku and Mickey confront Young Xehanort in the heart of the castle, where he reveals that Xehanort's vessels are nearly gathered – Master Xehanort himself and Sora are the only ones not quite ready. These thirteen Xehanorts will be the real Organization XIII. Riku attempts to rescue Sora, but is forced to fight against Young Xehanort, with his time manipulation powers in full display. | |
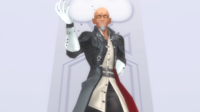 |
Despite Riku's victory, he and Mickey are quickly subdued by Ansem and Xemnas. Goofy and Donald come to their rescue, but they too fail. Master Xehanort is fully revived, and with the No Name in hand, he prepares to claim Sora as his latest vessel. At the very last second, Lea swoops in and rescues Sora. To his shock, he discovers that Isa – or rather Saïx – is also now one of Xehanort's vessels. With Master Xehanort missing his window of opportunity, the rest of the vessels all begin to fade as they are returned to their original timelines. Xehanort, however, is unconcerned, confident that everything will fall into place eventually. | |
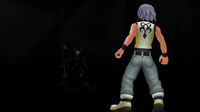 |
Everyone returns to Yen Sid's tower, but they find that they are unable to wake Sora up. His heart has been almost completely taken by darkness, and he has fallen into a deep slumber. To save him, Riku dives once more into Sora's dreams. There, he is confronted by Ventus's Keyblade Armor – it surrounds Sora as darkness enfulfs them both. Riku battles and defeats the Armored Ventus Nightmare, revealing that it has been attempting to protect Sora the entire time. | |
 |
With the Kingdom Key in hand, Riku opens a keyhole that transports him to the shores of the Islands. There, he must answer three questions posed by visions of Roxas, Ventus and Xion. Upon answering the questions, he is met by a vision of Ansem the Wise. The Sage-King reveals that as part of his atonement, he hid the results of his research deep inside Sora's memories during Sora's recovery from Naminé's tampering. He assures Riky that Sora is already awake; he need only leave and see for himself. | |
 |
Riku wakes up to discover that everyone has been having a literal tea party without him. Despite the revelries, the results of the exam must be announced. Yen Sid names Riku a true Keyblade Master, but refuses to name Sora as such as his heart has succumbed to the darkness during the exam. Despite this, Sora is overjoyed for Riku and celebrates his ascension. To the surprise of everyone, Lea announces that he intends to catch up to Riku and become a Master one day, revealing that he had his own Keyblade the entire time – though, he has yet to get a handle on summoning it. While everyone departs, Sora announces his return to the sleeping Traverse Town, wanting to get some more training before the final battle with Xehanort. Upon his return, he is greeted by all the Dream Eaters he has befriended during his journey. | |
 |
Soon after, Riku returns to Yen Sid's tower, accompanied by a certain someone. As Yen Sid prepares the Seven Guardians of Light, he reveals that Kairi will be among them, and she is to begin her training as a Keyblade wielder at once. | |
 |
Meanwhile, at the Keyblade Graveyard, Master Xehanort recalls his fateful encounter with the Master of Masters, wondering if he will ever discover the man's true identity. He is accompanied by Xigbar and Saïx, and the three of them go over their current roster and weigh their options as to how to fill the ranks. Despite the failure of obtaining Sora, Xehanort reveals they still have two other potential vessels: the Riku Replica and Xion. | |
 |
Together with Kairi and Riku in Yen Sid's tower, Mickey begins to retell the tale of how he met Aqua during their first journey, explaining why it's imperative that she be rescued. As Kairi prepares to begin her Keyblade training with Lea, Riku and Mickey depart to the Realm of Darkness to search for Aqua. Shortly after, Sora, Donald and Goofy arrive from their own training and prepare to take the next step. However, after nearly being taken over by Xehanort, Sora has lost almost all of his power and strength. In his current state, he would be no match for the Organization. He must get his strength back and acquire the Power of Waking. His first step is to see an old friend and a great hero who was once in the same situation: Hercules. | |
 |
On the shores of the Dark Margin, Ansem the Wise and Aqua are confronted by Ansem, Seeker of Darkness. Aqua attempts to fight him, but without a Keyblade she is easily dispatched, left to drown in the water as darkness overtakes her. The Seeker of Darkness then proceeds to kidnap Ansem. | |
 |
Sora, Donald, and Goofy land in Olympus, but find themselves in the middle of a great cataclysm: Hades has summoned the four Titans and has began a siege on Thebes, capturing the seat of the Gods. Together with Hercules, they fight to oust the persistent Lord of the Dead once again. Meanwhile, Maleficent and Pete have begun their search for the Black Box, certain it contains a copy of the Book of Prophecies. As Sora continues his quest, Xigbar appears to taunt him, hinting that he knows something of his ultimate fate. | |
 |
As Maleficent and Pete search for the Black Box, Xigbar observes them from the distance. He approached by Luxord, newly resurrected and a member of the real Organization XIII. Luxord questions why Xigbar has him looking for this same Black Box, seeing right through Xigbar's vague deflection. Luxord recounts to him the riddle of the black goat and the white goat, hinting that he may be aware of Xigbar's true identity and agenda, but ultimately shrugs it off and departs. Xigbar is left to wonder just who Luxord truly is and what his agenda may be. | |
 |
Riku and Mickey have successfully entered the Realm of Darkness, but Aqua is nowhere in sight. Moreover, the Heartless there are several times more powerful than in the Realm of Light, and they are quickly overwhelmed. With their Keyblades broken, they are forced to retreat. | |
 |
After visiting Twilight Town once more, the trio departs on their true journey ahead, armed with new tools and garments. As they continue their adventures across many worlds, they run into more members of the real Organization XIII: Marluxia, Larxene, Young Xehanort, Vanitas, and Dark Riku, who cause them no shortage of trouble. They learn of the existence of the New Seven Hearts, pure hearts and sucessors to the original Seven Princesses of Light. | |
 |
During their journey in the Toy Box while dealing with Young Xehanort's machinations, Sora first learns of the popular action-RPG video game franchise Verum Rex. Rex the Dinosaur is convinced that Sora is an action figure of the game's main hero, Yozora. Sora, upon looking at the poster, remarks that he looks much more like Riku than himself. | |
 |
Sora continues his quest for the Power of Waking, learning more about the many hearts contained within his own. Meanwhile, Riku and Mickey continue with their own journey through the Realm of Darkness. In Radiant Garden, Ienzo begins his analysis of the data Ansem the Wise placed inside Sora, hopeful to find a way to resurrect Roxas. In the Secret Forest, Lea and Kairi continue their training. | |
 |
Two more members of the real Organization XIII are revealed: Vexen and Demyx, although for the time being they are "benched." As Xigbar continues to order them to search for the Black Box, Vexen and Demyx plot to betray Master Xehanort. | |
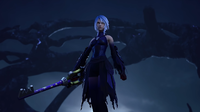 |
Unsure of how to proceed, Sora opts to follow his heart, opening a pathway to Destiny Islands. There, he finds the Master's Defender on the beach. Unknowningly channeling the Power of Waking, Sora uses the Keyblade to open a doorway into the Realm of Darkness. Back in the Dark World, Riku and Mickey continue battling powerful Heartless with their new Keyblades, but are quickly overwhelmed by Aqua – she had succumbed to the darkness and despair, becoming Anti-Aqua. Sora jumps to the rescue and manages to defeat her and restore her to normal. After over a decade in the darkness, Aqua can finally return to the Realm of Light. | |
 |
Ansem, Seeker of Darkness has taken Ansem the Wise to the mansion in Twilight Town, planning to force the Sage-King to work for the Organization. Hayner's gang, with help from Vexen, are able to free Ansem from the Seeker's clutches and spirit him to safety. Vexen reveals that, with some help from Demyx, he was able to smuggle a Replica vessel to Ienzo for the purpose of resurrecting Roxas. He, too, wishes to atone. | |
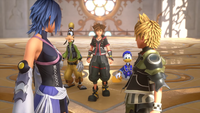 |
Aqua takes Sora, Donald, and Goofy to the gates of Castle Oblivion. With the power of the Master's Defender, she restores the Castle to its original form: the Land of Departure. Upon entering its halls, they locate Ventus, asleep just as he was twelve years prior. However, they are inturrupted by Vanitas. Aqua challenges him to a one-on-one duel; she emerges victorious, but Vanitas decides to switch targets to Ventus. Aqua puts herself in harms way to protect her friend; in this moment, Ventus's heart jumps from Sora's body back to his own, and the wielder finally awakens. Not wanting to challenge multiple Guardians of Light, Vanitas retreats, and Aqua and Ven are reunited at long last. | |
 |
The Seven Guardians of Light are fully assembled in Yen Sid's tower: Sora, Riku, Mickey, Kairi, Lea, Aqua, and Ventus. They take the night off to relax, collect their thoughts, and prepare for the Second Keyblade War that is to come. Riku converses with Replica Riku, who had stowed away in his heart after Riku's foray into the Realm of Darkness. Lea meets with Saïx one more time atop the tower in Twilight Town, sharing some sea-salt ice cream and reflecting on their pasts. | |
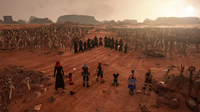 |
The Guardians arrive at the fated land, the Keyblade Graveyard, and are greeted by Master Xehanort himself. As they pass through the rocky crevice and out into the open battlefield, they are confronted by Dark Riku and Terra-Xehanort, the final member of the Organization. They are all quickly overwhelmed by an unimaginably large wave of Heartless. Sora watches Guardians all fall one by one. Riku encourages Sora to keep fighting, but he, too, is taken by the darkness. Sora is left alone; his death comes swiftly. | |
 |
Sora awakens in the middle of an endless sea and sky. He is greeted by the curious critter Chirithy. The quippy cat explains that they are in what's known as The Final World: the end of the road, an afterlife where only the attachments and regrets of those with strong hearts remain. However, Sora should find himself lucky in that his actual body has also found its way there, making it possible for him to return – he must simply collect himself first, literally. | |
 |
As Sora restores his body back to normal little by little, he meets many of the stars that populate the realm. One of these spirits is Naminé, sent adrift following Kairi's demise, who promises to lend Sora a hand once he returns. Another is a Nameless Star, who reveals to Sora that she is waiting for someone dear to her: a man named Yozora. After he gets his old self back, Chirithy reveals to Sora that he has long acquired the Power of Waking: it is his strength to reach the Hearts of others. | |
 |
Sora begins to use the Power of Waking to resurrect all of his friends, one by one, whose Hearts are all held captive by a special Heartless called the Lich. As Sora delves deeper into the abyss, Young Xehanort appears before him, amused at how recklessly Sora is using his newfound power. He explains that it is a power used for traversing hearts to reach worlds, not for traversing worlds to reach hearts. As he leaves, he states that there's no hope for Sora – there is a high price to pay for his transgression over the laws of nature, and he has doomed himself to the debt. | |
 |
The Guardians are all revived, sent back to a point in time just before they were attacked by Dark Riku and Terra-Xehanort. The two appear before them once more, but this time the Guardians are aided by an unlikely ally – the Lingering Will, courtesy of Naminé. Terra-Xehanort and the Lingering Will engage in a fierce battle, leaving the Guardians to deal with the legion of Heartless. The Lingering Will is ultimately defeated, but it had successfully protected Sora and his friends from Terra-Xehanort's darkness. | |
 |
As the swath of Heartless attack, Sora is suddenly blinded by a strange light. A vision of Ephemer appears before him, and the coutless Keyblades of wielders past begin to fly out of the ground. Riding a wave of Keyblades, Sora is able to cut through the storm of Heartless with the power of the Union χ. Dark Riku arrives with another wave of Heartless in tow, but an assist from Yen Sid allows the Guardians to finally come face to face with the full Organization. The final battle is about to begin. | |
 |
Riku attempts to fend off Dark Riku, Xigbar, and Ansem. When Sora joins the battle, Ansem takes his leave, and the two Organization members are quickly dispatched. Bested once again, Xigbar laments that if he had a Keyblade, things would have been different. When Sora and Riku taunt that he would never be worthy to wield one, Xigbar cryptically proclaims he has always been worthy before ostensibly falling to his death. Upon Dark Riku's defeat, Riku Replica emerges from Riku's heart and forces his past self's heart out of its vessel; instead of inhabiting the Replica himself, he leaves it for Naminé, content with fading away forever. Sora leaves to another battle, after which Demyx arrives to take Dark Riku's Replica body back to Ienzo. Riku chases after Ansem. | |
 |
Mickey fights Luxord, Larxene, and Marluxia, with Xemnas watching. When Sora joins the battle, Xemnas leaves, but not before powering up Luxord. The Gambler of Fate seals Mickey in a card and challenges Sora to one last game. Luxord is defeated, and he hands Sora a wild card that could help turn the tables, agreeing to play together again once everything is over. Together, Sora and Mickey defeat Larxene, who admits that she only rejoined the Organization to tag along with someone, and Marluxia, who thanks Sora for helping him begin to uncover the mysteries of his past. | |
 |
Sora assists Aqua and Ventus in fighting Terra-Xehanort and Vanitas. Sora and Ventus try to reason with Vanitas once he is defeated, but Vanitas is content with his role – darkness. Terra-Xehanort nearly kills Ventus and Aqua, but the Dark Figure saves them, betraying Terra-Xehanort. With Sora's help, Terra's heart is released from the Dark Figure, and Terra regains control of his body. | |
 |
Sora arrives to assist Kairi and Lea in fighting Xemnas, Saïx, and Xion. Xemnas orders Xion to kill Lea, but Saïx's taunts and Sora's pleas resonate with her; Xion's heart is released from Sora and returns to her body, forcing her old self's heart to return to its own time. Roxas arrives in his own Replica body, his heart also returning to its rightful place. Roxas, Xion, and Lea symbollically reclaim the Recusant's Sigil as a sign of their bond. In retaliation, Xemnas kidnaps a weakened Kairi and absconds from the battle. Sora, Roxas, and Xion defeat Saïx, who makes amends with Lea before fading away. | |
 |
Sora catches up with Riku and Mickey at the Tower of Endings, where Master Xehanort explains that with nine clashes completed, he only needs four more to forge the χ-blade. Sora, Riku, and Mickey defeat the remaining members of the real Organization XIII: Ansem, who expresses pride at Riku's growth; Xemnas, who admits he feels loneliness; and Young Xehanort, who declares that Sora's time in the world is doomed. Master Xehanort crystallizes Kairi to motivate Sora for the final clash, and at long last, he forges the legendary χ-blade. | |
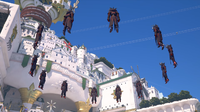 |
Mickey realizes that they can use Xehanort's own time-traveling schemes against him. With the combined power of the Guardians of Light, they force Xehanort into a portal. Sora, Donald, and Goofy chase Xehanort, arriving in Scala ad Caelum. There, they engage in a fierce fight against twelve Replica Xehanorts, before the old Keyblade Master himself approaches them. Xehanort summons a new set of Keyblade Armor and initiates the final battle. | |
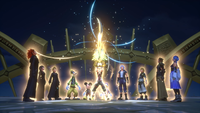 |
Sora bests Xehanort in several rounds of combat, but the old Master refuses to give up. Summoning the χ-blade, he nearly kills Sora; however, with Donald and Goofy's power, Sora finds the strength deliver the final blow. Battered and weakened, Xehanort confesses that everything he did was to remake the world into one without darkness. Sora responds that a real leader knows that destiny cannot be controlled. As the rest of the Guardians arrive, Xehanort is confronted by the spirit of Eraqus, who convinces him it is checkmate. An initially reluctant Xehanort surrenders the χ-blade to Sora, congratulating him on his hard-fought victory. Eraqus apologizes for his behavior towards his students and departs with Xehanort into the afterlife. | |
 |
After sealing Kingdom Hearts, Sora decides to use the Power of Waking to save Kairi. Under Chirithy's guidance, he returns to the Second Keyblade War and relives the Guardians' battles with the Organization, tracing their hearts until he is forced to relive Kairi's destruction. He then goes to Scala ad Caelum to retrieve the fragments of Kairi's heart, but is confronted by Xehanort, seemingly aware of Sora's time-traveling plot. As the Guardians fend off the Replica Xehanorts, Sora finds the final two fragments in Riku and Mickey, finally reviving Kairi. The Replica Xehanorts merge into a facsimile of Master Xehanort's armored form, but they are ultimately vanquished by Sora and Kairi's combined force. | |
 |
With Xehanort gone, the Guardians return home: Roxas, Lea, and Xion reunite in Twilight Town with Hayner, Pence, Olette, and a revived Isa; Terra, Ventus, and Aqua pay their respects to Eraqus before Ventus reunites with his Chirithy; and Sora and Kairi assist Ansem the Wise in reviving Naminé. The Guardians and their allies gather on Destiny Islands. But, Sora had abused Power of Waking, and he must face the consequences. Sharing one final moment with Kairi, Sora fades away. | |
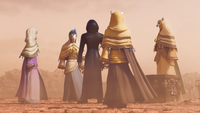 |
Back in the Keyblade Graveyard, Xehanort's No Name Keyblade falls to the ground. Xigbar, having faked his death, reclaims Keyblade. With the Black Box beside him, he summons four of the Foretellers: Aced, Ira, Invi and Gula. Xigbar reveals himself to be the latest incarnation of the Master's sixth apprentice, Luxu. Aced demands to know what Luxu's true role was. Luxu sighs: "I hope you like long stories". In the distance, Maleficent and Pete observe the reunion of the Lost Masters. | |
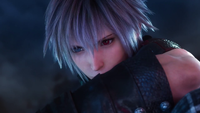 |
Riku begins having a peculiar, recurring dream. In a mysterious city filled with tall buildings and skyscrapers, he and Sora awaken separated and disoriented. As Riku walks off to search for him, he feels the presence of Yozora watching him from atop a skyscraper. Some distance away, the Master of Masters appears overlooking the city, and with his hands compares the gleaming full moon to the light of Kingdom Hearts. | |
 |
Riku pays a visit to the Land of Departure, his promise to Terra fulfilled. Together, Terra, Aqua, and Ventus don their Keyblade Armor and head off into the Realm of Darkness to search for Sora. | |
| Sora's Disappearance | ||
|---|---|---|
 |
One year has passed, but still no sign of Sora. Terra, Aqua and Ventus continue to search the Dark World, while Donald, Goofy, and the King revisit all of the worlds Sora has been to. Hayner's gang have been analyzing Roxas's and Xion's memories for clues, and Kairi has voluntarily placed her heart into a deep sleep so that Ansem, Even, and Ienzo may search her heart for clues to Sora's whereabouts. Despite the best efforts of everyone, Sora is nowhere to be found. | |
 |
Riku visits Leon, Cid, Yuffie and Aerith at Radiant Garden to see if they had made any progress. It turns out that Cid has managed to recreate the data of the Real Organization XIII, but they're far too powerful to access. The only way to do so is to have a data copy of Sora engage them all in one-on-one combat. Upon completion, however, all they get is an inconclusive analysis: they're back to square one. The Fairy Godmother appears at Yen Sid and Merlin's request – they believe that Riku's dreams may hold the key. Riku recalls that he has been having that one particular recurring dream, and begins to recount it. | |
 |
Meanwhile, Sora finds himself in The Final World once more, now illuminated by a starry night sky. There, he encounters Yozora. While Sora is surprised that Yozora is indeed a real person, Yozora is suspicious of Sora's identity and questions why he is "using Sora's name". Yozora summons his crossbow and sword, transporting Sora to a building in a strange city. It was in this place, Yozora explains, that he endured some trials and was asked to "save Sora". | |
 |
Yozora attacks Sora. Despite the young warrior's exceptional combat prowess and strange technology, Sora narrowly claims a victory. Yozora states contently that his power are not yet needed, and he fades away with a warm smile as Sora is taken back to The Final World. Yozora wakes up in the backseat of a car to the voice of his driver, and speaks those words said by Sora so long ago: "I've been having these weird thoughts lately... like, is any of this for real or not?" |
|
 |
Over the course of the same year, Kairi has been searching for clues to Sora's whereabouts as well. Following her sojourn into her own heart and experiencing the memories of Sora and those connected to him, Kairi finds herself facing a memory of Master Xehanort in The Final World. Following a fierce clash, he overpowers her, but a manifestation of Sora takes over her body and defeats him. However, Sora's voice is not capable of reaching either of them, cluing Xehanort to his location. He shares the clue with Kairi: Sora is in a world opposite of light, darkness, and reality itself. | |
 |
With Kairi finally waking up, Riku arrives in Ansem's laboratory to share news of his own clue: the dream of a city with tall buildings and skyscrapers. Ansem, Ienzo and Even theorize that the world opposite of reality is unreality, or fiction, but know next to nothing of it. The Fairy Godmother arrives and reveals she knows the location of the third "key" necessary to bring Sora back. Taking Kairi and Riku to The Final World, she reveals this third "key" to be the Nameless Star. By using the Power of waking, Riku is able to use her as a medium and travel directly to the city he dreamt of: Quadratum. Kairi, still remembering both of her losses against Xehanort, opts to stay behind to get stronger instead. | |
 |
Kairi, Donald, Goofy and King Mickey arrive at the Mysterious Tower to inform Master Yen Sid of the latest developments. Perplexed by the uncharted water that is the existence of a fictional world, Yen Sid recounts the story of how the ancient masters themselves may have crossed over to the other side of reality. He orders King Mickey to visit Scala ad Caelum and conduct an investigation into this tale. He also orders Donald and Goofy to inform everyone else to halt their search for Sora, while Kairi makes the decision to apprentice herself to Aqua in her bid to get stronger. | |
