User:Xelias0/DissidiaKH/Storylines: Difference between revisions
(Created page with '==Powers== {|border="1" cellspacing="0" cellpadding="2" width="100%" bgcolor="#CD5C5C" !width="30%"|Picture !width="10%"|Name !width="20%"|Effect |- !bgcolor="#ffffff"|Potion_(c…') |
|||
| (11 intermediate revisions by the same user not shown) | |||
| Line 1: | Line 1: | ||
==Powers== | ==Powers== | ||
{|border="1" cellspacing="0" cellpadding="2" width="100%" bgcolor="# | {|border="1" cellspacing="0" cellpadding="2" width="100%" bgcolor="#DAA520" | ||
!width=" | !width="10%"|Picture | ||
!width="10%"|Name | !width="10%"|Name | ||
!width=" | !width="80%"|Effect | ||
|- | |- | ||
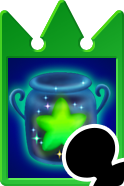
!bgcolor="#ffffff"|Potion_(card).png | !bgcolor="#ffffff"|[[File:Potion_(card).png]] | ||
!bgcolor="#ffffff"|Potion | !bgcolor="#ffffff"|Potion | ||
!bgcolor="#ffffff"|Restores 20% of the player's HP. | !bgcolor="#ffffff"|Restores 20% of the player's HP. | ||
|- | |- | ||
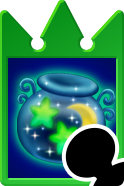
!bgcolor="#ffffff"|[[File:Hi-Potion_(card).png]] | |||
!bgcolor="#ffffff"|Hi-Potion | |||
!bgcolor="#ffffff"|Restores 50% of the player's HP. | |||
|- | |||
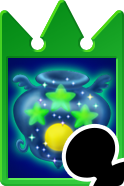
!bgcolor="#ffffff"|[[File:Mega-Potion_(card).png]] | |||
!bgcolor="#ffffff"|Mega-Potion | |||
!bgcolor="#ffffff"|Restores 100% of the player's HP. | |||
|- | |||
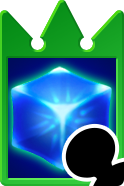
!bgcolor="#ffffff"|[[File:Ether_(card).png]] | |||
!bgcolor="#ffffff"|Ether | |||
!bgcolor="#ffffff"|Fills Ex Gauge by 50%. | |||
|- | |||
!bgcolor="#ffffff"|[[File:Mega-Ether_(card).png]] | |||
!bgcolor="#ffffff"|Mega-Ether | |||
!bgcolor="#ffffff"|Fills Ex Gauge by 100%. | |||
|- | |||
!bgcolor="#ffffff"|[[File:Elixir_(card).png]] | |||
!bgcolor="#ffffff"|Elixir | |||
!bgcolor="#ffffff"|Restores 50% of the player's HP and fills Ex Gauge by 50% | |||
|- | |||
!bgcolor="#ffffff"|[[File:Megalixir_(card).png]] | |||
!bgcolor="#ffffff"|Megalixir | |||
!bgcolor="#ffffff"|Restores 100% of the player's HP and fills Ex Gauge by 100% | |||
|- | |||
!bgcolor="#ffffff"|[[File:Fire_(card).png]] | |||
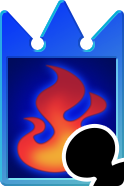
!bgcolor="#ffffff"|Fire | |||
!bgcolor="#ffffff"|Reduces an enemy's HP by 20%. Does not work on bosses. | |||
|- | |||
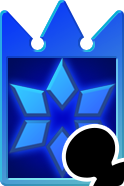
!bgcolor="#ffffff"|[[File:Blizzard_(card).png]] | |||
!bgcolor="#ffffff"|Blizzard | |||
!bgcolor="#ffffff"|Prevents an enemy from entering Berserk stage. Does not work on bosses. | |||
|- | |||
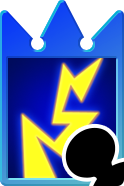
!bgcolor="#ffffff"|[[File:Thunder_(card).png]] | |||
!bgcolor="#ffffff"|Thunder | |||
!bgcolor="#ffffff"|Reduces all enemies' HP by 10%. Does not work on bosses. | |||
|- | |||
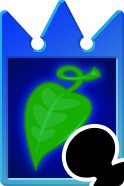
!bgcolor="#ffffff"|[[File:Cure_(card).png]] | |||
!bgcolor="#ffffff"|Cure | |||
!bgcolor="#ffffff"|Restores the player's health by 20% each time he defeats an enemy. | |||
|- | |||
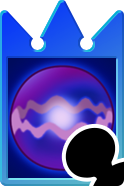
!bgcolor="#ffffff"|[[File:Gravity_(card).png]] | |||
!bgcolor="#ffffff"|Gravity | |||
!bgcolor="#ffffff"|Halves an enemy's initial Bravery. Does not work on bosses. | |||
|- | |||
!bgcolor="#ffffff"|[[File:Stop_(card).png]] | |||
!bgcolor="#ffffff"|Stop | |||
!bgcolor="#ffffff"|Stops the enemy for several seconds at the beginning of the battle. Does not work on bosses. | |||
|- | |||
!bgcolor="#ffffff"|[[File:Aero_(card).png]] | |||
!bgcolor="#ffffff"|Aero | |||
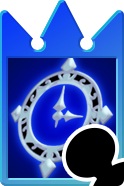
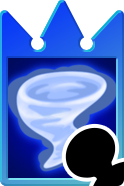
!bgcolor="#ffffff"|If the character has a full Ex Gauge, allows a longer Ex Mode duration during the next fight. | |||
|} | |||
==Storyline Elements== | |||
{|border="1" cellspacing="0" cellpadding="2" width="100%" bgcolor="#DAA520" | |||
!width="10%"|Picture | |||
!width="10%"|Name | |||
!width="80%"|Signification | |||
|- | |||
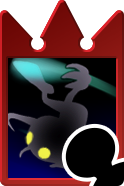
!bgcolor="#ffffff"|[[File:Tranquil_Darkness_(card).png]] | |||
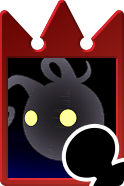
!bgcolor="#ffffff"|Heartless | |||
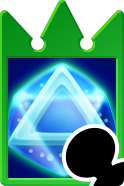
!bgcolor="#ffffff"|This icon represents a fight against one or few Heartless (or Nobodies), with a low level. | |||
|- | |||
!bgcolor="#ffffff"|[[File:Teeming_Darkness_(card).png]] | |||
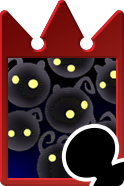
!bgcolor="#ffffff"|Heartless Swarm | |||
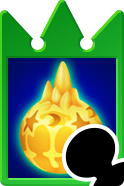
!bgcolor="#ffffff"|This icon represents a fight against many Heartless (or Nobodies) with a level ranging from low to average. | |||
|- | |||
!bgcolor="#ffffff"|[[File:Looming_Darkness_(card).png]] | |||
!bgcolor="#ffffff"|Heartless Menace | |||
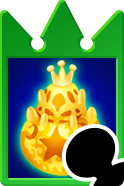
!bgcolor="#ffffff"|This icon represents a fight against a single Heartless or Nobody, but with quite a good level. This often leads to rewards. | |||
|- | |||
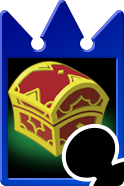
!bgcolor="#ffffff"|[[File:Calm_Bounty_(card).png]] | |||
!bgcolor="#ffffff"|Treasure | |||
!bgcolor="#ffffff"|This icon represents a treasure chest. Opening it allows to obtain a gear or accessory. | |||
|- | |||
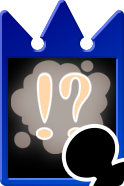
!bgcolor="#ffffff"|[[File:Mingling_Worlds_(card).png]] | |||
!bgcolor="#ffffff"|Mystery | |||
!bgcolor="#ffffff"|This icon represents... something. What ? Well, just try and you'll see ! | |||
|- | |||
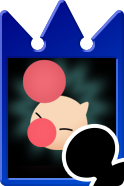
!bgcolor="#ffffff"|[[File:Moogle_Room_(card).png]] | |||
!bgcolor="#ffffff"|Moogle | |||
!bgcolor="#ffffff"|This icon represents a Moogle Shop. There, you can buy storyline powers such as Fire or Ether cards. They often appear before complicated areas, so be sure to save your munny for it. | |||
|- | |||
!bgcolor="#ffffff"|[[File:Key_of_Beginnings_(card).png]] | |||
!bgcolor="#ffffff"|Locked Area | |||
!bgcolor="#ffffff"|This icon represents a Key. Well, it stands for a locked area, and you will have to fulfill some requirements to get through it. | |||
|- | |||
!bgcolor="#ffffff"|[[File:Key_of_Guidance_(card).png]] | |||
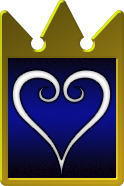
!bgcolor="#ffffff"|Door to Light | |||
!bgcolor="#ffffff"|This icon represents a Heart. It indicates the end of a Movement (storyline board). Touching it will allow you to move to the next Movement. | |||
|- | |||
!bgcolor="#ffffff"|[[File:Key_to_Truth_(card).png]] | |||
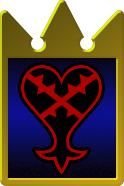
!bgcolor="#ffffff"|Door to Darkness | |||
!bgcolor="#ffffff"|This icon represents a Heartless emblem. It often indicates the end of a Movement , but not always. It indicates a boss that you must battle in order to progress. | |||
|} | |} | ||
==Stages== | |||
===Destiny Island=== | |||
Description : Actually, it is only the floating island where you battle a Darkside in KH1. It floats above a black vortex. Touching this black vortex will quickly sap your bravery. In Reverse Mode (The name given to the alternate version of the stage), parts of the island are progressively absorbed by the vortex, leaving at the end only a small platform. In that mode, the Stage Bravery increases as parts of the island are absorbed. | |||
The Battlegen Accessory for this area is the Destiny's Shell. The Shining Prelude's boards are themed after that stage. | |||
===Hollow Bastion=== | |||
Description : This stage is the place where Sora fought against Ansem-Riku in front of the world's Keyhole. It can be quite large, and it is easy to run away from your enemy. In Reverse Mode, Stage Bravery increases as the stage's breakable elements are destroyed. If every stage element is destroyed, Stage Bravery will progressively increase all the time. | |||
The Battlegen Accessory for this area is the Hollow Fragment. The Symphonies of Fate I-1 and II-1's boards are themed after that stage. | |||
===End of the World=== | |||
It figures a wide, empty area covered with what seems like water. Occasionally, you can see giant rocks, or little rocky platforms... In Reverse Mode, it is much more dangerous, as spheres of Darkness occasionally fall from the skies, lowering the players' Bravery to the point of undergoing Break if their Bravery is low enough. Bravery is drained and added to the Stage Bravery. | |||
The Battlegen Accessory for this area is the Heart's End. The Symphony of Fate I-2's board is themed after that stage. | |||
===Castle Oblivion=== | |||
This represents, more precisely, the Station of Oblivion. A very tiny arena, surrounded by darkness. In Reverse Mode, character's bravery is slowly sapped and added to the Stage Bravery. Furthermore, in that mode, the darkness surrounding the Station is Bravery-draining too. | |||
The Battlegen Accessory for this area is the Fading Memory. The Symphonies of Fate I-3 and II-2's boards are themed after that stage. | |||
===Memory's Skyscraper=== | |||
The famous area that is the theater of many fights... Not much is to be said about that arena, except that there are no Bravery-draining traps here. In Reverse Mode, the Artificial Kingdom Hearts will sometimes glow brighter, increasing players' Critical Hit Ratio and progressively raising the Stage Bravery. | |||
The Battlegen Accessory for this area is the Moonlit Tear. The Symphony of Fate II-3's boards are themed after that stage. | |||
===The Castle that Never Was=== | |||
Or, to be precise, the Castle that Never Was's personal arena, the Hall of Empty Melodies. A platform surrounded by nothingness, in the middle of a deserted hall. In Reverse Mode, the platform sometimes randomly changes its shape, increasing the Stage Bravery each time it does so. | |||
The Battlegen Accessory for this area is the Proof of Existence. The Finale of Destiny and Tragic Aubade's boards are themed after that stage. | |||
===Keyblade Graveyard=== | |||
This field takes the form of a desert surrounded by arid mountains. In that desert, some Keyblades are scattered. In Reverse Mode, Stage Bravery is always 0, but breaking the opponent allows your own Bravery to progressively increase as long as the opponent stays in Break. The aim for the player, as such, is to chain Brave Attacks to maintain the opponent in that state, and for the opponent to free himself using an HP attack. | |||
The Battlegen Accessory for this area is the Broken Willpower. The Sonata of Redemption's boards are themed after that stage. | |||
===Awakening=== | |||
This is the Station of Destiny, where Sora and Roxas battle each other. Except that now there are seven pillars, six forming an hexagon with the seventh in the middle. They are linked by stairs. In Reverse Mode, stairs may randomly collapse, and some pillars may switch positions, moving those who are on it. Besides, Stage Bravery randomly increases or decreases each time a player uses a summon. | |||
The Battlegen Accessory for this area is the Crossed Hearts. The Serenade to Oblivion's boards are themed after that stage. | |||
===Dark Meridian=== | |||
This is the area where Riku and Sora managed to open a door to Destiny Islands. That dark shore is boarded by a dark sea - in which you can go. In Reverse Mode, the Stage Bravery increases for each "0" in both player's Bravery... | |||
The Battlegen Accessory for this area is the Abyssal Essence. The Endless Ballade's boards are themed after that stage. | |||
===Realm of Oblivion=== | |||
This is the area that is briefly seen in KH1 through the door of Kingdom Hearts, after defeating Ansem. It is pretty high, so it is hard to slam the enemy into the ceiling. In Reverse Mode, the Stage Bravery is equal to the different between both players' bravery before one enters break. Stage Bravery is equal to 0 during Break. | |||
The Battlegen Accessory for this area is the Empty Remembrance. The Waltz of Emptiness's boards are themed after that stage, and this storyline is the only one to feature it as a stage. | |||
Latest revision as of 18:15, 25 March 2010
Powers
Storyline Elements
Stages
Destiny Island
Description : Actually, it is only the floating island where you battle a Darkside in KH1. It floats above a black vortex. Touching this black vortex will quickly sap your bravery. In Reverse Mode (The name given to the alternate version of the stage), parts of the island are progressively absorbed by the vortex, leaving at the end only a small platform. In that mode, the Stage Bravery increases as parts of the island are absorbed.
The Battlegen Accessory for this area is the Destiny's Shell. The Shining Prelude's boards are themed after that stage.
Hollow Bastion
Description : This stage is the place where Sora fought against Ansem-Riku in front of the world's Keyhole. It can be quite large, and it is easy to run away from your enemy. In Reverse Mode, Stage Bravery increases as the stage's breakable elements are destroyed. If every stage element is destroyed, Stage Bravery will progressively increase all the time.
The Battlegen Accessory for this area is the Hollow Fragment. The Symphonies of Fate I-1 and II-1's boards are themed after that stage.
End of the World
It figures a wide, empty area covered with what seems like water. Occasionally, you can see giant rocks, or little rocky platforms... In Reverse Mode, it is much more dangerous, as spheres of Darkness occasionally fall from the skies, lowering the players' Bravery to the point of undergoing Break if their Bravery is low enough. Bravery is drained and added to the Stage Bravery.
The Battlegen Accessory for this area is the Heart's End. The Symphony of Fate I-2's board is themed after that stage.
Castle Oblivion
This represents, more precisely, the Station of Oblivion. A very tiny arena, surrounded by darkness. In Reverse Mode, character's bravery is slowly sapped and added to the Stage Bravery. Furthermore, in that mode, the darkness surrounding the Station is Bravery-draining too.
The Battlegen Accessory for this area is the Fading Memory. The Symphonies of Fate I-3 and II-2's boards are themed after that stage.
Memory's Skyscraper
The famous area that is the theater of many fights... Not much is to be said about that arena, except that there are no Bravery-draining traps here. In Reverse Mode, the Artificial Kingdom Hearts will sometimes glow brighter, increasing players' Critical Hit Ratio and progressively raising the Stage Bravery.
The Battlegen Accessory for this area is the Moonlit Tear. The Symphony of Fate II-3's boards are themed after that stage.
The Castle that Never Was
Or, to be precise, the Castle that Never Was's personal arena, the Hall of Empty Melodies. A platform surrounded by nothingness, in the middle of a deserted hall. In Reverse Mode, the platform sometimes randomly changes its shape, increasing the Stage Bravery each time it does so.
The Battlegen Accessory for this area is the Proof of Existence. The Finale of Destiny and Tragic Aubade's boards are themed after that stage.
Keyblade Graveyard
This field takes the form of a desert surrounded by arid mountains. In that desert, some Keyblades are scattered. In Reverse Mode, Stage Bravery is always 0, but breaking the opponent allows your own Bravery to progressively increase as long as the opponent stays in Break. The aim for the player, as such, is to chain Brave Attacks to maintain the opponent in that state, and for the opponent to free himself using an HP attack.
The Battlegen Accessory for this area is the Broken Willpower. The Sonata of Redemption's boards are themed after that stage.
Awakening
This is the Station of Destiny, where Sora and Roxas battle each other. Except that now there are seven pillars, six forming an hexagon with the seventh in the middle. They are linked by stairs. In Reverse Mode, stairs may randomly collapse, and some pillars may switch positions, moving those who are on it. Besides, Stage Bravery randomly increases or decreases each time a player uses a summon.
The Battlegen Accessory for this area is the Crossed Hearts. The Serenade to Oblivion's boards are themed after that stage.
Dark Meridian
This is the area where Riku and Sora managed to open a door to Destiny Islands. That dark shore is boarded by a dark sea - in which you can go. In Reverse Mode, the Stage Bravery increases for each "0" in both player's Bravery...
The Battlegen Accessory for this area is the Abyssal Essence. The Endless Ballade's boards are themed after that stage.
Realm of Oblivion
This is the area that is briefly seen in KH1 through the door of Kingdom Hearts, after defeating Ansem. It is pretty high, so it is hard to slam the enemy into the ceiling. In Reverse Mode, the Stage Bravery is equal to the different between both players' bravery before one enters break. Stage Bravery is equal to 0 during Break.
The Battlegen Accessory for this area is the Empty Remembrance. The Waltz of Emptiness's boards are themed after that stage, and this storyline is the only one to feature it as a stage.
