The World That Never Was: Difference between revisions
Chitalian8 (talk | contribs) No edit summary |
BraviDunno (talk | contribs) |
||
| (127 intermediate revisions by 39 users not shown) | |||
| Line 1: | Line 1: | ||
{{Game | {{Game|KH2|FM2|358|DDD|DHD|KH3|MOM}} | ||
{{suite}} | {{suite}} | ||
{{World | {{World | ||
|name=The World That Never Was | |name=The World That Never Was | ||
| Line 18: | Line 16: | ||
|game2=Kingdom Hearts II | |game2=Kingdom Hearts II | ||
|game3=Kingdom Hearts 3D: Dream Drop Distance | |game3=Kingdom Hearts 3D: Dream Drop Distance | ||
|game4=Kingdom Hearts Melody of Memory | |||
|KH2normalname=Sacred Moon | |KH2normalname=Sacred Moon | ||
|KH2normalfile=Sacred Moon KHII.ogg | |KH2normalfile=Sacred Moon KHII.ogg | ||
| Line 23: | Line 22: | ||
|KH2battlefile=Deep Drive KHII.ogg | |KH2battlefile=Deep Drive KHII.ogg | ||
|358normalname=Sacred Moon | |358normalname=Sacred Moon | ||
|358normalfile=Sacred Moon KHD.ogg | |358normalfile=Sacred Moon (OST) KHD.ogg | ||
|358normalname2=Mystic Moon | |358normalname2=Mystic Moon | ||
|358normalfile2=Mystic Moon KHD.ogg | |358normalfile2=Mystic Moon (OST) KHD.ogg | ||
|358battlename=Critical Drive | |358battlename=Critical Drive | ||
|358battlefile=Critical Drive KHD.ogg | |358battlefile=Critical Drive (OST) KHD.ogg | ||
|DDDnormalname=Sacred Distance | |DDDnormalname=Sacred Distance | ||
|DDDnormalfile=Sacred Distance KH3D.ogg | |DDDnormalfile=Sacred Distance KH3D.ogg | ||
| Line 35: | Line 34: | ||
'''The World That Never Was''' is a [[world]] featured in ''[[Kingdom Hearts II]]'', ''[[Kingdom Hearts 358/2 Days]]'', and ''[[Kingdom Hearts 3D: Dream Drop Distance]]''. | '''The World That Never Was''' is a [[world]] featured in ''[[Kingdom Hearts II]]'', ''[[Kingdom Hearts 358/2 Days]]'', and ''[[Kingdom Hearts 3D: Dream Drop Distance]]''. | ||
The world of [[Organization XIII]], it is home to a seemingly endless supply of [[Heartless]] and [[Nobody|Nobodies]]. The Heartless seem to spawn more here due to how close The World That Never Was is to the darkness of [[Kingdom Hearts]]. The Organization | The world of [[Organization XIII]], it is home to a seemingly endless supply of [[Heartless]] and [[Nobody|Nobodies]]. The Heartless seem to spawn more here due to how close The World That Never Was is to the darkness of [[Kingdom Hearts]]. The Organization rules the city below from their massive castle. | ||
==Settings and Areas== | ==Settings and Areas== | ||
===''Kingdom Hearts II'' | ===''Kingdom Hearts II''=== | ||
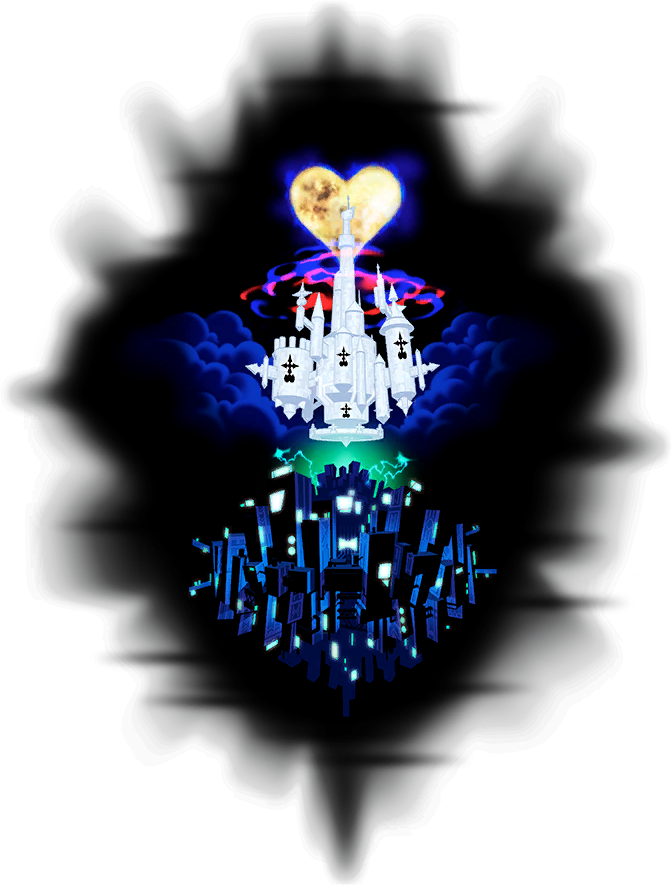
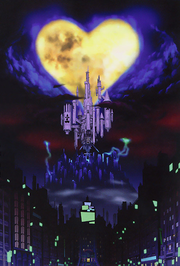
The World That Never Was is a world located in the [[Realm Between]], and serves as Organization XIII's stronghold. It's separated into two parts, the expansive Dark City filled with vacant buildings and neon signs, and the contrasting white and massive '''Castle That Never Was''' which floats weightlessly above the city, with [[Kingdom Hearts]] at its peak. | |||
The | |||
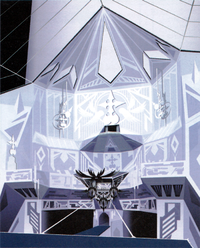
[[File:Castle That Never Was (Art).png|thumb|180px|left|Artwork of The World That Never Was.]] | |||
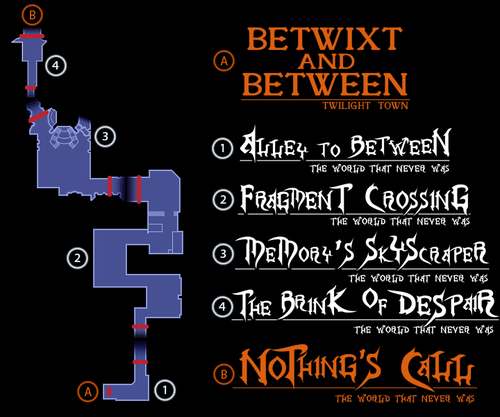
{{nihongo|'''Fragment Crossing'''|断片を紡ぐ道|Danpen o Tsumugu Michi|lit. "Fragment-Spinning Road"}} | Arriving from the [[Betwixt and Between]], Sora and party find themselves at the {{nihongo|'''{{a|Alley to Between}}'''|狭間につながる路地|Hazama ni Tsunagaru Roji}}, where the first [[save point]] of the world can be found. Exiting the alley leads to the {{nihongo|'''{{a|Fragment Crossing}}'''|断片を紡ぐ道|Danpen o Tsumugu Michi|lit. "Fragment-Spinning Road"}}, a long series of winding streets. Hordes of [[Shadow]]s appear here, but in ''Kingdom Hearts II Final Mix'', they're replaced with Nobodies. Following the Fragment Crossing is the {{nihongo|'''{{a|Memory's Skyscraper}}'''|記憶の摩天楼|Kioku no Matenrō}}, an imposingly tall building - filled with television screens at the top - which presides over the city. In the right corner of the plaza is a wrecked truck, flipped on its side, while in the left corner is a road leading up to the {{nihongo|'''{{a|Brink of Despair}}'''|絶望を望む断崖|Zetsubō o Nozomu Dangai|lit. "Cliff Overlooking Despair"}}. A save point can be found there near the edge of a gigantic crater, in which the world's castle hovers above. | ||
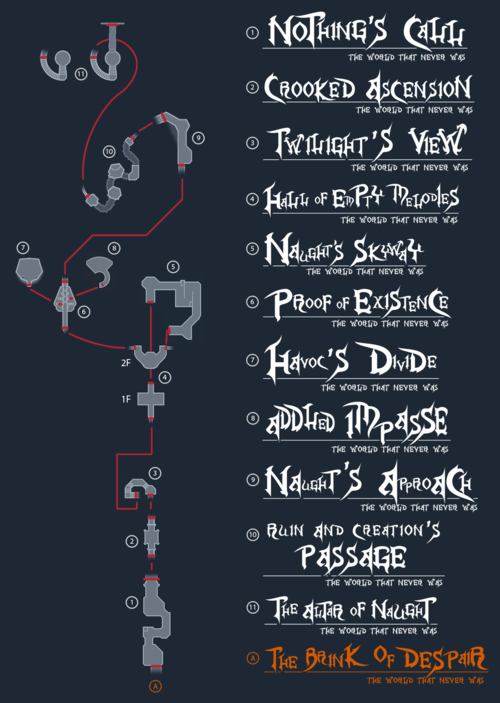
Through a path created by the Keyblade, the castle can be entered at its bottom floor, named {{nihongo|'''{{a|Nothing's Call}}'''|虚無への誘い|Kyomu e no Sasoi|lit. "Introduction to Nothingness"}}. From here the {{nihongo|'''{{a|Crooked Ascension}}'''|歪みを貫く柱|Yugami no Tsuranuku Hashira|lit. "Pillar Piercing Distortion"}} is entered, which is a giant elevator that'll transport the group up to {{nihongo|'''{{a|Twilight's View}}'''|黄昏から望む場所|Tasogare kara Nozomu Basho}}, which is a small stairway located inside a huge and hollow part of the castle. The bottom exit leads to a very long tunnel way to the outside of the tower, and the top exit leads to the mini tower towards the top. Massive windows in the shape of the Nobody insignia are found here, with a great view of the city outside. Below is what looks like an endless pit. Sora can meet a [[moogle]] here and [[synthesize]] new items before heading to the next part of the castle. Following Twilight's View is the {{nihongo|'''{{a|Hall of Empty Melodies}}'''|虚ろなる旋律の空間|Utsuro-naru Senritsu no Kūkan}}, which is composed of a large platform over an indefinite abyss, with a recessed second floor accessible via Naught's Skyway and multiple high balconies overlooking the room. The domed glass ceiling provides a view of the castle's highest tower. This is also where [[Xigbar]] is fought and defeated. The aforementioned {{nihongo|'''{{a|Naught's Skyway}}'''|虚空を辿る道|Kokū o Tadoru Michi|lit. "Road Following Empty Space"}} is what connects the Hall of Empty Melodies' two floors, and is a small outside path in a high section of the castle. It overlooks the eerie red-tinged clouds of the city far below. | |||
{{nihongo|'''{{a| | |||
Roxas | [[File:Hall of Empty Melodies (Art).png|thumb|right|200px|Artwork of the Hall of Empty Melodies.]] | ||
Continuing on from Hall of Empty Melodies' second floor leads to {{nihongo|'''{{a|Proof of Existence}}'''|存在の証|Sonzai no Akashi}}, a smaller area with white, pink, and light-blue pipes shaped like thorns piercing out from the room's exit. It initially contained twelve portals, though nine of them have been destroyed, making the area almost resemble a graveyard instead. The portals are arranged by the rank of each member from left to right then top to bottom, with digital panels on the floor in front of the portals, acting as epitaphs depicting the member's title and weapon. Demyx's portal is incorrectly numbered as XI instead of IX. The digital panels indicated whether a member is still alive or not, with Roxas's panel, in the end, being the only one which remains active as he's a part of Sora. Luxord's portal leads to {{nihongo|'''{{a|Havoc's Divide}}'''|混沌の狭間|Konton no Hazama|lit. "Valley of Disorder"}}, a downwards sloped area with a steep drop at the end, situated on a tower next to the main one, but cannot be seen from afar. The next portal leads to {{nihongo|'''{{a|Addled Impasse}}'''|惑わしの空間|Madowashi no Kūkan|lit. "Space of Deception"}}, a large chamber with a clear view of the Kingdom Hearts moon, and appears to be where Saïx spends a large amount of his time. Defeating Luxord and Saïx allows access to {{nihongo|'''{{a|Naught's Approach}}'''|虚空を目指す道|Kokū o Mezasu Michi|lit. "Road Heading Towards Empty Space"}}, an exterior passage which is located on the outside of the main tower. Eerie red and blue vapors leak out from the castle's next room, and above the tower, the {{nihongo|'''{{a|Ruin and Creation's Passage}}'''|破壊と創造の回廊|Hakai to Sōzō no Kairō}}, which is one of the biggest areas within the castle, with several platforms floating in the air. Invisible paths can be used to reach each platform and eventually navigate towards the exit. The room is filled with swirling red and blue smoke, with some collecting in a spiral at the top of the chamber. There are also numerous windows at the sides of the room, and neon lime colored bars of light hanging across the air. | |||
[[File:Where Nothing Gathers.png|thumb|180px|left|Where Nothing Gathers is the Organization's meeting room.]] | |||
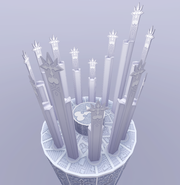
Deep inside the castle is also the {{nihongo|'''{{a|Soundless Prison}}'''|無音の牢獄|Muon no Rōgoku}}, a small and purple cell used by [[Saïx]] to imprison [[Kairi]] and [[Pluto]]. The area only appears in cutscene. Another cutscene exclusive area is {{nihongo|'''{{a|Where Nothing Gathers}}'''|虚無が集う場所|Kyomu ga Tsudou Basho}}, a circular room containing throne-like chairs ranging in height, where the members of Organization XIII gather to discuss developments, and for Xemnas to give out orders. There are thirteen throne-like pillars for each of the members, with Xemnas' chair being the tallest one. | |||
During his | At the end of the Ruin and Creation's Passage is a pathway leading to the top of the castle, the {{nihongo|'''{{a|Altar of Naught}}'''|虚空の祭壇|Kokū no Saidan|lit. "Altar of Empty Space"}}. The altar is a giant tower peering out of castle, with Kingdom Hearts radiating in front of it. The Dark City below is impossible to see from here due to all the swirling smoke leaking from previous area. During his first fight against Xemnas, Sora is transported to {{nihongo|'''{{a|Memory's Contortion}}'''|記憶の歪み|Kioku no Yugami}}, which is platform in the middle of nowhere with a strange and wavering illusion of the Memory's Skyscraper. After Sora returns to the Altar of Naught, Xemnas summons a huge door which leads to Kingdom Hearts. | ||
Entering Kingdom Hearts leads the party to The World of Nothing. The first area they arrive at is called {{nihongo|'''{{a|The World of Nothing—End's Beginning}}'''|ビル街|Biru Gai|lit. "Building District"}}, which is a passageway resembling the Dark City where skyscrapers suddenly erupt from the ground in order to repel Sora. Powering through a tunnel at the end leads to the next area where Xemnas' colossal [[Game:Xemnas|Dragon Ship]] can be seen from the distance. From here, Sora can ascend the falling skyscrapers, eventually leading him to the Dragon Ship's massive cannons at {{nihongo|'''{{a|The World of Nothing—Twin Cannons}}'''|ユニット砲身部|Yunitto Hōshin-bu|lit. "Unit Gun Barrel Area"}}. Once the cannons are destroyed, Sora swings his way up to the ship's Energy Core, which is kept in a room appropriately named {{nihongo|'''{{a|The World of Nothing—Energy Core}}'''|エネルギーコア前|Enerugī Koa Mae|lit. "Energy Core Front"}}. After disabling the ship's energy core, he ascends to {{nihongo|'''{{a|The World of Nothing—Xemnas's Throne Room}}'''|ゼムナス(ドラゴン)頭部|Zemunasu (Doragon) Tōbu|lit. "Xemnas (Dragon) Head"}}, where Xemnas sits in his [[Keyblade Armor]], enthroned in a chamber atop the Dragon Ship's head, equipped with several of the deceased Organization members' weapons. | |||
{{ | |||
Sora and Riku battle Xemnas's Dragon Ship from their [[Sidecar Glider]] in the {{nihongo|'''Sky'''|空中|Kūchū}}. Afterwards, they face Xemnas once more in his Keyblade Armor, in an area called {{nihongo|'''Within Xemnas (Dragon)'s Barrier'''|ゼムナス(ドラゴン)の結界内|Zemunasu (Doragon) no Kekkai-nai}} | |||
After completely destroying the gigantic Nobody, Sora and Riku find themselves inside a nearly-empty void of shifting greys and whites, the {{nihongo|'''{{a|World of Nothing}}'''|謎の空間最奥部|Nazo no Kūkan Saiō-bu|lit. "Innermost Area of the Mysterious Space"}}, where Xemnas is fought for the last time. | |||
{{ | {{-|left}} | ||
= | {|class="wikitable mw-collapsible mw-collapsed" | ||
[[File: | !Area Map in ''Kingdom Hearts II'' | ||
|- | |||
| | |||
[[File:Minimap (Dark City) TWTNW KHII.png|500px]] | |||
[[File:Minimap (Castle That Never Was) KHII.png|500px]] | |||
|} | |||
{{-}} | |||
===''Kingdom Hearts 358/2 Days''=== | |||
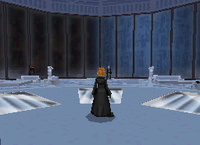
[[File:Grey Area KHD.png|thumb|right|200px|Roxas in the Grey Area.]] | |||
In ''Kingdom Hearts 358/2 Days'', The World That Never Was serves as the game's hub world. The world's main room is the {{nihongo|'''{{a|Grey Area}}'''|闇と光を紡ぐ庭|Yami to Hikari o Tsumugu Niwa|lit. "Courtyard Interweaving Darkness and Light"}}, which serves as a lounge for the Organization's members, as well as the place where they'll receive their mission briefings from [[Saïx]]. The room is wedge-shaped with one wall being just a giant window, out of which [[Kingdom Hearts]] can eventually be seen floating in the distance. The room has couches and tables spread around it, and Organization members are often seen lounging about between missions. There is also a [[moogle]] here wearing a [[Black Coat]], whom offers [[Roxas]] to synthesize panels as well as using the gained heart points to shop. | |||
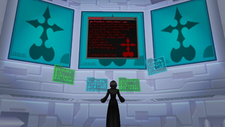
[[File:Quietude 01 KHD.png|thumb|225px|left|Xion using the Organization's computer.]] | |||
The castle is shown to have a large computer room which seems to contain information regarding all the various Organization XIII related projects, including the [[Replica Program]] and [[Castle Oblivion]]. The castle also contains a library filled with literature on various subjects. In here, Axel finds a book titled "The Truth about Naminé," authored by Vexen. All of the members have individual bedrooms across the castle, which are white with metal-like walls and lots of pipes across them. There's a single bed with the headboard in the shape of the Nobodies' symbol, and a window showing the heart-shaped moon of Kingdom Hearts. The Organization often gather at the {{nihongo|'''{{a|Round Room}}'''|円卓|Entaku|lit. "Round Table"}}<ref>'''''[[Roxas's Diary#Day 7: Entry 1|Roxas's Diary, Day 7: Entry 1]]''''': "Today they told us to go to the Round Room, where we met our new member, No. XIV."</ref> to discuss plans and other developments. Each member has a throne-like chair at top of a pillar here, except for Xion. These pillars can move up or down at the user's, or at the leader's will<!--The possibility of the thrones changing heights is also seen in ''[[Kingdom Hearts 3D: Dream Drop Distance]]'', when the throne where Sora's body is sitting lifts up.-->, though they all keep their thrones below Xemnas out of respect.<ref>'''''[[Kingdom Hearts II Final Mix+ Ultimania]]''''', pg. 502; '''Interviewer''': "During the meetings, the members of Organization XIII are sitting in chairs. Is the height of these chairs determined by things like their skills and abilities?" / ''' Tetsuya Nomura''': "No, the height of the chairs is not fixated, they move. That is to say, the height is up to each person. The leader, Xemnas, is always the highest and to be at the same height as him would have a pretty bad feeling, so the other members wouldn't do that." [https://www.khinsider.com/news/New-Nomura-Interview-Hoards-of-new-Information-388 Translation via TheWertle and Xaldin].</ref><!--explain as out-of-universe: Mission Mode of 358/2 Days shows that the thrones change height based on how well the members of the Organization do on missions.--> The remaining members also gather at the '''Altar of Naught''' on the ninety-third day, to watch as Kingdom Hearts finally takes form. | |||
The {{nihongo|'''{{a|Hall of Empty Melodies}}'''|虚ろなる旋律の空間|Utsuro-naru Senritsu no Kūkan}} is accessed during a few of the missions, and serve as a training ground for Roxas. When Roxas decides to leave the Organization he'll begins his escape at top of the second floor located here, and quickly reaches the lower floor by running through {{nihongo|'''{{a|Naught's Skyway}}'''|虚空を辿る道|Kokū o Tadoru Michi|lit. "Road Following Empty Space"}}. Leaving the hall Roxas briefly enters {{nihongo|'''{{a|Twilight's View}}'''|黄昏から望む場所|Tasogare kara Nozomu Basho}} before entering the elevator at {{nihongo|'''{{a|Crooked Ascension}}'''|歪みを貫く柱|Yugami no Tsuranuku Hashira|lit. "Pillar Piercing Distortion"}}. Taking the elevator to the bottom takes Roxas to {{nihongo|'''{{a|Nothing's Call}}'''|虚無への誘い|Kyomu e no Sasoi|lit. "Introduction to Nothingness"}}, where he battles Saïx before finally making his escape. | |||
When Roxas returns to face Xemnas, he arrives at the {{nihongo|'''{{a|Fragment Crossing}}'''|断片を紡ぐ道|Danpen o Tsumugu Michi|lit. "Fragment-Spinning Road"}}, where he's attacked by a horde of [[Neoshadow]]s. He eventually makes it to the {{nihongo|'''{{a|Memory's Skyscraper}}'''|記憶の摩天楼|Kioku no Matenrō}}, where he's confronted by Riku. | |||
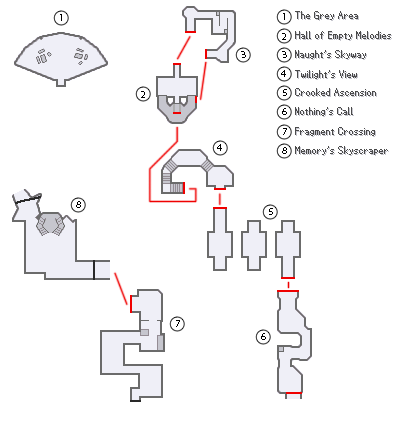
= | {|class="wikitable mw-collapsible mw-collapsed" | ||
!Area Map in ''Kingdom Hearts 358/2 Days'' | |||
|- | |||
| | |||
[[File:Minimap (The World That Never Was) KHD.png|404px]] | |||
|} | |||
{{-}} | |||
=== | ===''Kingdom Hearts 3D: Dream Drop Distance''=== | ||
In ''Kingdom Hearts 3D: Dream Drop Distance'', only Memory's Skyscraper, the Brink of Despair, and the real Castle That Never Was are visited in the Realm Between, while the rest of the areas appear within a dream version of the world. The dream version of The World that Never Was' Dark City appears a lot more contorted and ethereal than the city initially appeared in ''Kingdom Hearts II'', much similar to The World of Nothing within Kingdom Hearts, while the Castle That Never Was's areas seem to be located at specific parts of the actual castle. | |||
[[File:Contorted City KH3D.png|thumb|right|225px|Buildings sliced by Sora at the Contorted City area.]] | |||
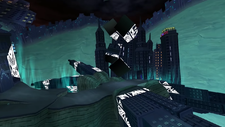
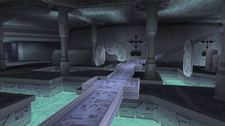
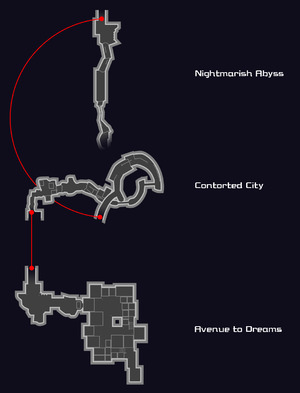
{{ | Sora first arrives at the Memory Skyscraper, but is quickly sent to sleep and eventually wake up at the {{nihongo|'''{{a|Avenue to Dreams}}'''|夢境の街路|Yumesakai no Gairo}}. The place is a large urban area beginning with an enclosed alley featuring a save point and a Moogle Shop hologram. Up a long flight of stairs lies a piece of a destroyed building, blocking the path into the city that must be scaled to advance. Beyond is an area of twisting alleys surrounded by skyscrapers that can be scaled with [[Flowmotion]]. Several buildings are adorned in blue stripes with a geometric pattern and when stood upon, they rapidly elevate, throwing Sora into the air. Perhaps the most notable feature of this area is a stream of blue-green mist that falls from the roof of a massive tower extremely similar to the Memory's Skyscraper. The Castle That Never Was can be seen from this area, but instead of floating above a giant crater, it floats above several tall buildings. The next area is the {{nihongo|'''{{a|Contorted City}}'''|歪みに満ちた街|Yugami ni Michita Machi|lit. "City Filled with Distortion"}}, which seems to emerge from a strange canyon. The area is similar to the previous one, though many of the buildings float of their own accord. Beyond several overturned buildings, a path of broken pavement and destroyed buildings form an upward spiral, and neon strips and signs on the buildings can be traversed with Flowmotion. Several floating buildings marked with red symbols will hurtle towards Sora and must be destroyed with [[Reality Shift]] to avoid damage. Unlike the previous area, the castle cannot be seen from here. Pressing on leads to the {{nihongo|'''{{a|Nightmarish Abyss}}'''|凶夢の深淵|Kyōmu no Shin'en}} which features a large open plaza surrounded by three skyscrapers, with a crashed truck blocking access to a side-street. The fourth side drops off to an abyss that is spanned by floating skyscrapers laid on their sides, forming a mostly straight path between two cliffs, and leads toward what appears to be the bottom of the Castle That Never Was seen from the left side, with the tower of the Verge of Chaos visible from down there. The largest floating building in the area is where Sora fights Xemnas. | ||
{{ | |||
[[File:Walk of Delusions KH3D.png|thumb|left|225px|The Walk of Delusions after destroying the devices.]] | |||
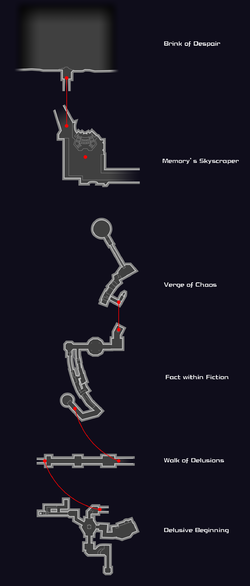
The {{nihongo|Walk of Delusions|幻惑の歩廊|Genwaku no Horō}} | Riku arrives at the {{nihongo|'''{{a|Delusive Beginning}}'''|幻想のはじまり|Gensō no Hajimari}}, the lowest known area of the Castle That Never Was, situated just inside the large spinning ring at the base of the castle. It is comprised of four hallways connecting to a circular central chamber, two connecting at the ground floor, two high above. In the central chamber rests an energy beam housed in an impenetrable shield that'll damage Riku; destroying it requires to go inside the shield, which can be accessed through the hallway on the left leading to a teleport hole and inside said shield. Once shut down, the shield disappears and it creates a walkway to the upper levels with one hallway leading to an open space yard, with a red wall that cannot be climbed with Flowmotion; instead, Riku must use the platforms that appear to go up and open the treasure chests, while avoiding the eventual lasers that are fired if within range. The other hallway leads to the next area, that is the {{nihongo|'''{{a|Walk of Delusions}}'''|幻惑の歩廊|Genwaku no Horō|lit. "Gallery of Entrancement"}}, which initially appears as a shifting maze. Scattered throughout the maze are devices which can be destroyed with a Reality Shift. Once disabled, the layout of the area changes, with new pathways opening up leading to the next device. Once three devices have been destroyed, the maze disappears entirely and reveals the area to be a long, straight bridge leading from the outer edge of the castle to the castle itself, across the open crater beneath it. | ||
Passing through the Walk of Delusions lead to {{nihongo|'''{{a|Fact within Fiction}}'''|虚実を紡ぐ回廊|Kyojitsu o Tsumugu Kairō|lit. "Corridor Spinning Fact and Fiction"}}, a large open-air level at the top of the castle's spinning ring, giving a view of the mechanism that spins it. It consists of several high-walled passages and thick metal pipes. Along one passage, beams of purple energy move back and forth that damage any enemy who crosses them. Near the end of the area is a large circular platform where many enemies spawn. After a flight of stairs, there is a lift that'll take Riku to the {{nihongo|'''{{a|Verge of Chaos}}'''|混沌を見下ろす場所|Konton o Miorosu Basho|lit. "Place Overlooking Chaos"}}. The area is primarily a large and slightly curved balcony. By using Flowmotion Riku can traverse the massive pipes attached to the walls, which will eventually take him through several smaller balconies. At the last balcony is a narrow bridge connecting to a multi-turreted tower, where Riku fights the [[Anti Black Coat]] Nightmare. The appearance of the ground of the arena is identical to that of the small pillar-shaped platform in the middle of Where Nothing Gathers. This tower can be seen from afar, and is located on the castle's left side. | |||
{{nihongo|Fact within Fiction|虚実を紡ぐ回廊|Kyojitsu o Tsumugu Kairō}} | |||
After defeating Anti Black Coat, Riku will be summoned by [[Ansem, Seeker of Darkness]] to {{nihongo|'''{{a|Darkness's Call}}'''|闇への誘い|Yami e no Sasoi|lit. "Invitation to Darkness"}} to battle. The area is a dark arena with a spiraling violet vortex below, and streams of darkness rising around the central area. A platform may appear if Riku uses Reality Shift on Ansem. After the first battle, Riku is further brought to the {{nihongo|'''{{a|Darkest End}}'''|闇の果て|Yami no Hate|lit. "Edge of Darkness"}}, which is a long corridor-like arena with huge dark pillars on each side, resembling the ones found in the [[Realm of Darkness]]. At the end of the room is a violet spiral where Ansem resides within a transformed [[Dark Figure]]. During their second battle, Ansem can manipulate the space within the area at will, by either stretching it to pull his enemies to the back or by compressing it to pull them right in front of him. Wherever the areas are located in the World that Never Was is unknown. | |||
[[File:Power Over Time 01 KH3D.png|thumb|right|225px|The Sanctum of Time arena where Young Xehanort transports Riku to battle.]] | |||
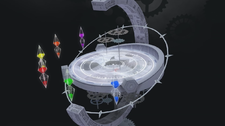
[[File:Power Over Time 01 KH3D.png|thumb|right|The arena Young Xehanort transports Riku to battle | After the battles against Ansem, Riku arrives back in the real The World That Never Was at the {{nihongo|'''{{a|Memory's Skyscraper}}'''|記憶の摩天楼|Kioku no Matenrō}}. From here the [[Link Portal]] is the only way to for him go to the World Map, that is Sora's dreams. He can press onwards to the {{nihongo|'''{{a|Brink of Despair}}'''|絶望を望む断崖|lit. "Cliff of Despair's Desire"}}, where he must activate [[Dreamline]] between his [[Komory Bat]] and Sora's [[Meow Wow]] to enter the real Castle That Never Was. Riku then finds himself at the '''Where Nothing Gathers''', before he's attacked by [[Young Xehanort]], who pulls him away to the {{nihongo|'''{{a|Sanctum of Time}}'''|時の祭壇|Toki no Saidan|lit. "Altar of Time'}}. The sanctum is a large circular arena with several cogs and clockwork devices integrated below the floor as well as atop pillars on either side of the battlefield, and is surrounded by six different colored hourglasses. The area as a whole resembles a fractured {{w|Sundial#Universal equinoctial ring dial|ring dial}}. Peculiarly, at certain times during battle, the poles sticking out of the ground cannot have Flowmotion used on them. Beneath the glass is a red Nobody insignia. | ||
The {{nihongo| | {{-|left}} | ||
{|class="wikitable mw-collapsible mw-collapsed" | |||
!Area Maps in ''Kingdom Hearts Dream Drop Distance HD'' | |||
|- | |||
| | |||
[[File:Minimap (Dark City) TWTNW KHDDD.png|300px]] | |||
[[File:Minimap (Castle That Never Was) TWTNW KHDDD.png|250px]] | |||
|} | |||
{{-}} | {{-}} | ||
==Story== | ==Story== | ||
===''Kingdom Hearts 358/2 Days''=== | ===''Kingdom Hearts 358/2 Days''=== | ||
When [[Roxas]] abandons the Organization, he wanders for a short time through the streets of the Dark City. Here, outside one of the many locked stores, Roxas meets [[Axel]], who tries to stop him from leaving, warning that the Organization would destroy him. Roxas leaves a saddened Axel behind, and continues along the streets to Memory's Skyscraper. | When [[Roxas]] abandons the Organization, he wanders for a short time through the streets of the Dark City. Here, outside one of the many locked stores, Roxas meets [[Axel]], who tries to stop him from leaving, warning that the Organization would destroy him. Roxas leaves a saddened Axel behind, and continues along the streets to Memory's Skyscraper. | ||
After defeating Xion, Roxas returns to the city, hoping to engage Xemnas and the other Organization XIII members. Instead, he discovers multitudes of Heartless, sent to attack the [[Keyblade]] | After defeating Xion, Roxas returns to the city, hoping to engage Xemnas and the other Organization XIII members. Instead, he discovers multitudes of Heartless, sent to attack the [[Keyblade]] wielder. Roxas fends off the hordes of [[Neoshadow]] Heartless, but is ultimately outnumbered. [[Riku]] appears from atop a skyscraper, and assists Roxas in slaying the Heartless using Roxas's [[Oblivion]] Keyblade. | ||
The two then turn on each other. Roxas nearly defeats Riku, who had not yet mastered himself or control of the Keyblade. In desperation, Riku releases the darkness in his heart, assuming the form of [[Ansem, Seeker of Darkness]], with his [[ | The two then turn on each other. Roxas nearly defeats Riku, who had not yet mastered himself or control of the Keyblade. In desperation, Riku releases the darkness in his heart, assuming the form of [[Ansem, Seeker of Darkness]], with his [[Dark Figure|guardian]], and subdues Roxas. [[Ansem the Wise|DiZ]] promptly arrives to find Riku-Ansem with his hood up. The two take Roxas back to their secret base in [[Twilight Town]]. | ||
===''Kingdom Hearts II''=== | ===''Kingdom Hearts II''=== | ||
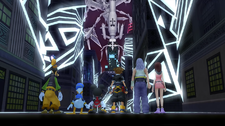
[[File:In the Writhing City 01 KHII.png|thumb|225px|left|Sora and his friends standing at the entrance to The World of Nothing, ready to fight Xemnas.]] | |||
Sora arrives in the Dark City, with the help of the Organization's traitor, Axel. Fighting their way through large numbers of Heartless, [[Sora]], [[Donald Duck|Donald]], [[Goofy]], and [[Mickey Mouse|King Mickey]] reach the center of the city, Memory's Skyscraper. Here, [[Samurai]] Nobodies materialize in front of Goofy and Donald. Roxas then appears, challenging Sora to a fight. The two disappear duel on the [[Dive to the Heart]]. Sora defeats Roxas, who departs, calling Sora "a good other." | Sora arrives in the Dark City, with the help of the Organization's traitor, Axel. Fighting their way through large numbers of Heartless, [[Sora]], [[Donald Duck|Donald]], [[Goofy]], and [[Mickey Mouse|King Mickey]] reach the center of the city, Memory's Skyscraper. Here, [[Samurai]] Nobodies materialize in front of Goofy and Donald. Roxas then appears, challenging Sora to a fight. The two disappear to duel on the [[Dive to the Heart]]. Sora defeats Roxas, who departs, calling Sora "a good other." | ||
The group then continues on to the Castle That Never Was. They ascend through the many levels of the castle, meeting up with Riku and [[Kairi]], and finishing off the remaining members of the Organization. | The group then continues on to the Castle That Never Was. They ascend through the many levels of the castle, meeting up with Riku and [[Kairi]], and finishing off the remaining members of the Organization. | ||
After | After the group runs into Ansem the Wise on one of the upper floors of the castle, he sacrifices his life in an attempt to destroy Xemnas's Kingdom Hearts, the blast returning Riku to his original form. The group make their way to the top floor, where they confront and defeat Xemnas, leader of Organization XIII. | ||
During the extensive final battle with Xemnas, much of the Dark City and the Castle That Never Was is destroyed. Chunks of building are ripped up and thrown at Sora and Riku, and the main tower collapses off the castle. What ultimately happens to The World That Never Was following Xemnas's defeat remains unknown. | During the extensive final battle with Xemnas, much of the Dark City and the Castle That Never Was is destroyed. Chunks of building are ripped up and thrown at Sora and Riku, and the main tower collapses off the castle. What ultimately happens to The World That Never Was following Xemnas's defeat remains unknown. | ||
{{-}} | |||
===''Kingdom Hearts 3D: Dream Drop Distance''=== | ===''Kingdom Hearts 3D: Dream Drop Distance''=== | ||
After Sora and Riku successfully unlock all seven sleeping Keyholes, Sora arrives at The World That Never Was, where he is then greeted by [[Xigbar]]. Xigbar explains that the [[Real Organization XIII]] has been guiding the still-sleeping Sora through the Sleeping Worlds to The World That Never Was since his exam began, and that the [[Robed Figure]] was present the night when [[Destiny Islands]] was swallowed by darkness in order to be there when Sora entered the Sleeping Worlds. Xigbar then puts Sora into a second sleep. | |||
Meanwhile, Riku arrives in the Castle That Never Was, wondering why he has not awoken yet with the exam supposed to be over. He travels through the castle to find Sora trapped in a sphere of darkness. Riku tries to awaken Sora, but the darkness around the sphere turns into the [[Anti Black Coat]] Nightmare, who Riku engages and defeats in battle. Riku is then swallowed by darkness and confronted by Ansem before he gets a chance to wake Sora. | |||
Meanwhile, Riku arrives in the Castle That Never Was, wondering why he has not awoken yet with the exam supposed to be over. He travels through the castle to find Sora trapped in a sphere of darkness. Riku tries to | |||
Riku | The still-dreaming Sora sees illusions of Kairi, Riku, Aqua, and Terra, while Sora takes on Ventus's appearance. Upon the dream's end, Sora asks Xigbar whether everything he had seen was implanted by the Organization. Xigbar clarifies that the visions were a dream, as it was impossible for the Organization to insert false memories and visions into his head. Xigbar then leaves Sora to battle with Xemnas, whom Sora defeats. Sora proceeds to collapse from exhaustion, and is then consumed in darkness. Young Xehanort appears and reveals his plan to turn Sora into the thirteenth member of the true Organization. Sora falls unconscious shortly after and is then taken to Where Nothing Gathers. | ||
Riku ultimately prevails against Ansem and travels to Where Nothing Gathers, where Riku finds the unconscious Sora. The cloaked members of the True Organization XIII materialize on the thrones, and Young Xehanort prepares himself to greet the recompleted Master Xehanort. King Mickey interrupts and freezes the group with [[Stopza]], but Young Xehanort recovers and knocks him away, and summons a [[Young Xehanort's Keyblade|Keyblade]] to battle Riku. Riku defeats Young Xehanort just as Mickey's spell breaks, and Master Xehanort reforms. | |||
Master Xehanort announces his plans to create the [[χ-blade]] again, after his experiment with Ventus and Vanitas proved a failure. Master Xehanort then prepares to turn Sora into his final vessel as Xemnas and Ansem restrain Riku and Mickey. However, [[Lea]] arrives and protects Sora from Xehanort's attack. Riku, Mickey, and Lea escape from The World That Never Was with the timely aid of Donald and Goofy. The members of the Organization then fade into darkness and return to their proper places in time. | |||
===''Kingdom Hearts III''=== | |||
The World That Never Was appears in various flashbacks when Riku and Mickey recall their encounter with Xehanort at Where Nothing Gathers. | |||
==Characters== | ==Characters== | ||
<gallery> | <gallery> | ||
File:Xemnas KHD.png|[[Xemnas]]<br>{{KHD}} {{KHII}} {{KH3D}} {{KHMoM}} | |||
File:Xemnas KHD.png|[[Xemnas]]<br>{{KHD}} {{KHII}} {{KH3D}} | |||
File:Xigbar KHD.png|[[Xigbar]]<br>{{KHD}} {{KHII}} {{KH3D}} | File:Xigbar KHD.png|[[Xigbar]]<br>{{KHD}} {{KHII}} {{KH3D}} | ||
File:Xaldin KHD.png|[[Xaldin]]<br>{{KHD}} {{KHII}} | File:Xaldin KHD.png|[[Xaldin]]<br>{{KHD}} {{KHII}} | ||
| Line 161: | Line 158: | ||
File:Axel KHHD.png|[[Axel]]<br>{{KHD}} {{KHII}} | File:Axel KHHD.png|[[Axel]]<br>{{KHD}} {{KHII}} | ||
File:Demyx KHD.png|[[Demyx]]<br>{{KHD}} {{KHII}} | File:Demyx KHD.png|[[Demyx]]<br>{{KHD}} {{KHII}} | ||
File:Luxord KHD.png|[[Luxord]]<br>{{KHD}} {{KHII}} | File:Luxord KHD.png|[[Luxord]]<br>{{KHD}} {{KHII}} {{KH3D}} | ||
File:Marluxia KHD.png|[[Marluxia]]<br>{{KHD}} {{KHII}} | File:Marluxia KHD.png|[[Marluxia]]<br>{{KHD}} {{KHII}} {{KH3D}} | ||
File:Larxene KHD.png|[[Larxene]]<br>{{KHD}} {{KHII}} | File:Larxene KHD.png|[[Larxene]]<br>{{KHD}} {{KHII}} {{KH3D}} | ||
File:Roxas KHHD.png|[[Roxas]]<br>{{KHD}} {{KHII}} | File:Roxas KHHD.png|[[Roxas]]<br>{{KHD}} {{KHII}} | ||
File:Xion KHHD.png|[[Xion]]<br>{{KHD}} | File:Xion KHHD.png|[[Xion]]<br>{{KHD}} | ||
File:Master Xehanort KHBBS.png|[[Master Xehanort]]<br>{{KH3D}} | |||
File:Young Xehanort KH3D.png|[[Young Xehanort]]<br>{{KH3D}} | |||
File:Ansem, Seeker of Darkness KH.png|[[Ansem, Seeker of Darkness]]<br>{{KH3D}} | |||
File:Vanitas (Black Coat) KHIII.png|[[Vanitas]]<br>{{KH3D}} | |||
File:Terra-Xehanort KHIII.png|[[Terra-Xehanort]]<br>{{KH3D}} | |||
File:Dark Riku KHIII.png|[[Dark Riku]]<br>{{KH3D}} | |||
File:Moogle KH.png|[[Moogle|Stiltzkin]]<br>{{KHII}} | File:Moogle KH.png|[[Moogle|Stiltzkin]]<br>{{KHII}} | ||
File:Organization Moogle KHD.png|[[Moogle]]<br>{{KHD}} | File:Organization Moogle KHD.png|[[Moogle]]<br>{{KHD}} | ||
| Line 172: | Line 175: | ||
==Enemies== | ==Enemies== | ||
===Heartless=== | ===Heartless=== | ||
{|class="wikitable collapsible collapsed" | {|class="wikitable mw-collapsible mw-collapsed" | ||
! | ! | ||
|- | |- | ||
| | | | ||
<gallery> | <gallery> | ||
File:Shadow KHII.png|[[Shadow]] | File:Shadow KHII.png|[[Shadow]]<br>{{KHII}} | ||
File:Neoshadow KHII.png|[[Neoshadow]] | File:Neoshadow KHII.png|[[Neoshadow]]<br>{{KHD}}{{KHII}} | ||
File:Armored Knight KHII.png|[[Armored Knight]]<br>(Cutscene only) | File:Armored Knight KHII.png|[[Armored Knight]]<br>(Cutscene only) | ||
File:Mushroom XIII No. 1 KHIIFM.png|'''[[Mushroom XIII No. 1]]''' | File:Mushroom XIII No. 1 KHIIFM.png|'''[[Mushroom XIII No. 1]]'''<br>{{FMII}} | ||
File:Ansem (First Form) KH3D.png|''' | File:Ansem (First Form) KH3D.png|'''{{ns|Game|Ansem, Seeker of Darkness}}<br> (Riku only) {{KH3D}}''' | ||
</gallery> | </gallery> | ||
|} | |} | ||
===Nobodies=== | ===Nobodies=== | ||
{|class="wikitable collapsible collapsed" | {|class="wikitable mw-collapsible mw-collapsed" | ||
! | ! | ||
|- | |- | ||
| | | | ||
<gallery> | <gallery> | ||
File:Dusk KHII.png|[[Dusk]] | File:Dusk KHII.png|[[Dusk]]<br>{{KHD}}{{KHII}} | ||
File:Creeper KHII.png|[[Creeper]] | File:Creeper KHII.png|[[Creeper]]<br>{{KHII}} | ||
File:Sorcerer KHII.png|[[Sorcerer]] | File:Sorcerer KHII.png|[[Sorcerer]]<br>{{KHII}} | ||
File:Sniper KHII.png|[[Sniper]] | File:Sniper KHII.png|[[Sniper]]<br>{{KHII}} | ||
File:Dragoon KHII.png|[[Dragoon]] | File:Dragoon KHII.png|[[Dragoon]]<br>{{KHII}} | ||
File:Berserker KHII.png|[[Berserker]] | File:Berserker KHII.png|[[Berserker]]<br>{{KHII}} | ||
File:Assassin KHII.png|[[Assassin]] | File:Assassin KHII.png|[[Assassin]]<br>{{KHII}} | ||
File:Dancer KHII.png|[[Dancer]] | File:Dancer KHII.png|[[Dancer]]<br>{{KHII}} | ||
File:Gambler KHII.png|[[Gambler]] | File:Gambler KHII.png|[[Gambler]]<br>{{KHII}} | ||
File:Samurai KHII.png|[[Samurai]] | File:Samurai KHII.png|[[Samurai]]<br>{{KHD}}{{KHII}} | ||
File: | File:Xemnas (Dragon) 2nd Fight KHII.png|'''{{ns|Game|Xemnas|Xemnas (Dragon Form)}}'''<br>{{KHII}} | ||
File:Xemnas KHD.png|''' | File:Xemnas KHD.png|'''{{ns|Game|Xemnas}}'''<br>{{KHII}} {{KH3D}} {{KHMoM}} | ||
File: | File:Xigbar (Sharpshooter) KHII.png|'''{{ns|Game|Xigbar}}'''<br>{{KHII}} | ||
File: | File:Saïx (Berserk) KHII.png|'''{{ns|Game|Saïx}}'''<br>{{KHD}}{{KHII}} | ||
File: | File:Anti-Saïx KHD.png|'''[[Anti-Saïx]]'''<br>{{KHD}} | ||
File: | File:Luxord (Fair Game) KHII.png|'''{{ns|Game|Luxord}}'''<br>{{KHII}} | ||
File: | File:Roxas (Dual Wield) KHII.png|'''{{ns|Game|Roxas}}'''<br>{{KHII}} | ||
File: | File:Bomb Bell B KHII.png|[[Bomb Bell B]] | ||
File: | File:Spiked Roller B KHII.png|[[Spiked Roller B]] | ||
File:Speeder B KHII.png|[[Speeder B]] | |||
</gallery> | </gallery> | ||
|} | |} | ||
===Dream Eaters=== | ===Dream Eaters=== | ||
{|class="wikitable mw-collapsible mw-collapsed" | |||
{|class="wikitable collapsible collapsed" | |||
! | ! | ||
|- | |- | ||
| | | | ||
<gallery> | <gallery> | ||
File:Eaglider (Nightmare) KH3D.png|[[Eaglider]] (Sora only) | File:Eaglider (Nightmare) KH3D.png|[[Eaglider]] (Sora only)<br>{{KH3D}} | ||
File:Keeba Tiger (Nightmare) KH3D.png|[[Keeba Tiger]] | File:Keeba Tiger (Nightmare) KH3D.png|[[Keeba Tiger]]<br>{{KH3D}} | ||
File:Drak Quack (Nightmare) KH3D.png|[[Drak Quack]] | File:Drak Quack (Nightmare) KH3D.png|[[Drak Quack]]<br>{{KH3D}} | ||
File:Cera Terror (Nightmare) KH3D.png|[[Cera Terror]] | File:Cera Terror (Nightmare) KH3D.png|[[Cera Terror]]<br>{{KH3D}} | ||
File: | File:Skelterwild (Nightmare) KH3D.png|[[Skelterwild]]<br>{{KH3D}} | ||
File:Electricorn (Nightmare) KH3D.png|[[Electricorn]] | File:Electricorn (Nightmare) KH3D.png|[[Electricorn]] (Riku only)<br>{{KH3D}} | ||
File:Majik Lapin (Nightmare) KH3D.png|[[Majik Lapin]] | File:Majik Lapin (Nightmare) KH3D.png|[[Majik Lapin]]<br>{{KH3D}} | ||
File:Ghostabocky (Nightmare) KH3D.png|[[Ghostabocky]] (Riku only) | File:Ghostabocky (Nightmare) KH3D.png|[[Ghostabocky]] (Riku only)<br>{{KH3D}}<ref>Do not appear anymore once all Illusion Generators in the Walk of Delusions have been destroyed.</ref> | ||
File:Thunderaffe (Nightmare) KH3D.png|[[Thunderaffe]] | File:Thunderaffe (Nightmare) KH3D.png|[[Thunderaffe]] (Riku only)<br>{{KH3D}} | ||
File:Ryu Dragon (Nightmare) KH3D.png|[[Ryu Dragon]] (normal and rare) | File:Ryu Dragon (Nightmare) KH3D.png|[[Ryu Dragon]] (normal and rare)<br>{{KH3D}} | ||
File:Halbird (Nightmare) KH3D.png|[[Halbird]] (normal, Riku only; rare, both sides) | File:Halbird (Nightmare) KH3D.png|[[Halbird]] (normal, Riku only; rare, both sides)<br>{{KH3D}} | ||
File:Tyranto Rex (Rare) KH3D.png|[[Tyranto Rex]] (rare only) | File:Tyranto Rex (Rare) KH3D.png|[[Tyranto Rex]] (rare only)<br>{{KH3D}} | ||
File:Pegaslick (Nightmare) KH3D.png|[[Pegaslick]] (normal and rare) | File:Pegaslick (Nightmare) KH3D.png|[[Pegaslick]] (normal and rare)<br>{{KH3D}} | ||
File:Aura Lion (Rare) KH3D.png|[[Aura Lion]] (rare only) | File:Aura Lion (Rare) KH3D.png|[[Aura Lion]] (rare only)<br>{{KH3D}} | ||
File:Queen Buzzerfly (Sora's Side) KH3D.png|'''[[Queen Buzzerfly]] (Side:Sora)''' | File:Queen Buzzerfly (Sora's Side) KH3D.png|'''[[Queen Buzzerfly]] (Side:Sora)'''<br>{{KH3D}} | ||
File:Anti Black Coat KH3D.png|'''[[Anti Black Coat]] (Riku only)''' | File:Anti Black Coat KH3D.png|'''[[Anti Black Coat]] (Riku only)'''<br>{{KH3D}} | ||
</gallery> | </gallery> | ||
|} | |} | ||
===Other=== | ===Other=== | ||
{|class="wikitable collapsible collapsed" | {|class="wikitable mw-collapsible mw-collapsed" | ||
! | ! | ||
|- | |- | ||
| | | | ||
<gallery> | <gallery> | ||
File:Riku KHD.png|''' | File:Riku KHD.png|'''{{ns|Game|Riku}}''' {{KHD}} | ||
File:Anti-Riku KHD.png|'''[[Anti-Riku]]''' | File:Anti-Riku KHD.png|'''[[Anti-Riku]]''' {{KHD}} | ||
File:Young Xehanort KH3D.png|''' | File:Young Xehanort KH3D.png|'''{{ns|Game|Young Xehanort}}''' (Riku only) {{KH3D}} | ||
</gallery> | </gallery> | ||
|} | |} | ||
| Line 255: | Line 256: | ||
<!-- | <!-- | ||
==Trivia==--> | ==Trivia==--> | ||
<!--incorporate into story section, this is pretty directly referenced as story by Chip and Dale | |||
*The World That Never Was cannot be accessed via the [[Gummi Ship]] until after you enter the world via the [[Simulated Twilight Town]].--> | |||
*The World That Never Was cannot be accessed via the [[Gummi Ship]] until after you enter the world via the [[Simulated Twilight Town]]. | |||
--> | |||
{{ | ==Notes and references== | ||
{{Reflist}} | |||
{{KH2}} | {{KH2}} | ||
{{358}} | {{358}} | ||
{{DDD}} | {{DDD}} | ||
{{MOM}} | |||
[[Category:Realm Between]] | [[Category:Realm Between]] | ||
[[Fr:Illusiopolis]] | |||
[[de:Die Welt die niemals war]] | |||
Revision as of 03:42, 22 February 2024
The World That Never Was is a world featured in Kingdom Hearts II, Kingdom Hearts 358/2 Days, and Kingdom Hearts 3D: Dream Drop Distance.
The world of Organization XIII, it is home to a seemingly endless supply of Heartless and Nobodies. The Heartless seem to spawn more here due to how close The World That Never Was is to the darkness of Kingdom Hearts. The Organization rules the city below from their massive castle.
Settings and Areas
Kingdom Hearts II
The World That Never Was is a world located in the Realm Between, and serves as Organization XIII's stronghold. It's separated into two parts, the expansive Dark City filled with vacant buildings and neon signs, and the contrasting white and massive Castle That Never Was which floats weightlessly above the city, with Kingdom Hearts at its peak.
Arriving from the Betwixt and Between, Sora and party find themselves at the Alley to Between (狭間につながる路地 Hazama ni Tsunagaru Roji), where the first save point of the world can be found. Exiting the alley leads to the Fragment Crossing (断片を紡ぐ道 Danpen o Tsumugu Michi, lit. "Fragment-Spinning Road"), a long series of winding streets. Hordes of Shadows appear here, but in Kingdom Hearts II Final Mix, they're replaced with Nobodies. Following the Fragment Crossing is the Memory's Skyscraper (記憶の摩天楼 Kioku no Matenrō), an imposingly tall building - filled with television screens at the top - which presides over the city. In the right corner of the plaza is a wrecked truck, flipped on its side, while in the left corner is a road leading up to the Brink of Despair (絶望を望む断崖 Zetsubō o Nozomu Dangai, lit. "Cliff Overlooking Despair"). A save point can be found there near the edge of a gigantic crater, in which the world's castle hovers above.
Through a path created by the Keyblade, the castle can be entered at its bottom floor, named Nothing's Call (虚無への誘い Kyomu e no Sasoi, lit. "Introduction to Nothingness"). From here the Crooked Ascension (歪みを貫く柱 Yugami no Tsuranuku Hashira, lit. "Pillar Piercing Distortion") is entered, which is a giant elevator that'll transport the group up to Twilight's View (黄昏から望む場所 Tasogare kara Nozomu Basho), which is a small stairway located inside a huge and hollow part of the castle. The bottom exit leads to a very long tunnel way to the outside of the tower, and the top exit leads to the mini tower towards the top. Massive windows in the shape of the Nobody insignia are found here, with a great view of the city outside. Below is what looks like an endless pit. Sora can meet a moogle here and synthesize new items before heading to the next part of the castle. Following Twilight's View is the Hall of Empty Melodies (虚ろなる旋律の空間 Utsuro-naru Senritsu no Kūkan), which is composed of a large platform over an indefinite abyss, with a recessed second floor accessible via Naught's Skyway and multiple high balconies overlooking the room. The domed glass ceiling provides a view of the castle's highest tower. This is also where Xigbar is fought and defeated. The aforementioned Naught's Skyway (虚空を辿る道 Kokū o Tadoru Michi, lit. "Road Following Empty Space") is what connects the Hall of Empty Melodies' two floors, and is a small outside path in a high section of the castle. It overlooks the eerie red-tinged clouds of the city far below.
Continuing on from Hall of Empty Melodies' second floor leads to Proof of Existence (存在の証 Sonzai no Akashi), a smaller area with white, pink, and light-blue pipes shaped like thorns piercing out from the room's exit. It initially contained twelve portals, though nine of them have been destroyed, making the area almost resemble a graveyard instead. The portals are arranged by the rank of each member from left to right then top to bottom, with digital panels on the floor in front of the portals, acting as epitaphs depicting the member's title and weapon. Demyx's portal is incorrectly numbered as XI instead of IX. The digital panels indicated whether a member is still alive or not, with Roxas's panel, in the end, being the only one which remains active as he's a part of Sora. Luxord's portal leads to Havoc's Divide (混沌の狭間 Konton no Hazama, lit. "Valley of Disorder"), a downwards sloped area with a steep drop at the end, situated on a tower next to the main one, but cannot be seen from afar. The next portal leads to Addled Impasse (惑わしの空間 Madowashi no Kūkan, lit. "Space of Deception"), a large chamber with a clear view of the Kingdom Hearts moon, and appears to be where Saïx spends a large amount of his time. Defeating Luxord and Saïx allows access to Naught's Approach (虚空を目指す道 Kokū o Mezasu Michi, lit. "Road Heading Towards Empty Space"), an exterior passage which is located on the outside of the main tower. Eerie red and blue vapors leak out from the castle's next room, and above the tower, the Ruin and Creation's Passage (破壊と創造の回廊 Hakai to Sōzō no Kairō), which is one of the biggest areas within the castle, with several platforms floating in the air. Invisible paths can be used to reach each platform and eventually navigate towards the exit. The room is filled with swirling red and blue smoke, with some collecting in a spiral at the top of the chamber. There are also numerous windows at the sides of the room, and neon lime colored bars of light hanging across the air.
Deep inside the castle is also the Soundless Prison (無音の牢獄 Muon no Rōgoku), a small and purple cell used by Saïx to imprison Kairi and Pluto. The area only appears in cutscene. Another cutscene exclusive area is Where Nothing Gathers (虚無が集う場所 Kyomu ga Tsudou Basho), a circular room containing throne-like chairs ranging in height, where the members of Organization XIII gather to discuss developments, and for Xemnas to give out orders. There are thirteen throne-like pillars for each of the members, with Xemnas' chair being the tallest one.
At the end of the Ruin and Creation's Passage is a pathway leading to the top of the castle, the Altar of Naught (虚空の祭壇 Kokū no Saidan, lit. "Altar of Empty Space"). The altar is a giant tower peering out of castle, with Kingdom Hearts radiating in front of it. The Dark City below is impossible to see from here due to all the swirling smoke leaking from previous area. During his first fight against Xemnas, Sora is transported to Memory's Contortion (記憶の歪み Kioku no Yugami), which is platform in the middle of nowhere with a strange and wavering illusion of the Memory's Skyscraper. After Sora returns to the Altar of Naught, Xemnas summons a huge door which leads to Kingdom Hearts.
Entering Kingdom Hearts leads the party to The World of Nothing. The first area they arrive at is called The World of Nothing—End's Beginning (ビル街 Biru Gai, lit. "Building District"), which is a passageway resembling the Dark City where skyscrapers suddenly erupt from the ground in order to repel Sora. Powering through a tunnel at the end leads to the next area where Xemnas' colossal Dragon Ship can be seen from the distance. From here, Sora can ascend the falling skyscrapers, eventually leading him to the Dragon Ship's massive cannons at The World of Nothing—Twin Cannons (ユニット砲身部 Yunitto Hōshin-bu, lit. "Unit Gun Barrel Area"). Once the cannons are destroyed, Sora swings his way up to the ship's Energy Core, which is kept in a room appropriately named The World of Nothing—Energy Core (エネルギーコア前 Enerugī Koa Mae, lit. "Energy Core Front"). After disabling the ship's energy core, he ascends to The World of Nothing—Xemnas's Throne Room (ゼムナス(ドラゴン)頭部 Zemunasu (Doragon) Tōbu, lit. "Xemnas (Dragon) Head"), where Xemnas sits in his Keyblade Armor, enthroned in a chamber atop the Dragon Ship's head, equipped with several of the deceased Organization members' weapons.
Sora and Riku battle Xemnas's Dragon Ship from their Sidecar Glider in the Sky (空中 Kūchū). Afterwards, they face Xemnas once more in his Keyblade Armor, in an area called Within Xemnas (Dragon)'s Barrier (ゼムナス(ドラゴン)の結界内 Zemunasu (Doragon) no Kekkai-nai)
After completely destroying the gigantic Nobody, Sora and Riku find themselves inside a nearly-empty void of shifting greys and whites, the World of Nothing (謎の空間最奥部 Nazo no Kūkan Saiō-bu, lit. "Innermost Area of the Mysterious Space"), where Xemnas is fought for the last time.
| Area Map in Kingdom Hearts II |
|---|
Kingdom Hearts 358/2 Days
In Kingdom Hearts 358/2 Days, The World That Never Was serves as the game's hub world. The world's main room is the Grey Area (闇と光を紡ぐ庭 Yami to Hikari o Tsumugu Niwa, lit. "Courtyard Interweaving Darkness and Light"), which serves as a lounge for the Organization's members, as well as the place where they'll receive their mission briefings from Saïx. The room is wedge-shaped with one wall being just a giant window, out of which Kingdom Hearts can eventually be seen floating in the distance. The room has couches and tables spread around it, and Organization members are often seen lounging about between missions. There is also a moogle here wearing a Black Coat, whom offers Roxas to synthesize panels as well as using the gained heart points to shop.
The castle is shown to have a large computer room which seems to contain information regarding all the various Organization XIII related projects, including the Replica Program and Castle Oblivion. The castle also contains a library filled with literature on various subjects. In here, Axel finds a book titled "The Truth about Naminé," authored by Vexen. All of the members have individual bedrooms across the castle, which are white with metal-like walls and lots of pipes across them. There's a single bed with the headboard in the shape of the Nobodies' symbol, and a window showing the heart-shaped moon of Kingdom Hearts. The Organization often gather at the Round Room (円卓 Entaku, lit. "Round Table")[1] to discuss plans and other developments. Each member has a throne-like chair at top of a pillar here, except for Xion. These pillars can move up or down at the user's, or at the leader's will, though they all keep their thrones below Xemnas out of respect.[2] The remaining members also gather at the Altar of Naught on the ninety-third day, to watch as Kingdom Hearts finally takes form.
The Hall of Empty Melodies (虚ろなる旋律の空間 Utsuro-naru Senritsu no Kūkan) is accessed during a few of the missions, and serve as a training ground for Roxas. When Roxas decides to leave the Organization he'll begins his escape at top of the second floor located here, and quickly reaches the lower floor by running through Naught's Skyway (虚空を辿る道 Kokū o Tadoru Michi, lit. "Road Following Empty Space"). Leaving the hall Roxas briefly enters Twilight's View (黄昏から望む場所 Tasogare kara Nozomu Basho) before entering the elevator at Crooked Ascension (歪みを貫く柱 Yugami no Tsuranuku Hashira, lit. "Pillar Piercing Distortion"). Taking the elevator to the bottom takes Roxas to Nothing's Call (虚無への誘い Kyomu e no Sasoi, lit. "Introduction to Nothingness"), where he battles Saïx before finally making his escape.
When Roxas returns to face Xemnas, he arrives at the Fragment Crossing (断片を紡ぐ道 Danpen o Tsumugu Michi, lit. "Fragment-Spinning Road"), where he's attacked by a horde of Neoshadows. He eventually makes it to the Memory's Skyscraper (記憶の摩天楼 Kioku no Matenrō), where he's confronted by Riku.
| Area Map in Kingdom Hearts 358/2 Days |
|---|
Kingdom Hearts 3D: Dream Drop Distance
In Kingdom Hearts 3D: Dream Drop Distance, only Memory's Skyscraper, the Brink of Despair, and the real Castle That Never Was are visited in the Realm Between, while the rest of the areas appear within a dream version of the world. The dream version of The World that Never Was' Dark City appears a lot more contorted and ethereal than the city initially appeared in Kingdom Hearts II, much similar to The World of Nothing within Kingdom Hearts, while the Castle That Never Was's areas seem to be located at specific parts of the actual castle.
Sora first arrives at the Memory Skyscraper, but is quickly sent to sleep and eventually wake up at the Avenue to Dreams (夢境の街路 Yumesakai no Gairo). The place is a large urban area beginning with an enclosed alley featuring a save point and a Moogle Shop hologram. Up a long flight of stairs lies a piece of a destroyed building, blocking the path into the city that must be scaled to advance. Beyond is an area of twisting alleys surrounded by skyscrapers that can be scaled with Flowmotion. Several buildings are adorned in blue stripes with a geometric pattern and when stood upon, they rapidly elevate, throwing Sora into the air. Perhaps the most notable feature of this area is a stream of blue-green mist that falls from the roof of a massive tower extremely similar to the Memory's Skyscraper. The Castle That Never Was can be seen from this area, but instead of floating above a giant crater, it floats above several tall buildings. The next area is the Contorted City (歪みに満ちた街 Yugami ni Michita Machi, lit. "City Filled with Distortion"), which seems to emerge from a strange canyon. The area is similar to the previous one, though many of the buildings float of their own accord. Beyond several overturned buildings, a path of broken pavement and destroyed buildings form an upward spiral, and neon strips and signs on the buildings can be traversed with Flowmotion. Several floating buildings marked with red symbols will hurtle towards Sora and must be destroyed with Reality Shift to avoid damage. Unlike the previous area, the castle cannot be seen from here. Pressing on leads to the Nightmarish Abyss (凶夢の深淵 Kyōmu no Shin'en) which features a large open plaza surrounded by three skyscrapers, with a crashed truck blocking access to a side-street. The fourth side drops off to an abyss that is spanned by floating skyscrapers laid on their sides, forming a mostly straight path between two cliffs, and leads toward what appears to be the bottom of the Castle That Never Was seen from the left side, with the tower of the Verge of Chaos visible from down there. The largest floating building in the area is where Sora fights Xemnas.
Riku arrives at the Delusive Beginning (幻想のはじまり Gensō no Hajimari), the lowest known area of the Castle That Never Was, situated just inside the large spinning ring at the base of the castle. It is comprised of four hallways connecting to a circular central chamber, two connecting at the ground floor, two high above. In the central chamber rests an energy beam housed in an impenetrable shield that'll damage Riku; destroying it requires to go inside the shield, which can be accessed through the hallway on the left leading to a teleport hole and inside said shield. Once shut down, the shield disappears and it creates a walkway to the upper levels with one hallway leading to an open space yard, with a red wall that cannot be climbed with Flowmotion; instead, Riku must use the platforms that appear to go up and open the treasure chests, while avoiding the eventual lasers that are fired if within range. The other hallway leads to the next area, that is the Walk of Delusions (幻惑の歩廊 Genwaku no Horō, lit. "Gallery of Entrancement"), which initially appears as a shifting maze. Scattered throughout the maze are devices which can be destroyed with a Reality Shift. Once disabled, the layout of the area changes, with new pathways opening up leading to the next device. Once three devices have been destroyed, the maze disappears entirely and reveals the area to be a long, straight bridge leading from the outer edge of the castle to the castle itself, across the open crater beneath it.
Passing through the Walk of Delusions lead to Fact within Fiction (虚実を紡ぐ回廊 Kyojitsu o Tsumugu Kairō, lit. "Corridor Spinning Fact and Fiction"), a large open-air level at the top of the castle's spinning ring, giving a view of the mechanism that spins it. It consists of several high-walled passages and thick metal pipes. Along one passage, beams of purple energy move back and forth that damage any enemy who crosses them. Near the end of the area is a large circular platform where many enemies spawn. After a flight of stairs, there is a lift that'll take Riku to the Verge of Chaos (混沌を見下ろす場所 Konton o Miorosu Basho, lit. "Place Overlooking Chaos"). The area is primarily a large and slightly curved balcony. By using Flowmotion Riku can traverse the massive pipes attached to the walls, which will eventually take him through several smaller balconies. At the last balcony is a narrow bridge connecting to a multi-turreted tower, where Riku fights the Anti Black Coat Nightmare. The appearance of the ground of the arena is identical to that of the small pillar-shaped platform in the middle of Where Nothing Gathers. This tower can be seen from afar, and is located on the castle's left side.
After defeating Anti Black Coat, Riku will be summoned by Ansem, Seeker of Darkness to Darkness's Call (闇への誘い Yami e no Sasoi, lit. "Invitation to Darkness") to battle. The area is a dark arena with a spiraling violet vortex below, and streams of darkness rising around the central area. A platform may appear if Riku uses Reality Shift on Ansem. After the first battle, Riku is further brought to the Darkest End (闇の果て Yami no Hate, lit. "Edge of Darkness"), which is a long corridor-like arena with huge dark pillars on each side, resembling the ones found in the Realm of Darkness. At the end of the room is a violet spiral where Ansem resides within a transformed Dark Figure. During their second battle, Ansem can manipulate the space within the area at will, by either stretching it to pull his enemies to the back or by compressing it to pull them right in front of him. Wherever the areas are located in the World that Never Was is unknown.
After the battles against Ansem, Riku arrives back in the real The World That Never Was at the Memory's Skyscraper (記憶の摩天楼 Kioku no Matenrō). From here the Link Portal is the only way to for him go to the World Map, that is Sora's dreams. He can press onwards to the Brink of Despair (絶望を望む断崖 lit. "Cliff of Despair's Desire"), where he must activate Dreamline between his Komory Bat and Sora's Meow Wow to enter the real Castle That Never Was. Riku then finds himself at the Where Nothing Gathers, before he's attacked by Young Xehanort, who pulls him away to the Sanctum of Time (時の祭壇 Toki no Saidan, lit. "Altar of Time'). The sanctum is a large circular arena with several cogs and clockwork devices integrated below the floor as well as atop pillars on either side of the battlefield, and is surrounded by six different colored hourglasses. The area as a whole resembles a fractured ring dial. Peculiarly, at certain times during battle, the poles sticking out of the ground cannot have Flowmotion used on them. Beneath the glass is a red Nobody insignia.
| Area Maps in Kingdom Hearts Dream Drop Distance HD |
|---|
Story
Kingdom Hearts 358/2 Days
When Roxas abandons the Organization, he wanders for a short time through the streets of the Dark City. Here, outside one of the many locked stores, Roxas meets Axel, who tries to stop him from leaving, warning that the Organization would destroy him. Roxas leaves a saddened Axel behind, and continues along the streets to Memory's Skyscraper.
After defeating Xion, Roxas returns to the city, hoping to engage Xemnas and the other Organization XIII members. Instead, he discovers multitudes of Heartless, sent to attack the Keyblade wielder. Roxas fends off the hordes of Neoshadow Heartless, but is ultimately outnumbered. Riku appears from atop a skyscraper, and assists Roxas in slaying the Heartless using Roxas's Oblivion Keyblade.
The two then turn on each other. Roxas nearly defeats Riku, who had not yet mastered himself or control of the Keyblade. In desperation, Riku releases the darkness in his heart, assuming the form of Ansem, Seeker of Darkness, with his guardian, and subdues Roxas. DiZ promptly arrives to find Riku-Ansem with his hood up. The two take Roxas back to their secret base in Twilight Town.
Kingdom Hearts II
Sora arrives in the Dark City, with the help of the Organization's traitor, Axel. Fighting their way through large numbers of Heartless, Sora, Donald, Goofy, and King Mickey reach the center of the city, Memory's Skyscraper. Here, Samurai Nobodies materialize in front of Goofy and Donald. Roxas then appears, challenging Sora to a fight. The two disappear to duel on the Dive to the Heart. Sora defeats Roxas, who departs, calling Sora "a good other."
The group then continues on to the Castle That Never Was. They ascend through the many levels of the castle, meeting up with Riku and Kairi, and finishing off the remaining members of the Organization.
After the group runs into Ansem the Wise on one of the upper floors of the castle, he sacrifices his life in an attempt to destroy Xemnas's Kingdom Hearts, the blast returning Riku to his original form. The group make their way to the top floor, where they confront and defeat Xemnas, leader of Organization XIII.
During the extensive final battle with Xemnas, much of the Dark City and the Castle That Never Was is destroyed. Chunks of building are ripped up and thrown at Sora and Riku, and the main tower collapses off the castle. What ultimately happens to The World That Never Was following Xemnas's defeat remains unknown.
Kingdom Hearts 3D: Dream Drop Distance
After Sora and Riku successfully unlock all seven sleeping Keyholes, Sora arrives at The World That Never Was, where he is then greeted by Xigbar. Xigbar explains that the Real Organization XIII has been guiding the still-sleeping Sora through the Sleeping Worlds to The World That Never Was since his exam began, and that the Robed Figure was present the night when Destiny Islands was swallowed by darkness in order to be there when Sora entered the Sleeping Worlds. Xigbar then puts Sora into a second sleep.
Meanwhile, Riku arrives in the Castle That Never Was, wondering why he has not awoken yet with the exam supposed to be over. He travels through the castle to find Sora trapped in a sphere of darkness. Riku tries to awaken Sora, but the darkness around the sphere turns into the Anti Black Coat Nightmare, who Riku engages and defeats in battle. Riku is then swallowed by darkness and confronted by Ansem before he gets a chance to wake Sora.
The still-dreaming Sora sees illusions of Kairi, Riku, Aqua, and Terra, while Sora takes on Ventus's appearance. Upon the dream's end, Sora asks Xigbar whether everything he had seen was implanted by the Organization. Xigbar clarifies that the visions were a dream, as it was impossible for the Organization to insert false memories and visions into his head. Xigbar then leaves Sora to battle with Xemnas, whom Sora defeats. Sora proceeds to collapse from exhaustion, and is then consumed in darkness. Young Xehanort appears and reveals his plan to turn Sora into the thirteenth member of the true Organization. Sora falls unconscious shortly after and is then taken to Where Nothing Gathers.
Riku ultimately prevails against Ansem and travels to Where Nothing Gathers, where Riku finds the unconscious Sora. The cloaked members of the True Organization XIII materialize on the thrones, and Young Xehanort prepares himself to greet the recompleted Master Xehanort. King Mickey interrupts and freezes the group with Stopza, but Young Xehanort recovers and knocks him away, and summons a Keyblade to battle Riku. Riku defeats Young Xehanort just as Mickey's spell breaks, and Master Xehanort reforms.
Master Xehanort announces his plans to create the χ-blade again, after his experiment with Ventus and Vanitas proved a failure. Master Xehanort then prepares to turn Sora into his final vessel as Xemnas and Ansem restrain Riku and Mickey. However, Lea arrives and protects Sora from Xehanort's attack. Riku, Mickey, and Lea escape from The World That Never Was with the timely aid of Donald and Goofy. The members of the Organization then fade into darkness and return to their proper places in time.
Kingdom Hearts III
The World That Never Was appears in various flashbacks when Riku and Mickey recall their encounter with Xehanort at Where Nothing Gathers.
Characters
Enemies
Heartless
|
Nobodies
|
|
Dream Eaters
|
Other
|
Notes and references
- ^ Roxas's Diary, Day 7: Entry 1: "Today they told us to go to the Round Room, where we met our new member, No. XIV."
- ^ Kingdom Hearts II Final Mix+ Ultimania, pg. 502; Interviewer: "During the meetings, the members of Organization XIII are sitting in chairs. Is the height of these chairs determined by things like their skills and abilities?" / Tetsuya Nomura: "No, the height of the chairs is not fixated, they move. That is to say, the height is up to each person. The leader, Xemnas, is always the highest and to be at the same height as him would have a pretty bad feeling, so the other members wouldn't do that." Translation via TheWertle and Xaldin.
- ^ Do not appear anymore once all Illusion Generators in the Walk of Delusions have been destroyed.
| Kingdom Hearts II |
|---|
| Characters |
| Party members |
| Roxas - Sora - Donald Duck - Goofy Fa Mulan - Beast - Auron - Jack Sparrow - Aladdin - Jack Skellington - Simba - Tron - Riku |
| Summons |
| Chicken Little - Genie - Stitch - Peter Pan |
| Antagonists |
| Organization XIII Xemnas - Xigbar - Xaldin - Saïx - Axel - Demyx - Luxord Villains Maleficent - Pete - Hades - Ursula - Hector Barbossa - Jafar - Oogie Boogie - Scar Shan-Yu - Master Control Program - Sark |
| Non-playable characters |
| Abu - Aerith - Ansem the Wise - Ariel - Ariel's Sisters - Auron - Bathtub - Belle - Biggs - Captain Pete - Carpet - Cave of Wonders Guardian - Cerberus - Chien Po, Ling, and Yao - Chip - Chip and Dale - Christmas Elves - Cid - Clara Cluck - Clarabelle Cow - Cloud - Cogsworth - Daisy Duck - Dark Figure - Dr. Finkelstein - Eeyore - Elizabeth Swann - Enchanted Brooms - Flora, Fauna, and Merryweather - Flotsam and Jetsam - Flounder - Fuu - Gopher - Gullwings - Hayabusa - Hayner - Hercules - Horace Horsecollar - Hostile Program - Huey, Dewey, and Louie - Hydra - Iago - Jasmine - Jessie - Jiminy Cricket - Kairi - Kanga - King Triton - Li Shang - Lock, Shock, and Barrel - Lumière - Maleficent's Raven - Megara - Merlin - Mickey Mouse - Minnie Mouse - Moogles - Mrs. Potts - Mufasa - Mushu - Nala - Naminé - Olette - Owl - Pain and Panic - Pegasus - Pence - Philoctetes - Piglet - Pluto - Prince Eric - Pumbaa - Rabbit - Rafiki - Rai - Reindeer - Rock Titan - Roo - Sally - Santa Claus - Scrooge McDuck - Sebastian - Seifer - Selphie - Sephiroth - Setzer - Shenzi, Banzai, and Ed - Simba and Nala's cub - Squall Leonhart - Terra-Xehanort - The Emperor - The Experiment - The Ghost of Scar - The Mayor - The Peddler - Tifa - Tigger - Timon - Tinker Bell - Undead Pirates - Vivi - Wallace - Wantz - Wardrobe - William Turner - Winnie the Pooh - Wedge - Yen Sid - Yuffie - Zero |
| Locations |
| Worlds |
| Twilight Town - Destiny Islands - Hollow Bastion/Radiant Garden - The Land of Dragons - Beast's Castle - 100 Acre Wood - Olympus Coliseum - Disney Castle - Timeless River - Atlantica - Port Royal - Agrabah - Halloween Town - Pride Lands - Space Paranoids - The World That Never Was - End of Sea |
| Places |
| The Other Twilight Town - Dive to the Heart - Mysterious Tower - Kingdom Hearts |
| Terms |
| Cornerstone of Light - Drive Form - Gate - Hollow Bastion Restoration Committee - Kairi's Letter - Keyblade - Kingdom Hearts Encoder - Organization XIII - Princesses of Heart - Reaction Command - Secret Ansem Report - Sidecar Glider - Skateboard - The End - Twilight Town Disciplinary Committee |
| Music |
| Kingdom Hearts II Original Soundtrack - Kingdom Hearts Original Soundtrack Complete - Sanctuary |
| Archives |
| Accessories - Artwork - Bosses - Enemies - Items - Keyblades - Other Weapons - Songs - Removed content |
| Kingdom Hearts 358/2 Days |
|---|
| Characters |
| Party members |
| Roxas - Axel - Demyx - Larxene - Lexaeus - Luxord - Marluxia - Saïx - Vexen - Xaldin - Xemnas - Xigbar - Xion - Zexion |
| Secret characters |
| Donald Duck - Goofy - King Mickey - Riku - Sora |
| Non-playable characters |
| Abu - Aladdin - Ansem the Wise - Beast - Belle - Captain Hook - Card Soldiers - Carpet - Cave of Wonders Guardian - Cheshire Cat - Cogsworth - Dark Figure - Doorknob - Dr. Finkelstein - Genie - Hayner - Hercules - Jack Skellington - Jasmine - Kairi - Lock, Shock, and Barrel - Lumière - Moogle - Mr. Smee - Naminé - Olette - Pence - Pete - Philoctetes - Queen of Hearts - Tinker Bell - White Rabbit - Zero |
| Locations |
| Worlds |
| Agrabah - Beast's Castle - Castle Oblivion - Destiny Islands - Halloween Town - Neverland - Olympus Coliseum - The World That Never Was - Twilight Town - Wonderland |
| Places |
| The Other Twilight Town |
| Terms |
| Heart - Heartless - Keyblade - Kingdom Hearts - Mission Mode - Nobody - Organization XIII - Organization XIII Device - Replica - Replica Program - Roxas's Diary - Sea-salt ice cream - The End |
| Music |
| Kingdom Hearts Birth by Sleep & 358/2 Days Original Soundtrack - Sanctuary |
| Archives |
| Rings - Artwork - Bosses - Enemies - Keyblades - Other Weapons - Removed content |
| Kingdom Hearts 3D: Dream Drop Distance |
|---|
| Characters |
| Party members |
| Sora - Riku |
| Dream Eater Spirits |
| Meow Wow - Tama Sheep - Yoggy Ram - Komory Bat - Pricklemane - Hebby Repp - Sir Kyroo - Toximander - Fin Fatale - Tatsu Steed - Necho Cat - Thunderaffe - Kooma Panda - Pegaslick - Iceguin Ace - Peepsta Hoo - Escarglow - KO Kabuto - Wheeflower - Ghostabocky - Zolephant - Juggle Pup - Halbird - Staggerceps - Fishboné - Flowbermeow - Cyber Yog - Chef Kyroo - Lord Kyroo - Tatsu Blaze - Electricorn - Woeflower - Jestabocky - Eaglider - Me Me Bunny - Drill Sye - Tyranto Rex - Majik Lapin - Cera Terror - Skelterwild - Ducky Goose - Aura Lion - Ryu Dragon - Drak Quack - Keeba Tiger - Meowjesty - Sudo Neku - Frootz Cat - Ursa Circus - Kab Kannon - R & R Seal |
| Antagonists |
| Real Organization XIII (Seekers of Darkness) Master Xehanort - Young Xehanort - Terra-Xehanort - Ansem - Xemnas - Vanitas - Xigbar - Saïx - Luxord - Marluxia - Larxene - Dark Riku Villains Maleficent - Pete - Ursula Claude Frollo - CLU - Rinzler - Beagle Boys |
| Non-playable characters |
| Aeleus - Ansem the Wise - Anti Black Coat - Aqua - Axel - Black Guard - Blue Fairy - Braig - Chernabog - Daisukenojo Bito - Dark Figure - Dilan - Donald Duck - Enchanted Brooms - Esmeralda - Even - Geppetto - Goofy - Ienzo - Jiminy Cricket - Joshua - Julius - Kairi - Kevin Flynn - Lea - Maleficent's Raven - Mickey Mouse - Minnie Mouse - Monstro - Moogle - Naminé - Neku Sakuraba - Phoebus - Pinocchio - Pluto - Quasimodo - Quorra - Rhyme - Roxas - Sam Flynn - Shiki - Terra - Ventus - Victor, Hugo, and Laverne - Xion - Yen Sid |
| Locations |
| Worlds |
| Traverse Town - La Cité des Cloches - The Grid - Prankster's Paradise - Country of the Musketeers - Symphony of Sorcery - The World That Never Was |
| Destiny Islands - Mysterious Tower - Disney Castle - Radiant Garden - Dive to the Heart |
| Places |
| Sleeping Worlds |
| Terms |
| Another Guardian of Light - Dream Eater - Glossary - Keyblade War - Mark of Mastery exam - Real Organization XIII - Sleeping Keyhole - Sleeping Worlds - The End |
| Gameplay terms |
| Ability Link - AR Card - Deck Commands - Dive Mode - Drop System - Flick Rush - Flowmotion - Forecast - Link System - Reality Shift - Spirit |
| Music |
| Kingdom Hearts: Dream Drop Distance Original Soundtrack - Simple and Clean - Sanctuary |
| Archives |
| Artwork - Bosses - Enemies - Keyblades - Removed content |
| Kingdom Hearts Melody of Memory |
|---|
| Characters |
| Party members |
| Kairi - Sora - Roxas - Aqua - Riku Donald Duck - Goofy - Axel - Xion - Terra - Ventus - Meow Wow - Komory Bat - Mickey Mouse Hercules - Aladdin - Ariel - Peter Pan - Beast - Fa Mulan - Simba - Stitch |
| Antagonists |
| Xehanort - Ansem, Seeker of Darkness - Xemnas - Maleficent |
| Non-playable characters |
| Aeleus - Ansem the Wise - Even - Fairy Godmother - Ienzo - Nameless Star - Terra-Xehanort - Yen Sid |
| Locations |
| Worlds |
| Mysterious Tower - Radiant Garden - The Final World |
| Terms |
| An Oath to Return - Another Key - Key Art - Keyblade - Museum - Music Stage - Rhythm Points - Story Scene - The End - VS Battle - World Tour |
| Music |
| Kingdom Hearts Melody of Memory - Special Disc - Unnamed tracks |
| Archives |
| Artwork - Bosses - Enemies - Items - Trophy - Songs |

![Xemnas [KH Days] [KH II] [KH 3D] [KH MoM]](https://kh.wiki.gallery/images/thumb/b/be/Xemnas_KHD.png/93px-Xemnas_KHD.png)
![Xigbar [KH Days] [KH II] [KH 3D]](https://kh.wiki.gallery/images/thumb/c/c8/Xigbar_KHD.png/106px-Xigbar_KHD.png)
![Xaldin [KH Days] [KH II]](https://kh.wiki.gallery/images/thumb/a/ab/Xaldin_KHD.png/104px-Xaldin_KHD.png)
![Vexen [KH Days] [KH II]](https://kh.wiki.gallery/images/thumb/2/23/Vexen_KHD.png/83px-Vexen_KHD.png)
![Lexaeus [KH Days] [KH II]](https://kh.wiki.gallery/images/thumb/0/09/Lexaeus_KHD.png/62px-Lexaeus_KHD.png)
![Zexion [KH Days] [KH II]](https://kh.wiki.gallery/images/thumb/b/bb/Zexion_KHD.png/57px-Zexion_KHD.png)
![Saïx [KH Days] [KH II] [KH 3D]](https://kh.wiki.gallery/images/thumb/1/11/Sa%C3%AFx_KHD.png/67px-Sa%C3%AFx_KHD.png)
![Axel [KH Days] [KH II]](https://kh.wiki.gallery/images/thumb/b/bd/Axel_KHHD.png/50px-Axel_KHHD.png)
![Demyx [KH Days] [KH II]](https://kh.wiki.gallery/images/thumb/c/c7/Demyx_KHD.png/79px-Demyx_KHD.png)
![Luxord [KH Days] [KH II] [KH 3D]](https://kh.wiki.gallery/images/thumb/3/3c/Luxord_KHD.png/71px-Luxord_KHD.png)
![Marluxia [KH Days] [KH II] [KH 3D]](https://kh.wiki.gallery/images/thumb/3/30/Marluxia_KHD.png/107px-Marluxia_KHD.png)
![Roxas [KH Days] [KH II]](https://kh.wiki.gallery/images/thumb/a/a7/Roxas_KHHD.png/51px-Roxas_KHHD.png)
![Master Xehanort [KH 3D]](https://kh.wiki.gallery/images/thumb/8/85/Master_Xehanort_KHBBS.png/71px-Master_Xehanort_KHBBS.png)
![Young Xehanort [KH 3D]](https://kh.wiki.gallery/images/thumb/5/5a/Young_Xehanort_KH3D.png/67px-Young_Xehanort_KH3D.png)
![Ansem, Seeker of Darkness [KH 3D]](https://kh.wiki.gallery/images/thumb/3/3e/Ansem%2C_Seeker_of_Darkness_KH.png/94px-Ansem%2C_Seeker_of_Darkness_KH.png)
![Vanitas [KH 3D]](https://kh.wiki.gallery/images/thumb/e/e7/Vanitas_%28Black_Coat%29_KHIII.png/68px-Vanitas_%28Black_Coat%29_KHIII.png)
![Terra-Xehanort [KH 3D]](https://kh.wiki.gallery/images/thumb/7/7d/Terra-Xehanort_KHIII.png/90px-Terra-Xehanort_KHIII.png)
![Dark Riku [KH 3D]](https://kh.wiki.gallery/images/thumb/b/b0/Dark_Riku_KHIII.png/53px-Dark_Riku_KHIII.png)
![Stiltzkin [KH II]](https://kh.wiki.gallery/images/thumb/e/eb/Moogle_KH.png/54px-Moogle_KH.png)
![Moogle [KH Days]](https://kh.wiki.gallery/images/thumb/8/88/Organization_Moogle_KHD.png/52px-Organization_Moogle_KHD.png)
![Shadow [KH II]](https://kh.wiki.gallery/images/thumb/d/de/Shadow_KHII.png/120px-Shadow_KHII.png)
![Neoshadow [KH Days][KH II]](https://kh.wiki.gallery/images/thumb/c/c9/Neoshadow_KHII.png/117px-Neoshadow_KHII.png)

![Mushroom XIII No. 1 [KH II FM]](https://kh.wiki.gallery/images/thumb/8/8d/Mushroom_XIII_No._1_KHIIFM.png/73px-Mushroom_XIII_No._1_KHIIFM.png)
![Ansem, Seeker of Darkness (Riku only) [KH 3D]](https://kh.wiki.gallery/images/thumb/3/37/Ansem_%28First_Form%29_KH3D.png/91px-Ansem_%28First_Form%29_KH3D.png)
![Dusk [KH Days][KH II]](https://kh.wiki.gallery/images/thumb/b/ba/Dusk_KHII.png/89px-Dusk_KHII.png)
![Creeper [KH II]](https://kh.wiki.gallery/images/thumb/d/d8/Creeper_KHII.png/102px-Creeper_KHII.png)
![Sorcerer [KH II]](https://kh.wiki.gallery/images/thumb/1/14/Sorcerer_KHII.png/71px-Sorcerer_KHII.png)
![Sniper [KH II]](https://kh.wiki.gallery/images/thumb/7/76/Sniper_KHII.png/120px-Sniper_KHII.png)
![Dragoon [KH II]](https://kh.wiki.gallery/images/thumb/8/8c/Dragoon_KHII.png/120px-Dragoon_KHII.png)
![Berserker [KH II]](https://kh.wiki.gallery/images/thumb/a/a1/Berserker_KHII.png/120px-Berserker_KHII.png)
![Assassin [KH II]](https://kh.wiki.gallery/images/thumb/d/dc/Assassin_KHII.png/104px-Assassin_KHII.png)
![Dancer [KH II]](https://kh.wiki.gallery/images/thumb/b/bd/Dancer_KHII.png/76px-Dancer_KHII.png)
![Gambler [KH II]](https://kh.wiki.gallery/images/thumb/0/01/Gambler_KHII.png/105px-Gambler_KHII.png)
![Samurai [KH Days][KH II]](https://kh.wiki.gallery/images/thumb/d/df/Samurai_KHII.png/103px-Samurai_KHII.png)
![Xemnas (Dragon Form) [KH II]](https://kh.wiki.gallery/images/thumb/9/95/Xemnas_%28Dragon%29_2nd_Fight_KHII.png/120px-Xemnas_%28Dragon%29_2nd_Fight_KHII.png)
![Xigbar [KH II]](https://kh.wiki.gallery/images/thumb/7/7e/Xigbar_%28Sharpshooter%29_KHII.png/85px-Xigbar_%28Sharpshooter%29_KHII.png)
![Saïx [KH Days][KH II]](https://kh.wiki.gallery/images/thumb/f/fe/Sa%C3%AFx_%28Berserk%29_KHII.png/70px-Sa%C3%AFx_%28Berserk%29_KHII.png)
![Anti-Saïx [KH Days]](https://kh.wiki.gallery/images/thumb/a/a6/Anti-Sa%C3%AFx_KHD.png/101px-Anti-Sa%C3%AFx_KHD.png)
![Luxord [KH II]](https://kh.wiki.gallery/images/thumb/4/48/Luxord_%28Fair_Game%29_KHII.png/102px-Luxord_%28Fair_Game%29_KHII.png)
![Roxas [KH II]](https://kh.wiki.gallery/images/thumb/9/99/Roxas_%28Dual_Wield%29_KHII.png/120px-Roxas_%28Dual_Wield%29_KHII.png)

![Eaglider (Sora only) [KH 3D]](https://kh.wiki.gallery/images/thumb/a/ab/Eaglider_%28Nightmare%29_KH3D.png/93px-Eaglider_%28Nightmare%29_KH3D.png)
![Keeba Tiger [KH 3D]](https://kh.wiki.gallery/images/thumb/f/f6/Keeba_Tiger_%28Nightmare%29_KH3D.png/115px-Keeba_Tiger_%28Nightmare%29_KH3D.png)
![Drak Quack [KH 3D]](https://kh.wiki.gallery/images/thumb/c/cc/Drak_Quack_%28Nightmare%29_KH3D.png/120px-Drak_Quack_%28Nightmare%29_KH3D.png)
![Cera Terror [KH 3D]](https://kh.wiki.gallery/images/thumb/c/c1/Cera_Terror_%28Nightmare%29_KH3D.png/120px-Cera_Terror_%28Nightmare%29_KH3D.png)
![Skelterwild [KH 3D]](https://kh.wiki.gallery/images/thumb/7/70/Skelterwild_%28Nightmare%29_KH3D.png/120px-Skelterwild_%28Nightmare%29_KH3D.png)
![Electricorn (Riku only) [KH 3D]](https://kh.wiki.gallery/images/thumb/d/d9/Electricorn_%28Nightmare%29_KH3D.png/120px-Electricorn_%28Nightmare%29_KH3D.png)
![Majik Lapin [KH 3D]](https://kh.wiki.gallery/images/thumb/8/8d/Majik_Lapin_%28Nightmare%29_KH3D.png/114px-Majik_Lapin_%28Nightmare%29_KH3D.png)
![Ghostabocky (Riku only) [KH 3D][3]](https://kh.wiki.gallery/images/thumb/7/7b/Ghostabocky_%28Nightmare%29_KH3D.png/108px-Ghostabocky_%28Nightmare%29_KH3D.png)
![Thunderaffe (Riku only) [KH 3D]](https://kh.wiki.gallery/images/thumb/9/9e/Thunderaffe_%28Nightmare%29_KH3D.png/90px-Thunderaffe_%28Nightmare%29_KH3D.png)
![Ryu Dragon (normal and rare) [KH 3D]](https://kh.wiki.gallery/images/thumb/0/03/Ryu_Dragon_%28Nightmare%29_KH3D.png/109px-Ryu_Dragon_%28Nightmare%29_KH3D.png)
![Halbird (normal, Riku only; rare, both sides) [KH 3D]](https://kh.wiki.gallery/images/thumb/8/8c/Halbird_%28Nightmare%29_KH3D.png/120px-Halbird_%28Nightmare%29_KH3D.png)
![Tyranto Rex (rare only) [KH 3D]](https://kh.wiki.gallery/images/thumb/9/94/Tyranto_Rex_%28Rare%29_KH3D.png/120px-Tyranto_Rex_%28Rare%29_KH3D.png)
![Pegaslick (normal and rare) [KH 3D]](https://kh.wiki.gallery/images/thumb/8/8e/Pegaslick_%28Nightmare%29_KH3D.png/120px-Pegaslick_%28Nightmare%29_KH3D.png)
![Aura Lion (rare only) [KH 3D]](https://kh.wiki.gallery/images/thumb/4/4f/Aura_Lion_%28Rare%29_KH3D.png/120px-Aura_Lion_%28Rare%29_KH3D.png)
![Queen Buzzerfly (Side:Sora) [KH 3D]](https://kh.wiki.gallery/images/thumb/6/6b/Queen_Buzzerfly_%28Sora%27s_Side%29_KH3D.png/104px-Queen_Buzzerfly_%28Sora%27s_Side%29_KH3D.png)
![Anti Black Coat (Riku only) [KH 3D]](https://kh.wiki.gallery/images/thumb/0/0f/Anti_Black_Coat_KH3D.png/51px-Anti_Black_Coat_KH3D.png)
![Riku [KH Days]](https://kh.wiki.gallery/images/thumb/f/fb/Riku_KHD.png/86px-Riku_KHD.png)
![Anti-Riku [KH Days]](https://kh.wiki.gallery/images/thumb/b/ba/Anti-Riku_KHD.png/78px-Anti-Riku_KHD.png)